Blog

  • 10 Minimalist Clay Planter Ideas

    10 Minimalist Clay Planter Ideas

    Handcrafted pottery and modern indoor gardening form a harmonious partnership across contemporary visual design platforms, inspiring plant enthusiasts to build tailored plant vessels. Minimalist clay planter designs represent a disciplined approach to interior styling, combining structural simplicity, clean geometric lines, and tactile earthen textures. This extensive guide provides ten functional, step-by-step concepts centered around crafting minimalist planters using air-dry or oven-bake polymer clay. Readers will learn the essential core techniques required to construct seamless cylinders, balanced pedestal bases, suspended vertical vessels, and integrated drainage systems without relying on a pottery wheel. Creating custom handmade planters enables decorators to size vessels precisely to nursery pots while avoiding the generic appearances of mass-produced containers. A minimalist approach emphasizes unadorned surfaces, muted natural earth tones, and architectural negative space, allowing the botanical form of indoor foliage to take visual center stage. By learning these foundational hand-building methods, crafters can produce durable, moisture-resistant, and aesthetically refined planters that enhance modern residential environments.

    Why This Idea Is Trending or Useful

    Sculptural, understated plant containers continue to dominate trending ideas across visual design channels due to their practical value and timeless decorative relevance. Modern living spaces prioritize thoughtful curation and deliberate spatial organization, favoring multi-functional home decor pieces that avoid unnecessary visual clutter. The DIY appeal of hand-built planters stems from the accessibility of polymer and air-dry clay mediums, which allow beginners to achieve sleek, stone-like finishes at home without access to specialized ceramic kilns. From a functional perspective, custom vessels resolve common indoor gardening challenges by providing tailored fits for odd-sized nursery containers, integrated catch basins for excess moisture, and space-saving vertical hanging alternatives for compact living quarters. Minimalist style naturally aligns with biophilic principles, using unglazed finishes, sand tones, terracotta, and slate grays to create grounding organic focal points. The low cost of raw clay combined with the high visual quality of finished geometric forms makes this a rewarding creative project for crafters seeking functional, long-lasting additions to their living spaces.

    Materials and Preparation

    Achieving durable, professional results when fabricating clay planters requires systematic preparation and appropriate tool selection before manipulating the raw medium. The foundational materials include high-density polymer clay or reinforced mineral air-dry clay, waterproof liquid sealant, acrylic rolling pins, wooden depth guide slats, craft blades, flexible smoothing ribs, and fine-grit sanding sponges. Planters that house live greenery require moisture barriers; therefore, liquid polyurethane, epoxy resin, or marine varnish is necessary to seal porous interior surfaces against water damage. Essential preparation begins with thoroughly cleaning a non-porous working plane, such as a smooth ceramic tile or glass plate, to prevent loose dust, lint, and table debris from embedding into light-toned clay. Condition raw clay thoroughly by kneading it repeatedly until it becomes pliable and free from dry fissures. Measure the target plastic nursery pot before cutting any slabs, allowing a ten percent expansion clearance to guarantee smooth insertion and removal during regular watering routines.

    1. Cylindrical Pedestal Basin
    1

    Execution Process

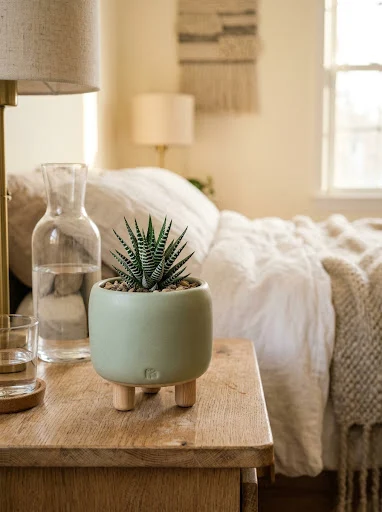
    The cylindrical pedestal basin elevates classic container gardening by combining a clean circular cup with a slightly narrower, recessed foot ring. This dual-tier construction lifts the primary planter body three-quarters of an inch off the tabletop, creating a light shadow gap that makes the solid clay form appear weightless. The design features straight, vertical walls meeting a flat perpendicular base, capturing the crisp geometry characteristic of modern architecture. Its unadorned exterior highlights the natural texture of warm sand or speckled stoneware clay, making it an exceptional companion for trailing pothos, compact jade, or upright snake plants. The integrated foot ring also prevents direct contact between the main water-bearing vessel and delicate furniture surfaces, eliminating condensation damage. This piece offers beginners structured practice in slab rolling, 90-degree corner joins, and concentric cylinder alignment.
    Begin by rolling conditioned off-white polymer clay onto a smooth tile using five-millimeter depth slats to guarantee an even slab thickness across the entire sheet. Cut a rectangular strip measuring four inches wide by twelve inches long using a metal ruler and a sharp craft knife to form the main outer wall. Cut two circular discs: a four-inch disc for the planter floor and a three-inch disc to build the recessed base pedestal. Wrap the rectangular strip around the perimeter of the larger disc, beveling the vertical seam edges at a 45-degree angle to produce an invisible, flush bond. Smooth the interior and exterior joint lines using a flexible silicone clay rib tool dipped in water or rubbing alcohol. Center the smaller circular disc beneath the base, blending the contact points firmly with a wooden modeling tool. Cut a half-inch drainage hole through both bottom layers using a brass tubing punch, then cure the planter according to the clay manufacturer’s thermal specifications before applying an interior water-resistant sealant.

    2. Fluted Arch Wall Pocket
    2

    Setup Method

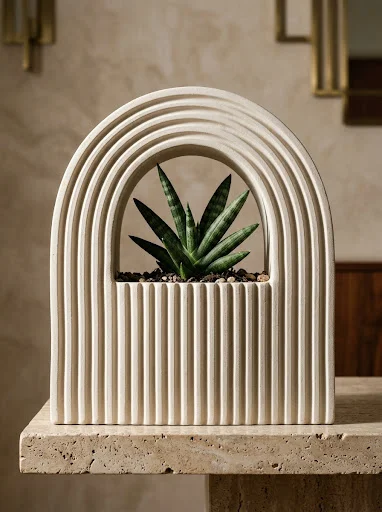
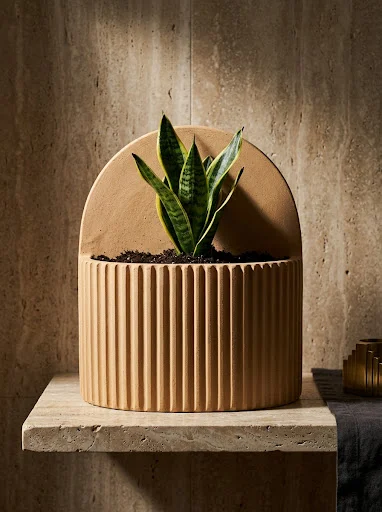
    The fluted arch wall pocket introduces vertical greenery to unused wall spaces, blending decorative relief textures with a practical, space-saving format. This design features a flat backplate cut into a smooth Roman arch, paired with a half-cylinder front pocket that bows outward to house trailing vine cuttings or air plants. The front surface is embellished with vertical, parallel fluting channels that run from the top rim down to the base, adding subtle tactile depth without interrupting the overall clean silhouette. Designed to mount directly onto drywall hooks, this vessel functions as functional wall art, bringing biophilic warmth to narrow hallways, gallery walls, and home office nooks. The flat rear panel keeps the container resting flush against the wall, while the open top provides easy access for plant maintenance.
    Roll a large slab of warm gray clay to a consistent four-millimeter thickness on your non-porous work surface. Use a paper template to cut out an elongated Roman arch measuring five inches wide by eight inches tall, rounding the top apex symmetrically. Next, cut a flexible rectangular panel measuring six inches wide by four inches tall, using a rounded gouge tool to carve straight, parallel vertical lines spaced a quarter-inch apart along the front exterior surface. Curve the textured front panel into a half-cylinder and affix its side edges to the lower half of the flat arch backplate, reinforcing the interior joins with a thin rolled coil of clay. Pierce a keyhole mounting aperture through the upper curved portion of the backplate using a five-millimeter craft hole punch. Smooth all exterior seams with a damp sponge, allow the vessel to cure completely, and coat the interior pocket with two layers of liquid waterproof varnish to protect the assembly against misting dampness.

    3. Asymmetrical Angular Prism Planter

    3

    How to Create

    The asymmetrical angular prism planter departs from traditional circular pottery forms, utilizing crisp multi-faceted geometry to interact with natural interior lighting. The exterior consists of several non-uniform triangular and trapezoidal planes that slope inward toward a hexagonal opening, creating dynamic shadows that shift as room lighting changes throughout the day. This faceted shape provides structural rigidity while keeping the overall wall thickness thin and lightweight. Styled in a matte charcoal or slate black clay body, this planter acts as a striking modern accent on wooden shelving units, glass coffee tables, or concrete window ledges. The angular facets contrast the soft, organic curves of succulents, cacti, or cascading string-of-pearls, demonstrating how geometric precision can complement natural plant growth.
    To build the prism, sketch and cut six asymmetrical trapezoidal templates from lightweight cardboard, keeping each panel approximately four inches tall with alternating base widths. Roll a dense slab of charcoal-colored clay to an exact four-millimeter depth, placing the cardboard templates onto the clay to trace and slice out the six individual faceted wall components with a sharp hobby knife. Bevel the mating edges of each panel inward at a 30-degree angle to ensure clean, tight corner joints when assembled into a three-dimensional ring. Join the panels sequentially over a hexagonal base plate, using a scoring tool to scratch the contact edges and applying a thin coat of liquid clay to act as a permanent bonding agent. Press a silicone smoothing tool along the inside corner seams to build mechanical strength while keeping the outer faceted angles sharp. Bake or air-cure the faceted vessel thoroughly, gently sand any excess exterior seams with 400-grit wet sandpaper, and apply a matte polyurethane sealant to the interior chamber.

    4. Suspended Hemispherical Hanging Bowl

    4

    Step-by-Step Guide

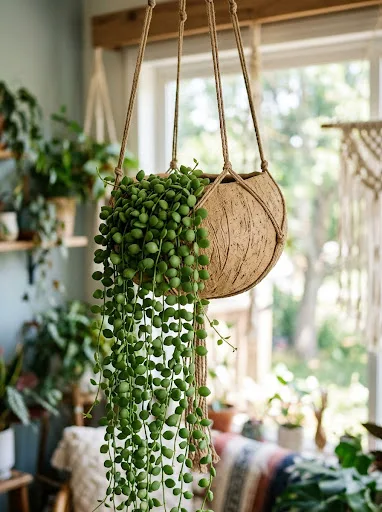
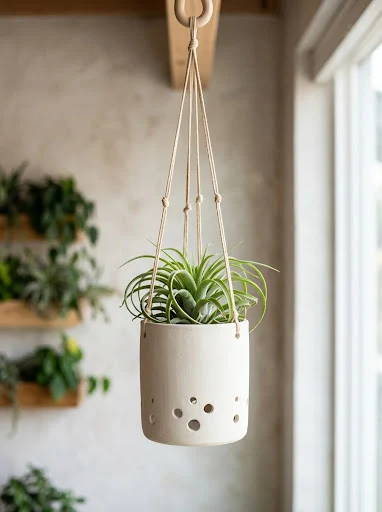
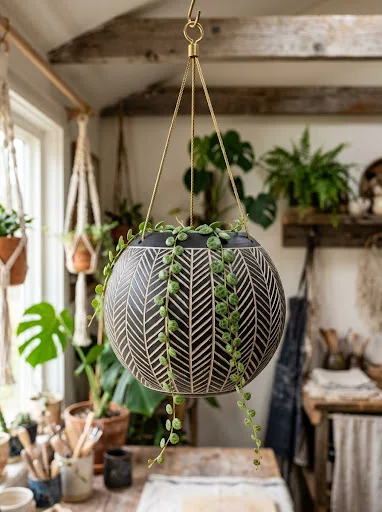
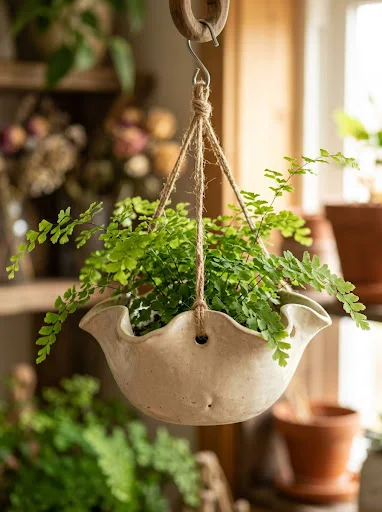
    The suspended hemispherical hanging bowl offers an airy, floating botanical display that maximizes overhead ceiling space and window light. This design consists of a half-sphere bowl suspended from three minimalist natural leather or unbleached cotton cords that converge into a single metal hanging ring. The exterior bowl surface remains smooth and unadorned, finished in a raw ecru or chalk-white tone that complements trailing foliage like string-of-hearts, English ivy, or burro’s tail. Elevating plants above floor and shelf surfaces improves airflow around foliage while keeping leafy vines away from curious pets. The smooth hemisphere distributes physical weight evenly across its surface, creating a balanced, level container that hangs straight without tipping.
    Begin by rolling conditioned white clay into a uniform five-millimeter slab, smoothing away all surface imperfections with a flexible rubber rib. Carefully drape the soft slab over the exterior of an oven-safe glass mixing bowl or wooden sphere mold that has been dusted lightly with cornstarch to prevent sticking. Trim away the excess clay around the circumference with a craft knife to establish a clean, level horizontal rim. Measure three equidistant points around the perimeter, placed three-quarters of an inch below the upper rim, and pierce clean four-millimeter holes using a hollow punch. Leave the clay seated on its mold during the initial baking cycle to prevent structural sagging or warping. Once fully cured and cooled, remove the vessel from the mold and sand the top lip smooth with fine-grit sandpaper. Thread three twenty-four-inch leather cords through the side holes, knotting them firmly inside the bowl, and gather the top ends into an antiqued brass ring.

    5. Concentric Tiered Succulent Trough

    5

    Execution Process

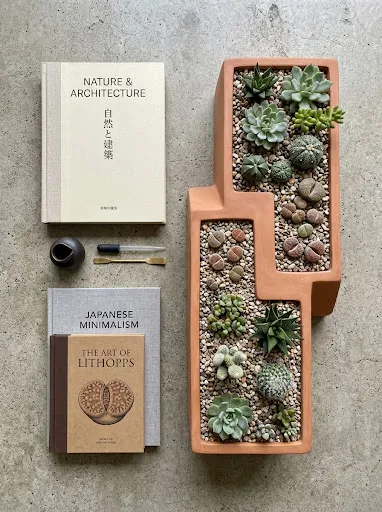
    The concentric tiered succulent trough provides an elongated, multi-level planting surface designed specifically for shallow-rooted succulent groupings, miniature cacti, and lithops. The planter features an elongated oval or rounded rectangular base, stepping upward through two distinct architectural levels to create separate soil depths within a single cohesive container. This tiered configuration creates visual interest across long dining tables, credenzas, and deep window sills, allowing gardeners to arrange plants with varied heights without overcrowding roots. The clean horizontal lines reflect Japanese architectural principles, celebrating balance, order, and spatial efficiency. Rendered in a warm taupe or washed terracotta clay, the trough frames succulents cleanly, keeping their structural rosettes neatly organized.
    To construct the tiered trough, roll a large clay slab to a sturdy six-millimeter thickness to support the wide, elongated base. Cut an oval base plate measuring twelve inches long by five inches wide, followed by an interior raised terrace plate measuring six inches long that spans half the floor area. Cut exterior wall strips of two different heights: a two-inch strip for the lower terrace and a three-and-a-half-inch strip for the elevated tier. Score and bond the lower wall strip around the circumference of the main base plate, then attach the taller wall strip around the elevated rear section, integrating the internal dividing shelf with liquid clay adhesive. Use a wooden modeling stick to compress all internal seams, reinforcing the joint lines with thin clay coils to prevent leakage between tiers. Punch two independent drainage holes through the bottom of each terrace floor. Cure the vessel completely, smooth the top outer rim with an abrasive sanding pad, and seal all interior compartments with waterproof marine varnish.

    6. Monolithic Fluted Column Vessel

    6

    Setup Method

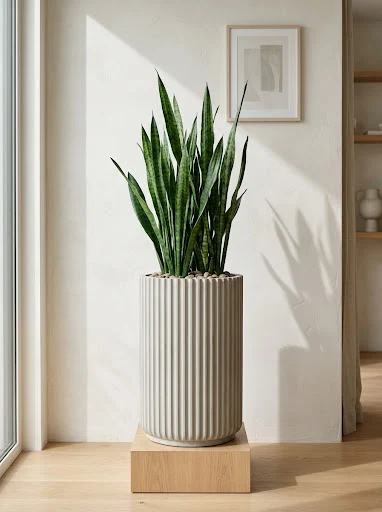
    The monolithic fluted column vessel draws inspiration from classical Greek column architecture, translating historical stone craftsmanship into an understated modern planter. The design features a tall, vertical cylinder wrapped in tight, concave vertical ridges that run continuously from base to rim, creating a repeating pattern of light and shadow around the perimeter. The repetitive fluting adds structural strength to the cylinder walls, allowing the planter to maintain a tall, slender silhouette without bowing outward under soil weight. Styled in an unglazed limestone or warm bone finish, this column planter provides an elegant vertical pedestal for upright indoor plants such as calatheas, peace lilies, or cast-iron plants. The vertical ridges draw the eye upward, complementing the natural vertical growth of interior house plants.
    Start by rolling out a three-millimeter slab of bone-white polymer clay onto a long ceramic tile. Lay a flexible silicone fluting mat or decorative clay texture mat over the entire slab, rolling firmly with an acrylic roller to press uniform vertical ridges into the surface. Trim the embossed sheet into a rectangle measuring six inches high by thirteen inches wide, ensuring the fluted channels remain aligned with the vertical edges. Roll a separate four-inch circular base disc at a thickness of five millimeters. Form the embossed rectangular slab into a cylinder around an interior cardboard support tube wrapped in parchment paper, joining the vertical edges along a fluted groove to conceal the seam. Score and bond the fluted cylinder onto the four-inch circular base, blending the interior seam with a wooden modeling tool. Remove the internal cardboard tube prior to baking, cure the clay cylinder according to manufacturer instructions, and seal the interior with brush-on polyurethane to preserve water tightness.

    7. Rounded Capsule Footed Planter

    7

    How to Create

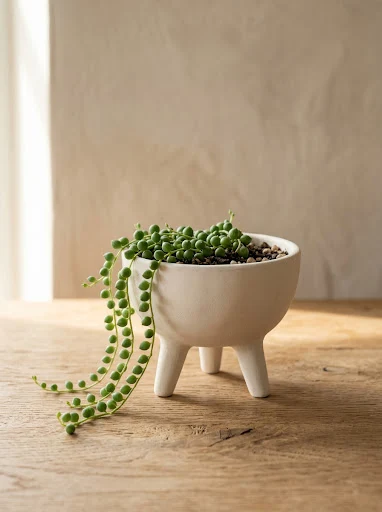
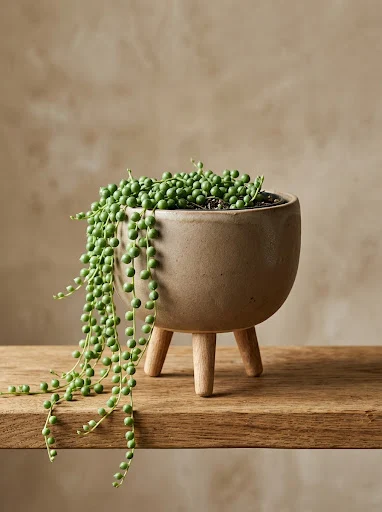
    The rounded capsule footed planter pairs a softened, pill-shaped bowl with three stubby, cylindrical dowel legs, creating a balanced, playful accent piece. The main bowl features a curved, parabolic profile that transitions smoothly into a flat top rim, resting on three short, solid clay feet attached to its base. Raising the curved body on three points of contact provides structural stability on slightly uneven surfaces while allowing air to circulate freely beneath the drainage hole. Rendered in a soothing sage green, pale terracotta, or warm buttercup tone, this container complements modern living rooms, nightstands, and open book displays. The soft curves contrast well with the spiky, architectural foliage of haworthias, pecorinos, or small upright ferns, adding an inviting artisan touch to interior spaces.
    Begin by shaping a solid ball of conditioned clay into a smooth hemisphere using pinch-pot methods, rotating the ball in your palm while pressing your thumb into the center to hollow out the cavity. Maintain an even wall thickness of roughly five millimeters throughout the bowl, using a curved rubber kidney tool to smooth the exterior and interior contours. Flatten the top rim by gently pressing the inverted bowl against a flat ceramic tile. To craft the three cylindrical feet, roll a thick coil of matching clay to a one-inch diameter and slice three equal segments measuring one and a quarter inches long. Invert the main bowl, score three equilateral mounting points across the curved underside, apply liquid clay bonding agent, and press the feet firmly into place. Blend the joint perimeters using a miniature ball-stylus tool to ensure the legs stay firmly attached through curing. Punch a drainage hole through the center of the base, bake the inverted planter, and coat the interior with waterproof acrylic varnish once cooled.

    8. Offset Cantilever Planter and Saucer

    8

    Step-by-Step Guide

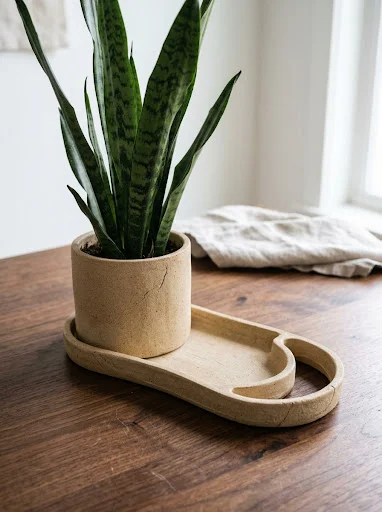
    The offset cantilever planter reinterprets traditional two-piece pot-and-saucer sets by integrating the drainage tray directly into an asymmetrical architectural silhouette. The upper cylindrical planter body sits intentionally offset over an elongated oval base tray, leaving a crescent-shaped open basin on one side that acts as an accessible bottom-watering port. This configuration allows growers to pour water directly into the lower basin, letting plant roots absorb moisture upward through bottom drainage holes without disturbing the upper soil. The clean visual break between the upper cylinder and the lower tray provides an interesting geometric profile that fits minimalist environments. Styled in a textured slate or sand-toned clay, this functional set eliminates the need for plastic catch trays, offering a clean, unified presentation for office desks and bookshelves.
    Roll out a flat slab of sand-textured clay to a six-millimeter thickness on your workspace. Cut an elongated oval base measuring eight inches long by five inches wide, and cut a four-inch-wide by fourteen-inch-long strip for the planter walls, alongside a matching four-inch circular disc for the pot floor. Construct the cylindrical pot by joining the strip around the circular floor, smoothing the interior and exterior seams thoroughly. Cut a half-inch drainage hole through the bottom floor near its perimeter edge. For the base tray, roll a low, three-quarter-inch-tall rim and wrap it around the outer perimeter of the large oval base plate to form a waterproof catch basin. Position the cured or raw cylinder onto one end of the oval tray, bonding the shared floor contact points securely with liquid clay while leaving the opposite side open. Cure the combined assembly according to clay package specifications, then apply two coats of waterproof epoxy resin over the entire interior tray basin to ensure complete water tightness.

    9. Minimalist Ring Handle Vessel
    9

    Execution Process

    The minimalist ring handle vessel incorporates functional transport features directly into its sculptural profile, featuring two oversized, circular ring handles attached symmetrically to opposite sides of a cylindrical planter body. The hollow circular handles echo early 20th-century ceramic studio designs, offering a comfortable, secure grip for moving the planter during watering or lighting adjustments. The contrast between the straight vertical walls and the rounded circular handles adds visual energy without needing surface patterns or bold colors. Finished in a matte warm-white or unglazed oatmeal finish, this vessel suits modern dining tables, credenzas, and kitchen islands, housing bushy herbs or leafy foliage plants like philodendrons and calatheas with practical, understated elegance.
    Roll conditioned off-white clay to an even five-millimeter thickness, cutting a rectangle measuring five inches tall by fifteen inches wide, along with a five-inch circular base plate. Join the rectangular slab around the circular base, using a scoring tool and water to bond the seams before smoothing the joint lines with a flexible scraper. To craft the circular handles, roll a long, uniform snake of clay to a three-quarter-inch diameter, cutting two segments measuring seven inches in length. Loop each segment into a closed circle, bevel the joining ends, and blend them into seamless rings with your fingertips. Flatten one side of each ring slightly to create a stable contact surface. Score the opposing vertical walls of the main cylinder three inches down from the rim, apply liquid clay, and press the flattened handle edges firmly against the planter walls. Reinforce the handle joins with small clay coils on the interior curve, cure the entire piece, and apply an interior coat of waterproof polyurethane.

    10. Ribbed Square Cachepot
    10

    Setup Method

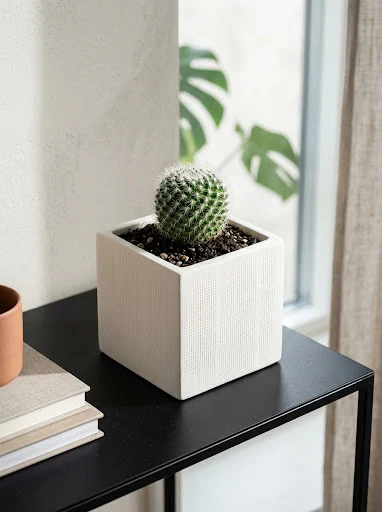
    The ribbed square cachepot brings crisp, cube-like geometry to indoor plant styling, designed specifically as an outer decorative sleeve for standard square plastic nursery pots. The four planar walls feature horizontal raised ribs spaced half an inch apart, introducing clean horizontal lines that accentuate the planter’s sharp corners. Because this design acts as a cachepot, it holds the interior nursery pot without requiring a drainage hole, preventing water droplets from escaping onto wooden shelves or office furniture. The boxy shape allows multiple containers to sit flush alongside one another, making it an excellent choice for compact windowsill herb gardens or organized library book ends. Finished in a soft bone, sage, or dark basalt tone, this piece offers a tailored, orderly look that suits clean, clutter-free interiors.
    Cut four identical square panels measuring four and a half inches on each side from a four-millimeter-thick slab of conditioned polymer clay. Using a straight ruler and an embossing stylus, impress straight, horizontal grooves spaced half an inch apart across the front faces of all four panels, keeping the lines parallel to the top and bottom edges. Bevel all vertical side edges at a 45-degree angle using an angled craft slicer to ensure tight corner joins. Cut a four-inch square base plate from smooth, untextured clay. Assemble the four wall panels around the base plate, aligning the horizontal ribs at every corner so the lines wrap continuously around the cube. Use an interior wooden modeling tool to seal the internal corner joins, reinforcing them with small clay coils pressed firmly into the seams. Check that the upper rim forms a true square with a set square before curing. Bake the planter flat on a ceramic tile, and brush a thick coat of waterproof acrylic sealant across the interior floor and walls once cooled.

    Common Beginner Mistakes and How to Avoid Them

    Constructing functional clay planters without specialized ceramic studio equipment presents specific structural challenges that require careful attention to detail. A frequent beginner mistake is rolling slabs to inconsistent depths, which causes uneven curing, localized warping, and weak walls that can buckle under the weight of wet potting soil. To prevent this, always roll clay using rigid wooden depth slats or silicone guide rings attached to both ends of your rolling pin to maintain an even four-to-six-millimeter thickness. Another common pitfall is inadequate seam compression; simply pressing clay edges together without scoring, using liquid clay, or blending internal joints often leads to cracked seams once the vessel is filled. Always score mating edges in a crosshatch pattern, apply a thin layer of liquid polymer clay or water-based slip, and press a reinforcing coil along the inside corners to ensure a durable bond. Beginners also frequently overlook proper water sealing, assuming cured polymer or air-dry clay is naturally impervious to standing water. Air-dry clays are water-soluble and will soften over time, while unsealed polymer clay can develop micro-fissures that allow moisture through. Always apply two to three coats of waterproof marine varnish or liquid epoxy resin across all interior surfaces before planting.

    Practical Tips for Better Results

    Achieving smooth, boutique-quality finishes on handmade minimalist planters relies on disciplined surface preparation and thoughtful curing techniques. Before baking or setting your clay to dry, inspect the exterior surfaces under directional raking light to spot subtle finger impressions, lint, or uneven areas. You can remove surface dust and fingerprints from uncured polymer clay by gently wiping the raw surface with a cotton pad lightly dampened with isopropyl alcohol. For air-dry clays, smooth away small surface imperfections using a flexible rubber pottery rib dipped in clean water. When creating vessels with straight, vertical walls, support the interior during construction using cardboard mailing tubes, glass jars, or metal cans wrapped in parchment paper to prevent the soft walls from sagging inward before curing. Always use an independent oven thermometer to verify the interior temperature of your home oven; temperature spikes can scorch light-colored clays, while under-baking leaves clay brittle and fragile. After the piece cures and cools completely, use 400-grit to 800-grit wet sandpaper under running water to polish the rim and base, giving your handmade planter a smooth, professional stone-like finish.

    Styling, Presentation, or Organization Ideas

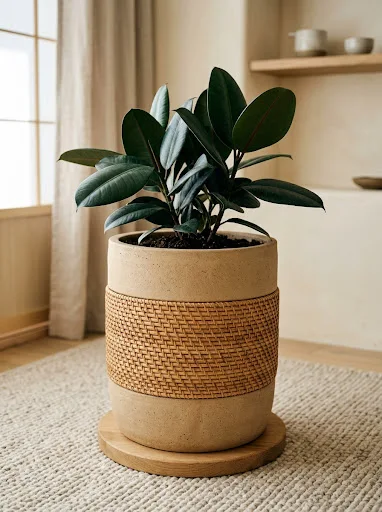
    The clean lines of minimalist clay planters make them exceptionally versatile for home styling, grouping, and interior plant presentation. When displaying multiple planters on open shelving or a credenza, group vessels in odd-numbered clusters of three or five, varying the container heights and diameters to create an organic, balanced visual rhythm. Pair unglazed, light-colored planters with deep green, glossy foliage plants like fiddle-leaf figs, monstera deliciosa, or rubber trees, using the high color contrast to emphasize the plant’s natural architectural shape. On dining tables or long window sills, arrange geometric or ribbed planters in a continuous linear row to establish a cohesive, modern centerpiece that feels intentional and structured. You can also match the vessel colors to the room’s broader architectural materials: pair charcoal and slate planters with blackened steel and glass accents, or style warm terracotta and bone planters alongside natural white oak and woven textiles. Using elevated plant stands, floating shelves, or wall-mounted pockets lets you disperse greenery at varied eye levels throughout the room, creating an immersive, multi-tiered botanical display that keeps floor spaces open and uncluttered.

    Budget or Time Planning

    Creating custom hand-built clay planters is an economical, budget-friendly project that yields high-end home decor accents without substantial financial investment. A standard block of professional polymer or air-dry clay costs very little and provides enough material to construct two medium-sized containers or three compact succulent cups, keeping production costs well below retail ceramic prices. To optimize your crafting time, organize your project into focused production stages rather than completing one vessel from start to finish. Dedicate your first session to conditioning the clay, rolling all flat slabs, and cutting your structural components using prepared cardboard templates. Allow the cut pieces to rest for twenty minutes to firm up slightly, which makes them easier to handle without warping the edges. Spend your second session assembling the wall seams, smoothing joints, and attaching base pedestals or feet before curing everything together in a single, energy-efficient oven cycle. The final sealing and optional wet sanding take roughly twenty minutes per piece once the clay is fully cooled. This systematic batching approach allows you to build an entire coordinated collection of designer planters over a single weekend.

    Creative Expansion and Advanced Inspiration

    Once you feel comfortable with foundational hand-building techniques, explore creative variations to expand the visual depth and functionality of your planter designs. Consider incorporating mixed-media elements into your clay vessels, such as embedding turned hardwood base rings, attaching woven brass wire accents, or pairing unglazed clay with raw stone elements for rich textural contrast. You can also experiment with surface clays, blending fine volcanic sand, crushed terracotta crumbs, or black granite flecks into smooth white clay to mimic the look of speckled studio ceramics and cast concrete. Advanced makers can try building interlocking modular systems, crafting matching sets of geometric planters that slot together into expandable honeycomb configurations along sunny window ledges. Another rewarding direction involves exploring natural earth pigments, using subtle iron oxide washes or watered-down mineral paints buffed into textured surface grooves to highlight relief details. By mastering these core shaping principles and exploring varied surface finishes, you can continue expanding your pottery skills, producing functional, modern plant vessels tailored to your evolving interior decor.
  • 10 Painted Clay Planter Ideas

    10 Painted Clay Planter Ideas

    Hand-painted clay planters provide an accessible avenue for upgrading everyday indoor greenery into striking decorative centerpieces that reflect personal style and intentional home decor. This comprehensive tutorial details ten versatile creative project concepts for transforming standard terracotta pots and air-dry clay vessels into custom functional art. Readers will discover clear methods for executing varied design styles, including mid-century arches, minimalist color blocks, organic botanical silhouettes, and textured modern terrazzo. Hand-painting clay planters allows plant enthusiasts to harmonize disparate nursery pots, introduce trending colors to living spaces, and protect porous earthenware surfaces against environmental wear. Learning the fundamentals of surface preparation, pigment application, and moisture sealing bridges the gap between basic crafting and durable ceramic styling. With clear step by step instructions, this guide covers tool selections, painting mechanics, sealing protocols, and troubleshooting methods tailored for crafters of all skill levels. By mastering foundational painting techniques like color masking, continuous linework, and sponge mottling, makers can produce unified botanical displays that elevate windowsills, desks, and shelving units. These painted vessels protect delicate houseplant root systems while serving as timeless, handcrafted home accents.
    Why This Idea Is Trending or Useful

    The popularity of painted clay planters across visual social boards reflects a widespread cultural interest in personalized living spaces, mindful crafting, and affordable home styling. Standard orange terracotta pots are durable and inexpensive, yet their uniform appearance often clashes with contemporary interior aesthetics. Applying custom paint treatments offers a budget ideas solution, allowing decorators to customize off-the-shelf garden containers to match modern design palettes without spending money on expensive ceramic collections. The ongoing rise of indoor gardening has created a demand for visually interesting plant housing, particularly for small succulents, trailing vines, and compact tropicals. Hand-painting pottery satisfies this need by combining practical plant care with an easy project suitable for a quiet afternoon. The activity requires no specialized machinery, making it exceptionally beginner friendly and safe for home worktables. Furthermore, painting terracotta allows makers to control internal and external porosity through strategic sealing, which helps regulate soil moisture levels for finicky houseplants. These adaptable vessels make thoughtful handmade gifts, cohesive desk organizers, and customizable accent pieces that adapt seamlessly to shifting seasonal decor themes.

    Materials and Preparation

    Executing clean, long-lasting painted clay planters requires thorough surface preparation, appropriate paint chemistry, and reliable sealing agents. Begin by acquiring standard unglazed terracotta pots or smooth, fully cured air-dry clay vessels equipped with bottom drainage holes. Essential painting materials include multi-surface acrylic craft paints, flat wash brushes, fine-detail liner brushes, high-density foam sponges, and low-tack painter tape for creating sharp geometric boundaries. Clay is a naturally porous earthenware material that absorbs water rapidly; therefore, raw pots must be thoroughly prepared before applying paint. Clean existing pots with warm water and a stiff nylon brush to remove surface dust, efflorescence salts, and soil residues, allowing the clay to dry completely for twenty-four hours. Sand rough manufacturing seams with a 220-grit sanding sponge to establish a smooth working canvas for fine linework. Apply a water-based interior clay pot sealer or clear acrylic primer to the inner walls and bottom to prevent moisture from seeping through the clay and bubbling the outer paint layer. Finally, secure a clear water-resistant acrylic varnish in matte or satin to safeguard completed painted artwork from soil stains and routine watering.

    1. Idea 1: Desert Sand Dune Horizon

    1

    How to Create

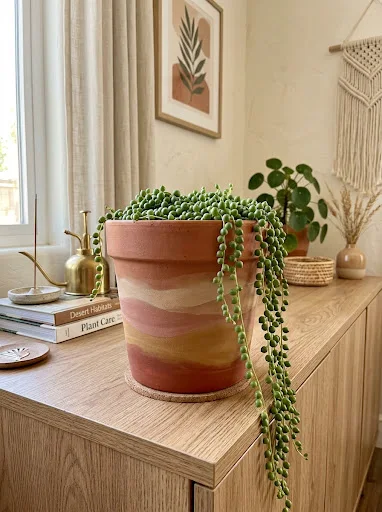
    The desert sand dune horizon design pairs earthy warmth with clean minimalist style, utilizing flowing horizontal bands to evoke arid landscapes. This design uses an understated color palette of warm terracotta, muted ochre, dusty rose, and creamy sand layered around the pot’s circumference. The organic curved lines soften the rigid, tapered conical shape of standard clay flowerpots, adding visual movement and calm stability. Contrasting flat clay tones against warm earth tones creates a grounded foundation that flatters blue-green succulents, snake plants, and trailing string-of-pearls. The horizontal banding visually widens the planter base, making tall, slender plants appear well-proportioned on side tables and desks. This pattern relies on sweeping, freehand brush strokes rather than rigid tape masks, making it a stress-free project that welcomes natural variation. The finished container brings a relaxed desert aesthetic into contemporary living rooms, pairing effortlessly with warm timber furniture, woven textiles, and neutral walls.
    Start with a thoroughly cleaned, primed terracotta pot, using a soft pencil to lightly sketch three to four undulating horizontal dune ridges around the vessel. Space the curves so that each band varies in height between two and four centimeters, establishing natural visual rhythm. Mix your acrylic paints on a ceramic palette, preparing a four-step gradient ranging from a pale desert sand hue to a rich spiced terracotta. Using a medium flat-edge filbert brush, fill the lowest horizontal section with your darkest tone, pulling smooth horizontal brush strokes along the pencil lines. Progress upward through your color gradient, painting adjacent bands with lighter pigments while maintaining crisp, clean boundary lines where sections meet. Allow each individual band to dry for twenty minutes before applying a second opaque coat to eliminate uneven streaking. Clean up slightly irregular transitions using a dampened fine-liner brush dipped in the lighter boundary color. Once the entire vessel is dry to the touch, apply two light coats of matte acrylic sealer across the exterior to preserve the soft chalky texture.

    2. Idea 2: Mid-Century Arch and Sphere Motif

    2

    Step-by-Step Guide

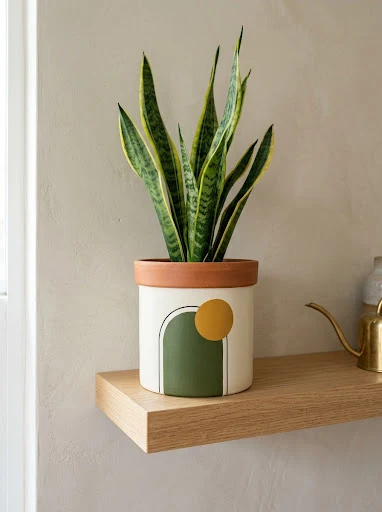
    The mid-century arch and sphere motif incorporates retro architectural geometry through stacked vertical portals, clean semicircles, and solid spheres. Rendered in classic modern hues like olive green, warm mustard, matte black, and off-white, this design brings dynamic structure to indoor plant displays. The repetition of upright curved arches elongates the planter’s silhouette, making compact pots appear taller and more commanding on low display shelving. The contrast between rounded arches and solid circular orbs introduces balanced visual interest without cluttering the planter’s surface. This clean graphic aesthetic complements upright houseplants with architectural leaf structures, such as sansevieria, zamioculcas, or rubber trees. The structured layout teaches precision brush handling and template tracing, delivering a polished, boutique-quality finish. It functions as a bold accent piece that coordinates seamlessly with mid-century modern credenzas, clean gallery walls, and minimalist desks.
    Begin by painting the entire exterior surface of the pot in two coats of an off-white or creamy eggshell acrylic base, letting it cure for two hours. Trace an arch template cut from thin cardstock onto the front face of the pot, positioning the arch four centimeters above the bottom rim. Use a plastic bottle cap to trace a matching circular orb directly above the curved apex of the arch, leaving a one-centimeter gap between the shapes. With a flat chisel-edge brush, paint the arch body using deep olive green, starting from the outer boundary and pulling strokes inward to prevent paint bleed. Fill the floating sphere above the arch with an opaque warm mustard acrylic paint, applying two thin layers for uniform coverage. Carefully outline the perimeter of both geometric shapes using a fine-detail liner brush loaded with matte black paint to accentuate the graphic lines. Inspect the edges, smoothing minor wobbles with an angled brush moistened with the off-white background paint. Finish the project by applying a clear satin protective varnish over the cured paint to enhance color richness.

    3. Idea 3: Botanical Monochrome Ginkgo Leaves

    3

    How to Make

    The botanical monochrome ginkgo leaves design introduces delicate, organic linework by painting stylized fan-shaped foliage across an understated background. This concept features fan-like leaves with delicate radiated ribbing rendered in crisp white paint over a dark charcoal or slate grey clay surface. The high-contrast palette creates a striking silhouette that emphasizes delicate leaf veins and curved stems. The dark background grounds the container visually, making vibrant green foliage—such as bright lemon button ferns or baby tears—stand out dramatically against the pot. Painting detailed botanical motifs sharpens fine-motor control and brush manipulation, proving that monochrome palettes can deliver rich visual depth. The pattern wraps continuously around the cylinder, providing visual interest from every angle as the plant grows and shifts toward window light. This design fits into contemporary, transitional, and classic interior spaces, serving as a functional piece of botanical illustration.
    Coat the entire outer surface and upper two centimeters of the pot’s interior with two coats of deep charcoal or matte graphite acrylic paint. Allow the dark base coat to dry completely for at least one hour until the surface is non-tacky and uniform in sheen. Lightly map out four to five distinct ginkgo leaf heads across the vessel using white chalk, connecting them with slender, gently curling stems. Load a fine number-one round liner brush with opaque titanium white acrylic paint, thinning the pigment slightly with water to ensure smooth, fluid brush glide. Begin painting each leaf by pulling delicate, radiating linework outward from the stem junction to the wide, scalloped outer perimeter of the leaf fan. Vary the pressure on the brush tip, pressing lightly at the stem base and releasing smoothly toward the outer leaf margin to achieve natural taper. Once all leaves are rendered, trace the connecting vine stems with continuous, uninterrupted line strokes. Allow the linework to cure fully before spraying with an invisible ultra-matte protective coat to secure the delicate white pigments.

    4. Idea 4: Bold Color-Blocked Half-Moon

    4

    Execution Process

    The bold color-blocked half-moon design applies sharp graphic geometry and high color contrast to transform a basic clay pot into a contemporary art object. This layout divides the pot vertically down its center, featuring a contrasting half-circle spanning across the dividing line, or an asymmetric horizontal split. Utilizing vivid color pairings like cobalt blue with pale peach, or forest green with warm terracotta, delivers an immediate visual statement. The clean lines provide structured balance, making this pot an effective home for trailing ivy, string-of-hearts, or cascading pothos vines. The graphic color separation draws the eye toward the center of the vessel, establishing a solid anchor on open living room shelving. Executing clean lines on a curved surface teaches disciplined painter tape application, burnishing techniques, and edge sealing mechanics. This easy project offers maximum decorative impact with minimal painting time, ideal for weekend decorators updating room accents.
    Thoroughly wipe down your clean clay pot and apply a smooth base coat of pale peach acrylic paint over the entire exterior wall, letting it dry completely. Measure the circumference of the vessel with a flexible cloth tape, marking the exact center points along the top and bottom rims with faint pencil dots. Apply a strip of flexible low-tack blue painter tape vertically down the side of the pot, aligning it with your measured guide marks. Burnish the tape edge firmly with your thumbnail or the back of a spoon to create an impenetrable barrier that prevents pigment bleed. Paint the exposed side with two coats of deep cobalt blue, brushing from the tape outward toward the open surface. Carefully peel away the painter tape while the second coat is still slightly damp, pulling back at a flat forty-five-degree angle to reveal a sharp edge. Once dry, position a circular stencil across the vertical seam and paint a contrasting half-moon using warm terracotta paint. After drying, apply two thin coats of clear water-resistant sealer to protect the graphic line work.

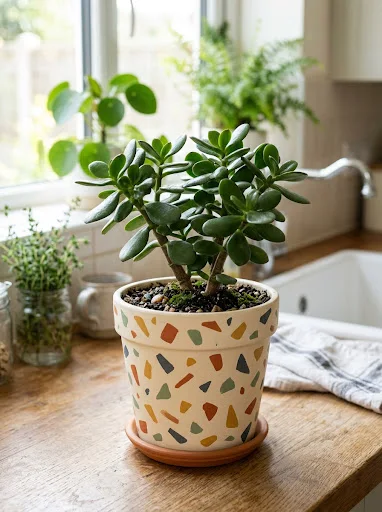
    5. Idea 5: Modern Earthy Terrazzo Pattern

    5

    Setup Method

    The modern earthy terrazzo pattern captures the lively, composite look of traditional Italian flooring through irregular hand-painted geometric chips. This concept scatters angular flecks of rust, soft sage green, warm mustard, and dark charcoal across a warm ivory or stone-colored base. The random arrangement of shapes produces dynamic movement that keeps the eye moving around the pot’s circumference. Terrazzo patterns soften the rigid symmetry of indoor furniture, introducing playful visual texture that complements compact jade plants, hawthorns, and flowering cacti. Because the chips are intentionally irregular, the painter is freed from strict measurement and precision symmetry, making the process relaxing and forgiving for beginners. The neutral stone background unifies the varied fleck pigments, ensuring the completed vessel complements existing decor without clashing. This style bridges classic stone composite architecture with playful modern design, functioning as an artistic conversation starter.
    Apply two smooth, even layers of warm ivory or pale buff acrylic paint across the entire exterior of the pot, letting each coat dry thoroughly. Select four accent colors: rust orange, sage green, ochre yellow, and deep charcoal, placing coin-sized portions of each pigment onto your mixing palette. Using a small flat square-tip shader brush, stamp small triangular, rectangular, and irregular polygonal chips randomly across the surface. Vary the orientation and size of the shapes, keeping individual flecks between three and eight millimeters across while leaving open space between marks. Rotate the pot continuously as you work, alternating colors systematically to ensure balanced distribution of tones without clustering identical hues. After painting the larger shapes, use the tip of a toothpick or fine round brush to add tiny specks and dots within the open spaces. Allow the multi-colored terrazzo chips to cure for forty-five minutes before applying a wet-look or satin clear coat to simulate polished composite stone.

    6. Idea 6: Scandi Minimalist Dotted Grid

    6

    How to Make

    The Scandi minimalist dotted grid applies ordered, rhythmic pointillism over natural raw clay to produce a calm, Nordic-inspired desktop accent. This aesthetic utilizes tiny, uniform white acrylic dots arranged in straight vertical and horizontal grid rows, creating an understated geometric framework. The contrast between raw reddish terracotta and crisp white enamel dots highlights the natural earthenware texture while introducing modern organization. This subdued design works particularly well in home offices, reading nooks, and bedrooms where quiet, non-distracting decor is preferred. The linear grid pattern complements upright botanical forms, including snake plants and structural aloe vera, echoing their upward verticality. Executing uniform point spacing sharpens patience and measurement discipline, teaching decorators how small details can transform basic surfaces. The finished pot functions as a tactile, modern accessory that balances raw materials with orderly styling.
    Seal the interior of a smooth terracotta pot with a clear clay pot sealer, leaving the exterior clay natural and raw for textural contrast. Use a clear ruler and faint pencil marks to draw a light grid matrix around the pot’s exterior, spacing horizontal and vertical guide marks one centimeter apart. Pour a small pool of thick, unthinned white acrylic paint onto a disposable surface, ensuring the pigment maintains a rich, viscous consistency. Dip the rounded wooden tip of a cotton swab, pencil eraser, or specialized clay dotting tool straight down into the white paint. Press the loaded tool gently against the first grid intersection on the pot, pulling the tool straight back to leave a crisp, three-dimensional dot. Re-dip the tool before stamping every individual point to ensure uniform dot volume and diameter across the entire grid field. Continue stamping systematically row by row, wiping the tool tip periodically on a damp cloth to prevent paint accumulation. Once the dots are fully dry and firm, gently erase visible pencil lines with a soft vinyl eraser, finishing with a clear matte sealant.

    7. Idea 7: Painted Textured Gingham Check

    7

    Step-by-Step Guide

    The painted textured gingham check translates classic woven textile patterns into dimensional ceramic art, creating an inviting cottage-inspired plant container. This design features intersecting horizontal and vertical bands in soft sage green, powder blue, or muted terracotta over a crisp white base. Where the semi-transparent colored bands cross, a deeper saturated tone is applied to replicate the natural optical overlap of woven textile threads. This pattern introduces cozy visual warmth that softens austere, minimalist interiors, bringing a relaxed farmhouse charm to sunny kitchen windowsills. The structured grid contrasts nicely with cascading greenery, making it a fitting vessel for creeping figs, culinary herbs, and delicate maidenhair ferns. Constructing this layered pattern develops an understanding of color transparency, brush control, and multi-stage masking. The resulting planter feels nostalgic, tactile, and distinctly handmade, introducing artisan character into everyday spaces.
    Paint the entire clay vessel with two coats of clean white multi-surface acrylic paint, allowing the surface to dry for one hour. Use low-tack painter tape to mask out vertical stripes two centimeters wide around the pot, maintaining uniform two-centimeter gaps between taped sections. Mix your primary color—such as dusty sage green—with twenty percent clear acrylic mixing medium to create a semi-transparent glaze. Paint the open vertical stripes with a flat brush using smooth vertical strokes, peeling the tape away while the paint remains slightly wet. Allow the vertical stripes to dry completely for thirty minutes before re-taping the pot horizontally with the same two-centimeter spacing. Apply the same semi-transparent paint over the horizontal openings, which naturally doubles the pigment depth at intersecting squares to create the authentic gingham effect. Remove the tape carefully, use a fine liner brush to touch up any small line bleeds with white paint, and seal the finished pattern with a satin protective varnish.

    8. Idea 8: Abstract Face Line Art Silhouette

    8

    Execution Process

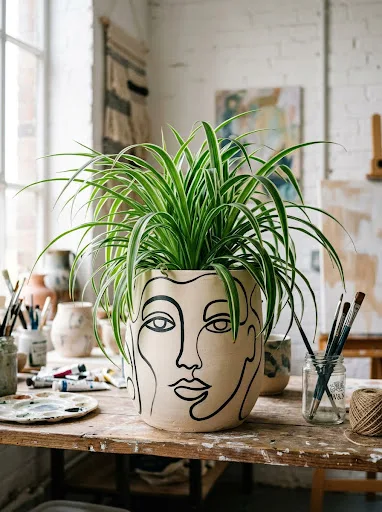
    The abstract face line art silhouette design draws inspiration from continuous contour drawing, turning a plain clay pot into a piece of modern figurative art. Rendered in a single continuous line of deep black or dark ochre paint over a warm cream or natural clay surface, this design emphasizes expressive facial silhouettes. The flowing line work wraps organically around the curve of the pot, revealing different profile elements as the vessel is rotated. When paired with trailing or unruly plants like spider plants or hoyas, the foliage appears like a sculptural head of hair, bringing playful humor into home styling. The minimalist aesthetic complements modern gallery walls, curated bookshelves, and creative studio workspaces where graphic, expressive art is appreciated. Executing fluid line art challenges the painter to commit to confident, continuous brush strokes without second-guessing or hesitation. This project delivers an artistic accent piece that looks like custom designer studio pottery.
    Prepare the surface of the pot by applying a smooth base coat of matte cream or soft linen acrylic paint, allowing it to dry thoroughly. Lightly sketch a continuous-line abstract face on the front wall using a faint watercolor pencil, incorporating fluid brows, closed eyes, an abstract nose, and curved lips. Prepare your black acrylic paint by blending it with a few drops of water or acrylic flow release until it reaches the consistency of heavy cream. Load a high-quality number-two script liner brush completely with the thinned black paint, gently rolling the bristles on your palette to form a sharp point. Beginning at the top of the silhouette, paint the continuous line in one smooth, confident movement, rotating the pot with your opposite hand to keep the brush stroke steady. Maintain light, even pressure along the brush tip, pulling the stroke continuously to prevent pooling or unexpected width variations along the line. Allow the black contour line to dry undisturbed for two hours before gently erasing any stray pencil guide marks with a damp cloth. Seal the finished artwork with two coats of non-glare ultra-matte varnish to maintain an authentic sketchbook aesthetic.

    9. Idea 9: Dip-Dye Ombre Ocean Wave

    9

    Setup Method

    The dip-dye ombre ocean wave design pairs soothing aquatic gradients with horizontal fluid color transitions, capturing the calm rhythm of coastal waters. This concept features a smooth vertical color bleed that transitions seamlessly from deep marine teal at the bottom base through seafoam green up to crisp white at the rim. The horizontal gradient creates an anchoring visual weight at the bottom of the pot, stabilizing top-heavy plants like fiddle-leaf fig cuttings or upright monsteras. The oceanic color palette introduces a refreshing, vibrant element to neutral bathrooms, sunny sunrooms, and airy outdoor patios. Blending paint smoothly across porous clay teaches gradient wet-on-wet blending mechanics, demonstrating how simple damp sponge tools can achieve professional airbrush-like transitions. The gentle color shift adds visual height to the container, making compact surfaces feel open and breezy. This design provides an engaging, tactile painting project that brings calm, coastal energy into everyday home decor.
    Wipe the raw clay pot down with a damp cloth and apply a solid coat of bright white acrylic paint over the top third of the exterior wall. Dispense white, seafoam green, and deep marine teal acrylic paints in three adjacent pools onto a flat paper plate or mixing palette. Dampen a dense, high-density cellulose craft sponge with clean water, squeezing out all excess moisture until the sponge remains slightly damp. Dip the flat face of the damp sponge into the marine teal paint, dabbing it firmly around the lower third of the pot to establish an opaque base color. While the teal layer remains wet, dip the opposite edge of the sponge into seafoam green, dabbing it around the middle third of the vessel and blending downward into the wet teal. Blend upward into the white rim by working the sponge in soft circular motions with pale seafoam and pure white, softening any hard boundary lines. Work swiftly around the pot to keep paint edges wet and blendable, smoothing visible sponge textures with a dry fan brush if desired. Once dry, protect the gradient with a high-gloss waterproof clear coat to simulate the reflective quality of ocean water.

    10. Idea 10: Rustic Brushstroke Color Block

    10

    How to Make

    The rustic brushstroke color block design utilizes expressive, painterly textures and visible brush marks to create an authentic modern wabi-sabi home accessory. Departing from taped lines and rigid geometry, this concept features broad, dry-brushed swatches of muted olive, rust, and ivory overlapping across natural terracotta clay. Leaving large sections of the raw clay exposed creates an appealing dialogue between raw earthenware and layered paint pigments. The visible bristle marks and semi-sheer edges deliver an artisan aesthetic that feels creative and uncontrived. This design works exceptionally well with wild, unstructured houseplants like maidenhair ferns, asparagus ferns, and trailing cacti, whose dynamic shapes complement the casual painterly background. The technique requires no strict templates, making it an enjoyable, low-pressure project for beginners seeking immediate decorative success. The finished container functions as an adaptable rustic accent that blends seamlessly into modern farmhouse, bohemian, and eclectic interiors.
    Clean the terracotta pot and seal only the interior cavity with a clear brush-on sealer, leaving the exterior clay natural and receptive to dry paint strokes. Squeeze small portions of muted olive green, warm rust, and matte black acrylic paints onto a textured cardboard palette. Dip a stiff-bristle flat hog-bristle brush lightly into the olive paint, dabbing the excess paint onto a paper towel until the brush is mostly dry. Hold the brush at a shallow angle against the pot, dragging it firmly horizontally across the surface to deposit a broad swatch with rough, textured edges. Repeat this dry-brush technique using the rust color, overlapping the olive swatch slightly while leaving forty percent of the natural terracotta pot exposed around the perimeter. Use a smaller flat brush to apply a final bold slash of matte black across the bottom third, creating an anchoring diagonal accent. Maintain light, swift hand movements to ensure brush marks remain distinct and dry, preventing thick, opaque paint accumulation. Once fully cured, spray the exterior with a single light coat of matte protective sealer, ensuring the natural raw clay retains its tactile earthenware texture.

    Common Beginner Mistakes and How to Avoid Them

    Beginner decorators frequently encounter issues with paint adhesion, bubbling surfaces, and messy lines when working with porous terracotta planters. A common mistake is painting directly onto uncleaned, dusty clay, which prevents pigments from bonding properly and causes peeling over time. Avoid this by washing pots with warm water and letting them dry completely for twenty-four hours before applying any paint. Another widespread misstep is skipping the interior sealant, which allows soil water to seep through porous clay walls and push off the outer paint in unsightly blisters. Always coat the pot’s interior with a liquid waterproofing sealer or use a plastic nursery pot inside to block moisture transfer completely. Beginners also often pull painter tape off dry paint, which tears the paint film and leaves jagged, uneven boundary lines. Remove your masking tape while the paint is still slightly damp, pulling the tape back flat at a forty-five-degree angle away from the painted edge. Additionally, applying heavy, unthinned acrylic coats often results in visible streaks and clumpy surfaces; build color gradually using two to three thin, even coats instead. Finally, forgetting to seal the finished exterior leaves painted designs vulnerable to scratches, soil stains, and fading from direct sunlight.

    Practical Tips for Better Results

    Achieving professional, store-quality finishes on hand-painted clay planters requires attention to tool hygiene, drying times, and proper material application. Keep your paint brushes clean by rinsing them frequently in cool water and reshaping damp bristle heads before setting them flat to dry. When masking geometric shapes, use flexible vinyl tape rather than traditional paper tape, as vinyl stretches smoothly across curved pot walls without puckering. If pencil guidelines remain visible after your paint has dried, gently remove them using a soft white artist eraser or a cotton swab dipped in rubbing alcohol. To achieve smooth, opaque solid color blocks without visible brush marks, use a high-density foam roller or dab lightly with a makeup sponge between brush coats. When working with fine linework or detailed lettering, steady your hand by resting your pinky finger against a clean, dry section of the pot wall. If you accidentally smudge wet paint onto an unpainted surface, immediately wipe it away with a damp cotton swab before the acrylic sets. Finally, apply clear protective sealers in multiple light coats rather than one heavy, dripping layer, allowing thirty minutes of drying time between applications to avoid cloudiness.

    Styling, Presentation, or Organization Ideas

    Displaying hand-painted clay planters effectively involves intentional placement, balanced scale, and complementary grouping within your living space. Cluster three planters of varying heights and coordinating patterns—such as a terrazzo pot, an arch planter, and a brushstroke vessel—to create an eye-catching tablescape. Place these groupings on natural wood credenzas, white floating wall shelves, or stone windowsills to showcase their handcrafted textures against clean backgrounds. Pair each painted container with plant varieties that complement its specific design style; match structured geometric pots with upright sansevierias, and pair organic, flowing patterns with trailing philodendrons. Elevating one planter on a wooden plant riser or a small stack of art books introduces vertical dimension, keeping flat shelf arrangements dynamic and balanced. On home office desks, these painted vessels can double as creative pen cups, brush holders, or tool storage caddies. Position planters where indirect natural daylight illuminates the painted surfaces, casting soft shadows that highlight layered textures without exposing pigments to harsh, fading sun rays. Adding a layer of small river stones, pea gravel, or polished black pebbles over the potting soil provides a clean, professional finish that complements the painted design.

    Budget or Time Planning

    Curating an original collection of hand-painted clay planters is an economical, time-efficient DIY craft that yields striking home decor with minimal expense. Standard terracotta pots are inexpensive, making them an accessible canvas for testing bold color palettes and new patterns without financial pressure. A starter set of multi-surface acrylic paints and basic craft brushes provides enough pigment to decorate a dozen small to medium pots, keeping initial project costs low. To optimize your time, organize your project into distinct stages: prepare and seal pots on one afternoon, followed by painting and detailing during a dedicated creative session. Batch-painting several pots at once saves preparation time, allowing you to rotate between vessels as base coats dry without idle waiting periods. Acrylic paints dry to the touch within twenty minutes, allowing a complete, detailed design to be completed within a two-hour crafting window. Allow finished planters to cure for twenty-four hours before potting live plants to ensure that both the paint film and protective clear sealers have hardened completely against moisture. Utilizing leftover household emulsion paints or sample pots from previous wall painting projects reduces costs further while ensuring new planters coordinate with your home’s existing color scheme.

    Creative Expansion and Advanced Inspiration

    Once you master fundamental color blocking, linework, and sponge blending techniques, you can explore advanced decorative approaches and mixed-media accents. Try incorporating metallic leafing, applying sheets of genuine gold, silver, or copper leaf along painted geometric borders to create refined, light-catching accents. You can also explore sgraffito-style techniques, painting contrasting acrylic layers over raw clay and carefully carving fine linear patterns through the top coat with an etching stylus before it fully cures. Integrating mixed-media elements—such as wrapping the top rim in natural jute twine, adding genuine leather hanging straps, or securing brass accents—introduces textural contrast to smooth painted pottery. Experiment with hand-cut stencils or specialized screen-printing transfers to reproduce complex botanical illustrations and typographic quotes across multiple matching containers. You can also scale your designs up to decorate large porch urns, hanging bowls, and matching ceramic saucers to create a unified outdoor container garden. Exploring relief textures by mixing coarse sand, baking soda, or texture pastes into acrylic paint yields a tactile, stone-like stucco finish that elevates modern minimalist designs. These advanced techniques provide limitless creative opportunities for personalizing functional plant housing throughout your home.
  • 10 Terracotta Clay Planter Ideas

    10 Terracotta Clay Planter Ideas

    Terracotta clay planters represent a foundational element of indoor gardening and landscape styling, making earthen pot transformations a dominant category across creative digital platforms. Transforming standard orange earthenware vessels allows plant enthusiasts, decorators, and craft hobbyists to design personalized focal points that balance organic materials with custom living arrangements. This comprehensive guide outlines ten distinct terracotta clay planter ideas structured to deliver practical fabrication methods, dependable moisture-management strategies, and durable decorative finishes for modern domestic environments. Readers will learn surface preparation steps, structural stacking configurations, mineral-washing techniques, and geometric color-blocking procedures that turn standard commercial clay pots into gallery-grade decorative accents. Integrating customized clay containers into your living space bridges functional botanical horticulture with intentional residential curation, ensuring root systems remain healthy while elevating household plant presentations. Understanding the core properties of porous clay prevents common maintenance errors, including salt efflorescence, cracked bases, and compromised drainage channels. Every featured project emphasizes approachable fabrication routines, accessible craft supplies, and step by step guidance suitable for all skill levels. By applying these reliable construction methods, anyone can craft enduring, visually balanced planters that celebrate natural materials while improving indoor and outdoor botanical styling.

    Why This Idea Is Trending or Useful

    Red clay pottery remains a centerpiece of contemporary home decor and patio inspiration because it combines organic texture, functional soil breathability, and exceptional DIY customizability. Unlike synthetic plastic or glazed ceramic containers, natural earthenware features porous capillary walls that allow soil to breathe, facilitating air circulation around root balls and preventing catastrophic overwatering. From an aesthetic perspective, the earthy, sun-baked warmth of traditional terracotta complements modern interior styles, including Scandinavian minimalism, desert bohemian motifs, and Mediterranean courtyard themes. The strong DIY appeal comes from the accessible, low-risk nature of the medium; inexpensive standard pots found at local garden centers can be upgraded using basic household supplies like mineral paint, twined cordage, or masonry mortars. For beginners, working with unglazed pottery offers a forgiving foundation for creative experimentation, as bare surfaces readily absorb stains, adhesives, and textured compounds without demanding specialized studio tools. These customizable vessels provide an economical way to assemble coordinated, stylish plant arrangements that look intentional and cohesive. Mastering these simple container modifications produces customized planters that mass-market retail options cannot match in tactile character or craftsmanship.

    Materials and Preparation

    Achieving durable, visually appealing modifications on standard terracotta requires disciplined workspace setup and methodical material preparation. Essential supplies include porous unglazed terracotta pots in various standardized diameters, fine-grit silicone carbide sandpaper, exterior acrylic primer, matte mineral or masonry paint, natural sisal rope, water-based penetrating waterproofing sealers, and diamond-grit masonry drill bits. Preparation starts with thoroughly cleaning your clay vessels; submerge new or used pots in a water bath mixed with white vinegar to dissolve powdery manufacturing residues, mineral salts, and stubborn dirt. Allow the clay to dry completely in open air for twenty-four hours, as trapped moisture inside the capillary pores will cause paint blisters and prevent adhesives from bonding. When planning your design layout, consider whether the finished vessel will reside indoors on hardwood furniture or outdoors exposed to seasonal freezing temperatures. Outdoor vessels require breathable, frost-proof mineral coatings and open bottom drainage holes, whereas indoor display pieces require internal liquid waterproofing membranes and non-marking felt base pads to protect delicate wooden surfaces.

    Idea 1: Weathered French Limestone Wash Vessel

    1

    How to Create

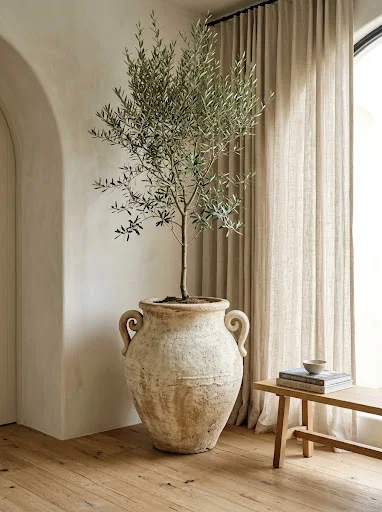
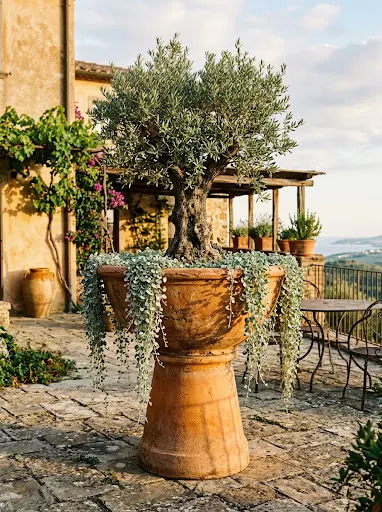
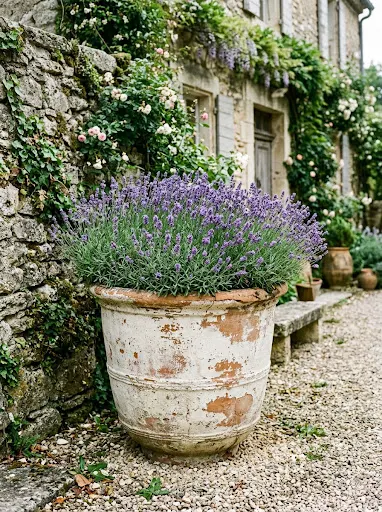
    Transforming a bright orange clay flowerpot into an antiqued limestone container brings timeless European estate charm into modern domestic spaces. This concept relies on applying a diluted, chalky mineral wash over the exterior terracotta surface, softening the sharp reddish hue into a muted, creamy bone-white tone with natural earthen undertones. The visual appeal centers on subtle tonal gradations; the wash settles deeper into natural micro-crevices and around the raised rim, simulating decades of outdoor weathering, exposure to wind, and gentle mineral patina. This muted aesthetic coordinates effortlessly with soft, silvery botanical foliage, such as olive saplings, trailing rosemary, and culinary lavender, creating an elegant focal point for sunny kitchen sills or covered garden terraces. Because the applied coating remains semi-porous, the pot retains its essential root-aeration properties while achieving the historic character of salvaged architectural stone. This versatile treatment brings quiet sophistication to casual living areas, blending classical garden proportions with soft, neutral decor palettes.
    Begin by scrubbing an eight-inch clean unglazed terracotta pot with two-hundred-twenty-grit sandpaper to open the surface pores, wiping away all residual dust with a damp cotton cloth. Prepare the mineral wash in a small container by mixing two parts matte off-white acrylic latex paint with one part cool water and one tablespoon of calcium carbonate powder, stirring until the mixture resembles thin cream. Using a wide, coarse-bristled utility brush, apply the wash rapidly across the exterior pot walls in multidirectional, erratic brushstrokes, working deliberately around the upper molded collar. While the surface remains wet, take a damp natural sea sponge and blot back high-contact areas along the body and bottom rim, exposing warm patches of underlying terracotta beneath the pale film. Allow the pigment to dry undisturbed for three hours, then gently buff the surface with a dry microfiber rag to remove loose chalky residue. Finish the exterior by applying a light mist of water-based matte penetrating sealer to lock the aged finish in place against moisture.

    Idea 2: Minimalist Matte Charcoal Dip Container

    2

    Step-by-Step Guide

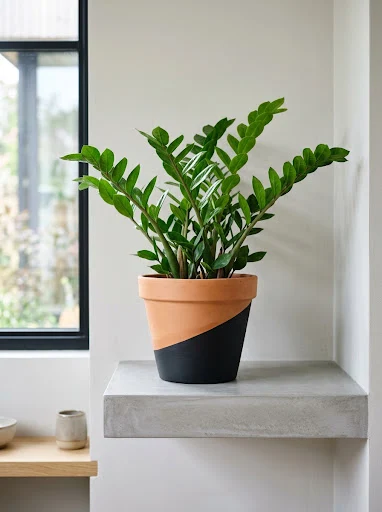
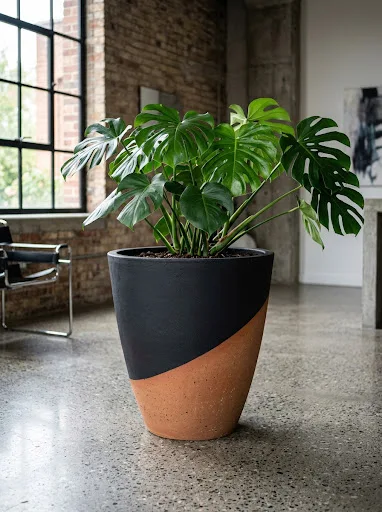
    A two-tone, dipped-effect terracotta pot offers a sharp, modern silhouette that pairs exceptionally well with contemporary interior spaces and minimalist architectural settings. This design utilizes a clean diagonal line that divides the vessel into two distinct sections: an upper band of raw, warm earthen clay and a saturated, light-absorbing matte charcoal base. The visual drama comes from high-contrast color blocking; the deep, velvety dark surface grounds the container, creating an architectural pedestal effect that makes vibrant green foliage, such as glossy ZZ plants or silver-toned pothos, pop against room backgrounds. Leaving the upper rim unpainted preserves the authentic texture of the natural clay, establishing a pleasing contrast between industrial sophistication and handmade earthiness. This graphic layout fits cleanly on floating wall shelves, modular credenzas, and streamlined workstation desks, offering an organized modern look without requiring complicated structural alterations.
    Start by preparing a smooth ten-inch terracotta planter, wiping the exterior with isopropyl alcohol to remove oil residues that could interfere with masking lines. Apply a continuous strip of flexible automotive-grade masking tape around the lower half of the pot at an intentional thirty-degree angle, burnishing the edge firmly with a wooden craft stick to prevent liquid paint from bleeding underneath. Apply a light coat of clear matte acrylic medium along the taped seam, letting it dry completely to seal the microscopic pores of the clay. Using a high-density foam roller, apply three thin, uniform coats of ultra-matte exterior charcoal or iron-black paint over the lower section of the pot, allowing thirty minutes of drying time between each application. Carefully peel away the masking tape while the third coat is slightly tacky to achieve a razor-sharp division line. Let the paint cure for forty-eight hours before potting your plant, ensuring the dark finish resists moisture, handling friction, and routine watering.

    Idea 3: Natural Jute Wrapped Hanging Globe

    3

    How to Make

    Suspending an inverted rounded terracotta pot using an integrated structural macrame wrap turns standard tabletop pottery into a functional vertical botanical display. This design encases the curved silhouette of a classic round-bellied clay pot within a cage of knotted natural jute twine, terminating in a secure hanging loop and a decorative fringe tassel beneath the base. The visual charm comes from natural material harmony; the raw, fibrous texture of natural jute rope complements the warm, unglazed clay surface, creating an earthy, organic aesthetic. Hanging planters are particularly useful for small urban apartments, compact sunrooms, and narrow entryways because they utilize unused ceiling space while keeping tabletops clear for daily living. The secure, knotted twine cradle balances the physical weight of wet potting soil and root systems, allowing trailing plants like string of hearts or English ivy to cascade freely downward. This lightweight, balanced installation adds dynamic movement and living dimension to sunny window bays.
    Cut eight continuous lengths of four-millimeter-thick three-ply natural jute twine, each measuring roughly ten feet long, aligning the ends evenly on your work surface. Fold the entire bundle in half to form a top loop, tying a secure three-inch gathering knot around the base of the fold using an additional two-foot cord to create your main ceiling hanging loop. Suspend the loop from a stable hook and separate the sixteen dangling cords into four equal groups containing four strands each. Tie a series of flat square knots along each four-strand bundle for five inches, then take the two right-hand cords from one group and tie them to the two left-hand cords of the adjacent group using an alternating half-knot, repeating around the circumference to form an open diamond netting pattern. Lower a thoroughly cleaned six-inch curved terracotta planter into the center of the twine cradle, pulling the ropes taut around the pot’s shoulders. Secure the bottom strands tightly against the drain hole base with a firm wrapping knot, trimming the remaining cords to form a balanced four-inch bottom tassel.

    Idea 4: Moroccan Geometric Stenciled Cachepot

    4

    Execution Process

    Adding intricate geometric linework inspired by traditional Moroccan tile motifs elevates standard garden pottery into an eye-catching decorative cachepot. This design uses repetitive diamond grids, interlocking stars, and delicate linear fretwork applied in contrasting white or deep navy pigment across the curved terracotta body. The aesthetic impact relies on structured symmetry; repetitive geometric patterns provide visual order, balancing the wild, asymmetrical growth habits of companion plants like bushy Boston ferns or branching jade succulents. Using fine-line stencils or measured hand-masking techniques gives the artisan full control over line weight and pattern density, turning everyday clay pots into custom display containers. This design works exceptionally well as a standalone tabletop centerpiece, bringing artisanal craftsmanship and vibrant architectural rhythm to patio tables, entry consoles, and living room shelving.
    Select a wide-mouthed eight-inch cylindrical terracotta pot, smoothing the exterior walls with fine-grit sandpaper and wiping away all surface dust. Fasten a flexible, repositionable Moroccan tile motif stencil firmly around the circumference of the vessel using low-tack painter’s tape, ensuring the stencil lies flat against the curved clay wall without bubbling. Dispense a small portion of thick, creamy white exterior craft acrylic paint onto a disposable paper palette, dabbing a flat-topped stiff stencil brush into the pigment. Tap the brush vigorously against a paper towel until nearly dry to the touch, as overloaded brushes cause paint to seep beneath stencil edges. Apply the paint through the stencil cutouts using a perpendicular bouncing or stippling motion, building up opaque, crisp lines across the open pattern areas. Carefully peel the stencil away while the paint is damp, clean off any pigment residue from the reverse side of the stencil, and repeat the process around the remaining circumference before sealing the dried patterns with a clear satin spray.

    Idea 5: Layered Earthenware Herb Tower

    5

    Setup Method

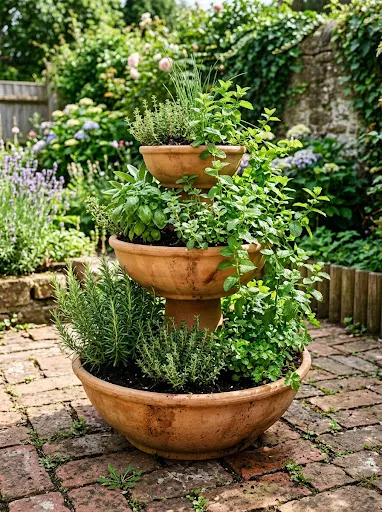
    Stacking graduated terracotta pots along a central stabilizing axis creates a compact vertical herb garden ideal for sunny balconies, kitchen stoops, and compact courtyards. This project arranges three or four clay pots of decreasing sizes on top of each other, forming concentric rings of exposed soil shelves that maximize planting capacity within a single square foot of ground space. The aesthetic appeal centers on balanced architectural tiers; cascading trailing herbs like creeping thyme and oregano soften the rigid circular rims, while upright varieties like chives and basil rise vertically from the central tiers. Beyond its visual charm, this stepped design provides functional horticultural zones, allowing gardeners to position sun-loving, drought-tolerant culinary herbs in the upper levels while moisture-loving varieties thrive in the broader, sheltered base pot. The physical mass of stacked, soil-filled earthenware forms a stable, wind-resistant installation that retains warmth through cool evenings.
    Gather four standard unglazed terracotta pots with diameters measuring twelve, ten, eight, and six inches, checking that every container possesses a clear, unobstructed bottom drainage hole. Procure a four-foot length of half-inch threaded galvanized steel rod, along with matching heavy-duty washers and nuts to construct an internal stabilizing spine. Set the twelve-inch base pot onto its intended permanent level patio position, placing rubber riser feet underneath the base to ensure water flows freely away from the bottom drain. Drive the steel rod vertically through the center drainage hole into the ground beneath, or secure it firmly through an exterior wooden sub-base using washers and locking nuts. Fill the bottom pot with well-draining potting soil up to two inches below the rim, then slide the ten-inch pot down the central rod, resting its base securely on the compacted soil of the lower container. Repeat this sequence with the eight-inch and six-inch pots, tilting intermediate containers slightly in alternating directions to create staggered, accessible planting pockets for your selected culinary herbs.

    Idea 6: Textured White Sand and Plaster Slurry Vessel

    6

    How to Create

    Applying a thick coating of silica sand and structural plaster compound gives a standard terracotta pot the coarse, tactile feel of hand-sculpted studio pottery. This concept covers the smooth industrial shape of basic pots beneath a dense, textured stucco-like crust, introducing natural irregularities, gentle tool marks, and fine pitted surfaces. The design value lies in raw, light-scattering tactile depth; when placed near sunny windows, shifting natural daylight catches the gritty, raised surface, casting subtle shadows that highlight its artisanal look. Finished in an unbleached stone, chalk white, or soft oatmeal tone, this textured vessel fits naturally into wabi-sabi interiors, Japandi living rooms, and modern minimalist settings. By applying the gritty slurry directly over the clay, you produce an expensive-looking artisan vessel on a modest budget, providing an understated, earthy home for architectural botanicals like snake plants, rubber trees, or cactus varieties.
    Wipe down an eight-inch clean clay pot with isopropyl alcohol, allowing the earthenware walls to dry thoroughly. In a plastic mixing tub, blend one cup of pre-mixed interior joint compound, half a cup of fine white silica play sand, and two tablespoons of matte white acrylic craft paint, stirring until the mixture reaches the consistency of gritty cake frosting. Using a flexible four-inch putty knife or a silicone spatula, apply the textured slurry over the exterior pot walls in broad, overlapping horizontal strokes, deliberately leaving subtle tool ridges, varied thicknesses, and tiny air pockets across the surface. While the compound remains pliable, lightly drag a dry, stiff nylon brush horizontally around the rim to create fine linear grooving. Allow the textured coating to cure undisturbed for twenty-four hours until rock-hard, then gently sand down any sharp points using one-hundred-twenty-grit sandpaper. Apply two coats of water-based matte polyurethane spray over the cured surface to shield the textured plaster from moisture and daily handling.

    Idea 7: Terracotta and Burnished Copper Leaf Pedestal

    7

    Execution Process

    Accenting the rim and base of an unglazed clay container with genuine metallic copper leaf produces an elevated mixed-material design that bridges earthy pottery and metallic warmth. This project applies thin sheets of metallic leafing over the natural clay, highlighting specific architectural details like the rolled upper lip or the recessed bottom base. The design impact comes from the contrast between two materials: the flat, porous, light-absorbing clay surface paired with the reflective, luminous glow of burnished copper metal. When placed on timber credenzas or brass-accented console tables, the copper elements catch ambient room light, adding a warm, sophisticated gleam to interior plant displays. The rich orange undertones of the copper harmonize naturally with the reddish hues of the terracotta, producing a cohesive, intentional palette that feels refined rather than overly decorative. This elevated look suits formal dining spaces, executive home offices, and modern living rooms that incorporate warm metallic hardware.
    Clean the rolled upper lip of a nine-inch terracotta container with a dry lint-free cloth, ensuring the area is completely free of dust and grit. Using a soft one-inch flat brush, apply a thin, uniform layer of water-based metal leaf adhesive sizing around the upper collar, taking care to keep the application line straight and level. Allow the milky sizing adhesive to dry for twenty minutes until it becomes completely clear and aggressively tacky to the touch. Carefully lay individual sheets of copper leaf over the tacky band, using dry fingertips to press the delicate metal down smoothly against the contours of the rim. Use a soft, dry makeup brush or domed mop brush to burnish the copper leaf with circular motions, brushing away loose metal flakes and smoothing the edges flat against the clay surface. Let the leafing settle for two hours, then brush on a coat of clear acrylic metal-leaf sealer to prevent the exposed copper from oxidizing or tarnishing over time.

    Idea 8: Sub-Irrigated Wicking Terracotta Basin

    8

    Setup Method

    Converting a wide, shallow terracotta bulb pan into a sub-irrigated wicking planter provides a self-regulating watering system tailored for moisture-sensitive houseplants. This design uses a closed reservoir beneath an internal perforated soil shelf, drawing moisture upward into the soil using absorbent cotton wicks. The visual appeal comes from its low, wide silhouette; a shallow clay dish makes an elegant tabletop display, framing low-growing plants like African violets, creeping figs, or collections of nerve plants without cluttering vertical sightlines. Sub-irrigation takes advantage of the natural capillary properties of both potting soil and porous clay, delivering steady, uniform moisture directly to root zones without wetting delicate surface foliage. This bottom-watering approach prevents common houseplant problems like fungal gnats, powdery mildew, and soil compaction, ensuring plants stay healthy and hydrated. The finished vessel serves as a functional, attractive desktop centerpiece that minimizes everyday plant maintenance.
    Select a wide ten-inch shallow terracotta bowl, thoroughly coating the entire interior floor and interior walls with three coats of liquid rubber waterproofing sealant to make the basin watertight, leaving the exterior unpainted. Cut a circular planting shelf from rigid perforated plastic needlepoint canvas to fit snugly inside the bowl, suspended two inches above the sealed bottom on three small plastic spacer blocks. Thread four eight-inch lengths of half-inch braided cotton wicking cord through the perforated shelf, letting the lower ends coil along the bottom reservoir floor while the top ends extend upward into the soil zone. Insert a rigid half-inch clear acrylic tube vertically through the edge of the shelf to serve as a water fill pipe and visual water-level gauge. Fill the upper compartment above the plastic shelf with an airy potting blend of peat, perlite, and vermiculite, planting your selected foliage around the wicks. Pour clean water down the fill pipe into the lower reservoir, allowing the cotton wicks to draw moisture upward into the root zone automatically.

    Idea 9: Fluted Architectural Scallop Clay Planter

    9

    How to Make

    Adding vertical fluted half-round molding to the outer walls of a cylindrical clay pot turns a basic container into a textured, architectural statement piece. This design arranges slim wooden dowels or extruded polymer clay half-rounds vertically around the pot’s exterior, finished in a continuous coat of warm terracotta or stone-toned mineral paint. The visual appeal comes from dynamic vertical shadow lines; the raised, rounded ribs catch shifting daylight, creating rhythmic shadows that accentuate the circular geometry of the pot. Fluted textures introduce mid-century modern and Art Deco character into modern interiors, helping plain store-bought pots blend with fluted furniture, tambour paneling, and ribbed glassware. The added vertical ribs also provide a practical benefit, adding structural thickness to the pot walls and offering a secure, textured grip when moving heavy potted plants around your home.
    Measure the height and circumference of an eight-inch straight-sided cylindrical unglazed terracotta pot using a flexible sewing tape measure. Cut half-inch wide half-round basswood molding strips to match the exact vertical height of the pot wall using a fine-toothed hand craft saw, smoothing the cut ends with sandpaper. Clean the pot exterior with rubbing alcohol, then draw straight vertical alignment guidelines around the pot every half-inch using a pencil and a carpenter’s square. Apply a thin bead of waterproof polyurethane construction adhesive along the flat backing of each wooden strip, pressing the molding firmly onto the marked guidelines until flush against the clay wall. Allow the structural adhesive to cure for twenty-four hours under the tension of two large elastic rubber bands wrapped around the pot. Once dry, coat the entire ribbed exterior with two coats of terracotta-toned exterior matte mineral paint, filling any fine seams between the wood ribs and clay walls to achieve a seamless, sculpted look.

    Idea 10: Rustic Sun-Baked Mud Wash Vessel

    10

    Step-by-Step Guide

    Emulating the sun-baked, hand-patted clay pottery of traditional rural artisan communities brings grounded, organic warmth into modern interior settings. This design uses a natural earth-and-clay slurry wash applied over an unglazed pot, producing fine surface fissures, matte chalkiness, and uneven mineral tones reminiscent of desert pottery. The appeal lies in intentional visual texture; rather than aiming for smooth factory perfection, this technique celebrates small surface cracks, rough earth tones, and authentic handmade character. This rustic style pairs naturally with desert succulents, sprawling cacti, and woody jade plants, creating a rugged botanical display suited for sunlit windowsills, exposed brick mantels, and rustic wooden dining tables. Because the wash uses natural earth pigments, the vessel retains its breathable capillary action, ensuring moisture evaporates smoothly from the soil to maintain healthy, resilient root systems.
    Gather two tablespoons of dry red clay soil, one tablespoon of calcium carbonate chalk powder, two tablespoons of matte beige acrylic paint, and three tablespoons of warm water, blending the ingredients in a dish until smooth and spreadable. Wash a nine-inch raw terracotta pot with water to clear away dust, leaving the clay slightly damp to slow the drying process of the earth wash. Use a wide, coarse hog-bristle brush to dab the mud mixture generously over the exterior walls, working in stippled, cross-directional strokes to build an irregular surface texture. Immediately run a warm hair dryer or heat gun across the wet surface for five minutes; the rapid surface drying causes the natural clay mud layer to develop fine, authentic micro-cracks across the pot walls. Allow the vessel to cool and cure in a dry room for twenty-four hours, then lightly brush away any loose, unbonded soil particles with a dry bench brush. Mist the exterior with a matte penetrating fixative spray to lock the cracked mud finish firmly onto the terracotta base.

    Common Beginner Mistakes and How to Avoid Them

    Modifying terracotta planters involves specific material and moisture considerations that differ from standard home craft projects. The most frequent beginner mistake is painting the interior surfaces of unglazed clay pots with impermeable latex paints while leaving drainage holes open. When water is added to the soil, moisture seeps through the unsealed interior into the porous clay walls, pushing outward against exterior paint films and causing bubbles, peeling, and unsightly white salt efflorescence beneath the surface. To avoid this, either seal the interior walls completely with an elastomeric waterproofing membrane, or leave both the interior and exterior surfaces breathable by using mineral-based washes. Another common oversight is drilling new drainage holes using high-speed standard steel drill bits without water lubrication, which causes sudden thermal shock that shatters brittle clay pots. Always use diamond-tipped or carbide masonry hole saws at slow drill speeds, keeping the drilling point submerged beneath a steady trickle of cold water to prevent cracking. Finally, never skip cleaning new pots before painting; unseen factory release agents and packing dust prevent adhesives and primers from forming a permanent bond with the clay.

    Practical Tips for Better Results

    Achieving professional, boutique-quality finishes on DIY terracotta planters requires attention to surface prep, paint choices, and hardware assembly. Always smooth exterior clay seams and manufacturing marks before decorating; twenty minutes of wet-sanding with two-hundred-twenty-grit silicone carbide sandpaper removes rough casting ridges and creates an even surface for paint or adhesives. When choosing paints for decorative pots, prioritize mineral silicate paints, chalk-finish mineral paints, or specialized exterior masonry coatings rather than basic interior latex paints. Mineral coatings fuse chemically with the porous earthenware rather than sitting as a plastic film, ensuring the decorative layer will not peel or blister under everyday watering. When assembling stacked pots or tiered garden towers, insert rubber spacers, neoprene washers, or small ceramic pot feet beneath every container base. Elevating the pots keeps bottom drainage holes open, allows air to circulate underneath, and prevents wet pot bottoms from trapping moisture and leaving stubborn water stains on outdoor patios or indoor floor surfaces.

    Styling, Presentation, or Organization Ideas

    Styling custom terracotta planters effectively requires an eye for visual balance, contrasting foliage textures, and harmony with surrounding architectural finishes. Group pots in odd-numbered clusters—such as arrangements of three or five pots in varied heights and widths—to create a pleasing, dynamic visual rhythm in room corners or patio steps. Balance the warm red-orange undertones of unglazed terracotta by pairing pots with plants that feature contrasting foliage: cool silvery-blue succulents, deep emerald rubber trees, and variegated cream pothos stand out crisply against the warm earthen clay. When arranging containers on indoor wooden shelving or credenzas, place wide cork mats or unglazed ceramic saucers lined with silicone feet beneath every pot to catch residual drainage while keeping damp pottery off finished furniture. Use natural styling accents that complement the rustic quality of clay, such as matching terracotta plant tags, smooth river stone top-dressings, and woven seagrass floor baskets that hold extra tools and watering cans neatly nearby.

    Budget or Time Planning

    Upgrading basic terracotta pots is an economical and time-efficient way to achieve high-end designer aesthetics on a modest budget. Standard terracotta vessels cost a fraction of the price of glazed ceramic or designer composite planters, making them accessible bases for creative home improvement projects. You can complete most of these decorative ideas over an organized weekend: spend Saturday morning cleaning, sanding, and applying mineral washes or structural adhesives, allowing bonding agents and paints to cure overnight undisturbed. Dedicate Sunday afternoon to assembling hardware, potting your plants with well-draining soil mixes, and styling your finished pieces throughout your home. To keep expenses low, purchase basic terracotta pots in multi-packs from wholesale garden centers, repurpose leftover house paint or joint compound from previous home projects, and source natural jute twine or wood scraps from hardware remnant bins. Storing your leftover paints and mineral sealers in tightly sealed glass jars ensures you have supplies ready for future plant decor projects without having to buy new materials each time.

    Creative Expansion and Advanced Inspiration

    Once you feel comfortable with basic mineral washes, rope wrapping, and paint applications, explore advanced techniques that combine terracotta with diverse media. Experiment with mosaic inlays, pressing tumbled beach glass, ceramic tile shards, or sliced river pebbles into thin-set mortar beds applied over broad pot rims to create custom decorative borders. Explore traditional botanical clay printing: press freshly gathered fern fronds or textured leaves into thin slabs of wet air-dry clay, transferring the delicate leaf impressions onto the curved walls of terracotta containers before firing or sealing. You can also incorporate low-voltage LED strip lighting into stacked planter arrangements, tucking warm waterproof lights beneath the overlapping rims of tiered herb towers to cast a gentle downward glow across foliage during evening patio gatherings. Moving beyond conventional houseplant displays, these durable clay containers adapt easily into versatile outdoor features, including tabletop water fountains, aromatic patio citronella candle bowls, and structured tabletop fire vessels, providing endless creative inspiration for your living spaces.
  • 10 Air Dry Clay Planter Ideas

    10 Air Dry Clay Planter Ideas

    Air dry clay planters represent an accessible, highly creative medium within modern interior styling and pottery crafting across visual discovery channels. Crafters searching for fresh Pinterest ideas frequently turn to self-hardening clays because they allow the creation of bespoke pottery pieces without requiring commercial high-temperature ceramic kilns. This comprehensive guide delivers practical guidance on ten distinct air dry clay planter projects tailored for desktop greenery, miniature succulents, trailing vines, and botanical cuttings. Readers will learn essential clay-forming methods, including pinch modeling, slab construction, coil rolling, structural armature usage, and durable interior waterproofing systems. Understanding the properties of air dry compounds is critical, as self-hardening formulas demand careful moisture management, controlled drying rates, and chemical sealants to withstand constant contact with damp potting soil. Beyond fundamental forming skills, this tutorial explores how to integrate modern geometric cuts, organic lip profiles, raised pedestal stands, and textured surface patterns into functional plant vessels. With structured step by step breakdowns, makers of all backgrounds can transform raw modeling blocks into practical, long-lasting botanical accessories that elevate home decor and tabletop organization.

    Why This Idea Is Trending or Useful

    The sustained popularity of air dry clay planters across contemporary design platforms stems from a desire for artisanal, tactile objects that replace mass-produced plastic containers. Modern minimalist style and modern design preferences favor organic surfaces, raw chalky textures, and warm earth tones, all of which self-hardening clays capture naturally. For plant enthusiasts, hand-building planters offers exceptional DIY appeal and practical value, allowing makers to sculpt custom vessels that match the exact root depth and diameter of unique succulent species. As an easy project requiring no specialized studio equipment, clay modeling provides high accessibility for beginners who want to explore ceramic arts from a kitchen table or desk. Furthermore, self-hardening materials are lightweight compared to dense kiln-fired stoneware, making them especially suitable for hanging plant cradles, modular wall pockets, and delicate bookshelf displays where excess weight is a concern. The process serves as an engaging creative project that encourages individual expression through stamped textures, carved flutes, and hand-painted motifs, producing functional home decor accents on budget-friendly terms.

    Materials and Preparation

    Achieving structural durability and water resistance with air dry clay requires deliberate material selection and careful workspace preparation before shaping begins. Foundational materials include high-density, fiber-reinforced white or terracotta air dry clay, water-resistant interior sealants such as two-part epoxy resin or marine-grade polyurethane, acrylic paints, and fine-grit sanding sponges. Essential modeling tools include an acrylic rolling pin with thickness rings, wooden modeling ribs, needle tools for scoring, flexible stainless steel scrapers, craft knives, and hollow brass tubing for punching uniform drainage holes. Preparation begins by wiping down a non-stick work surface, such as a smooth silicone craft mat, polished stone slab, or sheet of parchment paper, ensuring it remains clean and free of dried clay residue. Conditioning the clay through thorough kneading is vital to expel trapped air bubbles that can cause hairline drying cracks later. Planning considerations involve calculating a five to eight percent shrinkage rate during evaporation and scheduling an uninterrupted drying window of forty-eight to seventy-two hours away from direct heat sources before applying protective waterproof coatings.

    1. Minimalist Footed Pedestal Vessel

    1

    Step-by-Step Guide

    The minimalist footed pedestal vessel uses vertical elevation to showcase small desktop plants, raising the container base above flat surfaces on three sturdy legs. This architectural approach introduces visual lightness, allowing cascading plants such as string of pearls or creeping fig to drape naturally over the rim without pooling onto furniture. The design consists of a rounded spherical cup supported by three tapered cylindrical legs, creating a balanced, mid-century modern profile that emphasizes clean lines. Elevating the main vessel promotes continuous airflow beneath the base, which assists in moisture regulation and protects delicate wooden desks from condensation damage. The combination of smooth walls and rounded supports makes this piece a sophisticated accent that complements contemporary workspaces and open shelving arrangements.
    Begin by rolling six ounces of well-conditioned air dry clay into a smooth ball, pressing your thumb into the center to shape a uniform pinch bowl measuring three inches in diameter and two inches deep. Ensure the walls maintain a consistent one-quarter-inch thickness from the base up to the rim, smoothing internal tool marks with a lightly dampened silicone sponge. Invert the bowl onto a soft foam ring, roll a clay coil to a half-inch thickness, and cut three equal segments measuring one inch in length to form the legs. Bevel one end of each leg, crosshatch score both the leg tops and the three corresponding positions on the bowl base with a needle tool, and apply a thin layer of clay slip. Firmly press the legs into place, blending the seams with a wooden modeling rib, and punch a quarter-inch drainage hole through the floor between the supports.

    2. Fluted Architectural Arch Planter

    2

    How to Create

    The fluted architectural arch planter takes inspiration from classical structural motifs, featuring a flat-backed arch silhouette framed by repeating vertical exterior ridges. The face of the vessel presents parallel fluted channels that capture directional light, creating shadow lines that highlight the handmade craftsmanship. Designed with a straight back panel, this container rests flush against interior wall partitions or bookshelf dividers, optimizing display space in compact rooms. The interior chamber is hollowed to accommodate upright architectural foliage, such as sansevieria cuttings or micro ferns, providing balanced root depth while maintaining a narrow front-to-back footprint. The balance of smooth curves along the upper arch and sharp linear fluting along the front face establishes an eye-catching focal feature suitable for modern consoles.
    To create this planter, roll out a flat slab of clay to a uniform three-eighths-inch thickness using wooden guide rails, cutting two matching arch-shaped panels measuring four inches wide by five inches tall. Cut a flat base measuring four inches by two inches, alongside a continuous three-inch-wide perimeter strip to form the enclosing side walls. Using a round wooden dowel or a dedicated fluting tool, press parallel vertical lines into the exterior surface of the front arch panel, maintaining one-quarter-inch spacing between each ridge. Score all adjoining edges thoroughly with a crosshatch pattern, apply wet clay slip along the contact lines, and join the side wall strip between the front and rear arch panels. Reinforce the inner seams by blending a thin coil of soft clay along the joints, punch a drainage hole in the floor, and allow the assembled structure to cure slowly under loose plastic wrap.

    3. Hanging Half-Moon Wall Pocket

    3

    Execution Process

    The hanging half-moon wall pocket is a space-saving, semi-circular container designed to mount directly onto vertical wall surfaces, transforming bare walls into living botanical displays. This vessel features a flat, rigid backplate joined to a concave curved front pocket, creating a deep pocket for shallow-rooted cascading foliage like string of hearts or trailing jade. Elevating small plants off horizontal surfaces frees up desk space while keeping delicate greenery away from pets and drafty vents. The geometric half-moon shape complements gallery wall arrangements, blending with framed art prints and minimalist wall mirrors. Its lightweight construction allows it to hang safely from standard wall nails or picture hooks without putting excessive strain on drywall anchors.
    Roll out a flat slab of clay to a one-quarter-inch thickness, then cut two identical five-inch semi-circles and one narrow base strip using a precision craft knife and paper guide. Set one semi-circle aside as the backplate, using a circular punch to cut two reinforced mounting eyelets half an inch below the straight top edge. Take the second semi-circle and gently manipulate the clay with your fingers to stretch the center outward, forming a hollow front pocket that matches the curved boundary of the backplate. Score the curved contact perimeter on both components, apply binding slip, and join the pocket to the backplate, smoothing the outer seam with a flexible metal scraper. Support the inside of the pocket with crumpled paper towels to maintain its outward curve during drying, pierce a tiny drainage hole through the lowest point, and allow it to cure fully.

    4. Geometric Faceted Origami Basin

    4

    How to Make

    The geometric faceted origami basin uses sharp angular folds and triangular facets, moving away from traditional wheel-thrown forms toward an industrial, chiseled look. The vessel exterior consists of interconnected planar triangles that catch light differently across each face, creating a crystalline aesthetic that pairs with spiky succulents such as haworthias. By using precise slab cutting rather than manual pinching, the finished piece exhibits crisp edges and geometric symmetry that echo modern architectural design. The wide, low-profile base provides stability against tipping, while the angular walls offer generous soil volume for root spread. Finished in matte neutral paints or left in its natural chalky state, this faceted basin serves as an understated statement piece on modern coffee tables.
    Construct this vessel by rolling a clay slab to an even three-sixteenths-inch thickness, placing a printed geometric template over the damp clay to mark an array of connected triangular facets. Use a metal ruler and a needle tool to score shallow guide lines across the slab without cutting completely through the clay thickness. Carefully lift the slab, bending along the scored fold lines to draw the planar surfaces upward into a six-sided faceted bowl with angled triangular walls. Secure the closing seam by scoring the adjoining edges, pressing them together, and smoothing a thin reinforcing clay strip along the internal seamline with a modeling tool. Cut a flat hexagonal base tile to support the bottom, join it to the folded walls using slip, and punch a drainage hole through the center floor. Let the faceted basin dry on a level wooden board away from direct sunlight.

    5. Organic Rim Wabi-Sabi Pinch Pot

    5

    Setup Method

    The organic rim wabi-sabi pinch pot embraces natural asymmetry and hand-pressed textures, celebrating subtle imperfections that highlight the tactile qualities of the clay. Rather than aiming for machine-like symmetry, this design features an undulating upper rim, gentle thumb depressions along the exterior, and an unpolished, earthy surface. The compact, rounded shape provides a snug environment for slow-growing cacti or miniature propagation cuttings, with thick clay walls that help protect roots from sudden temperature swings. The organic silhouette looks right at home in rustic, bohemian, or Scandinavian spaces, especially when paired with coarse potting gravel or decorative river stones around the plant base. The heavy base provides grounded stability, making it a reliable addition to windowsills, side tables, and bathroom vanities.
    Take five ounces of conditioned clay, roll it into an even ball, and cradle the sphere in the palm of your non-dominant hand. Press your dominant thumb into the top center until it rests roughly three-eighths of an inch above the bottom, then begin pinching outward in a steady spiral toward the rim. Allow the upper edge to develop natural waves and organic variations in height, avoiding the urge to trim or level the rim into a straight line. Gently tap the bottom of the pot against a flat table surface to form a stable resting base without flattening the rounded outer contours. Pierce a drainage hole through the floor using a hollow brass tube, then wipe the interior smooth with a damp sponge while preserving the textured thumb facets on the exterior. Set the finished pot aside to dry on a wire rack to promote balanced air circulation.

    6. Stacked Coil Bubble Planter

    6

    How to Create

    The stacked coil bubble planter reinterprets historic ceramic coil-building methods, using smooth, rounded rings of clay to create a playful, bubble-textured exterior. Instead of smoothing the outside coils flat into a uniform wall, this design leaves the rounded profiles exposed, producing horizontal ridges with a tactile surface. The repeated ring pattern adds visual movement and depth, making the vessel an engaging decorative object even without a plant inside. The rounded interior walls provide adequate soil depth for compact foliage plants, while the layered construction builds thick, sturdy walls that resist warping as the clay dries. This bubbly silhouette brings a warm, contemporary feel to creative desk setups and colorful open shelving.
    Roll out several uniform clay coils measuring one-half inch in diameter, ensuring each rope maintains a consistent thickness along its entire length. Coil the first rope into a tight, flat spiral on your work mat to form a solid circular base measuring three inches across, smoothing the top surface flat with a wooden modeling rib. Score the outer perimeter of the base, apply clay slip, and stack the next coil directly on top of the outer edge, pressing down gently to bond the layers. Continue stacking coils upward in concentric rings, smoothing only the inside seams to bond the walls while leaving the rounded exterior surfaces exposed to create the bubble texture. Build the vessel up through five to six coil tiers, punch a clean drainage hole through the spiral base floor, and support the cylindrical shape with an interior cardboard sleeve while it cures.

    7. Concrete-Look Textured Terrazzo Cube

    7

    Step-by-Step Guide

    The concrete-look textured terrazzo cube combines clean cubic lines with decorative color flecks embedded directly into the clay body. This design uses a neutral white or light grey air dry clay base mixed with cured, colorful clay chips to mimic the look of polished architectural terrazzo. The square profile provides a stable base with right-angled corners that fit neatly into tray arrangements and desk organizers. The embedded color fragments introduce visual texture that will not chip or peel like surface-applied paint, resulting in an integrated finish that looks like polished aggregate stone. This clean cubic planter pairs well with spiky succulents, forming an appealing contrast between soft foliage and sharp industrial lines.
    Begin by rolling out thin sheets of scrap air dry clay tinted in terracotta, mustard, charcoal, and moss green, allowing these colored sheets to dry completely for twenty-four hours. Chop the dry colored clay into tiny, irregular chips ranging from one to three millimeters in size using a craft blade. Knead these colorful fragments into a fresh block of white or soft grey clay until the flecks are evenly dispersed, then roll the mixed clay into a quarter-inch-thick slab. Cut five matching three-inch squares using a metal square cutter and ruler, beveling the joining edges at forty-five-degree angles. Score the beveled edges, assemble four walls around the bottom base tile with slip, and reinforce the inner seams with rolled clay coils. Punch a drainage hole in the base, let the cube dry for three days, and wet-sand the dry faces with 400-grit sandpaper to expose the crisp edges of the embedded flecks.

    8. Cascading Hanging Coconut Shell Pod

    8

    Execution Process

    The cascading hanging coconut shell pod takes inspiration from organic seed pods, featuring a rounded, half-sphere bowl suspended from three braided natural cord lines. This hanging vessel features a curved base and a slightly tapered mouth, creating a snug home for cascading epiphytes and trailing vines such as English ivy or dischidia. Elevating the plant keeps trailing tendrils free to drape downward naturally, creating vertical movement without taking up counter space. The exterior can be finished with fine vertical scoring lines or subtle bark-like textures to mimic natural botanical seed pods. Its lightweight design makes it easy to hang from curtain rods, ceiling hooks, or wall brackets, adding natural greenery to sunny window frames.
    Roll out a clay slab to a three-sixteenths-inch thickness, then press the damp clay gently into a small round bowl lined with plastic wrap to form a smooth hemisphere. Trim the upper clay rim cleanly with a craft knife, then use a needle tool to punch three equidistant suspension holes one-half inch below the rim line. While the clay is still supported inside the mold, use a wire loop tool or stiff bristle brush to texture the exterior with fine, organic grooves resembling coconut husks. Punch a quarter-inch drainage hole through the lowest point of the curved bottom, taking care not to warp the rounded shape. Allow the clay to dry inside the mold for twelve hours until leather-hard, then remove the bowl mold to let the exterior dry completely. After sealing the inside and outside surfaces, thread lengths of waxed cotton cord through the rim holes, knotting them securely beneath the clay lip.

    9. Monolithic Trough Window Box

    9

    How to Make

    The monolithic trough window box offers an elongated horizontal design built to sit along narrow windowsills, housing three to four miniature plants in a single unified planter. This rectangular design uses thick, flat clay slabs joined at right angles, providing a clean minimalist presence that frames natural window views. The extended trough shape provides ample root space for grouping slow-growing succulents together, letting you create small arrangements with contrasting colors, shapes, and textures. The low front wall ensures small plants receive plenty of sunlight, while the straight sides sit flush against the glass to save space. Finished with a smooth, chalky off-white coat, this horizontal planter functions as an understated garden feature that suits narrow spaces throughout the home.
    Roll out a large slab of conditioned air dry clay to a consistent three-eighths-inch thickness, using parallel guide slats to ensure even depth across the entire sheet. Cut one rectangular base tile measuring nine inches long by three inches wide, two long side walls measuring nine inches by three inches, and two end caps measuring three inches by three inches. Bevel all connecting edges at forty-five-degree angles, score the mating surfaces with a dense crosshatch pattern, and apply bonding slip along every seam. Assemble the side walls and end caps around the rectangular base plate, pressing the seams together firmly to build the trough. Smooth a thin reinforcing coil of clay along all internal corners, use a hollow tube to punch three evenly spaced drainage holes along the floor, and brace the long walls with wooden blocks during the two-day drying period.

    10. Sculptural Ribbed Cylinder with Tray

    10

    Setup Method

    The sculptural ribbed cylinder with a matching catch tray pairs a functional two-piece setup with modern textured details, keeping surfaces protected from drainage water while highlighting clean craftsmanship. The main vessel features repeating vertical ribs created through slab carving or exterior coil attachments, giving the cylindrical walls tactile depth and shadow play. The accompanying shallow clay saucer is sized to fit beneath the cylinder base, catching excess water while matching the planter’s exterior texture and finish. This two-part design solves a common challenge with indoor planters by integrating drainage protection directly into the design, keeping water off wooden shelves and tables. The balanced proportions make this cylinder and saucer set a versatile styling accent for nightstands, coffee tables, and floating shelves.
    Begin by rolling a clay slab to a one-quarter-inch thickness, cutting a rectangle measuring eight inches wide by four inches tall to form the cylinder walls, alongside a circular base tile three inches across. Texture the exterior of the rectangular slab by pressing a fluted wooden tool vertically along the surface at regular intervals before shaping the cylinder. Form the textured slab into a cylinder around an upright cardboard tube, score the joining edges, and attach the circular base plate to the bottom with slip. Smooth the internal seams flat, punch a central drainage hole through the floor, and remove the inner cardboard support. To make the matching catch tray, roll a circular slab four inches wide, turn the outer half-inch edge upward at a ninety-degree angle to create a half-inch rim, and smooth the joint. Allow both components to cure separately for three days before testing the nested fit.

    Common Beginner Mistakes and How to Avoid Them

    Working with air dry clay for functional botanical planters introduces structural and moisture challenges that can lead to cracking or softening if handled incorrectly. A common mistake is planting directly into unsealed clay; air dry clay remains water-soluble after drying, meaning damp soil will soften the walls and cause the vessel to collapse. To prevent this, always apply two coats of waterproof epoxy resin, liquid rubber, or marine polyurethane to the inside chamber before adding soil. Another frequent issue is uneven wall thickness, where a heavy base meets thin upper rims; this variation causes uneven drying rates, which leads to cracks along the base seams. Maintain uniform thickness across all components by using wooden rolling guides and checking walls with a needle tool during shaping. Finally, many beginners rush the drying process by placing damp pieces near radiators, in sunny windows, or under hair dryers. Fast drying evaporates moisture from the surface too quickly while the core stays damp, leading to warping and surface cracks. Always let your clay planters dry slowly at room temperature away from drafts, covering them loosely with plastic wrap for the first twenty-four hours to ensure balanced moisture loss.

    Practical Tips for Better Results

    Achieving professional, long-lasting results with air dry clay planters requires careful attention to surface finishing, seam bonding, and proper post-cure sealing. Always spend time conditioning your clay thoroughly before rolling; working and kneading the clay warms the binder and eliminates air pockets that can weaken dry walls. When joining slabs or coils, avoid simply pressing damp pieces together; always score both surfaces with a deep crosshatch pattern and apply wet clay slip to create a permanent bond that will not separate during drying. For clean, smooth surfaces without visible tool marks, smooth the clay with a damp silicone rib or chamois cloth while it is leather-hard, rather than relying solely on dry sandpaper later. When drilling or punching drainage holes, cut the openings twenty percent larger than your target size to account for natural drying shrinkage. Once pieces are fully dry, wet-sand the exterior with 600-grit wet-or-dry sandpaper to achieve a smooth, stone-like finish, and always let your waterproof sealants cure for a full forty-eight hours before potting plants to ensure safe, moisture-resistant performance.

    Styling, Presentation, or Organization Ideas

    Handcrafted air dry clay planters offer great versatility for home decoration, plant styling, and tabletop organization across living and working spaces. Grouping three planters of varied heights and complementary shapes—such as a tall ribbed cylinder, a low faceted basin, and a footed pedestal bowl—creates a balanced display on coffee tables, mantels, and entryway consoles. When choosing plants, pair foliage habits with vessel shapes; position trailing string of pearls in elevated pedestal pots, upright sansevierias in fluted arch planters, and compact echeverias in low pinch bowls. These clay containers also serve practical organizing roles beyond housing plants, working well as desktop holders for ceramic pens, paintbrushes, small clips, and everyday essentials. In bathroom spaces, grouping small textured pots on a stone tray creates a tidy, spa-like vanity display for cotton pads and grooming accessories. For craft markets or portfolio photography, stage finished planters on natural linen fabrics or travertine tiles in soft natural morning light; this simple styling highlights the clay’s handmade textures and shows off the clean lines of each piece.

    Budget or Time Planning

    Crafting a collection of air dry clay planters is an economical, budget-friendly creative project that delivers high-end home decor with modest financial investment. A single ten-pound tub of quality air dry clay costs relatively little and provides enough material to build six to eight small planters, keeping the base material cost very low per finished vessel. You can keep tool costs minimal by using everyday household items, such as wooden kitchen dowels for rolling pins, glass bottles as cylinder forms, and craft knives for trimming slabs. To manage your time efficiently, plan your projects in assembly batches rather than finishing planters one at a time from start to finish. Dedicate an initial two-hour session to kneading clay, rolling slabs, and cutting all structural pieces, followed by an assembly session to join seams and punch drainage holes across every vessel. Factor in a full three-day drying period where pieces cure without handling, followed by a final afternoon for light sanding, detail painting, and applying waterproof sealants. This structured schedule keeps production smooth, minimizes material waste, and ensures every planter cures thoroughly for durable daily use.

    Creative Expansion and Advanced Inspiration

    Once you are comfortable with basic pinch-pot and slab-building methods, exploring advanced decorative techniques will help you create distinctive, collectible pottery pieces. Consider using sgraffito carving, applying a contrasting coat of dark acrylic paint over bone-dry clay and carving fine botanical lines through the paint to reveal the white clay body underneath before sealing. You can also explore faux stone finishes by mixing fine sand, coffee grounds, or dried crushed spices directly into damp clay, producing authentic speckled stone textures that mimic granite, sandstone, and raw basalt. Adding mixed-media elements—such as wrapping genuine leather cords through punched hanging holes, inlaying brass wire into wet clay grooves, or attaching turned wooden dowel legs to flat bases—introduces rich material contrast alongside the matte clay surfaces. Another engaging direction is building modular propagation stations with removable clay lids that support plant cuttings over hidden water jars, turning simple plant rooting into an elegant design feature for modern botanical spaces.
  • 10 White Clay Planter Ideas

    10 White Clay Planter Ideas

    White clay planters have become a central element across modern interior design boards, capturing attention through their luminous finish, structural simplicity, and timeless versatility. This comprehensive guide explores ten creative ideas for handcrafting custom white clay planters, covering techniques ranging from geometric slabs to textured organic pinch vessels. Readers will learn the practical steps needed to transform raw white polymer or air-dry sculpting compound into functional indoor containers suited for houseplants, succulents, and seasonal greenery. Crafting these decorative pots allows makers to customize vessel proportions, decorative relief patterns, and surface sheens to match existing home decor without paying premium boutique prices. Utilizing accessible modeling compounds eliminates the need for expensive high-temperature ceramic kilns, making miniature ceramic sculpture achievable in any home workspace. The article details fundamental hand-building methods, surface texturing approaches, vital drainage management, and protective moisture sealing. By mastering basic sculpting workflows including slab construction, coil wrapping, press molding, and linear carving, crafters can curate a balanced collection of plant containers. The resulting white planters brighten living rooms, work desks, and sunny windowsills while adding handcrafted sculptural texture to indoor living spaces.

    Why This Idea Is Trending or Useful

    The persistent popularity of white clay vessels across digital design channels stems from their neutral aesthetic and strong affinity with contemporary minimalist style. Crisp white tones provide a striking visual foil for vibrant green foliage, emphasizing delicate leaf silhouettes, structural stems, and diverse botanical forms. In modern home decor, white planters maintain a clean, uncluttered visual rhythm that integrates smoothly alongside natural wood, brushed brass, matte black metal, and neutral textiles. From a functional standpoint, small indoor planters meet the spatial demands of modern apartment living, allowing plant lovers to propagate cuttings and shelter small-root succulents efficiently. Hand-building with white clay remains an exceptionally beginner friendly endeavor because it requires minimal specialized machinery, relying instead on straightforward physical manipulation and basic household tools. The process provides therapeutic creative satisfaction, transforming an affordable block of sculpting material into an enduring, practical home accessory. Furthermore, white clay acts as an ideal neutral canvas, accepting fine surface textures, geometric impressions, and subtle carved patterns that cast delicate shadows in natural daylight. These vessels bridge the gap between studio ceramics and accessible home DIY crafting.

    Materials and Preparation

    Executing clean, structurally sound white clay planters requires thoughtful workspace preparation, appropriate tool gathering, and intentional vessel planning. Makers should choose between oven-bake polymer clay for water resistance or self-hardening white air-dry clay for classic matte plaster textures. Essential modeling tools include an acrylic rolling pin, guide slats for uniform thickness, precision craft knives, flexible silicone smoothing ribs, and wooden scoring styluses. A non-porous ceramic work tile or silicone mat provides a pristine, lint-free surface that doubles as a baking plate for oven-cured materials. Planning considerations must account for the mature root system of the chosen plant, ensuring inner vessel dimensions accommodate standard plastic nursery liners for stress-free repotting. To ensure long-term botanical health, incorporate a hollow brass tube or clay punch to create functional base drainage openings during construction. Surface finishing requires an assortment of sanding sponges ranging from medium to ultra-fine grits to refine seams after hardening. Finally, a durable water-resistant acrylic varnish or polyurethane matte sealant must be secured to protect the porous white clay against moisture seepage and soil stains.

    1. Idea 1: Architectural Fluted Column Cylinder

    1

    Step-by-Step Guide

    The architectural fluted column cylinder brings classical Greco-Roman design elements into contemporary indoor plant displays through neat, vertical exterior channeling. This design features an upright cylindrical form wrapped in rhythmic, parallel flutes that produce subtle vertical shadows across the white clay body. The structured lines provide tactile contrast against organic trailing foliage, making it a compelling choice for small plants like heartleaf philodendrons or hoyas. By executing the structure in pristine white, the vessel references carved marble columns while maintaining an approachable, handmade aesthetic. Uniformity across the fluted ridges delivers a sense of precision, proving that hand-built clay can achieve high-end studio quality. The cylindrical profile distributes interior soil volume evenly, supporting steady root growth and offering solid physical stability on narrow tabletops, floating shelves, or office desks.
    To construct this fluted vessel, condition white clay thoroughly until pliable, then roll it between two six-millimeter thickness slats onto a smooth ceramic tile. Cut a precise rectangular slab measuring twenty-two centimeters long and nine centimeters high, accompanied by a circular disc six centimeters in diameter for the base. Form the upright cylinder by standing the slab around the perimeter of the base, blending the vertical joint firmly using a silicone blending tool. Next, construct the exterior vertical fluting by pressing the rounded shaft of a wooden dowel or ceramic stylus vertically down the cylinder walls at five-millimeter intervals. Maintain even, light pressure along each vertical run to ensure uniform groove depth around the entire circumference. Smooth the upper lip of the pot with a damp sponge or finger pad, leveling away any clay displaced by the carving tool. Allow the piece to harden fully according to material instructions, wet-sand the rim flat, and seal with a moisture-resistant matte clear coat.

    2. Idea 2: Minimalist Footed Arch Pedestal Pot

    2

    How to Create

    The minimalist footed arch pedestal pot introduces structural height by elevating a rounded planting bowl on a pair of architectural arch legs. Inspired by mid-century modern design, this piece balances open negative space underneath with a solid geometric planting bowl up top. The elevated stance lifts trailing stems, preventing foliage from crowding flat furniture surfaces while creating an airy visual profile. White clay accentuates the clean intersections where the curved legs meet the main vessel, emphasizing the purity of form without color distractions. The dual-arch base acts as a built-in stand, providing reliable stability that keeps the planter upright when supporting top-heavy succulents or flowering cacti. This silhouette brings an art-gallery presence into home decor, functioning as both functional plant housing and standalone miniature sculpture.
    Begin by rolling out a seven-millimeter thick slab of white clay, cutting two matching rectangular strips measuring four centimeters wide and twelve centimeters long. Bend each strip into an inverted U-shaped arch, smoothing the outer curves against a circular form to establish matching structural legs. Set the arch legs aside on their flat cut ends, allowing them to firm up slightly while you shape the main planting container. Shape the upper bowl by pressing a circular clay sheet into a small spherical silicone mold, trimming the top rim flush with a tissue blade. Score the top crown of both hardened arch legs and the underside of the planting bowl, applying liquid clay or wet slip as a bonding agent. Press the bowl down firmly onto the parallel arch legs, smoothing the structural joint seams internally and externally with a miniature modeling tool. After complete curing or drying, sand all visible joint lines with high-grit sandpaper to produce a continuous silhouette, then apply a protective water-resistant clear finish.

    3. Idea 3: Textured Scandi Cross-Hatch Cube

    3

    Execution Process

    The textured Scandi cross-hatch cube combines sharp polyhedral geometry with subtle, tactile textile impressions, creating an understated modern desk accessory. This planter features six flat square faces arranged into a cube, with the exterior surfaces stamped in fine grid lines reminiscent of open-weave linen. The sharp planar facets contrast with soft botanical textures, making this square container an eye-catching home for spherical cacti or architectural air plants. The pure white clay finish ensures the delicate impressed cross-hatching captures directional daylight without appearing busy or overwhelming. Maintaining crisp ninety-degree corner joints gives the container a substantial, stone-like heft that anchors minimalist workspaces, side tables, or bookshelves. The wide square aperture facilitates simple watering access and allows easy integration of drop-in nursery pots.
    Roll out a flat sheet of conditioned white clay to an exact thickness of six millimeters, using parallel wooden slats to ensure absolute surface consistency. Lay a sheet of coarse linen cloth or textured craft mesh across the clay, rolling firmly across it once to emboss the woven cross-hatch pattern. Use a metal set square and craft knife to cut five identical eight-centimeter square panels from the textured slab, retaining four for the walls and one for the base. Bevel the vertical joining edges of the four wall panels inward at a forty-five-degree angle to create clean corner seams upon assembly. Stand the wall panels around the square base plate, pressing the beveled corners together firmly to weld the clay seams without flattening the embossed pattern. Reinforce each interior vertical corner by pressing a thin clay snake along the joint, smoothing it flat against the inner walls for maximum strength. Once fully cured, gently sand the exterior corner tips to remove sharp burrs, sealing the interior and exterior with a non-glossy clear waterproofing agent.

    4. Idea 4: Raw Matte Pinch Pot with Wavy Rim

    4

    Setup Method

    The raw matte pinch pot with an undulating wavy rim celebrates the tactile beauty of hand-sculpted organic forms. Departing from rigid symmetrical geometry, this container features soft organic curves and an expressive, flowing rim that rises and dips naturally around the top aperture. The warmth of pure white clay finished with a natural matte stone appearance softens surrounding room layouts, adding artisan personality to shelves and windowsills. This hand-shaped silhouette provides an ideal companion for delicate flowering plants or compact pilea varieties, mirroring the natural irregularity found in wild botanical growth. The thicker clay walls typical of pinch pot construction offer thermal insulation for delicate root systems, moderating soil temperature fluctuations near sunny windows. This project provides beginners with an immediate understanding of clay responsiveness, demonstrating how simple finger pressure transforms a solid mass into functional pottery.
    Begin by conditioning an orange-sized portion of white clay into a compact, seamless sphere between your palms to expel all internal air pockets. Press your dominant thumb straight into the top center of the ball, stopping approximately one centimeter before penetrating the bottom surface. Gently squeeze the clay upward and outward between your thumb on the inside and fingers on the outside, rotating the sphere continuously to create uniform walls. Continue this rhythmic pinching motion until the walls achieve a consistent thickness of eight millimeters and the vessel reaches approximately eight centimeters in height. Settle the pot down gently onto your work surface to establish a flat, stable bottom base while retaining natural organic variation along the walls. Form the wavy top rim by gently pushing the clay edge outward and inward with your fingertips, creating three to four soft, undulating crests and valleys. Allow the piece to harden thoroughly, use a damp abrasive sponge to smooth away unwanted surface scratches, and seal with a breathable matte waterproof sealer.

    5. Idea 5: Geometric Faceted White Gem Vessel

    5

    Step-by-Step Guide

    The geometric faceted white gem vessel incorporates sharp angular planes inspired by precision-cut gemstones and modern low-polygon architectural models. This design is composed of multiple flat triangular and trapezoidal facets angled around an open hexagonal top rim. The reflective white facets interact dynamically with room illumination, producing an ever-changing arrangement of crisp light planes and soft grey shadows as the sun moves across the sky. This crisp, faceted styling complements spiky structural succulents such as haworthias, agaves, and tiger jaws, highlighting their geometric growth habits. The broad, low-center-of-gravity silhouette provides excellent tipping resistance, making it dependable for high-traffic zones like kitchen counters and coffee tables. Executing this form teaches discipline in clean planar cutting and angular joinery, producing an accessory that looks like high-end slip-cast ceramic.
    Construct a solid six-sided clay vessel by shaping white clay into a rough tapered hexagonal prism measuring nine centimeters in height. Place the clay block firmly onto a flat craft mat, using a long, rigid tissue blade to slice thin, deliberate flat planes off the outer walls. Angle your slicing cuts in alternating directions, creating crisp triangular facets that taper gradually from the wide top opening down to the narrower base. Hollow out the solid faceted volume by scooping clay out from the top center using a looped ceramic wire tool until the wall thickness reaches eight millimeters. Smooth the interior cavity walls with your fingers to ensure an even, non-porous surface that supports soil weight without bulging. Carefully inspect each exterior flat facet, avoiding touching the faces directly with bare fingers to preserve the sharp, razor-cut planar edges. Cure or dry the container according to your clay’s guidelines, then lightly rub the flat planes with an ultra-fine sanding block to accentuate the crisp junction lines before sealing.

    6. Idea 6: Beaded Ring Tiered Cachepot

    6

    How to Make

    The beaded ring tiered cachepot introduces playful, tactile dimension to plant styling by incorporating stacked rings of spherical clay beads around a central core. This design draws from modern neo-classical and art deco pottery, turning simple spherical elements into an eye-catching decorative frame. The pure white finish gives the clustered bead profile a clean look, evoking carved plaster and modern stone composite work. These horizontal beaded tiers catch daylight across each rounded hemisphere, adding tactile interest that brightens dim corners and neutral shelving units. The substantial wall thickness produced by the applied beads provides solid insulation and substantial weight, anchoring top-heavy plant specimens securely. This design functions as an adaptable planter that doubles as an artistic focal point on entry tables, dressers, and mantelpieces.
    Begin by rolling out a base sheet of white clay seven millimeters thick, cutting a base disc six centimeters across and a matching rectangular cylinder wall strip. Wrap the rectangular strip around the base disc, welding the vertical and bottom seams together with a silicone sculpting spatula to form a smooth structural core. Roll dozens of identical white clay balls measuring twelve millimeters in diameter between your palms, checking size consistency against a measured reference card. Lightly score horizontal reference lines around the exterior wall of the cylinder, spaced twelve millimeters apart, and apply a thin brush coat of liquid bonding medium. Press the spherical beads along the scored lines in continuous horizontal tiers, positioning each sphere snugly against its neighbors around the circumference. Continue applying horizontal beaded rows until the cylinder is covered from the base plate up to the top lip. After curing the vessel, inspect the junctures between beads with a fine needle file to clean stray clay burrs, applying a clear satin sealant across all surfaces.

    7. Idea 7: Botanical Imprinted Herb Planter

    7

    Execution Process

    The botanical imprinted herb planter merges natural organic textures with clean white pottery, capturing delicate leaf skeletons directly within the clay. This functional container features subtle debossed impressions of fresh culinary herbs—such as rosemary, thyme, or flat-leaf parsley—pressed into the exterior walls. The pure white backdrop showcases delicate leaf veins, serrated margins, and stem geometries, translating fleeting plant forms into lasting ceramic relief. This design is tailored for kitchen windowsills and indoor herb collections, visually indicating the plant species housed within the pot. The debossed organic textures offer tactile richness without introducing loud color contrasts, aligning smoothly with modern country and minimalist Scandinavian decor. The rectangular trough format provides ample horizontal surface area for multiple small herb seedlings to establish healthy root networks side by side.
    Roll out a smooth, uniform slab of white clay measuring six millimeters in thickness, rolling across the material in crosswise directions to relieve internal stresses. Lay fresh, sturdy sprigs of culinary herbs—such as sage or thyme—flat against the clay slab, spacing them evenly across the center field. Lay a sheet of parchment paper over the foliage, rolling firmly with an acrylic pin to press the stems and leaves deep into the clay surface. Gently peel away the botanical sprigs with fine craft tweezers to reveal the crisp, detailed botanical venation cast into the white clay. Use a ruler to cut a long rectangular wall strip from the imprinted sheet, alongside an oval or rounded rectangular base slab. Wrap the imprinted strip around the perimeter of the base, blending the rear seam carefully to avoid disturbing the front botanical imprints. Allow the container to dry or cure fully, buff the raised edges with fine abrasive cloth, and seal with a food-safe waterproof polyurethane topcoat.

    8. Idea 8: Double-Handled Amphora Vessel

    8

    Setup Method

    The double-handled amphora vessel adapts ancient Mediterranean storage pottery into a chic, contemporary accent for compact indoor plants. This design features a bulbous spherical lower body tapering into an upright neck, flanked by two oversized, curved loop handles. The pure white clay construction strips away historical terracotta weathering, transforming a historic utilitarian shape into a sculptural conversation piece. The oversized handles introduce dynamic negative space, drawing the eye outward and establishing an architectural silhouette that balances leafy upright plants like sansevieria. Its rounded base provides ample interior space for root development, while the narrower neck supports taller stems comfortably. This vessel functions exceptionally well on console tables, floating wall ledges, and curated bookshelf displays where its historic proportions can be admired from multiple viewing angles.
    Roll out two matching slabs of white clay, pressing them into hemispherical pinch molds to build two matching hollow halves for the lower bulbous body. Join the two halves together along their equator with wet clay slip, blending the seam thoroughly until the sphere is smooth and structurally sound. Cut a circular opening in the top of the sphere and construct an upright cylindrical neck by attaching a three-centimeter-tall rolled clay collar. Roll two uniform clay ropes measuring eight millimeters in diameter, bending each into an exaggerated curved C-shaped handle. Score the attachment points along the upper neck and the wide shoulder of the vessel body, pressing the handles firmly into place. Smooth the handle joints with a rounded silicone blending tool, creating continuous filleted seams that resist stress fractures during handling. Support the outward curve of the handles with crumpled paper during the hardening process to prevent gravity from sagging the soft clay. Once fully cured, sand the exterior smooth and finish with a durable semi-gloss protective sealant.

    9. Idea 9: Modern Slanted Rim Succulent Cup

    9

    Step-by-Step Guide

    The modern slanted rim succulent cup features an intentional asymmetrical top profile that slopes cleanly from a tall back edge down to a low front lip. This angular silhouette displays low-growing rosette succulents at a tilted presentation angle, making compact plants visible when positioned on desks or low tables. The pure white clay emphasizes the clean, diagonal line across the vessel top, projecting contemporary sophistication and geometric clarity. By tilting the plant toward the viewer, this container improves air circulation around the succulent’s base leaves, helping prevent moisture buildup. Its compact footprint makes it an easy project for utilizing leftover clay scraps while creating a coordinated set of staggered desk organizers. The clean angled cut provides an architectural rhythm when multiple units are grouped side by side on modern floating shelving.
    Condition a block of white clay and roll it out between guide slats to create an even slab six millimeters in thickness. Cut a base circle five centimeters in diameter, followed by an asymmetrical trapezoidal wall panel measuring eighteen centimeters long, sloping from ten centimeters tall down to six centimeters. Wrap the sloped wall slab around the circular base plate, joining the vertical seam at the tallest point to establish a smooth, continuous rear wall. Blend the vertical and bottom seams using an acrylic smoothing blade, pressing clay inward to forge an airtight structural union. Inspect the sloped upper rim, using a metal craft ruler and razor blade to trim the angled cut into a sharp, straight diagonal plane. Smooth the cut rim with a damp sponge or silicone rib, taking care not to round off the crisp interior and exterior edge corners. Allow the vessel to cure or air-dry upright on a level craft mat to ensure the flat base remains completely plumb. After curing, wet-sand the sloped rim flat with fine-grit abrasive paper, sealing the entire pot with a water-resistant satin coating.

    10. Idea 10: Stacked Donut Modular Planter

    10

    How to Make

    The stacked donut modular planter utilizes rounded toroidal rings arranged in vertical columns, producing an expressive, sculptural container with bold tactile rhythm. Drawing inspiration from modern Memphis design and retro Scandinavian ceramics, this design layers three hollow, rounded rings on top of one another to form an open vessel. The clean white clay highlights the undulating exterior contours, creating soft horizontal shadow bands that complement upright indoor foliage. The hollow stacked ring structure yields a thick-walled vessel that provides substantial physical stability and thermal insulation for potted plants. Its rounded profile contrasts with straight-edged books and rectangular picture frames, making it an effective styling piece for open shelving, coffee tables, and desks. This project teaches modular construction, requiring uniform ring fabrication and secure joint assembly to produce a durable planter.
    Begin by rolling out three identical thick ropes of white clay, maintaining a consistent diameter of two and a half centimeters throughout their lengths. Loop each rope into a closed circle with an outer diameter of nine centimeters, welding the joining ends together seamlessly with a silicone modeling tool. Press each circular ring gently against a flat tile to flatten the top and bottom contact planes, creating stable horizontal bonding surfaces. Stack the three flattened rings vertically on top of a flat, seven-millimeter-thick white circular clay base plate that matches the outer diameter. Score all horizontal contact surfaces between the base and the rings, applying liquid clay or wet slip between the layers before stacking. Blend the interior seams between rings together with a curved wooden tool to create a smooth, unified internal vessel cavity that holds soil securely. Keep the exterior junctures distinct to preserve the clear aesthetic division between the stacked donut shapes. Cure or dry the assembly fully, wet-sand the top circular rim, and coat with an invisible matte waterproof sealer.

    Common Beginner Mistakes and How to Avoid Them

    Beginner crafters frequently face challenges related to structural cracking, surface discoloration, and moisture seeping through porous white clay walls. A common issue is failing to maintain uniform wall thickness, creating uneven moisture loss and structural stress fractures during baking or drying. Prevent this by using wooden guide rails when rolling slabs, ensuring the clay remains an even thickness across every section. Another widespread error is working on unwashed surfaces, which allows airborne dust and dark fibers to embed permanently into soft white clay. Keep your immediate craft mat, modeling tools, and hands clean by wiping them down with lint-free alcohol wipes before touching the clay. Skipping the creation of drainage holes often results in soggy soil and root rot; always punch an eight-millimeter drainage hole while the clay is soft, or use removable plastic nursery liners inside. Beginners also frequently under-condition clay, leaving trapped air pockets that expand and cause wall blowouts during oven curing. Knead the clay thoroughly using smooth folding motions, and pop visible air bubbles with a fine needle tool before assembling. Finally, failing to seal the interior walls with a proper waterproofing agent allows moisture to seep through permeable clay, leaving unsightly stains on delicate furniture surfaces.

    Practical Tips for Better Results

    Achieving a smooth, gallery-quality finish on white clay planters requires attention to surface refinement, tool cleanliness, and controlled curing conditions. When sculpting with white polymer or air-dry clay, keep a small ball of clean scrap clay on hand to roll across surfaces and lift away stray dust particles. Smooth raw clay seams using flexible silicone-tipped modeling brushes moistened with water for air-dry clay, or rubbing alcohol for polymer clay, to eliminate visible fingerprints. If baking polymer clay, invert an aluminum roasting pan over your ceramic tile in the oven to shield the white clay from direct radiant heat, preventing accidental scorching or yellowing. Use a standalone oven thermometer to verify temperature accuracy, as home oven controls frequently fluctuate significantly above their set points. When drying white air-dry clay, place a loose tent of plastic wrap over the piece to slow down surface evaporation, minimizing the risk of edge warping and drying cracks. After curing, refine the surface using wet-and-dry automotive sanding paper submerged in cool water, progressing from 400-grit to 1000-grit for a satin, stone-like finish. Finally, apply two thin, even coats of matte water-resistant varnish, allowing each coat to cure fully for lasting defense against water and soil stains.

    Styling, Presentation, or Organization Ideas

    Displaying white clay planters effectively involves intentional placement, balanced scale, and complementary background materials within your home environment. Grouping three planters of varying heights and complementary textures—such as a fluted cylinder, a smooth arch vessel, and a textured cube—creates a balanced, engaging display. Position these all-white groupings against natural backdrops like light oak shelving, unpainted concrete ledges, or raw linen table runners to highlight the pure white clay. Match each planter with plants whose growth habits complement the vessel’s form; pair structured geometric containers with spiky haworthias, and flowing wavy-rim vessels with soft trailing succulents. Raising one vessel on a turned timber base or a stack of hardcover books introduces vertical height, preventing straight horizontal displays from feeling flat. On home office desks, these white vessels can also double as organizers for pens, styluses, and small tools. Place the planters where natural indirect light from nearby windows casts soft, sculptural shadows across fluted surfaces and faceted planes. Adding light-colored river pebbles or white crushed quartz as a top dressing over the soil visually unifies varied vessel shapes into a cohesive container collection. Using standard drop-in plastic nursery pots makes it easy to rotate plants between vessels without messy soil transfers.

    Budget or Time Planning

    Curating an original collection of white clay planters is an economical, time-efficient DIY project that delivers high decorative impact with minimal expenditure. A single large block of white polymer clay or an economical bucket of white air-dry clay provides enough material to construct three to four medium-sized pots. Basic shaping tools can be assembled from everyday household items like wooden skewers, credit cards, plastic bottles, and metal rulers, keeping startup costs low. To optimize your crafting hours, divide the workflow into structured, sequential phases: material conditioning and shaping on one afternoon, followed by curing, sanding, and surface sealing. Batch-building several planters at once saves setup time and ensures consistent wall thickness across a matching decorative set. Allow white air-dry clay pieces three to four full days to cure completely before attempting surface sanding or applying sealers. Oven-baked polymer projects require approximately thirty minutes of heat processing per six millimeters of wall thickness, followed by gradual cooling inside the switched-off oven. Re-kneading clean trimmed scraps into accent discs or drainage trays ensures zero material waste from every block of clay. This balance of accessible pricing and quick completion makes white clay sculpting a practical home decor craft for any weekend.

    Creative Expansion and Advanced Inspiration

    After mastering basic slab, pinch, and coil construction techniques, you can explore more advanced decorative methods and mixed-media accents. Try incorporating metallic leafing, applying delicate sheets of genuine gold, silver, or copper leaf along the outer rims to elevate the crisp white clay base. You can also explore sgraffito and inlay carving, incising linear geometric patterns into raw clay and filling the grooves with contrasting black slip before final leveling. Integrating complementary materials like turned hardwood feet, solid brass rod handles, or woven cotton hanging cords introduces architectural contrast to simple clay forms. Experimenting with two-part silicone molding putty allows you to cast exact duplicates of custom hand-sculpted planters using fast-setting plaster or liquid casting clay. You can also scale up these forms to craft complementary home accents, including matching drainage trays, flared watering carafes, and modular candle holders. Exploring micro-perforations along the upper rim creates atmospheric lantern effects when planters are fitted with battery-operated LED wire lights alongside air plants. Experienced crafters can also build integrated internal water reservoirs with cotton wicks, merging sculptural white clay aesthetics with low-maintenance automated plant care.
  • 10 Large Clay Planter Ideas

    10 Large Clay Planter Ideas

    Large-scale earthen vessels have become foundational elements in contemporary indoor styling and landscape architecture, making statement containers a prominent focus across modern visual discovery platforms. Integrating expansive pottery into residential layouts allows homeowners to introduce architectural presence, ground cavernous spaces, and showcase substantial indoor trees or outdoor shrubs. This comprehensive guide delivers ten detailed large clay planter ideas structured to help decorators, gardeners, and crafters incorporate substantial stoneware into functional design schemes. Readers will discover practical fabrication workflows, stabilization techniques, structural soil layering, drainage configurations, and textural finishing methods designed to elevate standard earthenware into focal art installations. Oversized pottery anchors outdoor terraces and interior living zones by balancing expansive scale with the tactile warmth of natural kiln-fired clay. Understanding essential structural requirements prevents common pitfalls, such as structural potting cracks, root rot, floor staining, and immobility. Each featured concept provides actionable installation guidance, straightforward construction steps, and accessible supplies suitable for residential spaces. By learning these practical techniques, anyone can introduce durable, aesthetically balanced clay statements that enhance both living plants and overall interior architecture.

    Why This Idea Is Trending or Useful

    Monumental ceramic containers continue to dominate modern interior design and patio styling because they offer immediate visual grounding, architectural volume, and a strong connection to natural materials. Unlike smaller nursery pots that can create visual clutter when grouped together, a single expansive clay vessel provides a bold, minimalist focal point that organizes an entire room or garden corner. The practical value of substantial clay pots lies in their exceptional root insulation and moisture management; fired clay is naturally porous, allowing root systems to breathe and moderating soil temperatures against extreme weather shifts. The DIY appeal of upscaling and modifying large planters allows home decorators to achieve the look of luxury showroom imports using accessible techniques like mineral washes, masonry texturing, and custom wooden stands. For beginners, working with larger pots simplifies plant maintenance by accommodating larger soil reservoirs that resist drying out rapidly between waterings. These substantial vessels blend effortlessly into diverse decor styles, bridging the gap between Mediterranean warmth, brutalist concrete forms, and streamlined modern aesthetics while offering lasting, functional value for living plant displays.

    Materials and Preparation

    Achieving an enduring, structurally sound installation with large clay pots requires meticulous preparation and the right foundational supplies. Essential hardware includes heavy-duty terracotta or stoneware pots with minimum eighteen-inch diameters, electric masonry drill bits, exterior masonry sealant, pot feet or heavy-duty rolling casters, structural drainage mesh, lightweight filler elements like perlite or expanded clay pebbles, premium well-draining potting soil, and breathable geotextile landscape fabric. Preparation begins by inspecting the clay body for hairline fractures, tapping the rim lightly with a wooden mallet; a clear resonant ring indicates solid structural integrity, whereas a dull thud warns of internal fissures. Position the empty vessel directly in its permanent location or atop a mobile wheeled base before adding any contents, as filled containers can easily exceed two hundred pounds. Ensure adequate drainage by confirming the presence of clear bottom weep holes, drilling supplementary outlets through the base with water-cooled carbide-tipped bits if necessary. Line the interior bottom with durable fiberglass mesh to prevent soil migration while allowing excess irrigation runoff to escape freely onto protective saucers.

    Idea 1: Textured Sandstone Wash Roman Urn

    1

    How to Create

    Transforming an expansive terracotta vessel into an antiqued Roman urn brings classical architectural elegance into modern interiors and courtyard patios. This concept utilizes an oversized vessel with curved handles, coated in a custom matte mineral slurry that simulates naturally aged limestone or porous sandstone. The visual appeal centers on tactile depth; instead of a flat orange clay surface, the vessel displays subtle tonal variations ranging from warm bone white to pale desert sand. The substantial silhouette commands attention when placed beside entryways, French doors, or wide living room archways, providing an elevated sculptural backdrop for tall, architectural foliage like fiddle-leaf figs or Mediterranean olive trees. By muting the bright natural clay with layered mineral washes, the urn takes on the historical patina of an excavated antique while maintaining structural strength. This versatile vessel pairs naturally with both raw timber furnishings and sleek industrial metal elements, acting as an earthy anchor that softens hard geometric living spaces.
    Begin by scrubbing a clean twenty-four-inch terracotta urn with a wire brush to remove any powdery mold or factory release agents, wiping the surface dry. Mix two parts white exterior masonry paint, one part fine silica play sand, and one part dry powdered joint compound in a bucket, stirring until it reaches the consistency of thick pancake batter. Apply this mixture generously across the exterior walls of the urn using a wide masonry brush, employing multidirectional crosshatch strokes to build physical surface texture. While the mixture remains tacky, dab the wet coating with a damp natural sea sponge to create irregular pitted craters that mimic weathered stone. Once dry, mist the pot with water and apply a dilute wash of raw umber acrylic pigment into the recesses using a rag, immediately wiping the raised ridges clean to emphasize dimensional shadow. Seal the entire exterior with a matte water-based penetrating masonry sealer to protect the faux finish from water staining during routine plant care.

    Idea 2: Minimalist Fluted Cylinder Concrete Hybrid

    2

    Setup Method

    Linear architectural fluting applied to large cylindrical clay pots delivers a sleek Scandinavian look that fits effortlessly into contemporary interiors. This design relies on uniform vertical ribs arranged symmetrically around the circumference of a straight-walled clay container, turning an ordinary silhouette into an eye-catching geometric piece. The visual rhythm of vertical lines draws the eye upward, complementing the vertical growth of plants like snake plants, indoor bamboo, or tall dracaena. Combining the structural integrity of a large clay vessel with the clean look of pale grey micro-cement gives the pot an upscale, custom appearance. The fluting creates dynamic light and shadow across the curved surface as daylight shifts throughout the room. This piece is particularly effective in modern open-plan living rooms or minimalist office corners, where repetitive clean lines reinforce structured interior design while hiding minor surface irregularities in the underlying clay container.
    Select an eighteen-inch straight-sided cylindrical unglazed clay planter and clean the exterior with isopropyl alcohol to ensure proper bonding. Measure the pot’s outer circumference and mark vertical guidelines every inch using a carpenter’s pencil and level. Cut half-round wooden dowels or rigid foam moulding strips to match the precise height of the pot, smoothing the cut ends with fine sandpaper. Affix the vertical strips along the marked guidelines using an exterior polyurethane construction adhesive, pressing each strip firmly until flush and allowing the adhesive to cure for twelve hours. Prepare a smooth batch of polymer-modified grey micro-cement or feather-finish concrete patch, spreading it evenly over the fluted surface with a flexible silicone trowel to fill all gaps between the strips. Once cured, sand the ribs with two-hundred-grit sandpaper to achieve a soft matte concrete texture, finishing with an invisible masonry sealant to prevent moisture absorption.

    Idea 3: Raw Terracotta Pedestal Olive Tree Stand

    3

    Execution Process

    Elevating a wide-mouth terracotta pot on a matching flared clay pedestal creates a dramatic biophilic display suited for bright living spaces and sunny patio corners. This arrangement features a heavy, wide-rimmed Italian-style terracotta bowl secured atop an inverted tapered clay base, lifting the root ball to eye level. The design celebrates the raw, unpainted clay, allowing its natural red-orange warmth and chalky white mineral accents to shine through. Raising the planting vessel provides valuable floor clearance, making the surrounding room feel more spacious while ensuring trailing companion plants, like silver falls dichondra, cascade freely over the edges. An elevated planter also improves air circulation beneath the container, protecting delicate hardwood floors from trapped humidity and condensation. This classic setup works exceptionally well for slow-growing Mediterranean woody plants like dwarf olive trees or citrus trees, creating an enduring garden focal point that feels grounded, refined, and sculptural.
    Acquire a twenty-inch wide-rimmed shallow terracotta bowl alongside a sixteen-inch tall tapered cylindrical clay pot that will serve as the pedestal base. Flip the sixteen-inch pot upside down on level ground, placing a rubber isolation ring or high-density silicone pads around its base to prevent shifting. Apply a continuous bead of heavy-duty construction adhesive along the top rim of the inverted pedestal, then carefully lower the large bowl centrally onto the adhesive ring, checking alignment with a spirit level. Allow the structural bond to cure undisturbed for forty-eight hours before introducing any internal weight. Line the interior base of the upper bowl with a fine drainage screen, adding a three-inch layer of expanded clay hydro-pebbles to promote drainage without adding excessive weight. Position your potted olive tree in the center, backfilling with a porous potting blend of coarse perlite, pine bark, and loam, finishing with a tidy top-layer of smooth river stones.

    Idea 4: Matte Charcoal Geometric Color-Blocked Vessel

    4

    How to Make

    A two-tone, color-blocked clay vessel brings a striking mid-century modern look to living room corners and covered patio entries. This concept uses sharp diagonal or horizontal divide lines to separate a deep, light-absorbing matte charcoal surface from the raw, exposed terracotta clay below. The high contrast between industrial black pigment and warm earthen pottery modernizes traditional shapes, allowing standard garden pots to blend seamlessly into contemporary home decor. The dark upper band frames foliage with dramatic contrast, making bright green leaves like monstera, bird of paradise, or philodendron stand out vibrantly. By leaving the lower third of the pot in its raw state, the design retains the classic textural charm of clay while offering a clean, modern focal point. This approachable project updates budget-friendly garden center pots into high-impact, design-forward accessories with minimal material costs.
    Thoroughly wipe down a twenty-inch tapered round clay pot with a dry cloth, using fine eighty-grit sandpaper to remove any rough casting seams or surface wax. Wrap heavy-duty blue painter’s tape around the pot at a steep thirty-degree diagonal, pressing the tape edge down firmly with a wooden craft stick to prevent paint bleed. Seal the tape line by brushing on a light coat of clear matte acrylic medium, letting it dry completely to block any porous clay channels. Using an ultra-matte exterior charcoal or wrought-iron masonry paint, coat the upper section of the vessel using a high-density foam roller, applying three thin, even coats with two hours of drying time between each pass. Carefully peel the masking tape away while the final coat is slightly tacky to reveal a razor-sharp division line. Allow the paint to cure for three days before potting your plant, ensuring the finish can handle moisture and routine cleaning without scuffing.

    Idea 5: Aged European Lime-Washed Courtyard Planter

    5

    Step-by-Step Guide

    Emulating the weathered, sun-drenched pottery of historic French and Italian courtyards brings rustic warmth to modern garden borders and sunny living rooms. This technique uses authentic hydrated lime putty rather than synthetic latex paint, creating a chalky, breathable white crust that wears naturally over time. The visual charm comes from the layered finish; lime wash sinks directly into the pores of the clay, creating soft translucent veiling that lets the warm terracotta show through in high-contact areas. Unlike impermeable plastic coatings that trap moisture and bubble, lime wash breathes with the clay, accommodating the natural movement of water and salts through the vessel walls. This aged finish coordinates beautifully with gravel paths, weathered wood furnishings, and romantic flowering perennials like English lavender, climbing climbing roses, or scented geraniums. The finished pot looks like a treasured garden heirloom, adding history, visual depth, and organic charm to any outdoor space.
    Soak an oversized twenty-two-inch terracotta pot thoroughly with garden hose water until the clay darkens and absorbs moisture, which prevents the lime wash from drying out too fast. In a clean plastic bucket, combine one part agricultural hydrated lime powder with three parts warm water, stirring with a paint mixer attachment until smooth and watery. Using a wide, stiff-bristled boar-hair masonry brush, slap the lime wash across the damp pot exterior in quick, random figure-eight strokes. While the lime wash is still damp, take a coarse dry rag or steel wool pad and rub back sections around the rim, handles, and base to reveal the raw terracotta underneath. As the lime reacts with carbon dioxide in the air over the next forty-eight hours, it cures into a durable, insoluble chalk-white limestone layer. For an authentic aged look, mist the finished pot lightly with diluted liquid seaweed fertilizer, which helps moss and natural lichens take hold on the textured surface over time.

    Idea 6: Woven Rattan and Clay Dual-Texture Pot

    6

    Execution Process

    Combining the heavy durability of fired clay with the organic texture of natural hand-woven reed produces a sophisticated mixed-material statement piece. This design uses a wide, straight-walled clay pot wrapped around its center with thick natural cane, abaca fiber, or split sea-grass cordage, softening the hard masonry surface. The visual appeal comes from material contrast: smooth, cool earthenware set against the warm, flexible weave of dried plant fibers. This blended style fits effortlessly into Japandi, Scandinavian, and coastal minimalist homes, where textural layering takes priority over bold colors. The exterior rattan layer also provides a practical benefit, offering a non-slip tactile grip that makes the heavy container easier to adjust and rotate. This hybrid design works wonderfully for large, upright indoor plants like rubber trees or cast-iron plants, introducing subtle craft details into clean, uncluttered living rooms.
    Clean the central exterior band of an eighteen-inch cylindrical clay planter with mineral spirits to remove dust, marking a six-inch-wide horizontal band around the middle using pencil guidelines. Soak five-millimeter flat-oval natural cane reed in warm water for fifteen minutes until completely pliable, drying the excess surface water with a clean towel. Starting at the back of the pot, apply a three-inch vertical strip of high-tack exterior contact adhesive or clear polyurethane construction glue directly to the marked clay band. Press the end of the softened cane firmly into the adhesive, wrapping the strand tightly around the pot’s circumference while maintaining firm, continuous tension. Continue wrapping successive rows of cane flush against one another, applying small beads of adhesive every four inches around the pot to lock the reed securely against the clay wall. Once the six-inch band is completely wrapped, clamp the tail securely until the adhesive cures fully, trimming the end at an angle and sealing the natural fiber with clear matte polyurethane spray.

    Idea 7: Brutalist Chiseled Bas-Relief Planter

    7

    Setup Method

    Taking inspiration from mid-century brutalist architecture, this design adds chiseled, geometric clay facets to create a bold, sculptural art piece. The project involves applying a thick layer of dense masonry mortar to a large clay pot, carving abstract geometric relief patterns into the surface before it fully cures. The design impact comes from deep, jagged shadows cast across the chiseled facets, giving the container an impressive, stone-carved presence. Brutalist planters provide a strong geometric contrast to soft, cascading plant foliage like trailing pothos, Boston ferns, or weeping figs. The added layer of structural mortar increases the pot’s wall thickness, providing extra insulation for plant roots against rapid temperature changes on sunny balconies or exposed terraces. This substantial vessel functions as a standalone sculpture, offering an architectural presence that anchors minimalist interior spaces even when unplanted.
    Rough up the exterior surface of a large twenty-inch clay pot with a masonry grinding disc or fifty-grit sandpaper to create a rough tooth for new material to grip. Paint the roughened pot with a generous coat of liquid acrylic concrete bonding agent, letting it become tacky to the touch. Mix a batch of rapid-setting structural repair mortar to a firm, putty-like consistency, troweling a three-quarter-inch thick layer across the entire outer body of the vessel. Let the mortar firm up for roughly twenty minutes until it holds an impression without slumping or sliding down the walls. Using a variety of flat wood-carving gouges and notched steel modeling spatulas, carve bold geometric channels, angular wedges, and deep stepped facets directly into the firm mortar. Once the carved designs have cured for twenty-four hours, mist the surface with water, rub away any loose crumbs with a stiff brush, and seal the finished stone surface with a low-sheen siloxane penetrating sealer.

    Idea 8: Terracotta Herb Spiral Urn Assembly

    8

    How to Make

    A tiered terracotta planter assembly stacks multiple clay bowls of decreasing sizes onto a central hidden support, creating a cascading vertical garden tower. This design arranges three or four wide, shallow clay bowls on top of one another, forming concentric circular growing tiers ideal for compact spaces. The aesthetic appeal lies in the balanced, stepped silhouette, which displays a dynamic cascade of green foliage, trailing herbs, and colorful flowers within a single compact footprint. This vertical design is especially useful for small patios, balconies, or sunny kitchen courtyards where ground space is limited. Stacking clay pots allows you to group plants with different moisture needs in the same tower, placing drought-tolerant herbs like rosemary and thyme in the quickly-draining upper tiers, while moisture-loving varieties like basil and mint thrive in the larger base container. The substantial weight of the interlocking clay pots creates a self-stabilizing vertical tower that resists wind, serving as a functional, attractive kitchen garden centerpiece.
    Select three wide, shallow terracotta bowls with diameters measuring twenty-four, eighteen, and twelve inches, checking that each container has a central drainage hole. Cut a four-foot length of heavy-gauge threaded steel rod and prepare matching galvanized washers and nuts to build a central stabilizing core. Place the largest bowl on its permanent level patio location, resting it on solid clay pot feet to ensure water drains freely from the base. Drive the threaded steel rod vertically through the bottom drainage hole two feet into the ground below, or anchor it securely through an exterior wooden sub-deck. Slide an eight-inch inverted clay pot over the steel rod into the base bowl to serve as a sturdy internal pedestal, backfilling the surrounding space with coarse potting soil. Slide the eighteen-inch bowl down the rod so it rests flat on the internal support pedestal, repeating the process with another smaller spacer pot before adding the final twelve-inch top bowl. Fill every exposed soil shelf with well-draining potting mix, planting an array of cascading and upright herbs in outward-facing pockets around the tower.

    Idea 9: Industrial Iron-Oxide Weathered Clay Vessel

    9

    Step-by-Step Guide

    Replicating the rich, rusted patina of weathered Corten steel on an expansive clay pot brings industrial edge into modern garden designs and urban interiors. This design uses real micronized iron particles suspended in an acrylic base, followed by an acidic activator that triggers actual surface oxidation on the pot. The visual appeal centers on vibrant rust patterns, where deep umber, burnt orange, and raw sienna tones swirl across the earthenware surface. This rusted finish pairs naturally with dark architectural elements, matte black steel accents, and architectural desert plants like blue agave, yucca, or architectural ornamental grasses. Unlike actual heavy steel planters that can leach rust stains onto delicate light stone or indoor rugs, a chemically rusted clay pot stays sealed, preventing messy runoff while remaining light enough to move when empty. This technique gives gardeners the bold, rugged look of weathered industrial steel combined with the superior root breathability of traditional clay.
    Wipe down a smooth, nineteen-inch cylindrical clay planter with a damp microfiber cloth to remove dust, allowing the earthenware to dry completely. Apply two liberal coats of exterior acrylic primer to block the clay’s natural porosity and prevent the oxidizing solution from soaking inward toward the root zone. Once the primer is dry, brush on a coat of iron-rich metallic reactive paint, working in smooth horizontal passes to distribute the metal particles evenly. Apply a second coat of the iron paint forty-five minutes later, and while it remains slightly tacky, spray the entire surface with an acidic rust-activating solution containing copper sulfate and vinegar. The iron particles will begin oxidizing visibly within sixty minutes, developing a rich, genuine rusted patina over the next twenty-four hours. Once you achieve the desired rust depth, halt the oxidation process by misting the pot with a dilute baking soda water rinse, letting it dry before locking the finish in with a clear, non-yellowing matte exterior sealer.

    Idea 10: Smooth Earthenware Water Reservoir Basin

    10

    How to Create

    Converting a wide, non-draining clay basin into an indoor or patio water feature introduces tranquil sounds, natural humidity, and architectural sophistication to your living area. This concept features a smooth, shallow clay bowl sealed with an impermeable waterproof lining, hosting floating aquatic plants, smooth slate stones, and a discreet, solar-powered or plug-in bubbling fountain nozzle. The visual appeal comes from still, mirror-like water surfaces reflecting nearby greenery and sky, contrasted against the warm, organic texture of the clay bowl. Large, shallow water bowls serve as calming focal points in garden courtyards and open living rooms, improving air humidity and creating a welcoming oasis for visiting songbirds outdoors. Choosing a vessel with a thick, rounded lip gives the installation a grounded, substantial look that feels permanent and serene. This low-maintenance water garden provides an innovative way to use oversized clay pottery beyond traditional soil potting, adding the soothing movement and sound of water to your home.
    Acquire a substantial twenty-six-inch wide, twelve-inch deep terracotta water bowl, ensuring the vessel is free of drainage holes, or seal existing openings with expanding hydraulic cement plugs. Coat the entire interior of the bowl with three liberal coats of liquid black rubber pond liner or thick epoxy pool paint, feathering the coating right up to the inner rim. This waterproof barrier prevents water from weeping through the porous clay walls, which could otherwise cause exterior salt efflorescence and water leaks. Place a compact, quiet submersible fountain pump in the center of the basin, routing the slender power cable neatly over the rear rim, hidden beneath smooth river stones. Stack flat slate stones around the pump body to conceal the mechanical components while creating an elevated resting shelf for decorative aquatic plants like miniature water lilies or water lettuce. Fill the basin with clean, dechlorinated water, connect the pump to power, and adjust the nozzle to create a gentle, surface-rippling fountain that adds soothing movement without splashing over the rim.

    Common Beginner Mistakes and How to Avoid Them

    Working with large clay planters involves unique structural and horticultural challenges that differ significantly from caring for small houseplants. The most common mistake is failing to account for total weight once filled; a twenty-four-inch clay pot packed with damp soil and a mature plant can easily exceed two hundred and fifty pounds, making it nearly impossible to reposition without risking back injury or cracking the pot base. Always set the empty container onto its permanent saucer, heavy-duty wheeled dolly, or elevated pot feet before adding any drainage layers or soil. Another frequent error is plugging drainage holes with stones or broken pottery shards in the belief that it aids drainage; this practice actually raises the internal perched water table, saturating the lower root zone and causing root rot. Instead, cover bottom holes with flat pieces of fiberglass mesh screen, which holds soil inside while letting excess water drain away freely. Finally, unsealed terracotta pots lose moisture rapidly through their porous walls, which can quickly dehydrate moisture-loving plants in dry, heated indoor rooms. Combat this by applying a breathable penetrating sealer to the pot interior, or keep your plant in its plastic nursery container, setting it inside the clay vessel as a decorative cachepot.

    Practical Tips for Better Results

    Achieving professional results with substantial clay planters requires planning for structural balance, proper soil mechanics, and seasonal temperature shifts. When filling deep planters, you do not need to pack the entire depth with heavy potting soil; create a lightweight sub-base by placing upside-down plastic nursery pots or closed empty plastic bottles into the bottom third of the vessel, covering them with landscape fabric before adding soil. This smart method saves money on soil, cuts down the total container weight by up to forty percent, and preserves valuable aeration beneath the root ball. To prevent unsightly white salt crusts—caused by minerals and fertilizer salts leaching through damp clay—soak new pots in a solution of ten parts water to one part white vinegar before planting, which neutralizes residual manufacturing alkalis. Always elevate outdoor clay pots off flat concrete or stone surfaces using small terracotta or rubber pot feet. Raising the base prevents water from pooling underneath, ensuring drainage holes stay clear and protecting the vessel from cracking during winter freeze-thaw cycles.

    Styling, Presentation, or Organization Ideas

    Integrating substantial pottery into living spaces requires a thoughtful eye for scale, negative space, and architectural balance. Large planters work best when treated as primary architectural anchors rather than minor accents; position a single substantial vessel in an empty room corner or entryway to command attention and ground the area without creating clutter. When styling groupings on large outdoor decks or garden patios, follow the classic rule of odd numbers, clustering three vessels of varying heights and matching clay finishes to establish pleasing visual rhythm. Pair upright structural plants, like bird of paradise or ficus varieties, with low cascading underplantings like string of pearls, ivy, or creeping thyme that spill gracefully over the heavy clay rim to soften structural lines. Match the color and finish of your pottery to your room’s architectural materials: smooth grey-washed clay complements minimalist polished concrete and steel, while warm, unglazed terracotta adds inviting warmth to light oak floors, exposed brick, and bohemian woven textiles.

    Budget or Time Planning

    Creating a striking display with large clay planters does not require spending thousands on boutique garden showroom imports. Start by sourcing standard, unglazed commercial-grade terracotta pots from local wholesale agricultural suppliers, masonry yards, or home improvement centers, where prices are often a fraction of high-end home boutique costs. You can then upgrade these budget-friendly bases using inexpensive masonry washes, mineral paints, and textural concrete patches to replicate the look of luxury European pottery for under thirty dollars in supplies. Plan your installation as a structured, two-day weekend project: spend the first day inspecting, drilling, texturing, and sealing the pot surfaces, allowing mortars and protective coats to cure overnight undisturbed. Dedicate the second day to moving your planter into position, assembling drainage components, and planting your greenery. Save long-term money on potting mixes by blending bulk supplies of coarse horticultural perlite, shredded pine bark, and peat moss at home, producing a premium, well-aerated planting medium at half the price of pre-bagged retail soils.

    Creative Expansion and Advanced Inspiration

    Once you feel comfortable handling basic planting setups in oversized containers, explore advanced functional and artistic upgrades for your clay pottery. Consider installing concealed, sub-irrigation water reservoirs inside your largest vessels, using capillary wicking lines and vertical fill tubes to build self-watering planters that keep indoor trees hydrated for weeks without guesswork. Experiment with artistic mosaic inlays, pressing broken ceramic tiles, tumbled beach glass, or polished river pebbles directly into sculpted mortar channels along the pot rim to create custom geometric borders. You can also integrate low-voltage warm LED spotlighting directly beneath the rim of outdoor planters, uplighting the plant foliage and casting dramatic branch shadows against nearby walls during evening hours. Looking beyond living plants, expansive clay bowls adapt beautifully into seasonal focal points: fill them with fragrant evergreen branches and outdoor lanterns in winter, display floating candle arrangements for outdoor dinners, or arrange structured collections of smooth river stones and air plants for a low-maintenance, sculptural indoor display.
  • 10 Small Clay Planter Ideas

    10 Small Clay Planter Ideas

    Small clay planters have established a prominent presence across home decor and crafting spaces on visual discovery platforms, serving as functional desktop vessels and artistic accents for botanical styling. Exploring Pinterest ideas for miniature pottery allows makers to transform raw clay blocks into customized habitats for succulents, cacti, and small propagating cuttings. This long-form tutorial guides readers through ten distinct handmade planter concepts, ranging from rustic pinch pots and structured geometric slabs to modern pedestal dishes and textured hanging vessels. Readers will learn essential clay-working fundamentals, including clay body selection, wall thickness management, seam joining methods, drainage hole engineering, and interior waterproofing barriers. Beyond aesthetics, hand-building miniature planters addresses key indoor gardening needs by providing breathable root environments, balanced moisture retention, and stable weight distribution on shelves and windowsills. Whether using traditional terracotta, dense polymer compound, or air-dry clay reinforced with resin sealers, these structural techniques ensure your planters remain durable and resistant to water degradation over time. Through step by step instructions, this guide provides clear, practical knowledge that equips crafters of all skill levels to design durable, bespoke pottery pieces tailored for contemporary living spaces.

    Why This Idea Is Trending or Useful

    Handmade clay pottery continues to trend across contemporary interior design channels due to its balance of tactile minimalism, organic warmth, and daily functional utility. Modern design enthusiasts frequently seek handmade items that contrast with mass-produced plastic nursery pots, choosing earth-toned stoneware, unglazed terracotta, or matte porcelain finishes that elevate residential plant collections. From a practical perspective, small clay planters provide a compact footprint, making them ideal for apartment living, compact work desks, floating shelves, and narrow windowsill gardens. As an easy project requiring minimal specialized studio tools, miniature clay modeling offers high DIY appeal, allowing beginners to produce functional home decor without access to high-temperature ceramic kilns. Working with moldable clay also provides a relaxing, hands-on creative experience where makers can experiment with surface ribbing, stamped geometric impressions, and layered slip textures. Furthermore, clay vessels provide superior stability for top-heavy succulents and offer natural porosity that protects sensitive root systems from oversaturation and rot. This convergence of beginner friendly accessibility, biophilic home styling, and functional moisture management solidifies miniature clay vessels as a reliable creative project for modern plant enthusiasts.

    Materials and Preparation

    Proper preparation directly determines the longevity, structural integrity, and water resistance of any hand-built miniature planter. Makers must select an appropriate clay body based on their curing resources, choosing between self-hardening air-dry clay, oven-bake polymer clay, or low-fire earthenware terracotta clay. Working with self-hardening varieties requires a non-porous work surface, such as a smooth ceramic tile, silicone mat, or polished marble slab, alongside a solid acrylic rolling pin with depth guide rings. Essential shaping tools include wooden modeling ribs, flexible stainless steel scraping ribbons, wire clay cutters, needle tools for scoring, and brass tubing or hollow hole punchers for creating uniform drainage holes. Preparation involves thoroughly conditioning the clay through rhythmic kneading and wedging to eliminate internal air pockets that can cause structural cracks during drying or baking. Planning considerations require calculating material shrinkage rates, which typically range from five to twelve percent depending on moisture content and clay composition. Additionally, gathering waterproof acrylic sealants, liquid epoxy resin, and fine-grit sanding sponges ensures smooth post-cure finishing, preparing the interior surfaces to withstand continuous exposure to damp potting soil.

    1. Organic Thumb-Pinch Succulent Pot

    1

    Step-by-Step Guide

    The organic thumb-pinch succulent pot relies on one of the oldest foundational ceramic methods, using manual finger compression to turn a solid sphere into a balanced, thick-walled vessel. This design embraces subtle organic irregularities, featuring soft undulating rims, slight asymmetrical curves, and a natural tactile texture that reflects the maker’s hands. The compact spherical shape creates an ideal root chamber for slow-growing succulents such as echeveria, haworthia, and small sedum varieties. The substantial base provides a low center of gravity that prevents the planter from tipping over when placed on narrow ledges or crowded desks. Maintaining a consistent wall thickness of approximately one-quarter inch ensures the vessel cures evenly without developing hairline fissures along the base perimeter. The finished look pairs unglazed, matte earth tones with the waxy foliage of desert plants, establishing a calm, wabi-sabi presence that fits seamlessly into modern minimalist style interiors.
    To construct this vessel, roll four ounces of conditioned clay into a smooth, seamless ball between your palms, inspecting the exterior surface to confirm the absence of deep surface fissures. Hold the sphere securely in your non-dominant palm, then press your dominant thumb firmly into the center of the ball until your tip rests approximately one-half inch above the bottom table surface. Slowly rotate the clay ball in your palm while applying gentle, rhythmic pinching motions between your thumb on the interior and your fingers on the exterior wall. Work progressively from the base upward toward the rim, maintaining uniform pressure to draw the walls outward and upward into a rounded cup silhouette. Place the formed vessel onto a flat wooden board, pressing down gently to establish a stable, level base plate. Use a hollow brass tube or structural needle tool to punch a clean one-quarter-inch drainage hole through the exact center of the floor, then smooth the rim with a damp sponge.

    2. Geometric Hexagonal Slab Planter

    2

    How to Create

    The geometric hexagonal slab planter combines clean architectural angles with sharp planar facets, offering a structured silhouette that complements contemporary interiors. Unlike rounded vessels shaped through rotational pressure, this design utilizes precise flat clay slabs cut into uniform geometric components and assembled with reinforced mitered joints. The six straight outer walls create distinct light and shadow lines across the planter’s exterior, producing a clean, modern aesthetic that highlights crisp craftsmanship. This angular profile works exceptionally well in grouped clusters, allowing multiple hexagonal units to sit flush together in a modular honeycomb pattern on desks or side tables. The flat wall surfaces also provide an ideal canvas for exploring two-tone color blocking, subtle debossed grid lines, or smooth stone-effect finishes that resemble cast architectural concrete.
    Begin by rolling out conditioned clay between two parallel wooden guide slats to produce a uniform slab with a thickness of three-sixteenths of an inch. Using a steel ruler and a sharp craft knife, cut six identical rectangular wall tiles measuring two inches in width by three inches in height, beveling the long vertical edges at a thirty-degree angle. Cut a separate hexagonal base tile matching the interior dimensions of the assembled wall perimeter, keeping the edges square and clean. Score every beveled contact edge with a fine crosshatch pattern using a needle tool, then apply a thin layer of clay slip or liquid clay bonding agent along the scored seams. Stand the wall panels upright around the hexagonal base, pressing the beveled edges together firmly to form the six-sided structure. Smooth the internal seams using a wooden modeling tool to blend the clay across the joints, punch a drainage hole through the base, and let the assembly dry slowly under a loose plastic cover.

    3. Hanging Cylinder Air Plant Cradle

    3

    Execution Process

    The hanging cylinder air plant cradle functions as an airy, suspended botanical holder that maximizes vertical wall space while showcasing soil-free epiphytes. Designed specifically for tillandsia varieties, this planter features an open, semi-hollow cylindrical body with strategic cutouts or side apertures that promote continuous air circulation around the plant’s root base. The cylindrical profile maintains a clean, modern design with smooth vertical walls suspended from three balanced hanging points using natural linen or waxed cotton cords. Suspending the planter draws the eye upward, transforming empty window frames, wall corners, and ceiling alcoves into dynamic vertical gardens. The absence of heavy potting soil allows for a lightweight, delicate clay wall construction that hangs securely without putting excessive strain on standard wall hooks or ceiling anchors.
    Roll out a flat clay slab to an even one-eighth-inch thickness, then trim the sheet into a clean rectangle measuring eight inches in length by two and a half inches in height. Wrap the flexible clay rectangle around an upright cardboard tube lined with parchment paper, aligning the short edges together in an overlapping flush seam. Score the connecting edges thoroughly, apply binding slip, and smooth the joint with a flexible steel scraper until the seam disappears into the cylinder wall. Use a circular clay hole cutter to punch two small ventilation ports through the lower wall, then cut three small, equidistant suspension holes one-quarter inch below the top rim. Construct a flat circular disc to serve as an open-slatted interior shelf, joining it three-quarters of an inch above the bottom edge using standard score-and-slip techniques. Allow the vessel to dry slowly, remove the interior cardboard core, sand the exterior surface smooth, and string natural suspension cords through the rim eyelets.

    4. Footed Pedestal Desktop Pot

    4

    How to Make

    The footed pedestal desktop pot uses vertical elevation to showcase miniature trailing plants, using an integrated base stand that lifts the main vessel off flat surfaces. This design includes a rounded planting bowl mounted atop three tapered peg legs or a continuous hollow cylindrical collar. Elevating the planting chamber adds visual lightness, making small plants like string of pearls, trailing jade, or creeping fig cascade naturally over the rim without pooling on table surfaces. The lifted design also protects delicate wood furniture from moisture buildup, allowing free air circulation beneath the drainage hole. This elevated form draws inspiration from mid-century modern ceramics, balancing round curves with clean architectural supports to produce a functional decor accent that stands out on home office desks and bookshelves.
    Craft the upper planting bowl first by shaping a three-inch pinch pot or pressing a circular clay slab into a hollow mold, ensuring the walls maintain a uniform one-quarter-inch thickness. Invert the shaped bowl onto a supportive foam ring to keep the rim round while exposing the curved bottom surface. To create three matching pedestal legs, roll a clay coil into a uniform cylinder, cut three one-inch segments, and taper each piece slightly toward one end with a flat angle cut at the base. Score the flat contact surfaces of each leg and mark three equidistant anchor points on the bottom of the inverted bowl using a circular spacing template. Apply bonding slip to the scored zones, press the legs firmly onto the bowl base, and reinforce the contact seams with small coils of soft clay smoothed into the joint lines. Pierce a drainage hole through the center of the bowl floor between the legs, verify that the vessel stands level, and allow it to dry.

    5. Ribbed Arch Art Deco Planter

    5

    Setup Method

    The ribbed arch art deco planter draws inspiration from vintage architectural moldings, featuring repeating vertical flutes and an arched profile that highlights precise line work. The exterior surface consists of uniform, raised vertical ridges that wrap around the curved front face, creating tactile linear shadows that catch ambient light. This structured aesthetic bridges the gap between vintage European decorative art and modern geometric decor, offering a sophisticated home for upright miniature flora such as sansevieria cuttings or micro ferns. The flat, untextured rear panel allows the vessel to sit flush against wall surfaces or bookshelf dividers, maximizing shelf space while presenting a detailed, dimensional facade to the front. The balance of smooth curves and sharp vertical lines makes this vessel an eye-catching focal piece that elevates surrounding desk accessories.
    Construct a solid arch-shaped clay block measuring four inches in height, three inches in width, and two and a half inches in depth using layered, conditioned clay slabs pressed firmly together. Use a wire loop carving tool to scoop out the internal core, leaving a solid half-inch perimeter wall and a stable half-inch base floor to establish the internal planting chamber. To create the external ribbed texture, place a custom-grooved clay texture roller or a clean wooden dowel vertically against the exterior curved face, applying uniform inward pressure to stamp parallel vertical flutes along the surface. Smooth the top arched rim using a damp chamois cloth to remove sharp edges without distorting the carved ribs. Cut a central drainage hole through the floor of the hollowed chamber, directing the drill bit toward the rear base to keep the front facade clean. Allow the carved vessel to dry slowly under plastic sheeting to prevent uneven shrinkage between the dense floor and the ribbed walls.

    6. Self-Watering Wicking Clay Basin

    6

    How to Create

    The self-watering wicking clay basin utilizes a functional two-part ceramic system to automate moisture delivery for moisture-sensitive miniature plants like fittonias and baby tears. This construction pairs an upper unglazed porous clay planting cup with an external glazed or non-porous reservoir basin that holds standing water below. The upper cup features a bottom aperture fitted with a natural cotton or fiberglass wicking cord that draws water upward from the reservoir into the potting soil through capillary action. This passive irrigation system prevents both drought stress and soil waterlogging, maintaining consistent, balanced root moisture without daily watering. The nested, two-tiered silhouette provides a clean, modern aesthetic that neatly hides the standing water reservoir while keeping desk surfaces dry. Using contrasting clay colors or varied glaze finishes between the two nested components highlights the functional engineering of the piece.
    Begin by shaping the outer water reservoir, throwing or pinching a wide-mouthed cylinder measuring three inches in diameter and two inches in depth with an interior ledge near the top rim. Next, construct the inner planting cup, sizing its outer diameter to rest securely on the reservoir’s interior ledge while leaving a half-inch water clearance space at the bottom. Model the inner cup with porous, unglazed terracotta clay, punching a three-eighths-inch hole through its base to accommodate the wicking cord. Smooth all surfaces with a damp sponge, ensuring the nested fit remains loose enough to lift the inner cup easily during water refills. After curing, apply a waterproof epoxy or high-gloss varnish to the interior of the lower reservoir basin to prevent water from seeping through its walls. Thread a four-inch braided cotton cord through the inner cup hole, fill the cup with light potting soil, and nest it securely inside the filled lower reservoir.

    7. Ruffled Fluted Rim Botanical Cup

    7

    Execution Process

    The ruffled fluted rim botanical cup takes inspiration from delicate flower petals, featuring an outward-flaring rim shaped into soft, undulating ruffles. This design uses gentle manipulation of the upper clay edge to create an expressive silhouette that contrasts with rigid commercial pots. The flaring rim provides practical support for creeping or trailing foliage, allowing stems to spill outward gracefully without kinking against sharp rim edges. The soft, wavy contours catch directional light beautifully, creating a dynamic surface that complements flowering miniature plants such as African violets or micro orchids. The organic rim pairs well with smooth pastel finishes or soft speckled slip glazes, producing an elegant, handmade decor accent that brings a light, romantic feel to bedside tables and vanity counters.
    Roll out a circular clay slab to an even three-sixteenths-inch thickness, then press the slab into a hemispherical press mold or shallow wooden bowl lined with plastic wrap to form the base cup. Once the clay stiffens to a leather-hard state, remove it from the mold and position it upright on a rotating turntable. Roll a thin secondary clay strip measuring one inch in width, tapering the top edge with your fingers to create a delicate, paper-thin rim profile. Join this strip around the top edge of the cup using score-and-slip methods, blending the inner seam flat while angling the top edge outward at a forty-five-degree angle. Place your index finger and middle finger on the outside of the rim and use your other thumb to gently press the clay outward between them, repeating this gesture at regular intervals to shape flowing ruffles. Drill a clean drainage hole through the base, support the ruffled edges with tissue paper, and allow the vessel to cure completely.

    8. Textured Concrete-Look Faux Terrazzo Cube

    8

    How to Make

    The textured concrete-look faux terrazzo cube combines clean industrial proportions with colorful, decorative mosaic inclusions suspended directly within the clay body. This design relies on a crisp box structure where flat square faces showcase dispersed flecks of contrasting baked clay fragments that mimic authentic polished terrazzo stone. The square profile provides a grounded, stable base that resists accidental movement, making it ideal for narrow windowsills and shared office workstations. Incorporating contrasting colored clay flecks into a neutral white or light grey base clay produces a durable, built-in visual texture that will not chip or wear away like surface-applied paint. The combination of clean cubic lines and colorful stone-like inclusions results in a modern, gallery-inspired container that pairs effortlessly with architectural succulents like zebra haworthias and miniature jade trees.
    Prepare the terrazzo inclusions by baking thin scraps of colored polymer clay in terracotta, forest green, mustard yellow, and charcoal black, then chopping the cured scraps into small, irregular one-millimeter flakes. Knead these colored flakes into a block of conditioned white or light grey clay until the chips are evenly distributed throughout the mass. Roll the speckled clay into a smooth slab measuring one-quarter inch thick, then cut five identical two-and-a-half-inch squares using a metal square cutter and a ruler. Score the joining edges of all five tiles, assemble four walls around the square base plate to form an open cube, and reinforce the inner seams with thin rolled coils of matching clay. Once the cube is assembled, slice a drainage hole through the base floor and allow the vessel to cure fully according to the manufacturer’s baking instructions. Once cool, wet-sand the exterior faces using progressively finer 400-grit to 1000-grit wet sandpaper to expose the clean edges of the embedded colored flecks.

    9. Modern Minimalist Half-Moon Wall Pocket

    9

    Setup Method

    The modern minimalist half-moon wall pocket is a flat-backed, semi-circular planter designed to mount directly onto vertical wall surfaces, turning unused walls into living art displays. This space-saving design features a rounded front basin joined to a rigid, flat mounting backplate that rests flush against drywall or wood paneling. The half-moon shape provides an elegant, sculptural container for shallow-rooted cascading plants like string of hearts or burro’s tail, allowing foliage to drape down the wall naturally. Elevating plants off horizontal surfaces frees up valuable desk space while keeping delicate greenery away from curious pets. The clean geometric form suits modern interiors, functioning as a standalone statement accent or as part of a modular gallery wall arrangement paired with framed prints and wall hangings.
    Roll out a uniform clay slab to a one-quarter-inch thickness, then cut two identical five-inch semi-circles and one flat five-inch horizontal mounting plate using a paper template. Set one semi-circle aside to serve as the flat rear backplate, using a leather punch to cut two reinforced keyhole hanging slots through the upper corners for wall mounting. Take the second semi-circle, soften its center over your palm, and stretch the clay outward to form a concave curved pocket that matches the bottom contour of the backplate. Score the curved outer perimeter of both components, apply binding slip, and join the pocket to the backplate, pressing the seams together firmly with a curved wooden tool. Smooth the interior and exterior seams to establish a water-tight seal, then pierce a tiny drainage hole through the lowest point of the front curved basin. Place a folded support towel inside the pocket cavity to prevent it from sagging, and allow the assembly to dry thoroughly in an upright position.

    10. Stackable Totem Modular Planter System

    10

    Step-by-Step Guide

    The stackable totem modular planter system consists of interlocking, interchangeable clay tiers that can be arranged in various combinations, creating a customizable vertical plant display. Each modular segment features a distinct geometric profile—such as a sphere, a ribbed ring, or an inverted cone—fitted with a nested lip that locks into adjacent tiers securely. This modular system allows users to reconfigure their plant display over time, stacking multiple units to create an architectural tabletop totem or separating them into individual standalone vessels. The stacked configuration saves horizontal counter space while creating a striking vertical conversation piece that highlights varied foliage textures at different heights. The varied geometric shapes catch light differently, creating an engaging visual rhythm that bridges functional botanical housing with contemporary sculptural art.
    Roll out a dense, three-eighths-inch-thick clay slab, then cut three long strips measuring three inches wide to form the walls of three separate stacking tiers. Shape the first strip into a wide cylindrical base ring, the second into an inverted conical midsection, and the third into a compact, spherical top collar. On the upper rim of the base cylinder and midsection, model an interior recessed flange measuring one-eighth inch deep to receive the base of the tier above it. Verify the interlocking fit while the clay is soft, adjusting the diameters so each segment stacks flush and stable without wobbling or binding. Cut a primary drainage aperture through the floor of the upper planting vessels, aligning the holes so excess water drains through the tiers into an unperforated bottom drip tray. Smooth all exterior surfaces with a damp finishing sponge, separate the modular units, and allow each piece to cure individually to prevent them from fusing together during the drying process.

    Common Beginner Mistakes and How to Avoid Them

    When hand-building small clay planters, beginners often encounter structural and functional issues that can cause cracked walls or plant failure after potting. A frequent mistake is creating uneven wall thicknesses, leaving thick base corners alongside paper-thin upper rims; this unevenness causes differential drying shrinkage, which leads to deep drying cracks. To avoid this, always use wooden guide slats when rolling slabs and check wall thickness regularly with a needle tool during pinch-pot construction. Another common oversight is skipping drainage holes, which traps excess irrigation water at the base and leads to root rot. Makers should always punch a clean, unobstructed drainage hole at least one-quarter inch wide while the clay is soft, remembering that clay shrinks during curing. Additionally, joining clay pieces without proper scoring and slip application often leads to seam separation as the clay dries. Crafters must score both contact surfaces with deep, crosshatched grooves and apply adequate slip or liquid bonding agent, pressing the parts together until a small bead of slip emerges from the seam.

    Practical Tips for Better Results

    Achieving professional, long-lasting results with handmade clay planters requires careful attention to drying rates, surface finishing, and internal waterproofing. Air-dry and natural earthenware clays must always dry slowly and evenly; placing greenware under a loose plastic drop cloth for the first two days prevents the rapid surface evaporation that causes warping and edge curling. For a silky, refined finish without visible tool marks, smooth the exterior surfaces with a damp sea silk sponge or a flexible silicone rib while the clay is leather-hard, rather than attempting heavy dry sanding later. If working with air-dry clay, sealing the interior surfaces with two coats of two-part liquid epoxy resin or a dedicated marine-grade polyurethane varnish is essential to prevent moisture from softening the cured clay walls. When using oven-bake polymer clay bodies, baking the finished pieces on flat ceramic tiles lined with parchment paper prevents shiny flat spots and ensures even heat distribution throughout the piece. Finally, using sharp, dedicated carving tools kept free of dried clay residue ensures clean, crisp geometric cuts and defined stamped patterns across all your handmade planter designs.

    Styling, Presentation, or Organization Ideas

    Small clay planters offer remarkable flexibility for interior decoration, botanical styling, and tabletop organization across living and working spaces. Grouping three planters of varying heights and complementary neutral tones creates a dynamic visual vignette on bookshelves, mantels, and entryway consoles. When selecting botanical companions, choose plants with contrasting foliage textures and growth habits; pair an upright, architectural haworthia in a smooth cylinder pot with a soft, trailing string of pearls in an elevated pedestal vessel. Small clay vessels also serve practical functions beyond housing live plants, working beautifully as desktop organizers for paintbrushes, fountain pens, paper clips, and small craft supplies. In kitchen environments, grouping matching cylindrical pots on a stone tray creates a clean, accessible windowsill garden for fresh culinary herbs like thyme and rosemary. For craft fair displays or portfolio photography, stage finished planters on natural travertine tiles or neutral linen runners under soft, directional window light; this simple presentation emphasizes the tactile quality of the handmade clay and highlights the unique surface details of every piece.

    Budget or Time Planning

    Creating a collection of miniature clay planters is an economical, time-efficient creative project that yields high-value home decor with minimal financial outlay. A standard ten-pound block of air-dry clay or natural terracotta provides sufficient material to build eight to twelve miniature planters, keeping the base material cost very low per completed vessel. Sourcing basic modeling supplies—such as wooden sculpting tools, acrylic rolling pins, and craft knives—as bundled starter sets significantly reduces initial tool expenses compared to purchasing individual pottery supplies. To optimize your crafting time, work in structured production batches rather than completing vessels one by one from start to finish. Dedicate an initial two-hour session to conditioning the clay, rolling slabs, and cutting all structural components, followed by an assembly session to join seams and punch drainage holes across all pieces. Factoring in adequate drying time is essential; allow air-dry vessels three to five days of slow curing before scheduling a final afternoon for fine sanding, interior waterproofing, and potting. This organized workflow maximizes crafting efficiency, minimizes material waste, and ensures every vessel cures thoroughly for lasting daily use.

    Creative Expansion and Advanced Inspiration

    Once you have mastered foundational pinch-pot and slab-building methods, exploring advanced ceramic techniques can elevate your miniature planter projects into unique, collectible art pieces. Consider experimenting with sgraffito surface decoration, a traditional ceramic method where a contrasting liquid clay slip is applied to the leather-hard exterior and carefully carved away to reveal the raw clay body beneath in intricate botanical patterns. Makers working with oven-bake polymer clays can explore faux stone finishes by blending metallic mica powders, ground granite dust, or charcoal flecks into translucent clay bases, producing realistic simulations of marble, soapstone, and raw concrete. Incorporating mixed-media elements—such as wrapping thick natural rattan around planter rims, inlaying crushed turquoise stone into carved geometric recesses, or attaching handcrafted brass wire handles—adds rich textural contrast alongside the matte clay surfaces. Another engaging direction is designing specialized micro-propagation vessels featuring removable top perforated collars that suspend plant cuttings over water reservoirs, turning functional plant rooting into an elegant, visible design feature for modern botanical homes.
  • 10 Hanging Clay Planter Ideas

    10 Hanging Clay Planter Ideas

    Hanging clay planters represent a foundational element in modern botanical interior styling, uniting organic ceramics with vertical spatial design. This comprehensive guide explores miniature to mid-sized clay suspensions engineered specifically to display trailing houseplants, succulents, and airy foliage without consuming floor area. Readers will acquire technical knowledge regarding clay slab rolling, pinch-pot sculpting, structural hole perforation, structural balance distribution, and durable cord assembly. Learning to handbuild suspended vessels offers an accessible gateway to mastering foundational ceramic techniques, including consistent wall thickness, shrinkage compensation, smooth edge finishing, and moisture management. Beyond decorative appeal, elevating plants off surfaces maximizes ambient light penetration, enhances air circulation around lower root foliage, and provides safe botanical placement away from curious pets. The self-contained scale of each planter makes it an approachable, highly practical creative project that transforms raw earth into functional vessels without demanding complex studio equipment. Whether your goal is assembling a curated vertical window display or crafting customized gifts, this tutorial equips you with systematic, actionable techniques to create durable, balanced, and visually refined handmade plant holders.

    Why This Idea Is Trending or Useful

    Vertical botanical displays have surged across contemporary Pinterest inspiration boards as urban living spaces embrace compact, multi-functional home decor. Suspended planters directly address spatial constraints by converting empty window frames, bare corners, and vertical wall planes into thriving indoor gardens. From an interior styling perspective, the rich tactile contrast between raw clay, metallic accents, and cascading green vines introduces a grounding natural aesthetic that complements minimalist style and modern design. As a DIY endeavor, handbuilding planters eliminates the high cost of mass-produced ceramics while allowing crafters to tailor dimensions to specific plant nursery pots. Beginners find this medium particularly rewarding because non-wheel techniques like slab construction and pinch potting tolerate natural imperfections and organic forms. Furthermore, the tactile process of shaping damp clay provides an engaging, screen-free creative project with tangible, lasting utility. The combination of minimal startup expense, flexible display locations, and immediate room enhancement ensures that hanging planter projects remain central to trending ideas in contemporary handmade living.
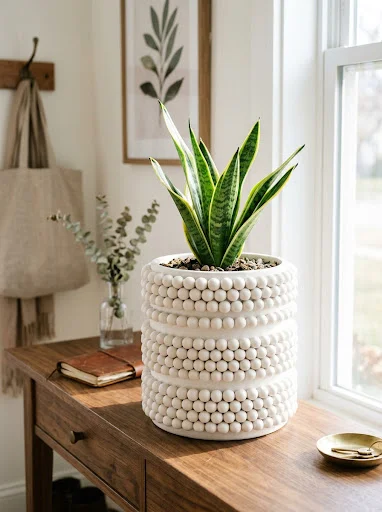
    Materials and Preparation

    Executing clean, structurally sound hanging clay planters requires selecting materials engineered to support soil weight, retain moisture, and hang plumb. Self-hardening air-dry clay or oven-bake polymer clay provides an excellent accessible medium for indoor decorative use, while kiln-fired stoneware clay yields fully vitrified, frost-resistant pots for outdoor installations. Essential handbuilding tools include an acrylic rolling pin, wooden guide slats measuring one-quarter inch thick, needle tools for precise trimming, flexible stainless steel rib scrapers, hole punch cutters, and a damp smoothing sponge. For suspension rigging, gather unbleached twisted cotton cord, durable hemp twine, or braided leather lace paired with solid brass O-rings and heavy-duty ceiling cup hooks. Preparation begins with clearing an expansive, non-porous work surface covered with canvas or parchment paper to prevent clay from sticking. Thoroughly knead the clay to eliminate internal air pockets that cause structural cracking during the drying or baking stage. Calculating the finished weight of the soil, plant, and pot ensures you select appropriately rated hardware and secure ceiling joists during your initial planning phase.

    1. Minimalist Matte White Demi-Globe Vessel

    1

    Setup Method

    The minimalist matte white demi-globe vessel uses a clean hemispherical silhouette that emphasizes negative space and architectural simplicity. The design concept focuses on a pure geometric half-sphere paired with recessed suspension points to keep the hanging cords sitting flush against the rim. The clean, unglazed white clay body presents an understated, powdery exterior that highlights the deep green tones of trailing plants like string of hearts or pearl succulents. Eliminating decorative surface patterns directs the eye entirely to the vessel’s curved contours and natural shadow transitions. This design functions exceptionally well in contemporary living spaces, matching Scandinavian and modern design interiors where clean lines and neutral palettes dominate. The balance of a rounded base with horizontal suspension rings creates an effortless visual floating effect that feels light and open in sunlit window apertures.
    Begin by rolling conditioned white clay between two quarter-inch wooden guide slats on a canvas work surface to establish an even thickness. Drape the flattened clay slab carefully into the interior of a six-inch spherical plastic or ceramic mold lined with plastic wrap, pressing outward from the center to eliminate trapped air. Trim the excess clay flush along the mold rim using a taut wire cutter or needle tool, then smooth the rim with a damp sponge. While the clay remains pliable inside the mold, use a five-millimeter brass hole punch to cut three equidistant holes exactly one-half inch below the top rim. Allow the clay to firm up to a leather-hard state before gently turning the bowl out of the mold to air-dry or cure in the oven. Cut three equal thirty-inch lengths of three-millimeter braided cotton cord, knot each end inside the punched rim holes, gather the strands at the top, and tie them securely to a brass hanging ring.
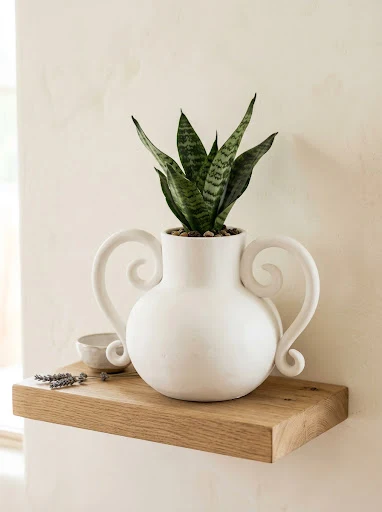
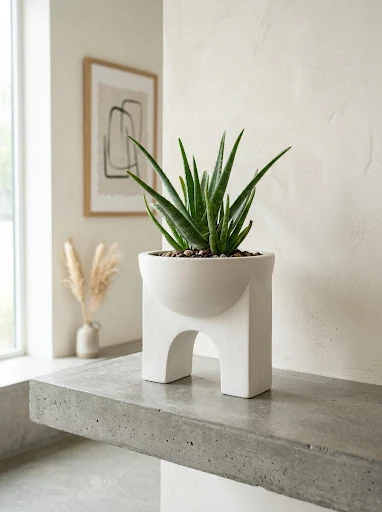
    2. Terracotta Cone Planter with Raw Leather Straps

    2

    Step-by-Step Guide

    The terracotta cone planter combines the rustic warmth of baked earthenware with the utilitarian durability of natural vegetable-tanned leather rigging. The structural appeal of this concept originates from its inverted conical taper, which channels the plant root ball into a compact, secure pocket. The earthy orange-red clay body remains unglazed, providing an authentic porous surface that naturally wicks excess moisture away from delicate indoor plant roots. The rich caramel tones of thick flat leather straps contrast sharply with the raw ceramic texture, introducing an elevated artisanal quality suitable for transitional and mid-century modern spaces. The steep conical profile keeps the visual profile slender, making it an ideal choice for narrow wall gaps, bedside corners, or double-hung window casings where wide vessels would obstruct light or movement.
    Roll a quarter-inch thick slab of terracotta clay into an expansive sheet, then cut a precise ninety-degree pie-wedge template using a metal ruler and craft blade. Lightly bevel both straight outer edges at opposing forty-five-degree angles, score the seam cross-hatch pattern with a needle tool, and apply a thin coat of water or clay slip. Roll the wedge around a conical cardboard armature, pressing the beveled edges together firmly with a wooden modeling tool to form a seamless cone. Cut two opposite five-millimeter holes through the upper walls one inch below the rim for strap placement. Once cured and fully dried, apply a non-toxic liquid acrylic sealer to the interior base to manage moisture containment. Thread two half-inch wide, twenty-four-inch long natural leather strips through the punched holes, folding each strap back onto itself and riveting the leather closed using heavy brass screw-post Chicago rivets.

    3. Scalloped Rim Ceramic Pod

    3

    Execution Process

    The scalloped rim ceramic pod takes inspiration from organic sea shells and botanical calyxes, incorporating a undulating wave along the upper edge of a bulbous base. The design concept shifts away from rigid geometric lines in favor of soft, natural contours that mimic unfolding flower petals. The flared rim catches natural ambient light, creating dynamic highlights that soften the transition between the suspended container and the green foliage emerging from within. Finished with an eggshell or satin-matte ceramic glaze, this vessel balances whimsical cottagecore elements with clean structural restraint. The scalloped perimeter provides functional benefits by creating natural resting notches for creeping vine stems, preventing delicate stems from kinking against sharp, straight ceramic edges as the plant trails downward toward the floor.
    Form a solid softball-sized sphere of conditioned clay, then insert your thumb deeply into the center to initiate a traditional pinch pot. Systematically rotate the clay ball in one hand, pinching outward with even pressure between your thumb and fingers to thin the walls to a consistent five-sixteenths inch thickness. To shape the scalloped perimeter, gently press the top rim outward over the side of a rounded wooden dowel at regular one-inch intervals, carving soft sinusoidal waves along the entire upper edge. Use a hollow leather punch to create three suspension perforations situated within the lower valleys of the scallops to ensure optimal hanging stability. Smooth the interior and exterior surfaces with a flexible silicone rib to erase finger indentations. After drying and final curing, suspend the pot using four-ply natural jute twine threaded through the perforations, securing each strand with a neat figure-eight knot tucked along the inside wall.

    4. Geometric Faceted Hanging Planter

    4

    How to Make

    The geometric faceted hanging planter showcases an architectural, polygonal exterior achieved through careful angle carving and directional light refraction. Rather than presenting a smooth curved bowl, the exterior walls feature interconnected triangular and diamond facets that catch light at distinct angles. The design evokes contemporary origami forms, turning a simple indoor container into a sculptural art piece that commands visual interest even without foliage. This modern silhouette pairs seamlessly with trailing succulents, spider plants, or geometric air plants, enhancing clean urban apartments and modern design interiors. The contrast between crisp geometric facets and soft, flowing botanical leaves generates visual tension that anchors open vertical wall spaces, establishing an eye-catching focal feature in entryways, living rooms, or home workspaces.
    Begin by rolling out a thick block of clay into a solid cylinder measuring five inches tall and five inches wide. Hollow out the central cavity using a metal loop wire trimming tool until you establish a consistent wall and base thickness of approximately three-eighths of an inch. Using a sharp modeling knife or razor tool, slice flat diagonal planes across the exterior wall surface, working sequentially in rows to produce rows of uniform triangular facets. Maintain a steady hand angle to ensure flat, crisp junction ridges between each cut plane. Perforate two pairs of parallel holes through the upper facet corners using a metal skewer, ensuring the holes line up precisely across the vessel diameter. Once the clay has dried completely and undergone firing or heat curing, thread thin, flexible steel wire or waxed nylon cord through the holes, securing the suspension harness with crimp beads hidden beneath the upper rim.

    5. Textured Coil-Built Hanging Basket

    5

    How to Create

    The textured coil-built hanging basket celebrates traditional ceramic manufacturing by showcasing raw stacked coil rings rather than smoothing them into a flat wall. The design concept turns the structural ribs of rolled clay cords into an intentional decorative pattern, producing an authentic, tactile ridged surface reminiscent of woven baskets. Subtle gaps between higher coils can be introduced to allow air circulation and provide integrated attachment points for hanging cords. The natural, hand-pinched ridges catch glazes in varying thicknesses, creating deep tonal variations across the pottery surface. This tactile approach honors traditional handcraft techniques, making it an excellent match for eclectic, bohemian, and modern rustic interior aesthetics that appreciate visible maker marks and honest material expression.
    Extrude or hand-roll ten to twelve even clay coils, each measuring approximately one-half inch in diameter and sixteen inches long, storing them under plastic wrap to preserve flexibility. Roll a flat circular slab four inches in diameter to establish the vessel base, scoring the outer perimeter edge with a needle tool. Apply slip or water to the scored circle and mount the first coil along the edge, pinching it firmly downward onto the base slab while leaving the outer cylindrical face untouched. Continue spiraling the coils upward, scoring between each layer and lightly blending the inside walls flat for structural integrity while keeping the exterior stacked ribs prominent and defined. On the penultimate coil layer, loop the coil outward to form three raised loop handles spaced evenly around the perimeter. Cure the piece thoroughly, sand the inner joints lightly, and attach strong, four-strand macramé hemp cords directly through the integrated clay loop handles.

    6. Speckled Stoneware Oval Canoe Vessel

    6

    Execution Process

    The speckled stoneware oval canoe vessel features an elongated horizontal profile that accommodates multiple small trailing plants within a single suspended planter. The design concept departs from typical circular bowls, offering a stretched oval boat shape that fits neatly along window sills, above dining tables, or over console surfaces. The ceramic body incorporates rich manganese or iron speckles into a light sand clay matrix, producing an organic texture that looks handmade and natural. The horizontal silhouette allows crafters to create layered arrangements by planting varied species—such as contrasting jade vines with silvery pearls—side by side. This suspended trough design distributes visual weight horizontally, making it an effective choice for anchoring wider spaces where several individual small hanging pots would appear cluttered or visually chaotic.
    Roll a rectangular clay slab measuring six inches wide, fourteen inches long, and three-eighths inch thick over a coarsely woven linen sheet to impart subtle textile texture. Cut an elongated oval template from the slab, then flare the long outer walls upward by six inches using a curved foam cradle support to maintain an even canoe contour. Score and reinforce the two pointed ends with small clay gussets on the interior to prevent the walls from slumping during drying. Cut two holes through the reinforced clay at each pointed terminal end, providing four suspension points that keep the elongated vessel balanced and level. Dry the vessel slowly under loose plastic wrap over five days to eliminate warping along the long bottom spine. Rig the planter using thin leather cords threaded through each end hole, joining them overhead into two paired apex loops hung from ceiling hooks.

    7. Hand-Carved Sgraffito Hanging Orb

    7

    Step-by-Step Guide

    The hand-carved sgraffito hanging orb combines spherical ceramic sculpture with graphic surface pattern design through contrast carving. The concept centers on a spherical planter bowl with a restricted opening, coated entirely in an opaque layer of dark liquid slip or underglaze. Using a sharp loop carving tool, the maker cuts through the colored surface layer into the leather-hard clay, exposing the light-toned clay body beneath to create clean, permanent line art. Repeating geometric hatch marks, delicate botanical leaves, or abstract wave patterns can be etched across the exterior, generating high-contrast surface drama. This technique transforms a basic clay planter into an artful decorative accessory, bringing vibrant tactile energy to spaces influenced by modern eclectic and mid-century aesthetic designs.
    Pinch two identical hollow hemispheres from buff-colored clay, smoothing the interiors until each bowl measures five inches across with a quarter-inch wall thickness. Score and slip the rims of both hemispheres, pressing them together to form a sealed, hollow sphere that traps air inside to maintain its shape while you work. Cut a circular plant opening measuring three inches across in the top quadrant, and carve three small drainage holes in the base. Coat the entire exterior with three layers of matte black liquid underglaze, letting the finish dry to a satin sheen. Using a fine-point loop sgraffito tool, gently etch rhythmic herringbone patterns through the black slip to reveal the pale buff clay underneath. Drill three hanging holes below the top rim, fire or bake the sphere to complete curing, and hang the vessel using thin, high-tensile stainless steel aircraft cable secured with brass ferrules.

    8. Layered Terrazzo Slab-Built Cylinder

    8

    How to Make

    The layered terrazzo slab-built cylinder introduces playful mosaic patterning into a clean, architectural drum silhouette. This design uses contrasting clay fragments—such as rich ochre, pastel mint, terracotta, and slate blue—embedded directly into a white polymer or porcelain base slab. Rolling the colorful chunks flush into the host clay produces an authentic terrazzo surface pattern with smooth transitions and flat planes. The straight vertical walls of the cylindrical drum create an architectural profile that highlights the random arrangement of the colorful terrazzo inclusions. This contemporary styling aligns with trendy Memphis modern and contemporary playful interior movements, offering a creative, lighthearted alternative to neutral earthware that suits creative workspaces, modern nurseries, and vibrant apartment corners.
    Condition small blocks of colored clay, rolling them into small snakes and slicing them into irregular flakes measuring two to four millimeters across. Scatter the colored chips randomly across an expanded, quarter-inch thick slab of rolled white clay, pressing them lightly into the surface with your fingertips. Place a sheet of parchment paper over the scattered clay and roll an acrylic pin firmly across the surface until the colored fragments are pressed completely flush into the white field. Cut a clean rectangle measuring four inches high by twelve inches long, alongside a separate three-and-a-half-inch circle for the base. Score and wrap the rectangle around the circular base, fusing the vertical seam with a smooth wooden paddle tool to form an architectural drum. Punch two opposing suspension holes near the top rim, cure the vessel, sand the exterior smooth with wet sandpaper, and hang using vibrant, color-matched paracord.

    9. Shallow Flying Saucer Air Plant Nest

    9

    Setup Method

    The shallow flying saucer air plant nest provides an ultra-light, aerodynamic silhouette designed specifically for epiphyte plants that require no soil and maximum air circulation. The vessel features two shallow, wide-brimmed discs joined at the perimeter, with a generous circular void in the upper center to cradle air plants. Because these air plants draw nutrients and moisture directly from the air, the clay walls can remain remarkably thin and lightweight. The minimal profile of the hovering saucer brings a modern architectural look to windowpanes, catching subtle air currents to turn slowly in the breeze. This design is an ideal creative project for beginners and apartment dwellers, requiring minimal hanging hardware and zero mess from soil or drainage drips, making it a safe choice over electronics, desks, and fine furniture.
    Roll a wide clay slab to a uniform thickness of three-sixteenths of an inch, using a compass or bowl to cut two matching seven-inch circles. Cut a three-inch circular window from the center of one disc to establish the open top seat for the plant. Place the solid bottom disc into a shallow concave paper plate to create a gentle upward curve, and gently flare the edges of the open top disc in an identical fashion. Score and slip the outer perimeters of both discs, pressing them together securely to form a hollow, disc-shaped saucer with an open central well. Use a fine needle tool to pierce three tiny suspension holes through the outer joined seam, spacing them symmetrically at 120-degree intervals. Once dry and cured, suspend the saucer using nearly invisible clear monofilament illusion cord connected to a ceiling hook, allowing the aerodynamic vessel to appear floating in midair.

    10. Tiered Vertical Triple-Clay Planter Column

    10

    How to Create

    The tiered vertical triple-clay planter column uses vertical modularity to combine three distinct graduated clay pots into a single cascading plant tower. This design maximizes vertical wall space, holding multiple trailing and upright plant varieties in a compact vertical footprint. Each pot in the stack is scaled down proportionally, creating a balanced pyramid effect that looks organized and deliberate. Using identical clay across all three vessels establishes visual harmony, while varied plant textures—such as upright ferns on top and trailing pothos at the bottom—provide organic balance. This vertical column works beautifully on narrow structural pillars, balcony walls, or patio uprights, turning neglected vertical space into an eye-catching, floor-to-ceiling indoor garden.
    Handbuild three open, flat-bottomed cylindrical pots measuring six inches, five inches, and four inches in diameter, maintaining consistent quarter-inch wall thicknesses across all three pieces. Cut three vertical hanging perforations through the floor and rim of each pot, aligning the holes along matching axes so a continuous cord can pass through the entire stack. After drying, curing, and firing the vessels, cut three heavy-duty ten-foot lengths of four-millimeter braided cotton cord, knotting all three cords together at an overhead brass ring. Thread the cords through the smallest top pot first, tying large, structural wooden beads onto the cords underneath the pot base to support its weight. Continue threading down through the middle and bottom planters, spacing the pots twelve inches apart with secure wooden support beads beneath each vessel. Mount the finished vertical column from a secure ceiling stud, populating each tier with lightweight potted plants.

    Common Beginner Mistakes and How to Avoid Them

    One frequent mistake among beginners is building planter walls with uneven thickness, which creates weak spots prone to cracking during drying or heat curing. When one section of clay dries faster than neighboring areas, internal stresses pull the clay apart, resulting in deep shrinkage fissures. Prevent this issue by using calibrated wooden guide slats on both sides of your rolling pin to ensure completely uniform slabs. Another common problem is punching suspension holes too close to the vessel rim. Placing a hole less than one-half inch from the edge leaves the clay wall too thin to support the combined weight of moist soil and ceramic material, often causing the rim to shear under load. Always position your suspension holes at least three-quarters of an inch below the rim, and soften the hole edges with a damp sponge so sharp cord friction does not wear down the clay. Finally, beginners often forget to account for hanging balance, ending up with vessels that tip forward and spill their contents when hung. Space your hanging points in an exact equilateral triangle, using a printed circular template to verify hole alignment before the clay hardens.

    Practical Tips for Better Results

    Achieving professional craftsmanship on hanging planters requires careful attention to clay moisture control, seam reinforcement, and dependable cord assembly. When joining clay slabs or structural components, thoroughly score both surfaces with a crisscross pattern and apply slip or water; simply pressing smooth clay pieces together will cause seams to separate as the clay shrinks. To achieve perfectly round, professional rims, lightly rotate a damp circular sponge over the edge while the clay is leather-hard to remove burrs and tool marks. If you plan to plant directly into the clay without interior plastic nursery pots, seal the inside with waterproof marine varnish or liquid rubber to prevent moisture from leaching through unglazed walls and causing mineral stains. For long-term hanging safety, use synthetic cords or waxed cords that will not rot from exposure to routine plant watering and humidity. Lastly, incorporate small swivel snap hooks at the top of your suspension cords; this allows you to rotate the planter smoothly, ensuring your plant receives balanced sunlight from all directions without tangling the hanging cords.

    Styling, Presentation, or Organization Ideas

    Hanging clay planters offer versatile styling potential across diverse architectural and interior spaces. Create an engaging window display by staggering three or five planters of varying shapes at different heights across a single window frame, forming a lush living curtain that filters sunlight. In small urban apartments, hang planters from sturdy ceiling brackets in unused corner nooks to add organic texture without cluttering walkways or valuable shelf space. You can also mount a horizontal birch branch or industrial black metal curtain rod across an accent wall, using it as an architectural rail from which to suspend multiple planters with matching brass S-hooks. When selecting foliage, match the plant’s growth habits to the shape of the pot: let cascading vines like string of nickels or trailing philodendron drape over low-profile bowls, and place upright architectural plants like snake plants or zebra haworthia in straight-sided modern cylinders.

    Budget or Time Planning

    Handcrafting hanging clay planters is a budget-friendly project that yields high-end decor accents at a fraction of retail boutique prices. A single ten-pound block of air-dry or ceramic clay costs very little and can produce three to five medium-sized hanging vessels, keeping your material investment minimal. The active crafting time for a single vessel typically spans one to two hours, making it an easy, manageable project to complete across a weekend afternoon. Plan your workflow across a systematic three-day timeline: spend day one shaping the clay forms, cutting clean hanging perforations, and refining surface textures; allow the clay to dry slowly and evenly on day two to prevent warping; and reserve day three for baking, sealing, threading cords, and potting your plants. Sourcing your suspension hardware—such as brass O-rings, leather laces, and ceiling hooks—in multipacks lowers your per-unit costs, making this project an economical way to create custom, personalized gifts for friends and family.

    Creative Expansion and Advanced Inspiration

    Once you master basic slab, coil, and pinch-pot methods, you can expand this craft into advanced designs and mixed-media projects. Experiment with integrating alternative raw materials, such as embedding polished quartz crystals into the exterior clay walls or wrapping planter necks in coiled wire or rattan reed. You can also explore multi-tiered kinetic mobiles by balancing horizontal ceramic spreader bars between stacked hanging bowls, creating dynamic, sculptural planters that turn gracefully in the air. For outdoor garden spaces, upgrade your clay body to a high-fire stoneware or porcelain fired in a professional kiln, creating weather-resistant planters capable of enduring freezing winter cycles without damage. Exploring varied textural finishes—such as hand-stamped botanical prints pressed directly from live garden leaves, or multi-layered reactive glazes applied over grogged clay—opens up limitless avenues for personal creative expression, allowing you to build an evolving collection of functional ceramic art.
  • 10 Polymer Clay Charm Bracelet Ideas

    10 Polymer Clay Charm Bracelet Ideas

    Handmade jewelry projects continue to dominate craft inspiration boards, offering a tactile way to express personal style through custom wearable art. This comprehensive guide explores ten creative polymer clay charm bracelet concepts designed to help makers craft durable, aesthetic, and professional-looking accessories. Readers will learn the core techniques required to condition oven-bake clay, sculpt uniform miniature charms, bake pieces safely without discoloration, and assemble balanced link bracelets. Understanding the mechanics of polymer clay jewelry provides practical benefits for both novice crafters and experienced designers. Rather than purchasing mass-produced metal trinkets that easily tarnish, working with clay allows you to produce lightweight, customized charms tailored to specific color schemes, seasons, or personal interests. This project teaches fundamental craft competencies including color blending, texture transfer, wire armature insertion, and secure jump ring closure. By focusing on structured methods, precise tool handling, and proper hardware selection, you can build a versatile charm collection that holds up to daily wear while remaining cohesive and visually appealing.

    Why This Idea Is Trending or Useful

    Miniature clay jewelry has seen a major resurgence in contemporary DIY spaces because it merges nostalgic charm bracelet traditions with modern minimalist aesthetics. In contemporary fashion, personalized accessories that tell an individual story are highly valued over standardized retail items. Polymer clay provides an exceptional medium for this creative project due to its remarkable versatility, lightweight nature, and wide range of specialty finishes, including translucent, metallic, and stone effects. Finished charms do not weigh down wrists like heavy pewter or zinc components, making them comfortable for everyday wear. For beginners, clay charm crafting offers high accessibility and low startup barriers. You do not need expensive jewelry casting machinery, soldering torches, or specialized kiln setups to achieve polished results; a standard kitchen oven and basic hand tools are sufficient. Furthermore, the modular nature of charm bracelets makes them ideal for phased crafting. Makers can complete one miniature charm in an afternoon, gradually building an intricate, multifaceted accessory over time that reflects genuine handmade artistry.

    Materials and Preparation

    Achieving smooth, durable, and crack-free polymer clay charms requires deliberate preparation and the right materials before modeling begins. Select premium oven-bake polymer clay blocks that cure with flexible durability rather than brittle hardness. Essential hand tools include an acrylic rolling roller, a rigid tissue slicing blade, double-ended ball stylus tools, needle tools, and fine-grain sandpaper sheets ranging from 400 to 1000 grit. For metal assembly, gather stainless steel or brass eye pins, open jump rings in four-millimeter and six-millimeter sizes, sturdy cable link chain, lobster claw clasps, and two pairs of smooth needle-nose pliers. Work surface preparation is critical for clean results. Always work on an ultra-smooth, non-porous ceramic tile or tempered glass sheet to prevent lint and fingerprint transfer. Clean your work tile and hands thoroughly with isopropyl alcohol before handling lighter clay blocks. Conditioning the clay thoroughly by hand kneading or rolling through a craft conditioning machine ensures plasticizers distribute evenly, eliminating internal air pockets that cause structural breakage during the baking cycle.

    Idea 1: French Bakery Pastry and Croissant Charm Bracelet

    1

    Step-by-Step Guide

    The French bakery charm collection celebrates miniature patisserie art, featuring iconic baked treats rendered with realistic crust textures and golden-brown pastry tones. This bracelet concept incorporates butter croissants, pastel French macarons, sliced fruit tarts, and braided brioche loaves evenly spaced along an antique brass chain. The key design element is realistic baked shading, which brings flat-toned clay to life by mimicking caramelization and flaky pastry layers. Using warm cream, golden ochre, and soft biscuit shades as a base, surface chalk pastels add depth and contrast across the ridges. The resulting charms offer high textural variety, ranging from the smooth gloss of fruit tart jelly glazes to the porous crumb of open pastries. When paired with warm brass or yellow gold hardware, this theme delivers a chic, European culinary aesthetic suitable for food lovers and cafe enthusiasts alike.
    Begin by mixing raw clay into a light ivory dough shade, conditioning it thoroughly until pliable. For the croissant, roll a flat triangle of clay, slice tiny horizontal ridges along the surface using a needle tool, and roll the triangle forward from the wide base toward the tip before bending the ends into a crescent. To create a macaron, form two flattened rounds in pastel pistachio or raspberry clay, texture the lower borders with a needle tool to create ruffled feet, and sandwich a thin disc of white cream clay between them. Shave dry brown and ochre chalk pastels into a fine powder with a craft knife, then lightly brush the pigment across the raised edges of the pastries using a soft dry makeup brush to replicate oven baking. Insert a two-inch stainless steel eye pin coated in liquid clay directly into the top center of each miniature pastry. Bake the charms on a tile at the manufacturer-recommended temperature for thirty minutes, allow them to cool completely, apply a matte water-based glaze, and attach each piece to a bracelet chain using six-millimeter jump rings.

    Idea 2: Botanical Succulent and Terracotta Pot Charm Cluster

    2

    How to Create

    The botanical succulent charm bracelet captures the geometric elegance of desert houseplants within a wearable micro-garden format. This design features an alternating sequence of miniature rosette succulents, hanging string-of-pearls beads, and tiny textured terracotta planters. Color choice is essential for this design: utilize muted sage greens, dusty eucalyptus teals, and soft lavender purples, finished with subtle rose-tinted tips that replicate sun-stressed succulent foliage. The miniature terracotta pots provide warm, earthy contrast against the cool green rosettes, anchoring the collection with rustic charm. Because botanical charms feature delicate petal structures, the leaves must be supported properly to withstand movement on the wrist. Stacking petals tightly around a central core ensures the finished charms remain compact, robust, and resistant to snapping during wear, making them ideal for everyday garden-inspired styling.
    Start by forming the miniature planting pots using rich terracotta-toned clay, rolling a short cylinder and tapering the bottom edge slightly before hollowing the interior with a round ball stylus. For the succulent rosettes, condition sage green clay, roll eight to twelve tiny teardrop-shaped balls, and flatten each teardrop into a pointed leaf petal between your fingertips. Assemble the plant by securing the largest petals in an overlapping circular base, gradually stacking smaller petals toward the center to build a full three-dimensional flower formation. Lightly dust the tips of the petals with powdered magenta pastel using a micro detailing brush to simulate natural botanical pigmentation. Insert an eye pin vertically through the center of the rosette, pushing the head down flush with the bottom. Bake the pieces on a bed of baking polyester fiber to prevent petal flat spots, let them cool, coat with an ultra-matte varnish to maintain an organic look, and secure the finished charms along a textured silver link bracelet.

    Idea 3: Vintage Fruit Orchard and Citrus Slice Bracelet

    3

    Execution Process

    The vintage fruit orchard bracelet showcases bright, colorful summer produce through detailed translucent clay layering techniques. This collection features miniature strawberry drops, whole peaches with velvety fuzz, plump blackberries, and translucent citrus wheel slices, including lemon, lime, and blood orange. The defining technique of this design involves building a cane for the citrus slices, using semi-translucent clay for the pulp segments surrounded by opaque white pith lines and a solid outer rind. When sliced with a rigid blade, the cane yields identical, paper-thin fruit sections that transmit light gracefully. Pairing rich glossy red berries with frosted matte stone fruits introduces dynamic tactile contrast. Suspended from a bright gold-plated cable chain, this vibrant charm layout provides an energetic, cheerful pop of color that pairs naturally with summer sundresses and casual linen outfits.
    To construct the citrus fruit cane, roll six elongated teardrop logs of translucent yellow or orange clay, wrapping each log in an ultra-thin rolled sheet of opaque white clay to represent the internal segment membranes. Bundle the six wrapped segments into a cylinder, fill the central void with a thin white clay cord, and wrap the entire exterior with a thin sheet of bright rind-colored clay. Gently roll and compress the large cane from the center outward until it reduces to an eight-millimeter diameter, then slice clean two-millimeter wheels using an unbent tissue blade. For strawberries, shape pointed red cones, impress uniform seed divots across the exterior with a needle tool, and attach a five-point green clay calyx to the crown. Insert silver eye pins into the tops of all fruits, using a dab of liquid polymer clay on the pin shafts to ensure a permanent bond. Bake according to package instructions, seal the berry and citrus surfaces with a clear UV gloss resin, and mount them onto an open-link charm bracelet.

    Idea 4: Coastal Sea Life and Shell Treasure Keepsake

    4

    Step-by-Step Guide

    The coastal sea life charm bracelet evokes the treasures of a secluded shoreline, incorporating miniature oceanic motifs with sandy, organic textures. This concept features realistic scallop shells, spiral auger shells, tiny starfish, and polished sea glass nuggets in oceanic blues and seafoam greens. Realism is achieved by using specialty translucent clays mixed with tiny flecks of brown granite clay or fine decorative craft sand to imitate ocean tumbled surfaces. The shells feature delicate linear fluting pressed directly into the clay with sculpting tools, giving the components realistic organic relief. Rather than using high-gloss plastic finishes, this piece relies on a smooth satin or frosted matte finish to evoke ocean-tumbled sea pottery and weathered shells. Displayed on a shimmering silver or surgical steel chain, this nautical design offers a refined, seaside accessory perfect for coastal vacations and warm-weather styling.
    Begin by rolling seafoam green, aqua, and translucent white clay into smooth slabs, cutting freeform organic pebble shapes with a craft knife to create sea glass beads. To form scallop shells, roll a teardrop of ivory clay, flatten it slightly onto your tile, and press radiating linear grooves from the narrow base to the wide rounded fan using the thin edge of a steel needle tool. To make miniature starfish, shape a small flattened disc of sand-colored clay, pinch five radiating arms outward, and texture the dorsal surface by gently pressing the tip of a fine-toothed mechanical pencil into the clay. Thread a stiff stainless steel headpin through each sea glass bead and shell, forming a clean wire loop at the top using round-nose pliers. Bake the components supported on a ceramic baking sheet dusted with cornstarch to preserve fine textural details. Once cool, wash off residual powder, coat lightly with diluted satin glaze, and hang the sea charms along a silver oval link chain.

    Idea 5: Whimsical Cottagecore Forest Mushroom and Acorn Bracelet

    5

    How to Create

    The whimsical cottagecore charm bracelet captures woodland magic through earthy, forest-floor botanicals, featuring speckled toadstools, textured acorns, and tiny woodland leaves. The design centers around miniature red fly agaric mushrooms with raised white polka dots, paired with earthy brown cupule acorns and muted moss-green oak leaves. This aesthetic leans into natural, rustic textures: the mushroom stems display gentle organic curves rather than rigid straight cylinders, while the acorn caps feature crosshatched textures pressed into deep umber clay. The deep forest palette—consisting of scarlet red, chocolate brown, deep forest green, and unbleached linen—provides an earthy aesthetic that coordinates well with knit sweaters and vintage clothing. Suspended from an antique bronze or oxidized copper chain, this woodland arrangement adds a storybook charm to seasonal autumn ensembles.
    Start by shaping the mushroom stems using unbleached ivory clay, rolling slightly tapered cylinders with wider bases and curving them gently to suggest organic growth. To craft the caps, form small domes of bright crimson clay, hollow the bottoms slightly to fit over the stem tops, and attach them using a thin drop of bakeable liquid clay. Roll micro-sized spheres of white clay, flattening them firmly across the red mushroom dome to form flat, durable polka dots that fuse during baking. For acorns, form an oval bead from warm beige clay, shape a small cup of dark chocolate clay, impress a detailed crosshatch pattern across the cup using a dull craft knife, and seat the cap onto the acorn bead. Pierce each woodland charm with a bronze eye pin from bottom to top, forming a secure loop at the crest. Bake on a ceramic tile, let cool, brush with a non-yellowing protective matte varnish, and connect the charms to an antique bronze chain using heavy-gauge jump rings.

    Idea 6: Celestial Starlight and Crescent Moon Talisman

    6

    How to Make

    The celestial starlight charm bracelet translates the mystery of the night sky into a refined, mystical accessory featuring crescent moons, eight-point starbursts, and miniature marbled planetary spheres. This piece utilizes deep cosmic tones, incorporating midnight navy blue, deep amethyst purple, and shimmering pearl clays accented with metallic gold mica powder. The crescent moons feature graceful, sweeping profiles with tapered horns, while the stars incorporate centered micro-sized crystal rhinestones pressed directly into the raw clay prior to baking. Swirling translucent clay with metallic pearl and tiny amounts of fine gold glitter produces a dimensional galaxy effect within the planetary orbs. Styled along an understated gold paperclip chain, this celestial bracelet serves as an elegant, talisman-inspired accessory suited for both casual daytime layering and evening occasions.
    To create the celestial elements, roll out a flat, uniform three-millimeter slab of midnight blue clay mixed with a pinch of gold mica powder. Use miniature metal cookie cutters or a sharp scalpel to stamp out sharp crescent moon shapes and symmetrical starburst silhouettes from the slab. To form the galaxy planets, twist thin snakes of black, pearl white, and deep purple clay together, fold the blend twice, and roll the marbling into tight, spherical beads between your palms. Gently press a heat-safe glass crystal or flat-back metallic rhinestone into the center of each starburst, embedding it flush within the raw clay walls. Pierce eye pins through the vertical axis of the moons and planets, ensuring the loops sit upright and aligned. Bake the pieces at the specified temperature, taking care to tent foil over the tray to prevent the mica-rich clay from scorching. After cooling, brush on a coat of high-gloss polyurethane varnish to amplify depth, and link the charms to a gold paperclip chain.

    Idea 7: Retro Pop Diner and Sweet Dessert Bracelet

    7

    Execution Process

    The retro pop diner charm bracelet channels mid-century ice cream parlor nostalgia through playful miniature sweets, including swirled milkshakes, frosted ring donuts, and cherry-topped sundaes. This design utilizes a bright pastel palette consisting of cotton candy pink, mint green, banana yellow, and creamy milk white, accented with vibrant confectionery details. The donuts feature textured pastry bases topped with wavy coats of glossy pink glaze and multi-colored clay sprinkle rods, while miniature sundae glasses are crafted from translucent clay filled with swirled ice cream layers and micro fruit slices. The lively, high-contrast colors and rounded shapes give this bracelet an animated aesthetic. Assembling these cheerful dessert charms on a shiny silver rolo chain creates a conversational piece that brings lighthearted joy to everyday casual wear.
    To make the miniature donuts, roll a small ball of tan-colored clay, flatten it slightly into a thick disc, and pierce the center with the rounded back end of a small paintbrush to create an even hole. Texture the exterior perimeter with a stiff-bristle toothbrush to replicate fried dough, then apply a thin layer of liquid polymer clay tinted with bright magenta pigment across the top face to form melted icing. Roll microscopic strands of primary-colored clay, slice them into tiny sprinkle lengths, and scatter them across the wet liquid icing. For the milkshake charm, build a tapered cone of translucent clay, crown it with a textured white swirl of whipped-cream clay, and insert a two-millimeter segment of striped plastic craft wire to serve as a retro drinking straw. Insert silver eye pins into the pastry tops, cure the charms in the oven, apply high-gloss glaze over the iced surfaces while leaving the dough matte, and fasten each charm onto a sturdy silver rolo bracelet chain.

    Idea 8: Southwestern Desert Terracotta and Turquoise Mosaic

    8

    Setup Method

    The Southwestern desert bracelet brings together earthy geology and tribal jewelry traditions, pairing faux turquoise stones with rustic terracotta tiles and carved feather charms. This concept relies on specialty clay manipulation techniques that imitate natural mineral stones, utilizing turquoise-colored clay veined with acrylic paint to mimic real spiderweb matrix webbing. These faux mineral stones are paired with raw geometric clay slabs stamped with Aztec or Southwestern patterns, finished with dry metallic patinas. The balance between cool, bright turquoise and warm earthen clay creates a grounding color harmony inspired by arid desert landscapes. Suspended along a burnished antique copper or dark oxidized brass chain, this artisanal charm bracelet adds a rustic, handcrafted focal point that pairs naturally with denim, silver cuffs, and bohemian styling.
    To create the faux turquoise stones, chop a conditioned block of vibrant turquoise clay into irregular rough chunks, dust the exposed edges generously with dark umber acrylic paint, and let the paint dry to a tack. Recompress the coated clay chunks into a solid block, roll the mass into organic nugget beads, and slice through the block to reveal natural-looking matrix veins running through the stone. For the decorative tiles, roll a thin sheet of terracotta clay, stamp geometric southwestern borders into the surface using carved craft stamps, and cut out uniform diamond and rectangle shapes. Shape slender leaf pendants from terracotta clay, carving fine linear feather ribs along the surface with a scalpel. Drill holes through the top of each charm using a steel needle tool before curing. Bake according to instructions, sand the faux stones smooth under running water with 800-grit sandpaper, buff with a soft denim cloth to a natural sheen, and assemble along an antique copper chain using heavy jump rings.

    Idea 9: Modern Monochrome Marble and Geometric Bead Cluster

    9

    Step-by-Step Guide

    The modern monochrome marble charm bracelet focuses on refined architectural balance, clean lines, and neutral interior styling principles. This minimalist design features a curated mix of sharp geometric charms—including cubes, flat hexagonal tablets, and clean disc beads—rendered in white Carrara marble, slate grey, and matte basalt black. The faux marble effect is achieved by gently twisting stark white clay with thin threads of translucent and charcoal clay, producing soft stone veins that flow across the geometric forms. The absence of bright color allows the clean geometric silhouettes and surface textures to command visual attention. Paired with polished rhodium or sleek matte black jewelry hardware, this contemporary charm bracelet functions as a sophisticated, versatile accessory suitable for professional workwear and modern minimalist outfits.
    Begin by conditioning a large portion of pure white clay until soft and pliable. Roll a micro-thin snake of soft black clay, lay it randomly across the white clay block, and fold the clay three times, rolling the block into a cylinder to stretch the black veins into delicate marbling patterns without blending the colors into solid grey. Flatten the marbled slab between two guide rails to achieve an even four-millimeter thickness, then use metal geometric cutters to stamp out crisp hexagons, squares, and circles. For dimensional interest, roll a few solid slate grey and basalt black clay cubes, slicing the corners cleanly with a rigid tissue blade to produce multifaceted geometric prisms. Carefully drill vertical suspension holes through each geometric bead using an unheated steel pin. Bake the pieces on a smooth ceramic tile, wet-sand the cured edges with 1000-grit sandpaper for a smooth finish, apply a satin stone sealant, and string the charms onto a minimalist paperclip chain.

    Idea 10: Whimsical Honeybee and Daisy Blossom Garland

    10

    How to Make

    The whimsical honeybee and daisy bracelet captures the freshness of a sunny spring meadow through charming garden insect and floral sculpting. This design pairs adorable three-dimensional honeybees with clean white daisy blossoms and textured golden honeycomb hex tiles. The bees feature plump striped bodies in golden amber and black clay, accented by translucent pearl wings angled backward as if in mid-flight. The accompanying daisies feature layered white petals surrounding textured yellow seed centers, creating a bright botanical contrast against the amber tones. The sunny color scheme—consisting of honey gold, daisy yellow, soft pearl, and bright white—brings cheerful seasonal energy to everyday outfits. Suspended from an interconnected bright gold cable chain, this sunny botanical accessory provides an uplifting touch of handcrafted springtime charm.
    To sculpt the miniature honeybees, roll an eight-millimeter oval body using rich golden-yellow clay, then roll micro-thin strings of black clay to wrap around the abdomen to form clean horizontal bee stripes. Form two small, paper-thin drop shapes from translucent pearl clay, pressing them together onto the bee’s back to establish delicate resting wings. To create the daisies, form ten tiny teardrop petals from bright white clay, arrange them in a flat circle, and press a flattened dome of yellow clay into the center, texturing the seed core with a needle tool. For the honeycomb charms, cut flat hexagons from warm honey clay, impressing clean hex grids into the face with a miniature geometric stamp. Insert stainless steel eye pins along the horizontal axis of each bee and through the top petal of each flower. Bake the pieces carefully, let them cool, apply a clear gloss varnish over the yellow honeycomb and bee abdomens, and fasten them along a bright gold-plated link chain.

    Common Beginner Mistakes and How to Avoid Them

    Novice clay crafters often encounter structural issues that cause charms to snap, discolor, or fall off bracelet hardware during wear. The most frequent error is under-baking polymer clay. Many beginners remove charms from the oven early out of fear of scorching, but insufficiently baked clay remains brittle, causing thin sections like flower petals or animal limbs to break under light pressure. Always use an independent oven thermometer to verify true internal temperatures, baking charms for the full thirty to forty-five minutes recommended on the packaging; clay cures through time and proper heat, not by drying out. Another common mistake is inserting smooth metal eye pins directly into raw clay without an anchoring agent. Metal does not chemically fuse with polymer clay during baking, meaning straight pins often pull out over time. Prevent this by bending the bottom tip of your eye pin into a tiny hook or zigzag before insertion, or coat the pin shaft with liquid polymer clay to create a secure mechanical lock within the cured charm. Finally, working on dusty or unwashed surfaces introduces lint, dust, and fingerprints into light-colored clays; always clean your hands, blades, and work tiles with rubbing alcohol before starting.

    Practical Tips for Better Results

    Achieving professional, boutique-quality finishes on polymer clay jewelry requires dedicated attention to refining techniques and surface preparation. One effective method for eliminating surface fingerprints before baking is gently smoothing raw clay surfaces with a cotton swab lightly dampened with ninety-percent isopropyl alcohol. The alcohol dissolves surface binder residue, leaving a clean, satin-smooth finish that requires far less sanding later. When cutting out precise geometric charms or slicing canes, cool your conditioned clay in the refrigerator for fifteen minutes prior to cutting. Chilling firms the plasticizers, preventing the blade from compressing round profiles into distorted ovals. When assembling charms onto bracelet links, always open jump rings using a lateral twisting motion with two pairs of smooth-jaw pliers, rather than pulling the ends outward. Twisting preserves the circular integrity of the metal loop and prevents metal fatigue, ensuring jump rings close flush with no gap for the chain link to slip through. Additionally, apply baking polyester batting or a mound of cornstarch on your baking tile to support dimensional, multi-layered charms, preventing flat contact spots from developing on curved surfaces during heating.

    Styling, Presentation, or Organization Ideas

    Handcrafted polymer clay charm bracelets offer broad styling versatility, functioning as playful standalone accents or layered complements within curated jewelry stacks. When styling a statement charm bracelet, pair it with simple, minimalist metal bangles or smooth stone bead bracelets in matching metal finishes to create a textured wrist stack that does not compete visually with the charms. If presenting a finished charm bracelet as a handmade gift, mount the piece across a branded kraft-paper jewelry card, securing the chain behind the card with gentle washi tape before sliding it into an embossed cotton-filled gift box. For organized home storage, avoid tossing clay charms loosely into tangled jewelry drawers where metal clasps can scratch delicate surfaces. Instead, hang charm bracelets individually from a vertical wooden jewelry stand, or store them flat in partitioned velvet-lined tray organizers away from direct sunlight and excessive humidity. When coordinating outfits, draw upon one or two secondary colors found within the miniature charms—such as matching a forest green sweater to a woodland mushroom charm—to tie your accessories and wardrobe together into a cohesive look.

    Budget or Time Planning

    Crafting a full ten-piece charm bracelet can be managed efficiently on a modest budget through structured batch processing and material planning. Polymer clay is an economical craft medium, as a standard two-ounce block yields dozens of miniature charms. To maximize your budget, purchase a core set of primary colors alongside large blocks of translucent and white clay; mixing custom shades from a basic palette is far more cost-effective than buying individual pre-mixed novelty specialty blocks. From a time management perspective, approaching charm creation in sequential production stages accelerates completion. Dedicate your first session to planning scale, sketching designs, and conditioning color mixtures. Spend a second session sculpting all clay components, adding surface textures, and inserting eye pins in a continuous assembly line. Bake all elements together in a single oven batch to save time and energy, using the cooling interval to prepare your metal chain, cut jump rings, and set up assembly tools. Setting aside two to three hours for sculpting followed by one hour for baking and metal assembly allows you to finish a complete, high-quality charm bracelet over a single weekend.

    Creative Expansion and Advanced Inspiration

    Once you master the basic modeling and assembly techniques detailed in this guide, you can expand your clay charm crafting into more complex, multi-media designs. Experiment with liquid polymer clay finishes, using tinted translucent liquid gels to create hyper-realistic dripping fruit syrups, miniature latte foam art, or crystalline honey drizzles that cure with high gloss. You can also explore incorporating mixed materials, such as embedding raw semi-precious crystal chips, freshwater seed pearls, or tiny dried flower petals directly into raw clay charms before baking. For advanced structural variety, learn how to build complex miniature canes featuring kaleidoscope mandalas, intricate citrus segments, or detailed floral cross-sections that can be sliced repeatedly to produce matching sets of earrings, necklaces, and phone charms that coordinate with your bracelet. You might also experiment with applying gold metal leafing across raw clay, then gently distressing the surface with a stiff brush to create vintage crackled gilded effects, transforming simple clay beads into luxurious, heirloom-quality jewelry components that showcase advanced craftsmanship.
  • 10 Geometric Polymer Clay Ring Ideas

    10 Geometric Polymer Clay Ring Ideas

    Geometric polymer clay rings represent a vibrant intersection of sculptural craft and wearable contemporary style across current DIY inspiration channels. This comprehensive tutorial explores how to design, shape, and cure bold architectural finger rings using accessible modeling compounds and basic household tools. Many aspiring jewelry makers encounter difficulties with clay jewelry due to brittle structural seams, incorrect oven temperatures, and improper sizing around human fingers. Through this structured guide, you will master the principles of polymer clay conditioning, dimensional slab construction, seamless ring band shaping, and professional post-bake finishing methods. Learning these geometric principles allows you to transform humble blocks of clay into sophisticated statement pieces that showcase clean lines, angular facets, and striking color blocking. The project requires no expensive metalworking setups, torches, or industrial casting molds, making it an exceptional entry point for beginners and experienced artisans alike. Whether you intend to produce bespoke accessories to complement personal fashion collections or create thoughtful handcrafted gifts for friends, these practical ideas offer actionable techniques to achieve durable, gallery-quality results from your own workspace.

    Why This Idea Is Trending or Useful

    Sculptural polymer clay rings have gained significant popularity across modern design feeds because they offer an expressive, lightweight alternative to traditional cast-metal jewelry. Modern fashion continuously embraces chunky, expressive accessories that showcase playful geometry, retro Memphis motifs, and clean architectural aesthetics. Handcrafted clay enables makers to produce large, eye-catching silhouettes that remain comfortable for all-day wear without weighing down the hand. From a practical perspective, polymer clay is a non-toxic, highly forgiving material that cures rapidly in a standard home toaster oven without specialized kiln equipment. The accessibility of this medium empowers beginners to experiment freely with color mixing, marbling, and surface textures without major financial risk. Furthermore, custom ring fabrication allows for bespoke sizing that accommodates individual finger shapes, eliminating the sizing limitations of commercial fast-fashion jewelry. The balance of modern design relevance, functional wearability, low production costs, and limitless creative freedom makes geometric clay rings an enduringly popular creative project for makers seeking satisfying, quick-turnaround artistic results.

    Materials and Preparation

    Achieving durable, professional-quality polymer clay rings requires proper materials, ergonomic modeling tools, and meticulous preparation before unboxing your clay. Select professional-grade polymer clay blocks known for their high tensile strength and flexibility after baking, avoiding low-density novelty clays that become brittle when exposed to daily hand movement. Essential equipment includes an acrylic rolling rod or mechanical clay conditioning machine, precise stainless steel craft tissue blades, geometric micro-cutters, silicone shaping tips, and an aluminum or wooden ring mandrel for accurate finger sizing. Additional supplies encompass ceramic work tiles, wet-and-dry automotive sandpaper in assorted grits from four hundred to twelve hundred, rubbing alcohol, lint-free cloths, oven thermometers, and liquid polymer clay for strong bond reinforcement. Preparation begins by thoroughly washing and drying your hands and wiping down your work surface with rubbing alcohol to remove dust, lint, and residual skin oils. Proper planning involves measuring the target knuckle circumference with paper strips and matching it to corresponding mandrel steps, factoring in minimal post-cure shrinkage to ensure an exact, comfortable fit.

    Idea 1: Architectural Hexagonal Arch Band

    1

    Step-by-Step Guide

    The architectural hexagonal arch band draws inspiration from brutalist architectural arches, featuring a wide, flat exterior perimeter structured into six precise, symmetrical facets around an inner circular finger cavity. This design replaces conventional cylindrical ring bands with a bold, flat-sided geometric profile that sits comfortably across the base of the finger while showcasing clean angles to the viewer. The hexagonal structure provides structural thickness along the upper bridge, preventing stress fractures across high-friction contact points without feeling overly bulky between adjacent fingers. By pairing an earthy neutral tone like terracotta or sandstone with sharp edges, this piece offers an understated modern aesthetic that complements everyday minimalist wardrobes. The uniform width of the band creates a balanced look suitable for standalone wear or clean stacking alongside slim metal bands.
    To construct this ring, condition a portion of terracotta polymer clay until pliable and roll it into a uniform six-millimeter thick slab using depth guide sticks. Wrap a strip of parchment paper around a metal ring mandrel at your desired finger size to prevent sticking. Use a sharp tissue blade to cut a clean clay ribbon measuring twelve millimeters in width, then wrap the strip firmly around the prepared mandrel step, slicing the overlapping ends at a clean forty-five-degree angle to create an invisible mitered joint. Smooth the seam thoroughly using a flat silicone tool and a tiny drop of liquid polymer clay. Next, use a flat acrylic ruler to gently press six distinct, equal flat facets along the outer circumference while the ring remains mounted on the mandrel, checking the symmetry from the front profile. Bake the ring directly on the mandrel in a preheated oven at the manufacturer’s specified temperature for thirty-five minutes, let it cool completely, and wet-sand the outer facets to reveal crisp, geometric edges.

    Idea 2: Cantilevered Prism Block Ring

    2

    How to Make

    The cantilevered prism block ring explores asymmetrical balance by suspending an oversized, dimensional rectangular prism horizontally across an offset circular band. This design references modernist industrial structures, using deliberate asymmetry to draw visual focus toward the outer edge of the hand. The foundational band remains thin and low-profile, while the upper block extends past the knuckle in an intentional overhang that creates striking negative space between adjacent fingers. By choosing contrasting monochrome tones—such as a deep charcoal block perched atop a crisp chalk-white band—you highlight the clean geometric lines of the silhouette. The piece serves as a striking conversation-starter, proving that everyday modeling materials can yield high-end gallery aesthetics when approached with precise architectural planning.
    Begin by rolling out a three-millimeter slab of chalk-white clay and wrapping a narrow five-millimeter ribbon around your sized ring mandrel, smoothing the underside joint to create the base band. To create the cantilevered block, condition a block of charcoal clay and compress it into a dense, solid brick measuring twenty millimeters in length, ten millimeters in width, and eight millimeters in height. Use an ultra-sharp tissue blade to trim all six faces of the brick, ensuring ninety-degree corners and flat, glass-smooth surfaces. Use a needle tool to score the contact point on top of the cured or raw white band and apply a small drop of bakeable liquid polymer clay adhesive. Press the charcoal prism firmly onto the band, offsetting it toward one side by five millimeters to create the dramatic cantilevered overhang. Bake the assembled structure supported by crumpled aluminum foil to prevent sagging, cool slowly, and finish the flat planes with dry microfiber polishing pads.

    Idea 3: Stepped Art Deco Zigzag Ring

    3

    Execution Process

    The stepped Art Deco zigzag ring incorporates tiered, ascending geometric levels that evoke the iconic glamour of 1920s skyscraper facades. The design features a central raised chevron or pyramid peak flanked by symmetrical descending steps cut into the top portion of the ring band. This tiered silhouette creates an illusion of elongation on the hand, making fingers appear longer and more slender through vertical directional lines. Combining rich jewel tones like deep emerald green, sapphire blue, or mustard ochre with metallic gold foil inclusions adds historic depth to the clean geometric profile. The structural rigidity of the stepped tiers reinforces the upper arch of the ring, ensuring exceptional resistance to bending or cracking during everyday wear.
    Start by rolling out two slabs of emerald green polymer clay: one at four millimeters thick for the inner core and another at two millimeters for the layered exterior steps. Form the primary base ring around a glass or metal mandrel, smoothing the interior seam to ensure a round finger channel. Cut three pairs of narrow rectangular clay strips from the thinner slab, sizing each pair progressively shorter by three millimeters to form the tiered elevation. Stack the strips symmetrically on top of the base band, centering the longest piece and building upward to the smallest top cap to create stepped terraces. Use a sharp blade to trim the outer edges at a crisp sixty-degree angle, forming an ascending chevron peak. Gently burnish micro-sheets of gold leaf onto the vertical faces of the steps using a soft dry paintbrush to accentuate the dimensional geometry, bake thoroughly, and seal with a matte protective glaze.

    Idea 4: Dual-Tone Interlocking Torus Ring

    4

    Setup Method

    The dual-tone interlocking torus ring consists of two separate, perfectly circular geometric rings linked permanently through one another, creating kinetic tactile movement on the hand. Rather than using a static, rigid silhouette, this design embraces functional movement, allowing the two contrasting circular bands to roll smoothly over the knuckle during daily wear. The cross-section of each individual ring is shaped into a crisp flat-sided ribbon or an equilateral triangle rather than a rounded donut, reinforcing the geometric theme. Pairing contrasting hues, such as warm terracotta alongside cool sage green, produces visual interaction as the bands slide and shift positions with hand movement. This project provides an excellent lesson in multi-stage baking, as one band must be cured and finished before forming the second interlinked ring through its center.
    Begin by conditioning a strip of sage green clay, extruding or slicing a triangular-profile rod with four-millimeter sides. Form this rod around your sized mandrel, join the seam with liquid clay, smooth the joint with a silicone rib, and bake it completely according to package instructions. Once the sage green ring has cooled and been sanded, condition a matching volume of warm terracotta clay and shape an identical triangular rod. Carefully thread the unbaked terracotta strip directly through the center opening of the cured sage green ring, wrapping it around the mandrel alongside its partner. Carefully seal the second ring’s connection seam using a tiny drop of liquid clay and an angled blade, ensuring the unbaked band moves freely around the cured ring without sticking. Return the linked pair to the oven, baking the entire assembly while supported on a bed of baking soda to prevent flat spots, resulting in a linked kinetic set.

    Idea 5: Cylindrical Monolith Signet Ring

    5

    Step-by-Step Guide

    The cylindrical monolith signet ring modernizes the traditional signet ring by replacing traditional rounded family crests with a flat, circular column rising from a thick tapered band. This design features substantial volume, creating an unbroken transition from the lower finger band into a wide, perfectly flat circular face. The flat face provides an ideal canvas for minimalist geometric surface techniques, such as contrasting terrazzo flecks, fine linear sgraffito carvings, or subtle two-tone color splits. The bold, monolithic weight gives the ring a substantial presence that grounds casual street-style outfits and minimalist tailored workwear. Its solid construction eliminates fragile overhangs or delicate connection points, resulting in an exceptionally durable ring that withstands active daily routines.
    Condition a block of slate-gray clay and press it into a tapered ring band around your mandrel, keeping the underside five millimeters wide and thickening the top bridge to eight millimeters. Roll a separate two-millimeter slab of contrasting bone-white clay containing baked colored clay crumbs to create a graphic terrazzo sheet. Use a fifteen-millimeter circular stainless steel cutter to punch out a round medallion from the terrazzo slab, along with an identical circle from the gray clay to act as a backing pad. Secure the circular disk assembly directly to the thickened top platform of the ring band using liquid polymer clay, blending the lower edge smoothly into the band using a rounded wooden modeling tool. Inspect the top face with a small spirit level to ensure it rests flat and parallel to the finger hole. Bake the signet on a ceramic tile, let it cool completely, and sand the top face through wet grits up to twelve hundred to reveal the crisp embedded terrazzo chips.

    Idea 6: Faceted Diamond-Cut Band

    6

    How to Make

    The faceted diamond-cut band embraces a subtractive sculpting method where multiple triangular and rhomboid facets are carved directly into a thick, cured or leather-hard clay loop. This design breaks away from flat surfaces to mimic the precision facets of a cut gemstone, creating dynamic surface geometry that reflects ambient light at diverse angles. The thickness of the band allows for deep, deliberate slicing that reveals crisp internal planes, producing a tactile surface that feels textured and engaging to the touch. When created using deep jewel-toned translucent clays—such as smoky quartz, amber, or amethyst—the sliced facets capture light beautifully, giving the cured polymer a semi-precious stone appearance. This technique teaches precise blade handling, empowering crafters to transform simple extruded bands into complex geometric forms.
    Roll out a thick, round sausage of translucent amber clay measuring eight millimeters in diameter, wrapping it around the mandrel and blending the seam thoroughly to form a heavy, uniform donut band. Bake this foundational band for twenty minutes to achieve a semi-cured, firm state that resists finger denting while remaining easy to carve with a fresh craft blade. Once cool enough to handle, use a brand-new scalpel or flexible tissue blade to slice off tiny triangular shavings from the outer corners and perimeter, working systematically around the circle to create alternating triangular facets. Maintain a consistent blade angle of thirty degrees during every cut to produce uniform geometric planes across the entire exterior. Inspect the band to ensure no cuts penetrate too deeply near the inner finger wall, return the faceted ring to the oven for an additional thirty minutes to complete the full cure, and polish each flat facet with dry denim to produce a natural satin luster.

    Idea 7: Open-Ended Geometric Bypass Ring

    7

    Execution Process

    The open-ended geometric bypass ring abandons the closed circular loop in favor of an adjustable C-shaped silhouette where the opposing ends bypass one another across the top of the knuckle. Each terminal end is finished with a distinct three-dimensional geometric shape, such as a crisp cube on one side and a sharp triangular pyramid on the other. This open structural design provides slight flexibility, allowing the ring to accommodate seasonal knuckle swelling and fit multiple fingers comfortably. The contrast between the opposing geometric terminals adds visual intrigue, creating an asymmetrical composition that sits gracefully on the hand. Pairing bold, high-contrast colors like matte black and bright cobalt blue emphasizes the visual separation between the shapes, making it a standout modern accessory.
    Begin by conditioning durable, high-flexibility polymer clay in matte black, rolling it into a four-millimeter square profile rod using a clay extruder or manual rolling guides. Form the rod around your mandrel into a loose spiral or open horseshoe, ensuring the two ends overlap horizontally across the top without touching. Sculpt two separate geometric terminals: hand-form a six-millimeter cube from black clay, and form an equilateral pyramid from bright cobalt clay using a tissue blade. Insert short half-inch segments of eighteen-gauge craft wire halfway into the base of each geometric terminal, securing them with a tiny drop of bakeable liquid clay. Insert the protruding wire ends into the cut ends of the open band to create a reinforced internal armature that prevents the shapes from snapping off during wear. Bake the open bypass ring on the mandrel supported by crumpled foil, cool thoroughly, and sand the geometric faces smooth.

    Idea 8: Floating Rhombus Negative Space Ring

    8

    Setup Method

    The floating rhombus negative space ring uses an open geometric silhouette to frame natural skin within its perimeter, producing an airy statement piece that feels light on the hand. Rather than using a solid plate, the focal point is an open diamond or rhombus outline that spans across the finger, supported by a dual-shank split band underneath. The open negative space in the center reduces the physical weight of the large geometric outline while preventing moisture buildup on the skin during warm weather. The clean diamond silhouette introduces bold diagonal lines that contrast beautifully with the horizontal lines of the fingers, creating a dramatic, contemporary jewelry profile. Finished in a minimalist matte black or crisp bone white, this design embodies modern Scandinavian and Bauhaus jewelry aesthetics.
    Roll out a four-millimeter thick slab of conditioned clay and use nested diamond-shaped cookie cutters to punch out an open rhombus frame with three-millimeter wall borders. Lay the cut diamond flat on a smooth ceramic tile and use a tissue blade to refine the four external corners into crisp, sharp points. To construct the split supporting band, roll two thin two-millimeter clay snakes, joining them together at the base of the finger while allowing them to branch outward into a V-shape near the top bridge. Place the open rhombus frame directly across the twin branches of the band on the mandrel, reinforcing the contact joints with liquid polymer clay and smoothing the seams on the underside with a miniature ball-stylus tool. Bake the assembly flat on the tile with support under the ring band to prevent sagging, allow it to cool, and finish all edges with fine sandpaper.

    Idea 9: Inverted Trapezoid Signet Ring

    9

    Step-by-Step Guide

    The inverted trapezoid signet ring updates vintage signet silhouettes through sharp angles, featuring a face that tapers inward toward the base of the finger to create an inverted wedge profile. The top horizontal surface remains wide and flat, while the side walls angle sharply downward toward a narrow lower band, giving the piece a tapered, industrial form. This inverse geometry focuses visual weight along the top edge, creating clean lines that look striking when viewed from above. The flat trapezoidal face can be left clean and unadorned, or detailed with contrasting linear clay inlays to create subtle geometric patterns. Using a muted, architectural palette like olive drab, warm slate, or deep sienna complements the industrial lines of the ring, resulting in an understated accessory suited for modern everyday styling.
    Condition olive-drab clay thoroughly, rolling a section into a solid wedge block that measures twelve millimeters across the top edge and eight millimeters along the bottom, with a depth of six millimeters. Cut a corresponding four-millimeter wide flat band, wrap it around your sized mandrel, and join the seam securely. Center the trapezoidal block on top of the band, using a flat blade to press the side walls inward at a seventy-degree angle to establish the inverted trapezoid profile. Cut ultra-thin hair-like strips of white clay and lay them across the flat top face in diagonal intersecting lines, rolling gently with a smooth acrylic rod to embed the stripes flush with the olive surface. Trim the perimeter to ensure the trapezoid edges remain sharp and crisp. Bake the completed signet ring directly on the mandrel, cool slowly, and sand the top face to reveal the embedded geometric line work.

    Idea 10: Stackable Triangular Chevron Trio

    10

    Execution Process

    The stackable triangular chevron trio consists of three separate, V-shaped pointed ring bands designed to be worn nested together into a single wide geometric band or split across multiple fingers. Each individual band features a sharp forward-pointing apex that fits flush against its neighboring ring, creating an interlocking puzzle ring set. This modular design provides versatile styling options, allowing the wearer to change the arrangement daily—wearing all three nested together for a bold statement or wearing single chevrons across different fingers for a minimalist look. Utilizing an ombre color palette across the three rings, such as cream, taupe, and deep espresso, highlights the interlocking geometry of the set while providing natural visual depth.
    Roll out a smooth, uniform three-millimeter slab of polymer clay for each of your three chosen ombre shades. Using a steel ruler and a sharp tissue blade, cut straight strips measuring four millimeters wide from each color slab. Wrap the first strip around the mandrel, using your fingers and an acrylic block to pinch and form a sharp ninety-degree V-shaped apex centered along the top bridge before trimming and joining the underside seam. Repeat this process for the second and third strips, fitting each uncured ring against the first to ensure the chevron points nest together with zero gap between them. Carefully separate the three matched rings and position them upright on a baking rack or bead-baking tray to prevent them from fusing together during the curing cycle. Bake for thirty minutes at the recommended temperature, let them cool completely, and lightly sand the interior and exterior contact edges to ensure the three rings slide together smoothly on the finger.

    Common Beginner Mistakes and How to Avoid Them

    A frequent mistake beginners make when crafting polymer clay rings is failing to condition the clay thoroughly before shaping the band. Unconditioned clay harbors brittle microscopic pockets and poorly integrated plasticizers, which causes completed ring bands to snap or crumble under normal finger flexion. Prevent this issue by kneading raw clay thoroughly until it becomes warm, soft, and flexible, passing it through a dedicated clay roller at least fifteen times before cutting shapes. Another widespread error is under-baking the finished pieces in an effort to avoid scorching the outer surfaces; under-cured polymer clay remains weak, rubbery, and prone to breaking. Always verify your internal oven temperature with a standalone analog oven thermometer rather than relying on oven dials, and bake pieces for at least thirty to forty-five minutes to allow the plastic compounds to cross-link into a durable structure. Crafters also frequently create ring bands with thin, razor-sharp edges that cut uncomfortably into adjacent fingers during everyday wear. Ensure long-term wearing comfort by gently beveling or rounding the interior edges of your bands using fine-grit sandpaper after curing. Finally, avoid applying thick liquid polymer clay adhesives without firm contact pressure, as loose seams can separate under daily tension.

    Practical Tips for Better Results

    To achieve clean, gallery-quality results with geometric clay rings, mastering precise cutting and post-bake finishing methods makes all the difference. When slicing geometric planes and trimming sharp faceted edges, always use a brand-new, ultra-thin stainless steel tissue blade rather than dull craft knives, which drag through soft clay and distort your straight lines. Keep a bottle of ninety-nine percent isopropyl alcohol and a lint-free cotton swab on hand to gently clean your raw clay forms before baking; this dissolves surface fingerprints, removes stray dust, and smooths out tiny imperfections without altering your geometric geometry. For flat-faced rings like signets or rectangular prisms, bake the pieces resting flat on a polished ceramic tile covered with a sheet of smooth deli paper; this prevents shiny glazed spots and prevents the underside from flattening unevenly. Embrace the wet-sanding process after curing, submerging your rings in a shallow bowl of lukewarm water with a drop of dish soap while progressing through four hundred, six hundred, eight hundred, and twelve hundred grit sandpapers. Finally, buff your cured, sanded rings vigorously with a scrap piece of raw cotton canvas or clean denim; this produces a gorgeous, natural satin sheen without requiring cloudy chemical liquid varnishes.

    Styling, Presentation, or Organization Ideas

    Styling your handcrafted geometric clay rings thoughtfully enhances their modern aesthetic, turning individual accessories into elevated statement accents. These architectural pieces look striking when worn as standalone thumb or index finger statement pieces, pairing beautifully with tailored wool blazers, minimalist linen apparel, and clean monochrome manicures. For a curated look, contrast the bold proportions of a chunky faceted ring with a few ultra-thin hammered gold or silver wire bands worn on adjacent fingers, balancing sculptural volume with delicate metallic accents. When presenting your rings for gifts or handmade craft market sales, mount them into custom slotted foam inserts nestled inside natural kraft cardstock boxes debossed with minimalist line art. In your home dressing area, display your ring collection on a tiered wooden ring cone rack, a stepped terrazzo tray, or a modern concrete jewelry dish; this keeps your accessories organized while showing off their clean geometric silhouettes as mini sculptures when not in use. You can also group your finished pieces by color families in divided acrylic organizers, protecting the matte surfaces from dust while keeping your favorite everyday accents ready to wear.

    Budget or Time Planning

    Crafting geometric polymer clay rings is an exceptionally affordable and time-efficient DIY project that delivers high-end accessories on a modest budget. A standard two-ounce block of artist-grade polymer clay costs just a few dollars and yields six to eight completed rings, keeping your material investment minimal per finished piece. To optimize your crafting hours, batch your production into organized, focused sessions: spend one evening conditioning clay, mixing custom color formulas, and cutting clean geometric bands, then bake the entire batch together in a single oven run. Curing takes roughly forty-five minutes per batch, during which you can clean your tools and prep your sanding station. Allocate a second evening for wet-sanding and buffing the batch while listening to music or podcasts, which keeps the repetitive finishing work relaxing and efficient. Using standard household items—such as metal drinking straws, razor blades, parchment paper, and wooden knitting needles for sizing—eliminates the need for costly jewelry tools early on. This efficient workflow allows you to produce a cohesive, eight-piece collection of custom rings over a single weekend, making it an ideal creative project for holiday gift making or starting an artisanal craft business.

    Creative Expansion and Advanced Inspiration

    Once you feel comfortable with foundational geometric shaping and clean slab assembly, you can explore limitless artistic possibilities to expand your jewelry collection. Experiment with surface texturing by pressing wire mesh, etched acrylic plates, or woven fabrics into damp clay slabs before cutting your bands, creating subtle textural contrasts across your geometric facets. You can also explore colored clay marbling, blending small amounts of contrasting clay colors into raw clay to produce swirled, stone-like patterns like faux agate, jade, or lapis lazuli running through the geometric planes. For advanced functional features, incorporate small recessed cavities into your geometric ring tops to hold tiny faceted glass crystals, dried botanical fragments, or metallic brass balls using UV resin after curing. Expanding into matching geometric accessories—such as coordinating faceted stud earrings, triangular pendants, or cuff bracelets—allows you to build cohesive, high-fashion accessory collections that showcase your distinctive design style. Mastering these sculptural clay techniques gives you the foundation to design bold, original jewelry pieces that bring modern design and handcrafted warmth to your everyday wardrobe.