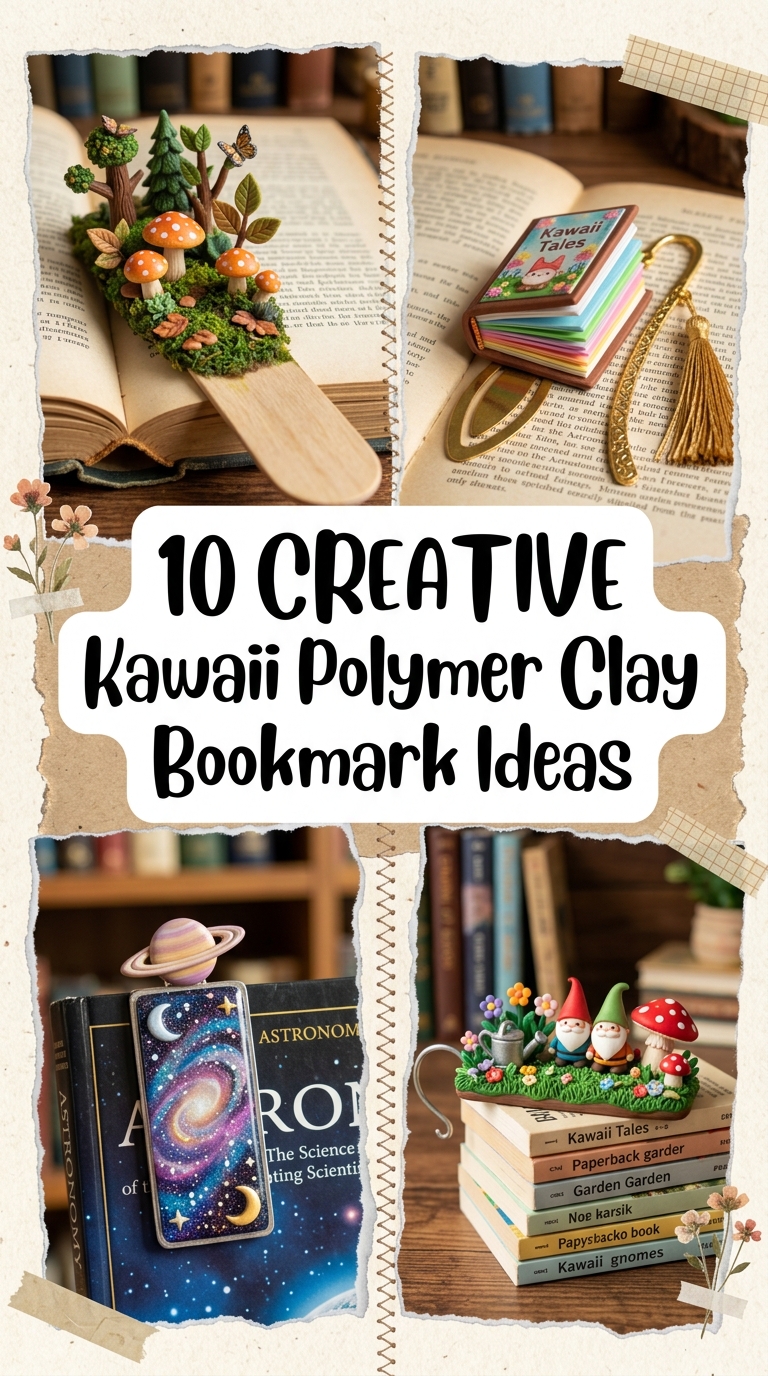
Handcrafted stationery combines personal utility with distinctive artistic expression, turning standard reading routines into visually delightful daily moments. Kawaii polymer clay bookmarks represent a popular creative niche, merging Japanese cuteness culture with durable, functional home accessories and desk tools. This comprehensive guide details ten imaginative bookmark concepts that pair sculpted oven-bake polymer clay toppers with sturdy metal paper clips, elastic bands, and smooth ribbons. Readers will discover essential methods for conditioning colorful clay, sculpting miniature animal faces and charming miniature snacks, attaching mechanical bases, and curing finished items safely. Learning to work with miniature proportions allows crafters of any skill level to turn simple modeling materials into enduring, practical page keepers. These items serve as reliable place markers in personal planners, sketchbooks, study journals, and bedside fiction without damaging delicate paper fibers. By understanding foundational forming mechanics, temperature monitoring, and surface sealing, anyone can complete charming handcrafted markers that withstand regular page turning. Crafting these decorative markers offers genuine creative enjoyment while producing personalized gifts that bring warmth and character to personal desks, study spaces, and curated bookshelf displays.
Why This Idea Is Trending or Useful
Playful stationery accents continue to gain momentum across online creative boards because they offer accessible DIY appeal, tactile charm, and useful organization benefits. Modern readers and planning enthusiasts frequently look for customized accessories that bring joy to structured tasks like studying, daily tracking, or bullet journaling. Sculpted clay markers fulfill this desire by transforming inexpensive, standard office supplies into miniature collectible artworks displaying expressive, cheerful aesthetics. Polymer clay remains an ideal medium for beginners due to its forgiving working properties, wide color spectrum, and long shelf life before thermal curing. Crafters can achieve polished, professional results without purchasing expensive studio equipment or enrolling in specialized sculpting courses. The miniature scale of these designs ensures minimal material consumption, allowing makers to experiment freely with pastels, simple geometric silhouettes, and playful motifs. Furthermore, these compact projects take very little time to complete, yielding immediate satisfaction within an afternoon crafting session. Handcrafted clay markers seamlessly bridge the gap between creative relaxation and functional organization, making them an enduring staple in modern stationery design.
Materials and Preparation
A successful sculpting session relies on proper tool selection, clean work surfaces, and systematic botanical and polymer preparation before heat curing. Essential materials include quality oven-bake polymer clay blocks in selected pastel and vibrant hues, heavy-duty metal jumbo paper clips, and liquid polymer bakeable adhesive. Useful sculpting instruments include smooth acrylic rolling pins, double-ended dotting tools, non-stick ceramic work tiles, fine-edge hobby blades, and soft blending brushes. Before opening any clay packages, thoroughly sanitize your workspace, hands, and metal implements with isopropyl alcohol wipes to eliminate rogue dust, skin oils, and lint. Condition every portion of raw clay by kneading it between clean palms until it feels completely pliable, smooth, and free of internal micro-fractures. Keep small airtight containers or plastic films nearby to shield conditioned portions from ambient particulate contamination while sculpting individual components. Plan your dimensional scales carefully, ensuring clay toppers remain lightweight, balanced, and appropriately proportioned to prevent tipping or stressing your chosen metal bookmark bases.
Idea 1: Smiling Strawberry Milk Carton Page Clip
How to Create
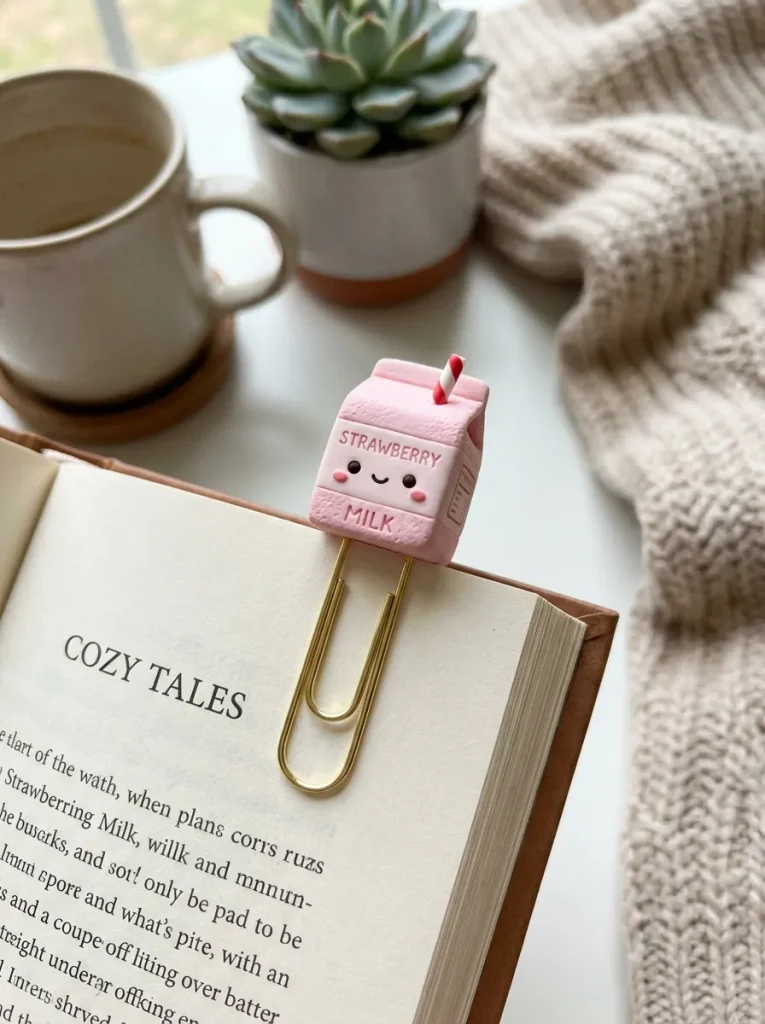
The smiling strawberry milk carton marker features a charming rectangular pastel pink drink box, complete with a tiny straw and miniature illustrated accents. This concept highlights geometric construction combined with soft, welcoming curves to evoke a nostalgic, cozy breakfast aesthetic. The carton shape provides a flat, reliable surface that bonds cleanly to metal clip hardware, ensuring the finished piece remains flush against paper margins. Tiny details—such as rounded white carton folded flaps, bright red berry appliques, and cheerful facial features—give the simple structural block distinct personality. Using soft millennial pink and crisp opaque white clay provides high contrast, making the small marker immediately identifiable between novel pages. The substantial flat backing provides maximum structural support, reducing the risk of accidental detachment during daily book transport in satchels and backpacks.
Condition pastel pink polymer clay thoroughly, then shape a solid rectangle measuring approximately one inch in height, three-quarters of an inch wide, and a quarter-inch thick. Use an acrylic blade to slice clean, straight vertical edges, gently angling the top portion inward to establish the sloped roof of a classic drink carton. Add a thin, folded strip of white clay across the angled crest to mimic a carton seal, and insert a miniature rolled cylinder of red-and-white clay for the drinking straw. Using the smallest dotting tool, indent two shallow eye sockets into the pink face, pressing microscopic balls of black clay flush inside each impression. Add tiny petal-pink blush circles on either side of the smile, then invert the carton to coat the upper loop of a metal paper clip in liquid clay adhesive. Press the adhesive-coated metal wire into the carton back, capping it with a thin pink clay patch, then bake the piece flat on a ceramic tile.
Idea 2: Sleepy Cloud with Pastel Rainbow Drops
Step-by-Step Guide
The sleepy cloud marker embraces soft minimalist charm by pairing a billowy, pristine white cloud form with dangling pastel raindrops or a textured curved rainbow. This design utilizes gentle bulbous geometry, producing a tactile, rounded silhouette that feels comforting to handle while flipping through journal sections. The calm facial detailing—featuring curved closed eyelids and pale peach cheeks—embodies the relaxing ambiance associated with quiet bedtime reading. Soft white clay provides a versatile visual backdrop that works nicely with subtle pastel accents in mint, lavender, and buttercup yellow. Because the cloud body remains wide and horizontal, it sits securely along the top margin of a book, framing the paper edge without obscuring surrounding text. This project is well suited for beginners learning how to blend joined spherical clay elements into unified, seamless shapes without introducing surface indentations.
Roll five small, slightly graduated spheres of bright white polymer clay, pressing them together laterally on a smooth ceramic surface to establish a cloud outline. Use a silicone chisel blender to smooth the interlocking bottom seams, creating a flat base while preserving the rounded domes along the upper perimeter. Roll two paper-thin strands of dark gray or black clay, curving each into a tiny upward arch to form contented, sleeping closed eyelids. Press these curved strands onto the front surface using light brush pressure, then apply soft chalk pastel dust beneath each eye with a cotton swab to form blush. Invert the cloud shape onto clean cardstock, and press the rounded upper third of a durable metal paper clip into the lower rear center. Cover the embedded metal wire with a generous layer of liquid translucent clay, then seal it completely with a flat white clay strip before baking thoroughly.

Idea 3: Cheerful Glazed Donut with Raised Sprinkles
How to Make
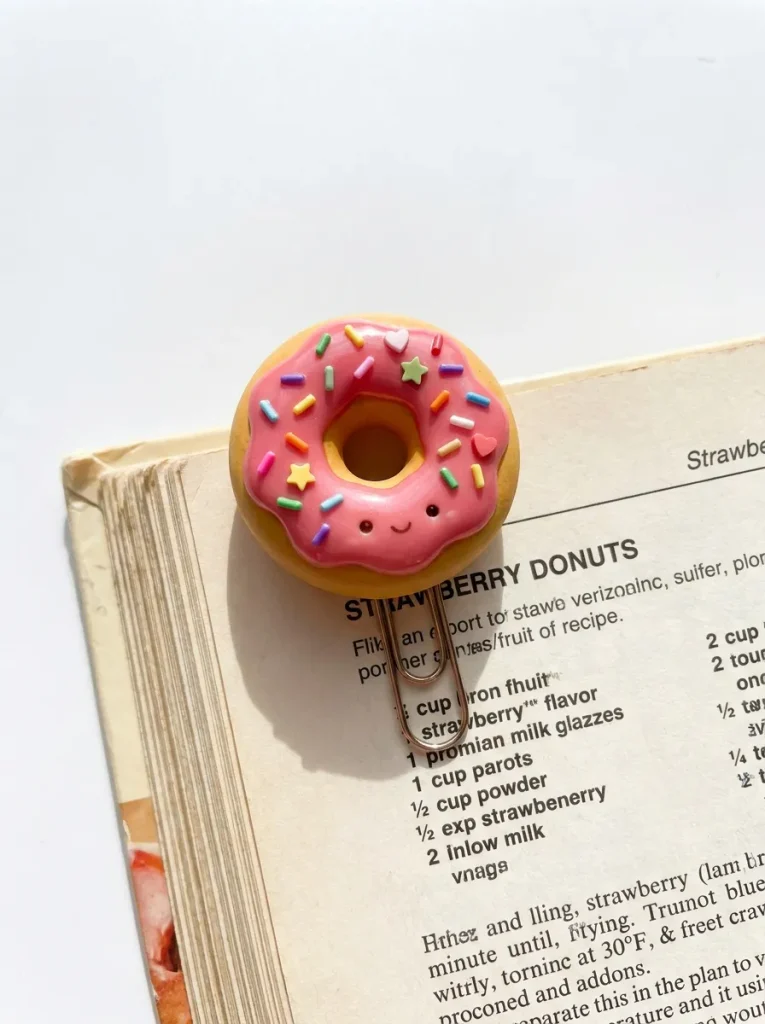
The cheerful glazed donut marker is a playful miniature food design featuring a golden-tan pastry base layered with colorful glossy frosting and textured sprinkles. This sweet food miniature relies on circular symmetry, soft organic contouring, and vibrant color contrasts to catch the eye instantly on a reader’s desk. The raised colorful sprinkle strands create a subtle three-dimensional relief, giving the smooth confection marker an appealing tactile quality. A cheerful curved smile placed beneath the central hole adds an expressive touch to the classic pastry silhouette without complicating its clean outline. This project helps crafters practice foundational clay skills like custom color mixing for realistic baked tones, even clay sheet flattening, and delicate miniature extrusions. When mounted onto an elongated silver or gold paper clip, the donut topper serves as a delightful visual treat bookmarking recipe collections or reading lists.
Mix equal parts light beige, translucent, and warm yellow clay to produce an authentic light-tan dough shade, rolling it into a smooth half-inch sphere. Flatten the sphere slightly with your palm until it reaches three-eighths of an inch in thickness, then punch a neat central hole using the wide end of a metal straw. Smooth the inner and outer donut edges with your fingertip to create rounded, organic pastry contours, softening any sharp cut marks. Roll a very thin sheet of bright strawberry-pink clay, cut a wavy circular boundary, and press this frosting layer directly onto the top face of the dough ring. Roll several microscopic, thread-thin logs of blue, mint, lavender, and white clay, slicing them into tiny two-millimeter segments to form colorful raised sprinkle strands. Press the sprinkles onto the frosting, attach two tiny black clay eye beads, secure your metal clip into the lower back using liquid clay, and bake as directed.
Idea 4: Cozy Boba Milk Tea Cup with Cheerful Tapioca Pearls
Execution Process
The cozy boba milk tea cup marker translates the popular modern beverage into a whimsical, collectible desk accessory that complements planners and notebooks. This design features a clear or creamy pastel cup silhouette filled with rich milk tea tones, topped with a puffy dome lid and chunky straw. The bottom of the drink cup displays tiny dark spheres representing tapioca pearls, providing dimensional visual interest through layered translucent materials. Adding sweet, friendly facial expressions to the center of the cup gives the everyday beverage container a lighthearted persona. The sturdy tapered-trapezoid cup shape provides an exceptionally stable mounting foundation for paper clip hardware, ensuring the topper remains upright on bound pages. This project provides practical experience with layered clay assembly, crisp structural cutting, and using translucent clays to mimic liquid depth in miniature craft projects.
Condition warm caramel-colored clay mixed with twenty percent translucent clay to create the rich, authentic appearance of steeped black milk tea. Roll this blend into a smooth three-millimeter-thick sheet, using an acrylic craft blade to slice a clean, slightly tapered cup shape measuring one inch tall. Form eight to ten miniature round beads from dark brown clay, pressing them firmly along the lower interior perimeter of the caramel cup to represent tapioca pearls. Roll a small dome of white clay to represent a rounded drink lid, attaching it along the top rim along with a small pastel straw cylinder. Use a ball stylus to press two small eye depressions into the center of the cup, filling each with glossy black clay, then add a delicate mouth. Coat the back of the tea cup with bakeable adhesive, anchor the top of a wide metal clip, cover it with matching clay, and cure in the oven.

Idea 5: Sleepy Panda Resting on a Fresh Green Bamboo Shoot
Setup Method
The sleepy panda resting on a bamboo shoot showcases classic animal cuteness through striking, high-contrast monochrome tones and clean, rounded anatomy. This sculptural concept positions a relaxed panda cub draped horizontally across a vibrant green bamboo stem, creating a balanced horizontal topper for books. The stark contrast between the bright white body, rich black limbs, and emerald foliage makes the character instantly noticeable against cream-colored book pages. Its relaxed horizontal posture keeps the center of gravity low and stable, preventing the marker from twisting or torquing paper edges during transit. Crafters will enjoy practicing two-color balance, seamless head-to-body joins, and sculpting delicate, miniature leaf details that frame the main animal character. The resulting marker adds a gentle, calming presence to study guides, personal reading materials, and workspace planners.
Roll a smooth oval of bright white clay measuring roughly three-quarters of an inch wide to form the panda’s resting torso and head. Attach two teardrop-shaped pieces of deep black clay horizontally along the front of the body to form sleepy, draped front paws. Add two small black clay circles to the head for rounded ears, and create two angled black eye patches containing microscopic white highlight beads. To construct the supporting bamboo shoot, roll a narrow cylinder of spring-green clay, segmenting it gently with shallow indentations made with the back of a craft blade. Position the resting panda directly atop the green bamboo shoot, smoothing the lower contact points together using a silicone blending tip. Press the curved end of a sturdy metal clip into the back of the bamboo shoot, applying liquid clay adhesive, and seal with a smooth green strip before curing.

Idea 6: Kawaii Smiling Avocado Half with a Heart-Shaped Pit
How to Create
The kawaii smiling avocado half utilizes organic contours, rich natural gradients, and a playful heart-shaped seed to create a sweet, modern design. This concept highlights a pear-shaped silhouette containing concentric color zones that shift gracefully from dark forest green skins to soft creamy-lime flesh. Transforming the central avocado seed into a dimensional raised heart gives the traditional fruit illustration an endearing, affectionate personality. The raised heart pit also provides a natural focal point, drawing the eye to the center of the miniature sculpture while adding pleasing three-dimensional relief. The smooth teardrop shape forms an exceptionally durable base with no delicate protruding limbs, minimizing the risk of edge breakage during frequent book handling. Working on this piece introduces crafters to nested teardrop shaping, smooth concentric color layering, and symmetrical facial placement.
Form a firm teardrop base using deep hunter-green clay, rolling it three millimeters thick to establish the firm outer rind of the avocado half. Roll a slightly smaller teardrop sheet of soft pastel lime clay, centering and smoothing it directly over the dark green base to form inner flesh. Sculpt a distinct heart shape from warm chocolate-brown clay, smoothing its rounded lobes before pressing it firmly into the center of the lime layer. Using a miniature needle tool, carefully indent two cheerful curved eyes and a tiny upturned smile into the center of the raised brown heart. Add two faint circular pastel blush patches onto the lime flesh beside the heart pit using dry cosmetic pigment applied with a small brush. Turn the layered avocado over, position your metal paper clip firmly against the dark rind, secure with liquid clay, seal with green backing, and bake.
Idea 7: Blushing Star with Sparkling Celestial Accents
Step-by-Step Guide
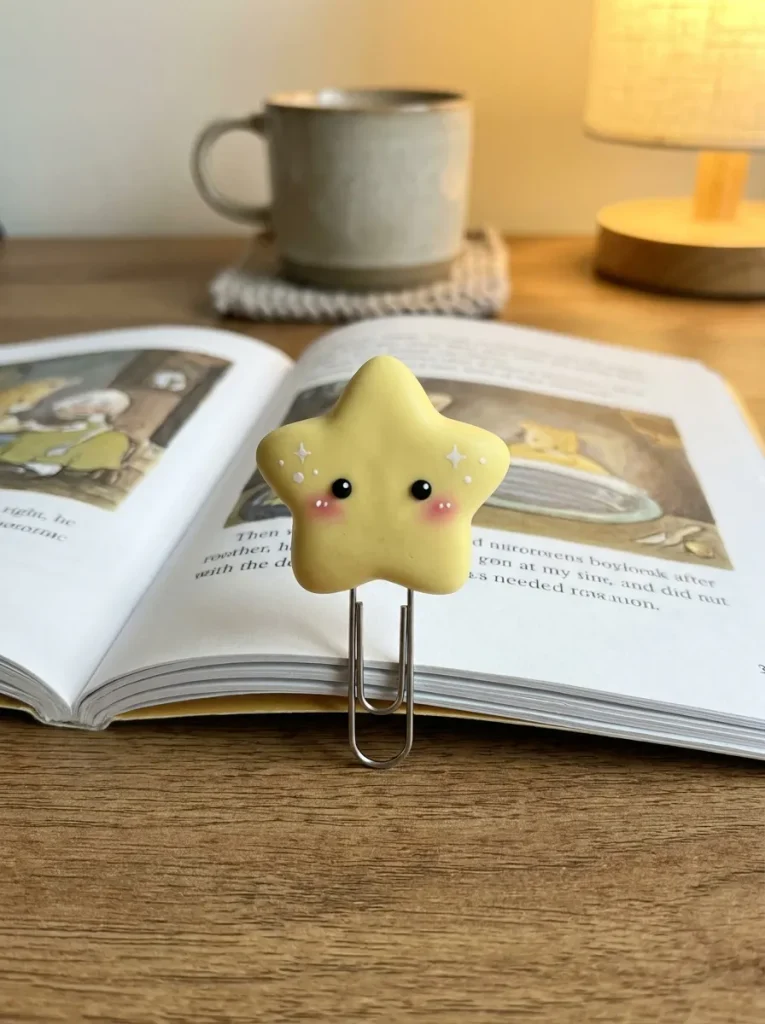
The blushing star with sparkling celestial accents combines geometric symmetry, gentle pastel tones, and soft celestial charm to create a radiant reading companion. This design features a plump five-pointed star finished with softened, rounded tips that avoid catching or tearing fragile paper pages during use. Accenting the central cheerful face with miniature white accent dots and pale rose cheeks evokes classic storybook illustrations of the night sky. Soft pastel butter-yellow or warm cream clay maintains a gentle visual presence that works well across diverse planner layouts and fiction formats. Because a five-pointed star features wide, radiating points, it creates an expansive, well-supported base that anchors firmly against metal clip assemblies. This project provides excellent practice in shaping balanced five-point radial symmetry by hand without flattening essential soft, pillowy contours.
Knead warm pastel yellow polymer clay until soft, rolling it into a smooth, plump ball roughly one inch in diameter on your work tile. Gently pinch five evenly spaced mounds around the perimeter of the sphere, resting the clay on your work tile to establish symmetrical star points. Soften each point using your thumb and index finger, pressing the tips lightly inward to create smooth, rounded star points rather than sharp edges. Use a fine-tip stylus to mark two eye positions in the center of the star, inserting small dots of black clay with microscopic white shine accents. Lightly shade the cheek zones with pulverized pink chalk pastel using a dry, soft-bristled brush to give the star character a warm, friendly glow. Secure the rounded head of a wide metal clip to the reverse side using liquid polymer adhesive, cover the connection with yellow clay, and bake flat.
Idea 8: Miniature Potted Succulent in a Terra Cotta Dish
How to Make
The miniature potted succulent marker brings refreshing botanical greenery and rustic earth tones to your desk accessories in a compact, durable format. This design features a squat, flared terra cotta pot holding a cluster of fleshy, dusty-green rosette leaves that look just like miniature echeveria plants. Adding a cheerful face to the front of the planter transforms a traditional garden element into a charming companion for study sessions. The combination of warm orange-clay planters, soft sage-green foliage, and dark soil accents offers rich color contrast and textural interest. The solid, wide-based flower pot creates a secure, flat foundation for attaching clip hardware, ensuring the arrangement remains stable during use. This project teaches miniature leaf assembly, concentric botanical arrangement, and realistic clay texturing methods that make handmade stationery pieces stand out.
Condition rich terra cotta-colored clay, shaping it into a small trapezoid three-quarters of an inch wide that tapers gently toward a flat bottom base. Add a thin, horizontal clay strip across the wider top edge to form the raised structural lip of a classic garden flower pot. Roll a tiny snake of dark brown clay, pressing it just behind the pot’s top lip to simulate rich potting soil inside the container. To build the succulent rosette, form six to eight tiny teardrop leaves from sage-green clay, pinching each tip slightly to create realistic foliage points. Layer the succulent leaves concentrically over the dark soil base, working from the outside edge inward to build a neat, dimensional rosette cluster. Add cheerful dot eyes and a mouth to the terra cotta pot, attach your paper clip hardware to the back with liquid clay, and bake until firm.

Idea 9: Fluffy Cinnabun Roll with Dripping Sugar Glaze
Execution Process
The fluffy cinnabun roll marker captures the comforting essence of freshly baked pastry through spiral construction and miniature glistening sugar glaze details. This design relies on coiled dough strips wrapped tightly into a rounded wheel, creating distinct layers that look just like a real breakfast pastry. A drippy, translucent-white glaze layer applied across the top spiral introduces contrasting texture, catching ambient light across your book margins. Adding a sweet, happy expression within the spiral layers brings a playful kawaii personality to the realistic food miniature. The circular pastry form is naturally sturdy, providing a compact, resilient shape that slips easily into bags without snapping along fragile edges. Crafters will practice rolling long, uniform clay coils, coiling concentric spirals without trapping air pockets, and applying liquid clay glazes for realistic food effects.
Roll a long, uniform snake of warm dough-colored clay measuring four millimeters in thick diameter and roughly five inches in total length. Flatten the coil slightly along its length with an acrylic roller, then dust one side lightly with brown pastel powder to suggest cinnamon filling. Roll the flattened coil tightly into a spiral wheel, keeping the dusted side facing inward so the cinnamon layers show clearly between pastry folds. Mix liquid polymer clay with a tiny amount of titanium white clay in a small dish until it achieves the consistency of rich, pourable icing. Drizzle this glaze mixture selectively over the top curves of the cinnabun spiral, letting small droplets pool naturally along the lower side edges. Add two miniature black clay eyes and a tiny smile near the center fold, attach your clip base securely to the back, and cure on a tile.

Idea 10: Whimsical Frosted Cupcake with a Glossy Cherry
Setup Method
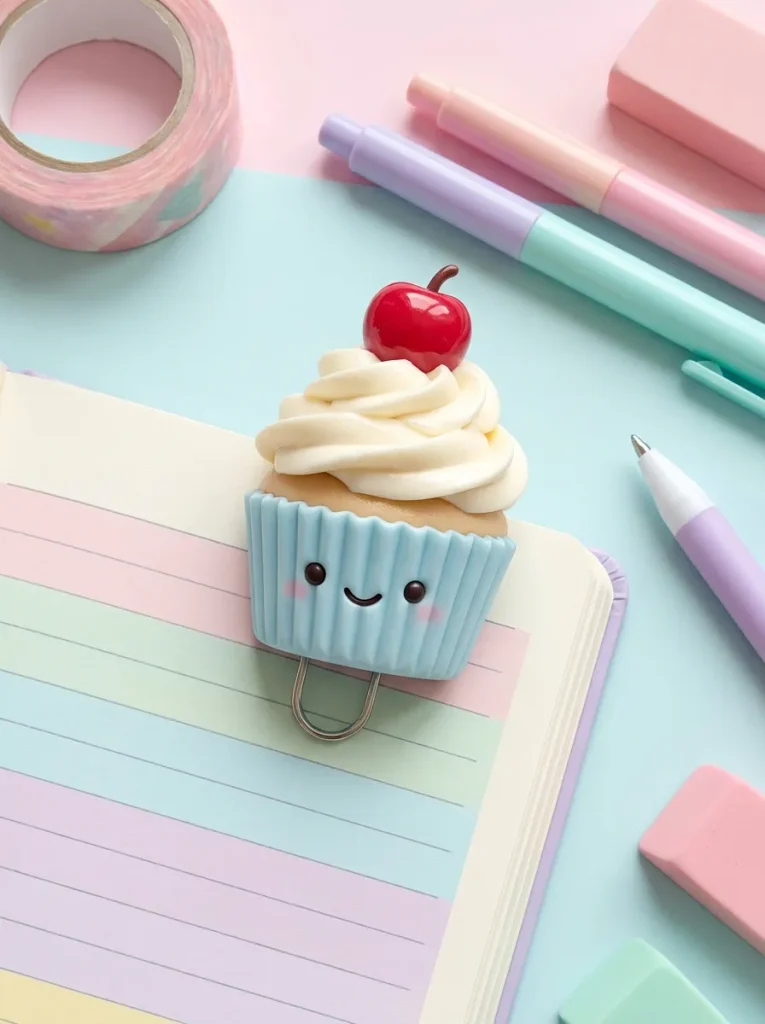
The whimsical frosted cupcake marker is a classic sweet treat design featuring a ridged pastel paper wrapper, a swirling frosting mound, and a glossy red cherry. This multi-tiered construction combines vertical height with rich surface textures, creating an eye-catching topper that peeks gracefully out from book tops. The contrast between the grooved cupcake base and the soft, rounded frosting swirls showcases versatile sculpting methods on a miniature scale. Capping the design with a shiny red cherry adds a vibrant splash of color, giving the sweet pastry character an instantly recognizable silhouette. The flat, sturdy back of the cupcake shape provides an ideal mounting surface for paper clips, ensuring the tall topper stays upright on notebook covers. This project helps makers practice scoring linear textures, coiling tapered frosting mounds, and assembling multi-part components securely before baking.
Shape a small block of pastel blue or yellow clay into a tapered trapezoid measuring half an inch wide to form the cupcake wrapper. Use a fine needle tool to score vertical lines down the face of the wrapper, creating the textured accordion folds of a paper baking cup. Roll a long, tapered coil of creamy white or pastel pink clay, coiling it around itself above the wrapper to form a soft frosting swirl. Roll a bright crimson-red clay bead for the cherry, pressing it gently into the peak of the frosting swirl alongside a tiny brown clay stem. Use a dotting tool to add two smiling eyes and a mouth to the cupcake wrapper, highlighting the cheeks with soft pink pastel dust. Secure a metal paper clip to the back using liquid adhesive, cover the join with a thin patch of matching clay, and bake flat.
Common Beginner Mistakes and How to Avoid Them
A frequent mistake when sculpting miniature polymer clay bookmarks is leaving structural wire hardware insufficiently secured, causing toppers to pop off metal clips after light use. Simply pressing a metal paper clip against raw clay without liquid adhesive creates a weak mechanical bond that fails under tension. Always coat the embedded wire loop with bakeable liquid polymer clay, then cap it with an additional thin clay backing patch to sandwich the metal securely. Another common issue is underbaking the clay, which leaves delicate pieces brittle, chalky, and prone to snapping along thin edges during normal book handling. Maintain accurate oven temperatures using a standalone oven thermometer, curing pieces according to manufacturer package directions—usually between 265 and 275 degrees Fahrenheit for thirty minutes. Beginners also often work on dusty surfaces, which can transfer dark lint, pet hair, and airborne particles onto bright pastel clays. Clean your ceramic tiles, tools, and hands thoroughly with rubbing alcohol wipes before conditioning light clays, and consider keeping a dedicated block of scrap clay to lift stray dust. Finally, avoid making toppers overly heavy or thick, as excessive weight causes bookmarks to pull down and damage delicate paperback pages.
Practical Tips for Better Results
Achieving clean, durable, and professional-looking clay bookmarks depends on careful workspace preparation, controlled baking temperatures, and thoughtful finishing touches. Always work directly on smooth, heat-resistant surfaces like ceramic tiles or glass sheets, allowing you to transport sculpted pieces straight to the oven without lifting or warping raw shapes. To keep pastel surfaces clean and fingerprint-free, smooth your raw clay sculptures gently with a soft brush dampened with a drop of isopropyl alcohol before baking. When baking, shield your miniature clay pieces under an inverted aluminum foil baking pan inside the oven to prevent uneven radiant heat from scorching delicate pastel pigments. After curing and allowing pieces to cool completely, seal all surface-applied pastel shading, painted details, and blush marks with a protective water-based or UV-cured varnish. Adding a coat of high-gloss sealant over select details—such as fruit pits, drink ice cubes, or glossy pastry glaze—creates lovely textural contrasts against matte clay bases. When assembling clips for thinner planner pages, select smooth vinyl-coated or rounded teardrop clips that slide onto paper effortlessly without snagging or indenting margins.
Styling, Presentation, or Organization Ideas
Presenting and organizing handcrafted clay bookmarks thoughtfully elevates them from simple craft projects into charming gifts, desk displays, and stationery collections. Slide finished clip bookmarks onto custom-cut cardstock backing cards stamped with hand-lettered quotes, colorful washi tape strips, or whimsical watercolor frames for a boutique finish. To organize your personal collection at home, display active markers upright in shallow ceramic dishes, vintage printer trays, or magnetized desktop metal boards placed beside reading nooks. Group matching bookmarks into themed seasonal sets—such as a cozy breakfast trio or sweet garden characters—packaging them in clear glassine bags tied with baker’s twine for easy gifting. When styling bookmarks inside journals and personal planners, coordinate clay topper palettes with your colored page tabs, highlighter schemes, and washi tape borders to build a cohesive aesthetic. Coordinate your markers with themed fabric book sleeves or book journals, creating charming photo compositions that showcase your current reading list and study setups. Storing reserve markers in divided craft organizers keeps dust away and prevents metal clips from scratching neighboring clay sculptures between reading projects.
Budget or Time Planning
Creating handmade clay bookmarks is an economical and time-efficient craft, requiring minimal initial material investment while yielding large batches of finished items. A single two-ounce block of polymer clay yields dozens of miniature bookmark toppers, keeping your per-unit material cost low compared to buying manufactured specialty stationery. To maximize your budget, purchase primary colors along with large white and translucent clay blocks, allowing you to mix custom pastels and specialty shades at home. Plan your workflow efficiently by batching tasks: condition and roll clay bases first, sculpt character features in groups, and bake all finished pieces simultaneously on one baking tray. Allocating two to three uninterrupted hours allows you to comfortably produce a coordinated collection of eight to twelve finished bookmarks from initial conditioning to final varnishing. Sourcing jumbo paper clips, jump rings, and ribbon findings in bulk quantities substantially reduces unit expenses, ensuring your hobby remains budget-friendly whether making gifts or building craft inventory. Maintaining a dedicated project tray with pre-conditioned clay scraps and essential tools allows you to complete smaller, spontaneous sculpting sessions without spending excessive time setting up.
Creative Expansion and Advanced Inspiration
Once you master basic paper clip assemblies, you can easily expand these kawaii clay concepts into more varied, versatile stationery and lifestyle accessories. Experiment with different functional bases by embedding flat, ultra-strong neodymium magnets into clay backs to create magnetic fold-over page markers that grip paper securely without creasing. You can also anchor miniature metal screw eye pins into clay tops before baking, allowing you to attach long satin ribbons, velvet cords, or delicate metal chains. Adding sparkling glass seed beads, freshwater pearls, or hand-tied silk tassels to the bottom ribbon tails creates dynamic visual interest that drapes elegantly along book spines. Try incorporating specialized clay techniques, such as swirling translucent clays with metallic mica powders to simulate marble, or using glow-in-the-dark clays for enchanting bedtime reading markers. You can also translate your favorite miniature animal and food toppers into complementary desk accessories, including matching pushpins, cable organizers, pen toppers, and planner charms. Exploring mixed-media accents like metallic leafing, fine glitter glazes, and miniature embroidery threads adds delightful artistic range, expanding your handmade stationery projects into a beautifully cohesive personal collection.
Leave a Reply