Custom bag charms have evolved into one of the most prominent accessories across social media boards, driving personal style and creative expression. Sculpting these accessories using oven-bake polymer clay provides a direct, hands-on path to making miniature art that functions as portable fashion. This comprehensive guide presents an extensive tutorial covering ten imaginative charm concepts designed specifically to elevate backpacks, totes, and purses. Readers will learn the essential principles of color mixing, precise miniature assembly, structural reinforcement, curing schedules, and protective finishing techniques. Polymer clay is an exceptionally durable medium, retaining its bright hues and smooth texture through everyday wear when handled correctly. Transforming raw clay into durable miniature sculptures requires understanding specific geometric foundations, clean workspace habits, and mechanical assembly methods. Beyond serving as personal accessories, these handmade charms function as thoughtful custom gifts and satisfying creative projects for crafters of all skill levels. By following structured techniques, anyone can construct polished, professional-looking accessories that stand up to daily use. Exploring these miniature sculptures will expand your crafting skills, introducing reliable workflows that ensure structural stability and long-lasting charm performance.
Why This Idea Is Trending or Useful
Handcrafted polymer clay accessories are experiencing unprecedented popularity due to their unique balance of tactile crafting, personalized customization, and visual charm. In modern design circles, small accessories allow individuals to showcase their personalities without altering an entire wardrobe or investing in expensive manufactured goods. These miniature crafts offer immediate practical value by transforming plain accessories into distinct, personalized statements that stand out in everyday environments. The DIY appeal of polymer clay lies in its accessibility; it requires no specialized studio space or industrial machinery, making it an ideal easy project for home crafters. Beginners can achieve professional, smooth finishes using basic hand motions and fundamental household equipment. Furthermore, crafting small items satisfies the desire for quick, high-reward creative activities that can be completed within an afternoon. The lightweight yet sturdy nature of properly cured polymer clay makes it ideal for everyday bag embellishment, resisting moisture, light impacts, and surface friction. Crafters can explore trending ideas without financial strain, using affordable blocks of clay to produce high-impact, eye-catching results that bring joy to daily life.
Materials and Preparation
Achieving reliable results with miniature polymer clay charms begins with systematic workspace preparation and gathering high-grade crafting materials. Your core inventory must include high-density oven-bake polymer clay in pastel, translucent, and primary shades to achieve clean, vibrant color profiles. Essential modeling tools include an acrylic rolling rod, fine-point silicone shaping pens, a rigid tissue blade, needle tools, and soft synthetic brushes. For the mechanical assembly of bag accessories, procure heavy-gauge stainless steel eye pins, five-millimeter jump rings, lobster clasps, and mini ball chains. Prepare your dedicated work surface using a smooth ceramic tile or a tempered glass mat, which provides a non-porous, dust-free base. Clean the surface thoroughly using isopropyl alcohol to eliminate lint, oils, and environmental residues that could discolor light clays. Planning requires testing your home baking oven with an external oven thermometer to ensure precise temperature calibration, preventing discoloration or under-curing. Conditioning the clay thoroughly between warm hands or through an acrylic roller until it becomes pliable without sticking is essential for long-term structural integrity.
Pastel Boba Milk Tea Tumbler
Step-by-Step Guide
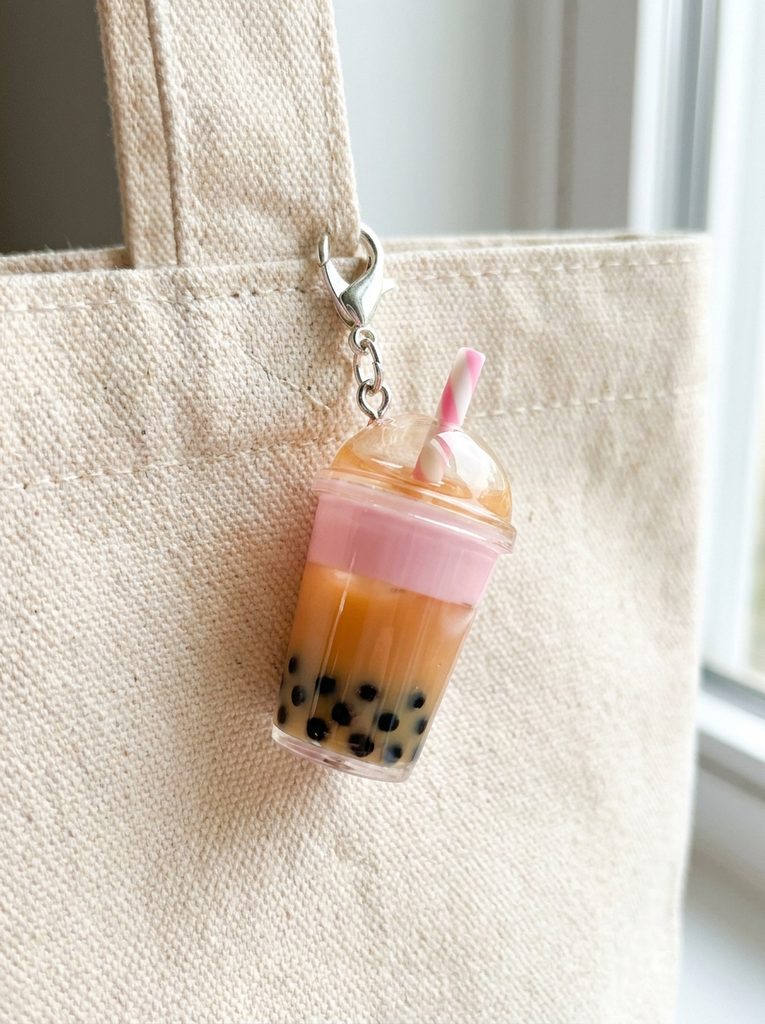
The miniature boba tea tumbler charm combines playful café aesthetics with clean geometric construction, producing an instantly recognizable purse accessory. This design features an opaque pastel cup body, a translucent tea filling, contrasting dark tapioca pearls, and an angled miniature straw. The miniature cup mimics the cheerful appearance of modern bubble tea drinks, relying on smooth transitions between the transparent and solid clay layers. Using translucent clay mixed with a pinhead-sized particle of warm amber clay creates an authentic liquid depth that captures the light. A smooth domed lid balances the top of the tumbler, providing structural surface area for mounting the suspension hardware securely. This charm functions exceptionally well on everyday backpacks because its cylindrical shape resists snagging against fabric or exterior pockets. The visual charm comes from the tiny dark spheres clustered along the base, contrasting sharply against the milky beverage tone. Mastering this concept teaches fundamental miniature layering and hollow-form illusion techniques.
Begin by conditioning translucent clay mixed with a touch of beige to form the milk tea interior, rolling it into an eight-millimeter tapered cylinder. Take black polymer clay, roll it into a slender string, and slice off tiny micro-segments, rolling each between your fingertips to form uniform tapioca pearls. Press eight to ten of these tiny spheres around the lower circumference of the translucent cylinder, embedding them slightly flush with the surface. Wrap a thin sheet of pastel pink clay around the central cylinder to represent the outer cup, trimming the top edge cleanly. Roll a tiny dome of translucent white clay for the lid, gently pressing it over the upper rim. Insert a two-millimeter segment of striped clay cane through the lid to create the drinking straw. Push a two-inch steel eye pin directly down through the center of the straw into the base, bake according to package directions, and coat the cured cup with high-gloss glaze.

Fluffy Cloud with Smiling Face
How to Create
A smiling cloud charm represents pure, minimalist charm, delivering a bright, whimsical accent that complements modern canvas tote bags effortlessly. This design relies on balanced organic volumes, created by uniting overlapping spherical forms into a seamless, pillowy silhouette. Crafted primarily from soft white or very pale blue clay, the cloud features gentle surface curves that catch soft directional light. Tiny blushing cheeks and delicate facial features provide subtle emotional warmth without complicating the clean lines of the overall shape. The rounded contours make this piece inherently durable, as the lack of sharp corners or thin protrusions prevents chipping during daily movement. This charm serves as an exceptional starting point for those learning how to blend multiple curved clay elements together without leaving seams or tool impressions. Its clean silhouette offers timeless appeal, serving as a cheerful daily companion suspended from a zipper pull or strap ring.
To build the cloud, roll five balls of white clay ranging from six to ten millimeters in diameter, arranging them in a horizontal cluster with the largest in the center. Gently press the spheres together, then use a silicone blending tool to smooth the interior joint lines on both front and back until they form one cohesive body. Flatten the base slightly against your glass work surface so the charm maintains horizontal stability. Roll two tiny spheres of soft pink clay, flattening them against the lower cheeks to create subtle blush accents. Using a fine needle tool, imprint two delicate curved eye arcs and an upturned smiling mouth directly between the cheeks, filling the indentations with tiny rolls of dark brown clay. Insert a head pin horizontally or vertically through the dense center of the top arch, bake completely, and apply a matte polyurethane finish to preserve the soft cloud texture.
Glazed Ring Doughnut with Multicolored Sprinkles
Execution Process
The miniature glazed doughnut charm translates classic bakery pastry appeal into a durable, colorful statement piece for handbags and backpacks. This design focuses on realistic pastry textures paired with bright, high-gloss simulated sugar icing and vibrant miniature cylindrical sprinkles. The circular base features a soft, golden-tan hue, indented slightly to mimic real fried dough, while the wavy icing layer adds organic visual interest. The scattering of microscopic sprinkles introduces diverse pops of color that catch the eye and highlight the meticulous detail of the piece. Because of its toroidal, ring-like geometry, the doughnut provides natural mechanical strength, distributing impact evenly across its curved outer perimeter. Crafting this charm builds core skills in faux-food texturing, color mixing for baked effects, and precision handling of miniature clay elements. It delivers an energetic, sweet accent that pairs perfectly with casual denim bags and colorful accessories.
Form the base by rolling a twelve-millimeter ball of tan polymer clay, flattening it into a thick disc, and piercing the exact center with a ball-ended stylus to create the doughnut hole. Lightly texture the dough surface using a clean toothbrush to produce a realistic, baked grain. Roll out a paper-thin sheet of pastel strawberry pink clay, cutting wavy, irregular outer edges with a needle tool to simulate draped sugar glaze. Lay this pink layer over the textured base, smoothing it around the central hole without stretching it flat. For the sprinkles, roll microscopic threads of yellow, mint green, lilac, and white clay, bake them for five minutes, and chop them into tiny one-millimeter lengths using your tissue blade. Scatter these cured sprinkles across the wet raw glaze, pressing each down lightly. Thread an eye pin through the upper curve, cure the piece thoroughly, and brush high-gloss varnish solely onto the pink glaze.

Resting Forest Mushroom Sprout
Setup Method
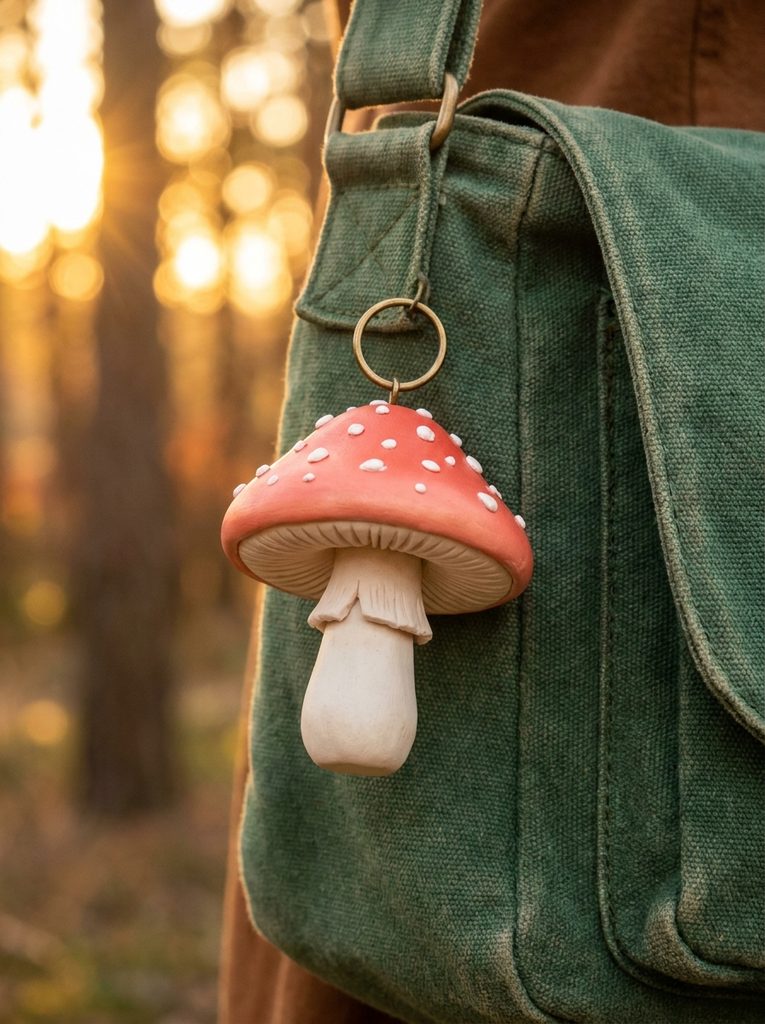
Drawing inspiration from natural woodland motifs, the resting mushroom charm infuses an earthy, fairytale aesthetic into any backpack or accessory set. This sculpture features a domed, brightly colored cap with soft white speckles, resting gracefully atop a short, thick, pale ivory stem. The gentle curve of the mushroom cap provides excellent structural integrity, deflecting impact when suspended on a bag that experiences frequent movement. Subtle under-cap detailing, such as carved gills and a slight stem taper, adds sophistication to the otherwise simplified, whimsical form. The contrast between a rich coral or pastel red cap and a soft cream stem creates visual harmony that complements neutral canvas or leather bags. This project allows makers to practice tapering techniques and secure two-part structural joins using liquid polymer clay. It stands as an iconic motif that bridges rustic cottagecore charm with bright character design.
Begin by rolling an ivory ball of conditioned clay into a cone shape measuring fifteen millimeters high, flattening both ends to create a sturdy, supportive stem. Use a fine needle tool to score vertical lines along the upper narrow neck to represent the mushroom gills. Next, roll a ball of soft coral-red clay, flattening its underside against your work tile while gently pinching and smoothing the top into an even, rounded dome. Apply a tiny drop of liquid polymer clay to the top of the stem, pressing the red cap firmly down upon it to ensure a chemical bond during baking. Roll five to seven microscopic spheres of pure white clay, pressing them flat onto the curved surface of the cap in a balanced, asymmetrical pattern. Insert a reinforced screw eye pin directly down through the center of the cap into the stem core, bake, and finish with a satin glaze.
Sleeping Celestial Moon and Star
Step-by-Step Guide
The celestial sleeping moon charm brings tranquil, dreamy imagery to purse hardware, using elegant curves and delicate metallic accents. This design features an arched crescent moon shape with softly rounded edges, showcasing closed, peaceful facial features and an accompanying dangling miniature star. Soft butter yellow or pale lavender clay forms the moon, while the tiny star companion provides dynamic kinetic movement as the bag shifts. The smooth, sweeping lines of the crescent lend a graceful silhouette to structured leather bags and sleek travel totes alike. Because crescent shapes can have delicate tips, this project teaches methods to thicken critical stress points without sacrificing the delicate visual silhouette of the moon. Crafting this set introduces multi-piece charm assembly, linking individual polymer elements together using jump rings and chain extenders. The resulting piece delivers an elevated, dreamy accent suited for refined daily wear.
To form the crescent moon, roll a ball of pastel yellow clay into a smooth snake that tapers gently at both ends, curving it against your tile into an arc. Flatten the form carefully with an acrylic roller until it reaches a uniform three-millimeter thickness, smoothing the outer rim with a silicone chisel tool to eliminate sharp edges. Use a needle tool to lightly indent a curved sleeping eye with delicate eyelashes onto the upper third of the moon body. For the star, flatten a small bead of matching yellow clay and use a star-shaped micro cutter, or pinch five points outward using your index finger and thumb. Pierce a clean hole through the top point of the star and the bottom horn of the crescent using an eyelet tool. Insert a top eye pin into the upper horn of the crescent. After baking both pieces, connect them using a five-millimeter jump ring, sealing the surfaces with micro-fine iridescent shimmer glaze.

Smiling Strawberry Milk Carton
How to Create
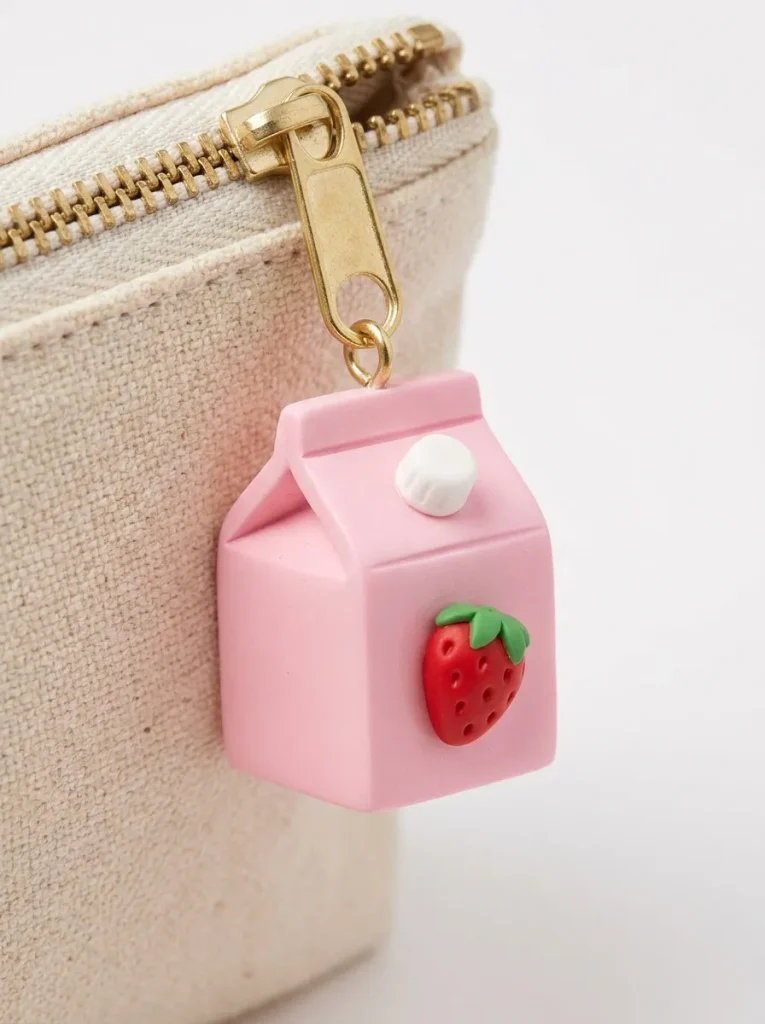
The vintage strawberry milk carton charm captures playful, nostalgic design through clean rectangular geometry and pastel graphics. This piece mimics a classic beverage carton, complete with a creased gabled top, a tiny pour spout, and miniature strawberry iconography. Soft pastel pink clay forms the architectural foundation, providing a canvas for tiny dimensional fruit accents and clean, stamped typography. The boxy silhouette provides substantial mass and stability, making it exceptionally resilient when bumping against other bag accessories. This charm is particularly well-suited for backpacks, pencil cases, and utilitarian totes that benefit from a pop of vibrant color and whimsical design. Completing this project develops precision sculpting skills, requiring sharp right-angle alignment, controlled slicing, and clean seam joins. It stands as a favorite project for makers who appreciate miniature packaging designs and cheerful everyday objects.
Begin by conditioning dense strawberry-pink clay and shaping it into an even rectangular prism measuring twelve millimeters wide, twelve millimeters deep, and eighteen millimeters high. Use your flat tissue blade pressed against all four sides to ensure crisp right-angle corners and flat planar surfaces. For the gabled roof, pinch the top five millimeters of the block inward from both sides, using the flat of the blade to press the central ridge into a sharp peak. Roll a tiny ball of translucent white clay into a flat disc and place it on the slanted roof to serve as the screw cap. On the front panel, apply a tiny triangular slice of red clay, dotting it with micro-specks of yellow to form a miniature strawberry accent. Carefully pass a long steel head pin through the peak of the carton roof, cure thoroughly in the oven, and apply two thin coats of clear satin varnish.
Cozy Ceramic-Style Teacup Pup
Execution Process
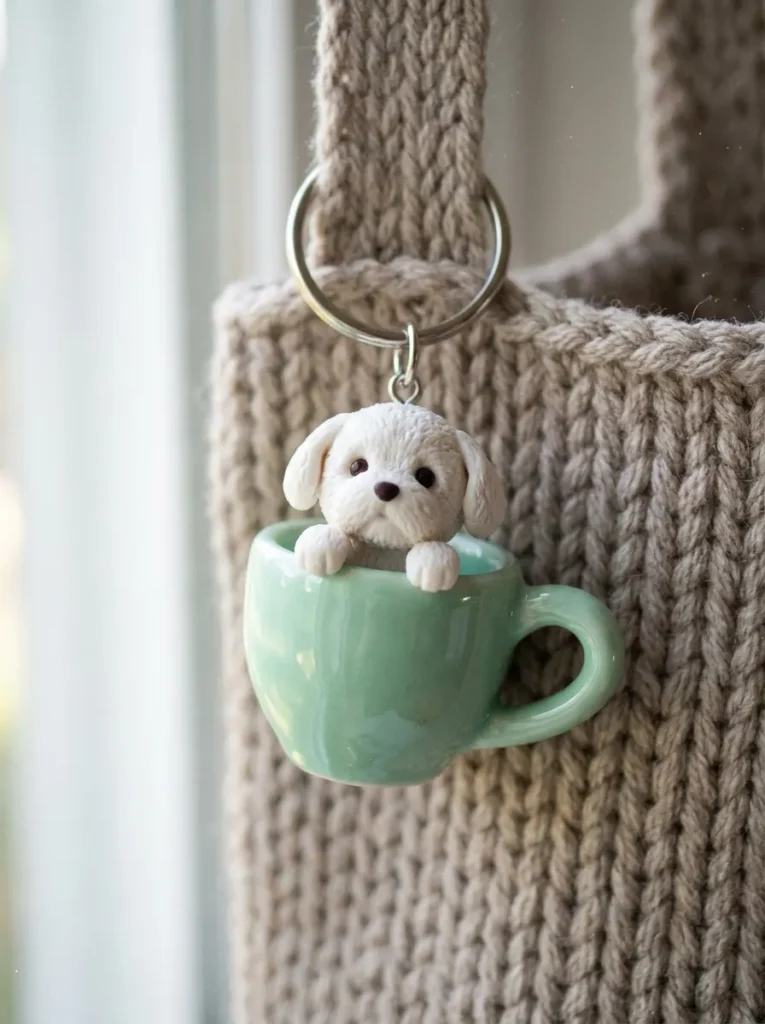
Combining animal elements with inanimate household vessels yields the teacup pup charm, an imaginative hybrid sculpture full of personality. This project depicts a tiny white puppy figure resting comfortably inside a pastel ceramic-style teacup, with miniature paws draped over the rim. The smooth, glossy porcelain appearance of the teacup provides a neat structural frame that protects the detailed character sculpture resting inside. The contrast between the sleek cup surface and the soft facial features creates dimensional storytelling within a very compact footprint. This charm brings a gentle, artistic warmth to canvas book bags, camera cases, and knit accessories. Constructing this piece sharpens skills in assembling multi-layered hollow forms, securing structural interior armatures, and painting micro-scale expressions. It serves as an engaging project for crafters looking to venture into animal character modeling without sculpting complete bodies.
To craft the cup, roll a ball of mint-green clay, flatten the base, and use a rounded ball stylus tool to press a deep hollow into the top, forming the interior cup basin. Roll a paper-thin snake of matching clay, looping it against the side to form the delicate cup handle, securing it with liquid clay. Next, roll a ball of pure white clay sized to fit snugly into the cup opening, texturing the top surface lightly to resemble fluffy fur. Roll two tiny white tear-drop shapes for ears, draping them downward along the sides of the head. Add two tiny oval paws resting directly over the front rim of the cup. Using black acrylic paint and a triple-zero detail brush, add two clean dot eyes and a miniature nose after baking. Push a threaded eye pin through the center of the puppy head down into the cup base, bake completely, and coat the cup section with high-gloss glaze.
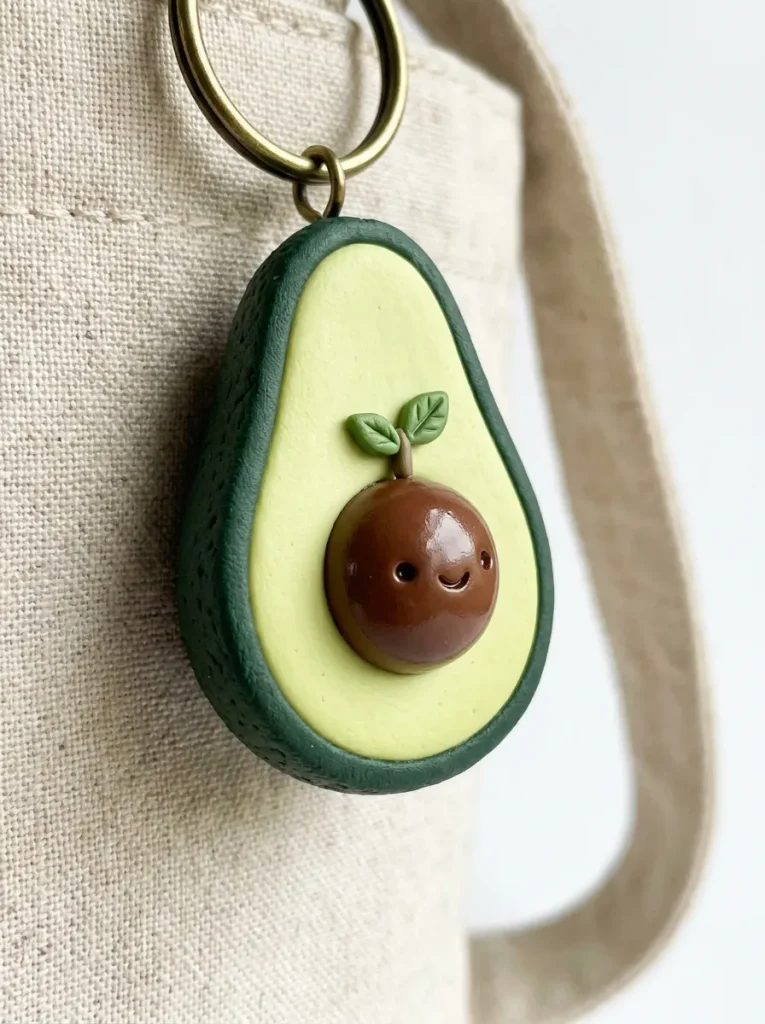
Cheerful Sprouted Avocado Half
Setup Method
The smiling avocado charm celebrates popular culinary culture through a modern, nature-inspired accessory design. This charm showcases an avocado sliced cleanly in half, featuring a pale green interior flesh, a dark green outer skin, and a dimensional brown seed smiling from the center. A tiny leafy green sprout emerging from the top of the pit adds height, dynamic movement, and a touch of whimsical flair. The teardrop shape of an avocado provides an aerodynamic profile that slides smoothly against purse fabrics without catching. The tiered concentric rings of contrasting greens offer a masterclass in gradient layering and clean clay border assembly. This project teaches crafters how to build organic teardrop forms, create hollow cavities to seat spherical components, and model delicate botanical stems securely. It adds an energetic, playful pop of color to neutral tote bags and luggage tags.
Form the outer shell by rolling dark olive-green clay into a thick teardrop, flattening it against your work tile to create the back surface. Roll out a slightly smaller teardrop of light chartreuse-green clay, pressing it cleanly over the dark base so a two-millimeter border of the dark skin remains visible. Use a large ball stylus to press a round, shallow indentation into the center of the light green flesh. Roll a sphere of rich chocolate-brown clay to represent the seed, seating it into the indented depression using a speck of liquid polymer clay. Model two microscopic green leaf shapes, attaching them to a tiny green stem set directly into the top curve of the seed. Imprint a tiny smile and closed eyes onto the brown seed using a needle tool. Insert an eye pin along the vertical spine of the avocado, bake carefully, and apply a matte finish to the flesh and gloss to the pit.
Floating Ice Cream Cone Swirl
Step-by-Step Guide
The soft-serve ice cream cone charm captures the nostalgic delight of summer treats in a compact, durable accessory format. This piece features a textured, geometric waffle cone topped with a spiraling, multi-tiered swirl of soft-serve clay finished with a miniature cherry. The warm, cross-hatched tan cone provides an earthy, structured base that balances the dynamic, flowing movement of the pastel swirl above. The swirling layers catch light beautifully, providing tactile ridges that make the charm engaging to touch. Its tapered triangular profile hangs cleanly from key rings, backpacks, and beach totes without creating excessive bulk. Making this charm introduces fundamental clay extrusion, spiral assembly, and uniform grid carving techniques. The project allows for endless color variations, from classic vanilla and chocolate swirls to vibrant pastel rainbow combinations that reflect your personal aesthetic.
Begin by rolling light caramel-colored clay into a cone shape measuring fifteen millimeters long, rolling the base flat across your work surface. Use the dull edge of a craft blade to score a diagonal crisscross grid across the cone, simulating authentic waffle texture. For the ice cream swirl, roll a smooth snake of pastel lavender or strawberry clay that tapers from four millimeters down to one millimeter at the tip. Starting at the wide upper rim of the cone, wind the clay snake upward in a tight, overlapping spiral, reducing the radius with each turn to form a clean peak. Roll a tiny crimson ball for the cherry, fixing it to the very tip of the swirl with a dot of liquid clay. Insert a sturdy steel eye pin straight down through the cherry and the center of the swirl into the cone. Bake the completed assembly, then seal the ice cream swirl with a glossy protective resin or varnish.

Smiling Star-Topped Bento Onigiri
How to Create
The bento onigiri charm draws inspiration from traditional Japanese rice ball snacks, reimagined into a clean, minimalist character accessory. The design showcases a rounded triangular white rice form wrapped with a contrasting black nori seaweed sheet, crowned with a tiny yellow star. The simplicity of the shape highlights crisp color boundaries and subtle textures, providing a sophisticated yet charming addition to everyday bags. The wide base and low center of gravity make this charm exceptionally robust, capable of withstanding rough daily handling inside packed bags. Its stark black-and-white contrast paired with a bright pastel yellow accent ensures high visibility against dark and light fabrics alike. This project refines your ability to model precise geometric forms with softly rounded corners while keeping white clay pristine and free of contaminants. It serves as an accessible, iconic design that resonates with fans of Japanese street style and minimalist design.
Begin by conditioning bright white clay, shaping it into a fifteen-millimeter ball before gently flattening it into a thick rounded triangle. Soften the three corners by rolling them lightly against your glass mat so no sharp points remain. Use a clean needle tool to gently stipple the white surface, producing the subtle, mottled texture of steamed rice grains. Cut a thin strip of black clay measuring eight millimeters wide and wrap it around the bottom center edge, smoothing the ends flat against the front and back to represent the seaweed wrap. Flatten a tiny piece of yellow clay, punch out a miniature star, and position it playfully near one top corner of the triangle. Use a fine-point tool to impress two simple dot eyes and a curved mouth onto the white rice face. Push an eye pin through the top center, bake the piece thoroughly, and leave unglazed for a modern, matte ceramic look.

Common Beginner Mistakes and How to Avoid Them
Working with polymer clay on a miniature scale presents unique structural and technical challenges that require deliberate preventative techniques. A frequent mistake among beginners is under-baking charms, which leaves the polymer chains incompletely cured, resulting in fragile creations that snap easily under pressure. Always verify your internal oven temperature with a standalone metal thermometer rather than trusting digital oven displays, baking for the complete duration specified by the clay manufacturer. Another common failure point is dust and fiber contamination on light-colored clays. You can prevent this by wearing disposable nitrile gloves, thoroughly washing hands, and rolling scrap translucent clay across your surface to pick up micro-debris before starting. Crafters also frequently struggle with eye pins pulling out of cured charms over time. Prevent this mechanical failure by bending the inserted tip of the pin into a zigzag or hook shape, or by removing the pin post-baking, applying industrial adhesive, and reinserting it permanently into the cured piece. Avoid thin, unsupported protrusions, as delicate features without internal armatures snap quickly when hitting exterior objects during daily bag use.
Practical Tips for Better Results
Refining your workflow with a few professional finishing techniques will dramatically increase the durability and visual appeal of your bag charms. Keep a small bottle of liquid polymer clay at your station at all times; it acts as a heat-activated ceramic glue, bonding separate raw clay sections permanently during baking. When blending seams between two elements, smooth the clay using silicone-tipped shaping tools lightly lubricated with a single drop of rubbing alcohol. This breaks surface tension and dissolves fine tool marks, leaving an immaculate, fingerprint-free surface before the charm enters the oven. For charms with fine surface paintings, use high-pigment acrylic artist paints thinned slightly with water, applying details with an ultra-fine detail brush under good lighting. Always finish painted charms with a water-based polyurethane or UV resin topcoat to shield surface pigments from friction. Finally, select heavy-duty, flat-wire split rings instead of standard jump rings when attaching charms to large bag clasps, as standard jump rings can pull open under sudden tension or movement.
Styling, Presentation, or Organization Ideas
Integrating handmade charms onto bags requires balancing visual scale, color harmony, and hardware selection to achieve a cohesive, elevated aesthetic. For minimalist canvas totes, style a single, brightly colored charm alongside a tonal ribbon or woven cord to create a balanced focal point. When accessorizing leather backpacks or structured purses, use brass or gunmetal lobster clasps that match the pre-existing metal hardware of the bag, creating a unified appearance. You can also assemble multi-charm clusters by varying suspension lengths, hanging a central focal figure slightly lower than secondary elements like beads, stars, or fabric tassels. For organized storage and display at home, mount a small wooden peg rail or acrylic grid on your wall to hang your collection of charms, keeping them safe from dust while turning your craft projects into decorative home displays. If packaging these charms as gifts or for a handmade market, secure each charm onto a thick cardstock backing card stamped with custom graphics, sealing it inside a clear glassine pouch for a clean, boutique presentation.
Budget or Time Planning
Creating polymer clay charms is an efficient, cost-effective craft that yields high-value artistic results with minimal financial outlay. A basic starter kit requires only four to five core blocks of quality clay, an acrylic roller, a basic blade, and a multipack of jewelry findings, typically costing very little while yielding dozens of miniature finished charms. To maximize productivity and keep your workspace tidy, plan your crafting sessions in structured batches based on mechanical processes. Dedicate your first session entirely to conditioning clay, mixing custom pastel shades, and storing color portions inside airtight plastic bags. In the next session, sculpt all matching components together, such as baking multiple bases before adding delicate character details. Batch curing multiple charms on a single ceramic tile conserves electrical energy and guarantees consistent baking conditions for all pieces. Assembling the metal clasps and jump rings in a final dedicated pass streamlines the manufacturing workflow, allowing you to produce an entire seasonal charm collection in a single afternoon without creative burnout.
Creative Expansion and Advanced Inspiration
Once you master these fundamental charm-building techniques, you can explore sophisticated multimedia expansions that elevate your pieces into complex miniature art. Experiment with embedding faceted glass rhinestones or miniature metal gears directly into the raw clay, firing them in place to create intricate mixed-media aesthetics. Incorporate mica powders, dry soft pastels, or holographic foils brushed gently across uncured clay ridges to create shimmering, ethereal gradients that catch the light dynamically. You can also explore building miniature wire skeletons using thin copper or brass wire, allowing you to sculpt longer, more dynamic character limbs that remain completely shatterproof during active bag wear. Another advanced approach involves constructing hollow, shaker-style charms using two-part silicone molds, filling the internal cavity with miniature clay sprinkles, clear mineral oil, and a sealed acrylic window. Blending polymer clay elements with handmade beaded chains, hand-knotted paracord loops, and enameled charms pushes the boundary of what functional everyday accessories can achieve, turning your projects into miniature wearable sculptures.
Leave a Reply