Handcrafted jewelry represents a meaningful way to personalize personal style, and polymer clay provides an exceptionally versatile medium for producing lightweight, artistic accessories. The bohemian aesthetic, known for its warm terracotta hues, organic curves, botanical textures, and raw geometric forms, pairs naturally with the pliable qualities of polymer clay. In this complete guide, readers will discover ten distinct bohemian polymer clay earring concepts that balance artisanal character with durable construction methods. This detailed tutorial covers the entire fabrication process, from proper clay conditioning and slab preparation to precise baking parameters, sanding techniques, and hardware assembly. Crafters will gain actionable insights into creating tiered arches, marbled slabs, botanical impressions, and mixed-media tassels using accessible studio equipment. By following these practical instructions, makers of all skill levels can successfully craft professional, durable statement jewelry that resists brittleness and daily wear. Beyond individual designs, this guide details essential assembly principles, such as securing jump rings, attaching hypoallergenic earring posts, and applying protective finishes. Exploring these curated projects offers continuous creative inspiration, allowing makers to turn simple blocks of oven-bake compound into boutique-quality handmade collections.
Why This Idea Is Trending or Useful
Boho polymer clay earrings consistently dominate modern craft feeds and fashion registries because they combine custom design with physical comfort. Traditional statement earrings crafted from metal, stone, or heavy resins often strain the earlobes, limiting wearability throughout full days. Polymer clay, by contrast, cures into an ultra-lightweight, resilient vinyl compound, allowing designers to produce expansive, dramatic silhouettes that remain virtually weightless on the wearer. From a design perspective, the bohemian movement emphasizes earthy tones, botanical motifs, and clean abstract lines, aligning seamlessly with modern design trends and minimalist style wardrobes. For independent makers, this craft serves as an accessible entry point into DIY jewelry production without requiring expensive metalsmithing equipment or specialized kilns. A conventional home kitchen oven, a smooth work tile, and basic shape cutters provide everything needed to manufacture high-end accessories. Furthermore, clay jewelry presents exceptional creative value by enabling crafters to test trending ideas, repurpose scrap materials into marbled stones, and iterate color palettes rapidly. This unique blend of ergonomic comfort, aesthetic adaptability, and low equipment overhead makes boho clay jewelry an enduring favorite across modern creative communities.
Materials and Preparation
Achieving structural durability and a refined finish requires careful workspace preparation and the selection of quality materials. Choose professional-grade polymer clay brands that cure to a flexible, resilient finish rather than brittle craft clays that crack easily when dropped. Gather a clean, non-porous ceramic tile or tempered glass sheet to serve as both your cutting surface and direct baking tray. Essential tools include an acrylic roller or dedicated manual clay conditioning machine, stainless steel shape cutters, a tissue-slicing blade, precision craft knives, and miniature hand drills. For hardware, acquire lead-free and nickel-free components, including brass jump rings, hypoallergenic titanium or stainless steel stud posts, silicone comfort backs, and brass geometric connector charms. Preparation begins with systematic sanitization: thoroughly clean hands, rollers, and tile surfaces with isopropyl alcohol or lint-free wipes to remove airborne dust and pet hair. Always condition your clay thoroughly by folding and rolling each block repeatedly until the compound becomes pliable, glossy, and free of internal micro-fissures before cutting any shapes.
Idea 1: Terracotta Sunburst Tiered Arch Drops
How to Create
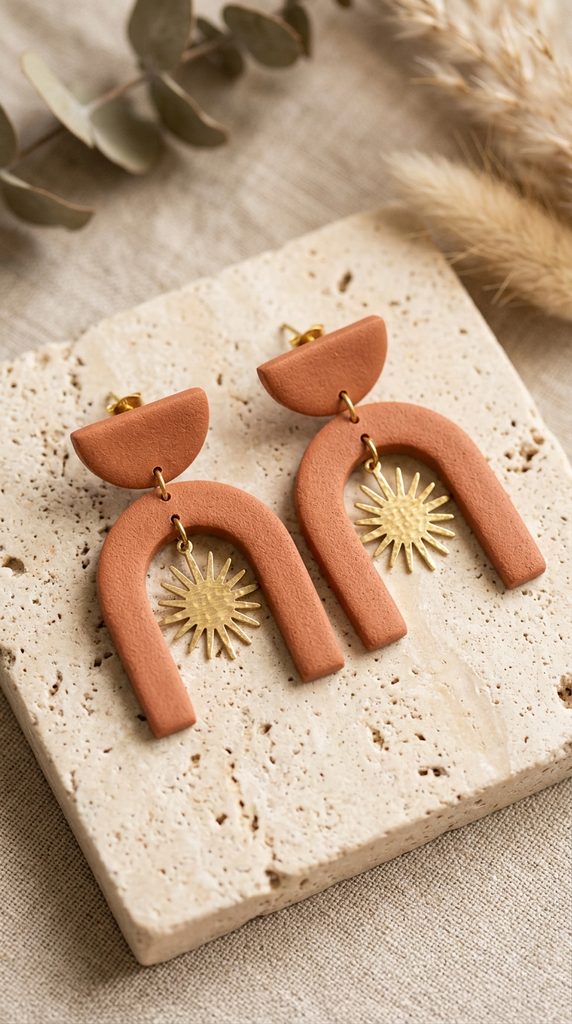
The tiered sunburst arch design captures the core principles of bohemian styling by balancing architectural symmetry with warm, sun-baked earth tones. This earring concept features a solid half-circle stud top that anchors a suspended, inverted U-shaped arch, framing a delicate brass sunburst charm within the central negative space. The color palette focuses on burnt terracotta, warm desert sand, and soft ochre, evoking desert landscapes and mid-century modern design motifs. The negative space created between the outer arch and inner metallic charm keeps the overall earring light and dynamic, catching movement without overwhelming the wearer’s jawline. This silhouette flatters diverse face shapes and pairs effortlessly with linen apparel, casual knitwear, and summer dresses.
To fabricate this tiered design, condition equal portions of terracotta and desert sand clay until soft and pliable. Roll the clay through your pasta machine or acrylic roller between two guide strips to ensure a uniform three-millimeter thickness across the slab. Press an inverted U-shaped arch cutter firmly into the slab, followed by a matching half-circle cutter for the top stud component. Before lifting the shapes from the ceramic tile, use a metal needle tool or 1.5-millimeter drill pin to pierce small attachment holes at the top and bottom of the arch, as well as the lower edge of the half-circle. Bake the pieces on the tile according to the clay manufacturer’s exact temperature specifications, usually around 275°F (135°C) for thirty minutes. Once cooled, smooth any rough perimeter edges with 400-grit wet sandpaper. Connect the top half-circle to the arch using a five-millimeter brass jump ring, suspend the brass sunburst charm from the inner arch hole using jewelry pliers, and secure a hypoallergenic stud post to the back of the half-circle using two-part jewelry epoxy.
Idea 2: Wildflower Pressed Botanical Statement Ovals
Step-by-Step Guide
Pressed botanical motifs celebrate natural textures by embedding organic floral elements directly into smooth clay foundations. This project utilizes elongated oval bases rendered in an unbleached ecru or raw linen shade, serving as a clean canvas for raised floral impressions. Instead of using artificial stamps, this technique captures authentic botanical forms by pressing dried baby’s breath, miniature ferns, or delicate garden foliage into the conditioned clay surface before baking. The resulting impressions introduce gentle dimensional relief that catches soft ambient light, echoing vintage herbarium specimens and cottagecore aesthetics. This design delivers a romantic, tactile quality that enhances both casual daytime outfits and bridal reception ensembles.
Begin by conditioning natural ecru polymer clay, rolling it into a flat, glass-smooth sheet measuring approximately 2.5 millimeters in thickness. Select thoroughly dried, pressed botanicals, positioning small sprigs of foliage and tiny blossoms across the clay surface in an asymmetrical layout. Lay a sheet of parchment paper over the arranged botanicals and gently pass an acrylic roller across the surface with light, even downward pressure to embed the flora flush with the clay matrix. Carefully peel back the parchment paper and use fine tweezers to lift the plant material, revealing crisp, debossed botanical channels underneath. Cut the slab using an elongated oval metal cutter, and pierce a clean connection hole at the top edge of each pendant. Bake the ovals flat on a parchment-lined ceramic tile. After curing and cooling, apply a drop of diluted burnt umber acrylic wash over the debossed impressions, immediately wiping the raised surface with a damp cloth to leave pigment settled inside the botanical grooves. Finish by attaching a brass kidney ear wire through the top drilled hole.

Idea 3: Desert Marble and Brass Geometric Pendants
Execution Process
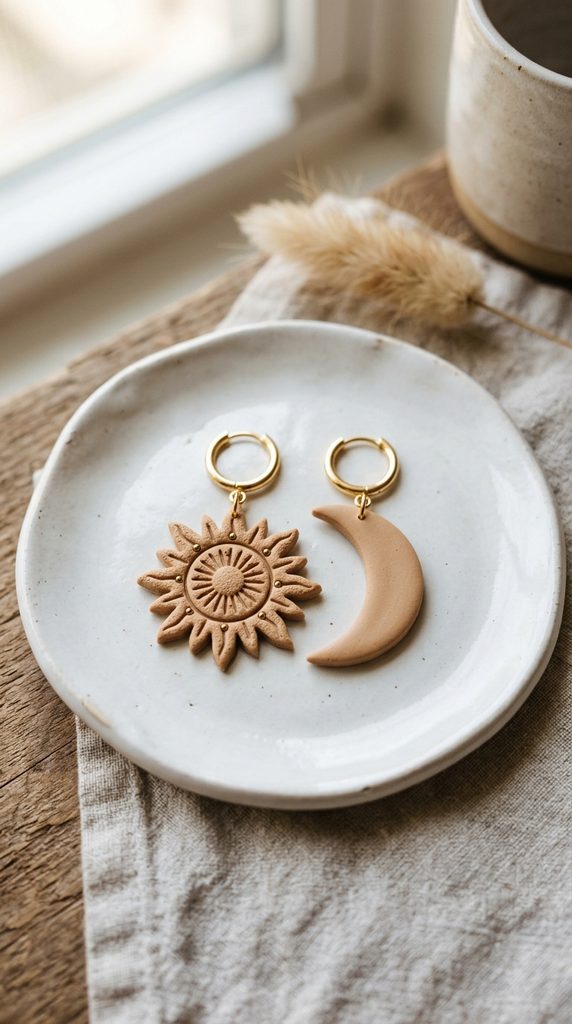
Marbled patterns provide an organic, fluid contrast to structured geometric brass hardware, creating sophisticated modern accessories. This design pairs a trapezoidal or rectangular marbled clay tablet with a flat brass chevron or half-moon connector. The marble pattern blends desert-inspired tones, including dusty rose, sage green, warm cream, and subtle veins of metallic bronze. Because each marbled slice yields unique, non-repeating fluid lines, every completed earring pair becomes a one-of-a-kind wearable art piece. The integration of polished brass accents adds reflective elegance, bridging casual handmade aesthetics with refined contemporary jewelry design.
To create the desert marble slab, roll individual snake-shaped coils of dusty rose, sage green, cream, and bronze clay, maintaining a ratio of roughly sixty percent cream to forty percent accent colors. Twist the gathered coils together into a single thick rope, fold the rope in half, and gently twist again to interweave the colors without blending them into a uniform muddy shade. Compress the twisted log into a solid square block, then use a flexible tissue blade to shave thin, uniform cross-sectional slices across the patterned face. Arrange these marbled slices side-by-side on your ceramic tile, smoothing the joins with an acrylic roller until a seamless, flat sheet forms. Stamp out rectangular or trapezoidal shapes with clean metal cutters, pierce attachment holes along the top and bottom margins, and bake thoroughly. Once cured and water-sanded up to 1000-grit for a silky matte finish, link the clay rectangles to geometric brass chevron charms using six-millimeter brass jump rings, and attach a matching brass ball post at the apex.
Idea 4: Ribbed Arch and Raw Fringe Hoops
Step-by-Step Guide
Combining hard-baked polymer clay with soft fibrous textiles produces rich tactile depth, making mixed-media fringe hoops an iconic bohemian staple. This design consists of a thick, horseshoe-shaped clay arch featuring ribbed surface texture, paired with a dense fringe of raw cotton macramé cord or natural linen thread dangling from the base. The clay arch is styled in a deep mustard ochre or warm cinnamon tone, providing a bold visual anchor for the airy, neutral fiber fringe below. This combination of structural rigidity and dynamic movement creates eye-catching motion when worn, making it an exceptional statement piece for summer festivals, vacation wardrobes, and casual gatherings.
Start by preparing cinnamon-colored clay, rolling it into a solid four-millimeter sheet on your working tile. To impart the ribbed surface texture, press a linear texture mat or the parallel tines of a clean comb firmly across the clay surface before cutting. Align an arch cutter over the ribbed section, stamping out two matching arches, and cut out the central inner curve to create a hollow horseshoe frame. Use a fine needle tool to punch five evenly spaced holes along the flat bottom crossbar of each arch, ensuring the perforations are wide enough to accommodate fiber strands. Cure the arches in the oven, supporting them flat to prevent warping. After the pieces cool completely, cut ten four-inch strands of fine unbleached cotton string. Fold each strand in half and loop it through the bottom holes using a secure lark’s head knot, tightening each knot against the clay rim. Comb out the dangling fibers with a fine-toothed brush, trim the fringe into a clean horizontal or V-shaped line with sharp scissors, and secure a stud post to the upper reverse side of the arch.

Idea 5: Abstract Terracotta Face Line Art Dangles
Execution Process
Abstract line art and minimalist portraiture bring an elevated, gallery-inspired aesthetic to bohemian handmade jewelry collections. This concept features a flat, organic oval or pebble-shaped clay drop that displays an embossed or carved continuous-line abstract human face. Rendered in a monochrome matte terracotta or soft beige, the piece highlights clean negative space, contour lines, and deliberate asymmetry. The subtle profile drawing introduces sophisticated modern design flair, moving away from conventional floral patterns into expressive visual art. Lightweight and visually striking, these statement dangles complement neutral wardrobe basics, oversized blazers, and artisanal linen apparel.
Begin by rolling conditioned terracotta clay into a smooth three-millimeter slab on your work tile, smoothing away any surface blemishes using a drop of isopropyl alcohol on your fingertip. Lightly sketch the continuous abstract face contour onto the clay surface using a blunt embossing stylus or rounded needle tool, carving a single uninterrupted line that defines the eyebrow, nose, and lips. Once the design is traced, deepen the carved channel with a miniature ball-head clay tool to create a clean, uniform furrow without cutting through the back of the sheet. Stamp out the finished illustration using an asymmetrical pebble cutter or an organic oval frame, ensuring the facial design remains nicely centered. Punch an attachment hole at the upper edge and bake the pendant thoroughly according to manufacturer guidelines. Once cooled, leave the clay bare for an authentic raw stone appearance, or buff the high surface with a clean denim swatch to create a subtle satin sheen. Mount the pendant onto a simple gold-plated hoop or hook fixture.

Idea 6: Textured Sage Green Monstera Leaf Drops
Step-by-Step Guide
Tropical botanical elements receive a soft bohemian interpretation when rendered in muted sage green polymer clay with realistic surface veining. This earring design features a stylized monstera leaf silhouette complete with classic fenestration cutouts along the outer margins. The matte sage tone departs from aggressive glossy greens, establishing an earthy, understated vibe that integrates seamlessly into nature-inspired accessories. Delicate surface veining adds dimensional realism, preventing the flat cutout from appearing generic or rigid. These botanical dangles serve as an easy project for beginner crafters seeking to master multi-step cutting and carving methods.
To construct the monstera drops, mix olive green, white, and a pinch of raw sienna clay to yield a muted, dusty sage hue. Roll the mixture into a 2.5-millimeter slab on your ceramic tile. Place a monstera leaf metal cutter onto the clay and apply firm, even pressure to cut the leaf perimeter. For the open side slits, use a fine craft scalpel to slice away narrow negative-space slivers along the leaf margins, rounding the inner corners with a smoothing tool. With the leaf still resting on the tile, use a fine needle tool to score a central vertical stem vein, branching outward with softer diagonal leaf veins extending toward each lobe. Pierce a small connection hole through the top stem base before transferring the tile into the baking oven. After a full thirty-minute cure at the recommended temperature, remove the leaves and let them cool completely. Sand the exterior perimeter using 600-grit wet sandpaper to soften the scalpel cuts, and suspend each leaf from a small raw brass ball post using a single sturdy jump ring.

Idea 7: Raw Stone Slab with Embedded Gold Flakes
Fabrication Method
Emulating the organic luxury of mined minerals, this faux raw stone design incorporates genuine metallic brilliance into translucent polymer clay bases. The earrings feature geometric hexagonal or teardrop shapes made from translucent clay tinted with subtle granite flecks and embedded fragments of imitation gold leaf. When baked, the translucent clay matrix clarifies, allowing the suspended gold leaf to reflect light from various internal depths like natural quartz or polished geode slices. The neutral, stone-like aesthetic complements bohemian festival styling, adding elevated metallic shimmer without introducing excessive weight or manufacturing complexity.
Prepare this design by conditioning translucent polymer clay alongside tiny pinches of black and white granite-effect clay until the stones are softly distributed throughout the translucent base. Tear small sheets of imitation gold leaf into irregular flakes using tweezers, scattering them across the flattened clay slab. Fold the clay repeatedly and compress it into a solid brick, distributing the metallic foil throughout the internal layers without over-kneading the material into microscopic glitter. Roll the clay through your roller to a uniform three-millimeter thickness, revealing the suspended gold sheets beneath the surface. Cut the sheet into crisp hexagons or clean triangles, punch an attachment hole near the apex, and bake on a tile lined with cardstock to prevent shiny contact patches. Once fully cured and cooled, coat the front surface with a thin layer of UV resin or liquid polymer clay, curing it under a UV lamp for two minutes to achieve a glossy, stone-like depth that magnifies the gold flakes. Connect the finished pendants to minimalist brass ear hooks.

Idea 8: Southwestern Mosaic Tile Segment Dangles
Execution Process
Southwestern design motifs introduce rich geometric vitality into bohemian accessories through sharp lines, mosaic layouts, and contrasting earth tones. This multi-piece dangle earring consists of three interlocking geometric segments—a triangular stud, a central diamond, and a lower trapezoid—that assemble into a cohesive vertical mosaic. The color palette draws inspiration from traditional desert textiles, combining dusty turquoise, coral rust, and ivory cream. Because the three individual tiles are linked with loose metal jump rings, the earring flexes and moves gracefully with the wearer, creating eye-catching rhythm and balanced proportions without adding excessive length.
Begin by rolling out three separate clay sheets in turquoise, coral rust, and ivory, calibrating each to an identical 2.5-millimeter thickness. Using a sharp craft blade and a metal ruler, cut precise strips from each color and join them edge-to-edge into a striped composite sheet, rolling lightly to fuse the seams together. Cut out your matching geometric components: two small triangles from the ivory section, two central diamonds across the striped junction, and two lower trapezoids from the turquoise field. Carefully pierce corresponding connection holes at the top and bottom edges of each piece, aligning the hole placements so the segments hang straight when linked. Bake the components flat on a ceramic baking surface. Once cooled, smooth all straight edges with a sanding block dipped in water to achieve razor-sharp geometric borders. Use round-nose pliers to link the three segments sequentially using four-millimeter antique brass jump rings, and attach stainless steel earring posts to the rear of the top ivory triangles with strong jewelry glue.
Idea 9: Bohemian Macramé Knot Impression Arches
How to Create
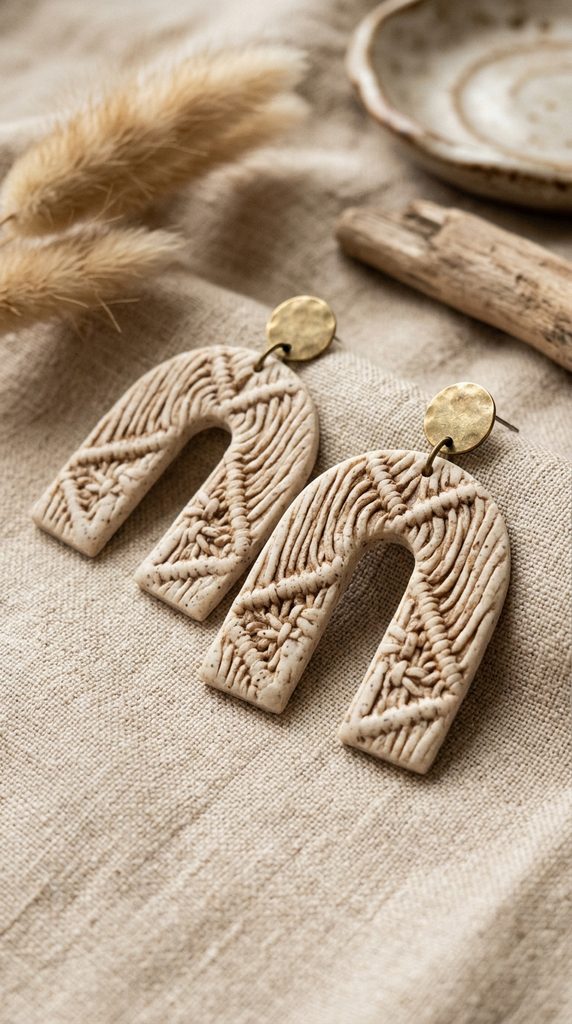
Textile imprinting offers a simple way to transfer complex surface patterns onto smooth clay without requiring advanced sculpting skills. This earring concept features a wide, U-shaped arch displaying the intricate, woven texture of knotted macramé textiles. Rendered in a soft oatmeal or warm linen tone with subtle natural speckles, the earring surface mimics woven fabric while preserving the rigid, protective qualities of cured polymer clay. The contrast between the soft visual texture of knotted yarn and the solid, durable feel of the finished earring embodies the tactile spirit of bohemian home decor and artisanal accessories.
To execute the macramé impression, condition a batch of oatmeal-colored clay containing subtle natural fibers or crushed spices like cinnamon to create a speckled look. Roll the clay into a three-millimeter sheet on your working tile. Take a clean piece of loosely woven macramé fabric, burlap, or a crocheted cotton lace doily, laying it flat over the clay surface. Place a sheet of parchment paper over the textile and roll firmly with an acrylic roller, transferring the cross-hatch fibers and knot depressions deeply into the clay foundation. Lift the textile slowly to preserve the woven design, then use a wide U-arch cutter to stamp out your earring shapes. Punch a single attachment hole at the top arch apex and two holes along the lower curved tips. Bake the textured arches flat in the oven. After cooling, lightly rub a damp sponge with raw umber pigment across the surface to emphasize the textile depressions, and seal with a matte varnish. Attach a brass hoop through the lower holes and mount an earring post to the upper reverse side.

Idea 10: Asymmetrical Sun and Moon Celestial Drops
Fabrication Method
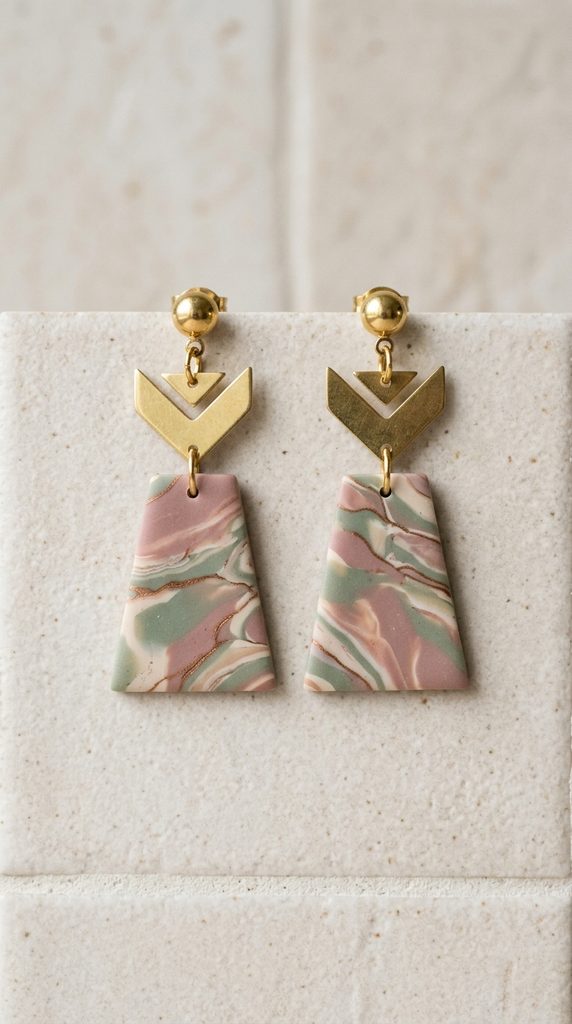
Celestial imagery holds an enduring place within bohemian aesthetics, symbolizing natural harmony through mystical sun and moon motifs. This mismatched earring pair features an asymmetrical configuration: one ear displays a radiant sun medallion adorned with sculpted rays, while the companion ear showcases an elegant, slender crescent moon. Both pieces are worked in a cohesive matte sand clay body, accented with tiny embedded brass ball studs that tie the two distinct celestial silhouettes together. The deliberate asymmetry brings a modern, playful edge to the jewelry set, satisfying crafters who appreciate creative ideas that break away from conventional matching pairs.
Start by conditioning warm sand-colored clay and rolling it out to a uniform 2.5-millimeter thickness. For the moon earring, use a circular metal cutter to stamp out a complete disk, then overlap the same cutter halfway across the cutout to produce a smooth, clean crescent moon shape. For the sun earring, cut a smaller solid central circle, then roll tiny teardrop-shaped clay beads, pressing them radially around the outer rim of the circle to form sculpted sun rays. Use a miniature ball stylus to make subtle indentations at the center of each sun ray, inserting tiny raw brass metallic beads into the wet clay to create cohesive decorative accents. Pierce connection holes at the top of both celestial charms, ensuring the balance point allows each piece to hang vertically. Bake the charms flat on a cardstock-lined tile. Once cooled, sand the outer perimeters smooth, seal the embedded brass beads with a dot of clear liquid clay, and link both charms to minimalist gold-plated ear huggie hoops.
Common Beginner Mistakes and How to Avoid Them
The most frequent error in polymer clay earring creation is underbaking, which leaves the cured vinyl brittle, chalky, and prone to breaking when flexed or dropped. Novice crafters often reduce baking times or lower oven temperatures out of fear of scorching the clay. However, polymer clay requires sustained heat—typically between 265°F and 275°F (130°C to 135°C) for thirty full minutes per quarter-inch of thickness—to fuse the PVC particles into a durable, flexible compound. Always utilize an independent, freestanding oven thermometer rather than relying on built-in appliance dials, which often fluctuate wildly. Another widespread issue involves trapped air bubbles, which blister during baking and weaken the structural integrity of thin slabs. To eliminate air bubbles, slice open any visible blisters with a sharp craft blade before cutting, smoothing the surface flat with a roller. Furthermore, crafters frequently neglect surface cleanliness, allowing dust and lint to embed into light-colored clays. Maintain pristine surfaces by wiping down tools with isopropyl alcohol, washing hands frequently, and using a designated scrap piece of translucent clay as a lint roller over your tile prior to rolling out final project slabs.
Practical Tips for Better Results
Achieving professional boutique quality requires consistent attention to fine finishing details and disciplined studio habits. Always implement wet-sanding techniques rather than dry sanding; dipping wet-and-dry sandpaper into clean water eliminates airborne clay dust and prevents deep abrasive scratches on your cured pieces. Progress systematically through sandpapers, beginning at 400-grit to level uneven perimeters, advancing to 800-grit to soften edges, and finishing with 1200-grit for a satiny, touchable surface. When drilling attachment holes, support the cured clay against a scrap piece of wood and rotate a handheld pin vise slowly to avoid blowout cracks on the back of the piece. For post attachment, avoid relying entirely on cyanoacrylate superglues, which degrade and shear off under temperature shifts. Instead, use a two-part jewelry epoxy, or embed the metal post base directly into the back of the raw clay using a drop of liquid clay and an overlay patch, curing the assembly in the oven a second time for permanent mechanical bonding. Finally, keep a dedicated craft log noting oven times, clay blends, and roller thickness settings to easily reproduce successful batches.
Styling, Presentation, or Organization Ideas
Thoughtful presentation and creative staging significantly enhance the perceived value and aesthetic appeal of handmade polymer clay earrings. For market displays and social media showcases, mount finished earring pairs onto custom kraft paper or textured cotton rag cards stamped with minimalist typography. Displaying terracotta and olive green earrings against neutral linen, raw travertine stone risers, or kiln-dried cedar planks highlights the organic, bohemian roots of the designs. When organizing studio inventory, store cured components and finished pieces in multi-compartment clear plastic craft boxes sorted by color family and hardware finish, preventing delicate surfaces from scratching against loose jump rings. In everyday personal spaces, arrange these statement earrings on an open wall-mounted jewelry organizer crafted from wooden dowels and natural macramé mesh, turning personal accessories into decorative home decor accents when not being worn. For customer packaging, tuck the mounted jewelry cards inside stamped unbleached muslin drawstring pouches accompanied by a brief handwritten note on cardstock, detailing simple cleaning instructions and reminding wearers to avoid submerging their polymer clay accessories in water or exposing them to harsh chemical perfumes.
Budget or Time Planning
Disciplined planning and efficient resource management allow makers to produce striking handmade collections without excessive financial investments or wasted studio hours. Polymer clay represents an economical craft medium, as a standard two-ounce block yields multiple pairs of statement earrings when rolled to standard three-millimeter depths. Maximize budget ideas by purchasing core neutral clays—such as translucent, ecru, and terracotta—in economical one-pound bulk blocks, using smaller two-ounce specialty packages strictly for accent pigments and metallics. Source jewelry hardware, like stainless steel jump rings, ear wires, and silicone backs, in bulk wholesale lots rather than retail craft packets to reduce your per-unit manufacturing cost significantly. In terms of time allocation, batch processing offers the most efficient production workflow. Dedicate distinct studio sessions to individual production stages: spend one afternoon conditioning, blending colors, and cutting slabs; reserve a second focused block for baking and precision drilling; and finish with a dedicated evening for wet sanding and hardware assembly. Grouping identical physical tasks reduces preparation and cleanup times, maintains consistent quality, and optimizes energy usage when heating your kitchen oven for extended baking cycles.
Creative Expansion and Advanced Inspiration
Once you master foundational slab cutting, proper curing, and hardware assembly, polymer clay offers limitless opportunities for advanced artistic exploration. Experiment with complex internal caning techniques, such as constructing detailed millefiori canes that reveal intricate desert landscapes, floral cross-sections, or geometric mandala patterns when sliced. Explore mixed-media expansions by incorporating natural elements directly into your designs, combining baked clay tablets with hand-shaped brass sheet metal, polished raw wood accents, freshwater pearls, or woven raffia trim. Another sophisticated avenue involves surface treatments, such as applying alcohol ink washes, metallic mica powders, or screen-printed silk transfer patterns to raw slabs before cutting and baking. You can also expand your product line beyond traditional dangle earrings by adapting these bohemian motifs into matching pendant necklaces, structural hair cuffs, minimalist hairpins, and architectural wall hangings. Mastering these advanced techniques turns basic polymer clay into an expansive, fine-art medium, empowering makers to build cohesive, high-end lifestyle collections that stand out across modern design platforms and artisanal markets.
Leave a Reply