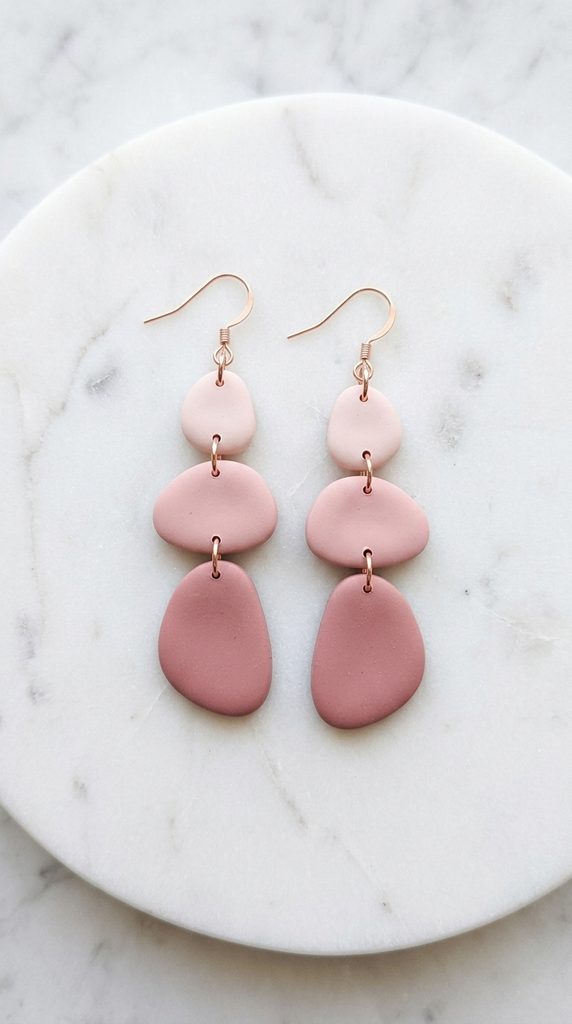
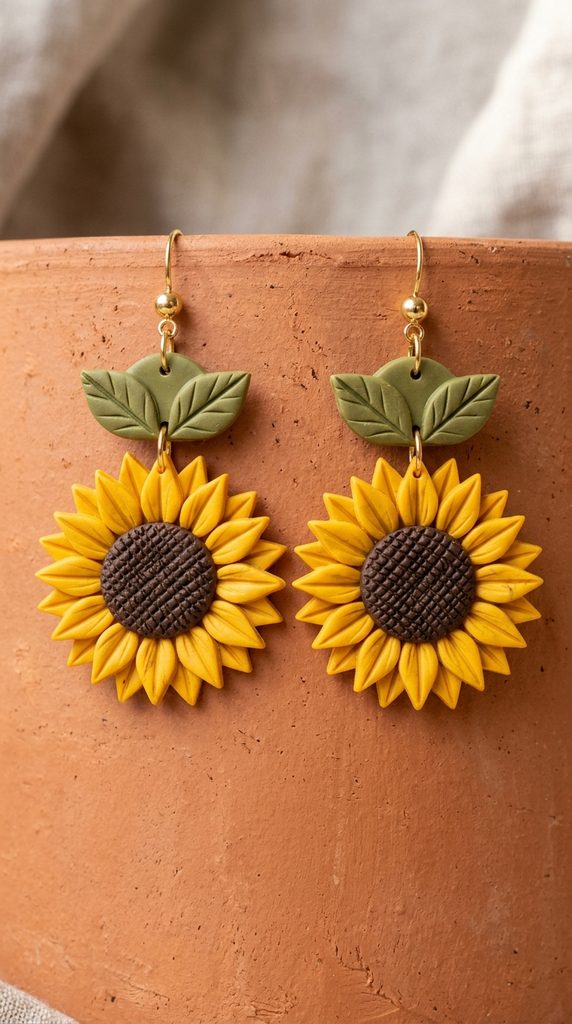
Category: Earrings

  • 10 Polymer Clay Earrings For Summer

    10 Polymer Clay Earrings For Summer

    Handmade artisan jewelry offers an expressive, accessible outlet for personal styling, and polymer clay earrings for summer have become essential statement accessories. Crafting wearable clay pieces combines color theory, tactile sculpture, and mechanical assembly into a rewarding creative project. This comprehensive guide details ten original, beginner friendly polymer clay earring designs tailored specifically for warm-weather styling, tropical vacations, and sunlit gatherings. Readers will learn the precise steps required to condition polymer clay, execute clean slab cuts, incorporate mixed-media components, and cure pieces to optimal structural flexibility. You will discover practical ways to balance lightweight wearing comfort with physical durability, ensuring that every handmade pair withstands daily movement and summer heat without warping or snapping. Understanding proper curing temperatures, hole-drilling techniques, and hypoallergenic hardware assembly helps crafters bypass common manufacturing hurdles and achieve boutique-quality results. Whether you are seeking budget ideas to start a handcrafted jewelry line, refreshing your personal warm-weather wardrobe, or exploring modern design concepts through tactile craft, this tutorial delivers structured technical guidance. By mastering these foundational methods, you will understand how to transform raw oven-bake clay into enduring, professional jewelry pieces that elevate your seasonal aesthetic.

    Why This Idea Is Trending or Useful

    Polymer clay jewelry continues to dominate modern Pinterest inspiration because it pairs bold visual scale with negligible physical weight. Traditional metal or resin statement earrings often pull heavily on the earlobes, causing discomfort during active summer outings and outdoor events. Polymer clay solves this ergonomic challenge completely; even oversized geometric statement drops weigh only a few grams, allowing comfortable day-long wear in warm weather. From a creative perspective, oven-bake polymer clay provides unmatched color customization, enabling makers to mix custom summer palettes featuring citrus neons, terracotta neutrals, coastal seafoam, and pastel tones. The medium requires no specialized studio infrastructure, kiln, or toxic chemical solvents, making it remarkably accessible for home crafters working on kitchen countertops. Beginners can start crafting with minimal upfront financial investment using basic cutting blades, household tile baking surfaces, and domestic ovens. The rapid satisfaction of moving from raw clay block to fully cured, wearable accessory within two hours drives widespread DIY appeal. Furthermore, clay jewelry effortlessly complements light linen garments, sun hats, and seasonal swimwear, securing its status among trending ideas for contemporary accessory design.

    Materials and Preparation

    Thorough planning and proper tool preparation are critical to achieving smooth surfaces and durable finishes in polymer clay crafting. Gather high-density polymer clay blocks in targeted seasonal colorways, ensuring you select brands known for post-bake flexibility rather than brittle formulations. Assemble essential modeling equipment: an acrylic rolling pin or stainless steel clay conditioning machine, rigid tissue slicing blades, precision craft knives, micro-geometric cutters, silicone texture sheets, and an acrylic work tile. For hardware assembly, prepare stainless steel or titanium ball posts, hypoallergenic jump rings in multiple millimeter gauges, silicone earring backs, flat-nose jewelry pliers, and a hand drill fitted with micro drill bits. Work on an ultra-smooth, lint-free surface such as a glazed ceramic tile or tempered glass cutting board to prevent surface marring. Clean your hands, cutting tools, and work surface thoroughly with isopropyl alcohol before handling light-colored clay to remove stray dust particles. Calibrate your domestic oven using a standalone internal oven thermometer; accurate thermal control prevents scorching lighter pigments while ensuring complete molecular cross-linking for long-term durability.

    Idea 1: Citrus Sunset Terrazzo Arches
    1

    Step-by-Step Guide

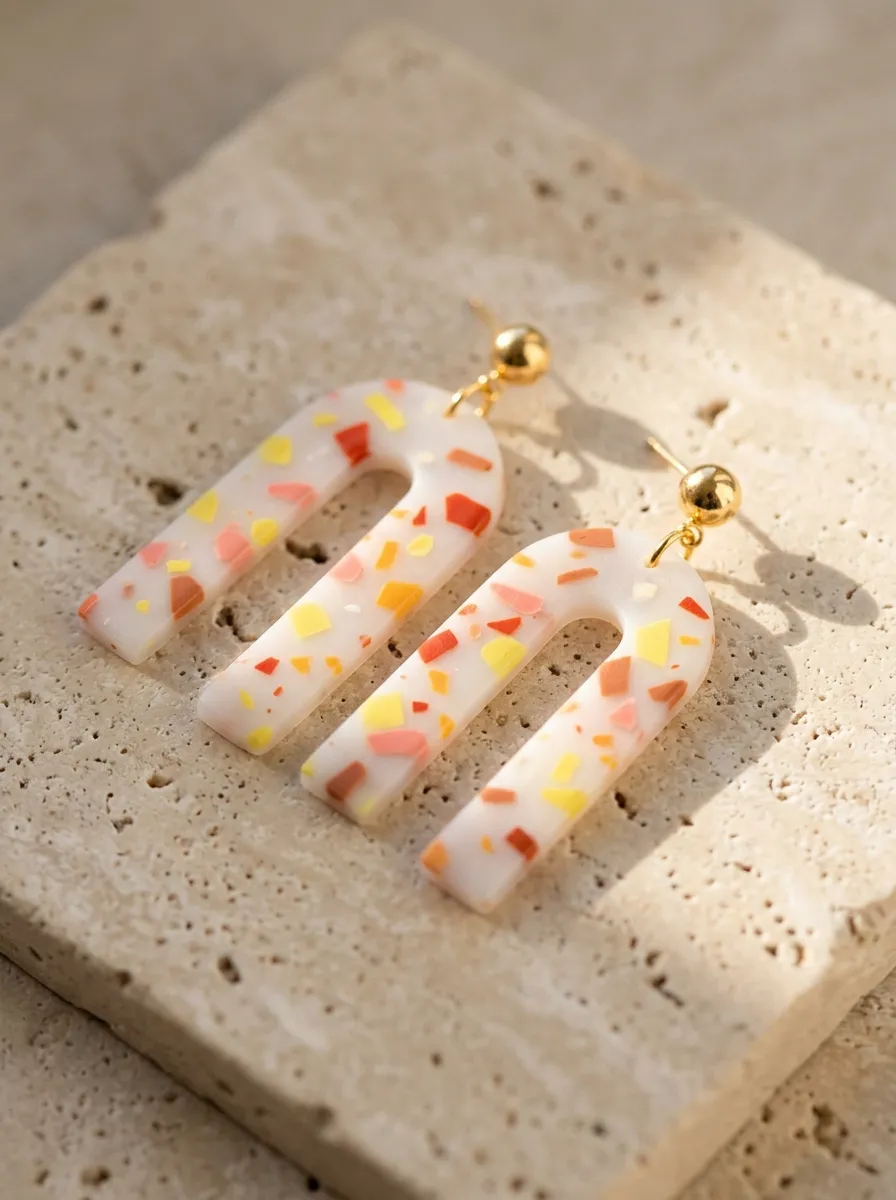
    The citrus sunset terrazzo arch earring design captures the energetic, warm atmosphere of midsummer twilights through bold geometric framing. This design uses an elongated arch silhouette constructed from a translucent white base clay embedded with multi-colored angular flecks. Saturated hues of blood orange, lemon zest, golden ochre, and soft peach are scattered across the neutral slab, mimicking mid-century architectural composite stone. The translucent base allows ambient daylight to filter softly through the earring body, producing a luminous quality that enhances bright summer resort wear. The structural arch shape provides generous visual presence while remaining structurally rigid and stable against the earlobe. Because the internal terrazzo chips are rolled flush into the background clay, the surface retains a sleek, two-dimensional plane that requires no heavy clear-coat sealers to look finished. This project serves as an ideal beginner friendly introduction to composite slab building, scrap-clay repurposing, and clean vertical symmetry.
    Begin by conditioning two ounces of translucent white polymer clay through a rolling machine until it forms a pliable, uniform sheet approximately two millimeters thick. Next, gather pea-sized scraps of conditioned clay in bright tangerine, sunny yellow, vibrant coral, and warm terracotta. Roll each colored scrap into a fine micro-snake, cut the strands into irregular fragments with a rigid blade, and scatter the tiny flecks randomly across the prepared translucent sheet. Place a sheet of clean parchment paper over the prepared slab and roll gently with an acrylic roller in alternating directions until the colored fragments fuse flush with the background surface. Using a clean metal arch cutter measuring two inches in length, press firmly downward onto the terrazzo slab on your ceramic tile. Carefully peel away the negative excess clay around the cut shapes, leaving the arches undisturbed. Pierce a 1.2-millimeter suspension hole near the top curve using a needle tool, and bake the pieces at the manufacturer’s specified temperature for thirty-five minutes. Once cooled, attach gold-plated jump rings and secure earring posts to the top reverse side using two-part epoxy adhesive.

    Idea 2: Textured Monstera Leaf Dangles
    2

    Execution Process

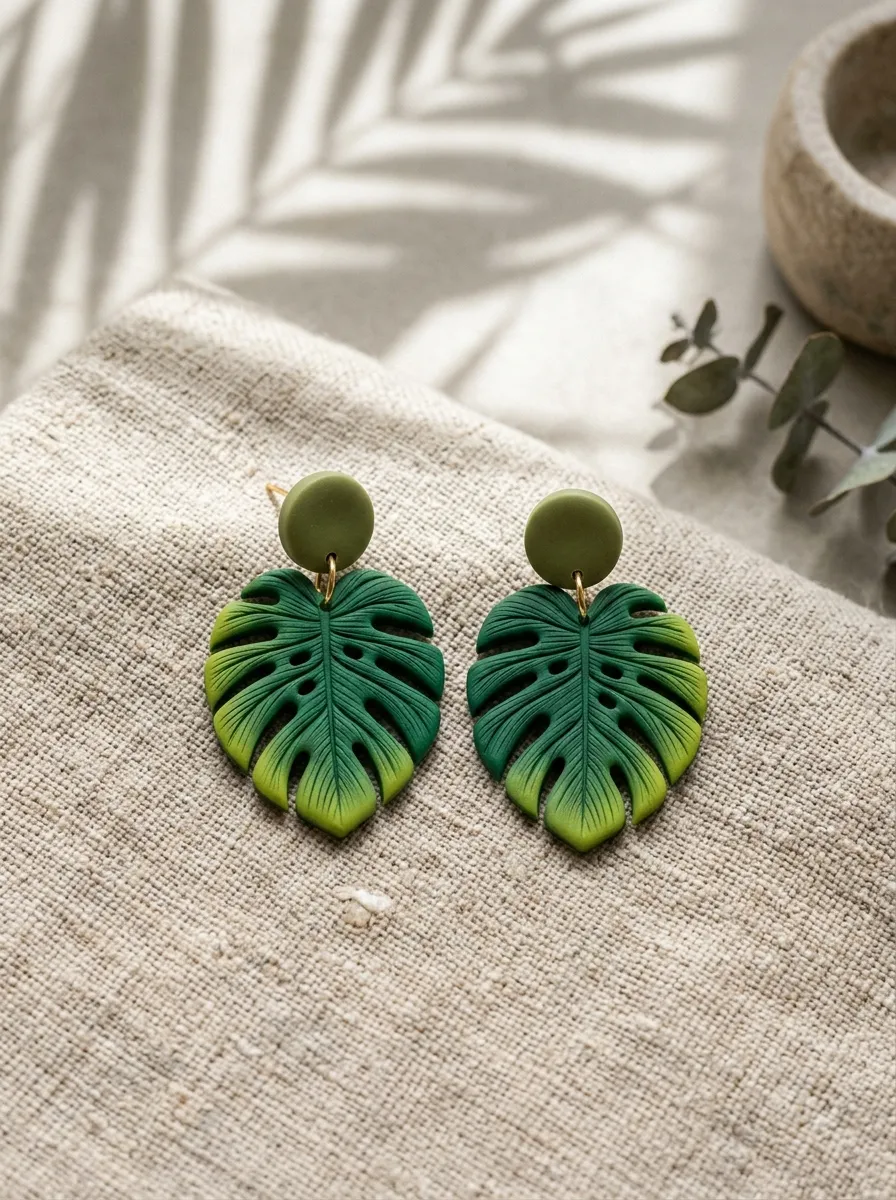
    Textured monstera leaf dangles incorporate botanical elements into tropical vacation wardrobes, capturing lush jungle foliage in sculptural clay form. This concept features a two-piece articulated earring consisting of a small circular ear stud linked to a detailed, perforated monstera leaf pendant. Using a custom blend of deep forest green, olive, and chartreuse produces a natural foliage gradient that complements breezy linen sundresses and woven straw accessories. The distinctive leaf fenestrations—the open slits characteristic of real monstera leaves—provide open negative space, reducing both the visual heaviness and actual physical weight of the finished earring. The subtle veining pressed into the clay surface catches sunlight, adding organic depth and eliminating the artificial, plastic appearance common to mass-produced accessories. Crafting these leaf components allows makers to practice botanical cutouts, negative space balance, and multi-segment jump ring assembly.
    Start by mixing emerald green and cadmium yellow polymer clay to establish an authentic tropical leaf hue, conditioning the mass thoroughly until no color striations remain. Roll the conditioned green clay into a flat slab measuring two millimeters in uniform thickness across a smooth ceramic tile. Place a monstera-shaped metal cutter over the slab and press down firmly to produce the outer leaf outline. Use a precision craft knife to cut out small interior oval fenestrations along each side of the central leaf axis, smoothing cut edges with a damp, lint-free cotton swab. Lightly score a central vertical stem vein and angled secondary veins using the dull edge of a modeling needle tool to introduce botanical texture. Cut two small half-inch circular clay studs from the remaining slab to serve as the upper earlobe anchors. Puncture connection holes at the base of each stud and at the stem apex of each leaf using a fine piercing tool. Bake the flat components on parchment paper, cool completely, and join the studs to the leaves using four-millimeter gold jump rings handled with dual pliers.

    Idea 3: Marbled Coastal Wave Hoops
    3

    How to Create

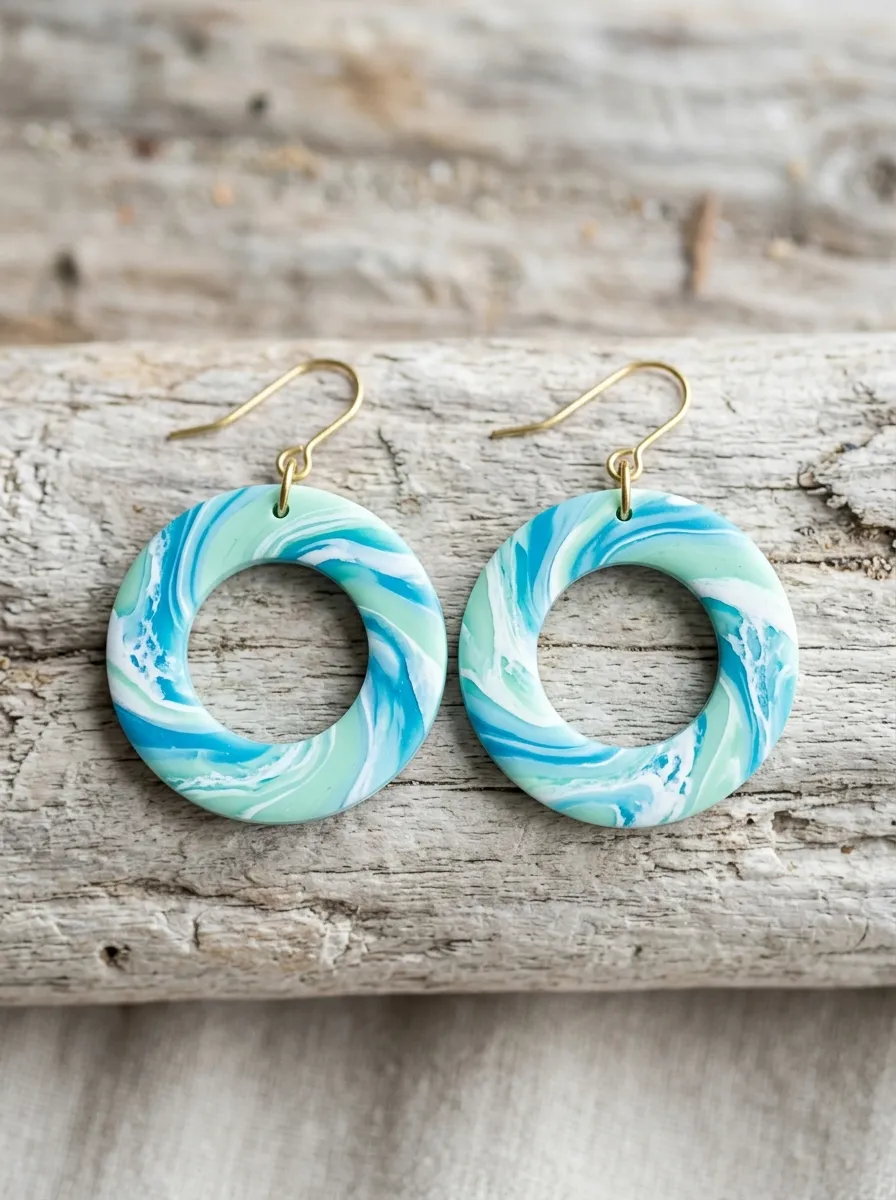
    Marbled coastal wave hoops draw direct inspiration from rolling ocean surf, combining seafoam hues with crisp minimalist style. This design features a flat, open circular hoop profile decorated with an organic marbled swirl pattern that mimics crashing ocean water and white foam crests. The color palette blends Mediterranean blue, aqua green, soft jade, and opaque titanium white, producing a continuous fluid pattern without muddying individual pigment boundaries. The open-circle hoop format creates a lightweight, airy profile that complements warm coastal climates and casual beach outings. Because the marbling process produces naturally unique color distributions, every single earring cut from the slab remains entirely one of a kind. This design teaches essential clay marbling control, twisting techniques, and concentric circular cutting mechanics, making it an engaging creative project for crafters looking to move beyond solid colors while maintaining clean, modern geometry.
    Begin by rolling four separate half-inch thick ropes of conditioned clay in ocean blue, pale aqua, mint green, and bright white, sizing each rope to approximately four inches in length. Twist the four colored ropes together into a tight spiral column, fold the twisted length directly in half, and roll it smooth on your ceramic work tile. Repeat this twisting, folding, and rolling sequence three times to create fine, undulating lines of color without overmixing the clay into a solid shade. Flatten the marbled block with your palm, then pass it through a clay conditioning machine set to a three-millimeter thickness. Inspect the slab surface to select the most visually dynamic wave patterns for your cuts. Using a concentric two-inch outer circle cutter and a one-inch inner circle cutter, stamp out your open hoop rings cleanly. Pierce a single mounting hole through the top perimeter of each hoop. Bake the cut hoops on a tile lined with cardstock to prevent surface shine, sand the finished edges with wet eight-hundred-grit sandpaper, and link each hoop to an open brass wire ear hook.

    Idea 4: Sunburst Half-Moon Statement Drops
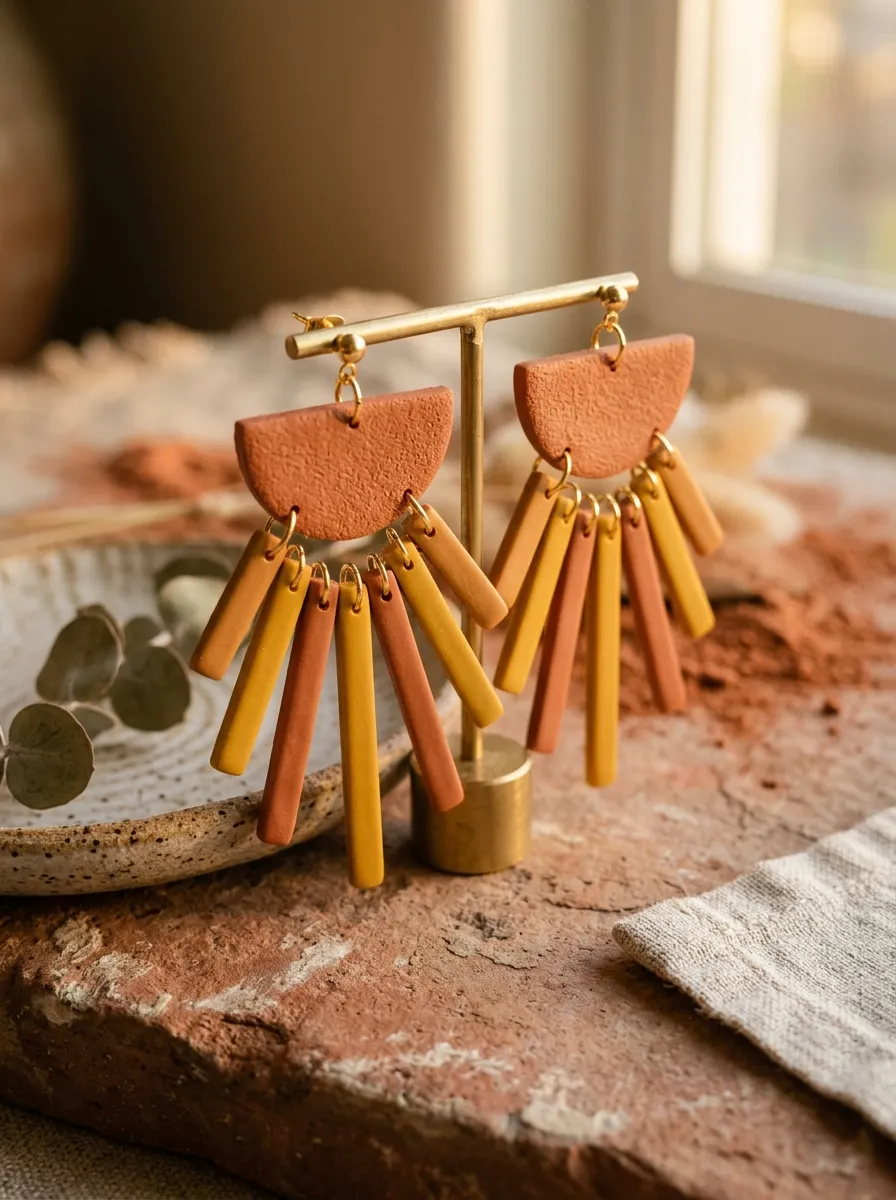
    4

    Setup Method

    Sunburst half-moon statement drops channel radiant celestial energy through tiered, fan-shaped geometric layers. This design pairs an inverted half-moon stud with a tiered fringe of radiating linear rays, framing the jawline with sharp, dynamic symmetry. A warm desert palette of mustard yellow, terracotta clay, raw sienna, and cream brings earthy warmth to casual summer wardrobes. The alternating lengths of the lower sunburst rays add textural movement that sways gently with natural body motion. Precision cutting is central to this piece; sharp, clean edges emphasize the crisp radial lines, while the upper semicircular stud anchors the visual composition securely on the earlobe. This project builds foundational skills in multi-part modular layout, repetitive geometric cutting, and multi-point jump ring alignment, producing an eye-catching statement accessory that transitions effortlessly from afternoon picnics to evening outdoor gatherings.
    Condition rich mustard yellow clay and warm terracotta clay separately until both sheets are soft and pliable, rolling each slab to a uniform thickness of 2.5 millimeters. Using a two-inch semi-circle cutter, stamp two half-moon shapes from the terracotta sheet to establish the top base anchors. Next, take the mustard yellow slab and use a rigid stainless steel tissue blade to slice even, two-millimeter-wide strips measuring 1.5 inches in length. Line up five yellow strips side-by-side beneath each terracotta crescent, trimming their lower ends at graduating angles to establish an expanding sunburst silhouette. Using a small hand drill or piercing tool, punch five evenly spaced connection holes along the straight bottom edge of the half-moon piece, and mirror those hole placements at the top of each individual ray. Bake all pieces on flat parchment paper at 275 degrees Fahrenheit for thirty minutes. After cooling, sand the straight edges using a fine grit sanding block, connect each individual ray to the half-moon base with three-millimeter jump rings, and mount surgical steel flat posts to the back of the studs.

    Idea 5: Abstract Pastel Geo-Collage Drops

    5

    How to Make

    Abstract pastel geo-collage drops bring contemporary post-modern artistry to warm-weather accessory collections through layered shapes and soft colors. This design features an asymmetric assembly of overlapping squares, trapezoids, and circles joined into a dynamic vertical drop. A refreshing sorbet palette of lavender, mint green, pale peach, and butter yellow adds a playful, modern accent to monochrome summer linen outfits. By varying the physical thickness and surface textures across the different geometric components, the earrings achieve visual depth without adding excess bulk. This design emphasizes negative space and proportional balance, proving that statement jewelry can feel sculptural without relying on symmetry. Crafting these abstract collage pieces helps makers develop creative composition skills, learn balanced assembly arrangements, and experiment with mixed surface treatments such as subtle stippling and matte finishes.
    Condition quarter-ounce portions of lavender, butter yellow, soft mint, and blush peach clay, rolling each distinct color into an even two-millimeter slab. Use various small geometric cutters to stamp out two three-quarter-inch squares, two long slender rectangles, and two miniature circles across your pastel color range. To create textural contrast, press a fine-mesh silicone texturing mat onto the peach rectangles while leaving the mint squares and lavender elements completely smooth. Arrange one square, one rectangle, and one circle per earring in a balanced, off-center vertical cascade on your work board to map out hardware connections. Use a micro leather punch or heavy needle tool to pierce connection holes at every structural overlap point, ensuring holes are placed at least two millimeters away from clay borders to prevent tearing. Bake the pieces on a flat ceramic baking tile for thirty minutes, cool fully, and link the components together using six-millimeter silver jump rings. Secure hypoallergenic ear wires to the top geometric anchor to complete the assembly.

    Idea 6: Gingham Check Picnic Dangles
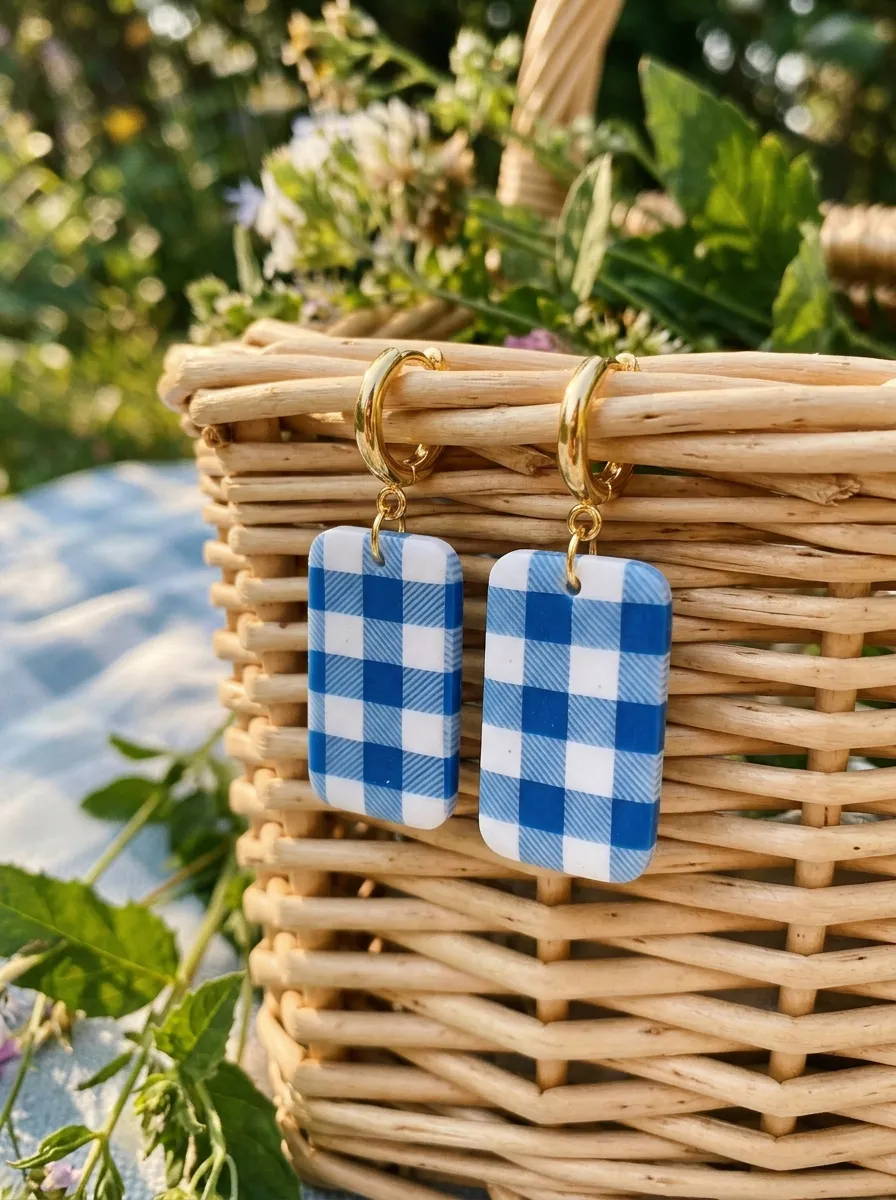
    6

    Step-by-Step Guide

    Gingham check picnic dangles bring vintage Americana appeal to summer styling, reimagining classic woven textiles in precision polymer clay. This design features a two-tiered rectangular drop displaying a classic gingham check pattern formed by interlocking squares of varying opacity. A timeless French blue or cherry red paired with semi-translucent white captures the nostalgic charm of summer garden parties, farmers’ markets, and park outings. Unlike surface-painted checks, this cane-based construction ensures the woven pattern runs completely through the clay body, producing crisp color divisions that will never chip, flake, or rub off with wear. The rectangular silhouette mirrors the structured nature of woven fabric, while rounded corners soften the outline against the neck. This project provides a practical way to learn clay cane construction, precise grid reduction, and systematic cross-section slicing, making it an engaging step by step challenge for intermediate crafters ready to expand their technical repertoire.
    Begin by mixing three distinct shades from the same primary color family: a saturated primary red, a fifty-percent tinted pink, and a pure opaque white. Form each color into four uniform square logs measuring three inches in length and one-half inch square. Assemble the logs into a four-by-four checkerboard grid cane: position pure red at two opposite corners, opaque white at the alternating corners, and fill the remaining intermediate positions with tinted pink logs to replicate woven light transmission. Gently compress the assembled square block from all four sides using uniform finger pressure, reducing the cane until the cross-section measures one inch square. Chill the cane in a refrigerator for fifteen minutes to firm the clay, then use a razor-sharp tissue blade to slice thin, one-millimeter-thick veneers across the cane face. Lay these patterned slices side-by-side onto a thin backing sheet of white clay, roll flush with an acrylic roller, and cut out rectangular drops using a rounded-corner cutter. Pierce suspension holes, bake the pieces for thirty-five minutes, sand the perimeter lines smooth under running water, and mount with gold huggie hoop findings.

    Idea 7: Sculpted Summer Bloom Clusters
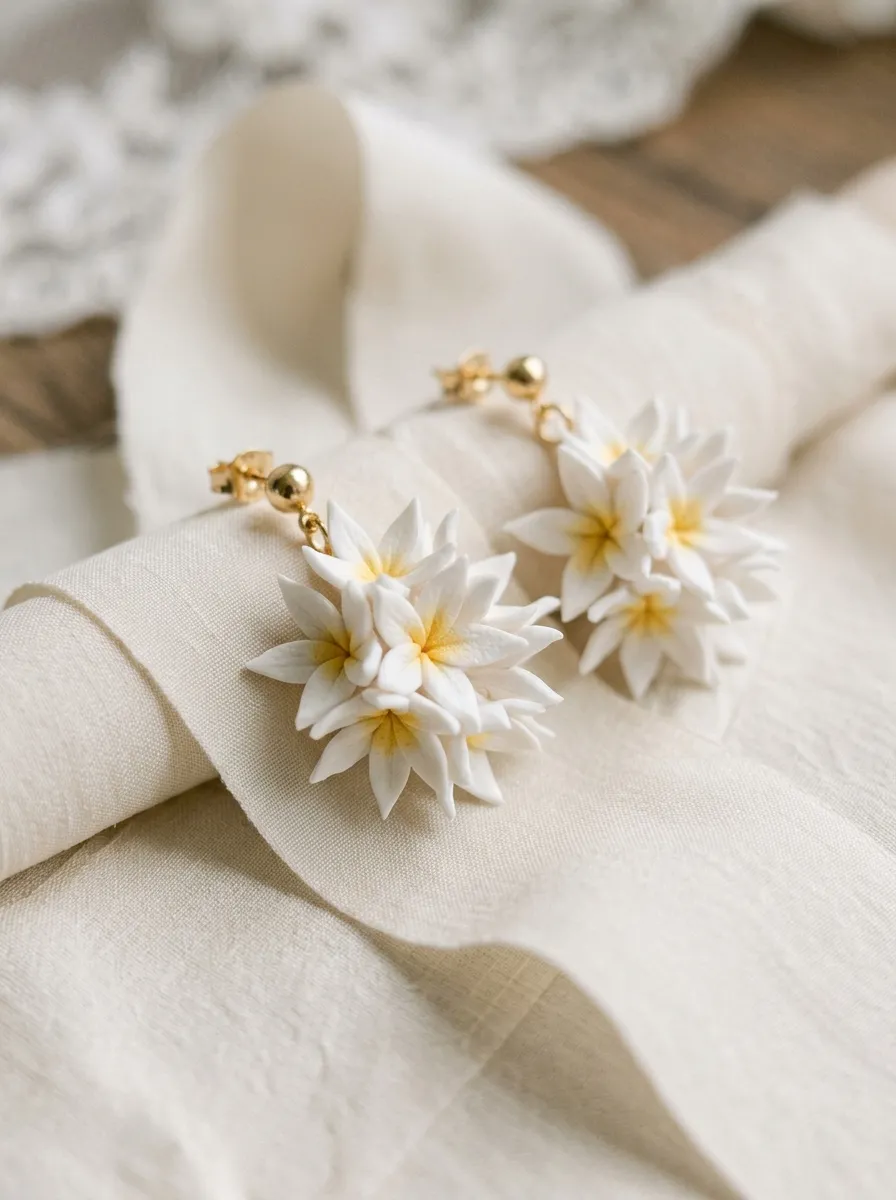
    7

    Execution Process

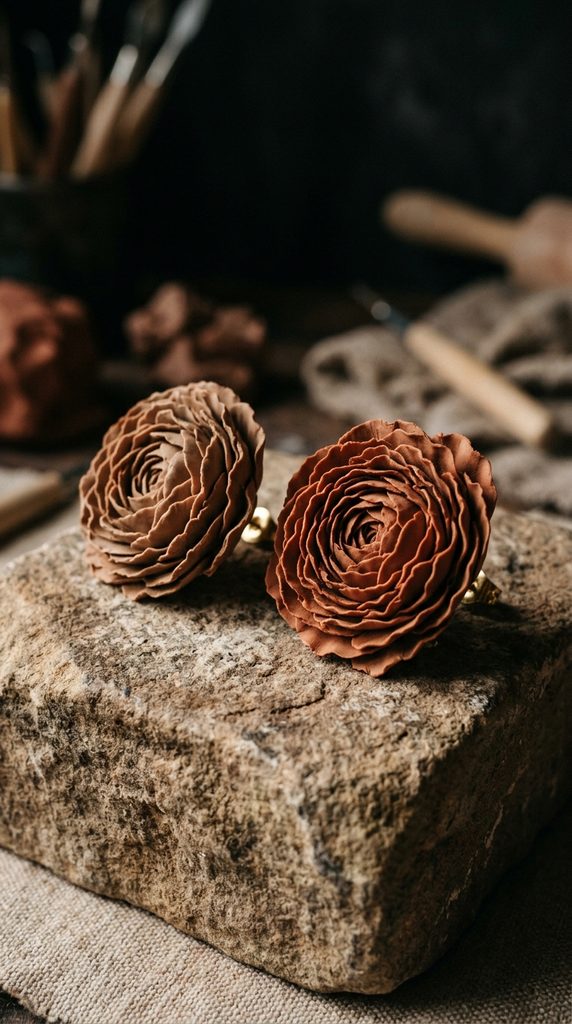
    Sculpted summer bloom clusters embrace three-dimensional floral modeling, translating delicate garden blossoms into tactile wearable art. This design features a central ear stud supporting an open cluster of sculpted plumeria or jasmine petals, creating an elegant organic silhouette for outdoor weddings and formal dinners. A soft monochromatic palette of pearlized ivory, pale cream, and subtle champagne gold brings a sophisticated touch that highlights fine sculptural details. Each tiny petal is shaped by hand and layered directly onto a flat base disc, producing dimensional depth that catches natural ambient light. Because the petals taper to thin, delicate margins, using a high-grade, flexible polymer clay ensures the blooms flex under pressure rather than breaking. This project helps crafters develop freehand sculpting skills, petal shaping techniques, and chalk pastel dusting methods, resulting in boutique-quality floral jewelry.
    Condition two ounces of premium pearlized white polymer clay, rolling half of the mass into a flat base disc measuring 1.5 millimeters in thickness. Take the remaining conditioned clay and roll it into dozens of uniform, three-millimeter spheres between your palms. Place each sphere on your ceramic tile and flatten it outward with a silicone-tipped shaper tool to form tapered teardrop petals with thin, natural edges. Cluster five overlapping petals together in a circle over a circular clay foundation base, pressing their center points together while curving the outer petal tips slightly upward. Using a dry, soft makeup brush, dust a tiny amount of warm yellow powdered chalk pastel into the deep center core of each flower to add natural botanical shading. Pierce a connection hole between the lower petals, bake the sculpted pieces on a concave baking tray to preserve their curved dimensions, and allow them to cool completely. Seal the pastel centers with a water-based matte varnish, drill a top hole, and join the floral clusters to gold ball-post studs.

    Idea 8: Mediterranean Painted Tile Mini-Drops

    8

    How to Create

    Mediterranean painted tile mini-drops capture the historic charm of southern European coastal architecture through crisp ceramic-style jewelry. This design features petite square studs showcasing cobalt blue and bright white patterns inspired by Portuguese azulejos and coastal mosaic art. The cool blue-and-white color scheme evokes seaside travel, making these lightweight studs a versatile pairing for casual denim, breezy button-downs, and warm-weather travel outfits. Applying a high-gloss baked glaze or liquid polymer clay finish gives the pieces the glassy sheen of kiln-fired ceramic tiles, elevating them from casual crafts to polished accessories. Their compact, square footprint ensures they sit close to the earlobe, making them a comfortable, low-profile choice for active outdoor days. This project introduces crafters to silkscreen stenciling on raw clay, acrylic paint transfer methods, and high-shine gloss finishing techniques.
    Condition an ounce of pure white polymer clay thoroughly and roll it into an even, three-millimeter slab across a smooth glass tile. Lay a finely detailed Mediterranean mosaic silkscreen stencil flat across the clay surface, gently burnishing the mesh with an old plastic card to eliminate air pockets. Apply a thin, uniform line of deep cobalt-blue water-based acrylic paint across the top border of the stencil, and draw the paint downward using an acrylic squeegee held at a forty-five-degree angle. Immediately peel the silkscreen away from the clay and rinse the screen in warm water to prevent paint from drying inside the fine mesh. Allow the painted clay slab to dry completely for fifteen minutes. Use a sharp, one-inch square metal cutter to cut out the individual tile shapes, aligning the borders with the geometric pattern. Bake the square tiles on cardstock for thirty minutes. Once cooled, coat each tile surface with a thin layer of clear liquid polymer clay, bake for an additional fifteen minutes to cure the glaze to a glass-like finish, and attach surgical steel stud posts to the back.

    Idea 9: Desert Sunset Arch and Fringe Tassels
    9

    Setup Method

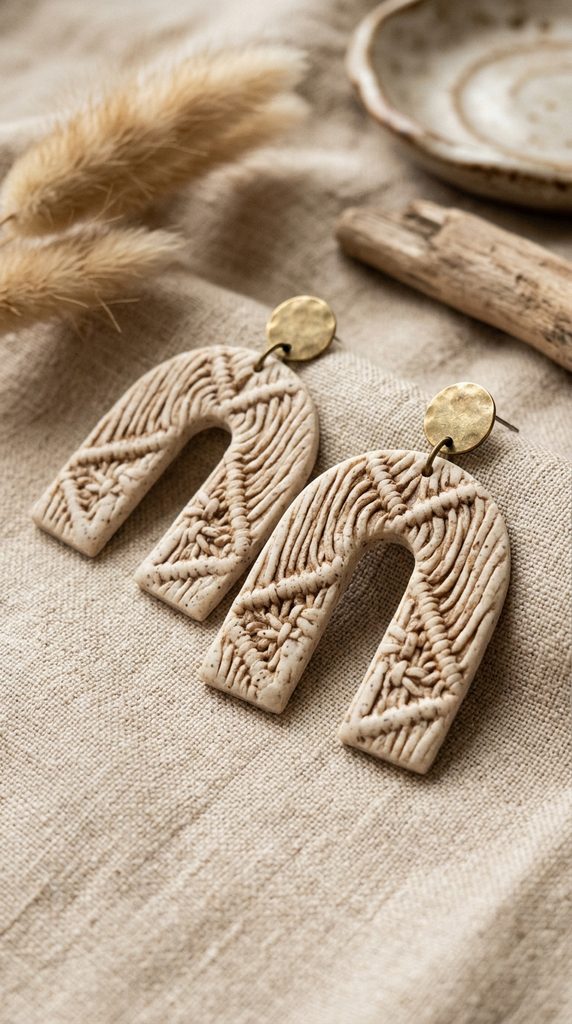
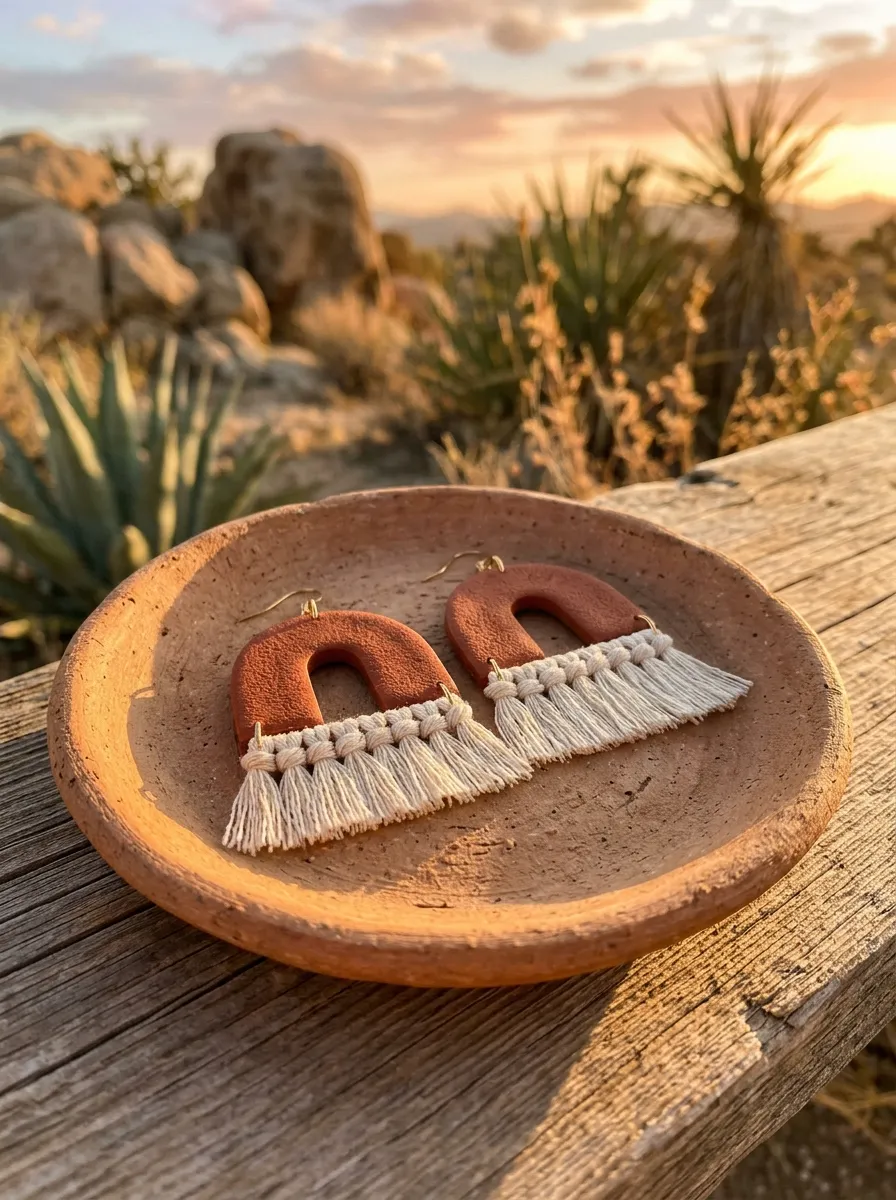
    Desert sunset arch and fringe tassels blend structured clay forms with soft fiber elements to produce a striking bohemian statement piece. This design features an earthy clay arch pendant supporting a row of densely knotted cotton fringe along its lower base. Warm hues of canyon rust, sandy beige, and soft desert sage ground the visual aesthetic, making it an earthy accent for warm summer evenings, music festivals, and casual gatherings. The contrast between the rigid, smooth clay frame and the soft, swinging cotton thread introduces tactile variety that moves naturally with the wearer. By incorporating open thread fringe, the earring gains dramatic vertical length while keeping physical weight minimal. This project provides a practical introduction to mixed-media construction, teaching crafters how to coordinate fiber accents with cured clay elements using simple knotting techniques.
    Condition rich canyon rust clay until pliable and pass it through a clay roller set to a thickness of 2.5 millimeters. Stamp out two curved horseshoe arches measuring two inches in height and 1.25 inches across the outer base using a metal arch cutter. Using a micro leather punch, punch a row of five evenly spaced 1.5-millimeter holes along the lower horizontal bottom bar of each arch, keeping holes three millimeters away from the bottom rim. Punch a single suspension hole at the top curved apex of each piece. Place the arches on parchment paper and bake at the manufacturer’s recommended temperature for thirty-five minutes. Once cooled, sand the outer perimeter smooth with four-hundred-grit wet sandpaper. Cut ten three-inch lengths of fine natural ecru cotton embroidery floss. Fold each floss strand in half, insert the looped end through a bottom hole using a latch hook tool, and draw the thread ends through the loop to form a secure lark’s head knot. Comb out the fringed ends with a small comb, trim the threads evenly with fabric shears to a one-inch drop, and assemble with gold French ear wires.

    Idea 10: Translucent Botanical Confetti Drops
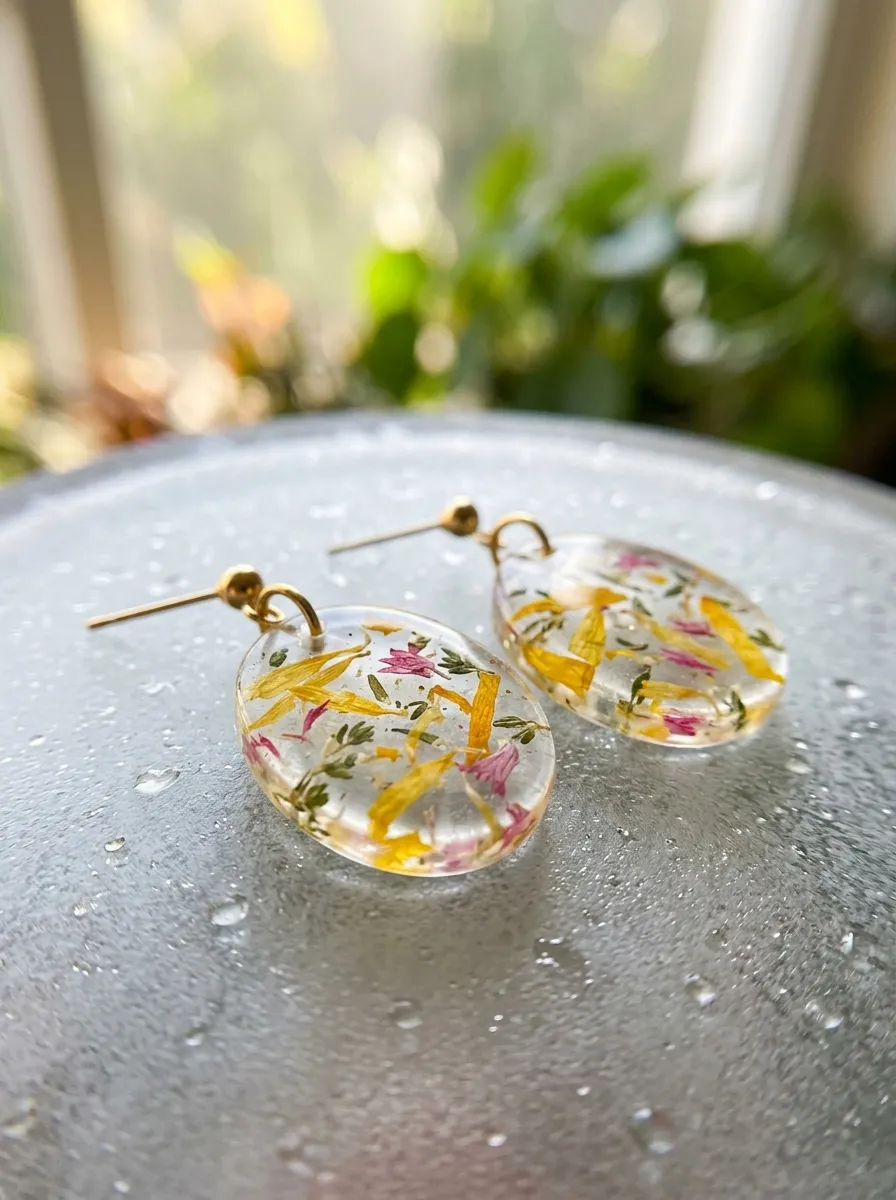
    10

    How to Make

    Translucent botanical confetti drops capture the delicate beauty of summer flora inside a suspended, glass-like pendant. This design features flat oval dangles made from ultra-clear translucent polymer clay embedded with real dried flower petals and green foliage flecks. Slices of preserved yellow marigold, pink cornflower petals, and tiny sprigs of thyme are pressed inside the clay, producing an organic mosaic that glows when illuminated by natural sunlight. The smooth, glass-like finish showcases the natural plant textures, offering a refined, modern look for outdoor garden parties and casual daily wear. Because the real botanicals are sealed within the clay body, they stay protected from air exposure, preventing the crumbling and discoloration common to open-air dried flora. This project teaches crafters how to properly condition translucent clay to eliminate internal air bubbles, balance organic inclusions, and sand pieces to a soft, sea-glass finish.
    Gather small, completely dried petals from cornflowers, marigolds, and baby’s breath, crumbling them into small fragments measuring two to three millimeters. Condition two ounces of ultra-translucent polymer clay thoroughly, folding it gently in the same direction to prevent trapping tiny air bubbles within the clear mass. Roll the translucent clay into a sheet measuring two millimeters in thickness on a clean glass plate. Scatter the dried flower fragments evenly across the slab, lay parchment paper on top, and roll with an acrylic roller to press the botanicals flat into the clay surface. Use an elongated oval cutter measuring 1.5 inches in length to stamp out matching pairs from the confetti sheet. Punch a single suspension hole at the upper apex of each oval using a needle tool. Bake the cut pieces between two ceramic tiles lined with parchment paper for forty minutes; baking under light tile weight prevents the thin ovals from curling in the oven. After cooling, sand the perimeter edges under running water through graduated grits from four-hundred to twelve-hundred, buff with a soft denim cloth to bring out the translucent shine, and attach minimalist gold wire studs.

    Common Beginner Mistakes and How to Avoid Them

    Creating professional polymer clay jewelry requires avoiding a few common mechanical and thermal mistakes that can compromise your finished pieces. A frequent beginner misstep is underbaking the clay, which results from relying on inaccurate oven dials rather than an independent oven thermometer. Underbaked polymer clay remains chemically incomplete, leaving cured pieces brittle and prone to snapping under gentle pressure; always bake your items for the full recommended duration, allowing the clay to complete the molecular cross-linking that yields true flexibility. Another common mistake is leaving trapped air pockets inside clay slabs, which expand in the oven and cause unsightly surface bubbles; prevent this by rolling and folding clay in consistent directions and pricking visible bubbles with a sharp needle before cutting. Beginners also often place piercing holes too close to piece perimeters, leading to torn margins when jump rings are attached; always position holes at least two millimeters away from the outer edge to protect structural strength. Finally, working on uncleaned surfaces can transfer dark lint and dust onto light summer palettes; clean all equipment and ceramic tiles with isopropyl alcohol before handling clay to keep colors crisp and clean.

    Practical Tips for Better Results

    Achieving a clean, professional finish with polymer clay earrings comes down to consistent slab preparation, clean cuts, and thorough post-bake finishing. Always condition your clay thoroughly until it bends smoothly without cracking along folded edges, as well-conditioned clay rolls out evenly and cuts cleanly without tearing. When stamping with metal or three-dimensional printed cutters, place a thin sheet of plastic wrap over the raw clay slab before pressing down; this simple technique rounds the cut edges naturally and prevents raw clay from sticking inside intricate cutter walls. Use wet-sanding methods to refine rough edges after baking: sand your cured pieces submerged in a shallow dish of water with a drop of liquid dish soap, progressing systematically from four-hundred-grit through twelve-hundred-grit sandpaper to eliminate micro-ridges without creating airborne clay dust. Use two pairs of flat-nose pliers to open jump rings with a gentle lateral twist rather than pulling them apart outward, preserving the circular tension of the metal hardware. Finally, secure your metal post findings to the back of cured clay studs using an embedded mechanical hold or high-grade two-part epoxy adhesive rather than basic instant glues, ensuring posts stay firmly attached through seasons of regular wear.

    Styling, Presentation, or Organization Ideas

    Styling and presenting handmade summer earrings thoughtfully helps highlight their artisan quality, whether you are coordinating your personal wardrobe or packaging pieces for an online shop. Pair vibrant citrus terrazzo or abstract geo drops with neutral linen dresses, woven sun hats, and leather sandals to let the accessories serve as the colorful focal point of your outfit. If you are preparing pieces for craft markets or retail displays, mount each pair on custom textured kraft-paper earring cards stamped with your branding, listing hypoallergenic hardware specifications clearly for shoppers with metal sensitivities. Organize your jewelry collection at home using an open wooden jewelry frame fitted with linen mesh; hanging clay earrings openly prevents delicate parts from tangling and protects clay surfaces from scratching against hard metal pieces in crowded jewelry boxes. For visual consistency on social platforms, photograph your finished earrings in natural morning daylight against neutral, textured backdrops such as travertine stone, bleached linen fabric, or raw architectural plaster. Grouping earrings by color palettes—such as ocean blues, desert warm tones, or sun-drenched pastels—creates cohesive visual collections that help customers choose complementary pairs for seasonal gifts.

    Budget or Time Planning

    Crafting polymer clay earrings is an affordable, time-efficient hobby that offers high creative returns on minimal upfront investment. A standard two-ounce block of polymer clay costs only a few dollars and yields three to four complete pairs of statement earrings, keeping your per-unit production costs remarkably low. Beginners can keep initial startup costs down by purchasing versatile primary colors, a large block of white clay for custom pastel tints, and a small starter set of stainless steel jump rings and ball posts. To manage your crafting time efficiently, batch your creative process into dedicated stages: spend one focused session conditioning clay, mixing custom color formulas, and rolling slabs, and a second session cutting out shapes and piercing hardware holes. You can bake multiple trays of cut pieces simultaneously to maximize energy use, reserving a separate session for wet-sanding, buffing, and assembling hardware components. A beginner can typically complete a simple pair of geometric studs in under forty-five minutes, while multi-tiered dangles or detailed cane-sliced designs take roughly ninety minutes from start to finish. This modular approach helps crafters build an expansive jewelry collection or prepare stock for craft markets without feeling overwhelmed by multi-step finishing workflows.

    Creative Expansion and Advanced Inspiration

    Once you feel confident in foundational clay conditioning, cutting, and assembly techniques, you can explore intermediate artistic methods and creative mixed-media combinations. Experiment with incorporating liquid polymer clays to build raised enamel-style details, glossy drip accents, or fluid marbled surface glazes across cured geometric slabs. You can also explore metal leaf inclusions by rolling delicate sheets of genuine gold leaf, silver foil, or variegated copper leaf directly into raw clay surfaces before cutting, creating elegant veined accents that shimmer under the summer sun. Another striking technique involves integrating wood accents, pairing laser-cut walnut or raw birch wood shapes with vibrant polymer clay components using small jump rings for rich textural contrast. Advanced crafters can try miniature carving techniques, using linoleum gouges or micro-woodcarving tools to carve intricate floral relief patterns directly into cured, flat clay surfaces before highlighting the carved lines with oil-based antiquing paints. Exploring these advanced modifications helps makers expand their creative boundaries, turning simple polymer clay pieces into unique, collectible works of wearable art that showcase advanced craftsmanship.
  • 10 Geometric Polymer Clay Earrings

    10 Geometric Polymer Clay Earrings

    Handcrafted statement jewelry has established a dominant presence in modern personal style, with geometric polymer clay earrings standing out as an exceptionally adaptable and accessible medium. This comprehensive design guide provides a complete, step-by-step tutorial on designing and assembling ten unique geometric polymer clay earring designs, showing makers how to convert unbaked clay slabs into durable, contemporary fashion accessories. Readers will learn the exact mechanical steps required to properly condition raw clay, cut crisp angular and curvilinear components, complete clean curing cycles, drill connection points, and link hypoallergenic hardware components. Mastering these foundational techniques allows craft enthusiasts to produce boutique-quality jewelry collections for personal wardrobes, curated gifts, or craft collections without demanding industrial studio equipment. Because polymer clay remains lightweight even when formed into substantial multi-tiered compositions, it offers the ideal balance of dramatic scale and comfortable all-day wearability. Learning how to shape precise angles, balance negative space, and pair modern color palettes builds strong tactile precision and creative confidence. By applying the practical methods and structured guidelines detailed throughout this resource, beginners and intermediate artists alike can reliably produce clean, professional finishes across every handmade pair.

    Why This Idea Is Trending or Useful

    The continued popularity of geometric polymer clay jewelry across digital platforms stems from a broader appreciation for minimalist style, clean architecture, and modern design principles. Modern fashion prioritizes customizable personal accents, making bold geometric jewelry an effective way to introduce tailored color palettes and graphic contours to daily attire. In contrast to metal casting or glasswork, which require specialized workshops, polymer clay offers a beginner friendly creative project that can be executed safely at a standard kitchen table. The material cures at low oven temperatures, making the medium uniquely accessible for home crafters seeking immediate, durable results. From a design perspective, geometric layouts rely on simple mathematical forms like arches, triangles, discs, and trapezoids, which naturally lend themselves to balanced, visually pleasing compositions. This aesthetic adaptability allows makers to experiment freely with trending ideas, including muted earth tones, monochrome contrasts, and playful retro color blocking. Furthermore, the low cost of foundational supplies makes this an attractive DIY pursuit, providing a cost-effective avenue to produce handmade wearable art that rivals commercial retail pieces in beauty and longevity.

    Materials and Preparation

    Assembling a professional earring collection requires reliable materials, proper tools, and systematic workspace preparation to achieve clean, lint-free outcomes. Begin by selecting high-grade polymer clay that cures to a firm, slightly flexible finish rather than a brittle consistency, ensuring finished pieces withstand accidental drops. Essential hand tools include an acrylic rolling roller or manual clay conditioning machine, ultra-thin flexible tissue blades, metal or three-dimensional printed geometric cutters, a handheld micro-drill with assorted bits, and flat-nose jewelry pliers. You will also need smooth ceramic tiles to serve as both an unyielding work surface and a stable baking plaque. Secure hypoallergenic jewelry findings, focusing on stainless steel or gold-plated brass jump rings, flat-pad earring posts, silicone backs, and strong two-part liquid epoxy. Thorough preparation involves wiping down your ceramic work tile with isopropyl alcohol and washing your hands to remove any stray dust or skin oils that could mar light-colored clay. Planning your geometric layouts on graph paper beforehand establishes exact dimensional proportions, ensuring that every layered segment aligns accurately before the first slab is cut.

    1. Minimalist Dual-Tone Arch Dangle

    1

    How to Create

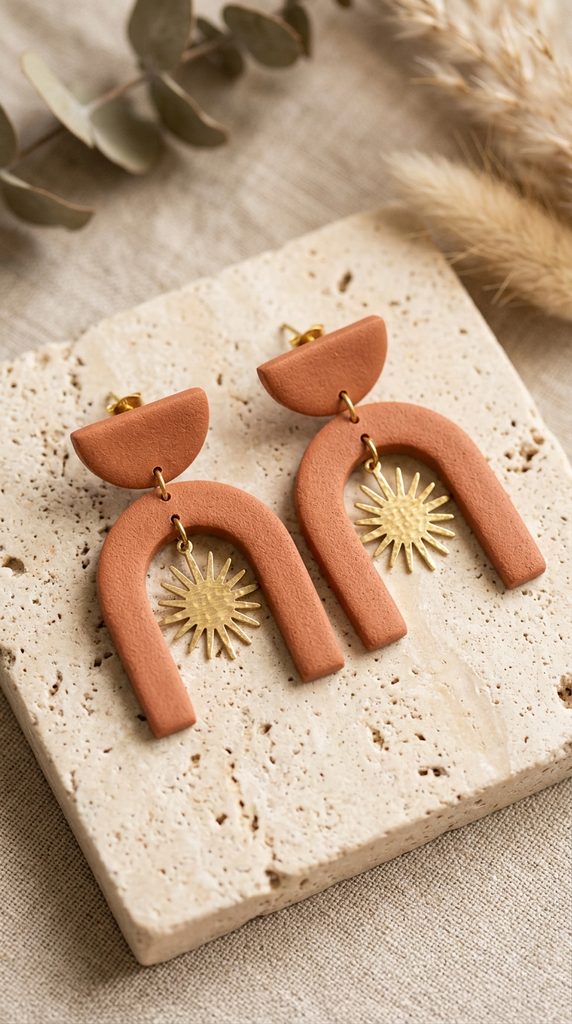
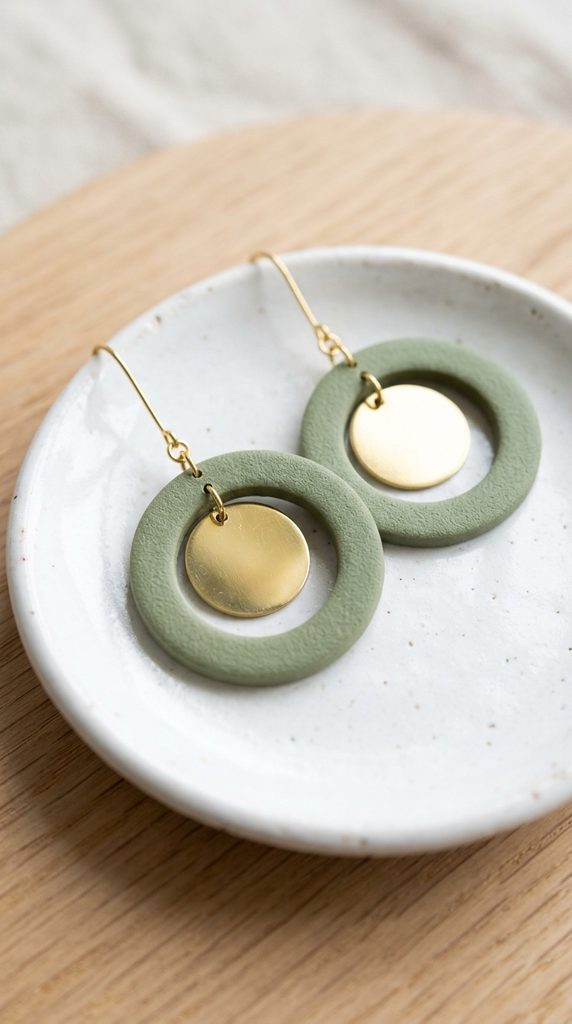
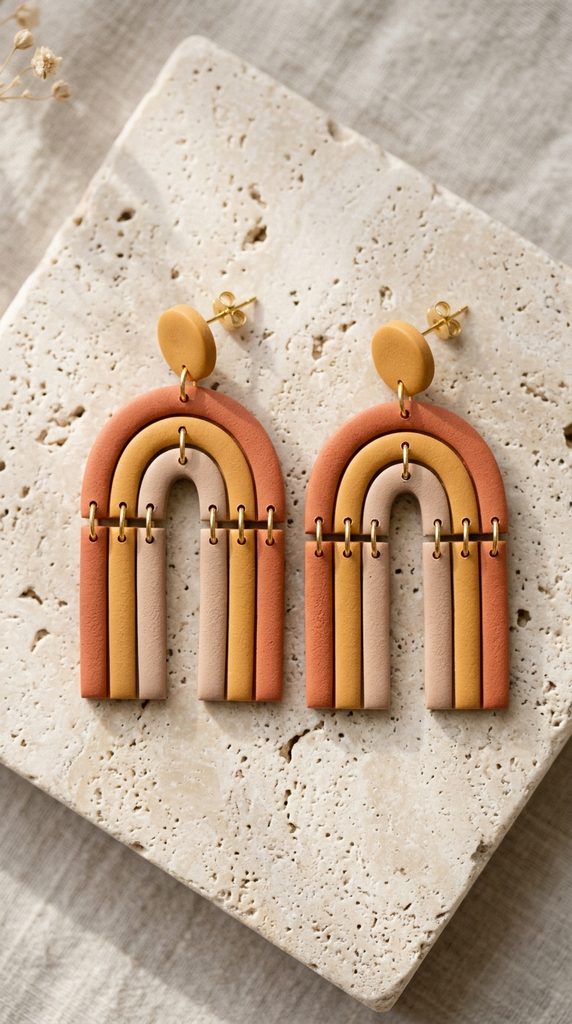
    The dual-tone arch dangle exemplifies modern design by juxtaposing an open architectural arch with a solid upper stud disc. This design balances structural negative space with clean exterior contours, producing a lightweight, modern silhouette that elongates the neck when worn. The top component consists of a small, opaque circular stud that anchors the earring directly to the lobe, while the lower pendant features a hollow, inverted U-shaped arch linked via a single jump ring. Choosing high-contrast color combinations, such as deep terracotta paired with creamy travertine or charcoal slate paired with warm mustard, reinforces the clean graphic lines of the geometric silhouette. The open interior cutout reduces physical weight significantly, preventing lobe fatigue while maintaining an eye-catching visual footprint. Because the arch swings freely from the upper disc, the earring moves naturally with the wearer, creating fluid dynamic interest against structured clothing or everyday casual wear.
    To construct this piece, begin by conditioning two separate portions of clay until pliable, rolling each block out evenly on your ceramic tile to a consistent depth of two millimeters. Use an arch cutter with an internal cutout blade to stamp out the main dangling segment, pressing firmly into the clay and rocking the blade gently to ensure a clean, vertical separation. Next, use a small twelve-millimeter round cutter on the contrasting clay sheet to form the upper stud component. Carefully peel away the surrounding scrap clay, leaving the cut geometric shapes directly on the ceramic tile to prevent finger distortion. Bake the components on the tile in a preheated oven according to your specific clay instructions, then allow them to cool completely. Using a hand-cranked pin vise drill, bore a one-millimeter hole centered along the bottom of the stud disc and another through the upper crest of the arch. Connect both components using a six-millimeter open jump ring, and secure an earring post to the back of the circular disc using clear jewelry adhesive.

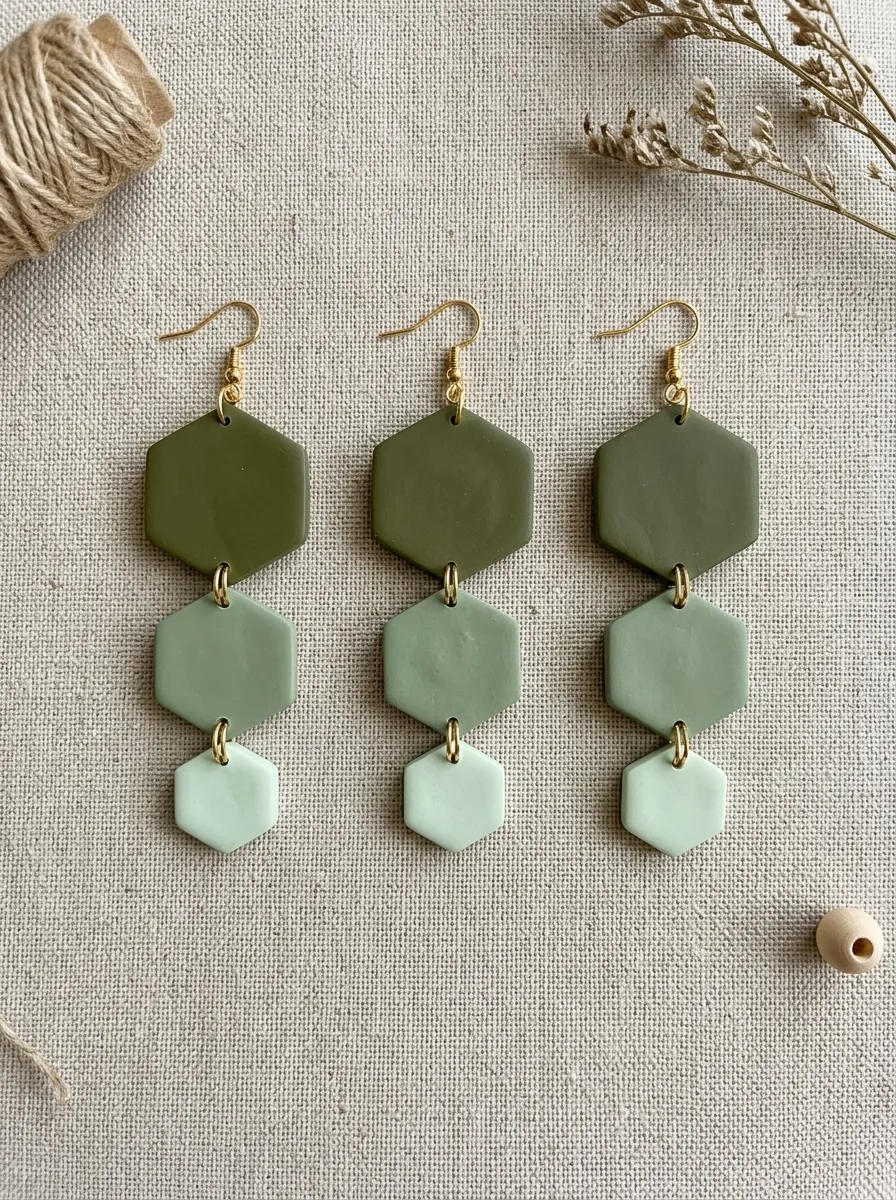
    2. Tri-Tiered Hexagon Cascade

    2

    Step-by-Step Guide

    The tri-tiered hexagon cascade utilizes progressive scale to create an articulated, kinetic piece of jewelry that drapes elegantly. This concept stacks three regular hexagonal components in descending dimensions, linking each element with dual jump rings to establish a stable, planar orientation that resists twisting. The repeating geometric symmetry of six-sided polygons provides a structured visual rhythm, while the stepped sizing creates a balanced taper from the earlobe downward. Utilizing a subtle gradient color palette, such as transitioning from deep olive green to sage and finally to pale mint, highlights the structural shift between each tier. The flat, faceted edges catch room lighting cleanly, lending the finished accessory an angular, crystalline presence. Despite including three separate tiers per side, rolling the clay to an exact one-and-a-half millimeter thickness keeps the overall weight under five grams per earring, ensuring long-term wearability.
    Initiate the project by rolling a conditioned sheet of clay through your pasta machine on a medium setting to achieve an even thickness of one and a half millimeters. Position nested hexagonal metal cutters measuring twenty-four millimeters, eighteen millimeters, and twelve millimeters across the slab, pressing down firmly to extract matching pairs for each tier. Carefully lift the surrounding excess clay, smoothing any micro-burrs along the cut perimeter with a soft fingertip dipped in a trace amount of water. Transfer the tile containing the shapes directly into the oven, baking at the recommended curing temperature for thirty-five minutes to ensure full polymer cross-linking. After the clay has cooled, map out drilling locations using a fine pencil, placing two parallel marks along the top and bottom flats of each intermediate hexagon. Drill precise one-millimeter holes through every marked coordinate, connect the descending tiers sequentially using four-millimeter jump rings, and attach a secure post to the reverse face of the smallest top hexagon.

    3. Asymmetrical Circle and Trapezoid Drop

    3

    Execution Process

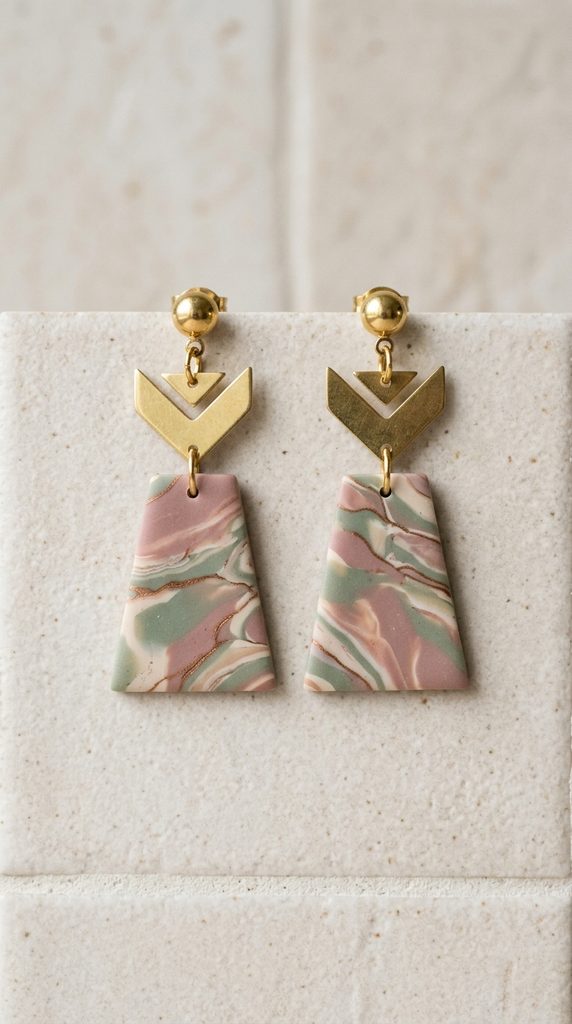
    The asymmetrical circle and trapezoid drop challenges standard matching pairs by varying the geometric arrangement between the left and right earrings while preserving overall visual balance. One side features a solid circular stud suspending a long, tapered trapezoid, while the opposite side pairs a trapezoidal stud with a large suspended disc. This intentional imbalance introduces an avant-garde, gallery-inspired aesthetic that immediately draws attention and complements contemporary, minimalist wardrobes. A restrained, neutral color scheme, such as soft ivory, matte black, and warm sandstone, prevents the differing geometric silhouettes from appearing chaotic or visually disjointed. The stark, straight angled edges of the trapezoids provide a sharp counterpoint to the smooth curves of the circular discs, creating a dynamic visual interplay of forms. This project demonstrates how thoughtful spatial composition can elevate simple geometric cutouts into sophisticated, artistic accessories.
    Start by rolling out two slabs of contrasting clay, maintaining a uniform two-millimeter thickness to guarantee uniform depth across both earrings. Using a round cutter measuring twenty millimeters and a matching trapezoid cutter measuring thirty millimeters in height, cut two circles and two trapezoids from your prepared slabs. For the first earring, designate the circle as the hanging lower drop and trim one trapezoid to serve as the compact upper stud base. For the companion piece, reverse this structural hierarchy, utilizing the second trapezoid as the elongated drop beneath the remaining circular stud. Bake all four pieces on a flat surface, allowing them to anneal slowly within the turned-off oven after the curing cycle finishes to prevent thermal warping. Once cold, drill clean connection holes through the designated interface points using a fine drill bit. Assemble each pair using five-millimeter jump rings, ensuring that the rings remain flush, and adhere hypoallergenic stainless-steel flat pads to the top components with two-part epoxy.

    4. Concentric Triangle Cutout Pendant

    4

    How to Make

    The concentric triangle cutout pendant utilizes sharp lines and nested geometry to form a striking, prism-inspired statement piece. This design features a large equilateral triangle with an inner triangular core removed, suspended beneath a matching miniature solid triangular stud. The framing effect created by the open interior chamber introduces a light, airy quality that prevents large-scale geometric earrings from feeling heavy or visually dense. Selecting a warm, monochromatic clay tone, such as raw umber, ochre, or brick red, emphasizes the clean, sharp perimeter angles without relying on distracting surface patterns. The precision of equilateral geometry gives these earrings a modern, graphic profile that pairs seamlessly with high-neckline apparel and structured tailoring. When constructed with straight, crisp cuts, the open framework creates a striking silhouette that frames the jawline cleanly.
    Begin by rolling out thoroughly conditioned clay onto a ceramic tile, using guide rails to ensure an exact two-millimeter depth across the entire sheet. Take a thirty-five-millimeter equilateral triangle cutter and press it firmly into the clay slab to establish the primary outer perimeter. Align a smaller, fifteen-millimeter triangular cutter centrally within the larger impression, cutting completely through the core to extract the internal cutout and reveal a hollow triangular frame. Repeat the procedure to create a matching pair, and cut two solid ten-millimeter triangles to function as the upper ear studs. Remove the surrounding scrap clay with a flexible tissue blade, gently smoothing the outer triangular tips to eliminate sharp burs. Cure the shapes at your clay’s specified temperature for thirty minutes, drill a single suspension hole at the apex of each hollow triangle, and join each frame to its corresponding stud using a single jump ring.

    5. Segmented Half-Moon Fan Earring

    5

    Step-by-Step Guide

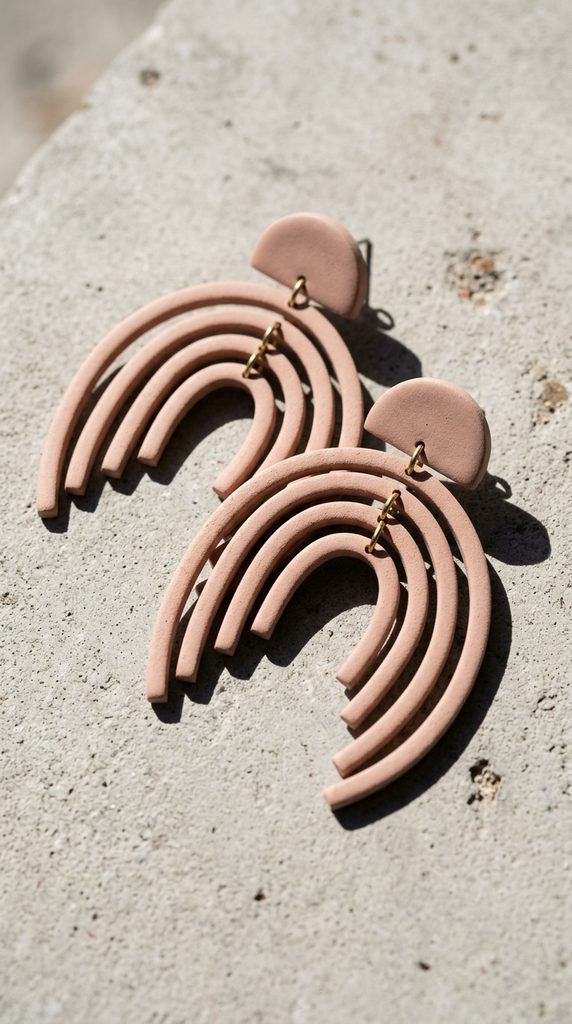
    The segmented half-moon fan earring blends Art Deco architecture with contemporary bohemian style, creating a sweeping fan motif that contours gently around the earlobe. The earring consists of a semi-circular top plate that suspends multiple vertical clay bars or radiating fringe segments, forming an articulated semicircle that swings freely. This segmented structure produces gentle motion and subtle clicking sounds as the wearer walks, adding a pleasant tactile dimension to the accessory. Working with a cohesive earth-tone palette, such as warm cinnamon, dusty blush, sand, and deep terracotta, enhances the sunburst or fan imagery. The flat upper crescent hugs the lower earlobe, providing a sturdy anchoring base that keeps the dangling fringe pieces hanging straight and evenly spaced. This design demonstrates how combining flat geometry with multi-point articulation can create sophisticated, fluid movement in polymer clay jewelry.
    Roll a conditioned sheet of warm terracotta clay to an even two-millimeter thickness using a pasta machine or acrylic roller. Cut two large semicircular shapes measuring thirty millimeters wide to form the top header plates, and cut eight narrow rectangular strips measuring five millimeters wide by twenty millimeters long to serve as the hanging fringe bars. Arrange the rectangular fringe pieces beneath each half-moon plate, aligning the bottoms into a sweeping curved contour that mirrors the outer radius of the semicircular head. Bake all elements together on a flat ceramic tile, ensuring the narrow strips remain perfectly straight throughout the heating process. Once fully cured and cooled, use a fine jeweler’s hand drill to bore matching pilot holes along the flat base of the half-moon and through the top of each individual fringe strip. Connect each hanging fringe segment to the corresponding header hole using small four-millimeter jump rings, and attach a pad post to the back of the half-moon using adhesive.

    6. Monochromatic Grid Stud Set

    6

    Setup Method

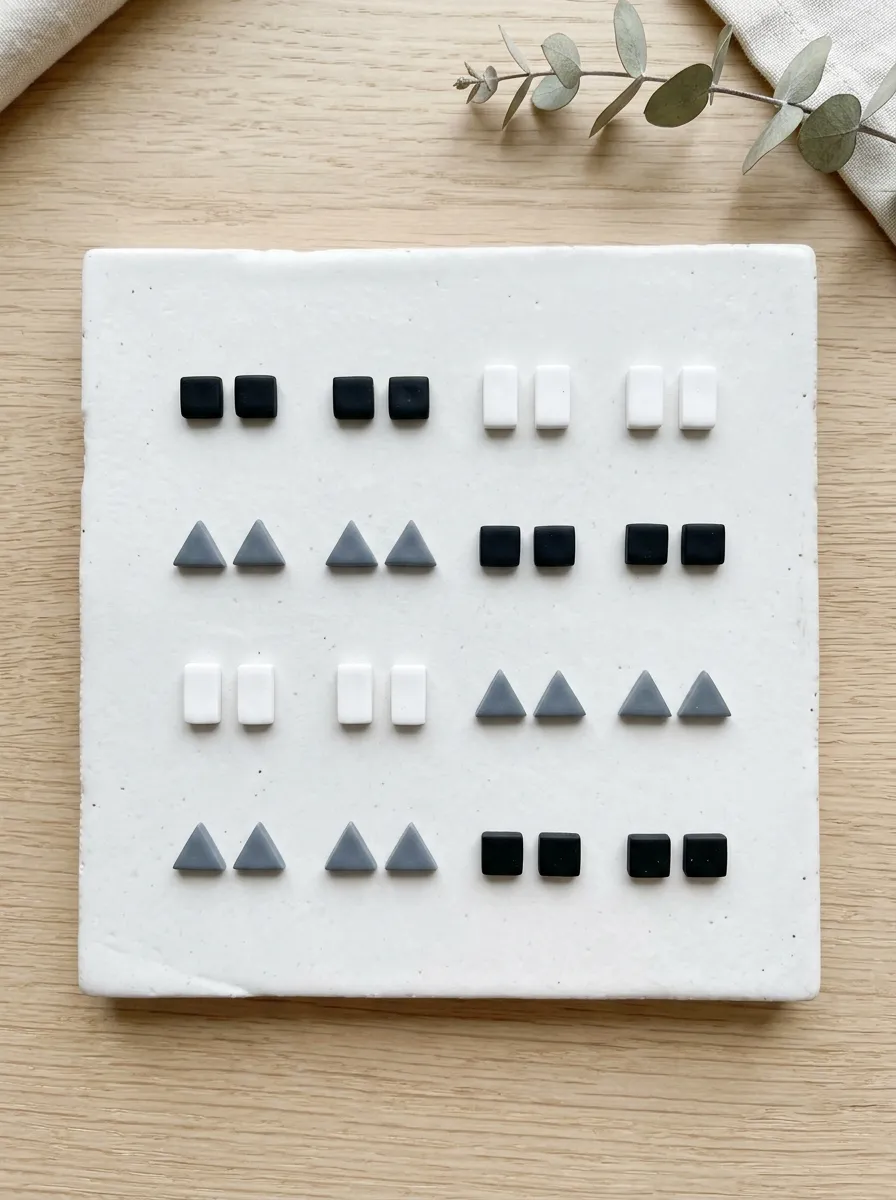
    The monochromatic grid stud set offers an understated, everyday jewelry alternative focused entirely on minimalist geometric precision. This design collection features a set of petite studs based on elemental shapes, including five-millimeter squares, narrow rectangles, and small equilateral triangles, executed in a clean black, white, and gray palette. Without dangling tiers or complex jump ring connections, the visual impact relies entirely on sharp edges, flat surfaces, and clean color blocking. These compact geometric forms provide a modern, architectural finish that pairs effortlessly with multiple ear piercings and casual daily outfits. The low-profile silhouette ensures the earrings sit flush against the earlobe, eliminating snagging risks against hair or clothing. This project is ideal for beginners because it requires no hardware drilling, allowing makers to focus on mastering basic clay conditioning, flat rolling, and precise cutter alignment.
    Prepare three small portions of polymer clay in pure white, jet black, and mid-tone slate gray, conditioning each until soft and free of air bubbles. Roll each color out separately on a clean glass plate or tile to a consistent depth of two and a half millimeters, taking care to prevent color cross-contamination between rolls. Use micro-geometric cutters measuring between five and eight millimeters to stamp out squares, rectangles, and small triangles from each colored sheet. Carefully remove the negative clay matrix using a flexible tissue blade, leaving the tiny geometric shapes resting untouched on the baking tile. Bake the cut studs for twenty-five minutes at the temperature recommended on your clay packaging to ensure a durable, break-resistant cure. After the pieces cool, sand the reverse side of each stud lightly with four-hundred-grit wet sandpaper to create a tooth, then secure stainless steel posts with a small dot of two-part epoxy.

    7. Interlocking Oval and Rectangle Link

    7

    How to Create

    The interlocking oval and rectangle link uses alternating curved and angular geometry to create a continuous, chain-inspired dangle. The upper component features a hollow, rounded oval loop, which cradles an elongated rectangular frame suspended freely within its lower curve. By pairing soft, sweeping curves with straight vertical lines, the design achieves visual balance through deliberate geometric contrast. Using a soft pastel color scheme, such as butter yellow paired with sage green or lilac paired with soft oat, softens the structural silhouettes and lends the accessory an airy, modern character. Because both components feature open centers, the earrings remain exceptionally light, producing an open-concept jewelry design that flatters without pulling down on the earlobe. The interlocking motion of the geometric frames creates natural fluidity, catching ambient light as the pieces shift throughout the day.
    Roll a conditioned sheet of clay to an even two-millimeter thickness using a dedicated rolling pin fitted with rubber guide rings. Stamp out two elongated oval shapes using a forty-millimeter cutter, then use a smaller thirty-millimeter oval cutter centered inside each shape to remove the inner core, leaving two clean oval frames. Next, roll a contrasting clay sheet to the same thickness and cut two rectangular frames measuring twenty millimeters wide by thirty-five millimeters long, again removing the internal clay with a smaller rectangle cutter. Bake the four hollow geometric frames on your ceramic tile, letting them cool completely inside the oven to prevent uneven cooling and surface curling. Using a fine drill bit, bore a clean pilot hole at the top apex of each oval and at the top center of each rectangle. Link the rectangular frame beneath the oval frame using a robust five-millimeter jump ring, and secure a comfortable ball-post stud to the top loop to complete the assembly.

    8. Rounded Trapezoid with Hollow Teardrop Core

    8

    Step-by-Step Guide

    The rounded trapezoid with a hollow teardrop core combines bold, flat architectural planes with an organic, drop-shaped internal cutout. The silhouette features a broad trapezoid with softly rounded bottom corners, housing a centrally removed teardrop opening that exposes the wearer’s neck through the pendant. This contrast between an angular perimeter and a curvilinear internal window creates sophisticated negative space, keeping the design visually engaging from all angles. A muted, earthy palette, such as olive green, burnt amber, or dusty mauve, complements the retro-modern shape, blending Mid-Century modern elegance with modern artisan craftsmanship. The broad lower base of the trapezoid gives the earring grounded visual weight, while the hollow teardrop opening prevents the piece from feeling heavy or cumbersome. This versatile geometric design transitions seamlessly from casual daytime wear to formal evening settings.
    Roll your conditioned polymer clay onto a smooth ceramic work surface to a uniform thickness of two millimeters. Align a rounded trapezoid cutter measuring thirty-five millimeters wide by forty millimeters tall over the slab, pressing down evenly to cut the primary perimeter shape. Before lifting the outer cutter, position an eighteen-millimeter teardrop cutter inside the center of the trapezoid, pressing straight down to punch out the hollow interior core. Carefully lift both cutters vertically away from the clay, and use a needle tool to gently extract the inner teardrop scrap without warping the outer frame. Repeat the sequence to produce a matching pair, placing two fifteen-millimeter solid round discs alongside them to serve as upper studs. Bake all components on the tile for thirty-five minutes at the appropriate curing temperature, drill a one-millimeter hole through the top of the trapezoid and the bottom of the stud, and link them securely with a jump ring.

    9. Layered Isometric Diamond Drop

    9

    Execution Process

    The layered isometric diamond drop uses overlapping diamond shapes and subtle stepped elevation to create a dimensional, relief-style statement earring. Rather than cutting out hollow sections, this design stacks smaller solid diamonds over a larger, contrasting diamond foundation to build visual depth. The resulting multi-layered profile casts subtle shadows across the surface of the earring, giving the piece an eye-catching, dimensional presence without adding unnecessary bulk. Working with a monochromatic or tonal palette, such as charcoal gray layered over light dove gray, emphasizes the stepped relief and brings out the clean lines of the diamond geometry. The vertical alignment of the pointed tips creates an elongated silhouette that naturally flatters the jawline. This design demonstrates how layering thin, flat geometric cutouts can produce rich, tactile dimension on a lightweight polymer base.
    Condition two contrasting blocks of clay and roll both sheets to a slim thickness of one and a half millimeters using a mechanical clay roller. Cut two large diamond shapes measuring forty-five millimeters from tip to tip using a stainless-steel cutter, and cut two smaller diamonds measuring twenty-five millimeters from the secondary color sheet. Place the smaller diamond directly over the lower half of the larger diamond base, pressing down gently with a smooth acrylic block to bond the raw clay layers without distorting their crisp pointed edges. Bake the assembled layered diamonds on a flat tile for thirty-five minutes, ensuring the dual-layer clay fully bonds during the thermal curing process. Once the pieces have cooled completely, sand the outer edges with wet eight-hundred-grit sandpaper to blend the layer seam smoothly. Drill a clean hole through the top point of each diamond, connect an open earring hook through the opening, and close the loop securely with flat-nose pliers.

    10. Split Circle Color-Blocked Geometric Dangle

    10

    Setup Method

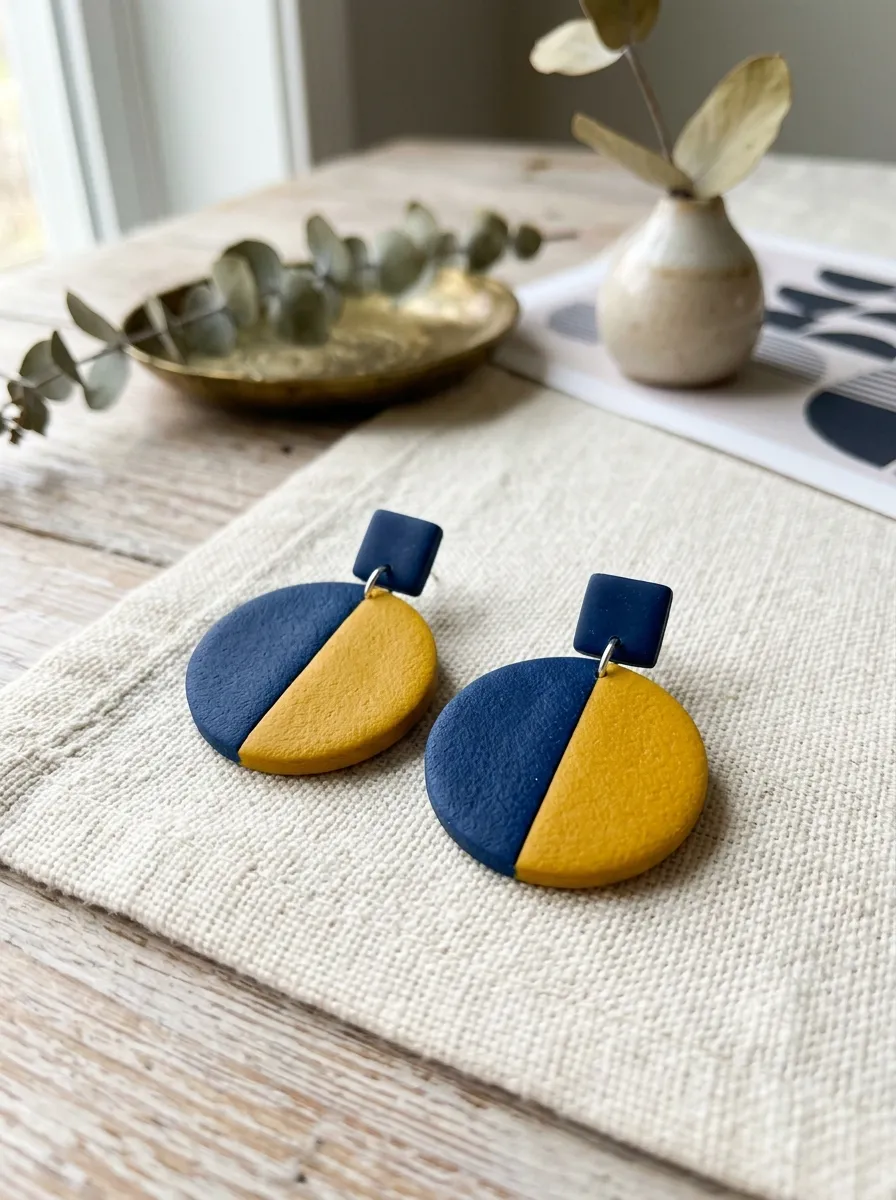
    The split circle color-blocked dangle uses a bisected circular silhouette to explore geometric contrast and bold color blocking. This design takes a large circular disc, slices it straight down the vertical centerline, and rejoins the two halves using contrasting clay tones, such as mustard yellow paired with deep navy blue. The joined circle is then suspended beneath a small, square stud component, creating an engaging dialogue between curved and right-angled forms. The straight dividing line down the center of the circle provides a sharp graphic axis that anchors the design, while the circular outer perimeter keeps the overall silhouette soft and approachable. This design provides an exceptional canvas for exploring graphic color theory, allowing makers to experiment with seasonal palettes and complementary color stories. The flat, balanced shape hangs comfortably on the ear, delivering a bold pop of color and modern design appeal to any jewelry collection.
    Condition two blocks of contrasting polymer clay and roll each sheet to a matching thickness of two millimeters on your ceramic work tile. Using a straight tissue blade, slice one straight, clean edge along both sheets, then press the two cut edges firmly together side-by-side to form a continuous, two-tone slab. Smooth the joined seam using an acrylic roller with light, even pressure, then center a thirty-millimeter circular cutter directly over the seam line and stamp out your round disc. This technique creates a clean, two-tone circle bisected precisely down the middle with crisp, unblurred color boundaries. Cut two small eight-millimeter square studs from one of the scrap colors to serve as the top anchoring pieces. Bake the components on the tile for thirty minutes, drill pilot holes at the top of each circle and the base of each square, connect the elements with jump rings, and attach stainless steel earring posts to the reverse sides with epoxy.

    Common Beginner Mistakes and How to Avoid Them

    Beginner jewelry makers frequently encounter structural and cosmetic issues when working with polymer clay, with incomplete conditioning serving as the most common root cause. When clay is not kneaded sufficiently before shaping, the internal plasticizers fail to distribute evenly, resulting in brittle cured pieces that snap or crumble under minor stress. Prevent this by kneading the raw clay thoroughly until it becomes warm, soft, and pliable, passing it repeatedly through a clay machine until it bends without cracking along the edges. Another widespread error is baking components at incorrect or fluctuating temperatures, which either leaves the pieces under-cured and fragile or scorches the clay and alters its color. Always utilize an independent, freestanding oven thermometer placed inside the oven to monitor real-time temperatures, rather than relying solely on the appliance dial. Additionally, working on rough or dusty surfaces can embed unwanted lint, hair, and fingerprints into the unbaked clay slabs. Protect your designs by cleaning smooth ceramic tiles with rubbing alcohol before rolling, keeping wet wipes handy, and gently wiping the surface of unbaked pieces with a cotton swab dipped in alcohol to smooth away stray surface debris.

    Practical Tips for Better Results

    Elevating the overall finish of handmade polymer clay earrings requires adopting refined preparation techniques and professional assembly practices. Utilizing ultra-thin, sharp cutters ensures clean vertical edges, significantly cutting down on post-bake sanding time. When working on smooth ceramic tiles, leave cut clay shapes directly on the tile during the baking cycle rather than lifting and transferring them, which prevents unintentional finger indentations and edge distortion. For post-curing refinements, invest in automotive wet-and-dry sandpaper in progressive grits ranging from four-hundred to one-thousand; sanding under a light trickle of running water prevents airborne clay dust while polishing edges to a smooth, factory-grade finish. When adhering metal earring posts to cured clay backs, avoid standard instant craft glues, which tend to degrade and pop loose over time. Instead, prepare the bonding surfaces by scratching a light crisscross texture into both the clay and the metal pad, then secure the post using a high-strength, two-part epoxy resin. Finally, use two pairs of flat-nose pliers to twist jump rings open sideways rather than pulling them apart, which preserves their round profile and prevents metal fatigue.

    Styling, Presentation, or Organization Ideas

    Presenting and organizing geometric polymer clay earrings thoughtfully enhances both their functional storage and their visual appeal as wearable art. For personal collections, display your earrings on tiered wooden stands fitted with perforated brass screens, which keeps hanging dangles untangled while turning colorful jewelry into attractive vanity decor. When styling geometric statement earrings with daily wardrobes, pair bold architectural shapes like arches and cascading hexagons with clean, minimalist clothing to let the jewelry serve as the central visual anchor. Neutral-toned clay accessories complement casual denim, crisp white button-down shirts, and tailored blazers effortlessly, while vibrant, color-blocked pieces bring energetic pops of color to dark knit sweaters and monochromatic outfits. If preparing earrings for gifting or boutique sales, mount finished pairs on heavy cardstock cards embossed with clean geometric patterns or neutral kraft textures. Store finished inventory in lidded compartments lined with soft cotton padding, shielding the cured clay surfaces from scratchy metal chains and keeping them safely protected from prolonged, direct sun exposure.

    Budget or Time Planning

    Careful material management and structured batch-working allow makers to produce high-end geometric jewelry collections efficiently on an accessible budget. A single standard two-ounce block of polymer clay can yield six to ten complete pairs of geometric earrings, making this craft an exceptionally economical creative pursuit. To keep initial costs low, invest in versatile starter tools, such as basic geometric cutter sets, a smooth acrylic roller, an independent oven thermometer, and a variety pack of stainless steel findings, avoiding expensive specialty equipment until your foundational skills are established. Maximize your crafting time by organizing production into dedicated, sequential stages: dedicate one session to planning layouts and conditioning clay, a second session to rolling, cutting, and baking, and a final session to drilling, sanding, and assembling hardware. Working in batches this way reduces tool cleanups, streamlines assembly-line efficiency, and ensures consistent quality across multiple pairs. Storing usable clay scraps by color family in airtight plastic bags prevents material waste, allowing you to recondition leftover trimmings into custom mixed shades, faux stone textures, or marbled slabs for future jewelry collections.

    Creative Expansion and Advanced Inspiration

    Once you master fundamental geometric cutting and assembly techniques, explore advanced variations that push the boundaries of polymer clay jewelry design. Experiment with mixed-media compositions by incorporating hammered raw brass charms, natural wood pendants, or woven cotton tassels alongside cured clay components, creating rich tactile contrast across your jewelry line. You can also introduce unique surface treatments to unbaked slabs, such as using silkscreen stencils with acrylic paint, embedding metallic gold leaf foil, or dusting mica powders over raw clay to simulate natural stone, terrazzo, or aged ceramics. Advanced structural methods include experimenting with hollow-core techniques, creating two-tone extruded cane patterns, or sculpting dimensional relief accents directly on flat geometric backers. Beyond personal jewelry, these same geometric clay techniques can be scaled up to create modern home accents, including decorative hanging wall mobiles, fan pulls, and minimalist keychain fobs. Keeping a dedicated sketchbook of architectural outlines, textile patterns, and trending color combinations will provide endless inspiration, helping you continuously evolve your personal aesthetic across future creative projects.
  • 10 Pastel Polymer Clay Earrings

    Handmade polymer clay jewelry provides an exceptional creative outlet for makers wanting to design custom accessories with distinct shapes, soft tones, and modern silhouettes. Pastel polymer clay earrings, in particular, anchor current fashion inspiration boards, offering delicate hues of mint, blush, lavender, butter yellow, and sky blue that coordinate with versatile capsule wardrobes. This structured tutorial provides step-by-step instructions for conditioning raw clay, mixing bespoke pastel formulations, cutting crisp geometric shapes, baking safely, and assembling professional hardware. Readers will learn the essential mechanics of curing durable pieces that resist snapping, drilling uniform holes for jump rings, and achieving smooth matte or glossy surface finishes. Making your own polymer clay earrings offers practical value by transforming accessible craft materials into wearable art pieces tailored to your personal aesthetic. Because the polymer medium remains malleable until heat-cured, it serves as an approachable, beginner friendly creative project that accommodates endless experimentation without high material costs. By adopting methodical studio practices and standardized baking protocols, crafters can produce lightweight, museum-grade statement earrings that hold up to regular daily wear. The following guide outlines the complete process to help you design, craft, and assemble ten unique pastel clay earrings from home.

    Why Soft Palette Clay Jewelry Captures Modern Style

    Pastel clay jewelry continues to dominate design boards because it merges sculptural modern design with soft, nostalgic color palettes that suit varied lifestyle aesthetics. Unlike heavy metal or resin accessories, cured polymer clay remains remarkably lightweight, allowing makers to craft substantial statement pieces that dangle comfortably from earlobes all day without pulling. The delicate nature of pastel hues—such as muted peach, soft pistachio, pale periwinkle, and chalky lilac—softens bold architectural geometries, making angular drop earrings and tiered arches feel approachable and balanced. For beginners, polymer clay represents a forgiving DIY medium that requires no specialized studio ventilation or expensive kilns, functioning reliably inside an ordinary domestic toaster oven. Sourcing basic clay blocks and rudimentary shaping tools provides a low barrier to entry, making it an easy project to undertake on a standard kitchen counter. Furthermore, the modern aesthetic favors tactile, handmade items over mass-produced plastic jewelry, giving each finished pair authentic artisan appeal. This combination of all-day physical comfort, gentle color balance, and accessible tooling makes pastel clay earrings an enduring favorite for handmade gifting, craft fair production, and personal creative exploration.

    Studio Workspace, Materials, and Slab Preparation

    Building reliable polymer clay earrings requires assembling the correct materials, hand tools, and dedicated curing equipment before shaping your first slab. Core materials include premium polymer clay blocks in white and assorted primary hues, stainless steel clay cutters, an acrylic rolling pin or dedicated pasta machine, and smooth ceramic work tiles. Hardware supplies require hypoallergenic stainless steel or brass jump rings, flat-pad ear posts, butterfly clutch backs, industrial jewelry adhesive, and two pairs of chain-nose pliers. Essential finishing tools consist of a handheld pin vise hand drill, assorted wet-and-dry sanding papers from four hundred to one thousand grit, and an independent oven thermometer. Begin studio preparation by wiping your ceramic work tile with isopropyl alcohol to remove lingering lint, pet hair, and airborne dust that easily embeds into light pastel clay. Plan your color formulas by blending translucent or opaque white base clay with pinches of saturated pigments until you achieve consistent, chalky pastel values. Condition the clay thoroughly through your roller until the sheet bends smoothly without cracking along folded edges, ensuring complete structural polymer chain fusion during baking.

    Idea 1: Sculpted Mint Archway Drops

    Step-by-Step Guide

    The sculpted mint archway drop earring features an architectural U-shaped silhouette suspended beneath a clean circular ear stud, establishing a balanced mid-century profile. This design highlights pale seafoam and mint green tones, offering a fresh, botanical presence that balances sharp geometric lines with a soft spring palette. The central cutout reduces the physical surface area of the earring, keeping the overall weight negligible while maintaining a bold, graphic outline on the earlobe. The negative space inside the arch allows the earring to swing freely with natural head movement, drawing focus toward the clean edges and smooth matte surface of the cured clay. This concept serves as an accessible entry point for beginners because standard arched cutters eliminate the need for complicated freehand slicing. The minimalist style coordinates effortlessly with crisp linen shirts, neutral knitwear, and minimalist casual outfits, delivering an understated statement piece suited for both professional workspaces and weekend events.

    Begin by conditioning two ounces of white polymer clay with a pea-sized portion of forest green clay until the mixture achieves a uniform, pale mint hue. Roll the conditioned clay across your ceramic tile using depth guide rings set to three millimeters to ensure a perfectly flat, level slab. Press an arch-shaped stainless steel cutter firmly through the clay, giving the cutter a slight lateral twist before lifting to leave clean cut lines. Cut two matching circular studs using an eight-millimeter round cutter from the remaining mint slab to serve as top anchors. Transfer the ceramic tile directly into a preheated oven set to one hundred and thirty degrees Celsius, curing the shapes for thirty-five minutes under an aluminum foil tent. Once cool, smooth the outer perimeter using eight-hundred-grit wet sandpaper, drill connection holes with a manual pin vise, and link the arch to the round stud using a six-millimeter gold jump ring before gluing a post to the back.

    Idea 2: Marbled Lilac and Cream Petal Clusters

    Execution Process

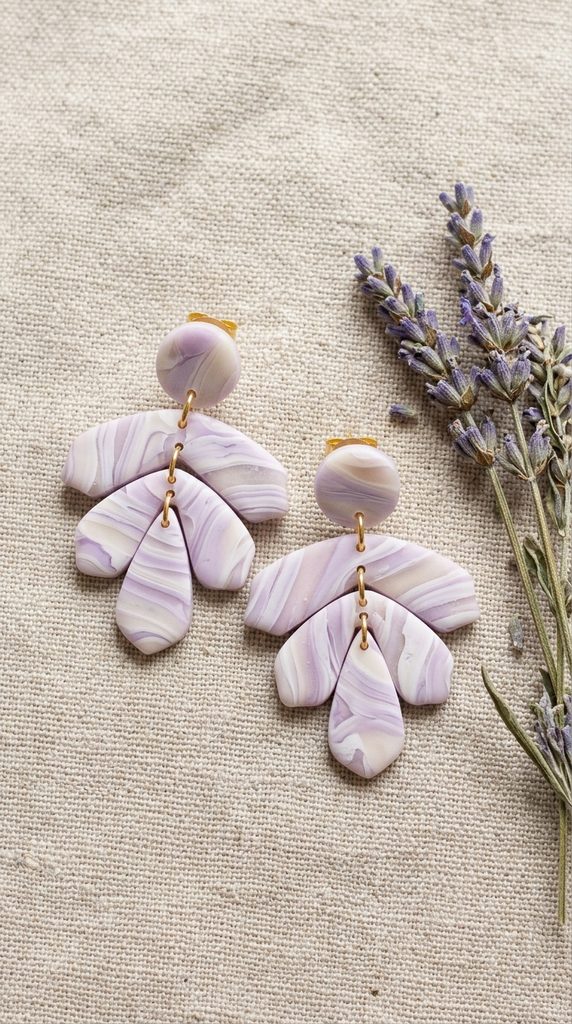
    Marbled lilac and cream petal cluster earrings combine soft swirling color patterns with organic, drop-shaped components arranged in an overlapping fan structure. The marbled effect blends translucent white, opaque cream, and pale violet clay, creating a fluid stone-like texture reminiscent of smoothed river pebbles or delicate flower petals. By layering small, cured petal elements beneath a central circular anchor, the earring gains dimensional depth and subtle surface shadows that accentuate the marbling. This design teaches essential color manipulation methods, demonstrating how to twist and fold contrasting clays without over-blending them into a single muddy color. The resulting botanical texture brings romantic, vintage appeal that suits wedding guest attire, garden brunches, and spring celebrations. Because every cut captures a unique segment of the hand-rolled marble pattern, no two earrings are identical, giving each pair authentic, one-of-a-kind craft value.

    To create the marbled pattern, roll three separate snakes of clay measuring four inches long: one in pale lilac, one in cream, and one in translucent white. Twist the three ropes together into a single striped cylinder, fold the length in half, and roll the cylinder smoothly across the tile to twist the colors again. Flatten the twisted clay into a ball and run it through a roller at three millimeters thickness, watching the fluid marble striations develop across the surface. Use a pointed petal-shaped cutter to punch six identical leaves, along with two small circular studs from the clearest marble section. Bake the components on parchment paper at the manufacturer’s specified curing temperature for thirty minutes, allowing the pieces to cool slowly inside the oven to prevent warping. Drill tiny holes at the tapered base of each petal and join three petals in a fan formation to the stud using miniature jump rings, securing an ear post behind the top anchor with resin.

    Idea 3: Tiered Butter Yellow Geometric Links

    How to Make

    Tiered butter yellow geometric link earrings showcase modern minimalist style through a vertical stack of interconnected hollow rectangles and solid squares. The soft pastel yellow hue introduces a warm, cheerful tone that mirrors morning sunlight without the stark intensity of bright neon yellow. By linking three distinct geometric components with metallic jump rings, the earring achieves linear movement and an elongated silhouette that flatters the jawline. The interplay between hollow framed pieces and solid color blocks keeps the accessory visually balanced, creating windows of open space that break up the monochrome palette. This project provides practical practice for cutting interior voids cleanly, requiring steady hand placement and accurate cutter alignment. The finished tiered earrings offer an elevated, modern accessory that pairs naturally with dark navy blazers, crisp white denim, or relaxed summer dresses, adding a subtle touch of warmth to daytime ensembles.

    Condition pale butter yellow clay by mixing zinc yellow with generous portions of translucent and white clay until the tone resembles creamy churned butter. Roll the slab onto a clean tile using a smooth acrylic roller until the sheet reaches a uniform three-millimeter thickness. Press a large rectangular cutter into the clay, then center a smaller rectangular cutter inside the first cut to extract a clean, hollow frame. Cut two matching solid square shapes to act as intermediate links, followed by two small round discs to serve as the functional earring posts. Bake all components on the ceramic tile at one hundred and thirty degrees Celsius for thirty-five minutes to achieve maximum flexibility without burning the pale pigments. After cooling, sand all cut edges under running water to eliminate stray burrs, drill vertical alignment holes through the centers, and connect the components sequentially using thin brass jump rings before cementing the ear backings.

    Idea 4: Periwinkle Floral Relief Discs

    How to Create

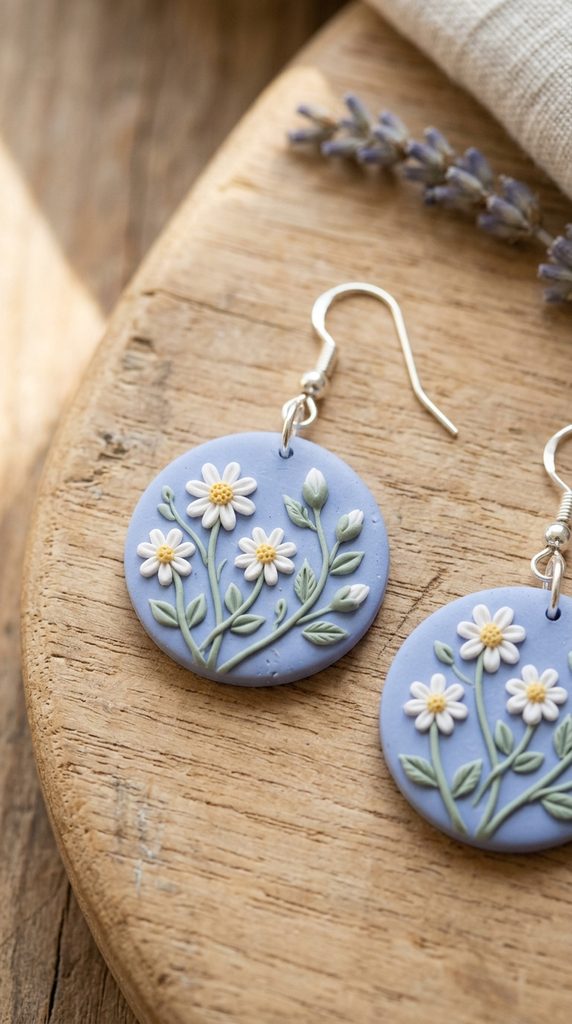
    Periwinkle floral relief disc earrings feature delicate three-dimensional botanical elements sculpted directly onto a flat pastel circular base. The soothing periwinkle background—blending cool blue with subtle lavender undertones—provides a peaceful canvas for tiny white daisies, delicate green vine stems, and golden floral centers. This miniature sculpted relief technique adds rich tactile interest and artisan charm, transforming simple flat rounds into small dimensional artworks. The flat disc base provides structural stability, ensuring that raised petals and leaves remain securely anchored during the baking and finishing steps. This project teaches fundamental clay applique skills, demonstrating how small amounts of raw clay bond together under light pressure before heat curing. The finished floral studs or drop discs complement cottage-inspired outfits, romantic lace tops, and relaxed weekend wear, adding a touch of handmade detail to everyday ensembles.

    Condition your periwinkle clay base and roll a flat slab to a thickness of two and a half millimeters on a clean ceramic tile. Cut two large one-inch circular discs using a stainless steel round cutter, leaving the cut circles undisturbed on the tile surface. Roll tiny specks of white clay into teardrop shapes, pressing five petals in a radial pattern onto each disc using a blunt needle tool to form miniature daisies. Add a microscopic ball of pale yellow clay to the center of each flower cluster, piercing the center lightly with a needle to add authentic floral texture. Trace delicate vine lines between the flowers using thin, hand-rolled threads of sage green clay, pressing them flush against the periwinkle background. Bake the decorated tiles for forty minutes at the clay brand’s recommended temperature, allow them to cool completely, and apply a drop of clear liquid clay over the flowers before a brief re-bake to lock the relief elements permanently.

    Idea 5: Peach and Sage Terrazzo Slab Dangles

    Setup Method

    Terrazzo-style clay earrings capture the timeless aesthetic of composite Mediterranean stone through random colorful chips pressed into a neutral background. This design uses a pale, chalky peach base scattered with irregular fragments of sage green, dusty rose, and creamy beige clay. The resulting mosaic pattern gives the earrings modern flair, blending contemporary graphic design with artisanal clay techniques. By cutting the finished terrazzo slab into long trapezoids or clean organic teardrops, makers achieve an elongated silhouette that highlights the scattered flecks across the surface. This technique is an effective way to repurpose raw scrap clay, turning leftover trimmed bits from earlier projects into deliberate design components. The warm peach and earthy sage color combination coordinates with modern autumn and spring palettes, making these earrings versatile accents for neutral cardigans, trench coats, and casual jumpsuits.

    Begin by rolling out an opaque pale peach clay sheet to three millimeters thickness to serve as your foundation slab. Gather small scraps of cured or raw clay in sage green, white, and dusty rose, slicing them with a sharp tissue blade into tiny, irregular geometric flecks. Scatter the colorful chips across the surface of the peach slab, leaving random spacing between the fragments to create an authentic terrazzo pattern. Place a sheet of parchment paper over the decorated slab and roll your acrylic pin firmly across the surface, pressing the chips flush into the base clay until completely smooth. Use a sharp trapezoid cutter to punch two matching shapes, followed by two circular stud toppers from the patterned sheet. Bake the cut pieces on a flat tile for thirty-five minutes at one hundred and thirty degrees Celsius, smooth the cut perimeters with wet-and-dry sandpaper, and assemble with gold-plated jump rings.

    Idea 6: Powder Blue Ribbed Fan Hoops

    Step-by-Step Guide

    Powder blue ribbed fan hoops combine classical art deco fan shapes with fine linear textures, creating an elegant half-moon earring with subtle movement. The pale powder blue hue brings a calm, serene presence that pairs cleanly with both polished silver and warm brass jewelry hardware. Surface ridges or ribs pressed into the clay catch directional light, creating fine shadow lines that give the flat half-circles greater dimensional depth. Connecting the ribbed fan component to an open metal wire hoop allows the piece to sway independently, creating balanced dynamic movement when worn. This design teaches makers how to use texture sheets, grooving combs, or linear blades to stamp uniform patterns into soft clay before cutting. The refined geometric silhouette makes these earrings suitable for formal dinners, gallery openings, or modern office wear, adding subtle texture without unnecessary weight.

    Condition pale powder blue clay by blending primary cyan, a trace of black, and a generous portion of white clay to achieve an understated dusty sky tone. Roll the conditioned clay onto your workspace tile at a thickness of three millimeters. Press a linear texture sheet or the spine of a rigid clay blade evenly into the slab surface to imprint uniform vertical ribs spaced two millimeters apart. Align a semi-circle or scalloped fan cutter over the textured pattern, pressing down firmly to extract two matching ribbed half-moons with the ridges running vertically. Bake the textured cutouts for thirty minutes at one hundred and thirty degrees Celsius, keeping the oven temperature stable to prevent burning the delicate blue pigment. Once cured and cooled, drill a single hole at the center top of each fan, insert a silver-plated wire hoop through the opening, and close the hoop securely with flat-nose jewelry pliers.

    Idea 7: Blush Pink Organic Pebble Totems

    Execution Process

    Blush pink organic pebble totem earrings feature an asymmetrical vertical stack of freeform, pebble-shaped clay stones connected by hidden internal loops or jump rings. The design celebrates organic irregularities, moving away from rigid geometric cutters to mimic smooth stones shaped by natural ocean currents. Tinted in shades of pale rose, ballet slipper blush, and dusty pink, these stacked elements create a soft monochromatic gradient down the neck. The layered, multi-part construction allows each individual pebble to pivot independently, introducing natural sway and dynamic movement to the earring. This project is ideal for crafters who enjoy freehand carving and organic shaping, demonstrating how small variations in shape enhance artisan appeal. The understated blush tones blend easily with skin tones and neutral clothing, providing a gentle accessory for flowy bohemian dresses, tailored cream blazers, and casual weekend tops.

    Condition your blush pink clay, dividing it into three portions and blending small amounts of white into two portions to establish three distinct tonal shades of soft pink. Hand-shape two large, two medium, and two small organic rounded pebbles, keeping each piece roughly three millimeters thick with softly rounded outer perimeters. Gently press the flattened pebbles onto a clean ceramic tile, smoothing out surface fingerprints using a cotton swab dipped in isopropyl alcohol. Bake the organic stones for thirty-five minutes at one hundred and thirty degrees Celsius, allowing the pieces to cure fully for maximum material durability. Once the shapes have cooled, sand the rounded contours using fine one-thousand-grit sandpaper under water to achieve a sea-glass finish. Drill small vertical holes through the top and bottom edges of each pebble, connecting the three graduated shades with small jump rings, and attach a titanium post to the rear of the smallest top stone.

    Idea 8: Lavender and Translucent Gingham Checks

    How to Make

    Lavender and translucent gingham check earrings feature a timeless woven fabric pattern translated into the tactile medium of polymer clay. By alternating squares of opaque lavender, milky translucent white, and a mid-tone purple blend, the surface replicates classic woven gingham cloth. The interplay between opaque and translucent clay segments creates visual depth, with the translucent sections glowing softly when held against natural light. This geometric pattern is cut into clean rectangular tags or circular studs, keeping the outer silhouette simple so the complex surface pattern remains the hero of the design. Crafting this piece teaches precise cane-building and strip-piecing techniques, helping beginners learn how to assemble uniform patterns without distorting internal grid lines. These charming gingham earrings bring sweet vintage flair to summer picnics, weekend farmers markets, and casual outdoor celebrations.

    To construct the gingham pattern, roll out a sheet of solid pastel lavender clay and a matching sheet of translucent clay to exactly two millimeters thickness. Cut both sheets into straight, uniform strips measuring three millimeters wide using a rigid tissue blade against a metal ruler. Lay the strips side-by-side on your work tile, alternating between lavender and translucent lines, and gently press them together to form a striped sheet. Create a secondary striped sheet using translucent strips paired with a fifty-fifty mix of lavender and translucent clay to represent the intersecting gingham threads. Slice across both striped sheets perpendicularly to yield cross-section strips, then assemble these cross-cut strips in an alternating checkerboard layout to complete the gingham cane. Roll the assembled pattern smooth under wax paper, cut into tidy rectangular pendants, cure for thirty-five minutes at the required temperature, and attach to comfortable kidney wire ear hooks.

    Idea 9: Pistachio Half-Moon Fringe Drops

    How to Create

    Pistachio half-moon fringe drop earrings combine a rigid clay upper anchor with soft, flowing textile fringe or fine metallic chain loops suspended from the curved lower edge. The pale pistachio green hue offers an earthy, sophisticated pastel foundation that balances beautifully with warm cream cotton threads or polished raw brass fringe. This mixed-media design creates dynamic contrast between the smooth matte surface of the polymer clay and the fluid motion of flexible fringe fibers. The half-moon shape sits flat against the earlobe or drops slightly below, providing an anchor point that supports the lower accents cleanly. This project introduces makers to mixed-media construction, demonstrating how to combine polymer clay with fibers and metal components. The resulting statement earrings fit bohemian bridal parties, beach celebrations, and creative dinner gatherings, adding tactile texture and lively movement to simple outfits.

    Condition pale pistachio clay by blending pea-green, soft yellow, and white clay until you produce a creamy, pale sage tone. Roll the conditioned slab out on your ceramic tile to three millimeters thickness, pressing down firmly to ensure the clay adheres to the tile during cutting. Use a large circular cutter to cut a disc, then divide the circle through the center using a straight tissue blade to yield two identical half-moons. Use a small leather hole punch or heavy needle tool to pierce five evenly spaced holes along the curved lower circumference of each half-moon before baking. Bake the prepared clay shapes on their tile for thirty-five minutes at one hundred and thirty degrees Celsius, allowing them to cool completely before handling. Thread small loops of neutral cotton macramé cord or fine brass chain through each drilled perimeter hole, knotting them securely on the reverse side before gluing flat hypoallergenic ear studs to the back.

    Idea 10: Pale Terracotta Minimalist Arcs

    Setup Method

    Pale terracotta minimalist arc earrings feature clean, sweeping curved bands that fit together into nested, open-air drop earrings. The muted, desaturated terracotta color combines dusty pink and warm earthen clay tones, creating an architectural look inspired by modern Mediterranean pottery. By nesting a smaller arc inside a larger archway with open air between the bands, the design maximizes visual footprint while keeping physical weight minimal. The sweeping curved lines frame the jawline, introducing flattering negative space that prevents the earrings from overwhelming delicate facial features. This design teaches precise nested cutter alignment and delicate handling of thin, curved clay strips before baking. These modern earrings pair naturally with dark linen tunics, structured jumpsuits, and everyday neutral workwear, offering a sophisticated, sculptural finish suitable for year-round styling.

    Condition pale terracotta clay by combining standard raw terracotta with twice its volume in opaque white clay, rolling the slab to a three-millimeter thickness. Press a large arch-shaped cutter into the clay, then carefully center a smaller arch cutter inside the first to excise an outer rainbow-shaped band. Use a third, smaller cutter to extract a miniature solid arch from the leftover center to serve as the top anchor stud. Repeat this cutting procedure to create the matching earring components, keeping the curved clay bands supported on the tile to prevent stretching. Cure the shapes on their tile inside the oven for thirty-five minutes at one hundred and thirty degrees Celsius under a protective foil tent. Once cooled, use a manual pin vise to drill connection holes through the top of the outer arc and the bottom of the stud, link them together with a small jump ring, and affix a flat earring post to the back using industrial jewelry adhesive.

    Avoiding Common Assembly and Baking Pitfalls

    The most frequent beginner mistake in polymer clay earring crafting is under-baking, which leaves the cured clay brittle, weak, and prone to snapping when flexed. Polymer clay cures through chemical polymerization, which requires sustained heat over time; under-baked pieces will crack or crumble when drilled or handled. Always rely on an independent, metal oven thermometer placed beside your baking tile rather than trusting built-in domestic stove dials, which often fluctuate widely. Another common error is allowing airborne lint, dust, and fingerprints to settle into soft pastel clay, which spoils the clean, professional finish. Keep your hands clean, wipe your tools with rubbing alcohol between color changes, and work on clean glazed ceramic tiles or glass sheets. When drilling holes for jump rings, avoid placing holes too close to the outer edge, which creates thin, fragile borders that tear out under tension. Maintain at least two millimeters of solid clay margin around every drilled hole. Finally, avoid using hot glue or standard craft adhesives to attach metal ear posts; use specialized two-part epoxy or bake-on liquid clay to guarantee that metal findings stay bonded permanently.

    Practical Finishing Methods for Professional Results

    Elevating your handmade clay earrings from rough craft projects to high-end boutique pieces requires disciplined sanding, buffing, and hardware selection. After baking and cooling, always sand the edges of your cut clay shapes using wet-and-dry sandpaper submerged in a shallow bowl of lukewarm water. Sanding wet prevents fine airborne clay dust while providing a smoother, silkier finish across the cut edges. Progress methodically through paper grits, beginning with four hundred grit to erase sharp cutter seams, moving to eight hundred grit to smooth surface textures, and finishing with one thousand grit for a soft, matte satin feel. If you prefer a high-gloss finish, apply two thin coats of water-based polyurethane varnish or UV-cured jewelry resin, curing the resin under an ultraviolet lamp to create a glass-like protective dome. Use two pairs of smooth, flat-nose jewelry pliers to open jump rings with a gentle lateral twist rather than pulling the ring apart, which preserves the circular shape and structural tension of the metal loop. Investing in hypoallergenic ear findings—such as surgical titanium, medical-grade stainless steel, or gold-filled components—ensures your finished jewelry remains safe and comfortable for sensitive ears.

    Styling, Organization, and Jewelry Storage

    Displaying and organizing your pastel polymer clay earrings effectively protects the delicate hand-mixed colors while simplifying daily accessorizing. Because pastel earrings feature soft, desaturated tones, they pair naturally with neutral wardrobe staples like off-white knitwear, oatmeal linen, charcoal wool, and washed denim. Store your completed earring collection on a vertical hanging jewelry organizer, perforated metal stand, or framed linen screen rather than tossing them into crowded drawers where metal posts can scratch soft clay finishes. Keeping earrings hanging flat prevents jump rings from tangling and protects multi-piece drops from bending under heavy accessories. When traveling, store individual earring pairs inside segmented, velvet-lined jewelry boxes or protective pill organizers to prevent thin clay arches from snapping under luggage pressure. For craft market vendors or online sellers, display pastel earrings on clean, heavy cardstock cards printed in neutral shades like warm stone or soft sand. Using consistent neutral packaging allows the delicate pastel hues of the clay to stand out, reinforcing the refined, artisan quality of your collection.

    Strategic Time Management and Budget Planning

    Managing your time and materials efficiently allows you to produce collections of handmade clay earrings without creative burnout or unnecessary expense. Group your workflow into specialized production stages rather than completing each pair individually from start to finish. Dedicate one work session to color mixing and conditioning slabs, another session to cutting and baking shapes, and a final session to sanding, drilling, and assembling hardware. Purchasing primary clay colors alongside bulk blocks of white and translucent clay saves money, allowing you to mix custom pastel shades without buying dozens of individual specialty blocks. Standard craft polymer clay provides an economical medium; a single two-ounce block yields multiple pairs of drop earrings, keeping your per-unit production cost very low. Store leftover conditioned clay wrapped tightly in clear polypropylene plastic wrap inside airtight storage boxes to keep it supple and clean for future projects. Setting up an organized studio workspace cuts your total assembly time down to roughly thirty to forty-five minutes per pair, making regular production rewarding and sustainable.

    Creative Expansions and Advanced Clay Techniques

    Once you master fundamental clay conditioning, cutting, and baking, you can expand your creative repertoire by introducing advanced mixed-media techniques and complex surface treatments. Experiment with applying metallic gold, copper, or silver leaf sheets to raw pastel clay slabs before rolling, producing delicate, crackled foil veins that catch the light across the earring surface. Try combining soft pastel clay with alcohol ink drops to create painterly watercolor washes, marble veins, and soft color gradients across pale slabs. You can also explore three-dimensional botanical sculpting, pressing dried natural flowers or textured foliage directly into raw clay before baking to leave delicate, fossil-like impressions in the pastel surface. Consider pairing polymer clay pieces with contrasting materials like natural turned wood beads, raw unpolished gemstones, woven fiber cords, or laser-cut acrylic shapes to introduce varied textures. As your technical confidence grows, you can upscale your designs into matching statement pendant necklaces, hair clips, or desktop dishes, using your pastel color mixing skills to build cohesive accessory collections. Polymer clay provides an adaptable foundation that supports ongoing artistic growth, design experimentation, and refined creative self-expression.

  • 10 Polymer Clay Flower Earrings

    Polymer clay jewelry continues to dominate modern creative feeds, offering endless inspiration for makers seeking distinctive, handmade accessories. This comprehensive tutorial explores ten original polymer clay flower earrings designed to elevate any personal wardrobe or handmade jewelry collection. Handcrafted floral designs combine structural durability with botanical beauty, providing an accessible creative outlet that requires minimal specialized equipment. By learning fundamental clay preparation, sculpting methods, baking procedures, and assembly practices, beginners and seasoned makers can produce professional accessories at home. This guide details each step of the design process, covering flower shaping, balance, color integration, and secure hardware attachment. Readers will discover practical solutions for creating delicate petals, dimensional foliage, and reliable connections that ensure long-lasting wear. Exploring handmade jewelry allows creators to craft customized colorways tailored to specific events, gift ideas, or seasonal fashion trends without excessive investment. Beyond basic aesthetic appeal, working with polymer medium develops fine motor control, spatial reasoning, and functional assembly expertise. The upcoming sections outline core supplies, structural considerations, ten distinct floral builds, troubleshooting recommendations, and presentation approaches, giving every reader an actionable, clear pathway from raw material to finished wearable art.

    Why This Idea Is Trending or Useful

    Handmade floral jewelry occupies a major position within trending ideas across visual discovery platforms due to its versatile, expressive nature. Contemporary fashion increasingly favors expressive sculptural earrings that display individuality and craftsmanship over mass-produced accessories. Polymer clay provides an ideal medium for this aesthetic movement because it remains lightweight regardless of sculptural complexity, preventing earlobe strain during daily wear. The material enables creators to translate complex botanical silhouettes into modern design accessories featuring matte, glossy, or textured surfaces. Enthusiasts value this craft for its low barrier to entry and accessible budget ideas, as introductory sets require only basic clay bars, simple rolling tools, and standard kitchen convection ovens. The DIY nature of floral clay crafting appeals strongly to hobbyists who desire customizable accessories for special celebrations like weddings, anniversaries, and seasonal parties. Furthermore, floral motifs hold cross-generational visual appeal, easily adapting from playful pastel daisies to sophisticated, minimalist style architectural blooms. As sustainable, intentional consumption gains momentum, crafting durable, personalized statement jewelry allows consumers to bypass generic fashion accessories while developing tangible artistic proficiencies.

    Materials and Preparation

    Achieving reliable results with floral clay jewelry requires proper workspace organization, appropriate tools, and deliberate material preparation before sculpting begins. Essential materials include professional-grade polymer clay blocks, surgical stainless steel stud posts or earring hooks, high-grade jump rings, and two-part epoxy or industrial liquid adhesive. Clean ceramic tiles or smooth tempered glass sheets serve as the primary sculpting and baking surface, preserving flawless petal reverses and stabilizing the uncured clay throughout processing. Specialized cutting tools, acrylic rolling pins, needle probes, ball stylus tools, and miniature circle punches form the core mechanical setup needed for detailing miniature botanical parts. Thorough planning demands that all workstations remain free of dust, loose fibers, and ambient oils, which can degrade uncured clay surfaces. Thoroughly condition each clay block by manual manipulation or repetitive passes through a dedicated manual clay conditioning machine until the material turns pliable, smooth, and resistant to edge cracking. Proper conditioning aligns the internal plasticizers, eliminating brittle points that cause structural failure after thermal curing. Organize floral hardware components systematically to streamline the post-bake assembly sequence efficiently.

    1. Sculpted Daisy Studs with Textured Centers

    Step-by-Step Guide

    The classic daisy stud emphasizes balanced radial symmetry, gentle petal contouring, and rich textural contrast between the white petals and the golden stamen base. This design functions as an ideal beginner friendly starter project, introducing fundamental modeling techniques that apply to complex botanical compositions. Begin by preparing bright white clay alongside warm mustard or sunflower yellow clay, ensuring both blocks reach pliable consistency through steady conditioning. Roll the white clay across a glass tile until it forms an even sheet approximately two millimeters thick, preserving flat, level dimensions across the entire work area. The central focal point relies on a dense collection of micro-indentations that imitate organic pollen clusters, catching natural ambient light and establishing dimensional realism. A crisp, clean perimeter remains vital for maintaining modern design aesthetics, preventing the daisy from appearing irregular or unfinished. Maintaining equal petal lengths guarantees proper visual alignment across both matching ear pieces, producing a balanced profile that sits neatly against the earlobe.

    To assemble the daisy studs, punch twelve uniform miniature petal strips using a fine teardrop cutter or slice balanced segments from a thin rolled snake of white clay. Arrange six identical petals radially over a clean baking tile, pressing their narrow bases lightly into the center while allowing the outer rounded tips to flare outward naturally. Roll a tiny marble of conditioned yellow clay, flattening it gently over the unified junction point where all petal bases intersect to lock the arrangement in place. Press a pointed needle tool or fine textured sponge repeatedly into the yellow dome, creating hundreds of minute indentations across the entire stamen zone. Carefully elevate the outer margins of every petal using a smooth metal spatula, imparting a subtle upward curve that prevents the cured flower from appearing flat. Bake the sculpted daisy flowers directly upon the ceramic substrate at the temperature specified on the clay packaging for thirty minutes, allowing the parts to cool completely before fixing surgical steel earring studs to the rear surfaces using two-part epoxy adhesive.

    2. Layered Wild Rose Drop Earrings

    Execution Process

    Layered wild rose drop earrings utilize progressive dimensional stacking, overlapping curved petals to generate structural depth that swings naturally from decorative ear hooks. This piece introduces botanical curvature, shifting flat clay cutouts into organic concave shells that mimic natural garden roses while retaining necessary physical stability. Soft dusty rose, pale crimson, or muted blush clay selections complement the delicate aesthetic, providing vintage-inspired tones suitable for elevated everyday styling. Each earring incorporates two distinct floral tiers suspended beneath a clean geometric stud base, achieving fluid mechanical motion that enhances comfortable daily wear. The outer floral tier features broader, gently cupped petals that cup an interior nest of smaller, more tightly curled components. Structural thickness must remain consistent at roughly 1.5 millimeters across all layers to prevent premature breakage during drill processes or regular handling. Achieving seamless integration between organic floral forms and sleek metal connector rings defines this elegant, wearable creative project.

    Construct the wild rose tiers by rolling thoroughly conditioned rose clay into an ultra-smooth slab, utilizing depth guide rings to guarantee uniform sheet thickness throughout. Cut ten circular disks for each earring unit, organizing five larger disks for the primary base layer and five smaller disks for the elevated inner flower center. Lay each individual circular disk into the palm of your hand, running a round ball stylus tool along its perimeter to thin and cup the petal edges organically. Overlap five large cupped petals in a circular pattern on your tile, pressing the base seams firmly together, then arrange the five smaller petals directly above the center point. Pierce a clean 1.2-millimeter connection hole through the top edge of the completed rose structure using an unthreaded needle tool prior to oven processing. Bake the components flat for thirty-five minutes, let them cool down entirely, and thread an open metallic jump ring through the pre-pierced opening to connect the rose drop directly to a coordinating minimalist clay stud top.

    3. Minimalist Pressed Hydrangea Clusters

    How to Create

    Pressed hydrangea clusters highlight clean geometry, botanical repetition, and balanced cluster layouts, translating traditional floral arrangements into streamlined, contemporary fashion statements. Rather than building high-profile floral domes, this method flattens small individual four-petal florets onto a single flat clay foundation sheet, creating a sleek mosaic profile. A muted color palette consisting of periwinkle blue, sage green, and soft lilac clay gives the hydrangea motif understated, elegant visual appeal. The primary structural advantage of this pressed technique lies in its planar durability, which minimizes the delicate, exposed edges that frequently snag on knitted clothing or long hair. Small spherical details placed at the center of every miniature floret introduce tactile variation, uniting the clustered elements into an artistic floral statement. This functional piece provides reliable physical integrity while showcasing the detailed precision possible through disciplined clay shaping practices.

    Begin by rolling an opaque white or neutral background slab to a uniform thickness of 2.5 millimeters, cutting out two matching oval or arch silhouettes to serve as backing foundations. Roll conditioned periwinkle clay into miniature spheres, pinching four equidistant points around each sphere to establish four distinct micro-petals, repeating this step to create fifteen tiny florets. Arrange the raw four-petal florets securely across the surface of the foundational arch, pressing them downward with a smooth acrylic roller until the surfaces meld seamlessly. Roll minute spheres of pale cream clay, depositing one sphere firmly into the core of each flattened floret, indenting the center with an ultra-fine stylus tip. Trim any overlapping floral edges flush against the foundational base perimeter with a flexible stainless steel tissue blade to ensure sharp, clean boundaries. Cure the clustered assemblies inside a preheated oven for thirty-five minutes, smooth any sharp outer edges using fine wet-and-dry sandpaper, and bond high-strength earring posts to the backing using jewelry-grade adhesive.

    4. Cascading Wisteria Statement Drops

    Step-by-Step Guide

    Cascading wisteria statement drops feature an articulated linear layout that generates dynamic visual movement and fluid drape alongside the jawline. This design breaks traditional monolithic statement earrings into multiple interconnected floral units that swing independently on linked metal jump rings. A graduated color scheme running from deep royal violet to pale lavender and soft translucent white captures the natural ombre appearance found in hanging garden wisteria racemes. Each descending tier diminishes slightly in scale, producing an optical taper that flatters facial features without feeling heavy on the earlobe. The articulation points demand careful structural planning, ensuring the clay loops or pre-drilled connection points withstand tension without deforming or breaking during assembly. This creative project bridges the gap between sculptural botanical work and traditional metal smithing mechanics, resulting in a showstopping handmade accessory.

    Prepare the gradient clay colors by blending concentrated violet with measured portions of translucent and opaque white clay, dividing the resulting tones into four precise hues. Roll each color mixture to an exact two-millimeter thickness, cutting graduated teardrop pairs that scale steadily from large upper petals down to tiny terminal lower buds. Sculpt each individual teardrop by pinching the upper stem and indenting the broader base, creating an inverted bell-like wisteria petal with soft, folded vertical sides. Carefully pierce balanced horizontal pass-through holes across the upper and lower margins of each petal segment using a stainless steel needle tool, leaving sufficient edge distance. Lay the graduated segments in matching vertical columns on your ceramic tile, baking the pieces for thirty-five minutes to achieve optimal polymer cross-linking. After the pieces cool completely, link the descending floral tiers using four-millimeter round jump rings, finishing the top violet petal with a secure earlobe hook hardware component.

    5. Modern Abstract Calla Lily Huggies

    How to Make

    Modern abstract calla lily huggies combine sleek, organic architectural folds with minimalist style hardware, delivering a bold, contemporary interpretation of classic botanical structures. The calla lily form features a single continuous petal wrap surrounding an elongated interior spadix, producing a graceful sculptural silhouette that wraps closely around standard metal hoops. Utilizing pure white or warm ecru clay emphasizes the dramatic spatial curves, while a rich cadmium yellow interior core injects a subtle pop of color. This minimalist aesthetic demands pristine execution, as any surface imperfections, embedded lint, or irregular seam work become instantly visible against the expansive, monochrome clay face. When executed properly, these stylized botanical wraps balance artistic flair with functional durability, offering versatile options for professional or elevated casual settings. The compact form factor avoids excessive swinging, making these lightweight floral accessories exceptionally comfortable for prolonged daily wear.

    Roll conditioned white clay into an even two-millimeter slab, utilizing an oval metal template to cut two identical elongated petal blanks measuring roughly four centimeters in length. Smooth the outer perimeter of each cut blank with a damp silicone brush, removing micro-fissures and softening the structural borders to produce an authentic organic edge. Roll two narrow, tapered cylinders of vibrant yellow clay to form the internal spadix elements, seating each cylinder along the central vertical axis of the white base. Gently fold the bottom lateral edges of the white oval inward over the yellow cylinder, overlapping the base margins and pressing the clay to lock the funnel shape. Insert a heat-resistant metal rod through the central funnel base to preserve an open mounting channel throughout the heating process, maintaining clear hardware clearance. Cure the wrapped floral lilies upright in the oven for thirty minutes, remove the metal rod after cooling, and thread the opening onto small gold-plated huggie hoop earrings.

    6. Sculptural Sunflowers with Textured Foliage

    Step-by-Step Guide

    Sculptural sunflower earrings present bold color impact, textured foliage, and reliable dual-component construction suitable for sunny, statement-making aesthetics. The design pairs a vibrant golden floral crown with a textured green leaf base, creating a two-part dropped composition that introduces visual contrast and organic balance. The deep brown central disk requires intricate cross-hatch texturing, mimicking mature seed patterns and creating an engaging tactile element within the center of the radiant petals. Saturated yellow-orange clay gives the petals natural vitality, while earthy olive or forest green balances the composition across the foundational segments. Because these sunflower earrings feature multiple separate petals radiating from a heavy core, deliberate structural fusion during the pre-bake assembly stage proves essential for ensuring lifetime product resilience. This practical design combines fundamental jewelry making techniques with botanical realism, making it a favorite for warm-weather handmade accessory collections.

    Form the sunflower petal frame by cutting twenty small diamond blanks from a 1.5-millimeter sheet of bright golden-yellow conditioned clay for each earring unit. Taper the lateral corners of each diamond slightly while pinching the upper points to establish crisp, pointed sunflower petals that feature natural longitudinal spine creases down their centers. Arrange the petals in a double-layered ring across a ceramic tile, overlapping the lower petal junctions to form a durable, unified structural foundation. Roll a smooth ball of chocolate brown clay, press it into the open center of the yellow petals, and apply a cross-hatch mesh pattern using a fine blade. Craft a broad teardrop leaf from conditioned olive green clay, embossing delicate foliage veins using a flexible needle tool, and pierce attachment holes at the petal bottom and leaf top. Bake both connected floral segments for thirty-five minutes, smooth the reverse profiles, and link the sunflower to the leaf using an antique bronze jump ring.

    7. Delicate Cherry Blossom Wire Threaders

    Setup Method

    Delicate cherry blossom wire threaders introduce lightweight, ethereal grace through the harmonious union of ultra-thin, translucent floral sculptures and elongated metallic chain components. Inspired by spring blossoms, this design showcases five notched petals cast in soft translucent pink clay, producing a delicate, glass-like finish when cured thoroughly. The subtle graduation from a deeper carmine center to pale, translucent petal tips gives the petals realistic visual depth without requiring complex secondary painting steps. Threader chain fittings introduce continuous movement, permitting the miniature blossoms to suspend at variable, adjustable lengths beneath the wearer’s earlobes. Because translucent polymer formulations contain fewer opaque fillers, the cured flowers demonstrate exceptional flexibility and resilience against impact or accidental drops. This creative project offers ideal opportunities for mastering translucent clay conditioning, miniature edge notching, and secure micro-hardware mechanical assembly.

    Create the cherry blossom tone by blending ten parts translucent clay with one part pastel magenta clay, mixing the components thoroughly to ensure uniform light transmission throughout. Divide the conditioned pink mixture into five miniature, uniform spheres, flattening each between your fingertips into thin, heart-shaped petal profiles displaying a subtle upper cleft. Press the lower points of the five petals together to establish a five-point blossom, then use a tiny round ball stylus to depress the center point. Pierce an ultra-fine vertical hole directly through the center of the depression, ensuring the hole remains clean and unobstructed for subsequent wire threading. Place the raw blossom onto a concave ceramic baking bead rack, allowing the petals to cure with an upward curve during thirty minutes of controlled thermal baking. Once cooled, thread a delicate, gold-plated box-chain threader post directly through the central opening, securing the clay blossom in place using a miniature dab of clear industrial adhesive.

    8. Vintage Lily of the Valley Bell Drops

    How to Create

    Vintage lily of the valley bell drops capture classic botanical charm through hollow, three-dimensional bell flowers arranged along an arching, organic branch structure. Unlike planar or flat-pressed pieces, this design explores advanced hollow-form clay sculpting, shaping soft clay over temporary supports to preserve internal volume during processing. Crisp white or pale porcelain clay shapes the flared bells, contrasting against deep jade green stems to evoke the understated beauty of woodland flora. The undulating, scalloped rim of each miniature bell flower presents a delicate visual detail that demands deliberate finger pressure and precise tool control during execution. Assembling multiple miniature floral bells along a single structural ear drop provides gentle movement and subtle sound, bringing dynamic, tactile charm to modern jewelry collections. This advanced DIY build enhances fine sculptural techniques while producing a sophisticated, heirloom-quality accessory.

    Roll conditioned porcelain white clay to an ultra-thin one-millimeter thickness on a chilled glass work tile, cutting six small circular disks using a hollow metal punch. Drape each individual circular disk carefully over a non-stick silicone bead mold or a smooth glass marble, smoothing the clay downward to create a hollow thimble profile. Use a needle probe to crimp the rim outward at six evenly spaced points, producing the signature scalloped petal lip characteristic of lily of the valley bells. Carefully poke a micro-aperture through the top dome of each bell before removing the clay form from its curing support, then bake the bells for thirty minutes. Sculpt an elongated arching stem from deep green clay, pierce three spaced dangling connection eyelets along its lower curvature, and cure the stem segment alongside the bells. Attach each cured bell flower to the green branch segment using fine, gold headpins tipped with tiny glass seed beads, finishing the assembly with comfortable ear hooks.

    9. Geometric Frangipani Plumeria Studs

    Execution Process

    Geometric frangipani plumeria studs blend tropical warmth with clean modern lines, showcasing the pinwheel overlapping petal layout that defines natural plumeria blooms. The design centers on five rounded, elongated petals that fold over each other in an unbroken rotary sequence, creating a dynamic visual vortex. A vibrant dual-tone transition featuring a bright white outer edge and an airbrushed golden-yellow throat gives the plumeria its unmistakable, eye-catching color profile. The seamless overlapping structure provides significant structural reinforcement, binding all five petals across their broad side seams to prevent cracking or stress fractures under daily handling. This functional format works exceptionally well as a simple, durable stud earring that rests flat against the earlobe without snagging on accessories. Crafting these plumeria flowers sharpens rotational balance techniques, clean edge rolling, and smooth surface-blending skills.

    Formulate the petal blanks by rolling conditioned bright white clay into a consistent two-millimeter sheet, cutting out five identical teardrop petals with broad, rounded tips. Dip a dry, soft-bristle artist brush into powdered yellow soft pastel, dusting the narrow inner point of each raw petal with a smooth gradient fade. Arrange the five petals in a rotating circle on your work surface, ensuring the left edge of each petal consistently rests over the right edge of its neighbor. Press the unified center firmly with a medium ball stylus tool, drawing the petal bases inward and generating an organic, pinwheel twist across the floral face. Use a flexible blade to loosen the assembled plumeria flower from the work surface, transferring it carefully to a ceramic baking tile to preserve its structural profile. Bake the flowers at the manufacturer’s recommended temperature for thirty-five minutes, let them cool down, and fix flat-pad hypoallergenic titanium stud posts to the backs with liquid epoxy.

    10. Textured Ranunculus Statement Posts

    How to Make

    Textured ranunculus statement posts showcase intricate floral detail through dozens of paper-thin, tightly packed petals gathered into an opulent, ruffled bloom. This design offers high visual impact, delivering a dramatic, runway-inspired profile that pairs naturally with understated outfits or formal wear. Deep terracotta, burnt sienna, or modern neutral taupe clays lend contemporary appeal to this multi-petaled arrangement, keeping the intricate form grounded in earthy tones. The primary sculpting challenge involves maintaining exceptionally thin petal margins while anchoring every layer securely to a central supporting core to prevent structural collapse. Ranunculus flowers naturally catch overhead light across their concentric interior ridges, casting delicate linear shadows that highlight the artisanal depth of handmade clay earrings. This rewarding project shows how repetitive, straightforward modeling steps can yield complex, professional accessories.

    Begin by shaping a tiny, firm teardrop cone from conditioned terracotta clay, mounting it directly onto an upright metal pin to serve as the supporting core. Roll additional terracotta clay through your conditioning machine at its absolute thinnest setting, using a miniature oval cutter to stamp out thirty uniform petal scales. Place the petal scales upon a firm foam pad, pressing each petal perimeter with an acrylic ball tool until the edges ruffle and cup outward naturally. Overlap the cupped petals concentrically around the central core, starting with three tightly rolled petals and expanding outward with looser, flared petals until the blossom matures. Carefully slice the ranunculus flower from its temporary mounting pin using a sharp tissue blade, transferring the ruffled bloom to a dedicated ceramic baking sheet. Bake the completed structural flowers for forty-five minutes to ensure deep, complete curing through the multiple petal layers, letting them cool before bonding wide-pad ear studs to the back.

    Common Beginner Mistakes and How to Avoid Them

    Beginners working with polymer clay floral jewelry frequently encounter structural cracking, visual discoloration, or premature hardware detachment due to minor process missteps during creation. Under-baking remains the single most common cause of snapped petals; polymer clay requires thorough thermal exposure to fuse its internal vinyl chains fully. Avoid relying on inaccurate oven dials; always place an independent, calibrated glass-tube oven thermometer directly beside your curing pieces to monitor temperatures accurately. Air bubbles trapped within poorly conditioned clay can expand under heat, causing unsightly surface blisters that ruin smooth botanical finishes. Eliminate this flaw by slicing raw clay slabs into thin ribbons and recombining them methodically before rolling out your final design sheets. Surface contamination from ambient dust, pet hair, and natural skin oils quickly discolors white or pastel petals during delicate assembly stages. Thoroughly cleanse hands, rolling pins, and cutting surfaces with isopropyl alcohol before handling light-colored clay, and consider wearing disposable powder-free nitrile gloves during petal shaping. Lastly, avoid securing metal earring posts with standard household super glue, as cyanoacrylate dries brittle and shatters under lateral shear stress; always choose two-part industrial epoxy.

    Practical Tips for Better Results

    Elevating polymer clay floral earrings from basic handmade crafts to refined boutique accessories relies on disciplined finishing techniques, surface control, and careful thermal management. Baking your floral pieces directly on glossy ceramic tiles or polished tempered glass plates guarantees a completely flat, professional finish across the back surfaces. Inverted cardboard trays or dome-shaped aluminum foil covers placed over baking pieces protect delicate, pale clay petals from direct oven heat radiation, preventing scorched tips and scorched edges. Incorporating a minimal drop of liquid polymer clay between raw petal interfaces acts as a dependable thermal binding agent, welding intersecting layers together into a monolithic piece during curing. After baking, refine any rough outer petal contours using progressive sheets of wet-and-dry sandpaper, working smoothly through 400, 600, and 1000 grit under a trickle of cool running water. Polishing bare cured clay with soft denim scrap or clean cotton muslin produces an elegant satin sheen without requiring chemical sealants or artificial clear coats. Storing conditioned clay colors inside airtight polypropylene organizers keeps your materials dust-free and organized for future creative sessions.

    Styling, Presentation, or Organization Ideas

    Effective presentation transforms handcrafted polymer clay floral jewelry into striking visual features, whether arranged for personal daily use, gift packages, or curated portfolio displays. Displaying finished earrings on thick, textured kraft paper cards stamped with minimalist botanical icons highlights their handmade quality while providing structural support for display or shipping. Clear acrylic hanging stands, natural linen jewelry trays, and unglazed travertine stone slabs offer beautiful, modern backdrops that showcase intricate floral details in photo galleries. When coordinating floral earrings with daily outfits, balance their visual weight by pairing expansive floral drops with clean necklines, crisp button-down shirts, or chunky knits. Compact floral stud styles pair effortlessly with multi-pierced ears, combining easily with micro gold hoops and minimalist cuffs to create curated, modern ear stacks. For functional home storage, organize your collection inside velvet-lined, multi-compartment wall cases or multi-drawer desktop organizers, keeping individual pairs separated to prevent metal hardware from scratching delicate petals. Incorporating simple presentation standards enhances the perceived value of your work, celebrating the time and craftsmanship invested in every design.

    Budget or Time Planning

    Creating polymer clay floral earrings offers an affordable, time-efficient crafting hobby, yielding wearable handmade art with minimal recurring supply expenses. An introductory crafting kit containing multiple basic clay blocks, an acrylic roller, a basic blade set, and hypoallergenic jewelry hardware costs modest upfront funds while yielding dozens of finished earring pairs. Maximize your budget by investing in essential primary colors, intense yellow, rich blue, deep red, alongside oversized blocks of neutral white and translucent clay, mixing custom hues manually. Dedicated makers can optimize production time by grouping tasks into distinct, efficient stages: conditioning and color formulation, petal sculpting, thermal curing, and post-bake assembly. Preparing matching components simultaneously across assembly-line batches drastically reduces tool cleanups and streamlines overall production flow. A single pair of floral studs typically demands fifteen minutes of active modeling, thirty minutes of curing time, and five minutes of final hardware assembly. Scheduling dedicated blocks for mass petal cutting and jump-ring assembly preserves creative focus, turning spontaneous design ideas into completed accessories without frustrating project delays.

    Creative Expansion and Advanced Inspiration

    Once you master foundational floral sculpting, expand your creative horizons by exploring advanced mixed-media techniques, layered color applications, and complex botanical forms. Try integrating metallic gold, silver, or copper leaf into raw translucent clay sheets before rolling petals to create delicate, shimmering veining throughout your flowers. Surface treatments using dry soft pastels, alcohol inks, or oil paints applied across cured petals introduce rich, botanical gradients that closely mirror real flowers. Explore multi-tiered botanical assemblies, joining cascading vine tendrils, realistic leaf arrangements, and multi-layered blossoms onto architectural brass hoops or sculpted organic drapes. Crafting matching wearable accessories, such as delicate floral hairpins, botanical pendant charms, or sculpted brooch pieces, deepens your design language across comprehensive jewelry sets. Incorporating non-traditional materials like raw freshwater pearls, rough-cut gemstones, and sparkling faceted crystal beads adds textural variety to floral drop earrings. Documenting your evolving methods, original color recipes, and unique structural silhouettes in a dedicated design sketchbook will fuel ongoing creative growth, inspiring unique polymer clay jewelry projects for seasons to come.

  • 10 Boho Polymer Clay Earrings

    Handcrafted jewelry represents a meaningful way to personalize personal style, and polymer clay provides an exceptionally versatile medium for producing lightweight, artistic accessories. The bohemian aesthetic, known for its warm terracotta hues, organic curves, botanical textures, and raw geometric forms, pairs naturally with the pliable qualities of polymer clay. In this complete guide, readers will discover ten distinct bohemian polymer clay earring concepts that balance artisanal character with durable construction methods. This detailed tutorial covers the entire fabrication process, from proper clay conditioning and slab preparation to precise baking parameters, sanding techniques, and hardware assembly. Crafters will gain actionable insights into creating tiered arches, marbled slabs, botanical impressions, and mixed-media tassels using accessible studio equipment. By following these practical instructions, makers of all skill levels can successfully craft professional, durable statement jewelry that resists brittleness and daily wear. Beyond individual designs, this guide details essential assembly principles, such as securing jump rings, attaching hypoallergenic earring posts, and applying protective finishes. Exploring these curated projects offers continuous creative inspiration, allowing makers to turn simple blocks of oven-bake compound into boutique-quality handmade collections.

    Why This Idea Is Trending or Useful

    Boho polymer clay earrings consistently dominate modern craft feeds and fashion registries because they combine custom design with physical comfort. Traditional statement earrings crafted from metal, stone, or heavy resins often strain the earlobes, limiting wearability throughout full days. Polymer clay, by contrast, cures into an ultra-lightweight, resilient vinyl compound, allowing designers to produce expansive, dramatic silhouettes that remain virtually weightless on the wearer. From a design perspective, the bohemian movement emphasizes earthy tones, botanical motifs, and clean abstract lines, aligning seamlessly with modern design trends and minimalist style wardrobes. For independent makers, this craft serves as an accessible entry point into DIY jewelry production without requiring expensive metalsmithing equipment or specialized kilns. A conventional home kitchen oven, a smooth work tile, and basic shape cutters provide everything needed to manufacture high-end accessories. Furthermore, clay jewelry presents exceptional creative value by enabling crafters to test trending ideas, repurpose scrap materials into marbled stones, and iterate color palettes rapidly. This unique blend of ergonomic comfort, aesthetic adaptability, and low equipment overhead makes boho clay jewelry an enduring favorite across modern creative communities.

    Materials and Preparation

    Achieving structural durability and a refined finish requires careful workspace preparation and the selection of quality materials. Choose professional-grade polymer clay brands that cure to a flexible, resilient finish rather than brittle craft clays that crack easily when dropped. Gather a clean, non-porous ceramic tile or tempered glass sheet to serve as both your cutting surface and direct baking tray. Essential tools include an acrylic roller or dedicated manual clay conditioning machine, stainless steel shape cutters, a tissue-slicing blade, precision craft knives, and miniature hand drills. For hardware, acquire lead-free and nickel-free components, including brass jump rings, hypoallergenic titanium or stainless steel stud posts, silicone comfort backs, and brass geometric connector charms. Preparation begins with systematic sanitization: thoroughly clean hands, rollers, and tile surfaces with isopropyl alcohol or lint-free wipes to remove airborne dust and pet hair. Always condition your clay thoroughly by folding and rolling each block repeatedly until the compound becomes pliable, glossy, and free of internal micro-fissures before cutting any shapes.

    Idea 1: Terracotta Sunburst Tiered Arch Drops

    How to Create

    The tiered sunburst arch design captures the core principles of bohemian styling by balancing architectural symmetry with warm, sun-baked earth tones. This earring concept features a solid half-circle stud top that anchors a suspended, inverted U-shaped arch, framing a delicate brass sunburst charm within the central negative space. The color palette focuses on burnt terracotta, warm desert sand, and soft ochre, evoking desert landscapes and mid-century modern design motifs. The negative space created between the outer arch and inner metallic charm keeps the overall earring light and dynamic, catching movement without overwhelming the wearer’s jawline. This silhouette flatters diverse face shapes and pairs effortlessly with linen apparel, casual knitwear, and summer dresses.

    To fabricate this tiered design, condition equal portions of terracotta and desert sand clay until soft and pliable. Roll the clay through your pasta machine or acrylic roller between two guide strips to ensure a uniform three-millimeter thickness across the slab. Press an inverted U-shaped arch cutter firmly into the slab, followed by a matching half-circle cutter for the top stud component. Before lifting the shapes from the ceramic tile, use a metal needle tool or 1.5-millimeter drill pin to pierce small attachment holes at the top and bottom of the arch, as well as the lower edge of the half-circle. Bake the pieces on the tile according to the clay manufacturer’s exact temperature specifications, usually around 275°F (135°C) for thirty minutes. Once cooled, smooth any rough perimeter edges with 400-grit wet sandpaper. Connect the top half-circle to the arch using a five-millimeter brass jump ring, suspend the brass sunburst charm from the inner arch hole using jewelry pliers, and secure a hypoallergenic stud post to the back of the half-circle using two-part jewelry epoxy.

    Idea 2: Wildflower Pressed Botanical Statement Ovals

    Step-by-Step Guide

    Pressed botanical motifs celebrate natural textures by embedding organic floral elements directly into smooth clay foundations. This project utilizes elongated oval bases rendered in an unbleached ecru or raw linen shade, serving as a clean canvas for raised floral impressions. Instead of using artificial stamps, this technique captures authentic botanical forms by pressing dried baby’s breath, miniature ferns, or delicate garden foliage into the conditioned clay surface before baking. The resulting impressions introduce gentle dimensional relief that catches soft ambient light, echoing vintage herbarium specimens and cottagecore aesthetics. This design delivers a romantic, tactile quality that enhances both casual daytime outfits and bridal reception ensembles.

    Begin by conditioning natural ecru polymer clay, rolling it into a flat, glass-smooth sheet measuring approximately 2.5 millimeters in thickness. Select thoroughly dried, pressed botanicals, positioning small sprigs of foliage and tiny blossoms across the clay surface in an asymmetrical layout. Lay a sheet of parchment paper over the arranged botanicals and gently pass an acrylic roller across the surface with light, even downward pressure to embed the flora flush with the clay matrix. Carefully peel back the parchment paper and use fine tweezers to lift the plant material, revealing crisp, debossed botanical channels underneath. Cut the slab using an elongated oval metal cutter, and pierce a clean connection hole at the top edge of each pendant. Bake the ovals flat on a parchment-lined ceramic tile. After curing and cooling, apply a drop of diluted burnt umber acrylic wash over the debossed impressions, immediately wiping the raised surface with a damp cloth to leave pigment settled inside the botanical grooves. Finish by attaching a brass kidney ear wire through the top drilled hole.

    Idea 3: Desert Marble and Brass Geometric Pendants

    Execution Process

    Marbled patterns provide an organic, fluid contrast to structured geometric brass hardware, creating sophisticated modern accessories. This design pairs a trapezoidal or rectangular marbled clay tablet with a flat brass chevron or half-moon connector. The marble pattern blends desert-inspired tones, including dusty rose, sage green, warm cream, and subtle veins of metallic bronze. Because each marbled slice yields unique, non-repeating fluid lines, every completed earring pair becomes a one-of-a-kind wearable art piece. The integration of polished brass accents adds reflective elegance, bridging casual handmade aesthetics with refined contemporary jewelry design.

    To create the desert marble slab, roll individual snake-shaped coils of dusty rose, sage green, cream, and bronze clay, maintaining a ratio of roughly sixty percent cream to forty percent accent colors. Twist the gathered coils together into a single thick rope, fold the rope in half, and gently twist again to interweave the colors without blending them into a uniform muddy shade. Compress the twisted log into a solid square block, then use a flexible tissue blade to shave thin, uniform cross-sectional slices across the patterned face. Arrange these marbled slices side-by-side on your ceramic tile, smoothing the joins with an acrylic roller until a seamless, flat sheet forms. Stamp out rectangular or trapezoidal shapes with clean metal cutters, pierce attachment holes along the top and bottom margins, and bake thoroughly. Once cured and water-sanded up to 1000-grit for a silky matte finish, link the clay rectangles to geometric brass chevron charms using six-millimeter brass jump rings, and attach a matching brass ball post at the apex.

    Idea 4: Ribbed Arch and Raw Fringe Hoops

    Step-by-Step Guide

    Combining hard-baked polymer clay with soft fibrous textiles produces rich tactile depth, making mixed-media fringe hoops an iconic bohemian staple. This design consists of a thick, horseshoe-shaped clay arch featuring ribbed surface texture, paired with a dense fringe of raw cotton macramé cord or natural linen thread dangling from the base. The clay arch is styled in a deep mustard ochre or warm cinnamon tone, providing a bold visual anchor for the airy, neutral fiber fringe below. This combination of structural rigidity and dynamic movement creates eye-catching motion when worn, making it an exceptional statement piece for summer festivals, vacation wardrobes, and casual gatherings.

    Start by preparing cinnamon-colored clay, rolling it into a solid four-millimeter sheet on your working tile. To impart the ribbed surface texture, press a linear texture mat or the parallel tines of a clean comb firmly across the clay surface before cutting. Align an arch cutter over the ribbed section, stamping out two matching arches, and cut out the central inner curve to create a hollow horseshoe frame. Use a fine needle tool to punch five evenly spaced holes along the flat bottom crossbar of each arch, ensuring the perforations are wide enough to accommodate fiber strands. Cure the arches in the oven, supporting them flat to prevent warping. After the pieces cool completely, cut ten four-inch strands of fine unbleached cotton string. Fold each strand in half and loop it through the bottom holes using a secure lark’s head knot, tightening each knot against the clay rim. Comb out the dangling fibers with a fine-toothed brush, trim the fringe into a clean horizontal or V-shaped line with sharp scissors, and secure a stud post to the upper reverse side of the arch.

    Idea 5: Abstract Terracotta Face Line Art Dangles

    Execution Process

    Abstract line art and minimalist portraiture bring an elevated, gallery-inspired aesthetic to bohemian handmade jewelry collections. This concept features a flat, organic oval or pebble-shaped clay drop that displays an embossed or carved continuous-line abstract human face. Rendered in a monochrome matte terracotta or soft beige, the piece highlights clean negative space, contour lines, and deliberate asymmetry. The subtle profile drawing introduces sophisticated modern design flair, moving away from conventional floral patterns into expressive visual art. Lightweight and visually striking, these statement dangles complement neutral wardrobe basics, oversized blazers, and artisanal linen apparel.

    Begin by rolling conditioned terracotta clay into a smooth three-millimeter slab on your work tile, smoothing away any surface blemishes using a drop of isopropyl alcohol on your fingertip. Lightly sketch the continuous abstract face contour onto the clay surface using a blunt embossing stylus or rounded needle tool, carving a single uninterrupted line that defines the eyebrow, nose, and lips. Once the design is traced, deepen the carved channel with a miniature ball-head clay tool to create a clean, uniform furrow without cutting through the back of the sheet. Stamp out the finished illustration using an asymmetrical pebble cutter or an organic oval frame, ensuring the facial design remains nicely centered. Punch an attachment hole at the upper edge and bake the pendant thoroughly according to manufacturer guidelines. Once cooled, leave the clay bare for an authentic raw stone appearance, or buff the high surface with a clean denim swatch to create a subtle satin sheen. Mount the pendant onto a simple gold-plated hoop or hook fixture.

    Idea 6: Textured Sage Green Monstera Leaf Drops

    Step-by-Step Guide

    Tropical botanical elements receive a soft bohemian interpretation when rendered in muted sage green polymer clay with realistic surface veining. This earring design features a stylized monstera leaf silhouette complete with classic fenestration cutouts along the outer margins. The matte sage tone departs from aggressive glossy greens, establishing an earthy, understated vibe that integrates seamlessly into nature-inspired accessories. Delicate surface veining adds dimensional realism, preventing the flat cutout from appearing generic or rigid. These botanical dangles serve as an easy project for beginner crafters seeking to master multi-step cutting and carving methods.

    To construct the monstera drops, mix olive green, white, and a pinch of raw sienna clay to yield a muted, dusty sage hue. Roll the mixture into a 2.5-millimeter slab on your ceramic tile. Place a monstera leaf metal cutter onto the clay and apply firm, even pressure to cut the leaf perimeter. For the open side slits, use a fine craft scalpel to slice away narrow negative-space slivers along the leaf margins, rounding the inner corners with a smoothing tool. With the leaf still resting on the tile, use a fine needle tool to score a central vertical stem vein, branching outward with softer diagonal leaf veins extending toward each lobe. Pierce a small connection hole through the top stem base before transferring the tile into the baking oven. After a full thirty-minute cure at the recommended temperature, remove the leaves and let them cool completely. Sand the exterior perimeter using 600-grit wet sandpaper to soften the scalpel cuts, and suspend each leaf from a small raw brass ball post using a single sturdy jump ring.

    Idea 7: Raw Stone Slab with Embedded Gold Flakes

    Fabrication Method

    Emulating the organic luxury of mined minerals, this faux raw stone design incorporates genuine metallic brilliance into translucent polymer clay bases. The earrings feature geometric hexagonal or teardrop shapes made from translucent clay tinted with subtle granite flecks and embedded fragments of imitation gold leaf. When baked, the translucent clay matrix clarifies, allowing the suspended gold leaf to reflect light from various internal depths like natural quartz or polished geode slices. The neutral, stone-like aesthetic complements bohemian festival styling, adding elevated metallic shimmer without introducing excessive weight or manufacturing complexity.

    Prepare this design by conditioning translucent polymer clay alongside tiny pinches of black and white granite-effect clay until the stones are softly distributed throughout the translucent base. Tear small sheets of imitation gold leaf into irregular flakes using tweezers, scattering them across the flattened clay slab. Fold the clay repeatedly and compress it into a solid brick, distributing the metallic foil throughout the internal layers without over-kneading the material into microscopic glitter. Roll the clay through your roller to a uniform three-millimeter thickness, revealing the suspended gold sheets beneath the surface. Cut the sheet into crisp hexagons or clean triangles, punch an attachment hole near the apex, and bake on a tile lined with cardstock to prevent shiny contact patches. Once fully cured and cooled, coat the front surface with a thin layer of UV resin or liquid polymer clay, curing it under a UV lamp for two minutes to achieve a glossy, stone-like depth that magnifies the gold flakes. Connect the finished pendants to minimalist brass ear hooks.

    Idea 8: Southwestern Mosaic Tile Segment Dangles

    Execution Process

    Southwestern design motifs introduce rich geometric vitality into bohemian accessories through sharp lines, mosaic layouts, and contrasting earth tones. This multi-piece dangle earring consists of three interlocking geometric segments—a triangular stud, a central diamond, and a lower trapezoid—that assemble into a cohesive vertical mosaic. The color palette draws inspiration from traditional desert textiles, combining dusty turquoise, coral rust, and ivory cream. Because the three individual tiles are linked with loose metal jump rings, the earring flexes and moves gracefully with the wearer, creating eye-catching rhythm and balanced proportions without adding excessive length.

    Begin by rolling out three separate clay sheets in turquoise, coral rust, and ivory, calibrating each to an identical 2.5-millimeter thickness. Using a sharp craft blade and a metal ruler, cut precise strips from each color and join them edge-to-edge into a striped composite sheet, rolling lightly to fuse the seams together. Cut out your matching geometric components: two small triangles from the ivory section, two central diamonds across the striped junction, and two lower trapezoids from the turquoise field. Carefully pierce corresponding connection holes at the top and bottom edges of each piece, aligning the hole placements so the segments hang straight when linked. Bake the components flat on a ceramic baking surface. Once cooled, smooth all straight edges with a sanding block dipped in water to achieve razor-sharp geometric borders. Use round-nose pliers to link the three segments sequentially using four-millimeter antique brass jump rings, and attach stainless steel earring posts to the rear of the top ivory triangles with strong jewelry glue.

    Idea 9: Bohemian Macramé Knot Impression Arches

    How to Create

    Textile imprinting offers a simple way to transfer complex surface patterns onto smooth clay without requiring advanced sculpting skills. This earring concept features a wide, U-shaped arch displaying the intricate, woven texture of knotted macramé textiles. Rendered in a soft oatmeal or warm linen tone with subtle natural speckles, the earring surface mimics woven fabric while preserving the rigid, protective qualities of cured polymer clay. The contrast between the soft visual texture of knotted yarn and the solid, durable feel of the finished earring embodies the tactile spirit of bohemian home decor and artisanal accessories.

    To execute the macramé impression, condition a batch of oatmeal-colored clay containing subtle natural fibers or crushed spices like cinnamon to create a speckled look. Roll the clay into a three-millimeter sheet on your working tile. Take a clean piece of loosely woven macramé fabric, burlap, or a crocheted cotton lace doily, laying it flat over the clay surface. Place a sheet of parchment paper over the textile and roll firmly with an acrylic roller, transferring the cross-hatch fibers and knot depressions deeply into the clay foundation. Lift the textile slowly to preserve the woven design, then use a wide U-arch cutter to stamp out your earring shapes. Punch a single attachment hole at the top arch apex and two holes along the lower curved tips. Bake the textured arches flat in the oven. After cooling, lightly rub a damp sponge with raw umber pigment across the surface to emphasize the textile depressions, and seal with a matte varnish. Attach a brass hoop through the lower holes and mount an earring post to the upper reverse side.

    Idea 10: Asymmetrical Sun and Moon Celestial Drops

    Fabrication Method

    Celestial imagery holds an enduring place within bohemian aesthetics, symbolizing natural harmony through mystical sun and moon motifs. This mismatched earring pair features an asymmetrical configuration: one ear displays a radiant sun medallion adorned with sculpted rays, while the companion ear showcases an elegant, slender crescent moon. Both pieces are worked in a cohesive matte sand clay body, accented with tiny embedded brass ball studs that tie the two distinct celestial silhouettes together. The deliberate asymmetry brings a modern, playful edge to the jewelry set, satisfying crafters who appreciate creative ideas that break away from conventional matching pairs.

    Start by conditioning warm sand-colored clay and rolling it out to a uniform 2.5-millimeter thickness. For the moon earring, use a circular metal cutter to stamp out a complete disk, then overlap the same cutter halfway across the cutout to produce a smooth, clean crescent moon shape. For the sun earring, cut a smaller solid central circle, then roll tiny teardrop-shaped clay beads, pressing them radially around the outer rim of the circle to form sculpted sun rays. Use a miniature ball stylus to make subtle indentations at the center of each sun ray, inserting tiny raw brass metallic beads into the wet clay to create cohesive decorative accents. Pierce connection holes at the top of both celestial charms, ensuring the balance point allows each piece to hang vertically. Bake the charms flat on a cardstock-lined tile. Once cooled, sand the outer perimeters smooth, seal the embedded brass beads with a dot of clear liquid clay, and link both charms to minimalist gold-plated ear huggie hoops.

    Common Beginner Mistakes and How to Avoid Them

    The most frequent error in polymer clay earring creation is underbaking, which leaves the cured vinyl brittle, chalky, and prone to breaking when flexed or dropped. Novice crafters often reduce baking times or lower oven temperatures out of fear of scorching the clay. However, polymer clay requires sustained heat—typically between 265°F and 275°F (130°C to 135°C) for thirty full minutes per quarter-inch of thickness—to fuse the PVC particles into a durable, flexible compound. Always utilize an independent, freestanding oven thermometer rather than relying on built-in appliance dials, which often fluctuate wildly. Another widespread issue involves trapped air bubbles, which blister during baking and weaken the structural integrity of thin slabs. To eliminate air bubbles, slice open any visible blisters with a sharp craft blade before cutting, smoothing the surface flat with a roller. Furthermore, crafters frequently neglect surface cleanliness, allowing dust and lint to embed into light-colored clays. Maintain pristine surfaces by wiping down tools with isopropyl alcohol, washing hands frequently, and using a designated scrap piece of translucent clay as a lint roller over your tile prior to rolling out final project slabs.

    Practical Tips for Better Results

    Achieving professional boutique quality requires consistent attention to fine finishing details and disciplined studio habits. Always implement wet-sanding techniques rather than dry sanding; dipping wet-and-dry sandpaper into clean water eliminates airborne clay dust and prevents deep abrasive scratches on your cured pieces. Progress systematically through sandpapers, beginning at 400-grit to level uneven perimeters, advancing to 800-grit to soften edges, and finishing with 1200-grit for a satiny, touchable surface. When drilling attachment holes, support the cured clay against a scrap piece of wood and rotate a handheld pin vise slowly to avoid blowout cracks on the back of the piece. For post attachment, avoid relying entirely on cyanoacrylate superglues, which degrade and shear off under temperature shifts. Instead, use a two-part jewelry epoxy, or embed the metal post base directly into the back of the raw clay using a drop of liquid clay and an overlay patch, curing the assembly in the oven a second time for permanent mechanical bonding. Finally, keep a dedicated craft log noting oven times, clay blends, and roller thickness settings to easily reproduce successful batches.

    Styling, Presentation, or Organization Ideas

    Thoughtful presentation and creative staging significantly enhance the perceived value and aesthetic appeal of handmade polymer clay earrings. For market displays and social media showcases, mount finished earring pairs onto custom kraft paper or textured cotton rag cards stamped with minimalist typography. Displaying terracotta and olive green earrings against neutral linen, raw travertine stone risers, or kiln-dried cedar planks highlights the organic, bohemian roots of the designs. When organizing studio inventory, store cured components and finished pieces in multi-compartment clear plastic craft boxes sorted by color family and hardware finish, preventing delicate surfaces from scratching against loose jump rings. In everyday personal spaces, arrange these statement earrings on an open wall-mounted jewelry organizer crafted from wooden dowels and natural macramé mesh, turning personal accessories into decorative home decor accents when not being worn. For customer packaging, tuck the mounted jewelry cards inside stamped unbleached muslin drawstring pouches accompanied by a brief handwritten note on cardstock, detailing simple cleaning instructions and reminding wearers to avoid submerging their polymer clay accessories in water or exposing them to harsh chemical perfumes.

    Budget or Time Planning

    Disciplined planning and efficient resource management allow makers to produce striking handmade collections without excessive financial investments or wasted studio hours. Polymer clay represents an economical craft medium, as a standard two-ounce block yields multiple pairs of statement earrings when rolled to standard three-millimeter depths. Maximize budget ideas by purchasing core neutral clays—such as translucent, ecru, and terracotta—in economical one-pound bulk blocks, using smaller two-ounce specialty packages strictly for accent pigments and metallics. Source jewelry hardware, like stainless steel jump rings, ear wires, and silicone backs, in bulk wholesale lots rather than retail craft packets to reduce your per-unit manufacturing cost significantly. In terms of time allocation, batch processing offers the most efficient production workflow. Dedicate distinct studio sessions to individual production stages: spend one afternoon conditioning, blending colors, and cutting slabs; reserve a second focused block for baking and precision drilling; and finish with a dedicated evening for wet sanding and hardware assembly. Grouping identical physical tasks reduces preparation and cleanup times, maintains consistent quality, and optimizes energy usage when heating your kitchen oven for extended baking cycles.

    Creative Expansion and Advanced Inspiration

    Once you master foundational slab cutting, proper curing, and hardware assembly, polymer clay offers limitless opportunities for advanced artistic exploration. Experiment with complex internal caning techniques, such as constructing detailed millefiori canes that reveal intricate desert landscapes, floral cross-sections, or geometric mandala patterns when sliced. Explore mixed-media expansions by incorporating natural elements directly into your designs, combining baked clay tablets with hand-shaped brass sheet metal, polished raw wood accents, freshwater pearls, or woven raffia trim. Another sophisticated avenue involves surface treatments, such as applying alcohol ink washes, metallic mica powders, or screen-printed silk transfer patterns to raw slabs before cutting and baking. You can also expand your product line beyond traditional dangle earrings by adapting these bohemian motifs into matching pendant necklaces, structural hair cuffs, minimalist hairpins, and architectural wall hangings. Mastering these advanced techniques turns basic polymer clay into an expansive, fine-art medium, empowering makers to build cohesive, high-end lifestyle collections that stand out across modern design platforms and artisanal markets.

  • 10 Polymer Clay Dangle Earrings

    Handcrafted statement jewelry continues to redefine contemporary fashion accessories by merging artistic individuality with lightweight physical comfort. Designing polymer clay dangle earrings offers a rewarding creative project that transforms raw, malleable polymer medium into durable, gallery-worthy wearable art. This detailed guide delivers step by step instructions, professional assembly techniques, and practical styling advice to assist makers in producing boutique-standard drop earrings at home. Readers will explore ten innovative aesthetic concepts, essential material science fundamentals, precise curing protocols, and durable hardware joinery designed to elevate beginner craftwork into high-end designer pieces. Polymer clay provides an exceptional balance of structural resilience and featherlight density, allowing creators to produce dramatic, multi-tiered hanging earrings that will not pull, tear, or fatigue earlobes during extended daily wear. By reviewing every production phase—from initial conditioning and precision slab slicing to jump ring mechanics and chemical post-curing refinement—you will gain the foundational knowledge and practical skills required to design, assemble, and finish balanced clay dangle earrings with total technical confidence.

    Why This Idea Is Trending or Useful

    Artisanal earrings consistently dominate modern Pinterest ideas because fashion enthusiasts actively favor sustainable, expressive, and personalized wardrobe accents over generic factory accessories. Polymer clay dangles directly address this trending ideas movement by offering an adaptable medium that mimics high-end materials such as raw earthenware ceramics, carved marble stone, terrazzo composites, and cast terrazzo tiles. From a practical perspective, the cured polymer vinyl matrix produces durable, flexible earrings that resist drops, moisture, and everyday impact while remaining remarkably light on the ear. For DIY crafters, the craft serves as an accessible, beginner friendly medium with minimal overhead costs, requiring only a domestic kitchen oven, simple slicing blades, and basic hand tools. The endless opportunities for custom color blending, negative-space cutouts, and kinetic multi-tier articulation provide boundless creative ideas for both casual hobbyists and ambitious small-business jewelry designers. These accessories deliver elevated design relevance, pairing naturally with relaxed casual outfits, formal evening wear, or minimalist capsule wardrobes.

    Materials and Preparation

    Executing pristine, long-lasting clay dangles requires selecting reliable materials and maintaining a spotless workspace before the fabrication process begins. Gather premium-grade polymer clay blocks in your designated color palette, prioritizing professional formulations that bake to a flexible, resilient finish rather than brittle craft-grade alternatives. Essential tools include an ultra-thin stainless steel flexible tissue blade, acrylic rolling rods, assorted geometric shape cutters, smooth glazed ceramic work tiles, wet-or-dry automotive sandpaper sheets spanning 400 to 1200 grit, and a handheld pin vise drill fitted with one-millimeter drill bits. For the assembly phase, procure hypoallergenic stainless steel or raw brass jump rings, flat ear posts with butterfly scrolls, French wire hooks, two pairs of flat-nose jewelry pliers, and a two-part epoxy or industrial jewelry adhesive. Thorough preparation requires cleaning your ceramic work tile with isopropyl alcohol to remove rogue lint, pet hair, and surface oils. Wash your hands thoroughly, maintain a cool room temperature to prevent clay from becoming overly sticky, and preheat your oven using an independent oven thermometer to verify internal thermal stability.

    Idea 1: Tiered Terracotta Sunset Arches

    Step-by-Step Guide

    The tiered terracotta sunset arch earring combines warm Mediterranean earth tones with clean architectural curves, producing a dynamic multi-segment drop that moves gracefully with every head turn. This design features a small upper stud connected to two graduated nesting arches that hang freely beneath one another, creating layered negative space lines. Utilizing rich desert shades such as burnt orange, muted ochre, and warm almond captures a sophisticated, sun-drenched aesthetic that complements warm neutral wardrobes. The open arch profile reduces overall physical mass while maintaining a bold, dimensional silhouette that flatters the jawline. The balanced symmetry between the outer arch and inner curve gives this piece an elevated, modern design presence suitable for daytime gatherings or evening occasions.

    To execute this design, condition three ounces of terracotta clay and two ounces of warm ochre clay by kneading each block until completely pliable and free of air bubbles. Roll both colors into smooth, uniform slabs measuring two and a half millimeters in thickness, using acrylic depth guides to ensure consistent vertical depth across the entire work tile. Align your graduated arch cutters perpendicular to the slab surface and press downward firmly with steady pressure, avoiding sideways rocking motions that deform edges. Use a handheld pin vise drill or sharp needle tool to pierce balanced pilot connection holes centered two millimeters inward from the top and bottom tips of each arch segment. Bake the pieces flat on your glazed ceramic tile at 275 degrees Fahrenheit for thirty-five minutes, allowing them to cool gradually inside the closed oven to prevent thermal shock. Smooth the cured perimeter edges under running water using 600-grit wet sandpaper, dry the components thoroughly, and link the nested arches sequentially using polished brass jump rings manipulated with flat-nose jewelry pliers.

    Idea 2: Floating Monochromatic Pebble Links

    How to Create

    The floating monochromatic pebble link earring embraces organic asymmetry, drawing inspiration from smooth river stones and tumbled coastal gravel. This design incorporates three softly shaped clay drops of irregular dimensions linked together in a linear vertical cascade, offering an effortless handmade charm that avoids rigid industrial geometry. By utilizing a restrained color scheme of soft ecru, warm sand, and flecked granite, the piece highlights subtle textural shifts and natural movement rather than vibrant contrast. The smooth, rounded contours feel tactile and grounded, creating a soothing accessory that pairs effortlessly with natural linen blouses, denim, and chunky knit sweaters. The kinetic flexibility between the three separate pebble segments produces an organic swing that catches ambient room light subtly.

    Begin the fabrication process by blending translucent polymer clay with solid bone-white clay, kneading in a pinch of crushed dried herbs or dark baked clay shavings to produce an authentic speckled stone texture. Roll the conditioned slab out on your ceramic work tile to a thickness of three millimeters. Instead of utilizing standard commercial metal cutters, trace and cut freeform rounded pebble profiles using a precision craft knife, varying the dimensions from a small ten-millimeter stud down to a twenty-five-millimeter elongated bottom drop. Soften the raw perimeter edges by gently gliding an isopropyl alcohol-dampened cotton swab along the cut lines to melt away microscopic tool burrs before curing. Pierce connecting holes through the vertical axis of each pebble shape using a needle tool, maintaining sufficient edge distance to ensure structural integrity under tension. Cure the pieces on a flat parchment-lined baking sheet for thirty-five minutes at the temperature recommended by your clay manufacturer. Once cooled, wet-sand the faces with 800-grit sandpaper to reveal the speckled grain, and assemble the links using matte silver jump rings.

    Idea 3: Art Deco Fan and Tassel Drop

    Execution Process

    The Art Deco fan and tassel drop earring unites vintage nineteen-twenties glamour with clean, contemporary craftsmanship. This concept features a scalloped, fluted fan-shaped upper shield supporting an array of slender, dangling clay rods that sway rhythmically like fringe. Styled in dramatic jewel tones like emerald green, midnight indigo, or deep plum paired with bright metallic accents, the earring delivers striking contrast and high visual drama. The fluted texture across the top fan catches light across its alternating ridges, establishing visual depth above the dancing vertical tassel rods below. This elongated silhouette draws the eye downward, providing a slimming aesthetic that pairs exceptionally well with swept-up hairstyles and formal evening wear.
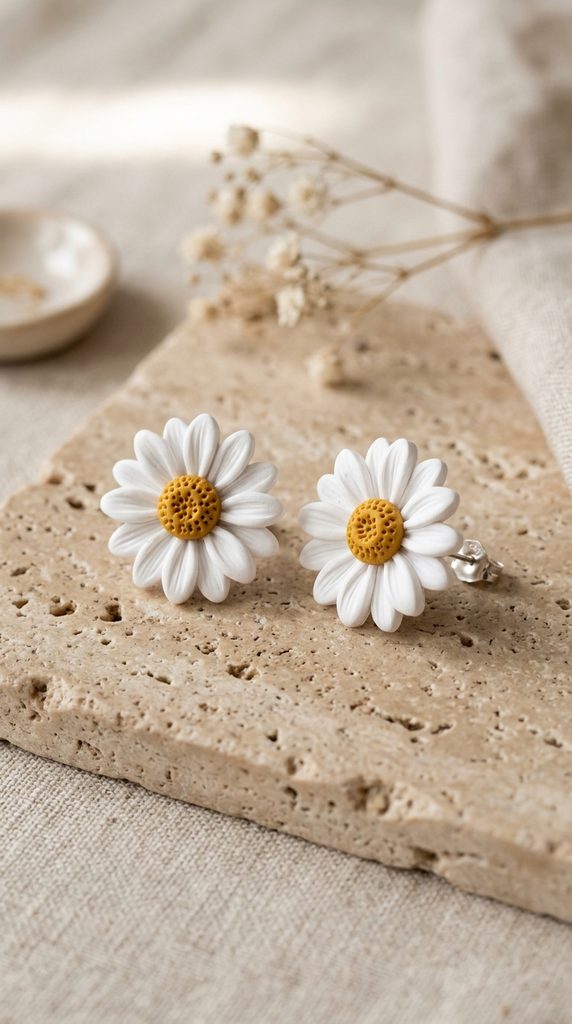
    Start by rolling out deep emerald green clay to a precise three-millimeter slab, ensuring complete surface uniformity across your tile. Press a rigid metal fan cutter firmly into the slab to stamp out two identical scallop-crested shields, followed by cutting six slender rectangular rods measuring three millimeters in width and thirty millimeters in length using a steel tissue blade and metal straightedge. To introduce fluted texture onto the fan surfaces, gently press the dull back of your tissue blade radially from the base point outward toward each scalloped peak, embossing crisp linear impressions into the raw clay. Pierce three evenly spaced jump ring holes along the straight lower baseline of each fan shield, and pierce a single matching hole through the upper tip of each slender hanging rod. Bake all elements flat on a smooth ceramic surface at 275 degrees Fahrenheit for thirty-five minutes. After full cooling, polish the raised fan ridges with a soft microfiber cloth, attach ear posts to the reverse side of the fans using industrial epoxy, and link the dangling rods to the base holes with gold jump rings.

    Idea 4: Mixed-Media Brass and Clay Hoops

    How to Make

    The mixed-media brass and clay hoop earring merges the earthy, matte quality of handcrafted polymer clay with the reflective brilliance of polished metal jewelry findings. This design features a flat, hollow polymer clay disc framing a suspended geometric brass charm or wire loop within its center cavity, producing a striking frame-within-a-frame kinetic effect. The juxtaposition of industrial metallic gold against soft, muted clay tones like olive green, dusty blush, or slate charcoal produces a sophisticated, boutique-quality accessory. The open negative space at the center preserves a featherlight weight profile while allowing the interior brass element to catch the light independently as the wearer moves. This versatile piece bridges modern industrial aesthetic standards with artisanal handmade charm.

    Prepare this piece by conditioning olive green clay until soft and pliable, rolling it into a clean slab measuring two and a half millimeters thick. Use two concentric circular cutters—measuring thirty-five millimeters and twenty millimeters in diameter—to punch out two open, hollow clay rings from the prepared slab. Using a needle tool, pierce a vertical hole straight through the top rim of the clay ring and a secondary hole directly opposite through the bottom interior edge. Place the raw rings onto an oven-safe ceramic tile and bake at 275 degrees Fahrenheit for thirty-five minutes to achieve optimal curing strength and flexibility. After the baked clay cools completely, wet-sand the inner and outer circular rims using 1000-grit sandpaper to remove any rough ridges. Clean matching round raw brass stamping blanks with a polishing cloth to eliminate surface tarnish, then suspend each brass piece inside the center of the hollow clay hoop using an open jump ring before connecting the top hole to a brass French ear wire.

    Idea 5: Sculpted Botanical Leaf Cascades

    Step-by-Step Guide

    The sculpted botanical leaf cascade earring captures the organic beauty of climbing vines and tropical foliage through a tiered vertical arrangement of overlapping clay leaves. Designed in graduated botanical tones such as deep eucalyptus, sage green, and pale mint, this piece showcases three distinct leaf sizes linked sequentially from smallest to largest down the earring spine. Each leaf element features hand-carved or impressed vein detailing that imparts realistic botanical relief to the flat clay surface. The multi-tiered articulation allows the leaves to sway independently, creating an eye-catching accessory that brings natural movement to simple, casual daytime outfits or warm-weather resort attire.

    Construct the leaf cascade by blending three shades of green clay, creating a dark, medium, and light variation of botanical sage. Roll each color out to a thickness of two millimeters on your working surface. Stamp out the smallest leaves in pale mint, the medium leaves in sage, and the largest hanging leaves in deep eucalyptus using graduated teardrop or leaf-shaped cutters. Using a sharp needle tool or fine clay modeling spatula, lightly score a central vertical vein line down each leaf, extending delicate diagonal lateral veins outward toward the outer borders. Pierce connection holes at the top and bottom points of the top and middle leaves, and a single hole at the top tip of the lowest leaf. Bake the components on parchment paper at 275 degrees Fahrenheit for thirty minutes. Once cooled, lightly buff the surfaces with a denim cloth to bring out a natural satin sheen, then link the three leaves together using small brass jump rings to complete the articulated botanical cascade.

    Idea 6: Minimalist Color-Blocked Trapezoid Drops

    Execution Process

    The minimalist color-blocked trapezoid drop earring focuses on geometric balance, sharp angled boundaries, and clean mid-century modern design principles. This accessory consists of an inverted trapezoid stud supporting an elongated hanging trapezoid below, with each segment divided diagonally into two contrasting color blocks. Utilizing bold, sophisticated color pairings such as mustard yellow alongside deep navy, or warm cream paired with jet black, this piece provides an instant visual punch without unnecessary ornamental clutter. The sharp diagonal boundaries produce an architectural aesthetic that highlights precision craftsmanship and clean edge alignment. Its streamlined, low-profile form hangs flush against the neck, making it a functional, striking accessory for contemporary professional wardrobes.

    To build this color-blocked design, roll out a sheet of navy clay and a sheet of mustard clay, ensuring both slabs share an identical two-and-a-half-millimeter thickness. Using a tissue blade and metal ruler, cut clean forty-five-degree diagonal edges along both colored slabs, then press the contrasting cut edges together flush on your ceramic tile to create a seamless, unified two-tone sheet. Roll an acrylic rod lightly across the joined seam to bond the clay fibers without smearing the crisp division line. Align your trapezoid cutters over the joined slab so the diagonal color line slices cleanly across the center of each shape, pressing down firmly to stamp out the earring components. Pierce precise jump ring holes through the matching anchor points, taking care not to warp the straight linear edges. Bake the cutouts on a ceramic tile for thirty-five minutes at 275 degrees Fahrenheit. Once the pieces cool, sand the exterior perimeters with 600-grit wet sandpaper to ensure razor-sharp borders, and join the trapezoids with minimalist jump rings.

    Idea 7: Contemporary Terrazzo Arch Dangles

    Setup Method

    The contemporary terrazzo arch dangle earring replicates the luxury aesthetic of mid-century Italian composite stone through colorful clay mosaic embedding techniques. This design features a wide, dramatic clay arch displaying an array of geometric flecks suspended across a creamy off-white or translucent background. Incorporating miniature fragments of terracotta, cobalt blue, forest green, and mustard yellow into the neutral base creates a playful, multi-colored surface pattern that pairs effortlessly with diverse wardrobe palettes. The smooth, flat arch shape maximizes the visible surface area of the terrazzo pattern, turning the earring into a statement conversation piece that celebrates artisan mosaic craft.

    Begin by rolling out a three-millimeter slab of clean ecru polymer clay across your glazed ceramic working surface to serve as the structural mosaic base. Take small leftover scraps of baked or firm unbaked clay in terracotta, black, cobalt, and mustard, slicing them with a razor blade into tiny, irregular chips measuring one to two millimeters across. Scatter the colorful chips randomly across the surface of the ecru slab, pressing them into the raw sheet with your fingertips. Place a sheet of clean deli parchment paper over the scattered chips and roll your acrylic rod across the surface with firm, even pressure until the flecks are pressed completely flush with the base clay. Stamp out your arch shapes using a sharp metal cutter, pierce connection holes at the top center and bottom tips, and bake the pieces at 275 degrees Fahrenheit for thirty-five minutes. After cooling, sand the surface with wet 800-grit sandpaper to remove any surface bumps and reveal the crisp terrazzo flecks beneath, then link to flat-pad ear studs using jump rings.

    Idea 8: Asymmetrical Abstract Face Silhouette

    How to Make

    The asymmetrical abstract face silhouette earring draws direct inspiration from modern line art and continuous contour drawings, celebrating avant-garde personal style. This creative project features a two-tiered drop where one side depicts a simplified, stylized eye and brow motif while the opposing earring showcases an abstract nose and lip contour, creating an intriguing, non-identical pair. Executed in a minimalist palette of stark white, charcoal, or warm nude clay, the design relies on bold negative space cutouts and flowing continuous contours. This artful accessory makes a sophisticated statement, appealing to makers who appreciate museum-inspired fashion, surrealism, and thoughtful artistic balance.

    To craft this abstract pair, sketch your continuous-line facial features onto paper within a two-inch vertical bounding box, ensuring all lines are sufficiently thick to hold structural strength in clay. Roll out a slab of charcoal black clay to a uniform thickness of three millimeters on a smooth glass sheet. Place your paper template over the clay slab and trace the lines using a sharp needle tool to transfer the design contours into the raw medium. Carefully cut away the negative space sections using a precision craft knife with a fresh blade, taking your time around tight curves to maintain smooth internal perimeters. Smooth away cut marks along the inner edges using an alcohol-soaked silicone modeling tool. Pierce a suspension hole at the balance point of each abstract shape, then bake the pieces on a ceramic tile at 275 degrees Fahrenheit for thirty-five minutes. Once cooled, assemble the abstract shapes onto simple silver ball-post studs with sturdy jump rings.

    Idea 9: Woven Rattan-Textured Teardrops

    How to Create

    The woven rattan-textured teardrop earring brings rustic textile warmth into the polymer clay medium by simulating traditional cane webbing or basketry weaves. This design features an open teardrop-shaped clay frame containing an embossed cross-hatch or woven texture across its surface, finished in natural flax, warm tan, or bleached linen tones. The rich surface relief introduces tactile depth that captures ambient shadows, producing an organic aesthetic that pairs naturally with warm-weather straw hats, linen dresses, and relaxed vacation wear. By pairing textured clay elements with bright metallic wire connectors, the earring achieves an upscale, boutique-ready finish that honors traditional fiber arts while retaining the durability of cured polymer.

    To create the woven texture, roll out a slab of tan polymer clay to a uniform three-millimeter thickness on your working tile. Lightly dust the surface of a silicone texture mat featuring an open-cane or cross-hatch basket pattern with cornstarch to prevent sticking, then press the mat firmly into the clay slab with an acrylic roller. Peel the mat away cleanly to reveal the crisp, embossed woven impressions across the clay sheet. Align an open teardrop cutter over the textured pattern, pressing down vertically to stamp out two matching textured teardrop frames. Pierce a suspension hole through the tapered upper peak of each frame using a handheld needle tool. Bake the frames on a ceramic tile at 275 degrees Fahrenheit for thirty-five minutes to ensure complete curing without flattening the raised texture. Once fully cooled, wash away any leftover cornstarch with cool water, dry thoroughly, and connect the teardrop frames to matching circular brass stud toppers using flat-nose pliers and gold jump rings.

    Idea 10: Linear Bar and Hammered Disc Cascade

    Step-by-Step Guide

    The linear bar and hammered disc cascade earring explores vertical movement and textural contrast through an elongated, multi-tier assembly. This design incorporates a slender vertical clay bar that supports a flat, faux-hammered circular disc below, establishing a clean geometric relationship between straight lines and rounded forms. Styling this accessory in rich earth tones like burnt umber, slate gray, or deep olive gives the piece a sophisticated, grounding aesthetic that complements minimalist capsule wardrobes. The kinetic connection between the vertical bar and the swinging lower disc produces an elegant elongation along the wearer’s neck, providing an understated statement piece suitable for both office wear and evening dinners.

    Prepare this design by conditioning slate gray clay and rolling it out on your ceramic tile to an even thickness of two and a half millimeters. Using a metal straightedge and sharp tissue blade, slice two slender rectangular bars measuring six millimeters in width and thirty-five millimeters in length. Next, stamp out two round discs measuring twenty-five millimeters across using a circular metal cutter. To produce the faux-hammered surface texture on the round discs, gently tap the rounded end of a metal ball stylus tool repeatedly across the raw clay surface, creating an irregular dimpled pattern that catches light. Pierce connection holes through the top and bottom ends of the vertical bars, as well as the top edge of each hammered disc. Bake the pieces on a flat tile at 275 degrees Fahrenheit for thirty-five minutes. After cooling, wet-sand the straight edges of the bars with 800-grit paper, attach ear posts to the back of the upper bar ends, and join the components with round jump rings using jewelry pliers.

    Common Beginner Mistakes and How to Avoid Them

    Crafting polymer clay dangle earrings involves several technical variables where minor procedural errors can compromise the durability and finish of the completed jewelry. The most critical mistake beginners encounter is underbaking the clay, which occurs when makers shorten baking times due to an unfounded fear of scorching the pieces. Underbaked polymer clay fails to achieve complete molecular fusion of its internal vinyl chains, resulting in brittle earrings that snap easily under light pressure. Always utilize a standalone oven thermometer to verify internal temperatures, and cure pieces for at least thirty to forty minutes at the exact temperature specified by your clay manufacturer. Another widespread issue is embedding airborne dust, surface lint, and fingerprints into the raw clay while handling and shaping. Prevent contamination by wiping down your work tiles, tools, and hands with isopropyl alcohol, and gently smooth the surface of cut pieces with an alcohol-moistened cotton swab before baking. Finally, many beginners drill jump ring connection holes too close to the perimeter edge, causing the thin clay border to break during assembly. Always maintain a minimum margin of two millimeters between the drilled hole and the outer edge of the component.

    Practical Tips for Better Results

    Achieving a smooth, professional-grade finish on handmade clay dangles requires disciplined preparation, sharp cutting tools, and methodical surface refinement. Always use acrylic depth guides or a calibrated craft pasta machine when rolling out your clay slabs to ensure completely uniform thickness across all components. Slabs with uneven thickness cool at different rates, introducing internal stresses that cause earrings to warp or cup during the baking process. When cutting shapes, use sharp, ultra-thin stainless steel cutters or 3D-printed cutters coated with a micro-layer of cornstarch to achieve clean edges that require minimal post-bake sanding. If minor surface imperfections appear after baking, wet-sand your components under cold running water using silicon-carbide sandpaper, progressing through 400, 600, 800, and 1200 grits to produce a silky, matte finish without releasing airborne dust. When mounting ear posts, avoid relying solely on standard super glue, which degrades over time when exposed to skin moisture and temperature shifts. Instead, use a high-strength, two-part epoxy adhesive, roughing up both the back of the clay and the face of the metal stud with coarse sandpaper before joining to create a permanent mechanical bond.

    Styling, Presentation, or Organization Ideas

    A thoughtful visual presentation elevates the perceived craftsmanship of handmade polymer clay earrings, whether you are staging photographs for social media, assembling craft displays, or organizing your personal collection. Photograph your earrings against natural, neutral backdrops such as raw travertine stone tiles, warm oak boards, textured linen fabrics, or unglazed ceramic plates. These organic textures complement the matte, tactile surface of the clay while keeping the visual focus squarely on your geometric designs. Utilize soft, indirect natural morning sunlight angled from the side to cast gentle shadows that highlight multi-tiered layers, negative space cutouts, and kinetic links. For personal home organization, store your dangles on a wall-mounted brass mesh screen or a linen-lined pinboard, preventing drop components from tangling or rubbing against hard surfaces. When packaging your earrings for gifts or boutique retail, mount them onto thick, unbleached kraft cardstock cards debossed with minimalist typography. Enclose the cards in protective cotton-lined boxes tied with natural twine, reinforcing the artisanal care and quality craftsmanship behind your handmade jewelry collection.

    Budget or Time Planning

    Careful planning allows makers to minimize production costs while optimizing creative output, making polymer clay earring design a sustainable and cost-effective endeavor. A standard two-ounce block of professional polymer clay costs only a few dollars yet provides enough material to produce four to six complete pairs of multi-tiered dangle earrings, yielding an exceptionally low material cost per piece. Maximize your initial budget by investing in essential core tools first—such as a dedicated oven thermometer, an acrylic roller, a sharp tissue blade, and a few versatile geometric cutters—before acquiring specialized texturing tools or complex cutter sets. Organize your studio time into structured batch-processing blocks to maximize creative flow and maintain clean working conditions. Dedicate an initial sixty-minute block to conditioning clay, mixing custom color palettes, and rolling out uniform slabs on your ceramic tiles. Use a second focused session to stamp out all components, pierce connection holes, and bake the full batch on shared tiles. Reserve a final session for wet-sanding edges, polishing surfaces, and assembling metal jump rings, completing several boutique-quality earring pairs in a single efficient afternoon.

    Creative Expansion and Advanced Inspiration

    Once you master basic flat slabs and simple jump ring links, you can explore advanced creative variations that expand the artistic range of your dangle earrings. Experiment with incorporating delicate inclusions into translucent clay slabs, such as genuine silver leaf foil, dried floral petals, or micro-glitter pigments, producing ethereal, suspended depths within the cured material. You can also explore dynamic mixed-media combinations by pairing cured clay components with hand-woven macrame thread fringes, carved wooden beads, or custom-bent sterling silver wire armatures. Another advanced direction involves designing kinetic multi-link chandelier earrings that incorporate four or five interlocking articulated drop tiers, challenging your balance and weight distribution skills. As seasons transition, curate cohesive capsule collections inspired by architectural movements, such as Art Nouveau floral motifs for spring or brutalist geometric forms for autumn. These thoughtful creative expansions allow you to continually refine your technical skills while developing a distinct, recognizable artistic voice within the modern handmade jewelry landscape.