Handcrafted polymer clay bridesmaid jewelry provides a contemporary, customizable alternative to traditional mass-produced bridal accessories, allowing wedding parties to coordinate color palettes and sculptural silhouettes with precision. Modeling oven-bake clay into bridal jewelry enables makers to produce lightweight, durable earrings, pendants, hairpins, and cuffs that match fabric swatches, floral palettes, and venue aesthetics. This comprehensive tutorial details ten original polymer clay bridesmaid jewelry ideas, spanning architectural arches, pressed botanicals, faux freshwater pearls, scalloped chokers, and textured floral dangles. Readers will learn the essential mechanics of clay conditioning, color formulation, sharp cutting methods, secure hardware embedding, and controlled oven curing. Designing custom accessories for bridal attendants eliminates the frustration of searching for matching commercial pieces while ensuring the jewelry remains comfortable throughout long celebration days. Beyond bridal styling, mastering these versatile polymer clay forming and finishing skills provides practical knowledge that transitions seamlessly into everyday jewelry making, creative gift packaging, and vanity organization. By understanding fundamental techniques such as slab rolling, wet sanding, and jump-ring assembly, crafters of any skill level can produce gallery-grade accessories. The following sections outline core preparation protocols, required material inventories, ten two-paragraph instructional breakdowns, and strategic planning timelines.
Why This Idea Is Trending or Useful
Handmade bridal party accessories continue to lead trending ideas across modern digital mood boards and Pinterest ideas because couples increasingly value personalized, thoughtful details over generic commercial offerings. Modern wedding styling embraces bespoke color palettes—such as dusty sage, terracotta, champagne, and muted slate—that can be challenging to match with standard retail jewelry. Polymer clay allows makers to mix exact pigment ratios, ensuring earrings and hair accessories harmonize directly with bridesmaid dress textiles and floral bouquets. As an engaging DIY creative project, making bridal party jewelry requires minimal space and accessible tools, functioning smoothly on a standard home craft desk without complex metalworking machinery. Because fundamental clay shaping relies on clean geometric cutters, simple rolling techniques, and uniform baking, this medium serves as an exceptionally beginner friendly entry point into artisanal jewelry construction. Crafting matching sets also provides sensible budget ideas, allowing hosts to produce luxury-look accessories for entire wedding parties at a fraction of fine jewelry costs. Furthermore, these durable, modern design pieces serve as meaningful keepsakes that bridesmaids can easily integrate into their personal wardrobes long after the wedding day concludes.
Materials and Preparation
Thorough planning and disciplined supply procurement ensure that handmade polymer clay bridesmaid jewelry achieves structural durability, clean surface definition, and secure hardware attachments. The primary medium should center on premium artist-grade polymer clay in translucent, opaque white, and desired wedding palette tones, along with liquid polymer clay for reinforced bonds. Essential shaping tools include an acrylic rolling pin or dedicated clay conditioning machine, rigid stainless steel tissue blades, micro geometric cutters, silicone sculpting pens, and fine-point tweezers. For assembly, procure hypoallergenic jewelry findings such as surgical steel or fourteen-karat gold-plated ball posts, butterfly backs, heavy-duty jump rings, bails, and flat alligator hair clips, along with round-nose jewelry pliers. Preparation begins by wiping down your ceramic work tile or glass cutting mat with ninety-one percent isopropyl alcohol to remove lint, oils, and airborne dust particles. Condition the clay thoroughly by hand-kneading or passing it repeatedly through your roller until the slab bends smoothly without cracking along folded edges. Calibrate your household oven with an independent, freestanding oven thermometer, verifying temperature stability before baking to prevent delicate pastel or white clays from scorching.
1. Minimalist Arch Dangle Earrings with Raw Brass Charms
Step-by-Step Guide
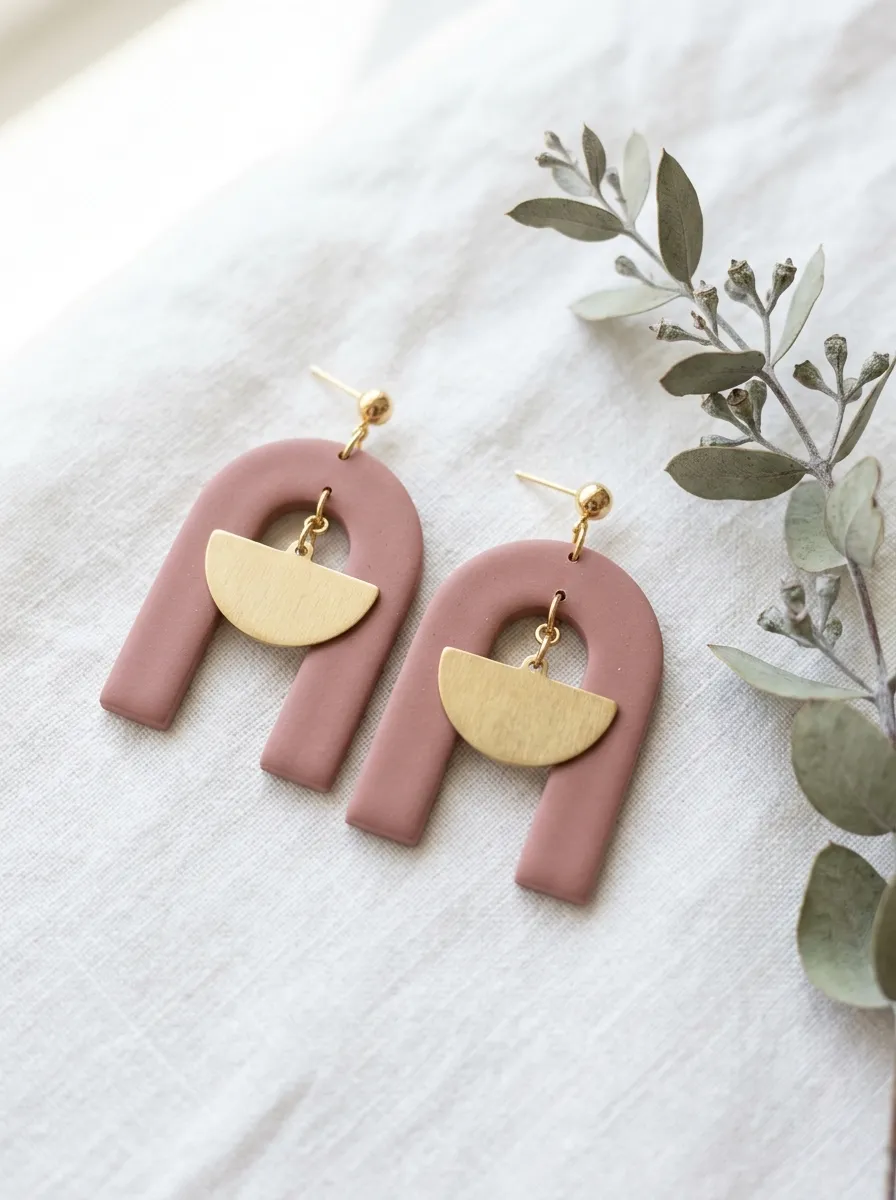
The minimalist arch dangle earring combines clean architectural lines with the warm, reflective contrast of raw metal, creating a timeless silhouette for modern wedding parties. This design features an inverted U-shaped arch sculpted from smooth, matte polymer clay in a soft wedding neutral such as champagne, dusty rose, or pale stone. Suspended beneath or within the negative space of the clay arch is a delicate, geometric raw brass charm—such as a brushed semi-circle or textured bar—that catches natural ambient light during movement. The contrast between the soft, velvety clay surface and the warm metallic element produces an elevated aesthetic that complements both sleek slip dresses and structured crepe gowns. The lightweight nature of polymer clay ensures that even substantial two-inch statement earrings remain comfortable to wear throughout photography sessions, dinner, and dancing.
To construct the arch earrings, roll a conditioned slab of neutral clay to a uniform thickness of two and a half millimeters using depth guides on your acrylic roller. Press a clean stainless steel arch cutter firmly into the slab, rocking the cutter gently from side to side before lifting straight up to maintain sharp edges. Use a pin tool to pierce a one-and-a-half-millimeter hole through the top center of the arch for the ear post, and another hole along the bottom center edge for connecting the metal charm. Transfer the raw clay shapes on their ceramic baking tile directly into a preheated oven, curing for forty minutes according to your clay manufacturer’s instructions. Once cooled, smooth any minor perimeter burrs with fine-grit wet sandpaper. Use flat-nose pliers to connect the lower hole of the cured clay arch to the raw brass charm using an open jump ring, then secure a gold-plated stud post to the top hole with a second jump ring.
2. Pressed Botanical White Clay Pendant Necklace

Execution Process
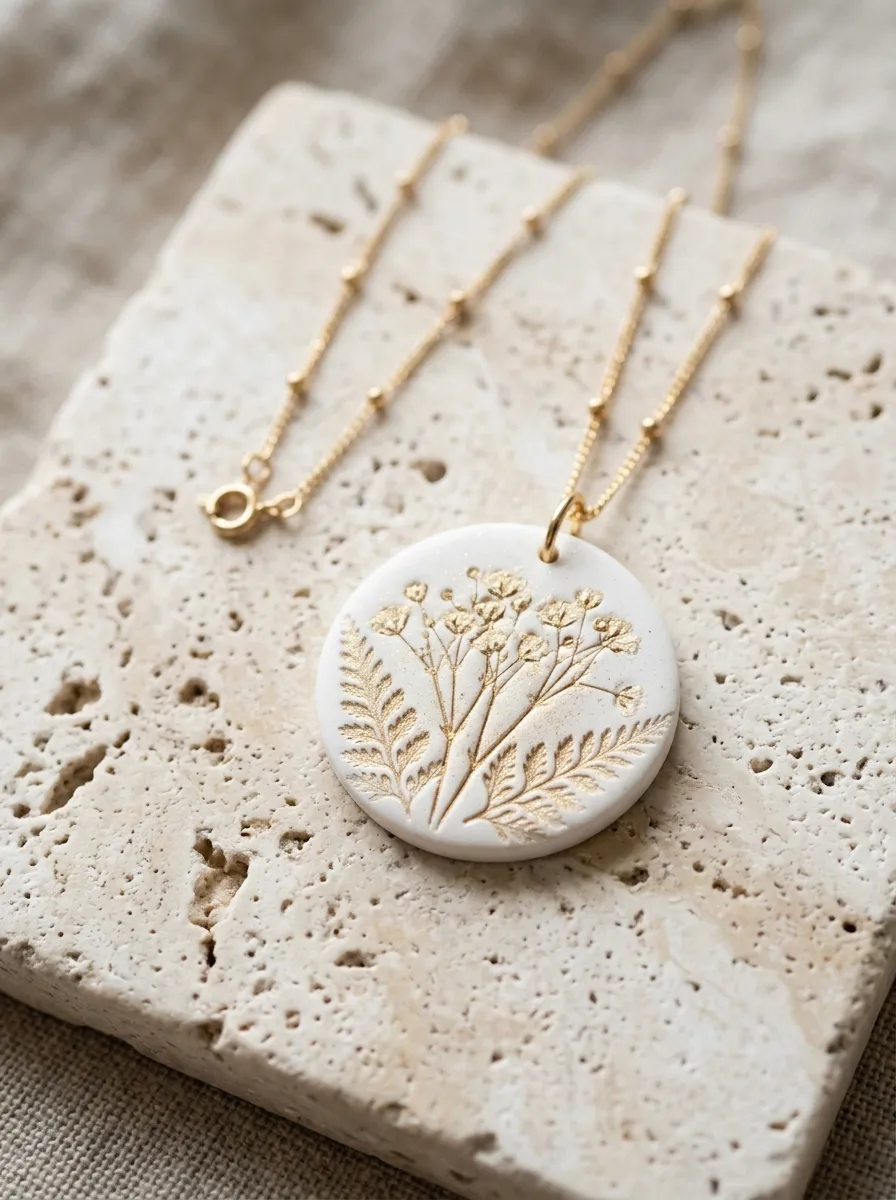
Botanical impression jewelry brings organic romance and natural textures into bridal styling, commemorating seasonal florals through delicate surface relief. This design incorporates a clean, circular or oval pendant crafted from opaque white or translucent porcelain-toned polymer clay, embossed with genuine miniature foliage or delicate blossoms. Sprigs of baby’s breath, sweet alyssum petals, or fine fern fronds are gently pressed into the raw clay to leave intricate vascular impressions, which are then lightly highlighted with soft gold mica powder or left clean for a modern debossed look. The pendant rests flat against the collarbone, suspended from a delicate satellite chain in fourteen-karat gold or sterling silver. This understated, nature-inspired accessory pairs beautifully with outdoor garden weddings, rustic vineyard celebrations, and bohemian bridal party ensembles, introducing sentimental botanical textures without distracting from the overall gown silhouette.
Begin by rolling out a conditioned slab of white polymer clay to a three-millimeter thickness on a polished ceramic tile. Select small, dried botanical specimens—such as tiny fern leaves or pressed flower buds—and lay them carefully across the clay surface in an asymmetrical, balanced composition. Place a sheet of parchment paper over the botanicals and roll your acrylic pin over the surface with light, even pressure to embed the foliage into the clay. Peel the parchment and botanicals away using fine tweezers, leaving sharp floral impressions in the slab. Cut the pendant shapes using an oval or round metal cutter, then use a piercing needle to create a clean hole near the top edge for the necklace bail. Bake the pendants flat on the tile for thirty-five minutes, allowing them to cool completely before buffing the surfaces with a soft cloth. Thread the finished pendant onto a fine gold-plated chain using an open bail.
3. Sculpted Organic Petal Statement Studs
How to Create
Three-dimensional floral studs celebrate natural volume, sculptural fluidity, and feminine elegance through hand-shaped botanical petals. Rather than lying flat against the earlobe, this design incorporates multiple curved petals sculpted individually from soft ivory or blush clay, layered together to form a blooming gardenia or open dogwood blossom. The subtle curvature of each petal catches multidirectional light, creating soft shadows that give the earrings dimension and visual depth. A central cluster of tiny textured stamens or small freshwater seed pearls adds refined contrast at the core of the flower. For bridesmaids wearing swept-up hairstyles or elegant chignons, these statement studs frame the jawline with sculptural beauty, providing high visual impact without the swinging movement of long dangle earrings.
To make the petal studs, condition two ounces of soft ivory polymer clay and roll several marble-sized balls into smooth, tapered teardrops. Flatten each teardrop on the palm of your hand using a round-ended ball stylus tool, thinning the outer edges while keeping the base slightly thicker to simulate natural flower petals. Curve the edges of five flattened petals upward, arranging them in a tight circular cluster on your baking tile with overlapping margins. Press the central petal joints together using a silicone shaper, securing the center with a drop of liquid polymer clay before adding tiny spheres of textured gold clay to form the stamen core. Bake the assembled floral studs for forty-five minutes to ensure maximum flexibility and strength. Once the pieces cool, apply a dab of two-part industrial epoxy to the reverse side of each flower, setting a surgical steel flat-pad earring post firmly into place and allowing it to cure fully before wear.
4. Faux Baroque Pearl Clay Drop Earrings
Step-by-Step Guide
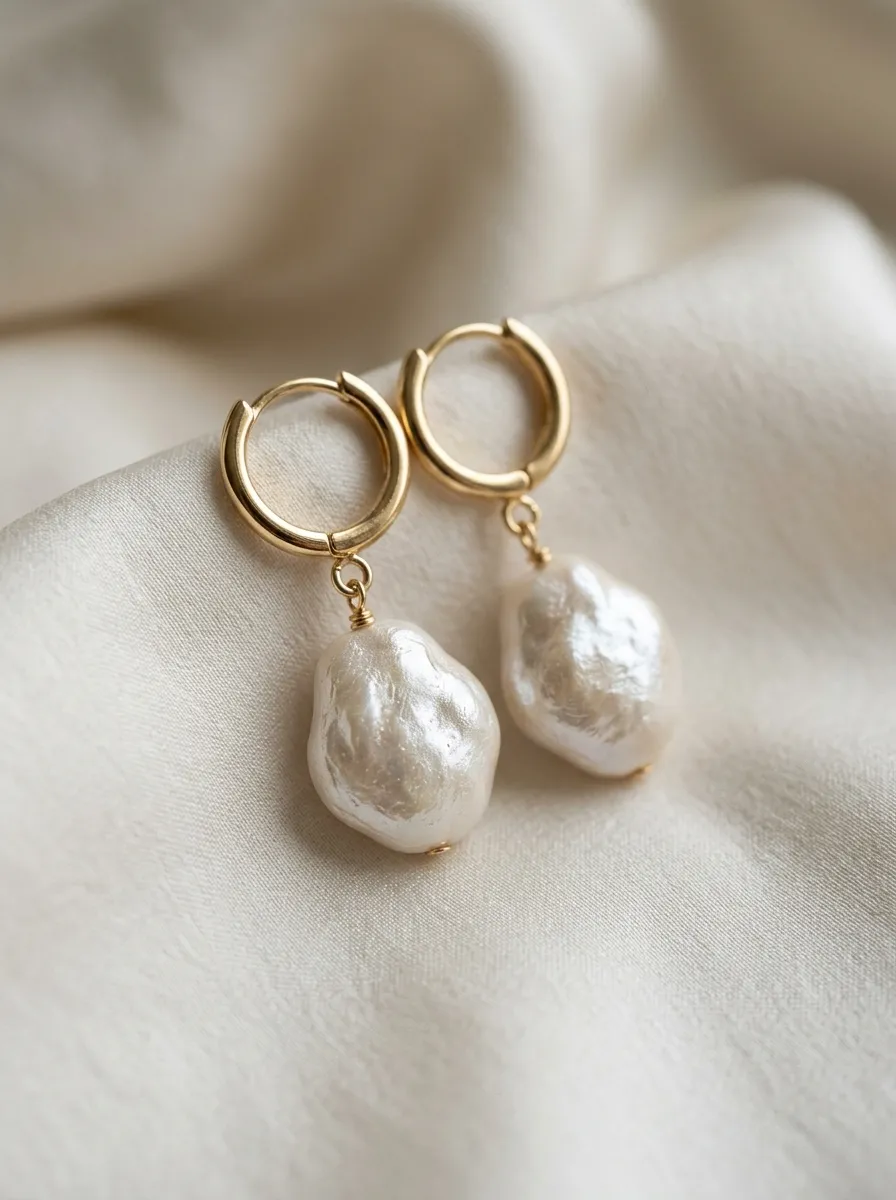
Baroque pearls are loved in bridal design for their organic asymmetry and soft iridescence, and replicating their aesthetic in polymer clay allows for lightweight, customized jewelry styling. This concept pairs hand-formed, irregularly contoured clay nuggets with high-luster pearlescent mica powders, capturing the organic beauty of cultured freshwater pearls without excessive physical weight. Each bead displays subtle ridges, soft indentations, and an undulating profile that mirrors natural marine formations. Suspended from sleek, minimalist huggie hoops or delicate ball-post studs, these faux baroque drops hang gracefully beneath the earlobes, swaying gently with every step. The warm, luminous sheen coordinates effortlessly with traditional ivory bridal gowns, delicate lace bodices, and satin bridesmaid dresses, delivering classic heirloom elegance through a modern, handcrafted medium.
Start by mixing translucent polymer clay with a tiny pinch of opaque white and soft champagne clay to produce an authentic semi-translucent base compound. Roll the conditioned clay into irregular, slightly flattened oval beads measuring twelve to fifteen millimeters in length, intentionally leaving soft surface bumps and asymmetric contours with your fingertips. Use a soft blending brush to dust the entire surface of each raw clay nugget with white and champagne pearlescent mica powder, buffing the pigment gently into the clay to create an even, iridescent sheen. Carefully push a stainless steel eye pin through the longitudinal axis of each bead, rotating slightly to keep the hole straight without flattening the outer contours. Suspend the beads by their pins over a ceramic baking rack and cure for forty minutes. After cooling, coat the beads in a thin layer of water-based gloss varnish to protect the mica luster, then attach them to gold-plated huggie hoops with open jump rings.
5. Modern Matte Terracotta Tiered Geometric Dangles
Execution Process
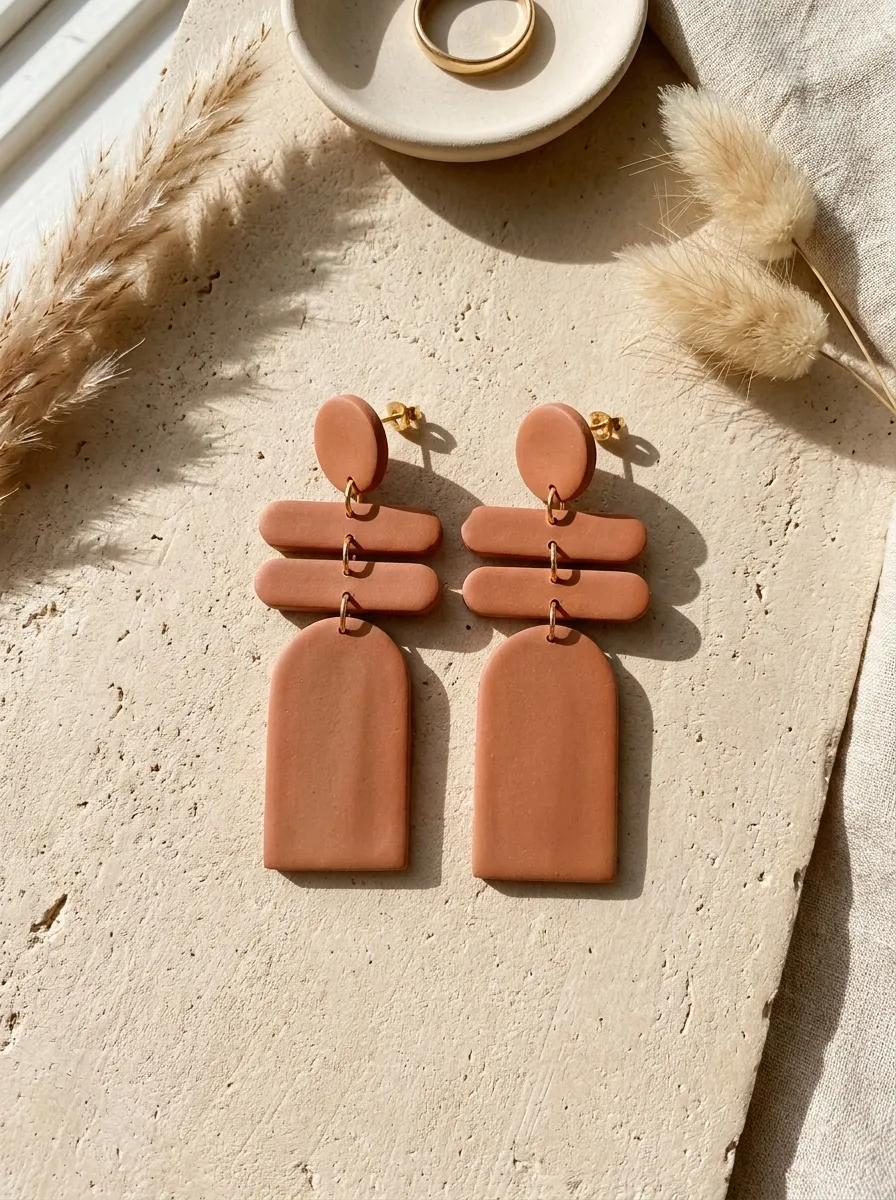
Warm terracotta and rust earth tones have become prominent palette choices for modern desert, autumn, and bohemian wedding celebrations. This design features a multi-tiered geometric earring that stacks contrasting shapes—such as a small top circle, an intermediate horizontal bar, and an elongated rounded arch—connected by delicate metallic jump rings. Sculpted in a rich, matte-finish terracotta clay, the jewelry provides a bold, grounded pop of color that contrasts beautifully against champagne, ivory, or eucalyptus-green bridesmaid gowns. The multi-jointed construction introduces kinetic movement, catching the eye as the wearer walks down the aisle. The velvety, unglazed matte surface preserves modern simplicity, ensuring the warm earth tone remains sophisticated and contemporary rather than overly shiny or casual.
To fabricate these tiered dangles, condition three ounces of terracotta-colored clay and roll it into an even sheet measuring two millimeters thick. Using matching geometric metal cutters, stamp out pairs of small ten-millimeter circles for the ear posts, narrow horizontal rectangles for the midsection, and larger rounded arch shapes for the bottom tiers. Use a micro needle tool to punch connecting holes at the top and bottom edges of the intermediate rectangles, the bottom of the top circles, and the top rim of the arches. Bake all pieces flat on a parchment-lined ceramic tile for thirty-five minutes at the temperature recommended on the package. Once cooled, inspect the alignment of all punched holes, clearing any remaining residue with a clean craft knife. Using two pairs of flat-nose jewelry pliers, link the three geometric components together in sequential order with gold jump rings, finishing by adhering flat-pad earring posts to the backs of the top circles using two-part epoxy.
6. Delicate Polymer Clay and Brass Hairpin Trio
How to Create
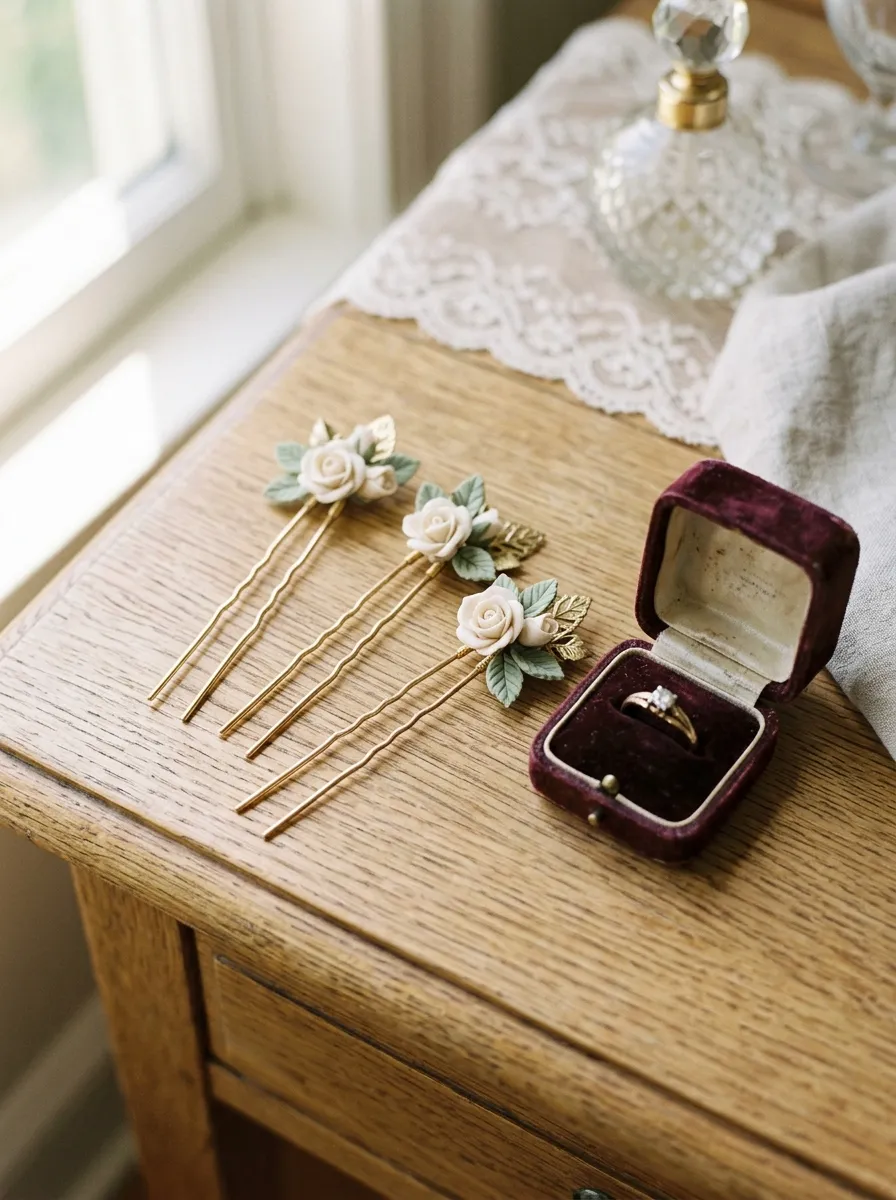
Coordinated bridal hair accessories provide a polished, unified look across a bridal party, especially when bridesmaids choose different hairstyles such as braids, loose waves, or formal updos. This project features a set of three decorative bobby pins or U-shaped hair forks, each topped with a small, hand-sculpted polymer clay floral motif anchored to raw brass leaf stampings. The clay blossoms—sculpted in delicate shades of ivory, blush, or soft sage—nestle cleanly into the hair, introducing soft floral details that echo the wedding bouquets. The metallic pins anchor firmly into hair without sliding, providing comfortable hold from morning preparations through evening celebrations. Crafting hairpins in sets of three allows each bridesmaid to customize placement, clustering the pins together for a statement look or scattering them throughout an intricate braided hairstyle.
To assemble the hairpins, condition small portions of ivory and pale green polymer clay to create the botanical elements. Sculpt three miniature roses by rolling thin clay petals and wrapping them tightly around a central core, flattening the bottom base of each rose so it rests flush against metal findings. Cut small, slender leaves from the sage clay, texturing the leaf faces with a needle tool to add central veins. Bake the clay roses and leaves on a flat ceramic tile for thirty minutes, allowing them to cool completely. Clean the flat decorative pads of three gold-plated hairpins or U-shaped hair forks with rubbing alcohol to remove oils. Mix a small batch of high-strength two-part epoxy, applying a drop to each hairpin pad before pressing a brass leaf stamping and a cured clay rose firmly into the adhesive. Allow the epoxy to cure undisturbed for a full twenty-four hours before wearing or packaging.
7. Marbled Stone and Gold Leaf Teardrop Earrings
Step-by-Step Guide
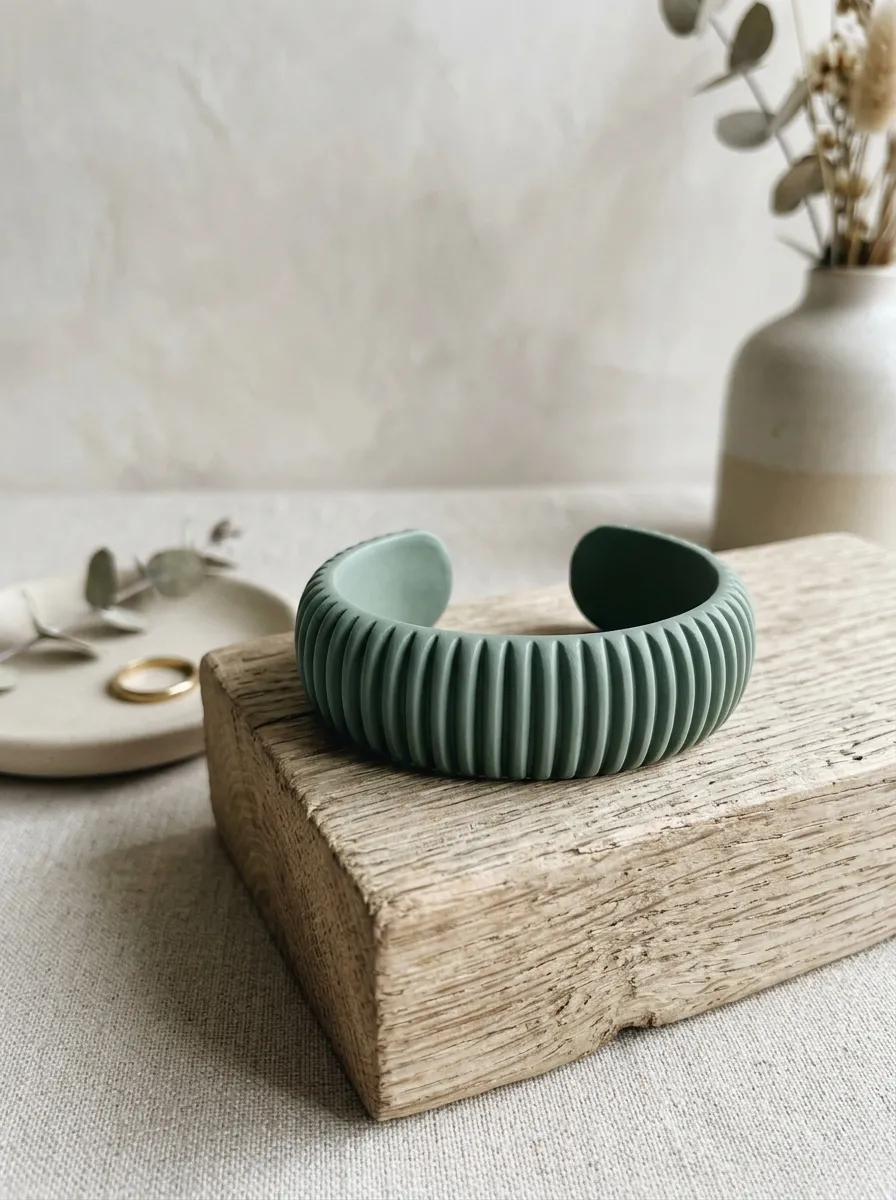
Marbling techniques in polymer clay allow makers to recreate the luxurious, organic veining of natural marble and granite, introducing high-end texture to wedding accessories. This design features an elegant teardrop-shaped earring crafted from swirled white, translucent, and soft gray clay, veined with delicate fragments of genuine or imitation gold leaf foil. The gold leaf fractures organically during the rolling process, producing fine metallic veins that shimmer beneath the clay surface. The teardrop silhouette offers a flattering, elongated shape that complements various face structures, making it a dependable, universally appealing gift for bridal attendants. The combination of cool stone textures and warm gold leafing pairs seamlessly with modern industrial venues, formal ballroom settings, and romantic garden celebrations alike.
Begin by conditioning equal portions of opaque white, translucent, and pale dove-gray polymer clays, rolling each into long, slender ropes measuring roughly eight millimeters in diameter. Lay the three ropes together side by side, gently twisting them into a single spiral coil before folding the coil in half and rolling it smooth. Place small flakes of gold leaf foil over the clay surface, folding and rolling the mass two or three times until fine, flowing marble striations and fractured gold veins appear throughout. Roll the marbled clay into a smooth slab measuring two and a half millimeters thick. Stamp out matching pairs of teardrop shapes using a clean stainless steel cutter, piercing a small connection hole through the tapered top point of each piece. Bake the teardrops on a smooth tile for forty minutes, cooling them slowly inside the oven. After cooling, sand the edges smooth, apply a thin coat of satin sealer, and assemble the drops onto gold-plated earring hooks.
8. Sculpted Ribbed Clay Cuff Bracelet with Open Back
Execution Process
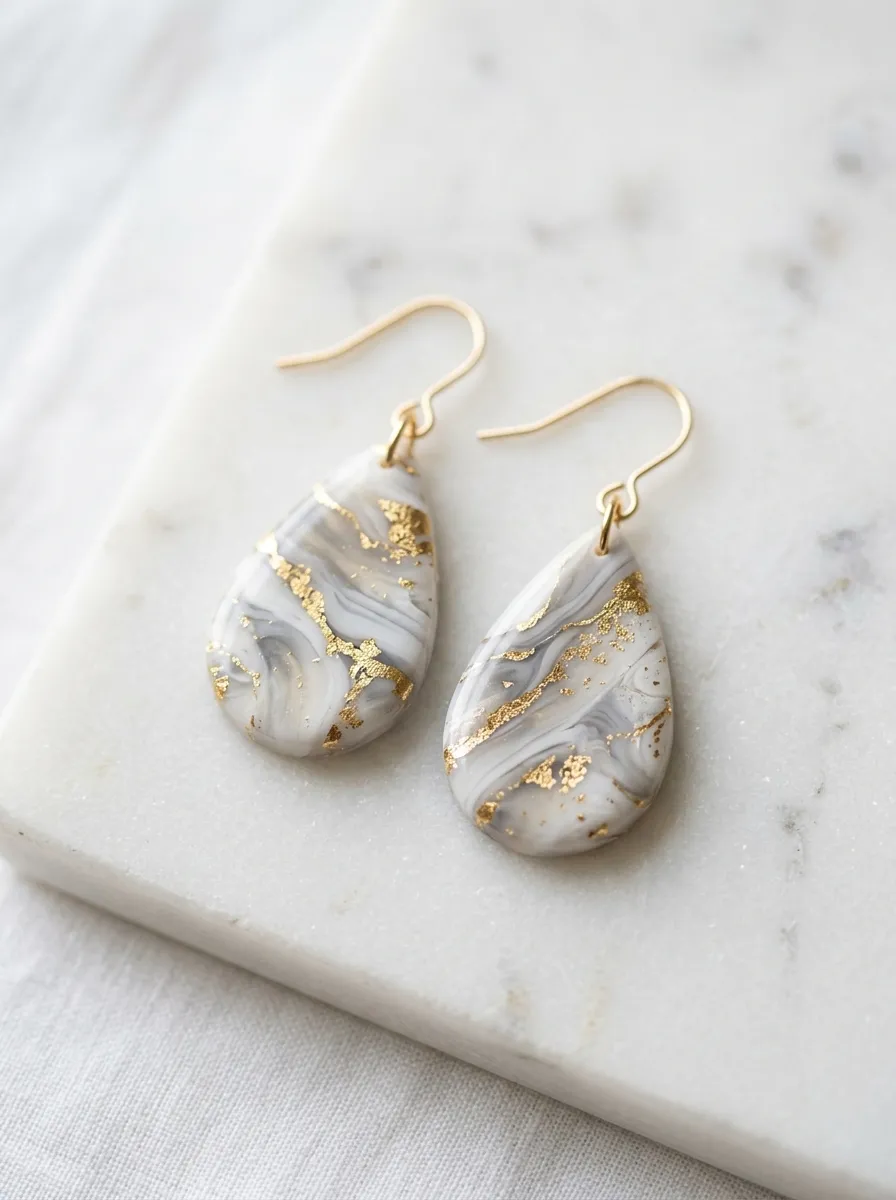
Statement wristwear brings architectural balance to sleeveless, strapless, and halter-neck bridesmaid dresses, creating a refined focal point that moves gracefully with the hands. This project features an open-back cuff bracelet sculpted from durable polymer clay, featuring a raised, fluted rib texture across its exterior band. Sculpted in a flattering neutral tone like warm almond, slate gray, or soft eucalyptus, the cuff maintains a clean, minimalist profile that avoids competing with bouquets. The open-back cuff design offers slight mechanical flexibility, allowing bridesmaids to adjust the fit comfortably around their wrists. Because polymer clay becomes resilient and slightly pliable when cured properly to appropriate thicknesses, the bracelet holds its curved shape through active wedding day movements without snapping or deforming.
To create the ribbed cuff, condition four ounces of high-strength polymer clay thoroughly, rolling it into a flat, uniform rectangular slab measuring six inches long, one and a half inches wide, and four millimeters thick. Using a grooved texture plate or the dull back edge of a metal ruler, press deep, evenly spaced horizontal lines across the entire length of the slab to produce a continuous ribbed accordion pattern. Carefully lift the textured slab, wrapping it around a clean, oven-safe glass jar or metal drink can that matches your wrist circumference to establish the curved cuff profile. Smooth the rounded ends with a silicone tool, ensuring the open gap measures roughly one inch wide for easy wrist access. Bake the cuff supported on the glass container for fifty minutes at the recommended temperature. Allow the metal or glass to cool completely before sliding the cuff off, finishing the outer edges with fine-grit wet sandpaper for a smooth, comfortable fit.
9. Scalloped Lace Clay Choker with Satin Ribbon Tie
How to Create
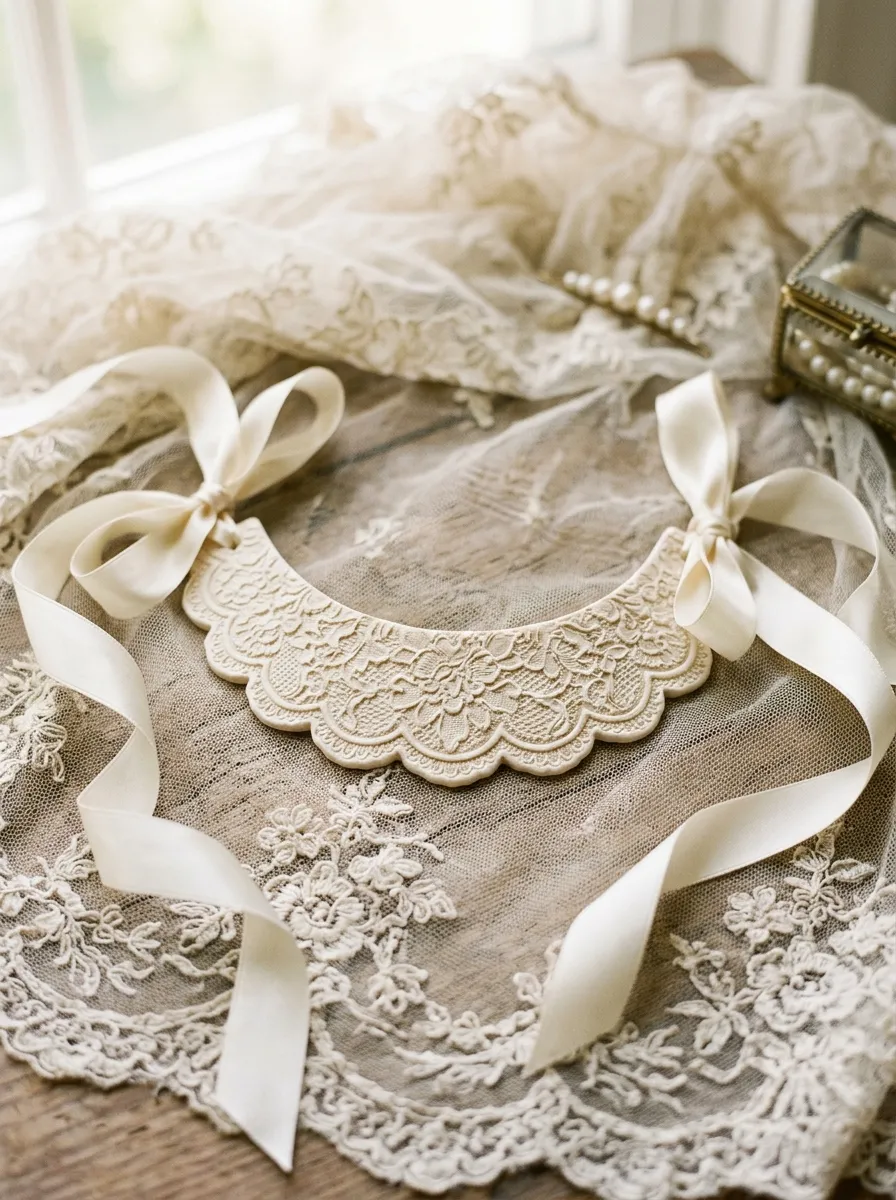
Vintage and Victorian-inspired weddings benefit from delicate, textural jewelry that echoes the intricate weave of antique lace and heirloom embroidery. This choker design features a central curved polymer clay segment with a scalloped lower border, detailed with embossed floral lace textures that mimic bridal gown fabrics. Sculpted from soft ivory or pale cream clay, the centerpiece rests flat against the hollow of the throat, suspended by delicate, double-faced satin ribbon ties that knot neatly at the nape of the neck. The satin ribbon closure allows each bridesmaid to adjust the choker height to suit her dress neckline, ensuring a customized fit. The contrast between the matte, structured clay lace and the soft, flowing ribbon ends creates an artisanal elegance that complements romantic, vintage-themed wedding celebrations.
Start by rolling conditioned ivory polymer clay into a slab measuring two millimeters thick on your ceramic work tile. Lay a piece of textured cotton lace or an etched lace texture mat over the clay, rolling firmly across the surface with an acrylic pin to transfer the detailed textile pattern. Use a sharp scalpel or craft knife to cut out a gently curved banner measuring four inches long and three-quarters of an inch wide, trimming the bottom edge into a decorative scalloped wave. Punch a small two-millimeter hole through each tapered end of the clay banner to accommodate the ribbon ties. Bake the clay banner on a curved piece of crumpled aluminum foil for thirty-five minutes, allowing it to take on a gentle anatomical curve that rests comfortably against the neck. Once cool, thread a twelve-inch length of narrow ivory satin ribbon through each end hole, securing the ribbon with neat slip knots and sealing the cut fabric ends with a quick heat seal to prevent fraying.
10. Petite Botanical Clay Ring Dish Keepsakes
Step-by-Step Guide
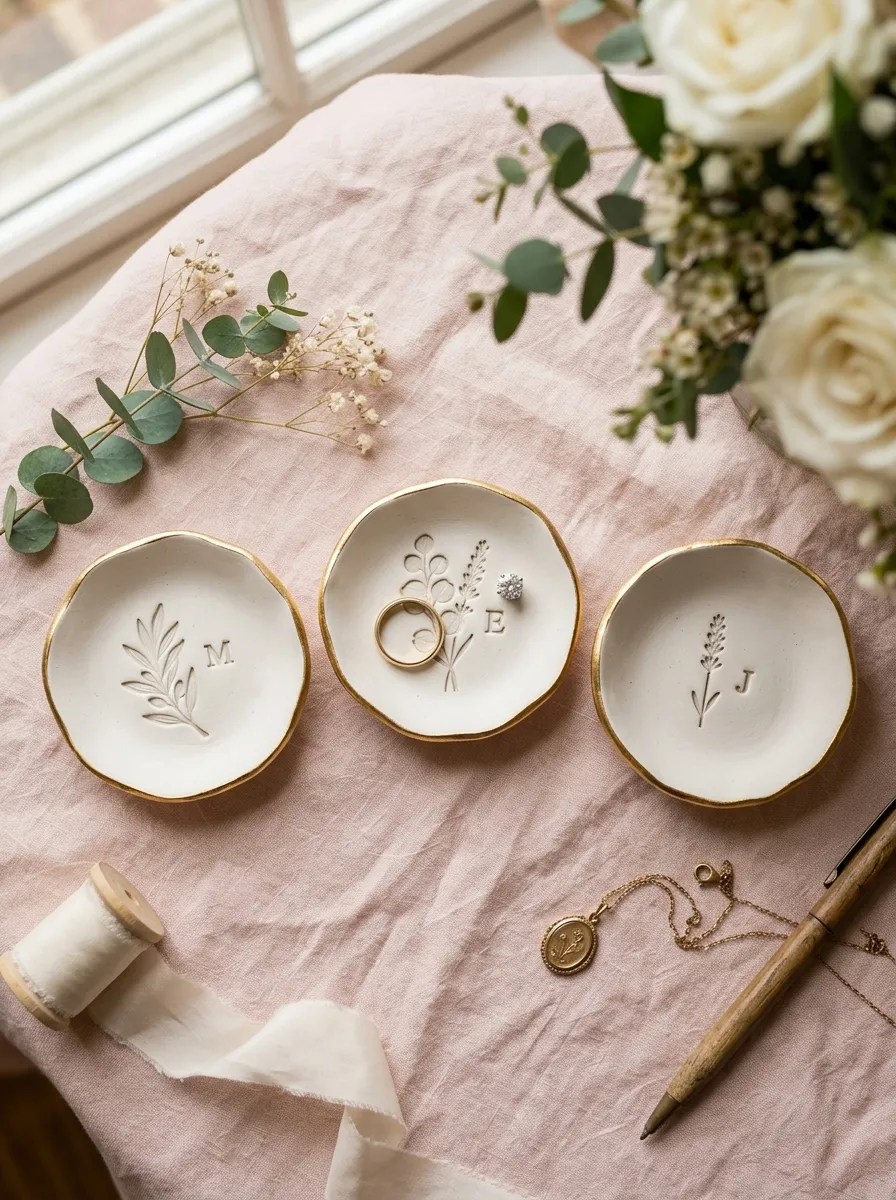
While wearable accessories complete wedding day attire, gifting coordinating ring dishes provides bridesmaids with a practical, decorative keepsake they can enjoy every day. This design features a small, shallow circular dish sculpted from white and translucent clay, finished with a gently curved, organic rim and stamped with each bridesmaid’s initial and delicate botanical accents. The interior basin of the dish is painted with an ultra-thin metallic gold or silver luster rim, introducing a hint of bridal elegance that catches the light on a nightstand or vanity. Sized at approximately three inches in diameter, this delicate dish provides a safe, designated resting spot for rings, stud earrings, and delicate chains. Gifting these personalized dishes alongside matching jewelry pieces elevates the bridesmaid gift into a cohesive, memorable wedding package.
To construct the ring dishes, roll conditioned white polymer clay to a uniform four-millimeter thickness on your work surface. Use a three-inch circular cutter to stamp out round discs, gently smoothing the outer perimeter with your fingertips to create soft, organic edges. Use miniature alphabet stamps to emboss each bridesmaid’s initial into the center of her dish, pressing small dried botanical stems around the letters to create a delicate floral border. Gently lift each stamped circle and press it into the bottom of an oven-safe ceramic ramekin or shallow muffin tin to form a concave, curved bowl shape. Bake the dishes inside their metal or ceramic forms for forty-five minutes to ensure complete curing. After cooling, carefully remove the dishes, wet-sand the rims smooth under running water, and use a fine-point artist brush to apply a delicate metallic gold acrylic or enamel line around the outer rim, sealing the paint with clear varnish once dry.
Common Beginner Mistakes and How to Avoid Them
The most critical technical mistake in polymer clay bridal jewelry construction is under-baking finished pieces out of fear of scorching delicate white or pastel clays. Under-cured polymer clay remains brittle and chalky, causing earrings and hair accessories to snap under minimal tension when bridesmaids handle them on the wedding day. Prevent this issue by using an independent oven thermometer to verify temperature accuracy, curing high-strength clays for the full recommended duration—often thirty to forty-five minutes per quarter-inch of thickness—under a protective tent of aluminum foil to shield pieces from direct heating elements. Another frequent error is allowing lint, dust, and pet hair to contaminate pale clays during preparation; prevent this by wiping all tools, hands, and tiles with ninety-one percent isopropyl alcohol and rolling a small scrap ball of light clay across your work surface to collect stray debris before beginning. Beginners also frequently attach metal earring posts using standard superglue, which becomes brittle and fails over time; always use high-strength, two-part industrial epoxy or embed hardware beneath a thin layer of baked liquid clay for a permanent bond. Finally, avoid piercing holes too close to the edges of clay components, as thin borders tear easily under jump-ring tension; always leave at least two to three millimeters of solid clay margin between any hole and the outer edge.
Practical Tips for Better Results
Achieving professional, boutique-quality finishes on polymer clay bridesmaid jewelry relies on meticulous surface preparation and disciplined finishing practices. Always utilize a high-density polished ceramic floor tile or thick glass mat as both your primary sculpting surface and your baking tray; this eliminates the need to peel raw, delicate clay shapes off your desk, preventing unwanted fingerprint impressions and warped silhouettes. To eliminate tedious post-bake sanding on delicate pieces, smooth away visible tool marks and surface blemishes on raw clay using a soft artist paintbrush dipped lightly in isopropyl alcohol before placing items in the oven. Invest in high-grade wet-or-dry sandpaper, and always sand your cured pieces submerged in a shallow dish of warm water with a single drop of dish soap to suppress airborne dust and prevent paper clogging. Progress methodically through four-hundred, six-hundred, eight-hundred, and one-thousand grits to achieve a silky, touchable satin finish. When assembling multi-piece dangles, open jump rings by twisting them sideways with two pairs of pliers rather than pulling them apart horizontally, preserving the circular tension of the metal and ensuring seams close flush without gaps that could snag fine dress fabrics.
Styling, Presentation, or Organization Ideas
Integrating handmade polymer clay jewelry into your bridal celebrations elevates the bridesmaid experience, whether presenting pieces at the rehearsal dinner, during morning wedding preparations, or in curated gift boxes. Display finished jewelry suites on custom unbleached linen or heavy cardstock presentation cards stamped with the wedding date, the bridesmaid’s name, and a thoughtful note of appreciation. Coordinate jewelry packaging directly with your wedding aesthetics, placing pieces inside small natural kraft gift boxes lined with ivory crinkle paper and tying the exterior with torn-edge silk ribbon in your signature wedding palette. When styling the wedding morning, arrange the jewelry alongside bridesmaid dress hangers, bouquets, and matching satin robes for cohesive, editorial-style detail photography. For daily bedroom organization, these sculptural clay earrings and hairpins can be stored on linen-covered jewelry boards, ceramic trinket trays, or modern brass stands, functioning as lovely home decor accents when not actively worn. Maintaining an understated personal styling approach ensures that handmade clay accessories harmonize effortlessly with glowing skin, soft bridal party makeup, and refined wedding day aesthetics.
Budget or Time Planning
Executing a full collection of polymer clay bridesmaid jewelry requires organized budget planning, patient color matching, and disciplined production timelines to maximize creative efficiency. Save on material expenses by purchasing large economy blocks of foundational translucent and white clays, custom-mixing specific wedding palette tones by blending small amounts of concentrated artist-grade colored clays into the neutral bases. Procure jewelry hardware—such as surgical steel posts, jump rings, and hairpins—in bulk wholesale quantities online to secure volume discounts while ensuring consistent metal quality across all pieces. Structure your jewelry production across three organized crafting sessions: dedicate the first session to color recipe testing, clay conditioning, and slab rolling; use a second uninterrupted block for cutting, texturing, piercing, and baking all clay components; and reserve the final session for wet sanding, hardware assembly, and gift packaging. A set of six to eight pairs of arch dangle earrings or statement studs requires approximately four to five hours of active crafting time, making it an enjoyable, low-stress weekend project. Staging your creative batches three to four weeks before the wedding day ensures ample time for minor adjustments, color matching confirmations, and peaceful, relaxed assembly.
Creative Expansion and Advanced Inspiration
Once you have mastered foundational polymer clay jewelry techniques, explore creative variations to expand your handcrafted bridal collection across broader celebration contexts. Create complementary accessories for other key wedding participants, crafting matching floral cufflinks for groomsmen, delicate lapel pins for fathers, or small hair combs for mothers of the couple using the same signature clay colors. You can also translate jewelry motifs into functional wedding reception details, such as sculpting matching clay place card holders, personalized luggage tags for destination guests, or custom napkin ring holders that tie table decor back to bridal party styling. Experiment with incorporating mixed-media elements into your clay pieces, such as embedding raw crystals, vintage glass beads, or woven embroidery threads alongside your baked clay components to introduce diverse surface textures. Consider designing personalized bridal shower favors, such as miniature initial keychains or decorative botanical wine charms, using leftover clay remnants. Document your custom color formulas, baking times, and design dimensions in a dedicated bridal planning journal, preserving an inspiring creative record that celebrates your wedding craftsmanship for years to come.
Leave a Reply