Polymer clay stacking bracelets combine modern jewelry making with tactile craft techniques to produce layered, everyday personal accessories. Working with polymer clay allows crafters to create custom beads, cylindrical tubes, geometric spacers, and discs tailored to specific color schemes. This structured tutorial explores ten practical project concepts designed around coordinated palettes, comfortable wrist sizing, durable stringing mechanics, and balanced visual weights. Crafters will learn essential conditioning methods, uniform bead slicing strategies, hole-piercing accuracy, and proper oven-curing standards necessary for producing resilient wearable art. Creating handmade bracelet stacks provides exceptional utility because it eliminates the challenge of finding store-bought pieces that fit properly and match existing wardrobes. Polymer clay cures to a lightweight, water-resistant finish that feels smooth against the skin, making these pieces suitable for long-term daily wear. By learning how to balance varied bead profiles alongside complementary metal spacers, elastic cords, and minimalist accents, beginners can build complete accessory suites with minimal studio equipment. This guide provides actionable steps to transform modest clay blocks into durable, modern bracelet stacks that elevate everyday outfits with artisanal character.
Why Polymer Clay Wrist Stacks Are Trending
The popularity of polymer clay wrist stacks across modern Pinterest ideas stems from an emphasis on personalized accessories, modern design simplicity, and vibrant DIY creativity. Commercial fashion jewelry often relies on generic metal alloys or mass-produced plastics that lack individuality and custom comfort. In contrast, handmade clay beads allow makers to control every parameter of their designs, including bespoke pastel blends, organic speckled textures, and architectural profiles. The visual appeal aligns naturally with contemporary stacked fashion aesthetics, where wearing multiple slender bands creates dynamic rhythm, depth, and curated contrast. For beginners, polymer clay provides an accessible creative project that does not require metalsmithing skills, open torches, or industrial machinery. A single block of clay yields dozens of individual beads, making this a cost-effective craft for developing seasonal collections, thoughtful gifts, or market inventory. Furthermore, the lightweight quality of baked polymer clay ensures that wearing five or six stacked strands simultaneously remains comfortable throughout the day, offering practical function alongside modern, handcrafted style.
Essential Materials and Preparation Methods
Beginning a polymer clay bracelet stack requires gathering the right tools, testing elastic elasticity, and preparing a clean workspace to avoid surface contamination. The core materials consist of standard oven-bake polymer clay in curated color combinations, accompanied by durable 0.7-millimeter or 0.8-millimeter clear elastic cord, brass or silver spacer discs, and fast-drying jewelry adhesive. Essential tools include an acrylic rolling rod, a rigid tissue blade for precision slicing, smooth stainless steel piercing needles, a standard bead-baking rack, and high-grit wet-dry sandpaper. Preparation begins by thoroughly cleaning a ceramic tile or tempered glass working board with isopropyl alcohol to remove lint, hair, and dust particles. Conditioning the clay is necessary: knead the clay by hand or roll it repeatedly until it becomes completely pliable, uniform in density, and free of visible air pockets. Planning requires measuring wrist circumferences accurately, allowing an additional half-inch of interior cord space to accommodate bead thickness, and laying out pattern sequences on a beaded felt mat before stringing begins.
Idea 1: Minimalist Terracotta and Sand Disc Stack
Step-by-Step Guide
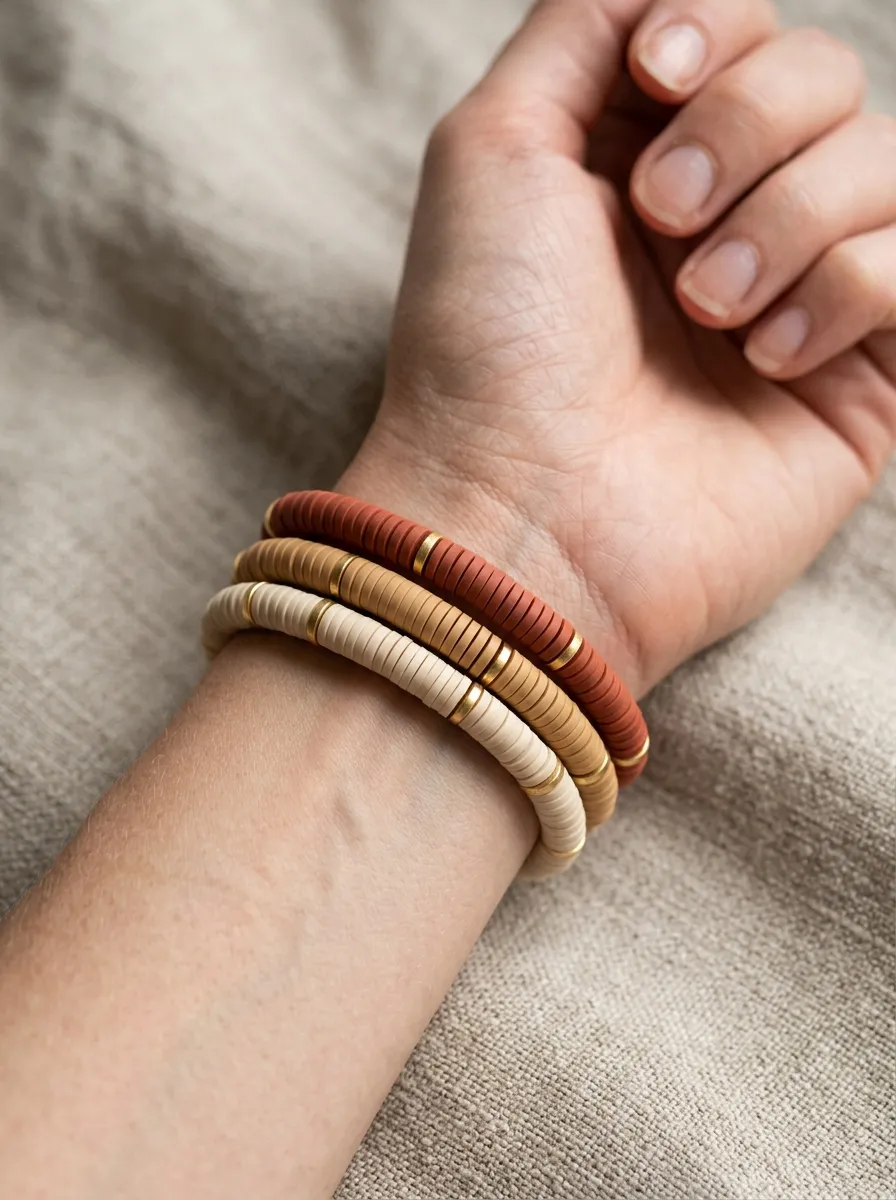
The minimalist terracotta and sand disc stack emphasizes flat, coin-shaped heishi beads arranged into three coordinating wrist strands. The visual identity relies on warm earth tones, pairing rich burnt terracotta, unbleached oatmeal, and muted desert sand to achieve an organic aesthetic. Each bead is cut into a thin, uniform circular disc with a smooth outer edge, creating a dense, continuous textile-like cylinder when strung together. Thin, brushed gold spacer washers are inserted every ten clay discs to provide metallic accents that reflect light without overpowering the matte clay surfaces. This design is exceptionally beginner friendly because heishi beads do not require complex spherical rolling, relying instead on consistent clay sheet thickness and precision slicing. The resulting stack sits flat against the wrist, providing a low-profile silhouette that slides easily under jacket cuffs and sweaters while maintaining a clean, modern design profile suitable for everyday business or casual styling.
To make the discs, condition equal portions of terracotta and sand polymer clay, passing each through a clay roller or rolling them manually to a uniform three-millimeter thickness on parchment paper. Stack alternating sheets together, compress them gently to eliminate trapped air, and use a small three-millimeter round brass cutter to punch out individual circular bead blanks. While the blanks are resting on your work tile, pierce a clean central hole through each disc using a fine needle tool, rotating the tool gently to avoid distorting the circular perimeter. Slide the raw discs onto straight stainless steel baking wires, suspending the wires over a dedicated bead-baking rack to keep the discs elevated during baking. Bake in an oven preheated to 135°C (275°F) for thirty minutes, allowing the components to cool completely inside the oven chamber. String the baked heishi beads onto pre-stretched 0.7-millimeter elastic cord, inserting a flat brass washer every ten beads, then secure the terminal ends with a surgeons knot reinforced with jewelry adhesive.
Idea 2: Modern Monochrome Geometric Bar Trio
How to Create
The modern monochrome geometric bar trio moves away from traditional rounded beads, introducing sleek rectangular tube beads and angular square tiles. This design features high-contrast black, crisp white, and cool slate-gray blocks arranged in an alternating three-tier configuration. One strand features curved rectangular clay tubes that match the natural contour of the wrist, while the remaining two companion strands incorporate tiny cubic clay spacers and matte black lava stones. The sharp, geometric lines create an architectural feel that complements minimalist wardrobe palettes, providing a structured accent for urban streetwear and tailored apparel. By curing the clay tubes with a slight pre-formed curve, the bracelet sits comfortably over the wrist bone without pinching or rotating unpredictably during movement. This project develops fundamental techniques in slab construction, linear trimming, and structural bending, yielding durable accessories that combine modern simplicity with handmade authenticity.
Begin by rolling out a sheet of conditioned black clay to a consistent five-millimeter thickness on a clean ceramic tile. Using a metal ruler and a sharp tissue blade, cut straight strips measuring forty millimeters in length and six millimeters in width. Carefully insert a rigid steel piercing wire lengthwise through the center core of each strip, rotating the wire between your fingers to create a clear interior stringing channel. Gently curve the clay-covered wire over an empty glass bottle or curved metal tin to establish a soft anatomical curve that matches the wrist profile. Repeat this process with white and slate-gray clay to produce contrasting structural bars. Bake the curved bars on their supporting metal armature at 135°C (275°F) for thirty minutes to ensure complete core curing, then let them cool before gently sliding them off the wires. String the curved bars onto elastic cord, framing each tube with flat matte silver beads, and knot the cords securely inside the bar cavities.
Idea 3: Soft Sage and Marble Bead Cluster

Execution Process
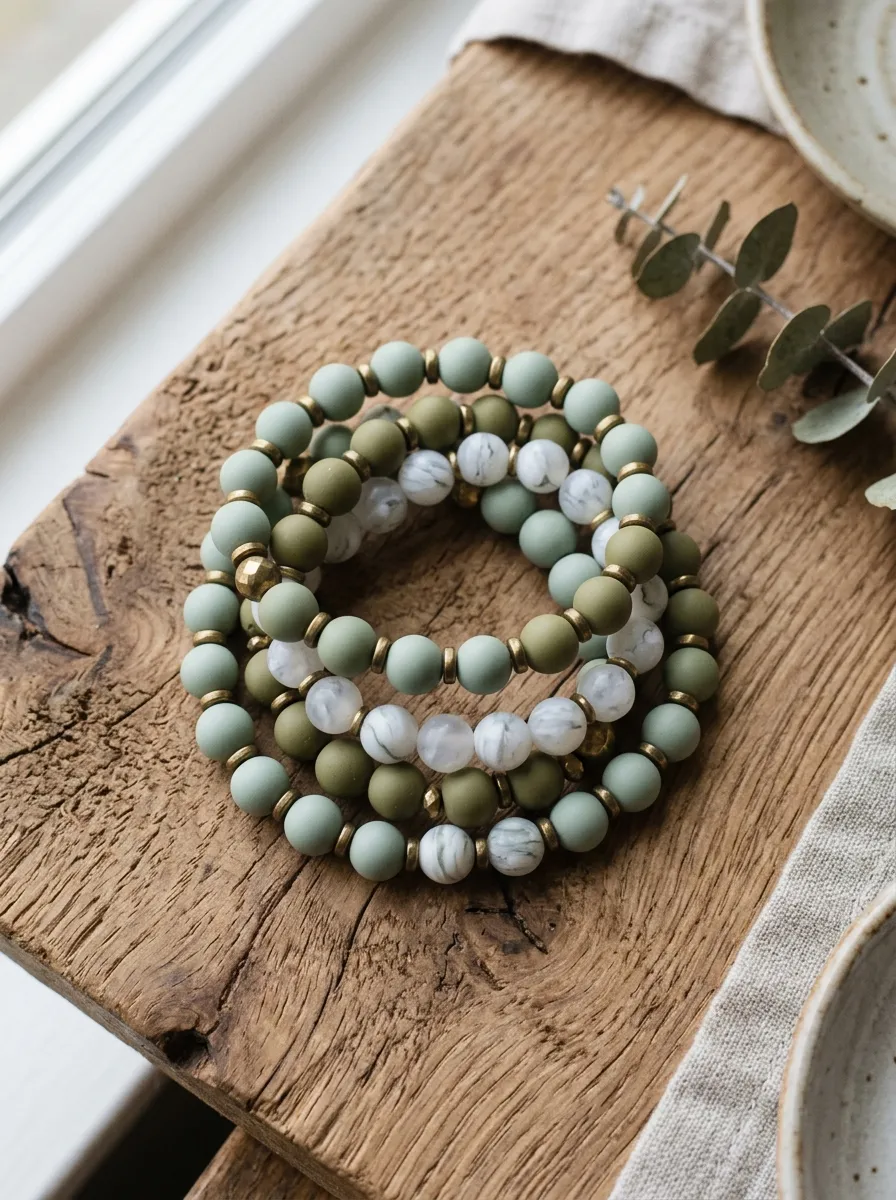
The soft sage and marble bead cluster combines delicate pastel greenery with faux-carrara stone patterning across four layered stretch bracelets. The color palette focuses on pale eucalyptus sage, muted olive, solid ivory, and a custom marble mixture made from translucent clay veined with charcoal thread fibers. The beads feature spherical profiles in graduated diameters, ranging from four millimeters up to eight millimeters, establishing tactile rhythm and visual movement across the arm. The faux-marble components mimic natural quarried minerals, offering an upscale aesthetic without the heavy weight or chill of real stone. Matte finishes are prioritized by wet-sanding the cured beads with fine-grit sandpaper, producing a soft, sea-glass texture that feels luxurious to the touch. This creative project offers an accessible introduction to pattern blending, continuous spherical rolling, and multi-tier bracelet balance, producing a gentle, nature-inspired stack that pairs seamlessly with neutral linen apparel.
To fabricate the marble effect, roll translucent clay and white clay into two thick cylinders, then press very thin, rolled strings of black clay randomly across the pale surfaces. Twist and fold the combined cylinders three times, taking care not to over-blend the compound into a uniform gray, and slice the twisted mass into equal pea-sized portions. Roll these marble segments, along with solid sage and olive clay portions, between your palms to form smooth, round spheres measuring six millimeters across. Carefully pierce each sphere through the center with a thin beading needle, twisting the needle slowly to prevent flattening the spherical contours. Bake the beads supported on a bead rack at the clay manufacturer recommended temperature for thirty minutes. Once cooled, submerge the beads in a small bowl of water and rub them gently with 1000-grit wet-dry sandpaper to remove surface imperfections, then string them onto elastic cord in alternating sequences anchored by brass accent rings.
Idea 4: Warm Speckled Sandstone Heishi Stack
Step-by-Step Guide
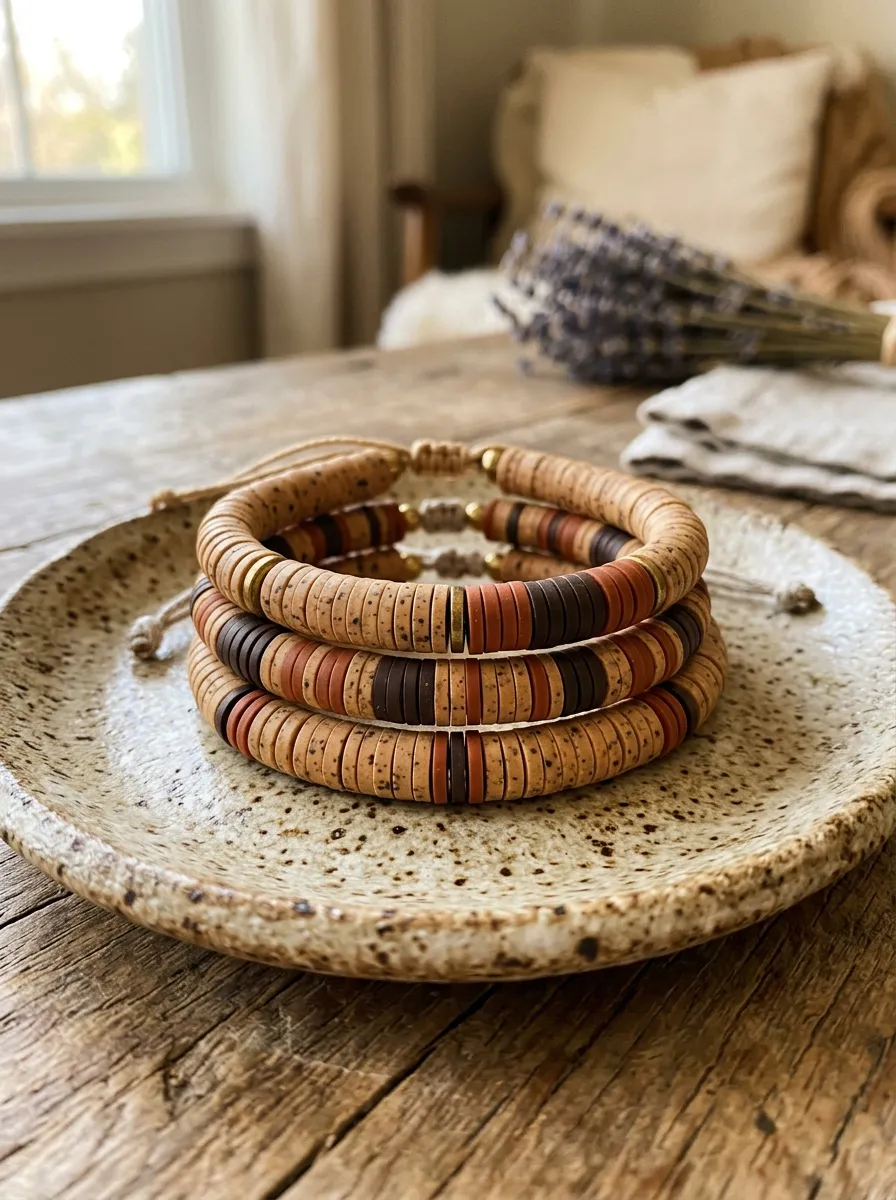
The warm speckled sandstone heishi stack replicates natural desert minerals through custom clay inclusions and slender disc geometries. The stack features three complementary strands made from oatmeal-colored clay mixed with genuine baking spices, dried ground herbs, or pulverized granite particles to create an authentic speckled texture. The warm biscuit foundation is contrasted on alternating strands with narrow accent sections of deep espresso and rust clay discs. The edges of the discs are lightly tumbled or sanded together after stringing to create an aged, weathered surface that mimics natural river stones. The overall look is understated, earthy, and refined, making this set a reliable accessory for bohemian wardrobes, casual weekend outfits, and neutral layered looks. This project teaches crafters how to incorporate dry particulate inclusions safely into raw polymer clay without compromising the structural integrity or flexibility of the cured jewelry elements.
Prepare the speckled clay by conditioning two ounces of unbleached cream clay, then folding in a half-teaspoon of finely ground black pepper or dark craft sand, kneading thoroughly until the particles are evenly distributed throughout the block. Roll the speckled clay into an even three-millimeter sheet, along with smaller separate sheets of rust and espresso clay. Use a small four-millimeter round punch cutter to stamp out numerous clay discs, piercing the center of each disc with a clean beading needle while the clay remains seated on the tile. Thread the raw discs snugly onto thin metal skewers, pressing the flat faces lightly together so they support each other, and bake them horizontally suspended over a baking pan for thirty minutes at 135°C (275°F). Once fully cured and cooled, leave the beads on the wire and rub the outer cylinder surface with 600-grit wet sandpaper to ensure uniform roundness. String the textured discs onto elastic cord, alternating speckled runs with rust segments, and knot the strands tightly.
Idea 5: Abstract Cobalt and Ochre Slab Cutouts

Setup Method
The abstract cobalt and ochre slab cutout stack draws inspiration from mid-century modern art, utilizing bold contrasting shapes and dynamic color blocking. The centerpiece strand of this three-piece collection features flat, irregular organic shapes cut from a patterned slab composed of vibrant cobalt blue, mustard ochre, peach, and crisp white clay. The two accompanying strands are made from solid ochre and cobalt micro-beads, providing saturated, grounding frames for the patterned centerpieces. Each abstract bead is formed as a flat, rounded pebble shape with dual parallel stringing holes, allowing the beads to lie completely flat against the skin without twisting upside down. The bold graphic palette provides a striking accent against monochrome garments, serving as wearable art that sparks conversation. This project develops valuable skills in making patterned raw clay slabs, positioning template cutters accurately, and engineering dual-hole threading channels for wide jewelry components.
Begin by rolling out an opaque white clay slab to a four-millimeter thickness to serve as your working base. Roll small scraps of cobalt blue, mustard yellow, and peach clay into flat, irregular shapes, placing them across the white slab alongside thin black line accents, then smooth everything flat with an acrylic roller to fuse the pattern. Use an oval or organic teardrop cutter to punch out six identical decorative beads from the patterned sheet. Using a fine needle tool, pierce two parallel horizontal holes through the width of each flat bead, spacing the channels five millimeters apart to accommodate a double-strand elastic structure. Place the cut beads flat on a parchment-lined ceramic tile, cover them with a second sheet of parchment paper weighted lightly with an oven-safe tile to prevent curling, and bake for thirty-five minutes at 135°C (275°F). After baking and cooling, thread two parallel elastic cords through the beads, filling the remaining wrist sections with solid ochre micro-discs before tying off the dual cords.
Idea 6: Coastal Sea-Glass and Cream Saucers
How to Make
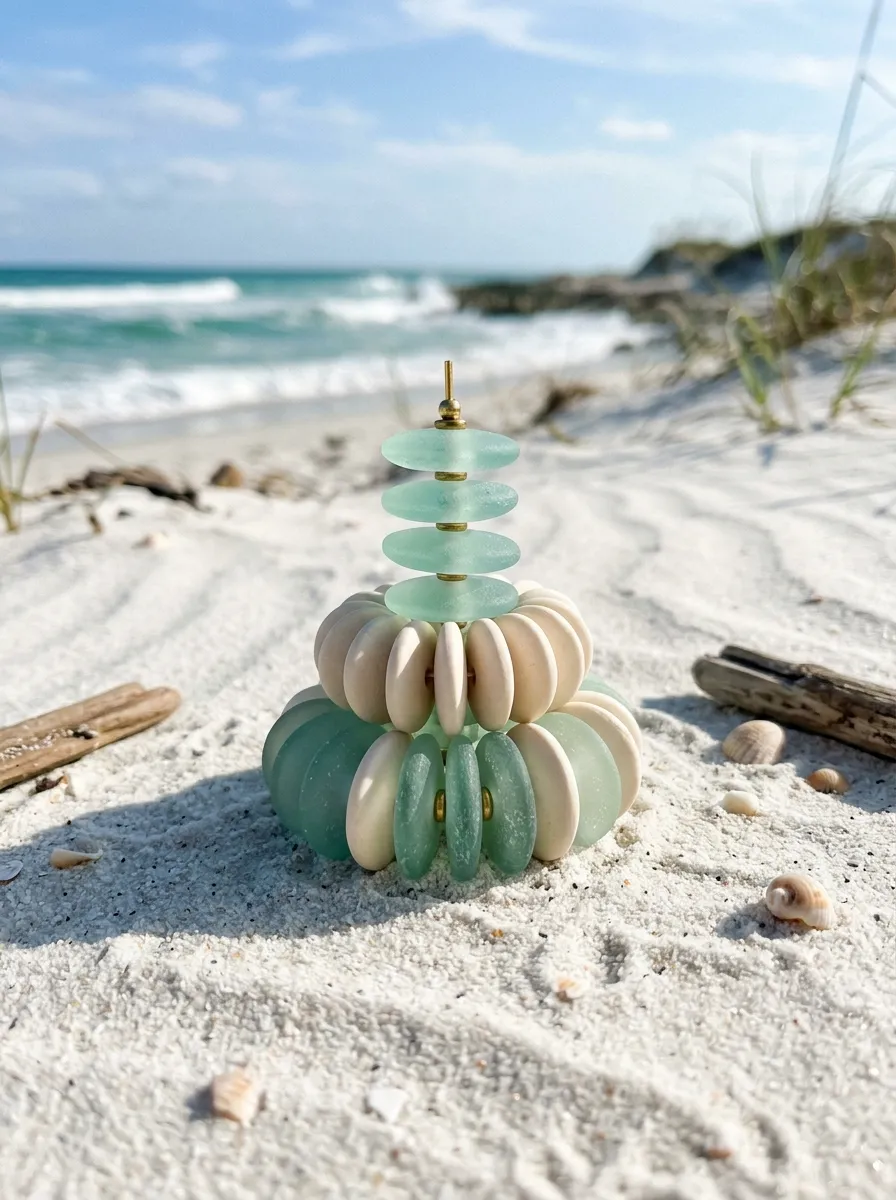
The coastal sea-glass and cream saucer stack evokes the weathered surfaces of ocean-tumbled pottery through frosted, semi-translucent clay shapes. The stack combines three delicate strands composed of saucer-shaped lentil beads—beads that are thick in the center and taper to a narrow perimeter—in seafoam green, aqua, and unbleached cream. The seafoam components are crafted from translucent polymer clay tinted with a tiny drop of green alcohol ink, which produces a luminous, light-filtering quality after baking. Alternating between opaque cream discs and translucent aqua saucers creates visual depth, mirroring the play of coastal sunlight across shallow ocean water. The outer perimeters are lightly buffed with a dry denim scrap to achieve a soft matte luster rather than a high-gloss synthetic shine. This project teaches crafters how to form bi-cone lentil beads, mix custom translucent glazes, and balance delicate, saucer-like silhouettes within a comfortable, cohesive jewelry suite.
To produce the translucent sea-glass color, blend a quarter-block of translucent clay with a pea-sized piece of emerald green clay until the hue is evenly distributed, then roll the mixture into an even snake measuring six millimeters in diameter. Slice the snake into uniform four-millimeter segments using a sharp tissue blade to ensure consistent volume. Place each slice between the palms of your hands and rotate in a smooth circular motion while tilting your hands slightly outward, pressing gently to form a tapered lentil saucer. Pierce each saucer edge-to-edge through the thick center axis using a beading needle, keeping the hole centered to prevent edge tearing. Bake the saucers on a smooth ceramic tile at 135°C (275°F) for twenty-five minutes, immersing them in an ice-water bath immediately after removal from the oven to maximize the clarity of the translucent clay. String the cured saucers onto pre-stretched elastic cord, interspersing unbleached cream discs, and knot securely.
Idea 7: Golden Amber and Honeycomb Tubes

How to Create
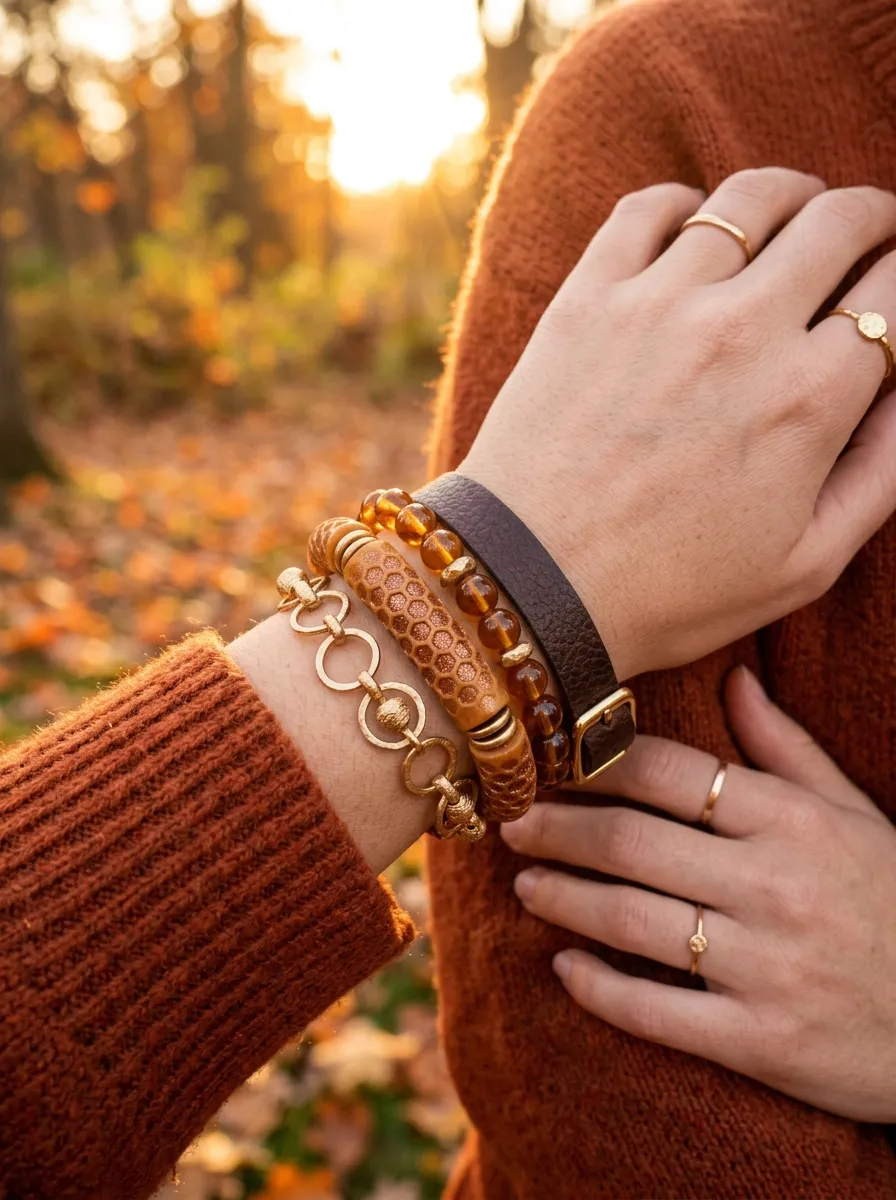
The golden amber and honeycomb tube stack brings rich autumnal warmth to everyday jewelry through warm golden tones, honey accents, and delicate surface textures. The main focal bracelet utilizes cylindrical clay tubes impressed with a subtle hexagonal honeycomb pattern, worked in a rich marigold clay that has been dusted with fine bronze mica powder. The complementary companion strands feature small, glossy amber beads that resemble natural copal resin, paired with warm brass beads that reflect the metallic highlights of the central tube. The golden palette functions as an elevated neutral, pairing effortlessly with denim, cream knits, and dark brown leather accessories. Working with metallic powders introduces beginners to surface texturing techniques, demonstrating how simple relief impressions can transform plain clay tubes into rich, artisanal jewelry components that look far more intricate than their construction methods require.
Start by rolling conditioned golden-yellow clay into an even five-millimeter sheet on your working tile. Press a clean rubber texture stamp featuring a fine honeycomb pattern firmly into the clay surface, rolling over it with an acrylic roller to transfer the geometric impression evenly. Lightly dust the raised surface with bronze mica powder using a soft cosmetic brush, highlighting the hexagonal grid lines. Cut the patterned sheet into thirty-millimeter by eight-millimeter strips, wrapping each strip around a thin metal rod to form a hollow textured cylinder, then smooth the rear seam with a silicone modeling tool. Bake the tubes on their metal rods at the clay manufacturer recommended temperature for thirty minutes, letting them cool before sliding them off the metal cores. String the finished honeycomb tubes onto elastic cord as focal centerpieces, framing them with dark amber-toned round beads and brushed gold accent rings, securing the final knots with a dab of clear jewelry adhesive.
Idea 8: Blush Rose and Granite Chunky Stack
Step-by-Step Guide
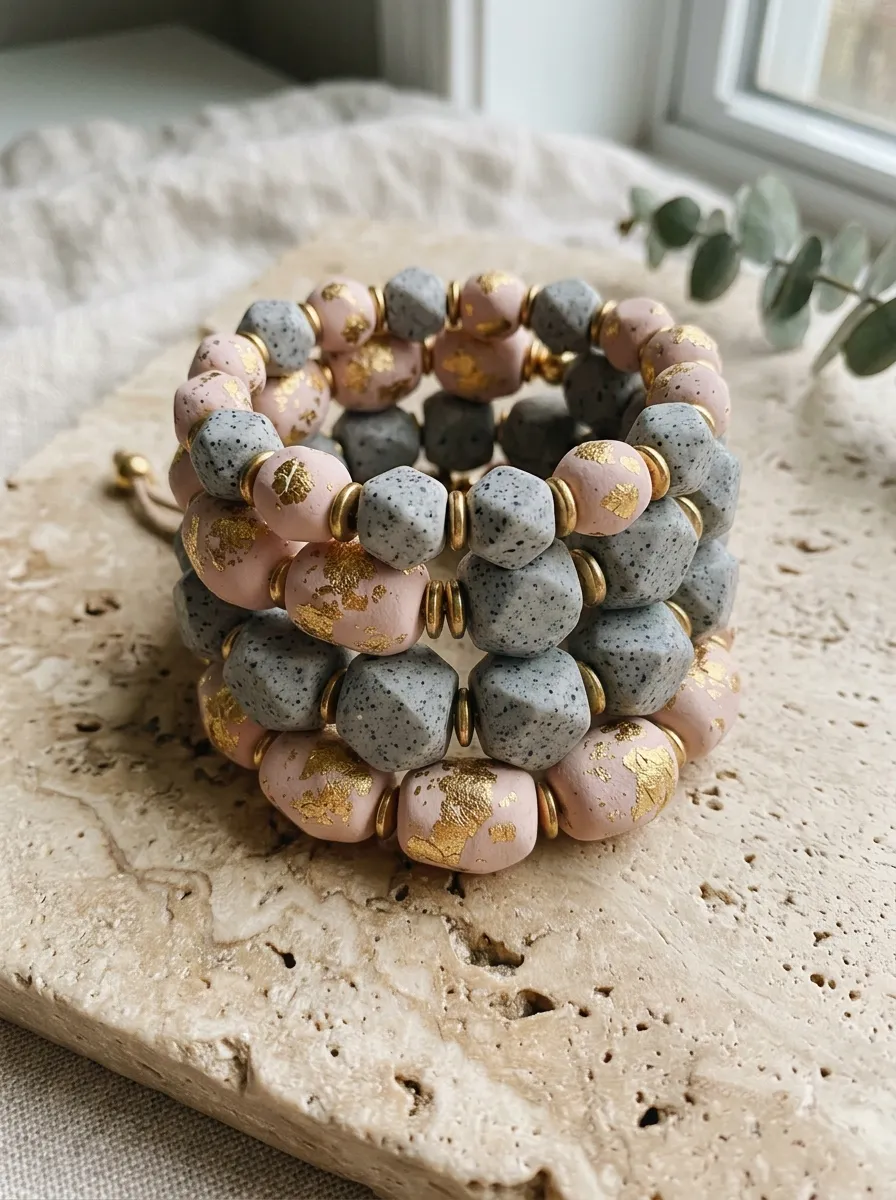
The blush rose and granite chunky stack introduces playful contrast by pairing soft, romantic pastel pinks with bold, industrial granite textures. The collection consists of four coordinating bracelets featuring oversized geometric rondelle beads, smooth melon-shaped balls, and faceted stone-like spacers. Two strands showcase pale blush pink clay highlighted with subtle gold-leaf inclusions that catch the light, while the opposing strands feature speckled faux-granite clay shaped into bold, chunky cubes with beveled edges. The deliberate contrast between feminine blush hues and rugged stone textures establishes a balanced visual dynamic that feels both delicate and grounded. Because the individual beads are larger—measuring between ten and twelve millimeters—this stack makes a confident personal style statement while remaining lightweight on the wrist. Crafters will practice applying metal leafing, carving precise geometric facets with a tissue blade, and balancing larger bead masses comfortably across multiple strands.
Condition a block of soft blush pink clay, then press a small sheet of gold leaf foil over the surface, rolling the clay through a roller twice to tear the gold foil into delicate, organic flakes. Form the leafed clay into smooth rondelle beads by rolling round spheres and flattening them slightly between your fingers, piercing each through the center with a beading needle. For the granite components, use pre-mixed granite-effect clay, rolling it into a square log measuring ten millimeters on each side. Use a rigid tissue blade to make clean, straight cuts along the log, producing uniform cubes, then slice the sharp corners away at forty-five-degree angles to create faceted geometric surfaces. Pierce each faceted cube carefully from corner to corner. Bake both bead styles on a bead rack for thirty-five minutes at 135°C (275°F), allow them to cool, and string them onto heavy-duty 0.8-millimeter elastic cord, alternating between faceted granite cubes and blush gold-leafed rondelles.
Idea 9: Olive Grove and Hammered Brass Cylinders
Execution Process
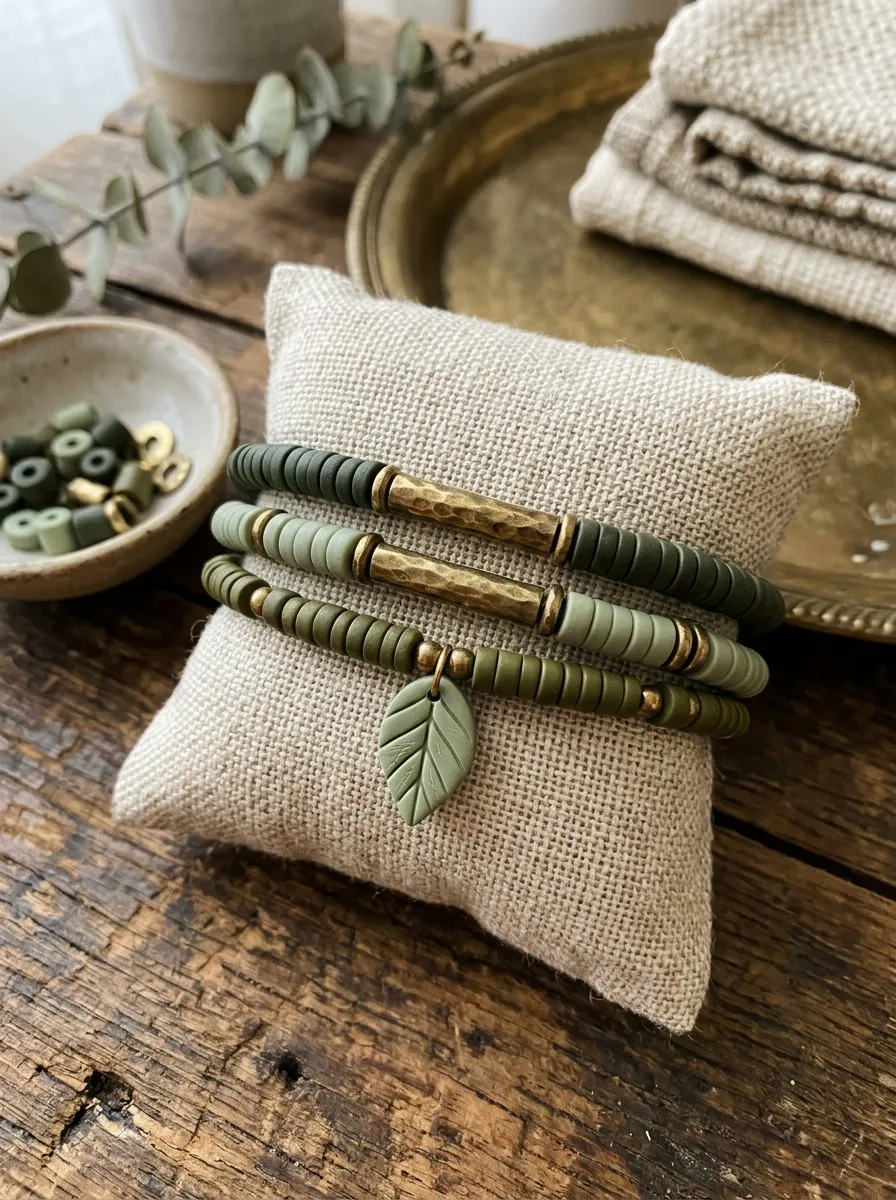
The olive grove and hammered brass cylinder stack combines deep Mediterranean green tones with gleaming warm metallics for an elevated, earthy aesthetic. This sophisticated four-strand set features slender cylindrical beads in deep olive, dark moss, and light sage, accented by real hammered brass tube spacers that catch the eye. The clay cylinders are rolled into slender, uniform rods with flat cut ends, creating a bamboo-like aesthetic when strung end-to-end. One strand introduces tiny olive-leaf charms handcrafted from leftover clay, suspended from miniature jump rings nestled between the beads. The rich green color story evokes quiet luxury and natural landscapes, pairing naturally with neutral linen clothing, dark jackets, and earthy accessories. This project teaches makers how to roll uniform clay snakes without manual thickness variations, achieve crisp right-angle cuts on tubular beads, and integrate metal jewelry charms cleanly into flexible stretch cord designs.
Roll conditioned deep olive green clay into long, consistent snakes measuring four millimeters in diameter, using a clear acrylic ruler as a guide to ensure uniform thickness along the entire length. Place the clay snakes on a flat ceramic tile and chill them in the refrigerator for fifteen minutes; cooling the clay ensures crisp, undistorted cuts when slicing. Using a sharp tissue blade, cut the chilled snakes into fifteen-millimeter tubular segments, then pierce each segment lengthwise using a fine beading needle while the clay is cool and firm. Bake the olive cylinders on baking wires for twenty-five minutes at 135°C (275°F), allowing them to cool thoroughly before stringing. Thread the olive cylinders onto pre-stretched elastic cord, alternating them with hammered brass metal tubes of equal diameter to create a balanced rhythm. For the charm strand, attach a small teardrop clay leaf to a brass jump ring, slip it over the center cord between two olive beads, and complete the strand with a double knot.
Idea 10: Multi-Toned Neutral Ribbon Strand
How to Make
The multi-toned neutral ribbon strand presents a refined study in subtle color gradations, using seven closely matched neutral shades to create a continuous ombré transition across the wrist. The beads are formed as thin, curved ribbon-like tiles that overlap slightly when strung, forming a flexible, articulated band that wraps comfortably around the arm. The color palette begins with unbleached ivory, transitions through soft ecru, linen, and warm taupe, and concludes with deep charcoal brown. Because the color progression is gradual, the bracelet stack exhibits an understated elegance that complements almost any wardrobe palette. This design is exceptionally comfortable because the overlapping flat tiles distribute pressure evenly around the wrist, preventing skin irritation during desk work or typing. This project refines skills in systematic color recipe mixing, uniform slab slicing, and curved component assembly, resulting in a cohesive set of wearable accessories that showcase delicate, professional craftsmanship.
Create the ombré palette by systematically mixing varying ratios of white clay into a dark brown clay base, rolling out seven small sheets to a uniform two-millimeter thickness. Using a sharp metal tissue blade, cut each colored sheet into small rectangular tiles measuring twelve millimeters wide by six millimeters tall. Punch two fine threading holes near the top edge of each tile, spacing them four millimeters apart to accommodate a parallel two-cord elastic system. Lay the cut tiles over an arched ceramic form or clean glass bottle, baking them at 135°C (275°F) for thirty minutes so they cure with a subtle curve that matches the natural arc of the wrist. After cooling, thread two lengths of 0.7-millimeter elastic cord through the parallel holes, arranging the tiles in a seamless color gradient from light ivory to dark charcoal. Tie the elastic ends with secure surgeons knots, tucking the knot ends inside the nearest tile channels with a touch of jewelry cement.
Common Beginner Mistakes and How to Avoid Them
When making polymer clay stacking bracelets, beginners often encounter technical setbacks that can compromise the strength, appearance, and longevity of their jewelry. A frequent error is under-baking the clay components, which leaves the beads brittle, chalky, and prone to cracking under everyday wrist tension. Crafters should always rely on an independent, analog oven thermometer placed directly next to the baking rack rather than the built-in oven dial, baking beads at the manufacturer’s specified temperature for at least twenty-five to thirty-five minutes to achieve complete core curing. Another common mistake is failing to pre-stretch the elastic cord before stringing; unstretched elastic relaxes after a few days of wear, resulting in loose, sagging bracelets with visible internal knots. Pull the elastic cord firmly several times before threading any beads to prevent future loosening. Additionally, piercing bead holes with excessive force can flatten rounded contours; spinning the needle slowly like a drill bit maintains the bead’s shape. Finally, avoid using standard cyanoacrylate superglues on elastic knots, as harsh solvents can degrade the cord fibers over time; choose flexible, rubber-based jewelry cements instead.
Practical Tips for Better Results
Achieving refined, boutique-quality finishes with polymer clay beads relies on several technical habits that elevate simple shapes into professional jewelry. When conditioning clay, work with clean hands and wipe your rolling tools with baby wipes between colors to prevent dark lint and pigment cross-contamination on light pastel shades. To create uniform bead sizes every time, roll your conditioned clay into a consistent snake, lay it alongside a clear acrylic ruler, and make marks at regular millimeter intervals using a tissue blade before slicing. When baking rounded or cylindrical beads, suspend them horizontally on beading wires resting across a dedicated metal rack; this prevents flat, shiny shiny spots from forming where beads contact flat baking trays. For beads that require a smooth, stone-like finish, wet-sand the cured pieces in a small water bowl using progressive grits—starting at 600-grit and finishing at 1200-grit—to eliminate tiny tool marks, fingerprint ridges, and surface dust. Finally, when finishing elastic bracelets, add a tiny drop of flexible craft cement to the final knot, letting it cure for two hours before trimming the tails flush to prevent premature unknotting.
Styling, Presentation, or Organization Ideas
Polymer clay stacking bracelets offer versatile styling possibilities that bring handmade character and artisanal polish to modern personal wardrobes. When styling multiple strands, balance your stack using the rule of odds: wear three, five, or seven bracelets simultaneously, varying bead textures and diameters to create visual movement across the wrist. Pair chunky, geometric focal strands alongside two or three slender, flat heishi bands to prevent the collection from feeling visually overwhelming or physically cumbersome. For a modern aesthetic, mix clay finishes with genuine metallic elements, interspersing brushed brass washers, sterling silver beads, or textured raw gemstones to break up solid clay sections. When presenting bracelet sets as gifts or market merchandise, wrap coordinated stacks around natural birch wood dowels, textured linen display pillows, or custom kraft cards stamped with simple line art. For home organization, store completed clay bracelets flat in felt-lined jewelry trays or slide them onto upright wooden bottle displays, protecting the matte surfaces from abrasive metal jewelry and keeping your color stories neatly organized.
Budget or Time Planning
Executing polymer clay bracelet stacks represents an economical craft practice that yields high design value with minimal financial investment. A single two-ounce block of polymer clay costs very little and can produce upwards of one hundred heishi discs or forty round beads, allowing crafters to build a complete four-strand bracelet stack for just a few dollars in raw materials. To maximize your budget, purchase primary colors alongside larger blocks of white, translucent, and black clay; blending your own custom pastels, terracotta tones, and earthy greens is far more affordable than buying pre-mixed specialty hues. From a time management perspective, making a complete three-piece bracelet stack typically requires two to three hours of active crafting time, including conditioning, shaping, piercing, and final stringing. Organize your crafting into structured phases: spend the first hour conditioning clay and cutting bead blanks, thirty minutes piercing and mounting beads on baking wires, thirty minutes monitoring the oven cycle, and the final hour sanding, sequencing, and stringing. Batch-producing identical bead components saves significant time, making this workflow efficient for personal gifting and market preparation.
Creative Expansion and Advanced Inspiration
Once you master foundational bead cutting and elastic stringing techniques, consider exploring advanced creative variations that introduce mixed-media textures and refined structural methods. Experiment with surface marbling by rolling gold, silver, or copper leaf foil directly into translucent clay, producing luminous inclusions that mimic natural quartz, lapis lazuli, and agate stones. Advanced makers can also move beyond simple elastic cords, using braided nylon beading thread with adjustable sliding macramé square knots, antique brass clasps, or wire-wrapped findings to create heirloom-quality jewelry. Another compelling creative direction involves carving cured clay beads with linoleum gouges or micro-woodcarving tools, introducing deep geometric facets, sgraffito patterns, or clean fluted channels that can be backfilled with contrasting acrylic paints. You can also explore multi-strand leather wraps, using clay slider bars as central focal hardware on flat leather lace cords. These creative extensions allow makers to build upon fundamental techniques, establishing a distinctive artistic style within contemporary polymer clay jewelry design.
Leave a Reply