Polymer clay pen holders represent a practical intersection of sculptural craft and functional desktop organization. Working with oven-bake polymer clay allows makers to build durable, customized desk accessories that match specific workspace aesthetics and spatial requirements. This comprehensive tutorial details ten unique, beginner friendly projects designed to store writing instruments, stylus pens, fine-point markers, and everyday stationery. Readers will learn the essential principles of three-dimensional clay fabrication, including slab building, structural core reinforcement, surface texturing, seamless joining, and controlled oven curing. Incorporating handmade polymer clay organizers into home office environments provides genuine utility by eliminating desktop clutter, protecting delicate nib points, and keeping daily essentials within immediate reach. Because polymer clay cures into a dense, water-resistant, and resilient plastic composite, finished holders withstand continuous daily use without chipping or deteriorating. By understanding proper wall thickness, weight distribution, and baking parameters, beginners can produce professional, durable pieces using basic household craft tools. Transforming basic clay blocks into structured organizers bridges the gap between creative expression and workspace efficiency, offering an accessible method for upgrading your desk setup.
Why Handmade Clay Desk Organizers Are Trending
The increasing prominence of polymer clay pen holders across modern Pinterest ideas reflects a widespread movement toward intentional workspace personalization, slow crafting, and clutter-free minimalist style environments. Remote and hybrid professionals seek practical ways to elevate functional desks into inspiring, curated spaces that reflect personal aesthetics. Mass-produced plastic containers often lack tactile warmth, weight, and visual distinction, prompting home decor enthusiasts to craft custom handmade alternatives that integrate seamlessly with contemporary interiors. From a DIY perspective, desk accessories are rewarding creative project ideas because they require modest raw materials while delivering high everyday utility. Beginners appreciate that polymer clay stays workable indefinitely until baked, allowing unlimited time to refine contours, correct angles, and smooth imperfections. The tactile richness of matte surfaces, speckled stone inclusions, and subtle pastel palettes complements modern design aesthetics, including Scandinavian, mid-century modern, and Japandi styling. These functional sculptures offer an accessible, satisfying entry into three-dimensional clay craft while providing dedicated storage solutions for creative workspaces.
Essential Materials and Preparation Methods
Successfully sculpting durable polymer clay pen holders requires assembling compatible materials, testing structural stability, and preparing a clean working station. The primary material is standard oven-bake polymer clay in curated tones, supported by high-tack liquid polymer clay to reinforce seams. Essential tools include an acrylic rolling pin or manual clay conditioning machine, rigid stainless steel tissue blades for clean cuts, silicone shaping tools for smoothing joins, metal ruler guides, and oven-safe armatures such as empty aluminum cans, glass cylinders, or ceramic tiles. Preparation begins by thoroughly cleaning your ceramic tile or tempered glass working surface with isopropyl alcohol to eliminate surface lint, dust, and microscopic debris. Clay conditioning is mandatory: knead small chunks by hand or pass the material through rollers until it becomes completely pliable, glossy, and free of air pockets. Planning requires measuring the height and diameter of your tallest pens, ensuring holder walls measure between five and seven millimeters in thickness to prevent structural warping during the oven-curing process.
Idea 1: Minimalist Fluted Arch Desk Caddy
Step-by-Step Guide
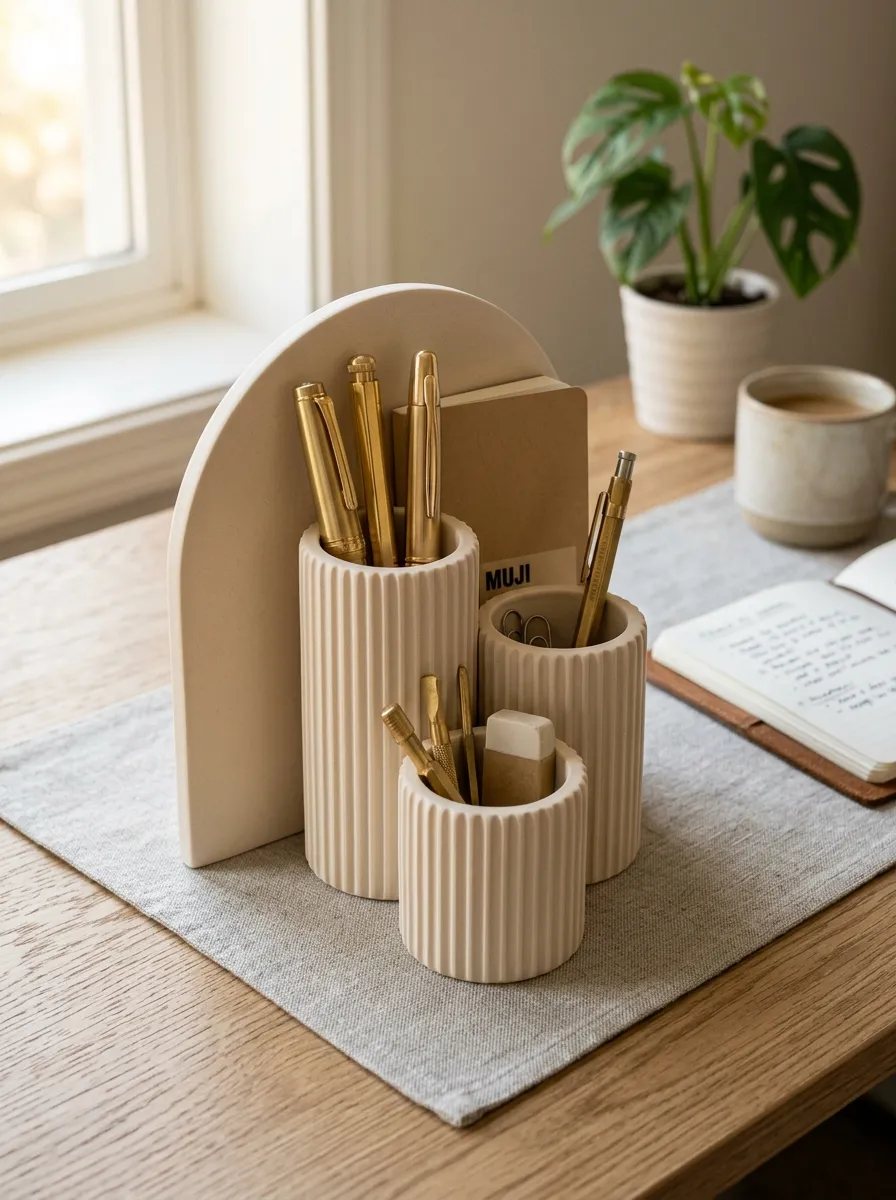
The minimalist fluted arch desk caddy utilizes architectural forms and repeating vertical textures to create an understated home decor centerpiece for modern desks. This design features a flat-backed, semi-arched silhouette with three graduated vertical cylindrical chambers designed to hold fountain pens, mechanical pencils, and gel pens separately. The exterior perimeter is adorned with continuous vertical fluting, mimicking the classical stone details seen in neoclassical and modern Mediterranean architecture. The monochromatic cream or warm limestone color palette accentuates the shadows cast by the recessed fluted grooves without visual clutter. Because the caddy features a flat base and a broad footprint, it maintains complete stability even when fully loaded with heavy metal writing instruments. This beginner friendly concept introduces crafters to template cutting, multi-chamber slab assembly, and texture strip application, resulting in an organized, sculptural desk fixture that complements sleek laptop setups, natural linen blotters, and neutral wooden office furnishings.
Begin by rolling conditioned warm ivory clay into an even six-millimeter sheet on a smooth ceramic tile using depth guide rings. Cut out an arched backplate measuring twelve centimeters in height and eight centimeters in width using a metal ruler and a sharp tissue blade. Form three separate hollow cylinders by wrapping conditioned clay sheets around oven-safe glass spice jars measuring three centimeters in diameter, joining the vertical seams with liquid clay and smoothing them flat with a silicone tool. Trim the cylinders to staggered heights of six, eight, and ten centimeters, then press them firmly against the flat arched backplate, fusing the contact points with liquid clay. Cut narrow, three-millimeter-wide clay strips using a multi-blade cutter, adhering them vertically along the exposed outer curved faces of the cylinders to produce clean fluted ridges. Transfer the entire assembly on its ceramic tile into an oven preheated to 135°C (275°F), baking for forty-five minutes before cooling completely inside the turned-off oven chamber.
Idea 2: Modern Terrazzo Hexagonal Pencil Cup
How to Create
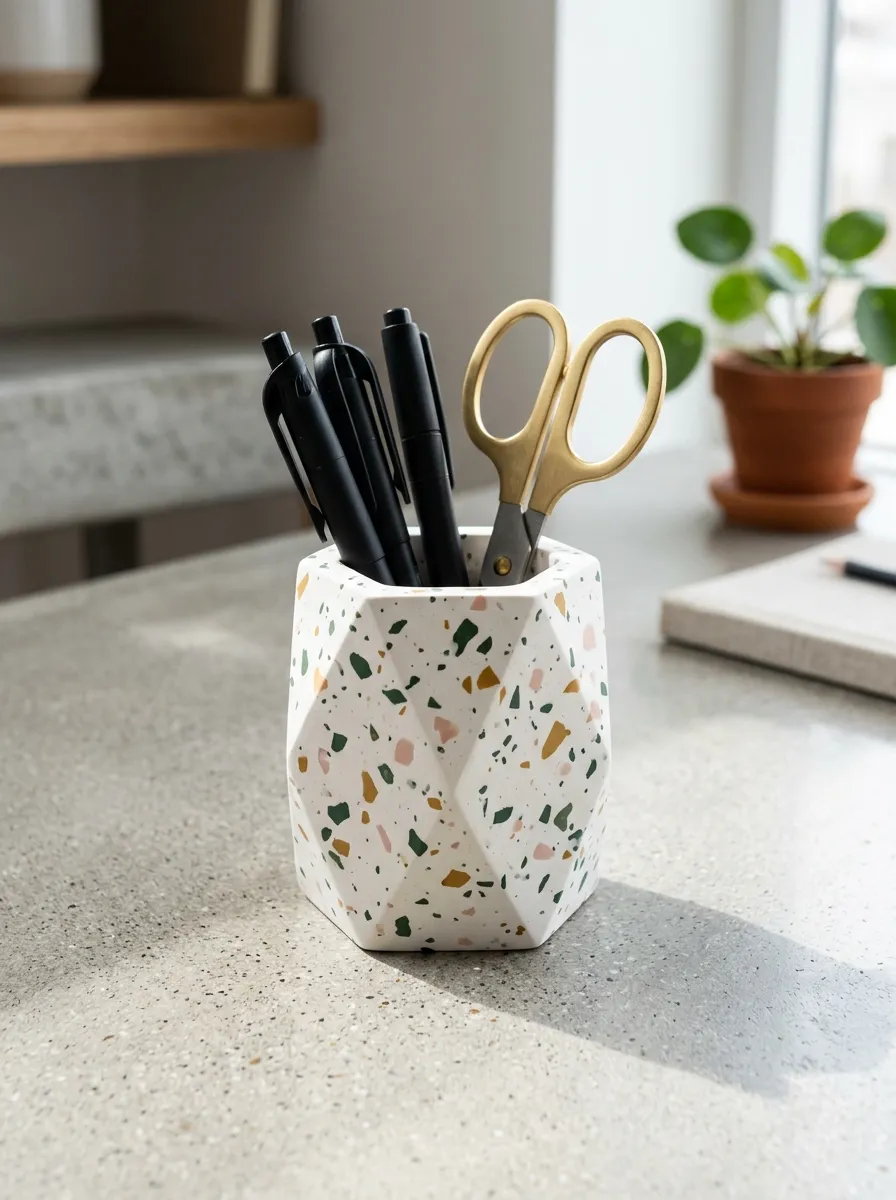
The modern terrazzo hexagonal pencil cup reimagines ancient Venetian mosaic flooring into a contemporary geometric desktop organizer. This project features a clean six-sided polygon profile with crisp, beveled vertical corners and a flat interior base. The surface showcases an array of sharp, multi-colored clay chips—such as forest green, mustard ochre, soft blush, and charcoal—embedded flush into an unbleached white clay foundation. The exterior walls are cured and subsequently wet-sanded, revealing the smooth cross-sections of the colorful fragments beneath the surface. This geometric design provides ample volume for twenty or more standard pens, scissors, and studio markers while maintaining a tidy desktop footprint. The hexagonal form allows multiple cups to nest flush against each other, creating modular organization configurations for growing tool collections. The project teaches crafters foundational terrazzo compounding, accurate mitered edge trimming, and progressive grit wet-sanding to achieve a stone-like finish.
To make the terrazzo sheet, roll a base block of white polymer clay into a smooth five-millimeter slab on parchment paper. Chop small, baked or firm scraps of green, mustard, blush, and black clay into irregular two-millimeter fragments using a tissue blade, scattering them evenly across the raw white sheet. Place parchment paper over the scattered chips, using an acrylic roller with firm downward pressure to press the fragments flush into the base sheet until the surface is completely level. Cut out six identical rectangular wall panels measuring ten centimeters tall by four centimeters wide, shaving the long vertical edges at a forty-five-degree inward bevel using an angled blade. Join the beveled edges around a flat hexagonal base cut from the same slab, applying liquid clay along every interior seam and smoothing the joins with a ball stylus. Bake the assembled cup at 135°C (275°F) for forty-five minutes, then wet-sand the cooled exterior using 400, 800, and 1200-grit sandpaper under running water.
Idea 3: Sculptural Ribbed Cylinder Pen Pot
Execution Process
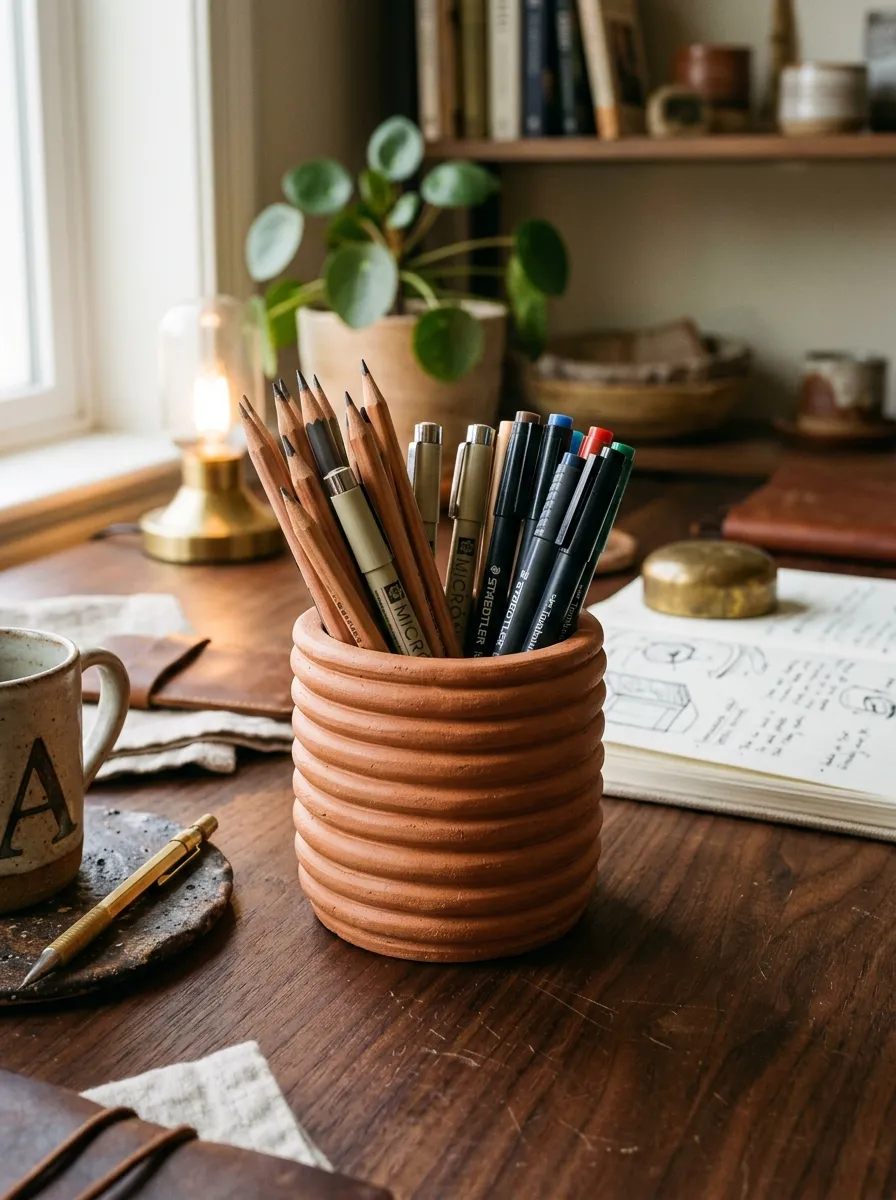
The sculptural ribbed cylinder pen pot draws inspiration from wheel-thrown ceramic vessels, utilizing horizontal concentric rings to introduce tactile depth to a classic cylindrical container. This design features an upright cylindrical vessel encased in five to seven rounded horizontal clay toroids that wrap around the circumference like stacked structural ribs. The deep terracotta or raw umber color scheme highlights the organic warmth of unglazed clay, delivering a handmade aesthetic that coordinates with modern bohemian and mid-century interiors. The substantial wall thickness and circular base lower the center of gravity, preventing accidental tipping when removing long paintbrushes or heavy stylus tools. This project is practical for novice makers because building over a permanent or removable glass cylinder ensures straight internal walls and uniform symmetry without complex wheel-throwing machinery. The finished pot functions as a tactile decorative piece that holds essential office stationery securely.
Commence by conditioning a block of rich terracotta clay, rolling out a uniform four-millimeter sheet on your work surface. Wrap the clay sheet around a clean, oven-safe glass tumbler measuring seven centimeters in diameter and ten centimeters in height, trimming the excess with a blade and smoothing the vertical seam with your thumb. Roll several long, uniform clay ropes measuring eight millimeters in diameter using a flat acrylic board to maintain even thickness throughout each strand. Apply a thin film of liquid clay around the exterior of the wrapped tumbler, wrapping the clay ropes horizontally around the vessel from the base to the upper rim, stacking each ring snugly atop the one below it. Blend the contact seams between each horizontal rib using a curved wooden modeling tool, preserving the outer rounded profile of each ring. Bake the covered glass vessel at 135°C (275°F) for forty minutes, allowing it to cool slowly inside the oven to prevent thermal shock to the glass core.
Idea 4: Organic Blob Desktop Pen Stand
How to Make
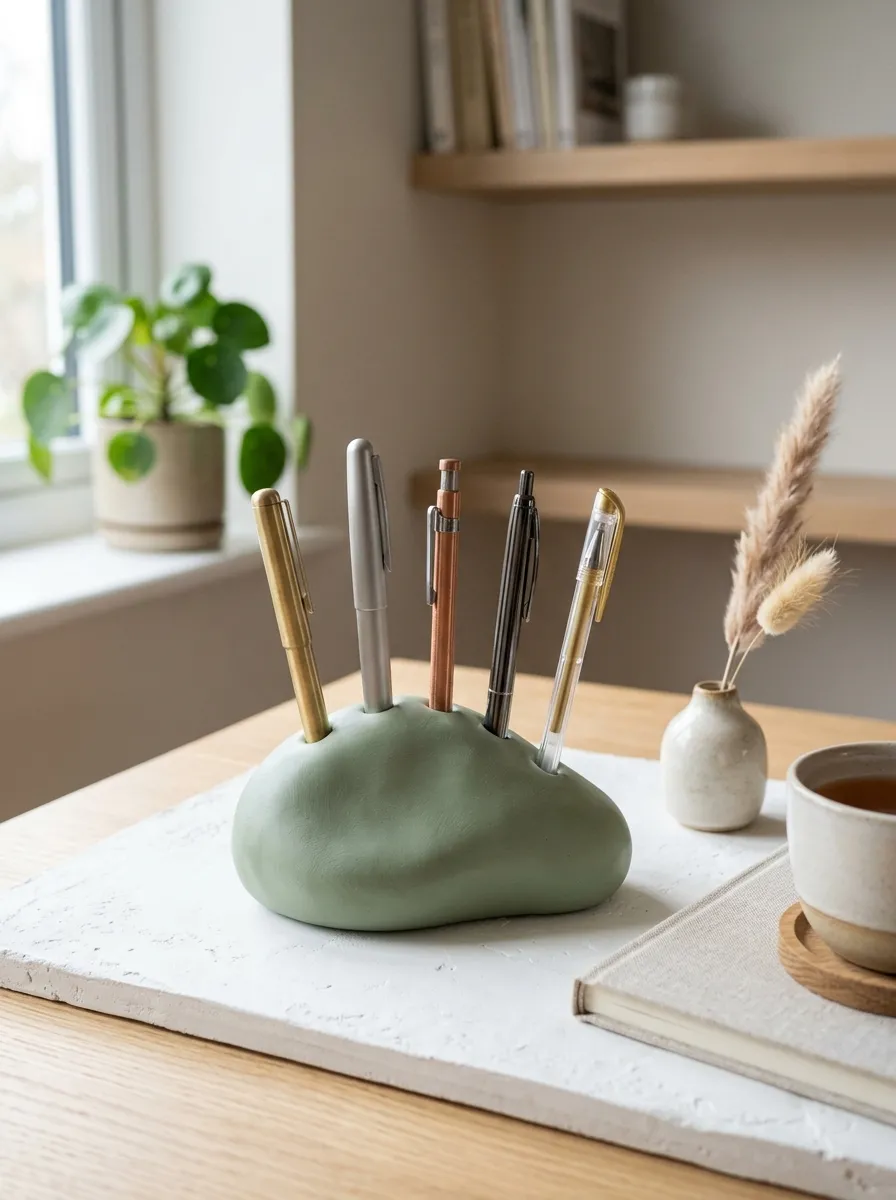
The organic blob desktop pen stand introduces playful, fluid forms to functional desk organization by abandoning rigid geometric symmetry in favor of soft, asymmetrical curves. This design features a low-profile, solid horizontal clay mass shaped like an undulating river stone or organic pebble, punctuated with several vertical holes of varying diameters. Rather than holding pens in a single loose cluster, this organizer stores each writing instrument in its own dedicated, upright slot, displaying fine stationery like individual sculptural elements. The soft sage green or pale buttercup yellow finish brings a calming, modern design presence to minimalist desks. Because this design holds each pen separately, it prevents delicate pen barrels from scratching against one another, making it an excellent storage solution for high-end fountain pens or digital drawing styluses. The solid mass provides substantial physical weight, anchoring the stand firmly to the desktop surface without slipping.
Condition two blocks of soft sage polymer clay, combining them into a dense, solid spherical mass and kneading thoroughly to expel any trapped air pockets. Press the mass firmly down onto a ceramic working tile, tapping the outer margins with your palms to sculpt an asymmetrical, rounded organic pebble measuring twelve centimeters long, eight centimeters wide, and four centimeters tall. Smooth away all visible finger impressions across the upper contours using a lint-free wipe dampened with isopropyl alcohol. Select three to five pens from your daily workspace to serve as sizing guides, wrapping their tips in plastic wrap to protect the barrels. Press the wrapped pen tips straight down into the top surface of the clay mass at varying depths, rotating them slightly to expand the holes by one millimeter before carefully withdrawing the pens. Bake the solid clay stand on the ceramic tile at 135°C (275°F) for fifty-five minutes to ensure complete core curing, then let it cool before use.
Idea 5: Faux White Marble Cube Pen Rest
Setup Method
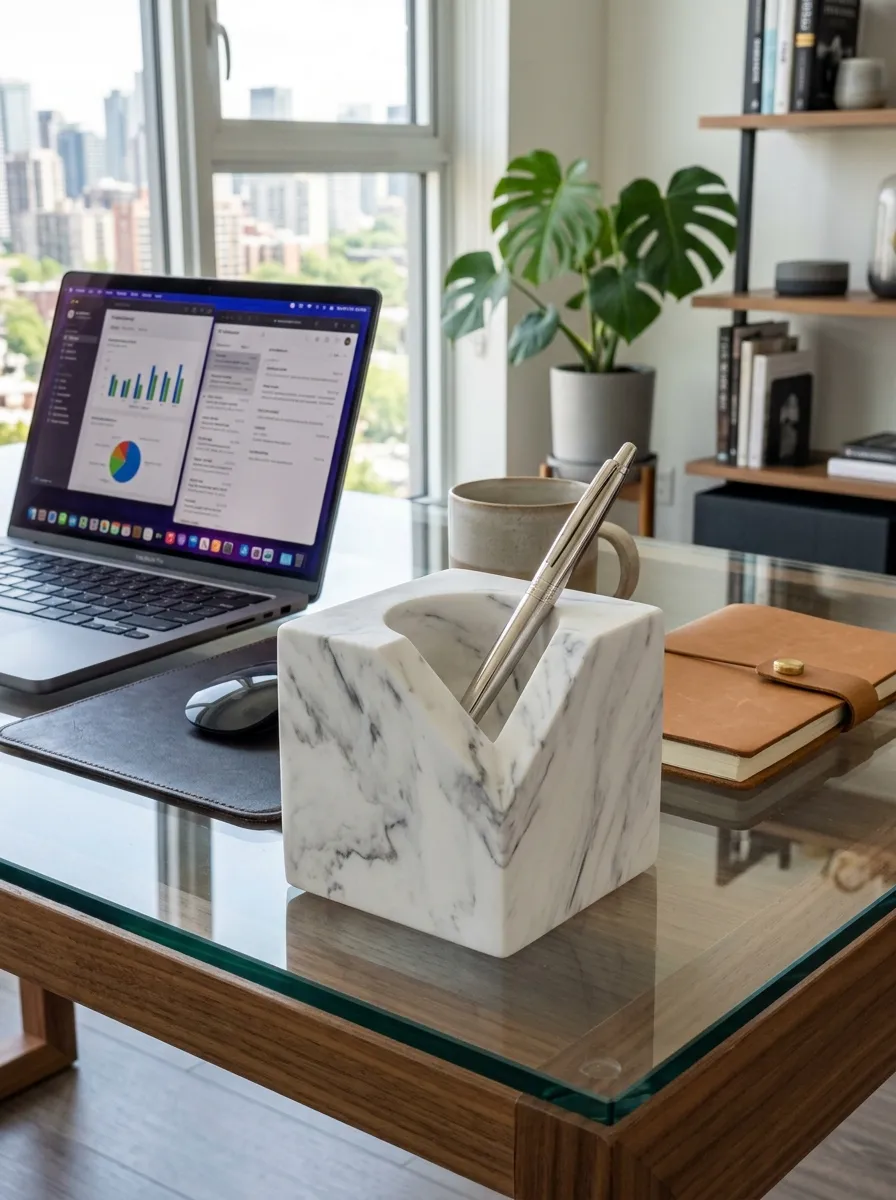
The faux white marble cube pen rest combines the luxurious look of natural Carrara stone with the clean, sharp geometry of minimalist architectural blocks. This design consists of a solid, crisp cube measuring seven centimeters on each side, featuring a wide, angled circular cavity bored into the top face to hold several pens at an accessible thirty-degree slant. The body utilizes bright white clay veined with translucent gray and soft charcoal filaments, realistically capturing the subtle crystalline depth and movement of real quarried marble. The compact, heavy cube format fits into small corner desks, tight shelving units, or modern reception counters where surface space is limited. The angled internal chamber presents pen caps forward, allowing users to select their preferred writing tool with a natural, ergonomic hand motion. This project teaches precision marbling formulas, geometric block forming, and clean diagonal core carving techniques.
To create the marble compound, roll two blocks of white clay into thick logs, pressing thin, rolled threads of gray and black clay randomly along the length of each log. Twist the logs together, fold the twisted rope in half, and roll it out into a single block, repeating the twist-and-fold motion three times to produce soft, organic veins without muddying the colors together. Pack the marbled clay into an oven-safe cubic silicone mold, or square the block manually against a flat glass work surface using an acrylic roller. Use a hollow metal piping tube or circular clay corer measuring four centimeters in diameter to core out an angled cylindrical cavity from the top center down toward the base. Smooth the outer flat planes and beveled corners with an acrylic blade guide to ensure sharp edges. Bake the cube supported on a flat ceramic tile at 135°C (275°F) for fifty minutes, then finish the cooled piece by wet-sanding all exterior faces with 1000-grit sandpaper for a soft satin sheen.
Idea 6: Stackable Modular Tiered Desk Cups
Step-by-Step Guide
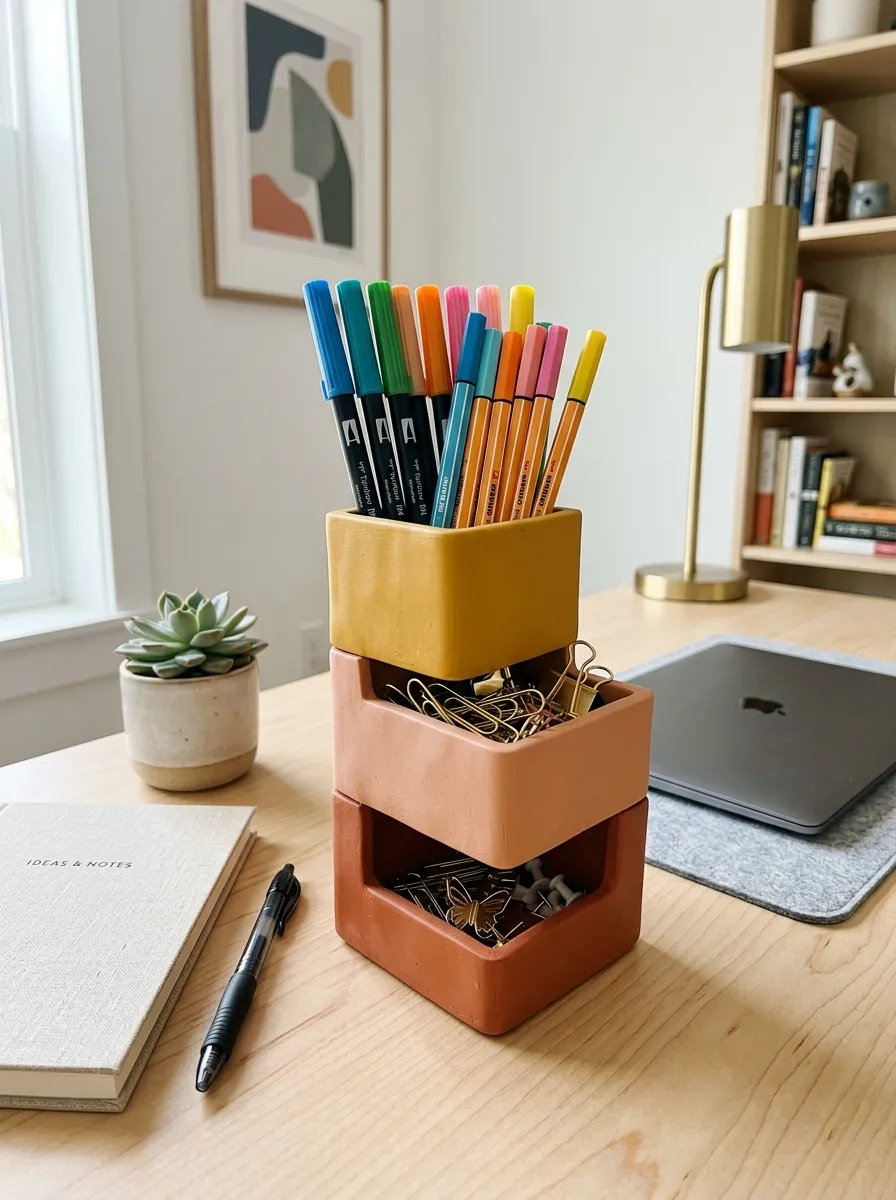
The stackable modular tiered desk cups solve complex stationery storage challenges through interlocking geometric components that can be reconfigured based on changing workspace needs. This system consists of two or three shallow, interlocking octagonal or square cups that stack securely on top of one another, crowned with a taller open cup dedicated to vertical pen storage. The lower tiered compartments store small accessories like paperclips, pushpins, and erasers, while the upper vessel holds writing instruments, consolidating multiple desktop organizers into a single space-saving footprint. A warm, earthy palette—combining mustard, dusty peach, and soft terracotta—distinguishes each functional tier while maintaining visual harmony. The interlocking structural lips along the rims prevent upper modules from sliding off when pens are retrieved. This project develops skills in precision measurement, edge consistency, and multi-component registration, providing an adaptable DIY organization system for creative desks.
Begin by rolling conditioned mustard clay into a consistent five-millimeter sheet, cutting out an eight-centimeter square base and four vertical wall panels measuring four centimeters tall. Join the walls to the base using liquid clay, smoothing the vertical seams, then attach a continuous three-millimeter recessed clay ridge along the top interior perimeter to create an interlocking stacking lip. Construct a second identical shallow cup using dusty peach clay to serve as the intermediate tier. For the top pen container, use terracotta clay to construct an eight-centimeter square base with taller wall panels measuring nine centimeters high, creating a deep vessel for pens, leaving the bottom exterior recessed to lock over the lower cup lip. Verify that each module nests snugly on top of the tier below it before curing, trimming any friction points with a blade. Bake all three modules side by side on a flat baking sheet at 135°C (275°F) for forty minutes, cooling completely before stacking the finished organizer on your desk.
Idea 7: Raw Speckled Sandstone Vessel
How to Create
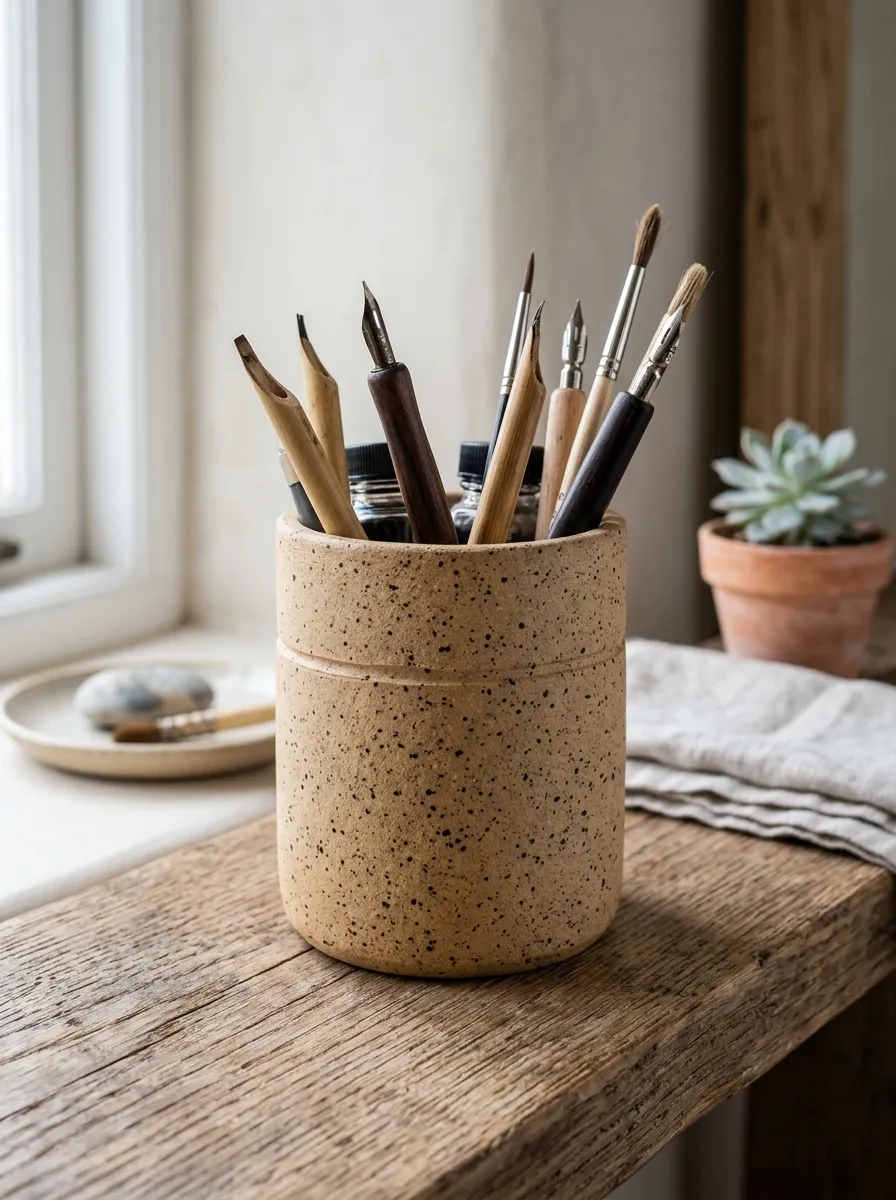
The raw speckled sandstone vessel captures the natural texture and organic aesthetic of desert sandstone through custom clay inclusions and a matte, unglazed surface. This design features a wide-mouthed cylindrical silhouette with gently tapered base walls, providing a balanced vessel for pens, rulers, and scissors. The clay body is mixed with real ground spices, coarse sand, and dark volcanic rock powder, resulting in an authentic mineral grain that mimics artisan wheel-thrown pottery. A subtle, hand-carved linear notch encircles the vessel two centimeters below the rim, introducing a tailored architectural detail that breaks up the continuous stone surface. This earthy organizer fits effortlessly into minimalist, coastal, and Japandi interiors, pairing naturally with raw wood furniture, ceramic mugs, and natural woven accessories. The project teaches makers how to safely mix particulate inclusions into polymer clay without compromising structural strength or causing brittle fractures during baking.
Condition a block of unbleached cream polymer clay, kneading in two teaspoons of fine craft sand and a quarter-teaspoon of ground black pepper until the speckles are evenly dispersed throughout the clay. Roll the speckled clay into an even five-millimeter sheet, then wrap it around a removable, parchment-covered glass jar measuring eight centimeters in diameter. Cut the bottom edge flush and weld a flat circular base cut from the same speckled sheet onto the bottom of the cylinder, blending the perimeter seam using a rubber-tipped shaping tool. Use the blunt edge of a steel ruler to press a clean, horizontal indentation line around the vessel circumference two centimeters beneath the top rim. Slide the glass jar carefully out of the clay cylinder before baking, keeping the parchment paper cylinder inside to support the walls during curing. Place the vessel upright on a baking tile, baking at 135°C (275°F) for forty-five minutes, then let it cool before gently peeling out the internal parchment liner.
Idea 8: Botanical Fern Imprint Pen Cylinder
Execution Process
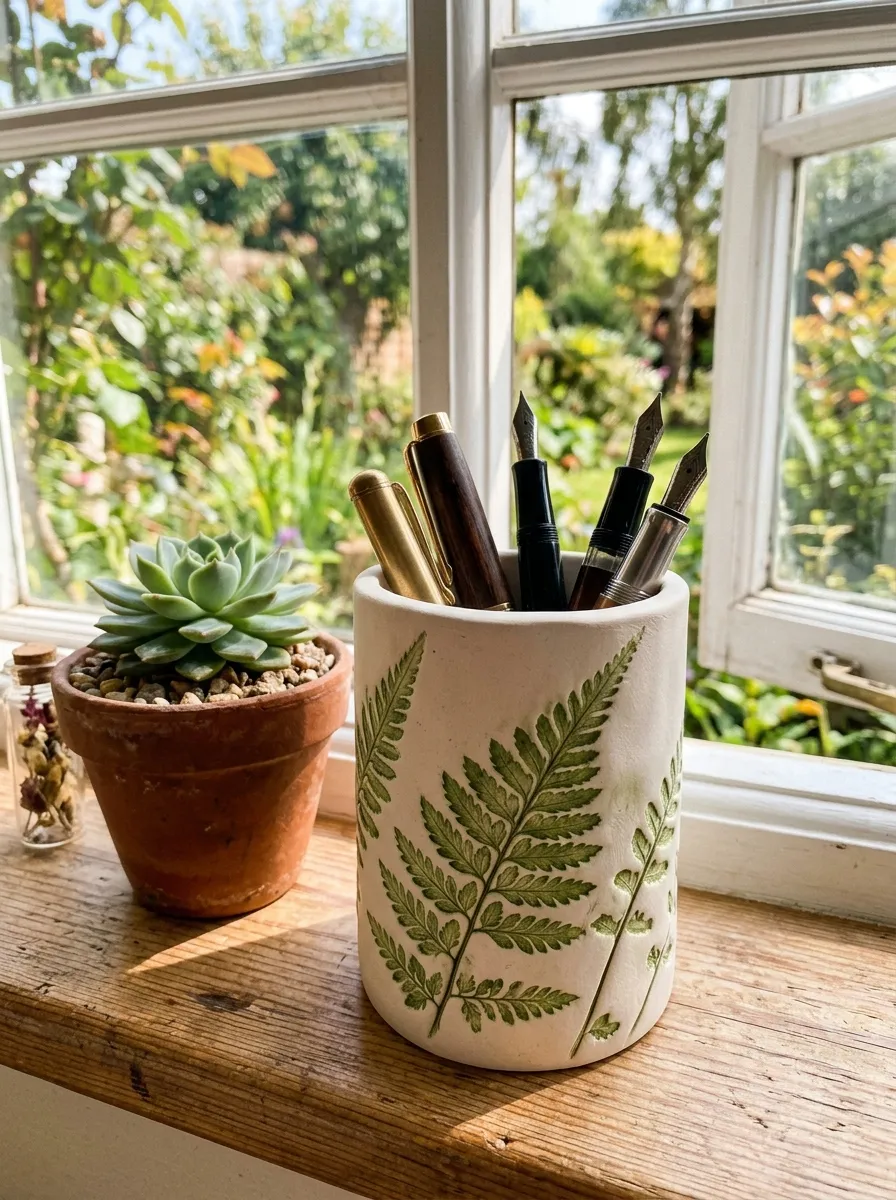
The botanical fern imprint pen cylinder brings natural textures directly into office spaces by using real botanical foliage to create delicate surface relief. This design features a classic upright cylinder in soft sage green or unbleached off-white, wrapped in pressed botanical impressions derived from fresh fern fronds, rosemary sprigs, or cedar leaves. After the plant material is pressed into the raw clay and removed, the recessed veins and frond outlines are highlighted with a wash of dark green or raw umber acrylic paint, which settles into the grooves to emphasize the botanical details. The clean, functional form holds up to fifteen pens, keeping workspaces organized while adding a touch of biophilic design. This project is ideal for nature enthusiasts and beginners, requiring no specialized sculpting skills beyond harvesting garden clippings and applying even rolling pressure.
Gather several fresh, sturdy fern leaves, washing and drying them completely to remove surface dust. Roll conditioned white polymer clay into a six-millimeter sheet measuring twenty-five centimeters long by ten centimeters wide. Lay the fresh fern fronds vein-side down across the clay slab, covering them with parchment paper and rolling over them firmly with an acrylic rolling pin to press the leaf structure into the clay. Carefully peel the fern leaves away using tweezers, revealing the clean botanical impressions left in the surface. Wrap the embossed clay sheet around an oven-safe aluminum can, trimming the ends for a neat vertical seam and sealing the bottom with a flat clay disc. Bake the cylinder supported on the can at 135°C (275°F) for forty minutes, allowing it to cool fully. Brush dark green acrylic paint over the botanical impressions, immediately wiping the raised surface clean with a damp sponge so pigment remains only inside the leaf veins.
Idea 9: Retro Checkered Mod Desk Pen Cup
How to Make
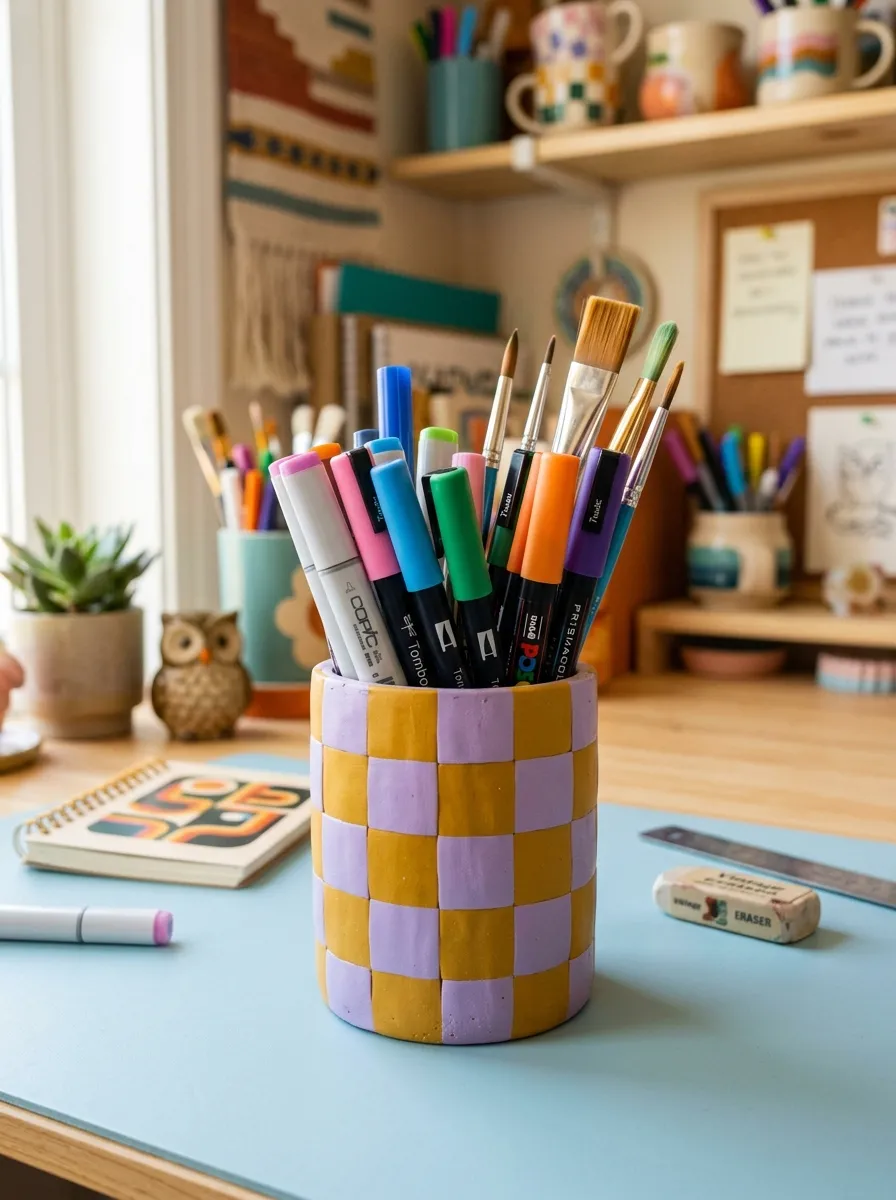
The retro checkered mod desk pen cup channels vintage seventies and nineties design energy through a bold, two-tone checkered surface pattern. This eye-catching organizer features an upright cylinder wrapped in a balanced checkerboard grid composed of alternating squares of soft lavender and warm mustard, or classic black and crisp white. The flat checkered slab is constructed using traditional clay cane slicing techniques, ensuring that each individual square maintains straight edges and crisp corners without messy color bleeding. The bold graphic aesthetic provides a playful focal point for modern creative desks, balancing retro nostalgia with contemporary desk accessories. The sturdy cylindrical build provides dependable storage for colorful art markers, mechanical pencils, and paintbrushes. Crafters will develop fundamental skills in constructing multi-strand cane assemblies, precision block slicing, and joining patterned veneers onto three-dimensional supporting vessels.
Begin by rolling separate blocks of lavender and mustard polymer clay into two identical square logs measuring two centimeters on each side and ten centimeters long. Cut each log lengthwise into four equal square strips, then reassemble the strips in an alternating two-by-two checkerboard pattern, pressing them firmly together to eliminate internal air gaps. Compress and lengthen the checkered log by squeezing from the center outward until the cane measures three centimeters square. Using a sharp tissue blade, slice thin, two-millimeter cross-sections from the cane, laying the sliced checkered tiles edge-to-edge on parchment paper to create a continuous patterned sheet. Smooth the seams between tiles by rolling lightly with an acrylic roller. Wrap the checkered sheet around a prepared four-millimeter clay cylinder supported by an oven-safe glass jar, trimming the edges to form a continuous pattern around the vessel. Bake the assembled cup at 135°C (275°F) for forty minutes, letting it cool before sliding the inner glass jar free.
Idea 10: Slanted Desktop Multi-Pen Organizer
Step-by-Step Guide
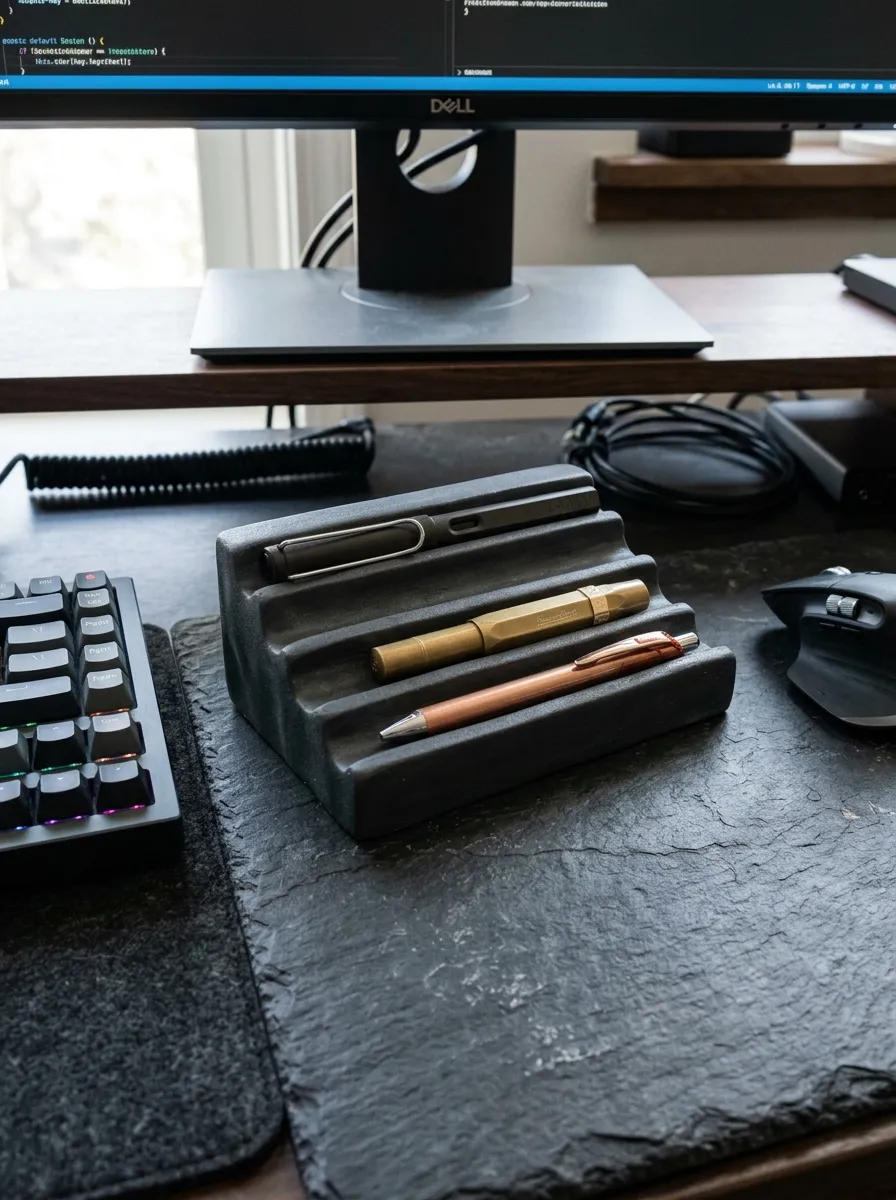
The slanted desktop multi-pen organizer provides an ergonomic, horizontal storage solution designed for artists, architects, and writers who use multiple pens throughout the day. This design features an architectural wedge profile with three stepped, angled tiers, each equipped with a shallow horizontal trough that cradles writing instruments on their sides. This horizontal presentation keeps pen labels, nib sizes, and ink colors fully visible, allowing users to switch between pens quickly without searching through a crowded cup. The cool slate-gray or charcoal finish provides a modern, utilitarian aesthetic that pairs well with drafting boards, mechanical keyboards, and metal desk lamps. The low-profile wedge fits neatly beneath elevated computer monitors or against desk walls, maximizing vertical space in compact home offices. This project teaches crafters how to build structured angled armatures, carve curved storage troughs, and ensure dimensional consistency across multi-tiered clay functional objects.
Construct an internal supportive wedge armature from folded heavy-duty aluminum foil, shaping it into a triangular prism measuring twelve centimeters wide, ten centimeters deep, and six centimeters tall at the back, tapering down to two centimeters at the front. Roll conditioned charcoal polymer clay into an even five-millimeter sheet, cutting panels to encase the foil armature completely, then seal all outer seams with liquid clay. Use a rounded wooden dowel measuring two centimeters in diameter to press three parallel horizontal troughs into the top slanted face, spacing them two centimeters apart from front to back. Smooth the contours of each trough with a damp fingertip to ensure pens rest securely without rolling forward. Check that the front retaining lip of each tier sits tall enough to hold pens in place on the incline. Bake the organizer on a flat ceramic tile at 135°C (275°F) for fifty minutes to ensure the thick exterior shell cures completely around the foil core, allowing the piece to cool fully before placing it on your desk.
Common Beginner Mistakes and How to Avoid Them
When sculpting polymer clay pen holders, beginners often make several common technical mistakes that can compromise the structural integrity, balance, and appearance of their finished organizers. A frequent mistake is creating vessel walls that are too thin, typically under four millimeters; thin-walled clay containers often slump, warp, or crack during baking when unsupported by an internal armature. Crafters should maintain a minimum wall thickness of five to six millimeters, using oven-safe glass, metal, or dense foil cores to preserve clean vertical lines throughout the baking cycle. Another common error is joining raw clay components without sufficient surface pressure or bonding agents, which causes walls, bases, and decorative attachments to separate cleanly after curing. Always score contact surfaces lightly, apply a thin coat of bakeable liquid polymer clay between joints, and blend visible seams using silicone shaping tools. Additionally, failing to verify true oven temperatures with an independent, analog oven thermometer often leads to scorched clay surfaces or under-cured, brittle pieces; never rely solely on built-in appliance dials. Finally, leaving trapped air pockets inside clay slabs can cause bubbling or blistering during curing; knead clay thoroughly and smooth slabs carefully with a roller to release trapped air before assembly.
Practical Tips for Better Results
Achieving clean, boutique-quality finishes with polymer clay desk accessories depends on adopting specific technical habits that refine raw clay into polished homeware. Always build and bake your projects directly on transportable, smooth ceramic tiles or tempered glass sheets; this eliminates the need to lift or handle delicate, unbaked structures, preventing accidental dents and warped walls. When smoothing out visible fingerprints, tool marks, and minor surface imperfections before baking, rub the raw clay lightly using a cotton swab or lint-free cloth dipped in isopropyl alcohol; the alcohol dissolves superficial surface irregularities, leaving a smooth finish. To produce crisp geometric edges and square walls, let conditioned clay slabs rest on the tile for twenty minutes to cool and firm up before making cuts with a rigid tissue blade; cool clay resists dragging and stretching when cut. When designing hollow pen cups, cut a small, two-millimeter pinhole into the base plate before baking; this hidden vent allows expanding air to escape safely without cracking seams. Finally, wet-sand cured pieces in a shallow water bath using progressive grits to achieve a soft stone-like finish that elevates the finished piece.
Styling, Presentation, or Organization Ideas
Integrating handmade polymer clay pen holders into your workspace decor requires thoughtful color coordination, functional clustering, and balanced spatial placement across the desk. To create an intentional, cohesive home office aesthetic, pair your clay pen holder with complementary desk accessories that echo its textures, such as stone coasters, linen blotters, and matte ceramic mugs. When organizing varied writing tools, use the rule of functional separation: dedicate tall cylindrical vessels to long markers and scissors, reserve low-profile multi-hole stands for premium fountain pens, and use shallow stacking cups for small items like clips and erasers. If styling a long desk or credenza, group your handmade organizer in an odd-numbered cluster alongside a small potted succulent and an architectural brass desk lamp to create balanced visual height. For creative gift presentation, pair a completed handmade pen holder with a set of curated, high-end gel pens tied with natural jute twine and a handwritten care tag. Storing your organizer along the non-dominant side of your computer screen maintains an efficient desktop workflow, keeping tools easily accessible without obstructing primary typing areas.
Budget or Time Planning
Crafting polymer clay desk organizers provides an economical alternative to expensive retail homeware, delivering custom storage solutions on a modest materials budget. A standard five-hundred-gram block of polymer clay costs very little and can produce two large cylindrical pencil cups or three low-profile pen stands, making this an affordable DIY project. To manage your budget effectively, upcycle everyday household items—such as clean aluminum food cans, glass beverage bottles, and cardboard shipping tubes wrapped in foil—as supportive baking armatures rather than purchasing specialized metal molds. From a time management perspective, building a standard pen holder requires approximately one to two hours of active sculpting, followed by forty-five minutes of baking and an optional thirty minutes of wet-sanding and finishing. Organize your creative sessions into focused stages: spend thirty minutes conditioning clay and rolling base slabs, forty-five minutes assembling walls and adding surface textures, and conclude with a consolidated baking and cooling cycle. Planning your projects in small batches saves energy, allowing you to cure multiple desk accessories simultaneously on a single large oven rack.
Creative Expansion and Advanced Inspiration
Once you feel comfortable executing basic cylindrical and slab-built pen holders, consider exploring advanced decorative techniques that introduce mixed-media materials, intricate surface relief, and expanded functionality. Experiment with embedding natural raw crystals, polished sea glass, or solid brass eyelets directly into raw clay walls before baking, creating luxurious, textural focal points that catch desktop light. Advanced makers can also explore combining polymer clay with turned hardwood bases, using liquid clay and two-part epoxy to join cured clay cylinders to oiled walnut or oak pedestals for sophisticated Scandinavian styling. Another rewarding design direction involves incorporating functional organizational components, such as embedding strong neodymium magnets beneath the clay surface of a pencil cup to hold metallic paperclips neatly against the exterior wall. You can also experiment with creating multi-tier revolving desk carousels by mounting large multi-compartment clay holders onto small ball-bearing lazy susan hardware. These creative expansions build upon foundational skills, encouraging crafters to develop unique, heirloom-quality desk organizers that enhance daily productivity and workspace style.
Leave a Reply