Fluid swirls, contrasting mineral veining, and rich color dynamics define polymer clay marbled designs, making organic patterned clay accents a dominant feature across curated visual platforms. Exploring tactile marbling inspiration enables crafters to manufacture bespoke decorative accents, modern accessories, and sculptural functional objects directly from a domestic worktable. Within this comprehensive guide, you will learn the foundational conditioning techniques, color blending formulas, precise slicing disciplines, and heat-curing methods required to produce flawless marble swirls at home. Mastering the behavior of unbaked polymer clay allows makers to bypass costly boutique ceramic goods while achieving an authentic stone appearance. Polymer clay offers remarkable durability, light structural weight, and non-porous moisture resistance, making it an exceptional medium for statement jewelry, desktop organization trays, and modern living accents. By applying disciplined manipulation sequences, hobbyists can transform solid, uninspiring blocks of synthetic clay into vibrant, multifaceted surfaces that elevate contemporary living environments.
Why This Idea Is Trending or Useful
Artisanal faux-stone modeling continues to lead modern creative inspiration because it merges classic architectural luxury with approachable, home-based fabrication. Polished marble, quartz, and terrazzo finishes remain timeless staples of upscale interior design, yet acquiring genuine quarried stone for micro-decor remains impractical and expensive. Polymer clay marbling solves this dilemma by allowing creators to simulate sedimentary mineral formations, crystalline veins, and fluid agate patterns using affordable, widely accessible modeling blocks. From an interior styling perspective, marbled items introduce organic motion and complex visual texture into clean minimalist spaces, softening monochromatic palettes with subtle mineral tones. The technique offers immense DIY appeal because it requires zero specialized pottery machinery, kilns, or advanced sculpting skills to achieve impressive results. Anyone with an ordinary craft oven, an acrylic roller, and a steady cutting blade can produce functional decorative objects, establishing polymer clay marbling as a versatile, beginner-friendly artistic outlet.
Materials and Preparation
Achieving crisp marbled lines without creating muddy, oversaturated color bleeds requires selecting appropriate clay formulations and setting up an immaculate fabrication station before starting. High-density, professional-grade polymer clay blocks serve as the foundation, providing sufficient firmness to preserve sharp structural boundaries during rolling and compression. Essential tools include an acrylic hand roller or manual clay conditioning machine, flexible steel tissue blades, ceramic tile work surfaces, metal geometric cutters, and fine-grit wet-or-dry sanding paper. Workspace preparation requires cleaning your ceramic tile or tempered glass base with isopropyl alcohol to remove lingering lint, pet hair, and airborne dust particles. Color preparation requires planning your ratio balance ahead of time, typically designating one dominant neutral tone, two contrasting secondary shades, and an optional metallic accent. Thoroughly conditioning each individual color snake before twisting ensures optimal thermal bonding during baking, preventing seam delamination and premature structural breakage.
1. Carrara White and Slate Gray Monochromatic Slab
Step-by-Step Guide
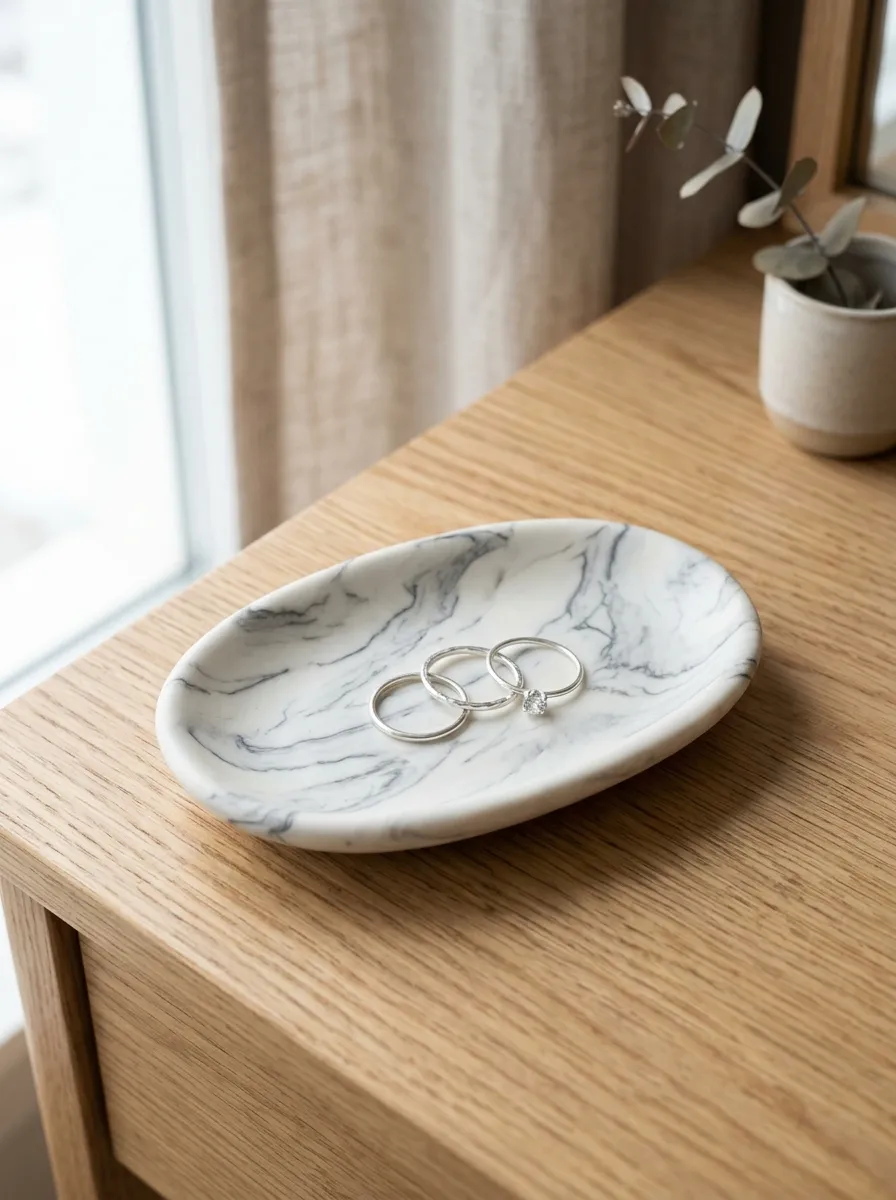
The Carrara white and slate gray pattern draws direct inspiration from traditional Italian sedimentary marble, presenting clean charcoal veining suspended inside an opaque white base. This style relies on high visual contrast balanced by delicate, hair-thin lines, making it an ideal choice for modern bathroom soap dishes, ring dishes, and minimalist stud earrings. The design avoids overwhelming busy environments, providing a subdued, timeless aesthetic that integrates naturally alongside brushed brass fixtures and white porcelain countertops. By maintaining an overwhelming ratio of pure white base clay against narrow dark accents, the resulting slab maintains crisp visual separation without muddying into a flat gray wash. This foundational technique serves as the ultimate test of a crafter’s temperature management and rolling pressure, demonstrating how delicate tension controls line definition.
Begin by conditioning eighty grams of opaque white polymer clay and ten grams of slate gray clay on an immaculate glass work tile. Roll the white clay into a thick cylinder measuring twelve centimeters in length, and roll the gray clay into three paper-thin snakes of equal length. Press the thin gray snakes along the longitudinal sides of the white cylinder, spacing them evenly around the circumference. Twist the assembled cylinder like a candy wrapper, stretching it outward until the length doubles, then fold the rope in half onto itself. Repeat the twisting and folding cycle precisely three times, taking care not to overwork the joined layers. Compress the twisted mass into a compact solid block with flat palms, then use a flexible tissue blade to shave thin, four-millimeter cross-section sheets. Lay the cut sheets adjacent to one another on a ceramic tile, rolling them smooth with an acrylic roller to form a continuous marbled slab.
2. Emerald and Metallic Gold Agate Pattern
How to Create
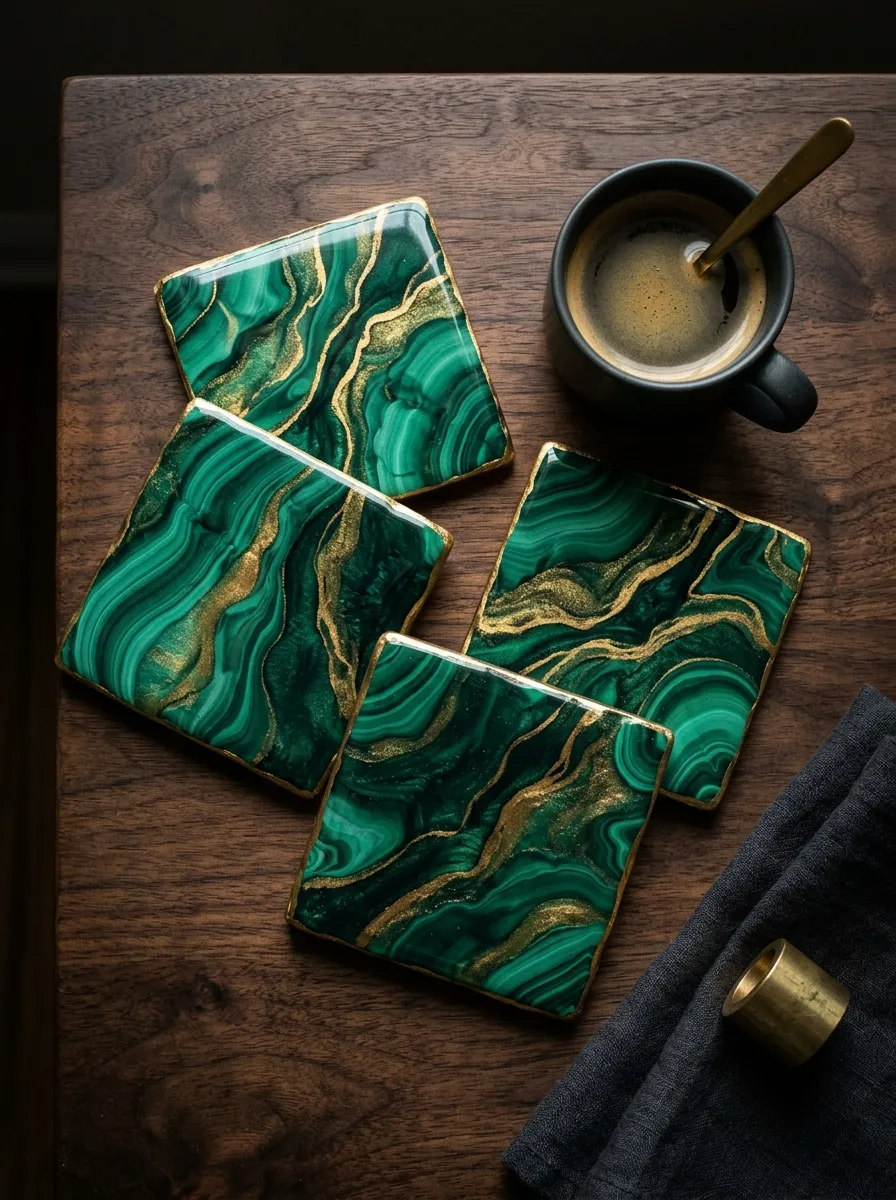
Rich emerald green intertwined with shimmering metallic gold evokes the geological luxury of raw polished agate stones and natural malachite formations. This bold marbling style incorporates metallic mica-infused polymer clay, which reflects directional light and introduces three-dimensional depth beneath the polished surface. The dramatic color saturation makes this treatment suitable for eye-catching statement earrings, luxury bookmarks, and decorative coaster sets in contemporary home settings. The concept relies on stacking alternating sheets of translucent emerald, deep forest green, and metallic gold, then distorting those boundaries to simulate chaotic natural crystal growth. This approach yields an opulent visual texture that anchors transitional home decors, pairing exceptionally well with dark walnut furniture and gold-trimmed coffee table accessories.
Condition thirty grams of forest green clay, thirty grams of translucent emerald clay, and fifteen grams of metallic gold polymer clay. Roll each color through a clay conditioning machine to create even sheets measuring two millimeters in thickness. Stack the sheets in alternating color sequences to construct a layered rectangular block, compressing the stacked layers gently to purge trapped air pockets. Using a dull wooden sculpting tool, press deep, irregular vertical divots into the top of the block, pushing through the layered colors to distort the stratification. Recompress the block into a uniform cube using flat acrylic pressing plates. Slice the block horizontally with a steady, sweeping pull of a flexible steel blade to reveal organic, distorted mineral waves across each slice. Place these dynamic slices onto a flat base clay sheet, roll lightly to fuse the surface, and trim into desired functional shapes.
3. Terracotta and Sand Desert Sunset Swirl
Execution Process
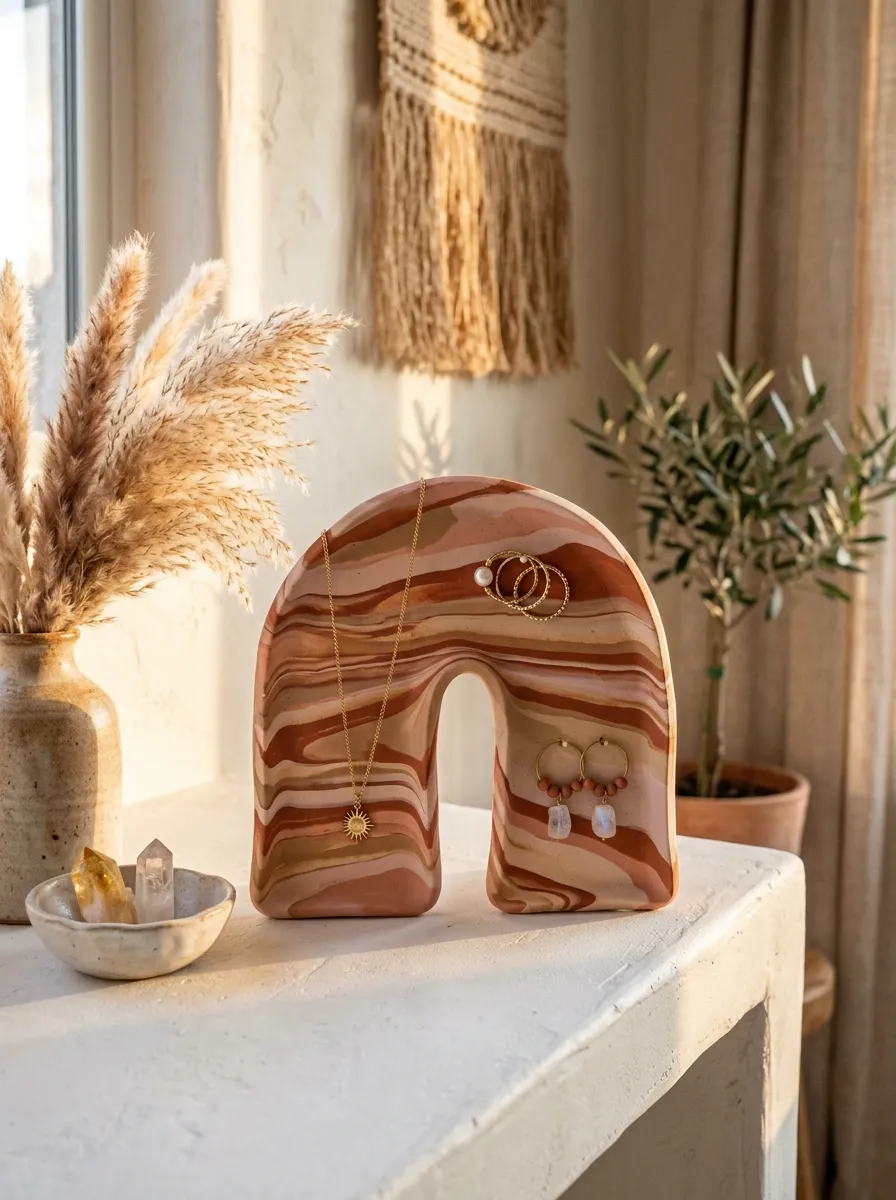
Warm earth tones dominate modern rustic interiors, making the terracotta and sand desert swirl an enduring favorite for bohemian and Mediterranean-inspired decor. This design captures the wind-swept strata of desert canyons by blending burnt orange, raw sienna, pale sand, and muted blush tones into soft horizontal bands. The lack of harsh contrasting colors generates an inviting, grounded warmth, well-suited for organic trinket trays, modular desk organizers, and sculptural arch-shaped wall hangings. Unlike sharp, fractured marble veins, this style emphasizes smooth, flowing transitions that mimic layered sandstone formations. The organic rhythm of the soft curves adds warmth to stark white shelving and pairs effortlessly with dried botanical arrangements, potted succulents, and natural linen textiles.
Prepare twenty-five grams each of rich terracotta clay, warm sandy beige clay, soft blush clay, and unbleached titanium white clay. Roll each conditioned shade into separate ropes approximately fifteen centimeters long and equal in diameter. Align the four ropes side by side to create a wide, multi-colored strip, pressing the contact edges together firmly with your fingertips. Gently roll the composite rope against your work surface until the diameter decreases by half, then coil the extended rope into a tight flat spiral. Flatten the spiral with an acrylic roller, rolling outward from the center in alternating directions to stretch the circular curves into undulating, horizontal canyon waves. Maintain a uniform final slab thickness of three millimeters. Cut the rolled slab using oval or arched metal cookie cutters, smooth the perimeter edges with a damp finger, and cure on a flat parchment-lined baking sheet.
4. Modern Pastel Terrazzo and Marble Hybrid
Setup Method
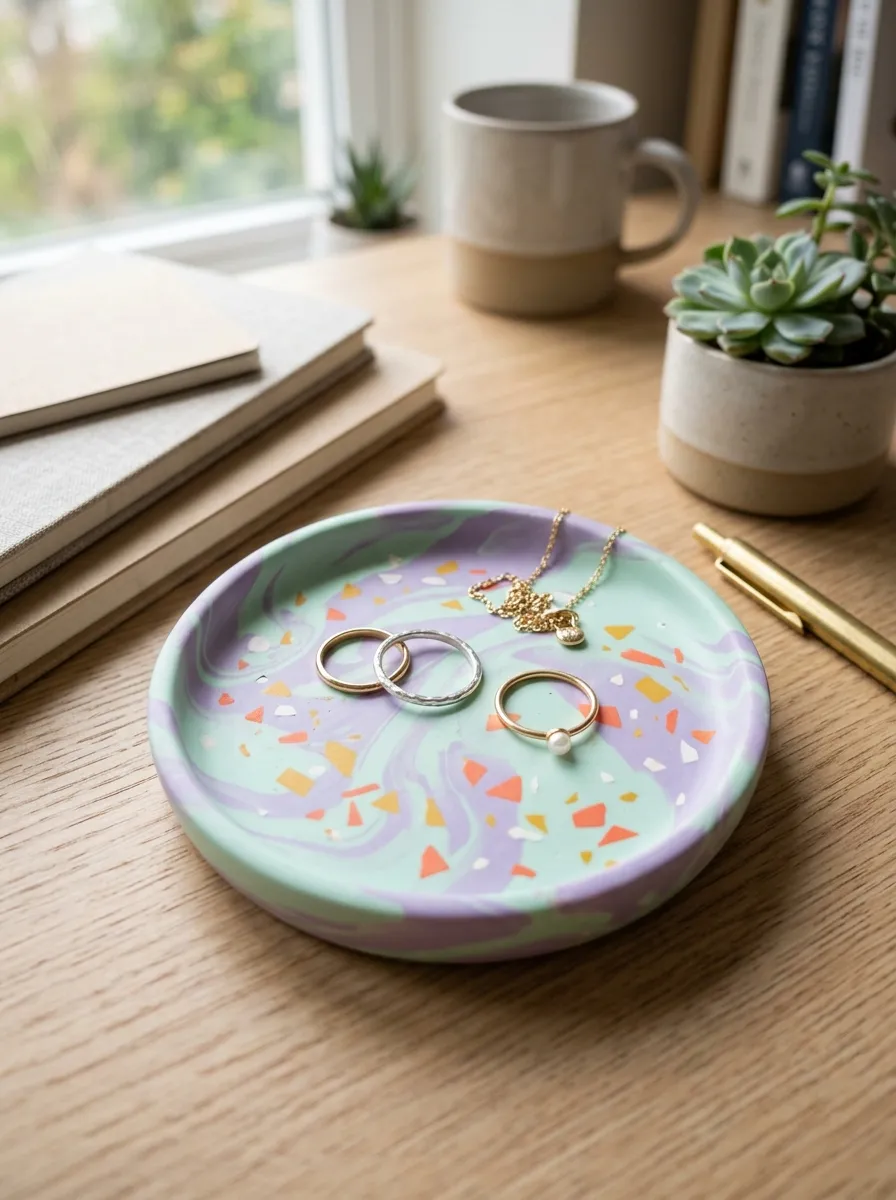
Combining the sweeping fluid lines of marbled clay with the crisp geometric flecks of Italian terrazzo produces a striking contemporary design hybrid. This concept pairs a pale mint and lavender marbled background with suspended, sharp-edged fragments of contrasting clay, creating playful visual complexity. The resulting surface mimics composite architectural stone, making it highly effective for contemporary vanity trays, wall clocks, and modernist geometric pendant jewelry. The contrast between soft, organic marbled swirls and hard, angular color chips keeps the viewer’s eye moving across the piece. This modern aesthetic complements Scandinavian interiors, light oak furniture, and minimalist pastel home decors, bridging casual craft with sophisticated modern surface design.
Roll out fifteen grams of white clay, five grams of soft mint, and five grams of pastel lavender into thin snakes, twisting them twice to create a subtle, muted marbled base sheet. Simultaneously, take pre-conditioned scraps of baked or firm unbaked clay in bright coral, mustard yellow, and cobalt blue. Using a craft scalpel, chop these vibrant accent scraps into tiny, irregular angular fragments ranging from one to three millimeters in size. Scatter the angular chips across the surface of your rolled pastel marbled sheet, maintaining deliberate negative space between the fragments. Lay a sheet of clean deli paper over the composite slab, using an acrylic roller to press the raised fragments flush into the marbled background with firm, even strokes. Peel away the paper carefully, inspect the surface for flat uniformity, and cut out circular coasters using a sharp steel cutter.
5. Moody Indigo and Cosmic Silver Starlight Vein

How to Make
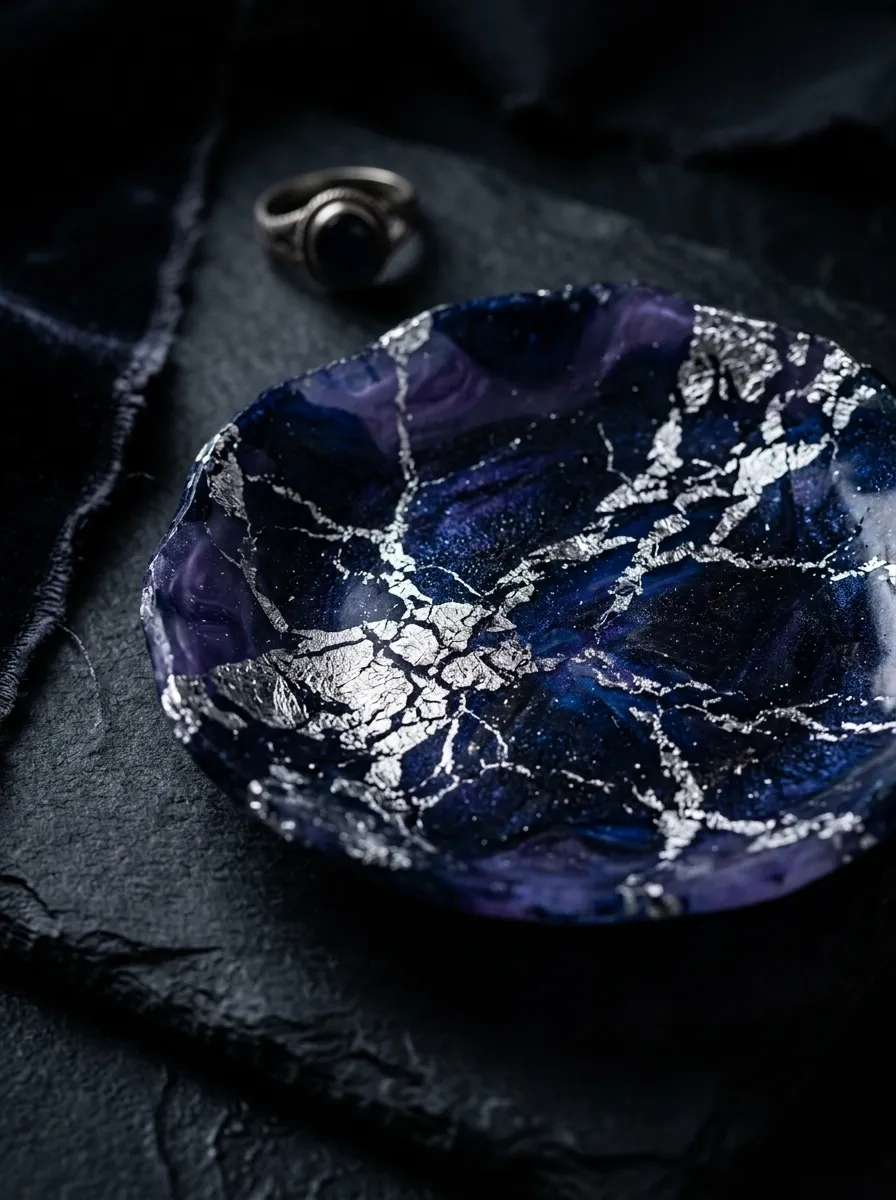
Deep, dramatic color schemes introduce an element of mystery and refined luxury into handmade polymer clay crafts. The moody indigo and cosmic silver pattern pairs midnight navy clay with translucent violet and leafed silver foil, capturing the shimmering appearance of celestial night skies and lapis lazuli gemstones. This deep, saturated design works exceptionally well for statement evening jewelry, decorative candle bases, and upscale vanity boxes. The silver elements catch artificial ambient lighting, creating a bright metallic contrast against the deep blue background. Incorporating genuine silver imitation leaf alongside colored clay introduces a delicate, crackled texture that simulates high-end metamorphic rock fissures.
Condition forty grams of deep midnight blue polymer clay and twenty grams of translucent violet clay, rolling them into two thick, flat rectangles. Apply a sheet of imitation silver leaf directly over the surface of the midnight blue slab, burnishing it flat with a soft, dry makeup brush until it adheres completely. Stack the violet slab on top of the silver-leafed blue slab, pressing the layers together firmly to create a dense laminate. Cut the block into four equal quarters, stacking them vertically to multiply the internal metallic strata, then roll the entire stack into a thick cylinder. Twist the cylinder several times, causing the delicate silver leaf to fracture into thousands of microscopic metallic veins. Slice the block into cross-sections, lay the patterned tiles together on a clean tile, and roll flat to form your cosmic marbled slab.
6. Earthy Sage and Ochre Botanical Swirl
Step-by-Step Guide
Drawing inspiration from natural mosses, forest floors, and raw minerals, the sage and ochre botanical swirl delivers an organic, biophilic aesthetic. This design pairs soft eucalyptus green, earthy mustard ochre, rich raw umber, and translucent clay to produce an earthy, calming marbled pattern. The inclusion of translucent clay provides visual depth, allowing light to penetrate the surface and illuminate the undulating layers underneath. This organic pattern is suited for plant pot markers, wall hangings, and botanical pendant jewelry. The earthy palette matches biophilic interior styling, rattan accents, and indoor botanical collections, making it an appealing option for nature-inspired home decor.
Condition twenty grams of muted sage green clay, twenty grams of warm yellow ochre, ten grams of raw umber, and twenty grams of pure translucent polymer clay. Shape each color into long, tapering logs of varying thicknesses, ensuring the translucent material represents roughly one-third of the total volume. Bundle the varied logs together irregularly, avoiding symmetrical placement of the colors. Twist the bundled log firmly from both ends until the exterior displays tight, spiral ridges, then roll the twisted rope into a single uniform ball between your palms. Cut the ball directly down the middle using a rigid tissue blade to inspect the internal swirling. Place the cut halves cut-side down, press them flat with an acrylic roller, and smooth the resulting slab to an even four-millimeter thickness ready for shaping.
7. Deep Onyx and Bright White High-Contrast Marbling

Execution Process
High-contrast graphic patterns deliver an architectural presence, and the combination of deep onyx black and stark white provides timeless visual punch. This treatment mimics luxury black marble, featuring jagged, lightning-like white fissures cutting across an obsidian background. The striking visual contrast makes this design ideal for bold modernist wall clocks, structural key bowls, and sharp geometric earrings. The key challenge lies in keeping the white veining crisp, preventing black pigments from staining the lighter clay during the manipulation process. When executed properly, this technique delivers a clean, high-end stone appearance that complements industrial loft styling, blackened steel hardware, and monochrome living spaces.
Condition sixty grams of dense black polymer clay and ten grams of pure white clay on separate, thoroughly cleaned work tiles. Roll the black clay into a thick rectangular block, and roll the white clay into exceptionally thin, flat strips using the thinnest setting of your clay machine. Tear the thin white strips by hand to create ragged, uneven edges that simulate organic rock fractures. Wrap these torn white ribbons randomly around the exterior faces of the black block, pressing them flat against the surface. Cut the block into thirds diagonally using an angled blade, rearrange the cut wedges to expose interior black sections, and press the parts back into a unified block. Slice thin veneers from the front face of the block, arrange them onto a plain black backing base, and burnish smooth under wax paper.
8. Warm Blush and Rose Quartz Mineral Wash
How to Create
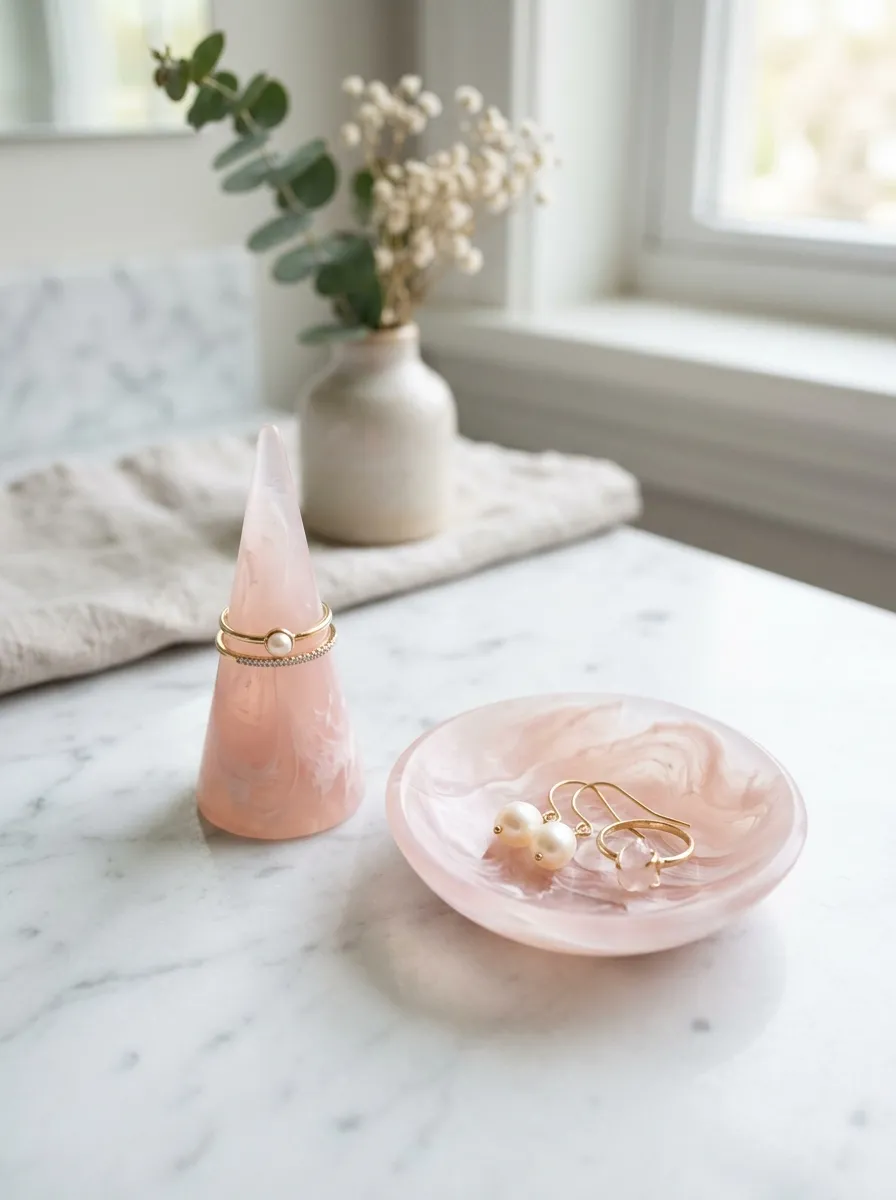
Simulating translucent gemstones requires careful balancing of light transmission and delicate pastel pigments within the clay body. The warm blush and rose quartz pattern recreates the cloudy interior layers and milky white veins characteristic of raw quarried rose quartz crystal. This soft, romantic design is popular for bridal accessories, vanity organizers, ring cones, and delicate feminine jewelry pieces. The subtle, cloud-like transitions between pink and translucent tones produce a soft aesthetic that complements white oak furniture, gold filigree, and soft linen home textiles. The technique relies on subtle, broad color gradations rather than hard, sharply cut lines, creating a dreamy, ethereal finish.
Condition forty grams of translucent clay, ten grams of opaque white clay, and five grams of saturated magenta clay. Mix a tiny fraction of the magenta clay into half of the translucent clay to produce a delicate, see-through blush pink base. Roll the white clay, translucent blush clay, and remaining translucent clay into flat, irregular patties of differing thicknesses. Tear the edges of each patty to produce ragged margins, then stack them randomly like fallen leaves to construct an irregular, tiered mound. Press the mound into a compact cube using smooth acrylic blocks, avoiding excessive twisting that might blend the colors into a uniform pink paste. Slice horizontal layers from the cube, revealing milky, cloud-like quartz veining. Roll the cut slices smooth on a ceramic tile to yield a lustrous, gem-like slab ready for final fabrication.
9. Ocean Coastal Wave and Sea Salt Marbling
Setup Method
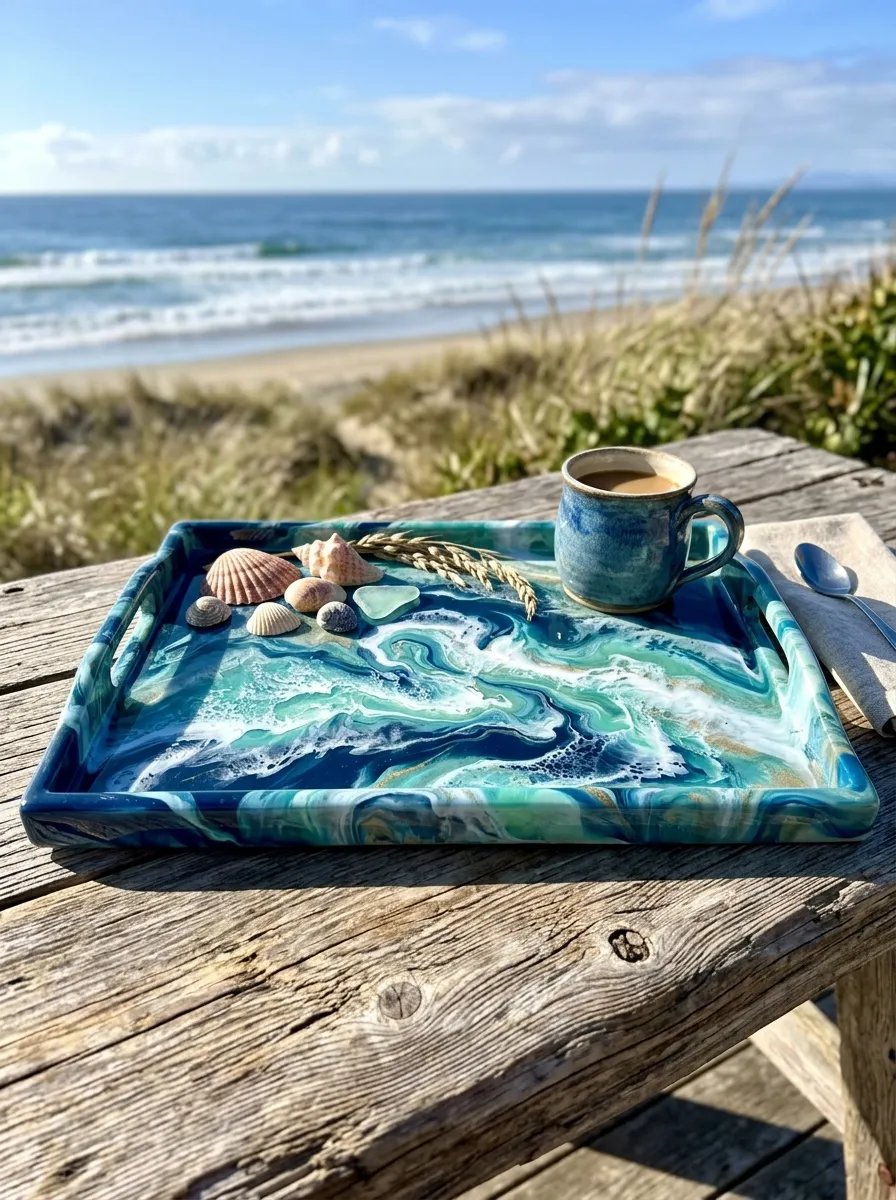
Evoking the fluid motion of surging coastal tides, the ocean wave marbled design pairs deep sea navy, vibrant turquoise, crisp seafoam, and foaming white accents. This dynamic design captures the organic movement of ocean swells, making it an appealing pattern for beach house serving trays, decorative wall plates, and summer accessory lines. The construction emphasizes directional rolling, stretching the blended clay along a single linear axis to simulate cresting waves and shoreline foam. The rich aquatic palette injects refreshing, serene energy into living spaces, coordinating beautifully with weathered driftwood decor, white shiplap walls, and nautical-themed interiors.
Condition twenty grams of deep ocean navy, twenty grams of bright turquoise, fifteen grams of soft seafoam green, and fifteen grams of opaque white polymer clay. Shape each color into equal rectangular logs measuring ten centimeters long, aligning them side by side on a flat glass mat. Roll the four colors together into a unified multi-stripe sheet using an acrylic roller, working along the length of the seams. Fold the striped sheet accordion-style into a dense, multi-layered block with numerous internal vertical color channels. Use your thumbs to press undulating waves into the top edge of the block, distorting the layered stripes downward. Slice thin, vertical sheets across the wavy cross-section using a sharp tissue blade, laying the wave patterns down flat onto a white base sheet to construct a fluid, oceanic decorative slab.
10. Vintage Amber Tortoiseshell Pattern

How to Make
Classic tortoiseshell finishes exude timeless mid-century warmth, pairing deep espresso browns with warm golden amber tones. Simulating tortoiseshell in polymer clay requires high proportions of translucent amber clay blended with irregular chips of dark brown and black clay. The resulting finish mimics vintage spectacles, luxury hair combs, and upscale mid-century desk accessories, adding rich, retro character to any collection. The pattern relies on light transmission through the translucent amber body, allowing the suspended dark patches to appear three-dimensional. This classic design complements mid-century modern furniture, brass desk lighting, and rich leather goods, functioning as a refined home decor or jewelry accent.
Prepare forty grams of translucent liquid or solid polymer clay tinted with a drop of transparent yellow and orange alcohol inks to achieve a rich honey-amber base. Prepare ten grams of opaque dark chocolate brown clay and five grams of black clay. Tear the brown and black clays into tiny, ragged flakes of varying sizes using your fingertips. Flatten the amber clay into a three-millimeter slab, scattering the dark flakes randomly across the front and rear faces of the amber base. Roll the slab gently to embed the flakes flush into the translucent amber matrix. Fold the slab in half, compress it firmly, and pull it through your clay machine on the thickest setting to distort the dark patches into fluid, swimming spots. Cut out functional shapes and cure thoroughly to achieve deep, rich visual clarity.
Common Beginner Mistakes and How to Avoid Them
Creating crisp, professional polymer clay marbled designs requires careful control over clay temperature, pressure, and blending cycles to avoid muddying the colors. The most widespread error among beginners is overworking and over-twisting the combined clay snakes, which blends contrasting colors into a flat, murky tone rather than preserving sharp veining. Always limit twisting and folding passes to three or four cycles, inspecting the clay after each pass before continuing. Another common mistake is attempting to slice soft, warm clay directly after conditioning, which causes the colors to drag, smear, and compress under the blade. Place your twisted clay block into a refrigerator or freezer for ten minutes before cutting, as chilled clay offers clean resistance to the blade, yielding sharp, distortion-free slices. Beginners also tend to introduce trapped air bubbles when compressing irregular clay ropes into solid blocks, which leads to surface blisters and blemishes during baking. Prevent air pockets by smoothing layers together firmly from the center outward and piercing any visible bubbles with a sharp needle before smoothing.
Practical Tips for Better Results
Achieving professional, gallery-worthy finishes with polymer clay marbling requires disciplined studio habits, proper blade maintenance, and post-curing finishing techniques. Always keep a dedicated bottle of isopropyl alcohol and lint-free microfiber wipes at your station to clean rolling pins, blades, and work tiles between color batches, preventing accidental contamination. When cutting cross-sections from marbled canes or blocks, use an ultra-thin, flexible stainless steel tissue blade, wiping the metal clean with alcohol after every single slice to avoid color smearing. To achieve an authentic polished stone appearance, finish your cured clay objects with wet-or-dry sanding paper under running water, working progressively through four-hundred, six-hundred, eight-hundred, and one-thousand-grit abrasives. This wet-sanding routine eliminates surface irregularities, exposes vibrant interior mineral patterns, and leaves a silky, tactile finish. Applying a thin coat of museum-grade microcrystalline wax or high-gloss polymer glaze after sanding enhances depth and protects metallic leaf accents, giving the finished project an authentic polished marble luster.
Styling, Presentation, or Organization Ideas
Handcrafted marbled clay objects offer great versatility for home decoration, bringing tactile texture and visual interest to functional surfaces when styled thoughtfully. Position flat marbled trinket dishes on wooden entryway consoles or bedroom dressers to organize everyday jewelry, keys, and watches within an elegant, artistic container. Group three marbled cylinder vases or candle holders of varying heights together on a living room coffee table to create a dynamic, balanced focal composition. Pair cool, slate-gray marbled coasters with warm brass accessories and dark slate trays to create rich textural contrast across dining or office desks. In modern, light-filled bathrooms, use polished white-and-gray marbled soap trays to anchor organic bath products against clean porcelain sinks. For gallery wall presentations, mount geometric marbled clay tiles inside shadowbox frames with wide white matting, turning small clay experiments into sophisticated architectural art displays. Always apply small felt pads or cork backings to the base of finished clay items to protect polished furniture from scratches and moisture.
Budget or Time Planning
Crafting bespoke marbled clay decor at home represents an economical alternative to purchasing expensive designer homewares, provided you manage your materials and schedule efficiently. A modest investment in basic polymer clay blocks, an acrylic roller, a flexible tissue blade, and wet sanding paper will yield dozens of small dishes, jewelry components, or coasters at a fraction of boutique retail prices. Organize your production schedule into manageable blocks across one or two days to maintain focus and prevent creative fatigue: spend an hour cleaning the workspace, conditioning base colors, and mixing custom mineral shades during your first session. Dedicate the second hour to assembling marbled canes, chilling the clay blocks, slicing veneers, and pressing final functional shapes. Allow sixty minutes for oven baking and cooling, finishing with a final session reserved for wet sanding, buffing, and sealing the cured pieces. This structured schedule prevents rushed assembly, minimizes material waste, and ensures every finished project meets high standards of quality.
Creative Expansion and Advanced Inspiration
Once you master basic rope twisting and block slicing, you can expand your polymer clay crafting into complex sculptural forms and sophisticated mixed-media applications. Experiment with embedding contrasting metallic powders, raw mica flakes, or crushed stone chips into translucent clay matrices to create realistic simulated granite, lapis, or pyrite formations. Explore mixed-media integration by combining cured marbled clay handles with stainless steel serving utensils, or framing marbled clay slabs within raw brass jewelry bezels and custom timber bases. Consider scaling your work into larger projects, such as building multi-panel wall hangings linked with jump rings, or shaping continuous marbled veneers around glass candle cylinders and ceramic planters. You can also explore specialized surface carvings, carving fine line art into cured marbled surfaces and filling the grooves with contrasting oil paints or liquid clay. As your confidence grows, these techniques will enable you to transform basic polymer clay into high-end decorative art that elevates your living spaces.
Leave a Reply