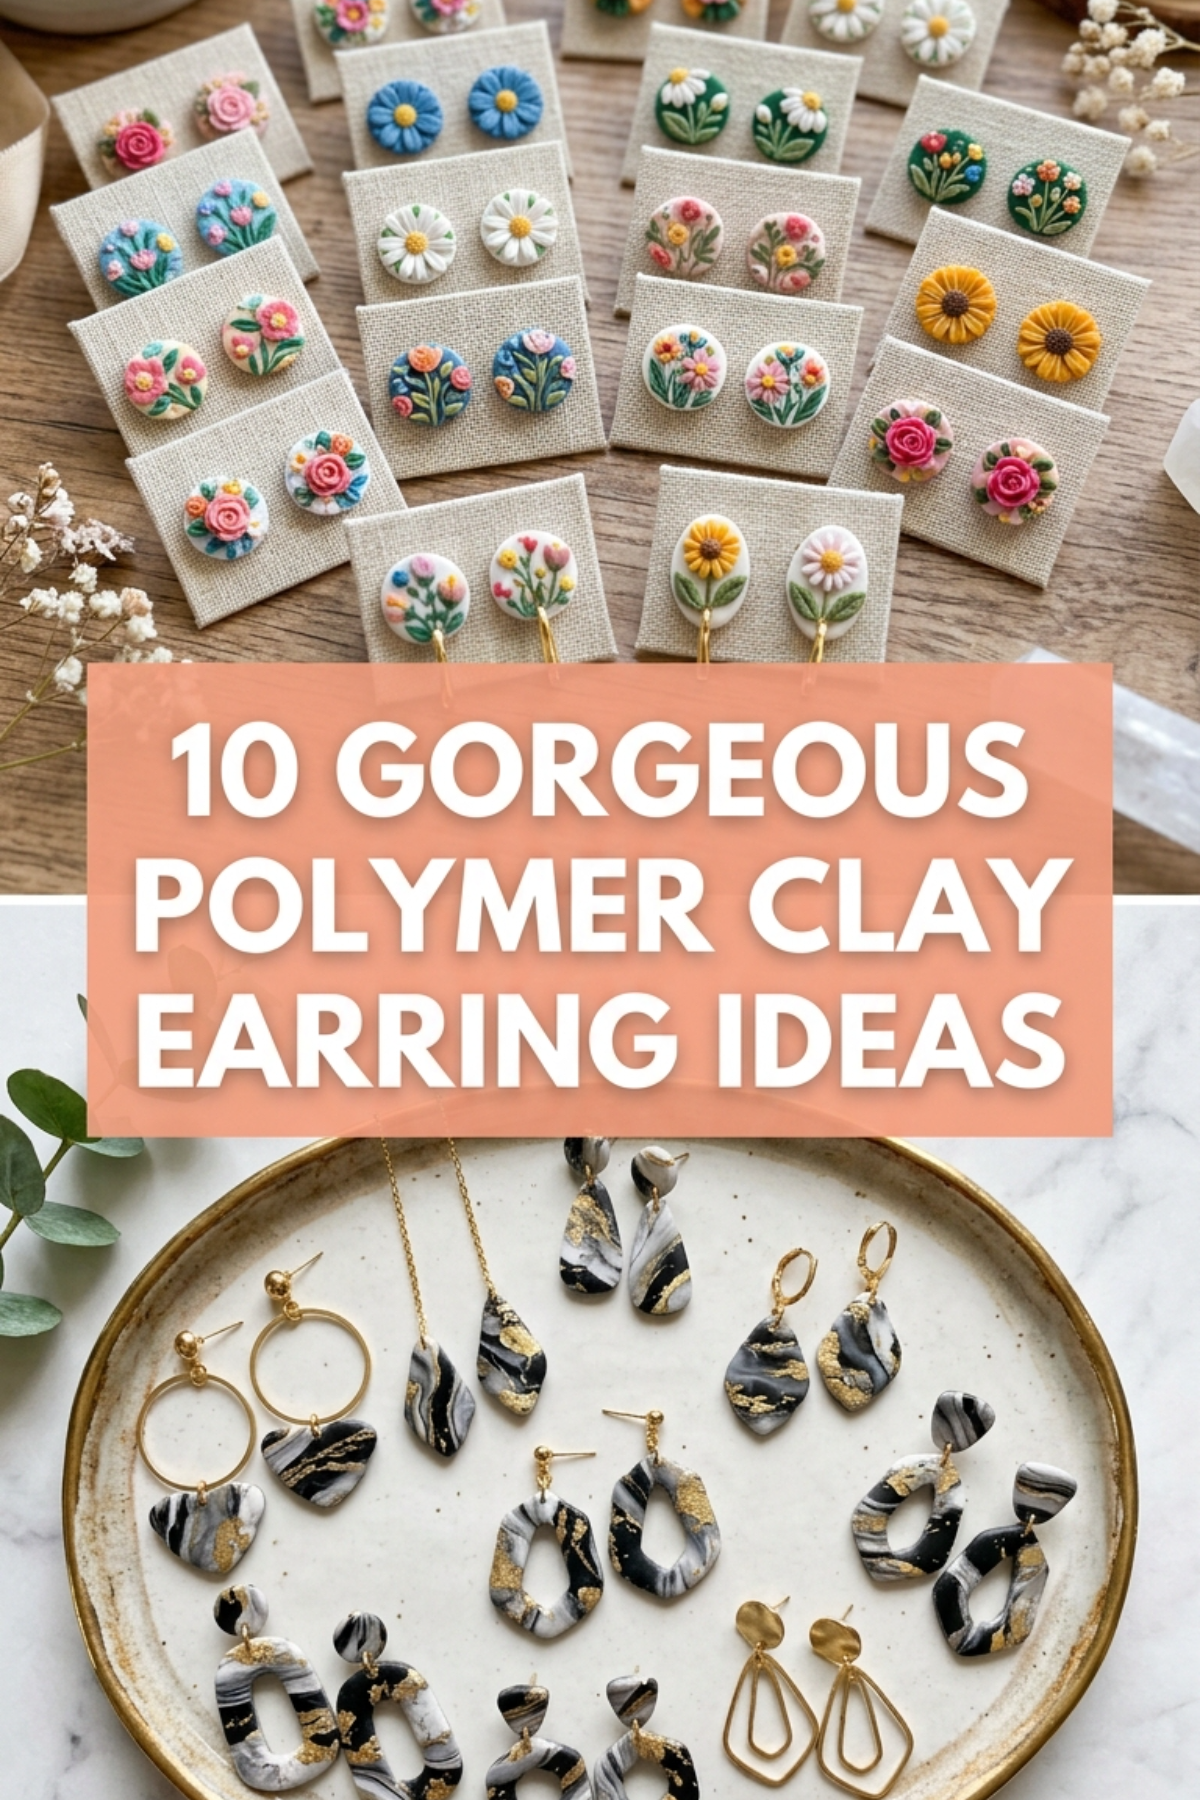
Polymer clay jewelry making has established itself as an essential craft within contemporary accessory styling and handmade design. Handcrafted clay earrings combine sculptural geometry, custom color mixing, and featherweight comfort, making them a practical choice for everyday statement jewelry. Readers will discover ten distinct polymer clay earring projects designed to develop technical skills while producing modern, boutique-quality accessories. This detailed tutorial breaks down core construction methods, including clay conditioning, slab rolling, pattern development, precision baking, and mechanical hardware assembly. Mastering these fundamental techniques allows makers to design lightweight statement pieces that resist brittleness, surface blemishes, and hardware failures. Furthermore, understanding the physical properties of curing polymer clay guarantees that finished pieces maintain proper flexibility and long-term durability. By following a structured, step-by-step approach, crafters can bypass common beginner obstacles and execute clean, polished silhouettes with confidence. These wearable projects balance artistic exploration with wearable functional ergonomics, producing versatile handmade accessories that elevate any wardrobe.
Why This Idea Is Trending or Useful
Handmade clay jewelry continues to dominate modern design feeds because contemporary fashion increasingly celebrates expressive, artisan-made accents and personalized color palettes. Modern styling prioritizes sculptural accessories that deliver bold visual scale without the heavy physical pull associated with metal or cast resin pendants. Polymer clay provides the ideal medium for this aesthetic, offering an accessible platform where beginners can replicate high-end ceramic and stone textures using simple household tools. The creative appeal remains unmatched because a single package of raw conditioning clay can yield multiple pairs of statement dangles, studs, or drops, making it a budget ideas staple for home studios. The process is approachable for novices because foundational designs require only basic rolling, cutting, and tabletop oven curing. Transforming malleable blocks of color into durable, wearable art provides immense practical satisfaction, empowering makers to build customized capsule jewelry collections or launch small handmade gift lines with minimal startup overhead.
Materials and Preparation
Achieving smooth surfaces and structural durability begins with proper workspace setup, clay conditioning, and dedicated hardware selection. Essential supplies include professional-grade polymer clay, an acrylic rolling roller or manual pasta conditioning machine, stainless steel jewelry cutters, a craft tissue blade, and rigid ceramic tiles to serve as non-stick baking platforms. Supporting hardware consists of hypoallergenic stainless steel or raw brass ball posts, jump rings (six to eight millimeters), flat-nose jewelry pliers, silicone smoothing tools, and wet-dry sandpaper in 400 through 1000 grits. Before starting any project, sanitize your work surface with isopropyl alcohol to remove lint, oils, and airborne dust particles that cling to raw clay. Condition the clay thoroughly by folding and passing it through your roller repeatedly until it becomes pliable, uniform, and free of air bubbles. Test clay slab thickness against uniform wooden depth guides to ensure every cutout cures evenly, preventing warped edges or uneven baking across your design components.
1. Minimalist Terrazzo Arch Statement Dangles
How to Create
The minimalist terrazzo arch dangle draws direct inspiration from mid-century Mediterranean stone architecture, balancing structured lines with scattered organic specks. This design pairs a solid, rounded upper arch with an inverted companion oval or stud post, creating visual movement when worn. The terrazzo effect mimics crushed stone composite by embedding tiny, irregular fragments of contrasting colored clay directly into a neutral, stone-hued background slab. A matte, smooth finish gives the piece an authentic mineral appearance, making it suitable for both casual linen outfits and structured office attire. The geometric arch distributes weight evenly across the earlobe, while the dynamic contrast between the base color and the colorful flecks provides rich visual texture. Because the design relies on clean outer contours, precise cutting and edge smoothing are critical to achieving a high-end, gallery-worthy silhouette.
Condition an off-white or light ecru clay slab to an even three-millimeter thickness using your acrylic roller on a clean ceramic tile. Take small, pea-sized remnants of mustard yellow, terracotta, olive green, and charcoal clay, slicing them into micro-shards with a sharp tissue blade. Scatter the colored flakes across the top of the neutral slab, ensuring balanced spacing without overcrowding the surface. Cover the slab with a sheet of parchment paper and roll gently in alternating directions to press the terrazzo chips flush into the base clay. Press a sharp metal arch cutter firmly through the slab, gently wiggling the cutter before lifting to achieve clean, crisp borders. Use an acrylic needle tool to pierce a small connecting hole through the top-center edge and the bottom legs of each arch. Bake the cut pieces on your ceramic tile at 275 degrees Fahrenheit (135 degrees Celsius) for thirty-five minutes, let them cool completely, sand the outer perimeters smooth, and join them with brass jump rings.
2. Textured Botanical Leaf and Gold Hoop Drops
Step-by-Step Guide
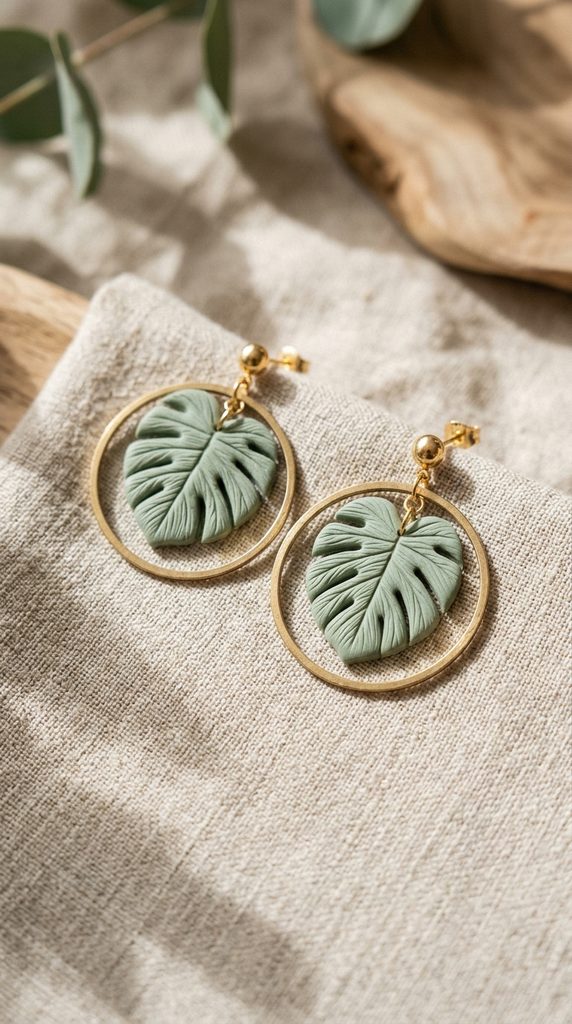
The textured botanical leaf drop blends modern organic styling with the warm metallic sheen of circular brass hoops. This design incorporates a delicate monstera or palm leaf silhouette stamped with subtle vein textures, suspended inside or beneath an open wire circle. The juxtaposition of soft clay foliage against rigid metallic wire creates an appealing multi-dimensional finish that catches ambient lighting. Earthy tones such as deep forest green, sage, or muted eucalyptus evoke natural foliage while harmonizing with warm skin tones. The open-frame construction keeps the earring feeling airy and delicate, preventing larger statement drops from appearing visually heavy or bulky. This nature-inspired piece transitions effortlessly across seasons, pairing just as well with summer dresses as it does with textured winter knits.
Condition two ounces of sage green polymer clay and roll it across a ceramic tile to a consistent depth of 2.5 millimeters. Lay an actual pressed leaf or a silicone botanical texture mat over the clay surface, rolling over it with light, even pressure to imprint delicate vein channels. Remove the texture mat carefully, lifting from one corner to prevent stretching the detailed impressions beneath. Position a leaf-shaped steel cutter over the patterned areas, pressing down with firm downward force to extract symmetrical leaf pairs. Pierce a clean jump ring hole through the stem base of each cut leaf using a fine metal awl. Bake the components on a flat baking sheet lined with plain paper for thirty minutes at the manufacturer-specified temperature. Once cured and cooled, use flat-nose pliers to open a six-millimeter raw brass jump ring, thread it through the leaf hole and around a thirty-millimeter brass wire hoop, and close the ring securely.

3. Layered Sunset Color Palette Geometric Cascades
Execution Process
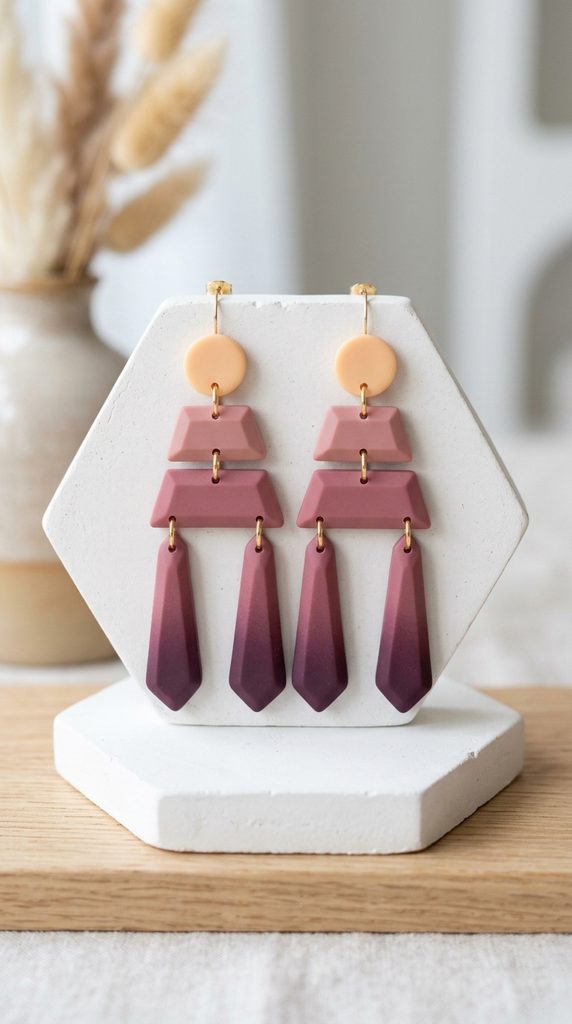
The layered sunset geometric cascade captures the warm visual progression of dusk using stacked, interlocking polygons in harmonious gradients. This design uses three distinct geometric tiers—such as a round stud post, a horizontal trapezoid, and an elongated rounded drop—connected by mobile metal jump rings. The color story transitions sequentially from pale apricot and dusty rose to warm terracotta and deep plum, forming an ombré cascade down the neck. The articulation between each geometric layer allows the earrings to sway naturally with the wearer’s movements, reflecting light off each planar surface. This articulated construction keeps the accessory dynamic and expressive while maintaining clean, contemporary geometry. The balanced proportions make it an eye-catching focal accessory that brings warm, flattering color directly toward the face.
Begin by custom-mixing your sunset color gradient using pure white, warm yellow, cadmium red, and cobalt blue clay blocks to create four cohesive tonal values. Roll each conditioned color into separate slabs of identical three-millimeter thickness, using uniform depth guide sticks alongside your rolling tool. Cut two round studs from the lightest apricot shade, two medium trapezoids from the dusty rose slab, and two elongated paddle drops from the deepest plum slab. Align the matching geometric pairs on your baking tile, verifying that the scale of each descending piece feels balanced and symmetrical. Punch connecting holes through the top and bottom margins of the central elements using a 1.2-millimeter hole punch tool to ensure proper alignment. Bake the stacked components for thirty-five minutes, allow them to reach room temperature, smooth all cut edges with 800-grit wet sandpaper, and link the three tiers together using matching gold-plated jump rings.
4. Faux White Marble and Raw Brass Dangles
How to Make
The faux white marble dangle reproduces the luxurious appearance of natural Carrara stone while retaining the featherweight comfort of polymer clay. This sophisticated design pairs smooth, cool-toned stone patterns with bold raw brass connectors, delivering a high-end luxury look without heavy stone weight. The marbling effect is achieved by twisting pure white clay with delicate veins of translucent clay and subtle threads of graphite grey. Translucent clay gives the cured piece depth and natural light permeability, closely mimicking real metamorphic rock. When paired with high-polish brass elements like crescent moons or bar charms, the organic grey veining stands out in sharp contrast against the bright metallic surfaces. This timeless design offers exceptional versatility, making it a reliable wardrobe staple for formal dinners, gallery openings, and modern bridal wear.
Condition four parts opaque white polymer clay, one part translucent clay, and a very small pinch of soft charcoal clay. Roll the white and translucent clays into thick logs, roll the charcoal clay into hair-thin strands, and lay the dark strands randomly across the pale logs. Twist the assembled bundle into a tight spiral, fold the twisted rope in half, and roll it out into a single log again to distribute the fine veining lines. Repeat this folding and twisting process three times, being careful not to overmix, which would turn the batch uniformly grey. Slice the marbled log into coins, press them together on your work tile, and roll the slab flat to a three-millimeter thickness to expose the internal veining patterns. Cut out modern teardrop shapes, punch top suspension holes, and bake on a tile for thirty-five minutes. After cooling, buff the cured surface with a soft denim cloth to create a natural semi-gloss sheen, and attach each teardrop to a raw brass crescent finding.
5. Modern Ribbed Rainbow Arch Studs
Step-by-Step Guide
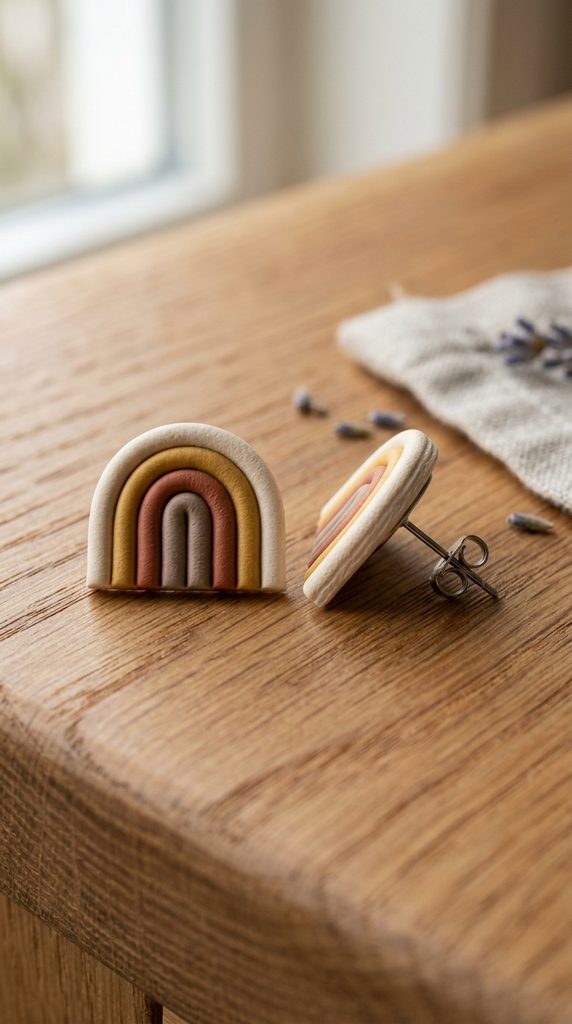
The modern ribbed rainbow arch stud updates the classic rainbow motif with a grounded, earthy color palette and clean Scandinavian design lines. Rather than using bright primary hues, this piece relies on muted neutrals like cream, dusty mustard, burnt sienna, and warm taupe to achieve a mature, understated look. The design features several smooth clay cords bent into nesting concentric arches, joined side by side to form a cohesive, ribbed relief structure. The raised, rounded cords create tactile ridges that catch light and shadow across the front of the earlobe. Because these earrings are worn as direct post studs without hanging dangles, they offer a secure, low-profile fit ideal for busy active days. Their understated, minimalist aesthetic complements casual everyday wardrobes, adding thoughtful handmade detail to simple tees and knit sweaters.
Prepare four distinct neutral clay colors, conditioning each block until it is soft, uniform, and completely free of trapped air bubbles. Roll each color through a clay extruder fitted with a two-millimeter circular disc, or roll them by hand against a smooth tile to form four long, uniform clay ropes. Take the inner color rope and bend it into a tight, two-centimeter U-shaped arch on your tile. Carefully wrap the second, third, and fourth colored ropes around the perimeter of the initial arch, pressing each consecutive layer lightly against the previous one to ensure solid surface contact without flattening the round profiles. Use a sharp tissue blade to slice evenly across the bottom legs of the combined arches, establishing a clean, flat baseline. Bake the assembled rainbow arches directly on your ceramic tile at 275 degrees Fahrenheit for thirty minutes. Once cooled, use waterproof two-part epoxy paste to bond hypoallergenic surgical steel earring posts to the flat backside of each arch.
6. Checkered Retro Checkerboard Circle Dangles
Execution Process
The checkered retro circle dangle brings lively mid-century mod graphic energy into everyday wardrobes through precise, high-contrast surface patterns. This design features a crisp checkerboard grid—often paired in classic black and white, olive and cream, or terracotta and pink—cut into round statement discs. Achieving sharp, clean intersections without distorted lines requires an exact clay cane assembly process. The graphic grid creates a striking visual focal point that draws attention upward toward the jawline. Because the pattern runs all the way through the clay cane rather than sitting only on the surface, the design never rubs away, fades, or chips over time. This playful style pairs exceptionally well with monochromatic outfits, denim jackets, and tailored modern blazers, serving as a confident, retro-inspired conversation starter.
Condition equal blocks of opaque ivory and deep olive green clay, rolling both out into uniform rectangular blocks measuring one centimeter in height. Slice each block lengthwise into four identical square-profile strips using an acrylic ruler and a clean tissue blade. Assemble the alternating colored strips into an eight-bar striped block, press the layers firmly together to eliminate gaps, and slice the block crosswise into eight matching perpendicular square rods. Rotate every other rod ninety degrees to align opposing colors, reforming the strips into a unified eight-by-eight checkered cane block. Compress the cane evenly from all four sides using flat acrylic plates to lock the internal joints together. Use a thin tissue blade to slice paper-thin checkered sheets from the end of the cane, laying them side by side across a thin white backing slab. Roll lightly with parchment paper to fuse the layers, stamp out circular discs with a round steel cutter, pierce hanging holes, bake for thirty-five minutes, and attach earring hooks.
7. Chunky Sculptural Croissant Hoops
How to Create
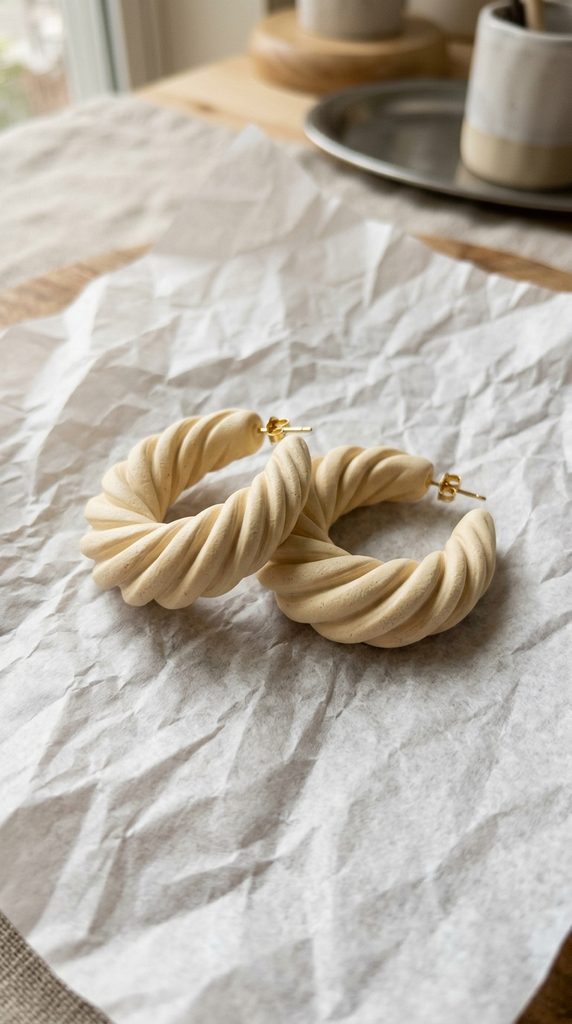
The chunky sculptural croissant hoop transforms flat clay crafting into three-dimensional wearable sculpture, referencing luxurious Parisian fine jewelry designs. This piece features a tapered, curved clay body wrapped in diagonal carved fluting or twisted folds that resemble a classic pastry silhouette. The thick center gradually tapers toward thin, delicate tips that curve backward to meet the earlobe, creating a flattering, three-dimensional frame around the face. Soft butter tones, warm caramels, and rich espresso shades enhance the textural curves, highlighting the play of light and shadow across the ridges. Despite their bold, chunky proportions, these hollow or lightweight solid-clay hoops remain remarkably comfortable to wear all day long without earlobe strain. This sculptural accessory delivers runway-level drama while remaining accessible for makers who enjoy freeform, tactile shaping techniques.
Condition two equal two-ounce portions of buttery cream polymer clay, rolling each portion into a smooth, symmetrical sphere between your palms to remove air pockets. Gently roll each sphere against your clean ceramic tile with an angled palm motion to shape a plump, double-tapered spindle that is thick in the middle and narrow at both ends. Using the blunt spine of your tissue blade or a smooth wooden modeling stylus, press deep diagonal grooves across the center of the spindle at evenly spaced forty-five-degree intervals. Carefully curve the fluted spindle around a cylindrical metal mandrel or a clean wooden dowel to form a classic, open C-shaped hoop. Carefully trim the narrow ends flat to provide a solid mounting surface, and pierce a shallow horizontal hole into one end to accept an earring post. Bake the curved hoops supported on a bed of cornstarch or crumpled foil for thirty-five minutes to prevent flat spots from forming during curing. After cooling, secure stainless steel post hardware into the pre-pierced ends with heavy-duty jewelry epoxy.

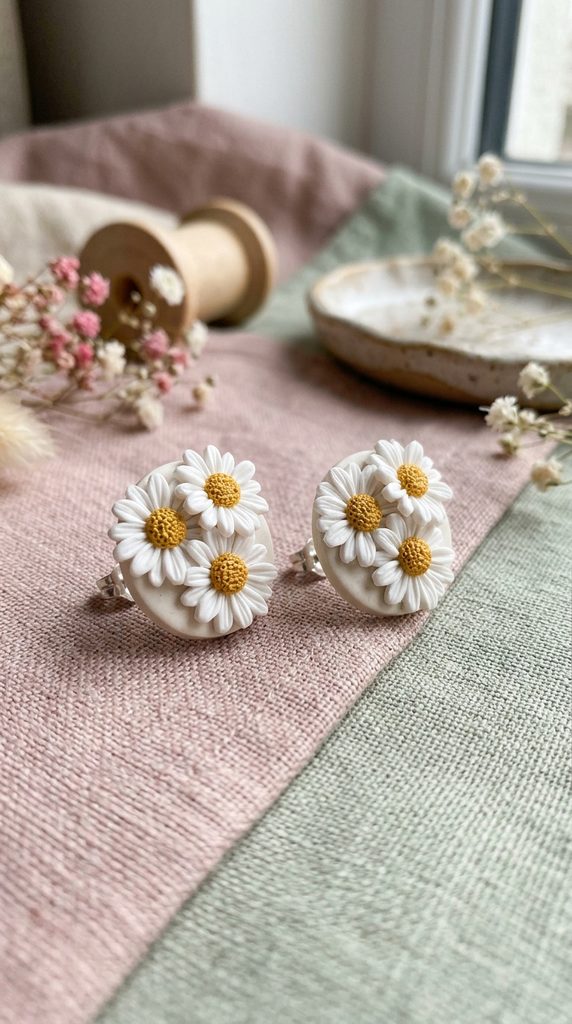
8. Hand-Sculpted Dimensional Daisy Stud Clusters
Step-by-Step Guide
The hand-sculpted dimensional daisy cluster introduces delicate romantic detailing through miniature clay modeling and tactile petal layering. This design features a gathering of small white daisies accented by warm golden-yellow centers, clustered together on a rounded or curved base plate. Each delicate petal is shaped individually, giving every flower organic character that celebrates the charm of handmade craftsmanship. The bright white and sunshine yellow colors pop cleanly against linen collars, summer knitwear, and pastel blazers. Stacking individual blossoms creates dimensional relief that elevates the design far beyond flat, printed floral patterns. Because the flowers are anchored to a shared flat base, the earring remains structurally sound and resistant to edge chipping, even with frequent daily wear.
Roll a small piece of conditioned white polymer clay into a narrow log, slicing it into twenty-four tiny, uniform fragments for each earring pair. Roll each tiny fragment into an elongated teardrop between your fingertips, flattening it gently against a clean tile using a smooth silicone tool to shape pointed daisy petals. Arrange five to six petals in a radiating circle atop a flat, thin, ten-millimeter circular clay foundation base. Mix a small amount of bright yellow clay with a speck of brown, roll it into a round center ball, press it into the middle of the petals, and texture it lightly with a metal needle tool. Assemble three overlapping daisy blossoms onto the foundation base to complete a dynamic floral cluster. Bake the assembled floral clusters on a ceramic tile for thirty minutes at 275 degrees Fahrenheit. Once the piece cures and cools completely, sand the rear foundation pad flat, clean it with alcohol, and adhere a flat hypoallergenic stud post using a drop of high-strength jewelry adhesive.
9. Monochromatic Matte Abstract Slab Drops
Setup Method
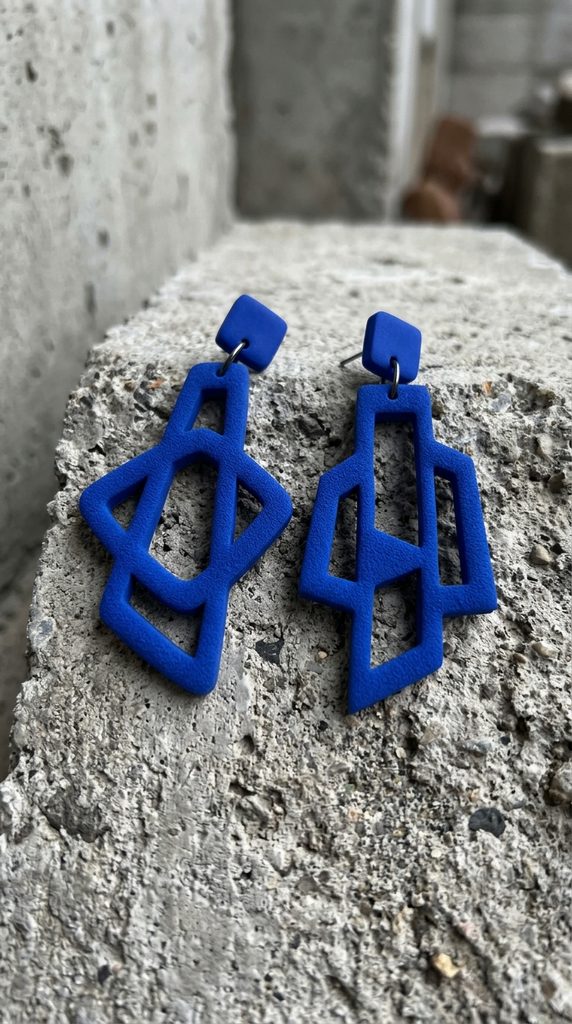
The monochromatic matte abstract slab drop relies on clean negative space, asymmetric balance, and refined single-tone color palettes to make a confident modern design statement. This architectural style combines organic, hand-drawn cutouts—such as hollow organic rings, curved pebbles, and oblong frames—arranged into an asymmetric balance. Using a single saturated tone, like cobalt blue, deep terracotta, or black, directs full visual attention toward the piece’s negative spaces and outer silhouettes. The smooth, ultra-matte surface absorbs ambient light, giving the clay the modern look of powder-coated metal or unglazed architectural ceramic. Because there are no multi-colored patterns or metallic accents to distract the eye, success depends entirely on balanced proportions and crisp, clean perimeter edges. This design appeals directly to lovers of Scandinavian design, contemporary fine art, and bold minimalist fashion.
Condition three ounces of rich cobalt blue polymer clay, rolling the slab flat to an exact three-millimeter depth between calibrated metal depth bars. Trace your custom abstract silhouette templates onto paper, cut them out, place them directly on the clay surface, and guide a sharp craft blade along the contours to cut the unique shapes. Alternatively, use modern nesting geometric cutters to punch out an off-center inner opening, creating a striking hollow frame. Smooth the outer and inner cut borders with a damp silicone brush or your fingertip dipped in a drop of water to remove any edge fraying before baking. Pierce connecting holes through the top and bottom margins using an acrylic piercing needle. Bake the cut pieces on your flat ceramic tile for forty minutes to ensure thorough, durable curing throughout the dense slab. Once cured and cooled, sand the outer perimeters with 600-grit wet sandpaper to ensure perfectly square, crisp edges, and join the components with matte jump rings.
10. Translucent Faux Amber and Tortoiseshell Drops
How to Create
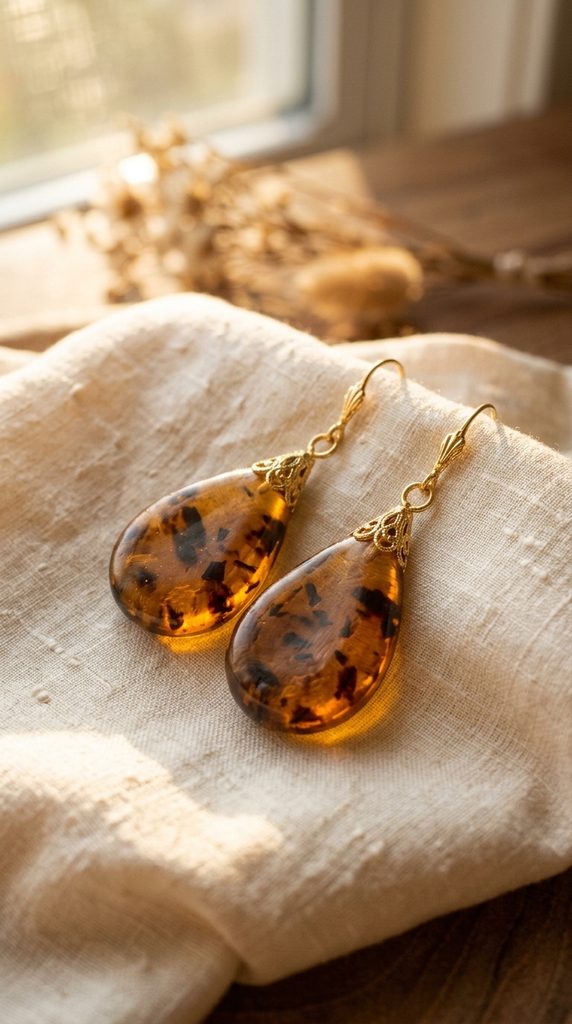
The translucent faux amber and tortoiseshell drop brings the rich, glowing warmth of classic vintage optical frames and retro jewelry to modern clay making. This design features interlocking discs or flowing teardrops crafted from semi-transparent amber, golden honey, and rich mahogany clay layers. When exposed to natural daylight, the translucent base allows sunlight to pass through the material, illuminating the rich dark tortoise spots suspended within the layers. This material interplay produces organic depth that changes dynamically depending on lighting and background fabric. Polishing the cured pieces to a glossy glass-like sheen enhances the vintage look, making these drops look like authentic carved resin or antique shell accessories. This timeless colorway pairs effortlessly with neutral wool overcoats, crisp white shirts, and everyday tortoiseshell eyeglasses.
Condition three parts translucent liquid clay or translucent block clay with a micro-drop of transparent yellow-orange alcohol ink to build a clear honey-amber foundation. Condition small separate portions of rich chocolate brown and black clay, tearing them into thin, paper-like ragged flakes. Layer the dark torn flakes randomly between thin sheets of the translucent honey clay, stacking them into a multi-layered block to create organic suspended depth. Compress the layered block gently by hand to bond the strata, then use a tissue blade to slice thin cross-sectional sheets from the stack, revealing the floating tortoise spots. Lay these patterned slices over an acrylic tile, smooth the seams with a rolling tool under parchment paper, and cut out teardrop drop shapes. Bake at the precise temperature recommended for translucent clays for forty minutes, cool in an ice-water bath to maximize clarity, sand through 1200 grit, and finish with a microcrystalline wax polish before adding jewelry hardware.

Common Beginner Mistakes and How to Avoid Them
The most common mistake novice makers encounter is underbaking their polymer clay pieces out of fear of scorching the material. Polymer clay is composed of PVC particles suspended in liquid plasticizers; it requires sustained heat to fully cross-link its polymer chains and achieve its intended flexibility and strength. When baked at low temperatures or for too short a duration, the resulting earrings remain brittle, snapping easily under the light pressure of opening jump rings or dropping on a floor. To prevent this, place a dedicated, calibrated oven thermometer inside your countertop oven to monitor true internal temperatures, as residential oven dials frequently display inaccurate readings. Another frequent misstep is failing to eliminate trapped air pockets during the conditioning phase, which expand into visible surface bubbles and blisters during baking. Always roll and fold your clay in a single direction through your pasta roller or rolling pin, rather than folding edges haphazardly, to let trapped air escape smoothly out the sides. Finally, avoid using standard hot melt glue or super glue to attach metal stud backings; direct surface adhesion fails over time due to seasonal moisture changes. Always use a high-performance two-part epoxy paste, mechanically embed posts into a thin backing layer of clay, or cure the metal base directly beneath an overlay of fresh clay.
Practical Tips for Better Results
Achieving professional boutique-quality earrings requires careful attention to surface preparation, edge smoothing, and clean workspace hygiene. Keep a lint roller, a pack of alcohol-based wipes, and a pair of clean nitrile gloves at your workbench to protect light-colored clay slabs from dust and skin oils. When cutting shapes from rolled slabs, place a sheet of thin plastic kitchen wrap over the clay surface before pressing down with your metal cutters; this simple step rounds off sharp top borders naturally, cutting down on post-bake sanding time. To cure items with zero flat shiny spots or heat marks on the back, support your clay pieces on a bed of simple baking soda, loose cornstarch, or plain cardstock during their oven cycle. After baking, sand all edges underwater using wet-dry automotive finishing sandpaper, progressing through 400, 600, 800, and 1000 grits to produce a velvety satin finish without kicking fine dust into the air. Clean all pierced jump ring holes with an alcohol-dipped swab, and always use flat-nose pliers to twist jump rings open laterally rather than pulling them apart, preserving the clean circular shape of your jewelry findings.
Styling, Presentation, or Organization Ideas
Artisan polymer clay earrings deserve thoughtful organization and display methods that protect delicate surfaces while showcasing their creative textures. For home storage, use hanging linen wall hangings, slotted wooden organizers, or wire mesh display frames that let statement dangles hang freely without tangling or scratching adjoining pieces. Storing clay jewelry flat in divided acrylic jewelry boxes lined with soft velvet protects delicate floral petals and brass findings from moisture and scratches. If you are presenting earrings as thoughtful handmade gifts or preparing inventory for pop-up craft markets, mount finished pairs onto custom, thick linen-cardstock display cards stamped with your signature maker mark. Use soft earth-toned packaging—such as unbleached kraft paper jewelry boxes, natural cotton pouches, or tied wax-paper envelopes—to reinforce your brand’s sustainable, artisan roots. When styling outfits around statement clay pieces, let the earrings lead the look: pair bold, high-contrast geometric cascades with clean, solid-colored clothing, or coordinate smaller botanical studs with textured knitwear to add subtle, intentional detail to everyday style.
Budget and Time Planning
Polymer clay jewelry making is an exceptionally economical hobby and small business model when managed with a structured setup strategy. A single standard two-ounce block of polymer clay costs very little yet yields four to six complete pairs of medium-sized statement earrings, keeping material costs remarkably low per finished piece. To optimize your starter budget, avoid buying complex electronic tools early on; invest in a high-grade primary color clay palette (cyan, magenta, yellow, black, and white) that you can custom-blend into any trendy seasonal shade. In terms of working time, working in structured batch assemblies is far more efficient than making individual pairs from start to finish. Dedicate your first session to conditioning clay, blending custom color families, and rolling foundational slabs; spend your second session cutting shapes, piercing holes, and baking batches together on shared tiles. Reserve a final focused session for sanding edges, buffing surfaces, and assembling metal jump rings and post findings. This assembly-line approach allows you to produce eight to ten professional, finished pairs in a single productive weekend.
Creative Expansion and Advanced Inspiration
Once you develop confidence in basic rolling, baking, and hardware assembly, consider exploring advanced mixed-media techniques to expand your jewelry designs. Incorporate liquid polymer clay techniques, utilizing fine-point applicator tips to paint raised, glass-like line work or glossy lettering over cured, matte geometric slabs. Experiment with metal leaf application by pressing genuine gold, silver, or copper foil onto raw clay slabs before running them through your pasta roller, creating an organic, weathered crackle finish across modern shapes. You can also explore hand-carved sgraffito methods, coating a cured white base slab with colored liquid clay or ceramic underglaze and scratching fine line patterns into the surface with a steel linoleum carving gouge before a secondary cure. Combine lightweight polymer clay elements with complementary organic materials like carved hardwood pendants, macrame fiber fringe, or freshwater baroque pearls to create multi-textured statement jewelry. Mastering these technical skills frees your creativity, empowering you to design durable, high-impact accessory collections that highlight the versatility of handmade polymer clay art.
Leave a Reply