Pastel polymer clay jewelry represents a refined intersection of contemporary wearable art, hands-on craft exploration, and modern design principles. This comprehensive DIY tutorial provides a step by step guide to designing, sculpting, and finishing ten distinctive pastel jewelry pieces from home. Readers will learn the essential mechanics of handling oven-bake clay, including precision slab conditioning, custom color blending, clean silhouette cutting, and long-lasting hardware assembly. The featured concepts explore varied forms, including tiered geometric drop earrings, arch pendants, organic botanical hair clips, and minimalist beaded chokers. Beyond structural creation, this guide addresses critical technical requirements such as accurate curing temperatures, scratch-resistant sanding techniques, and protective sealant application. Crafting miniature clay accessories develops fundamental tactile control and spatial planning skills, yielding versatile, lightweight pieces suitable for daily wear or elevated gifting. The accessibility of polymer clay makes it an ideal creative project for both complete novices and seasoned makers seeking fresh artistic inspiration. By working through these practical methods, crafters can repurpose modest blocks of clay into durable, gallery-quality jewelry collections that balance subtle pastel tones with refined aesthetic harmony.
Why Pastel Polymer Clay Jewelry Is Trending and Practical
The continued popularity of pastel polymer clay jewelry across contemporary design platforms stems from its exceptional versatility, featherweight comfort, and approachable barrier to entry. While traditional metalwork or resin crafts require specialized studio machinery and protective ventilation enclosures, polymer clay allows makers to produce professional accessories using simple household ovens and handheld cutters. Pastel colorways—such as muted lavender, soft sage, powdery sky blue, gentle buttercup, and dusty blush—remain a fixture in modern fashion because they function as versatile neutrals that effortlessly complement varied wardrobe palettes. From a practical standpoint, cured polymer clay provides notable structural durability while remaining remarkably light on the earlobes, preventing the drooping or discomfort often caused by heavy acetate or cast-metal earrings. For DIY enthusiasts, working with clay delivers an easy project framework where mistakes can be re-kneaded and reshaped before baking. This creative medium accommodates limitless aesthetic variation, from sculptural matte finishes to high-gloss terrazzo patterns, empowering crafters to build personalized collections on modest budget ideas.
Essential Materials, Tools, and Advance Preparation
Achieving pristine, gallery-worthy clay jewelry requires methodical preparation, lint-free workspaces, and appropriate sculpting instruments. Essential materials include premium oven-bake polymer clay blocks in primary pastel shades and pure white for custom tint dilution. Foundational tools include an acrylic rolling roller or manual clay conditioning pasta machine, high-carbon steel tissue slicing blades, precision craft knives, and sharp stainless steel clay cutters in various geometric shapes. Prepare an unblemished, non-porous working surface using smooth ceramic tiles or tempered glass plates to prevent clay adherence. For finishing and hardware attachment, assemble wet-or-dry silicon carbide sandpaper in 400, 800, and 1200 grits, a handheld hand-twist pin vise drill with micro drill bits, flat-nose jewelry pliers, hypoallergenic surgical steel earring posts, and sturdy jump rings. Thorough preparation starts by wiping hands, work surfaces, and tools with isopropyl alcohol or lint-free baby wipes to eliminate stray dust fibers that readily stick to pale clay. Pre-conditioning the clay through repeated folding and rolling ensures optimal plasticizer distribution, eliminating internal air pockets and preventing brittle breaks after the baking cycle.
1. Minimalist Dual-Tier Arch Drop Earrings
Step-by-Step Guide
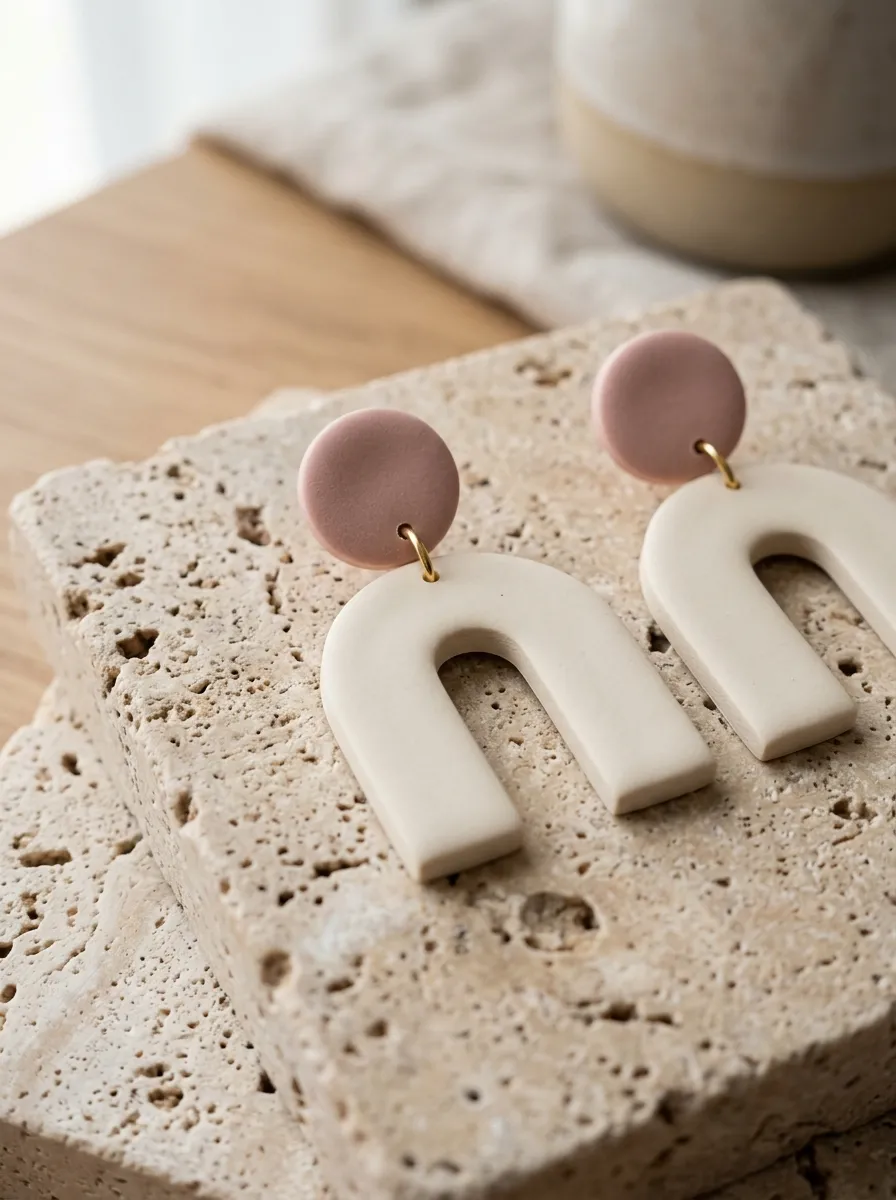
The minimalist dual-tier arch drop earring balances architectural structure with gentle pastel color blocking, making it an exemplary introduction to geometric slab design. This concept utilizes two interlocking U-shaped rainbow arch components: an upper solid stud anchor in dusty blush and a lower swinging pendular arch in muted cream or pale peach. The clean negative space within the lower arch frames the jawline softly without introducing visual heaviness or excessive physical weight. Clean lines and razor-sharp perimeter edges are fundamental to the modern design appeal of this piece, elevating it above casual novelty crafts. Crafters can adapt the color scheme to reflect tonal gradients, using varying saturations of a single pastel hue or pairing complementary pastels like mint and soft coral. The flat planar surface highlights the velvety matte texture of well-conditioned polymer clay, serving as an understated accent that pairs naturally with casual linen attire or formal evening wear.
To construct the arches, condition equal portions of blush and cream polymer clay until pliable, passing each through a clay roller to create a uniform three-millimeter slab. Lay the slabs onto a ceramic tile, gently smoothing away surface bubbles with an acrylic roller. Press a nested stainless steel arch cutter firmly downward through the clay, rocking the blade slightly before lifting it straight up to ensure crisp, vertical sidewalls. Cut two matching top stud components using a smaller solid rounded arch cutter. Place the ceramic tile directly into an oven preheated to 275 degrees Fahrenheit, baking the pieces undisturbed for thirty-five minutes to achieve complete plasticization. Allow the components to cool completely to room temperature before handling. Use a hand-twist pin vise equipped with a 1.2 mm drill bit to create connecting holes centered near the adjoining edges. Connect the upper and lower arches using a five-millimeter brass jump ring opened with flat-nose pliers, and attach hypoallergenic titanium posts to the back of the blush stud using two-part jewelry epoxy.
2. Speckled Terrazzo Pastel Slab Studs
Execution Process
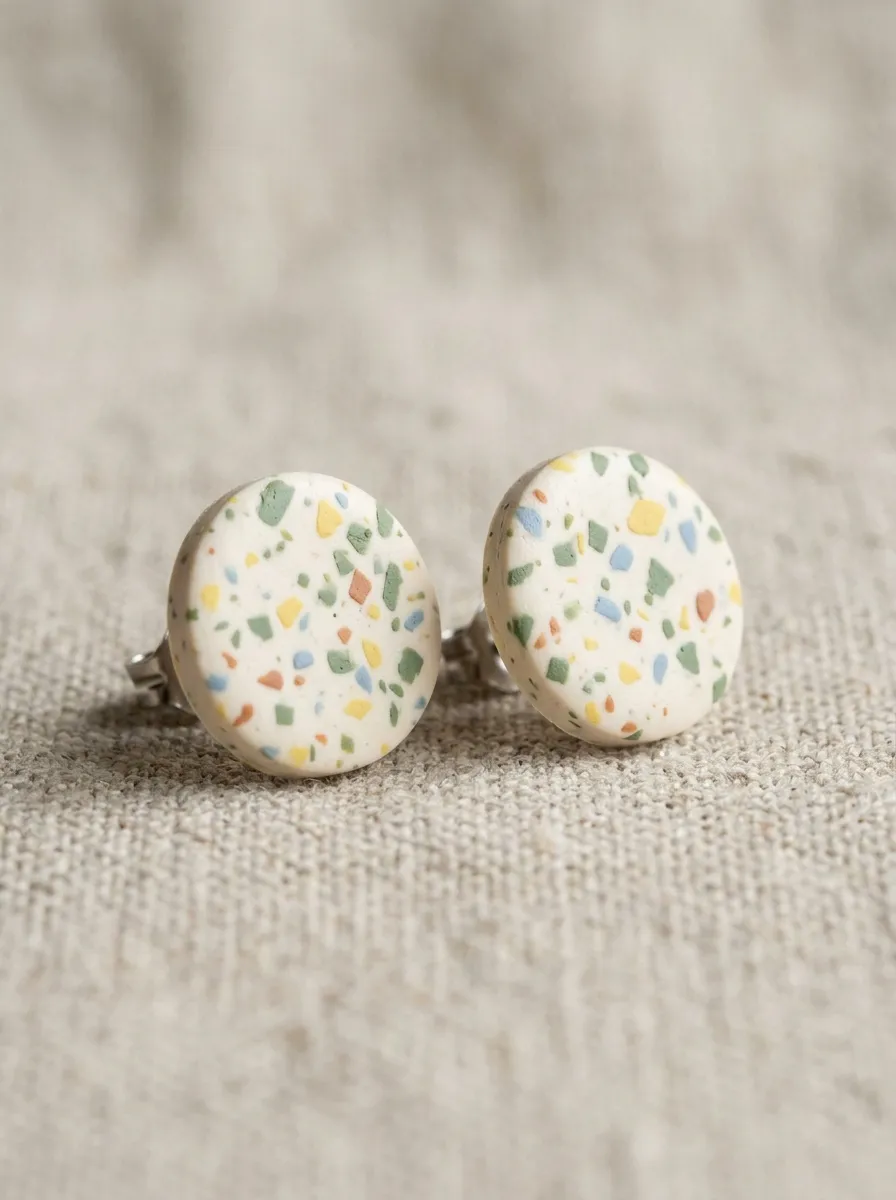
Speckled terrazzo slab studs capture the sophisticated mosaic aesthetic of mid-century Italian masonry in a miniature, wearable format. This creative project relies on embedding micro-shards of contrasting pastel clay fragments into a pale ivory or soft sand foundation slab. The visual charm comes from the deliberate irregularity of the flecks: tiny angular inclusions of sage green, pale buttercup, sky blue, and terracotta scatter across the surface, mimicking polished stone chips. Once flattened into a cohesive single plane, the slab is cut into clean circular or hexagonal stud pairs. This technique offers an exceptional avenue for zero-waste crafting, as it transforms residual clay scraps from previous projects into decorative design assets. The resulting studs provide a versatile accent suitable for everyday wear, offering subtle visual texture that enhances minimalist outfits without overwhelming facial features. The smooth composite surface can be buffed to an organic satin sheen, emphasizing tactile craftsmanship while celebrating artisanal individuality.
Begin by rolling out an opaque ivory clay base slab to a four-millimeter thickness on a glass work tile. Take cured or firm raw clay remnants in sage, buttercup, soft blue, and terracotta, slicing them into micro-chips measuring less than one millimeter across using a rigid slicing blade. Scatter these colored fragments randomly over the ivory base, ensuring balanced color distribution across the surface. Lay a sheet of parchment paper over the scattered chips and roll an acrylic roller firmly over the surface to press the flecks flush with the base clay, reducing the overall thickness to three millimeters. Peel away the parchment paper carefully. Cut paired stud components using a twelve-millimeter circular stainless steel cutter. Transfer the cut studs on their tile into an oven preheated to 275 degrees Fahrenheit and bake for thirty minutes. After cooling, sand the perimeter edges under running water using 800-grit wet sandpaper to remove micro-burrs, dry thoroughly, and adhere flat-pad surgical steel earring posts to the backs with liquid polymer clay, curing for an additional ten minutes.
3. Sculpted Buttercup Daisy Statement Ring
Setup Method
The sculpted buttercup daisy statement ring introduces three-dimensional sculptural techniques, moving beyond flat planar slabs into organic floral relief work. This design features a central layered daisy blossom sculpted from pale buttercup yellow clay, centered over an adjustable gold-plated ring blank or a handcrafted clay band. Each petal is individually rolled, tapered, and textured to produce authentic botanical curvature that rises gently above the finger. A slightly darker pastel honey-yellow stamen cluster provides subtle tonal contrast at the heart of the flower, adding realistic depth. This statement ring embraces playful retro aesthetics while remaining sophisticated through the use of soft, desaturated pastels rather than harsh primary colors. The compact, rounded geometry minimizes the risk of snagging on clothing during daily wear, provided the petals are securely bonded during the pre-bake assembly. The sculptural presence transforms modest materials into a tactile focal piece that showcases delicate handmade precision.
Start by rolling twelve miniature teardrop-shaped spheres of pale buttercup clay, ensuring each sphere measures approximately three millimeters in diameter. Lay the teardrops onto a clean ceramic tile, flattening the wide rounded end of each sphere with a rounded ball-stylus tool to create flared petals with natural cupped edges. Arrange six flattened petals in a circular radial pattern on the tile, slightly overlapping the adjacent edges to form the bottom floral layer. Position the remaining six petals on top, staggering them across the gaps of the lower tier to build three-dimensional volume. Roll a four-millimeter sphere of soft honey-toned clay, flatten it into a dome, and texture the surface using a stiff wire brush to mimic natural stamen pollen. Press the textured stamen firmly into the center of the petals. Bake the sculpted blossom at 275 degrees Fahrenheit for thirty minutes. Once cooled, roughen the back surface of the flower with 400-grit sandpaper, apply a drop of industrial cyanoacrylate adhesive, and clamp the floral element securely onto a flat-pad brass ring base for twenty-four hours.
4. Marbled Mint and Pearl Pendant Necklace
How to Create
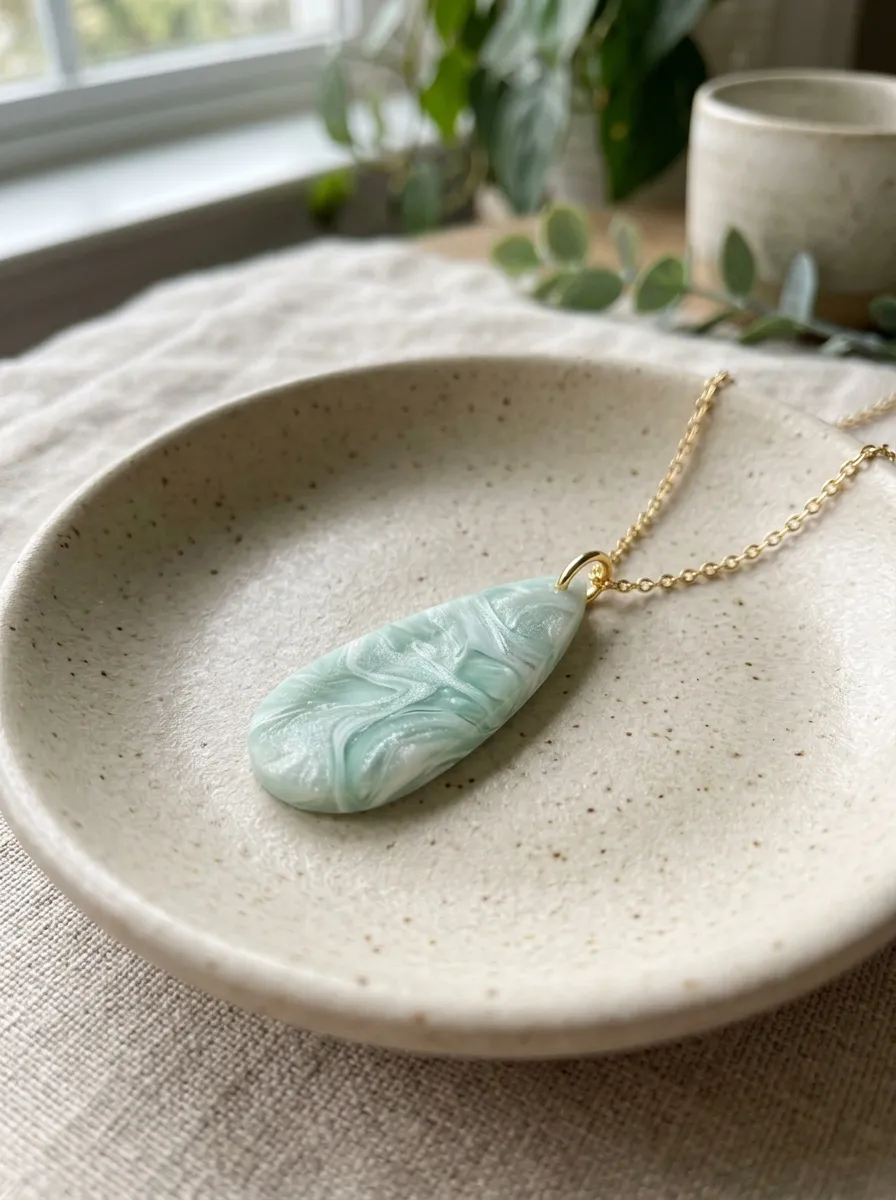
The marbled mint and pearl pendant necklace demonstrates fluid stone-imitation techniques, capturing the organic swirls of polished jade and seafoam agate. This design features a teardrop or elongated rectangular pendant exhibiting gentle striations of soft mint green, translucent white, and shimmering pearl clay. The marbling method produces natural fluid lines where colors blend without becoming muddy, creating a unique pattern in every cut piece. The inclusion of translucent and pearlescent clay layers introduces light refraction, giving the cured pendant optical depth that mimics natural minerals. Paired with a delicate gold-filled or sterling silver cable chain, this pendant exemplifies refined minimalist style. Its smooth, polished face sits comfortably against the collarbone, serving as an elegant centerpiece for daytime blouses and open-collar evening wear. The project allows beginners to practice controlled clay twisting and ribbon-folding techniques that establish reliable foundations for complex pattern canes.
To produce the marbled slab, roll three equal snakes of clay: one pale mint green, one pearl mica clay, and one translucent clay. Press the three ropes together side by side, twisting them into a tight spiral coil until the colors begin to compress. Fold the twisted coil in half, roll it smooth against your work surface, and twist the rope again in the opposite direction. Repeat this folding and twisting process three times to create fine, ribboned layers without over-blending the individual colors. Compress the twisted mass into a compact block and slice thin two-millimeter cross-sections using a flexible tissue blade. Lay the sliced veneers edge to edge on a backing slab of solid white clay, rolling smooth through parchment paper to consolidate the layers. Cut out an elongated teardrop shape using a metal cutter. Use a needle tool to create a clean horizontal hole through the top tapered tip before baking. Cure at 275 degrees Fahrenheit for forty minutes, sand progressively up to 1200 grit for a glassy stone finish, and thread onto a gold cable chain.
5. Segmented Lavender Caterpillar Hair Barrettes
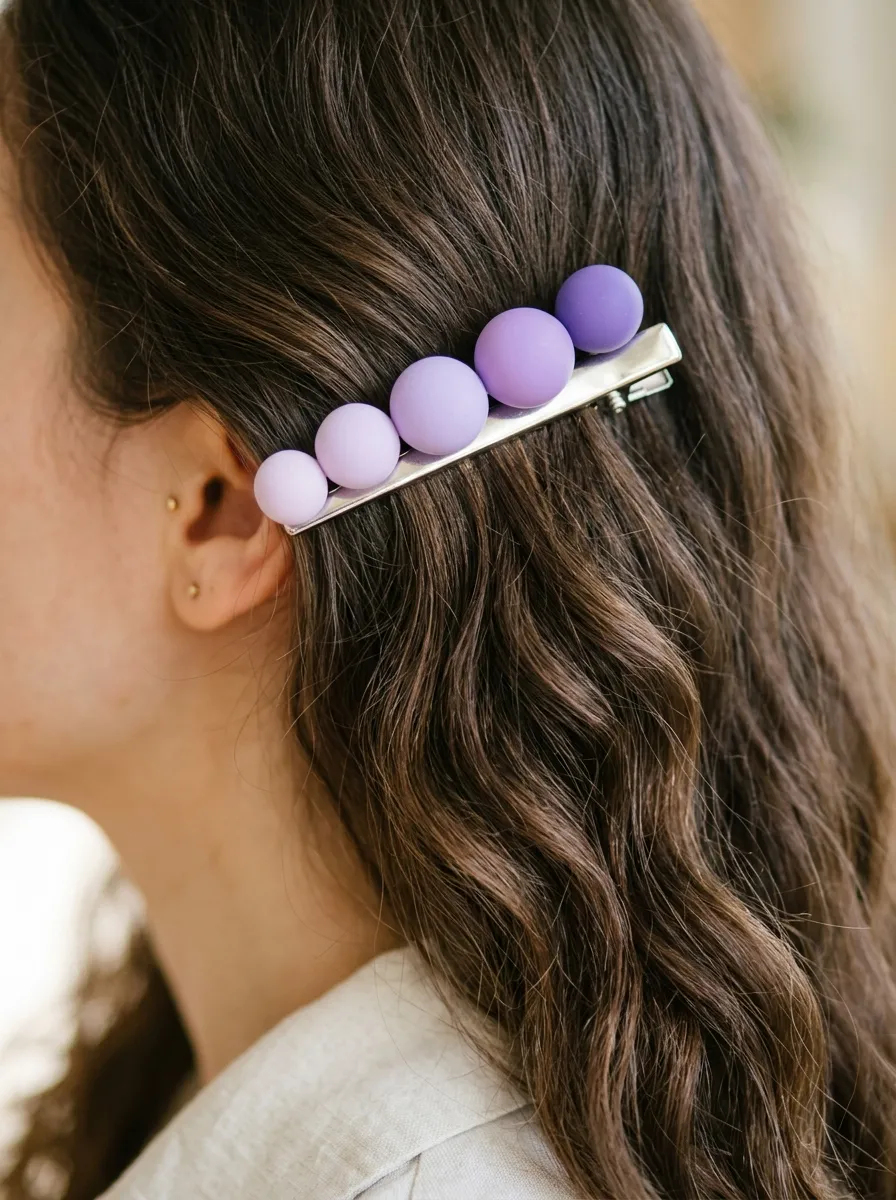
Execution Process
The segmented lavender caterpillar hair barrette unites functional hair styling hardware with playful dimensional clay modeling. This design features five graduated pastel spheres in descending tones of lavender, lilac, and pale heather, arranged in a linear row atop a silver alligator hair clip. The rounded, pillowy spheres create a tactile dimensional profile that elevates simple hairstyles, such as side-swept bangs or half-up twists. The tonal transition from deep pastel violet to airy lilac establishes a sophisticated ombre progression that catches natural daylight. Because hair accessories endure frequent handling and mechanical spring tension, the clay components must be anchored using industrial-grade bonding techniques and structural clay backs. This accessory serves as a functional decorative accent that adds a subtle pop of color to everyday styling routines. Its straightforward assembly sequence makes it an approachable entry point for makers interested in expanding into non-earring accessory categories.
To build the barrette, mix five distinct tones of lavender by systematically adding white clay to a base violet hue in increasing proportions. Roll one sphere from each color batch, starting with an eight-millimeter sphere for the largest tone and reducing each subsequent sphere by one millimeter down to a four-millimeter tail sphere. Press the spheres onto a ceramic tile in a straight line, gently flattening the bottom side of each ball against the tile while allowing the top hemisphere to retain its rounded dome. Ensure adjacent spheres press firmly into one another along their sides to create strong surface-contact bonds. Bake the segmented assembly on the tile at 275 degrees Fahrenheit for thirty-five minutes, allowing it to cool inside the oven to prevent thermal shock. Roughen the flat back of the cooled clay segment and the top face of a stainless steel alligator clip using 400-grit sandpaper. Apply a generous layer of industrial-strength two-part epoxy along the metal barrette, press the clay segment firmly into place, and allow the adhesive to cure undisturbed for a full twenty-four hours.
6. Layered Pastel Sunset Horizon Brooch
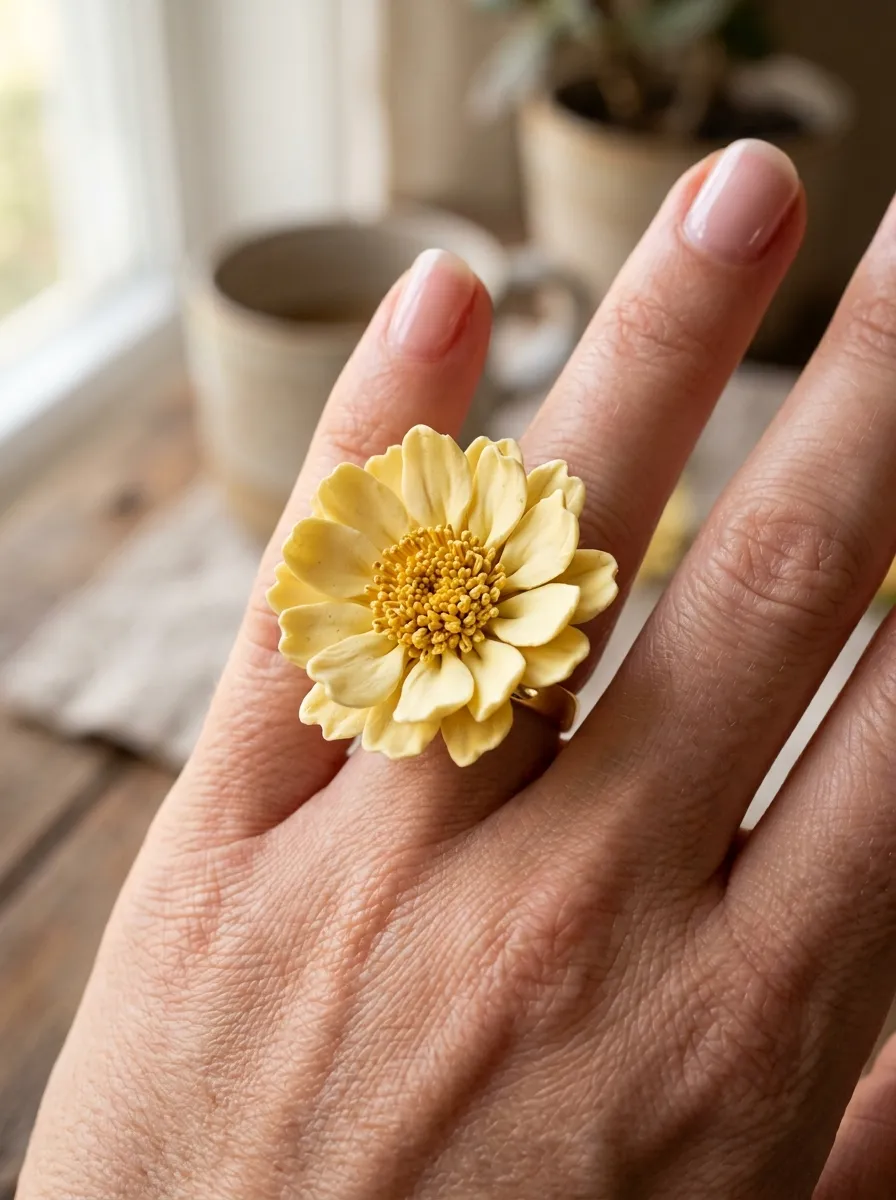
Step-by-Step Guide
The layered pastel sunset horizon brooch translates scenic landscape art into a wearable geometric textile accent. This concept utilizes a half-circle or arch frame containing horizontally stacked bands of color that evoke a twilight horizon: dusty lilac at the base, muted mauve, soft peach, and pale buttercup at the upper rim. The distinct linear color strata are achieved through precision slab slicing, where extruded clay strips are fitted together seamlessly before cutting. The resulting flat, planar brooch functions as a wearable art pin, perfect for adorning heavy knit cardigans, canvas tote bags, or wool coat lapels. The calm, nostalgic gradient aligns with modern landscape illustration and minimalist home decor themes, showcasing how graphic compositions can be adapted to personal adornment. Its solid single-piece construction delivers excellent structural durability, ensuring the pin holds its shape without bowing or cracking during daily use.
Prepare four distinct clay slabs rolled to an identical three-millimeter thickness in dusty lilac, mauve, soft peach, and buttercup. Using an acrylic ruler and a straight tissue blade, cut a precise six-millimeter-wide strip from each colored slab. Align the strips edge-to-edge on a clean glass tile in vertical sequence from darkest to lightest, pressing the seams together with gentle fingertip pressure. Place a sheet of tracing paper over the joined strips and roll lightly with an acrylic roller to blend the horizontal seams into an unbroken, flat sheet. Align a two-inch semi-circle cutter over the joined slab so the horizon lines divide the arc evenly, and press downward firmly to cut the brooch body. Bake the piece at 275 degrees Fahrenheit for forty minutes on a flat ceramic tile. Once cooled, sand the outer curved perimeter smooth using 600-grit wet sandpaper. Secure a two-inch locking safety pin bar to the reverse side using bakeable liquid polymer clay and an overlay strip of scrap clay, re-curing for fifteen minutes to embed the pin hardware permanently.
7. Pastel Checkerboard Chunky Hoop Earrings
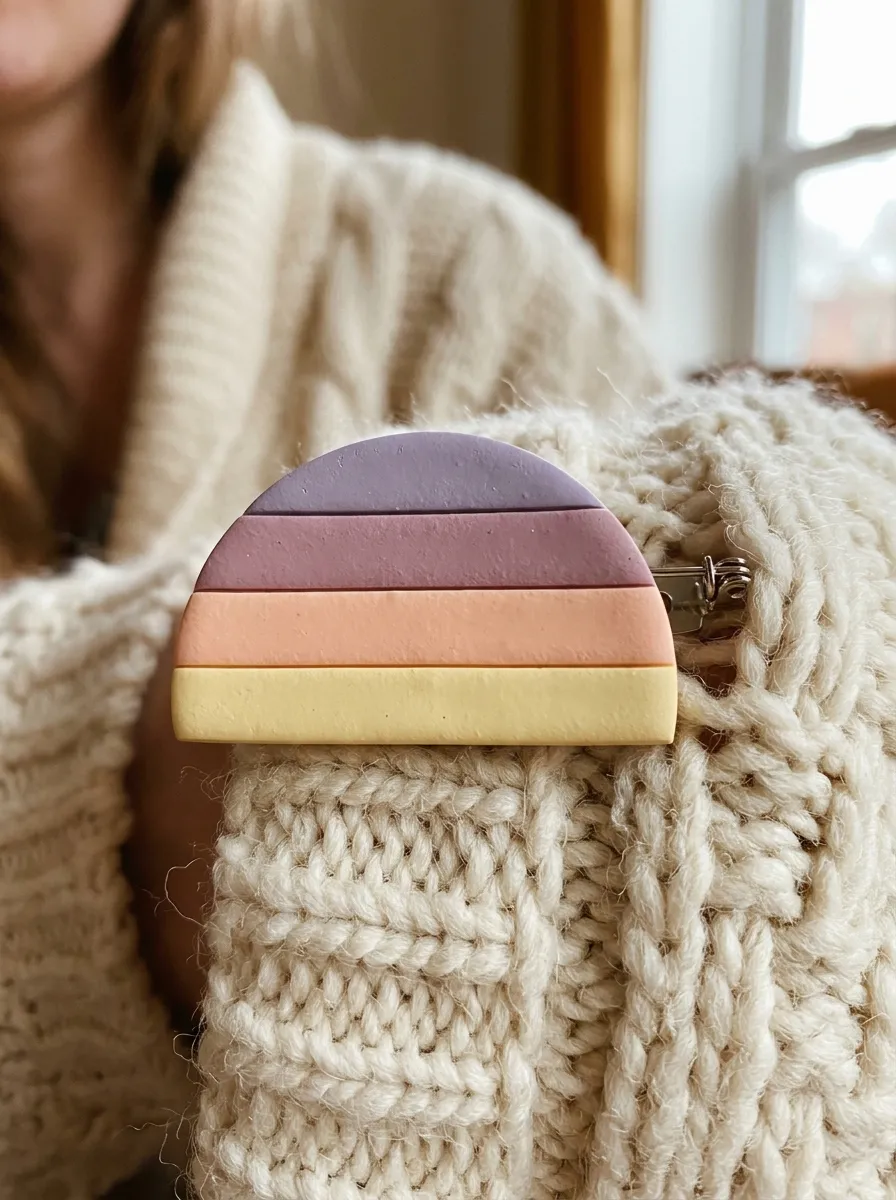
How to Create
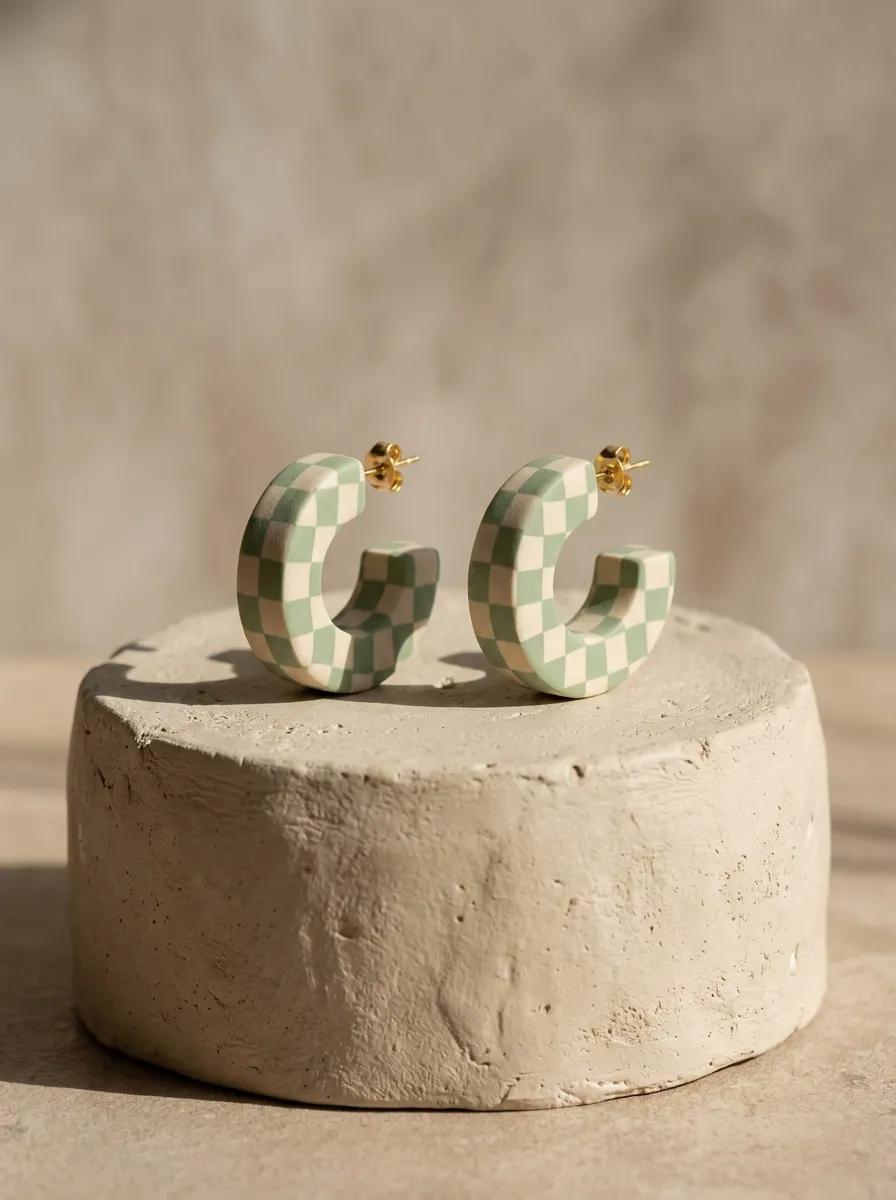
Pastel checkerboard chunky hoop earrings explore graphic retro patterns, blending vintage mod aesthetics with contemporary muted colorways. This design features thick, C-shaped hoop earrings showcasing a miniature checkerboard pattern composed of alternating squares of soft sage green and warm cream. Achieving crisp, undistorted grid lines requires building a geometric cane block that is reduced and sliced with care. The bold, chunky silhouette provides substantial visual presence while the low density of cured clay ensures the hoops remain comfortable for extended wear. The clean contrast between the checkered surface and gold hardware introduces a high-end designer sensibility that elevates everyday outfits. This project introduces crafters to fundamental cane-building methodologies, a cornerstone of advanced polymer clay artistry that develops spatial planning and uniform extrusion skills applicable to diverse creative projects.
To construct the checkerboard cane, roll out two identical slabs of clay in sage green and cream, each measured to five millimeters in thickness. Stack the two slabs directly on top of each other, trim the edges square, and slice the stack vertically into five-millimeter-wide square rods. Rotate every other rod one hundred and eighty degrees so the cream and sage squares alternate, forming a four-square grid cane. Compress the square cane gently from all four sides using flat acrylic blocks to bond the seams, maintaining the sharp square profile. Slice two-millimeter-thick patterned tiles from the cane face using a sharp tissue blade, laying them edge-to-edge on a three-millimeter-thick cream backing slab to form an expansive checkered sheet. Cut two rectangular strips measuring one-half inch wide by two inches long. Wrap each strip around a wooden baking dowel lined with parchment paper to establish a curved C-shaped hoop profile. Bake the hoops on the dowel at 275 degrees Fahrenheit for thirty-five minutes, cool, and attach titanium earring posts to the interior top curve with epoxy.
8. Dainty Pastel Floral Bead Choker
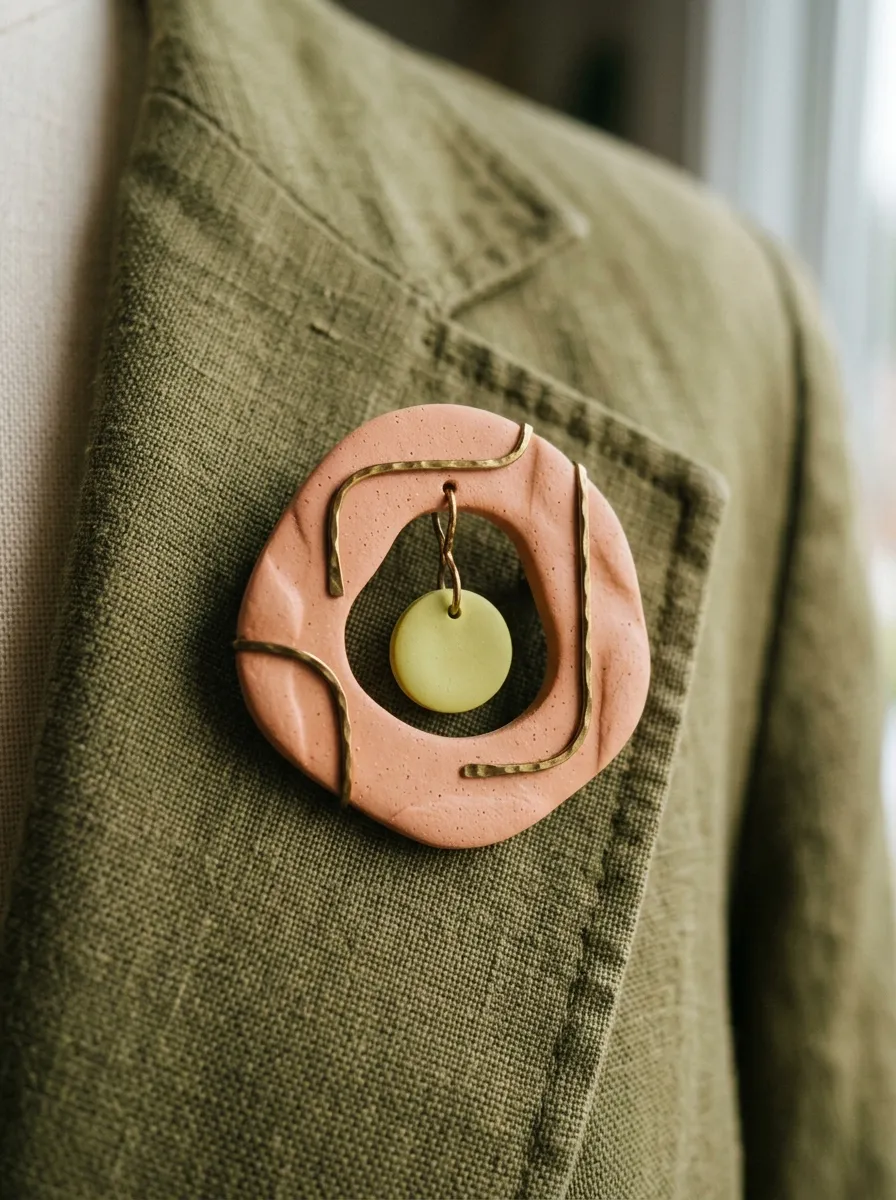
Setup Method
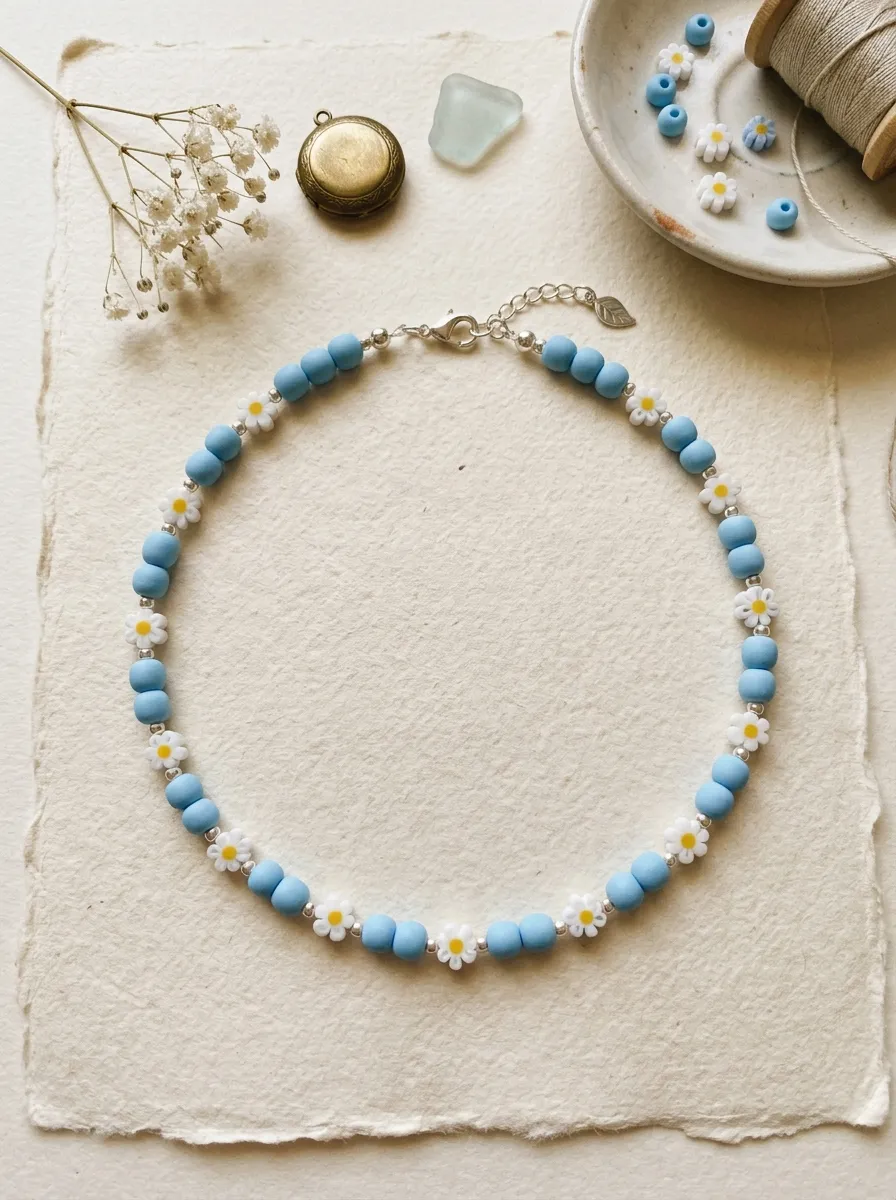
The dainty pastel floral bead choker applies delicate miniature modeling techniques to create a flexible, wearable botanical collar. This design features hand-rolled five-millimeter clay beads in pale sky blue, interspersed with miniature millefiori clay daisy beads showcasing white petals and pale yellow centers. Strung along a flexible nylon-coated stainless steel wire, the repeating floral pattern creates a nostalgic, summery aesthetic reminiscent of vintage beaded jewelry. The organic variations inherent in hand-rolled beads lend an authentic artisanal charm that distinguishes the piece from mass-produced plastic accessories. The lightweight clay components rest gently along the collarbone without scratching delicate skin, while the secure crimp-bead hardware guarantees structural longevity. This project introduces makers to round bead-rolling, precision center-hole piercing, and professional stringing techniques, broadening their jewelry-making skillset beyond flat slab construction.
To produce the uniform spherical beads, roll a thin snake of sky blue clay and slice it into four-millimeter segments using an acrylic ruler to ensure identical clay volume. Roll each segment between your palms into a smooth sphere, then carefully pierce the center with a fine bead-piercing needle, rotating the bead gently to avoid flattening the spherical profile. To build the miniature daisy beads, wrap five thin white clay cylinders around a central yellow cylinder, compress into a tiny four-millimeter cane, and slice into cross-sections, piercing each flower through its center. Thread all raw beads onto length of stiff beading wire suspended across an oven-safe metal baking rack to prevent flat spots from developing during curing. Bake at 275 degrees Fahrenheit for thirty minutes. Once cooled, string the beads onto a sixteen-inch length of flexible multi-strand beading wire in an alternating pattern of three blue beads to one daisy bead. Terminate the wire ends with sterling silver crimp tubes and attach a secure lobster claw clasp using flat-nose pliers.
9. Abstract Pastel Cutout Dangle Brooch
Step-by-Step Guide
The abstract pastel cutout dangle brooch combines playful kinetic movement with asymmetrical mid-century modern design sensibilities. This design features a main asymmetrical pebble-shaped base in muted dusty peach, containing an internal organic negative cutout. Suspended beneath the central cutout window is a swinging, polished disc in soft chartreuse or mint green, connected by a small internal jump ring. As the wearer moves, the suspended inner element sways gently, introducing eye-catching kinetic energy to the piece. The soft pastel palette tempers the bold geometric styling, yielding a balanced, wearable art accent suitable for jackets, scarf wraps, and high-neck tops. The project challenges makers to master interior negative-space cutting and precision hole placement on irregular contours, building advanced hand control and finishing skills that elevate the artisanal quality of the finished collection.
Begin by rolling a four-millimeter slab of dusty peach clay onto a ceramic tile, smoothing the surface with an acrylic roller. Using a freeform organic shape cutter or a precision craft knife, cut an asymmetrical oval pebble measuring two inches across. Align a smaller three-quarter-inch circular cutter within the upper quadrant of the pebble, pressing through to create the interior negative window, and discard the cutout slug. Cut a separate nine-millimeter circular disc from a two-millimeter slab of soft chartreuse clay to serve as the suspended interior element. Use a needle tool to create a clean vertical hole through the bottom rim of the outer window and a matching hole through the top edge of the chartreuse disc. Bake both elements flat on the tile at 275 degrees Fahrenheit for thirty-five minutes. After cooling, sand all interior and exterior contours with 800-grit wet sandpaper to round the edges smoothly. Connect the chartreuse disc into the peach window using a four-millimeter gold jump ring, and affix a safety pin bar to the upper reverse side using epoxy.
10. Organic Scalloped Edge Pastel Hair Comb
Execution Process
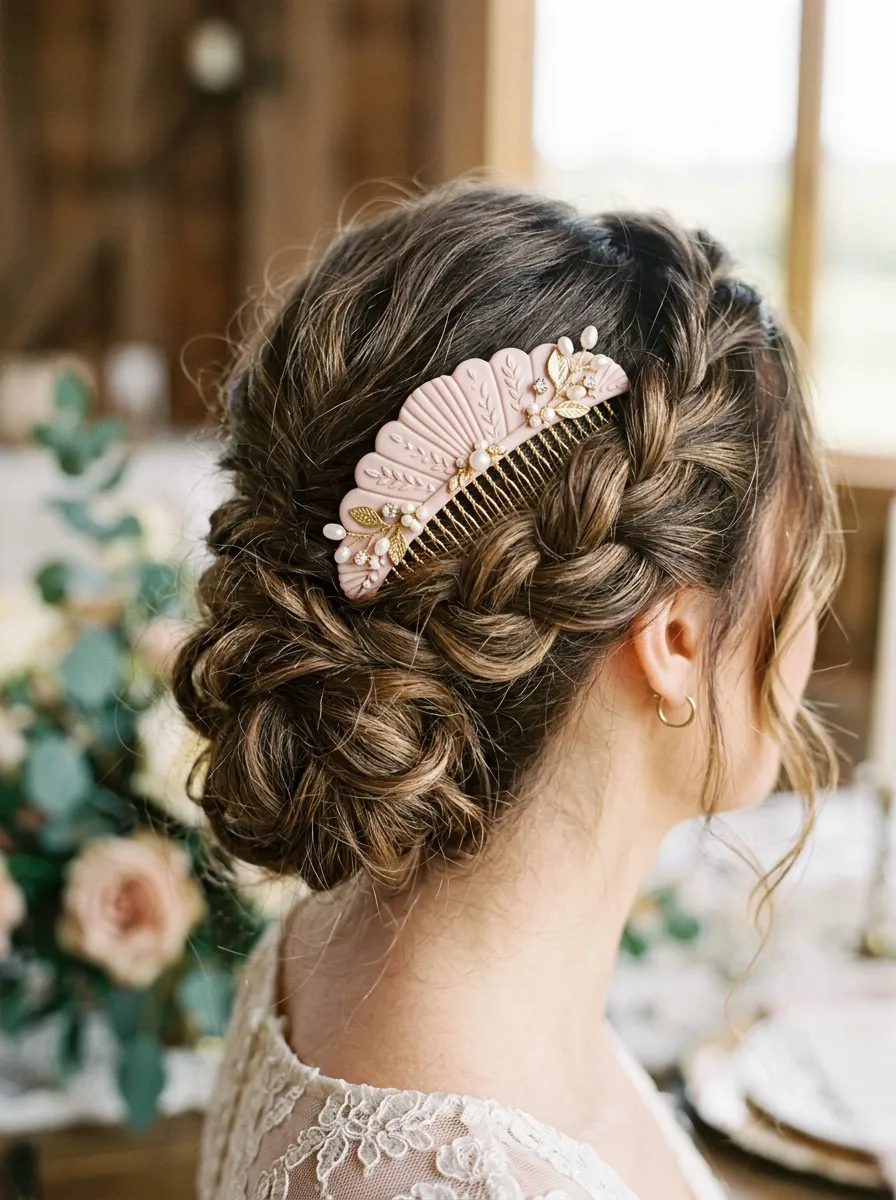
The organic scalloped edge pastel hair comb transforms traditional hair hardware into a romantic, sculptural floral headpiece. This design features a curved decorative clay band worked in a delicate blush-pink tone, adorned with hand-carved scalloped ridges that mimic delicate seashell or petal textures. The clay element is permanently bonded along the upper spine of a clear acrylic or gold-plated metal side comb, providing an elegant anchor for bridal updos, romantic French twists, or loose braids. The scalloped crest catches light along its ridges, introducing soft dimension and artisanal refinement without adding excess bulk to the hairstyle. The project showcases how polymer clay can seamlessly interface with existing functional hardware, transforming utilitarian items into heirloom accessories. Its durability and secure placement make it an appealing accessory for weddings, seasonal celebrations, or refined everyday styling.
To create the decorative scalloped band, roll a four-millimeter-thick rectangular strip of blush pink clay measuring three inches long by three-quarters of an inch wide. Using a round edge cutter or a small circular piping tip, stamp repeated half-circle notches along the entire upper edge of the strip to form uniform decorative scallops. Use a rounded wooden modeling tool to press shallow, radiating fluted lines from the base upward into each scalloped apex, adding organic sculptural texture. Gently curve the clay strip across an inverted glass bowl to match the natural curvature of the hair comb spine. Bake the curved strip on the bowl at 275 degrees Fahrenheit for thirty-five minutes, allowing it to cool completely before removal to retain its permanent contour. Thoroughly clean the upper spine of a gold metal hair comb with alcohol, roughen the contact surfaces with 400-grit sandpaper, and secure the scalloped clay piece using two-part epoxy adhesive, clamping the assembly firmly for twelve hours to ensure a resilient bond.
Common Beginner Mistakes and How to Avoid Them
One of the most frequent errors encountered by novice clay artists is underbaking, which leaves the polymer chains incompletely fused and results in brittle, snapping jewelry. Crafters often rely on the default temperature gauge of home ovens, which can fluctuate wildly; investing in an inexpensive freestanding oven thermometer placed beside the baking tile ensures accurate, sustained temperatures of 275 degrees Fahrenheit. Another common challenge is airborne lint and fingerprint transfer onto pale pastel surfaces. To eliminate dust contamination, clean hands, rolling pins, and tiles with alcohol before handling pale colors, and keep a ball of raw white scrap clay on hand to roll over tools to pick up stray particles before conditioning final slabs. Additionally, beginner crafters often skip wet-sanding, resulting in rough, jagged perimeter rims that look unfinished. Always sand cured clay edges under a light stream of water or in a shallow dish using silicon carbide wet-or-dry sandpaper, progressing through graduated grits to buff away cut ridges and micro-tears without releasing fine airborne clay dust into your workspace.
Practical Tips for Exceptional Results
Refining small details elevates handmade clay jewelry from basic home crafts into boutique-quality designer pieces. When combining pastel colors, use a systematic ratio formula by mixing tiny measured balls of concentrated primary clay into large uniform portions of opaque white, recording your recipe notes to ensure consistent color matching across future production batches. To achieve pristine, razor-sharp edges when using cutters, stretch a sheet of thin plastic wrap tightly across the conditioned slab before stamping the metal cutter downward; this creates softly rounded, professional cushion edges that require minimal perimeter sanding after the bake. When drilling connection holes for jump rings, avoid using high-speed motorized rotary drills, which can melt the polymer plasticizer and create unsightly flared burrs; instead, employ a manual hand-twist pin vise drill for clean, perfectly centered holes. Finally, apply a drop of liquid polymer clay over cured surfaces when bonding clay-to-clay elements and re-bake, as liquid clay creates a fused chemical bond that holds significantly better than simple surface superglues over time.
Styling, Presentation, and Packaging Ideas
Thoughtful presentation and styling highlight the artisanal craftsmanship of pastel clay jewelry, enhancing its perceived value for gifts or online craft sales. When styling drop earrings or brooches for visual portfolios, place the items against natural, tactile backdrops such as raw linen textiles, travertine stone slabs, dried palm fronds, or pale birch wood chargers. The organic textures of natural stone and woven fiber provide a warm, complementary contrast that accentuates the smooth matte finish of the pastel clay. For branded packaging, mount earrings on heavy-weight, textured cotton cardstock in neutral tones like warm ecru or charcoal grey, which allows pale pastel colors to stand out prominently without color clashes. Include a clear, concise care card instructing recipients to avoid submerging their jewelry in water, storing pieces away from direct prolonged sunlight, and cleaning surface scuffs gently using a cotton swab dipped in rubbing alcohol. Organizing your workspace with divided acrylic trays for hardware components and stacking modular storage drawers keeps delicate, unbaked clay slabs protected from airborne dust and accidental damage between sculpting sessions.
Budget Planning and Production Timeline Management
Developing a cohesive pastel polymer clay jewelry collection is remarkably cost-effective when resources and assembly schedules are managed systematically. A standard two-ounce block of clay can produce between four and six pairs of tiered statement earrings, making the material cost per unit exceptionally low compared to metalsmithing or bead weaving. To optimize expenses, purchase foundational white and translucent clay in large economic one-pound blocks, supplementing with a few smaller two-ounce accent colors to mix your own custom pastel palette, rather than purchasing pre-mixed pastel blocks at premium prices. From a time management perspective, organize your workflow into focused assembly-line stages: dedicate the first session entirely to color mixing, slab conditioning, and shape cutting; batch all components onto baking tiles for a single, controlled curing cycle; and spend the final session on batch wet-sanding, hole drilling, and jump ring assembly. This segmented production approach prevents constant tool swapping, minimizes workspace clutter, and dramatically increases overall crafting output, allowing makers to complete entire multi-piece jewelry suites within a single weekend.
Creative Expansion and Advanced Inspiration
Once artisans master foundational slab conditioning and geometric cutting, numerous exciting avenues open for advanced creative exploration and technical growth. Experienced makers can experiment with surface application techniques such as silk screening with acrylic inks, applying genuine 24-karat gold leaf foil before cutting, or utilizing alcohol ink washes to produce ethereal watercolor effects across raw clay slabs. Artisans can also explore the incorporation of complementary mixed-media materials, pairing soft pastel clay components with cast brass charms, raw freshwater pearls, textured macrame fiber tassels, or hand-carved wood elements to produce striking mixed-media jewelry. Beyond wearable accessories, these same clay modeling, marbling, and terrazzo techniques can be adapted seamlessly into functional home decor accents, including sculptural drawer knobs, modern decorative light switch plates, trinket ring dishes, and minimalist plant stake markers. By combining disciplined craftsmanship with an adventurous spirit of experimentation, makers can continually evolve their personal aesthetic and discover endless practical applications for versatile polymer clay.
Leave a Reply