Modern interior design increasingly celebrates sculptural organic forms, positioning handcrafted ceramic and clay vessels as central elements of refined home decor. This detailed design manual presents ten distinct modern clay planter concepts engineered to transform ordinary indoor plants into striking architectural statements. Readers will discover clear fabrication principles covering sharp geometric silhouettes, fluted stone textures, integrated elevation stands, and specialized drainage mechanics. Learning how to shape custom planters delivers substantial horticultural and decorative value, as tailored pots provide precise volume for delicate root systems while harmonizing with minimalist interior palettes. The following tutorial breaks down exact wall-thickness guidelines, slab-rolling standards, internal reinforcement methods, and moisture-resistant sealing steps. Whether you aim to house compact desert cacti or dramatic cascading foliage, these practical projects establish reliable hand-building foundations accessible to novices and seasoned crafters alike. By mastering these structured techniques, you can produce unified container suites that introduce artisanal warmth, refined texture, and enduring visual order to personal work areas and residential spaces.
Why Contemporary Clay Vessels Are Essential in Interior Styling
Custom clay planters maintain exceptional prominence across digital aesthetic mood boards because they bridge the divide between functional plant care and modern design gallery art. Modern interior styling emphasizes tactile authenticity, favoring raw unglazed textures, earthy mineral tones, and architectural profiles over generic mass-produced containers. For DIY enthusiasts, working directly with self-curing or oven-baked clays offers complete freedom to design bespoke vessels proportioned to uncommon plant cultivars and specific shelving dimensions. This approachable creative project delivers high-value budget ideas by replicating high-end ceramic studio finishes using basic manual tools and minimal workspace setups. Clay vessels also offer superior practical value; their balanced physical weight prevents top-heavy botanical specimens from tipping, while customized drainage setups protect indoor root systems against moisture accumulation. The calming tactile rhythm of clay sculpting reduces routine daily stress while yielding durable home accents that remain visually relevant across shifting seasonal trends.
Studio Materials and Essential Preparation Steps
Achieving structural longevity and smooth, clean contours in handmade planters requires thoughtful material selection and organized workspace preparation before building begins. Choose high-density self-hardening clay for decorative indoor pots or professional-grade polymer clays for smaller water-resistant succulent vessels. Essential modeling tools include an acrylic rolling pin, guide strips to maintain uniform slab thickness, stainless steel ribbon carvers, flexible silicone smoothing ribs, and brass circle cutters for drainage vents. Keep fine-grit wet-dry sandpaper, industrial waterproof liquid sealant, clean ceramic tiles for curing, and cotton canvas mats ready to prevent clay adhesion. Begin by wiping your work surfaces thoroughly to eliminate loose debris that could become embedded within light-colored clays. Measure the plastic nursery containers of your houseplants accurately, ensuring your clay templates incorporate an extra ten to fifteen percent volume allowance to account for natural shrinkage during the curing phase.
1. Monolithic Stacked Ring Architectural Pot
Execution Process
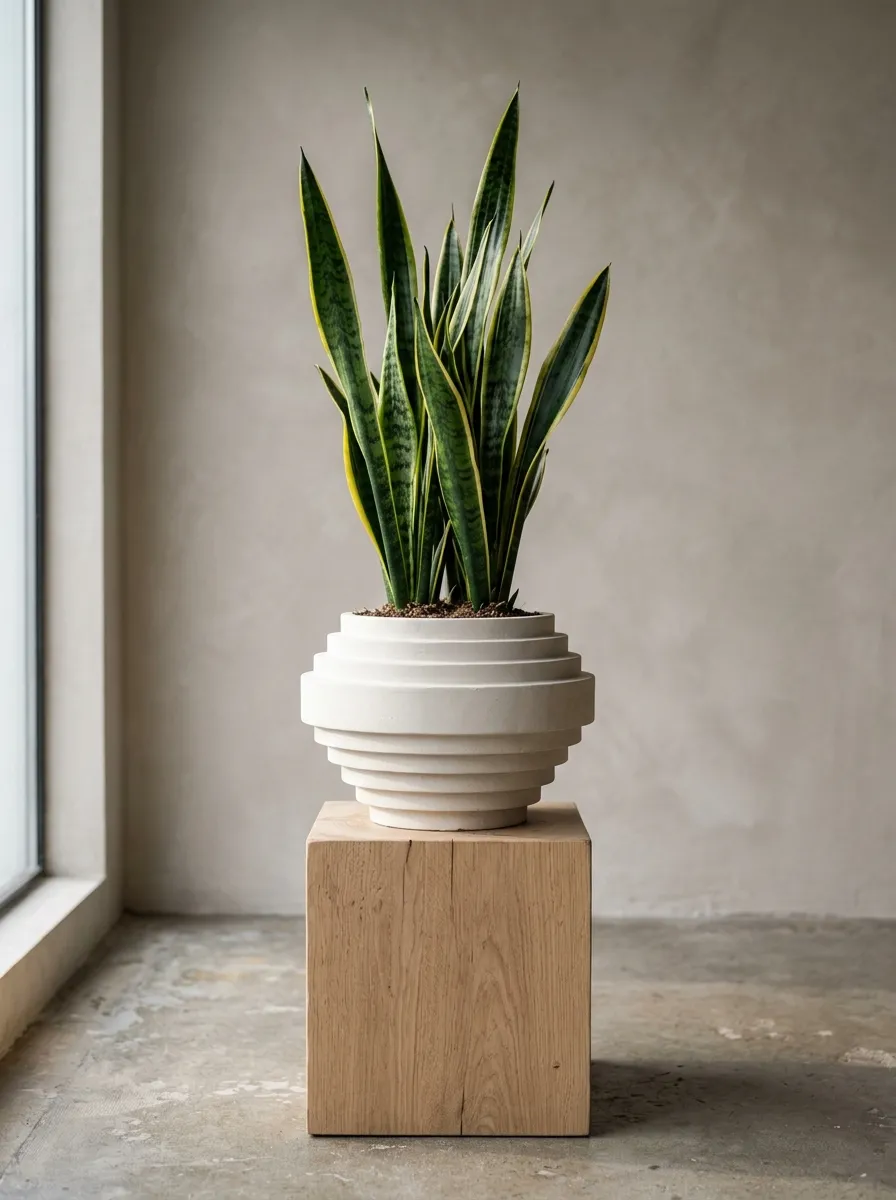
The monolithic stacked ring architectural pot utilizes repetitive horizontal terraces to construct a bold, sculptural vessel suitable for striking foliage plants. This concept features concentric tiers of equal thickness that step outward as they rise, creating dynamic shadow lines across the exterior surface. Rendered in a raw unglazed chalk-white or warm linen tone, the pot mimics the brutalist elegance of cast stone structures while maintaining a warm handmade feel. The wide horizontal rings provide visual stability, making the vessel an ideal anchor for tall, upright specimens like snake plants or structural cacti. By avoiding surface color patterns in favor of clean geometric relief, this design complements modern design living rooms and minimalist shelving arrangements. The stepped silhouette elevates standard cylindrical forms into dimensional art, demonstrating how simple repetition creates high-impact contemporary home accents.
To build this tiered vessel, roll conditioned clay into five long, dense coils measuring exactly one-half inch in diameter. Roll a flat circular slab to a thickness of six millimeters, cutting a six-inch disc to establish the stable bottom base. Score the outer perimeter of the base slab, applying a thin bead of clay slip before wrapping the first coil along the edge. Flatten the inner seam completely using a flat wooden modeling tool while leaving the outer rounded curve intact to preserve the clean horizontal ridge. Repeat this stacking process with each subsequent coil, expanding each ring slightly outward by two millimeters to create a subtle upward flare. Cut a half-inch drainage aperture through the center of the base disc using a sharp brass punch tool. Allow the vessel to dry gradually under a loose plastic wrap for seventy-two hours, finishing the interior with two coats of waterproof liquid sealant before potting.
2. Minimalist Terrazzo Block Planter

Step-by-Step Guide
The minimalist terrazzo block planter integrates colorful aggregate patterns directly into a clean cubic silhouette, offering a contemporary take on classic Mediterranean stone surfaces. The design features a smooth geometric cube with sharp right-angled corners, presenting a flat canvas that highlights embedded clay chips. A neutral bone or warm ivory background carries irregular specks of charcoal, terracotta, and olive green clay, achieving an authentic composite stone appearance without chemical resins. This modern aesthetic provides high visual contrast against dark green, glossy leaves such as jade plants, ZZ plants, or small rubber ficus trees. The flat planar surfaces catch natural room light evenly, making this compact square container an attractive desk organizer or windowsill display piece. Mastering the flat-slab lamination and corner joinery in this build equips makers with dependable fabrication skills for modern architectural pottery.
Begin by conditioning two blocks of white clay, rolling the material into an even five-millimeter slab using parallel wooden rolling guides. Slice scrap pieces of terracotta, charcoal, and forest green clay into tiny, irregular shavings, scattering them across the white slab. Place a sheet of clean parchment paper over the scattered chips and roll with firm pressure to press the colored flakes flush with the base sheet. Cut five identical four-inch squares from the patterned slab using a steel ruler and an ultra-sharp craft blade, beveling the joining edges at precise forty-five-degree angles. Assemble the four walls around the square base plate, scoring all beveled contact lines and bonding them securely with liquid clay. Smooth the interior joints with a wooden ball tool, reinforcing each corner seam with a thin interior coil to prevent structural separation. Cure the cube thoroughly according to your clay guidelines, then wet-sand the exterior with eight hundred grit paper to reveal the crisp, embedded terrazzo stones.
3. Sculptural Fluted Column Plant Stand

Setup Method
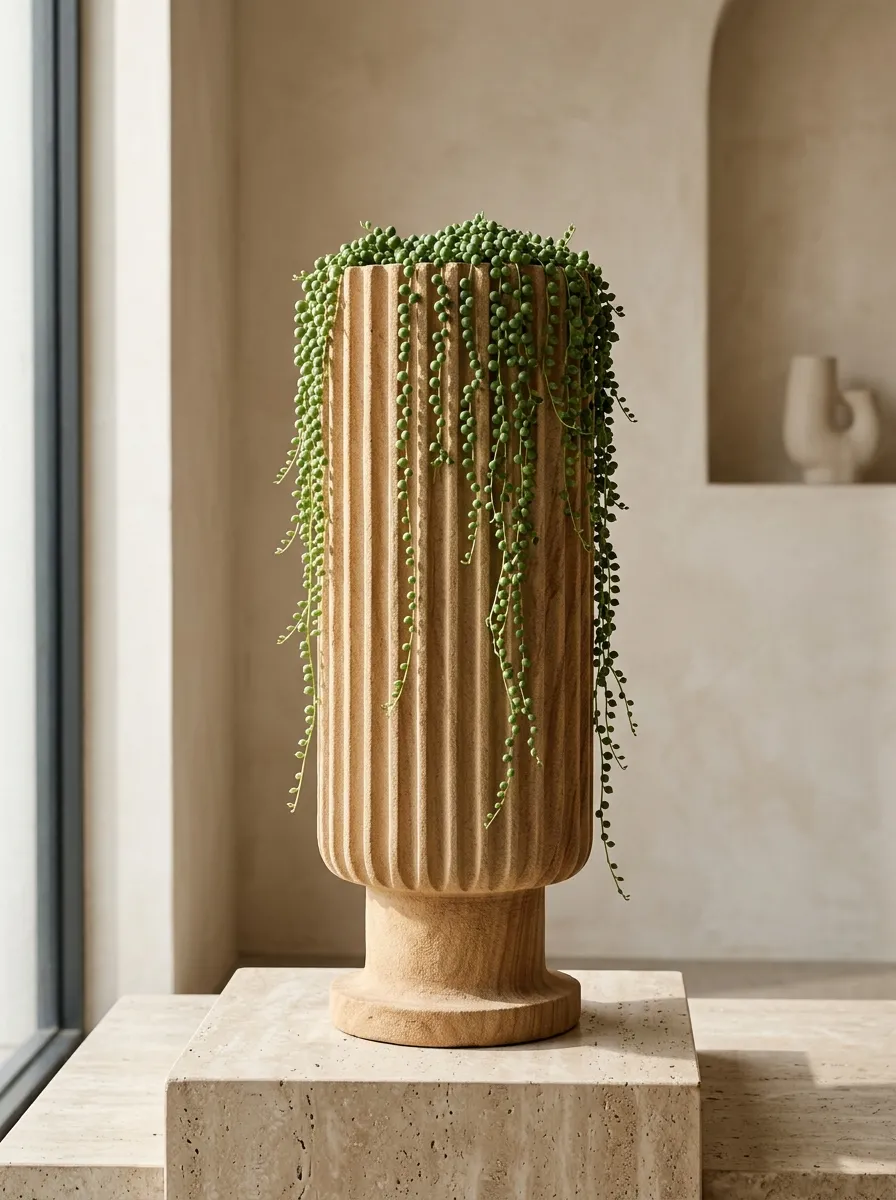
The sculptural fluted column plant stand incorporates classical Roman architectural channeling into a modern vertical container with an integrated base. This vessel features uniform vertical grooves that wrap continuously around a slender cylinder, creating strong vertical lines that draw the eye upward. Raised upon a matching fluted pedestal, the elevated planting cup allows trailing vines like string of pearls or satin pothos to cascade freely over the edges. Rendered in soft biscuit or warm sandstone clays, the vessel creates rich, alternating vertical highlights and shadows under soft directional lighting. The integrated pedestal base provides essential clearance, preventing low foliage from tangling against table surfaces while adding an architectural silhouette to low credenzas. Hand-building this fluted vessel teaches makers how to manage structural scoring, carve repetitive details, and join separate cylindrical forms with balanced alignment.
Roll out a large clay slab to an even six-millimeter thickness, using a straight edge and a rounded gouge tool to carve parallel vertical channels spaced one centimeter apart. Wrap the fluted slab around a smooth cardboard cylinder covered in parchment paper, pressing the vertical seam closed from the inside to form the hollow column. Construct a separate shallow bowl using a simple slump mold, smoothing the rim with a damp sponge until symmetrical. Cut a circular base plate, score the bottom edge of the fluted cylinder, and attach it to the base plate using generous amounts of clay slip. Once both components become leather-hard, attach the shallow bowl firmly to the top of the fluted column, reinforcing the joint with an internal clay coil. Allow the complete unit to cure away from direct sunlight for four days to prevent uneven shrinkage stress. Apply a matte water-resistant sealant across the entire interior cavity to ensure long-term durability against watering runoff.
4. Geometric Faceted Hanging Vessel
How to Create
The geometric faceted hanging vessel pairs crisp angular planes with aerial suspension capabilities, maximizing vertical display areas in compact living spaces. The design consists of interlocking triangular and pentagonal flat planes that reflect natural daylight at varied angles, creating a jewel-like container. Suspended from durable waxed cotton cords or polished brass chains, this suspended planter provides a clean visual contrast against the soft, trailing foliage of English ivy or string of hearts. The angular geometry gives the pot an architectural edge that fits naturally into industrial lofts, minimalist apartments, and modern office corners. Suspending plants frees up valuable desk space while elevating foliage to eye level, catching balanced light near window exposures. Building this faceted shape strengthens your slab-cutting accuracy, seam beveling, and internal corner reinforcement skills.
Roll out a smooth clay slab to a uniform five-millimeter thickness, using cardstock templates to trace and cut six identical triangular facets and five pentagonal wall pieces. Bevel every edge to an inward forty-five-degree angle with a sharp blade, ensuring the planes join together tightly without open gaps. Score all beveled borders, brush them lightly with clay slip, and assemble the faceted bowl while supporting the internal walls with crumpled tissue paper. Pierce three evenly spaced hanging holes one centimeter below the top rim using a hollow brass tube, verifying that the holes are aligned to keep the pot level when hung. Smooth the exterior seams with a flexible metal scraper, keeping the transition lines between planes sharp and defined. Let the planter dry slowly over four days in a draft-free space to eliminate structural drying stress along the multi-angled joints. Thread heavy-duty suspension cords through the rim holes, securing the underside with wooden beads before hanging your favorite trailing houseplant.
5. Organic Asymmetrical Pinch Vessel

How to Make
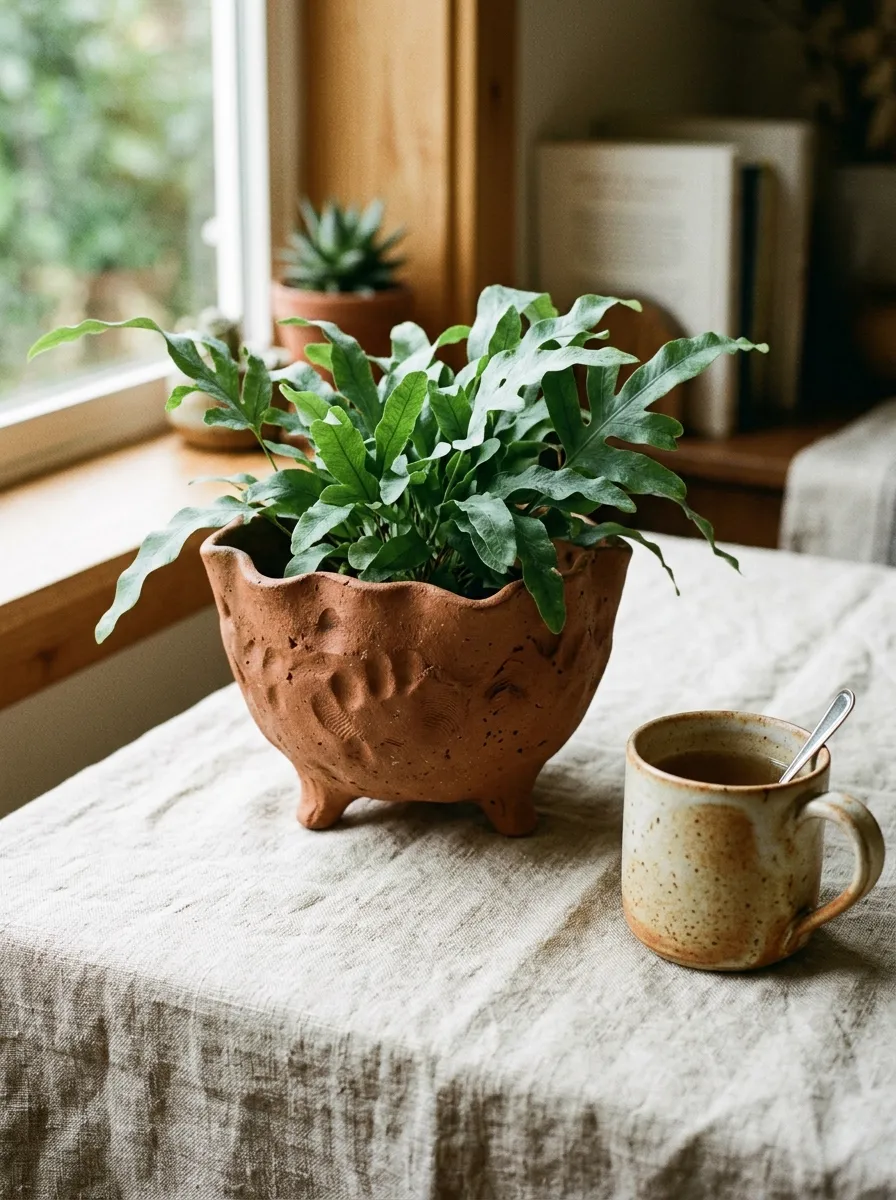
The organic asymmetrical pinch vessel embraces organic, wabi-sabi principles, highlighting the maker’s hand marks through undulating rims and soft contours. Starting from a single solid ball of clay, the vessel is formed entirely through thumb pressure and slow finger rotation, eliminating mechanical lines in favor of natural variations. The rim gently dips and rises irregularly, evoking the natural contours of weathered river stone or coastal cliffs. Finished in earthy terracotta, raw umber, or unglazed stone tones, this vessel pairs effortlessly with textured botanicals like blue star ferns, rhipsalis, or compact begonias. The visible thumb impressions along the exterior walls add tactile warmth, catching ambient light to celebrate authentic hand-building craft. Novices will appreciate this accessible, tool-free method, which builds an intuitive understanding of clay elasticity and wall-thickness regulation.
Begin by rolling a baseball-sized mass of conditioned clay into a smooth sphere, pressing your thumb firmly into the center until stopping one-half inch from the bottom. Slowly rotate the clay ball in the palm of your hand, pinching the walls upward with your thumb inside and fingers supporting the exterior. Keep your pinching pressure steady and deliberate, moving from the bottom base toward the rim to establish an even five-millimeter wall thickness. Shape the top opening into a subtle, asymmetrical wave by pressing gently along the upper perimeter with your forefinger. Form three small clay balls into flattened feet, scoring and slipping them onto the underside of the base to provide stable elevation. Smooth the interior basin with a moist silicone sponge, leaving the organic exterior impressions untouched to preserve its handmade character. Allow the vessel to dry on an elevated wire drying rack for seventy-two hours, coating the inner basin with a waterproof stone sealer before planting.
6. Ribbed Arch Wall Pocket Planter
Step-by-Step Guide
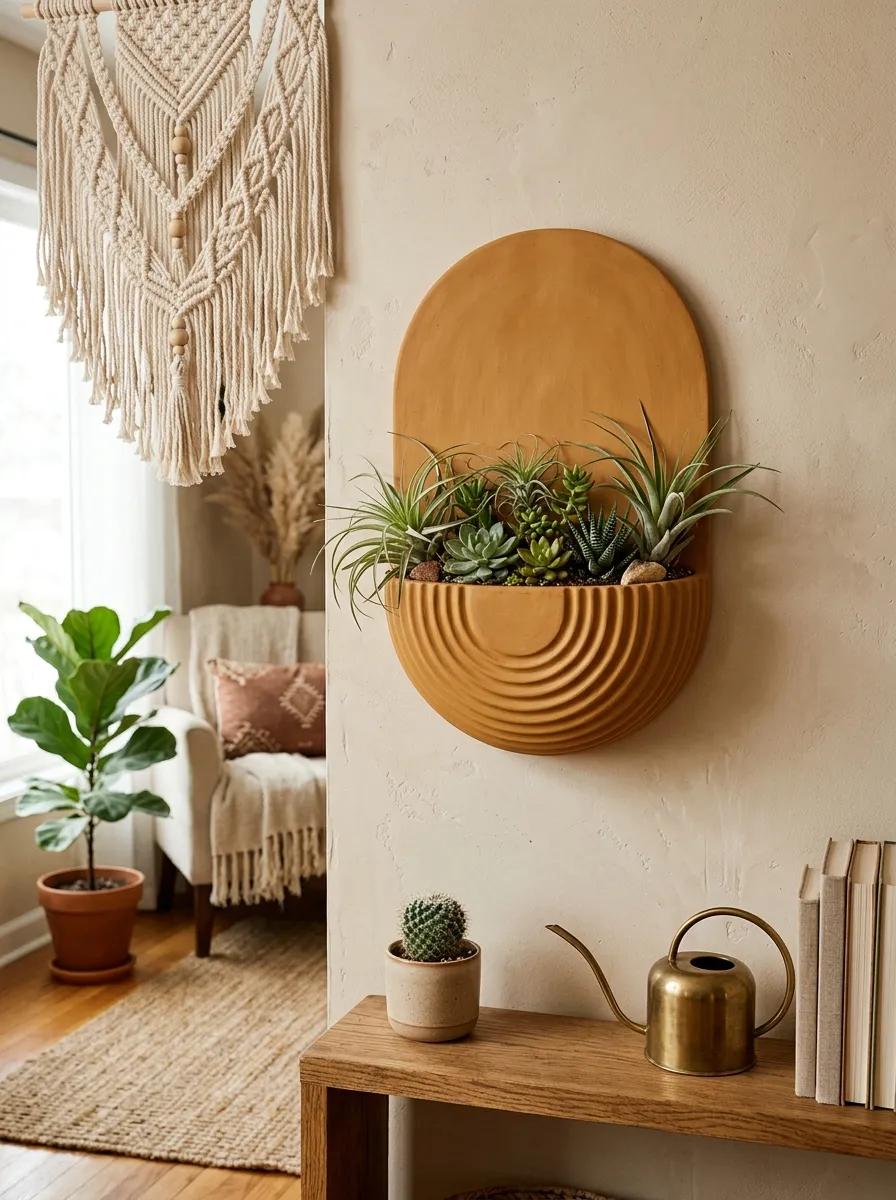
The ribbed arch wall pocket planter functions as vertical living art, mounting flush against interior walls to hold compact succulents, air plants, or dried floral bouquets. Featuring an inverted U-shaped backplate combined with a semicircular projecting pocket, this container brings clean architectural lines to empty vertical spaces. The curved front pocket is embellished with horizontal fluting, adding visual texture that balances the smooth, flat backplate. Rendered in desert ochre, dusty rose, or warm terracotta, this wall-mounted container adds warmth to modern gallery walls, home entryways, and stairwells. Elevating houseplants onto wall surfaces maximizes floor space in urban homes while keeping delicate greenery away from curious pets. Constructing this piece develops your flat-slab cutting, dimensional curve manipulation, and vertical weight-bearing seam reinforcement skills.
Roll conditioned clay into a flat seven-millimeter slab, cutting out an eight-inch by five-inch arched backplate with a clean utility blade. Cut a keyhole mounting slot or punch two sturdy hanging apertures near the top center of the backplate using a hollow brass punch. From a separate four-millimeter slab, cut a semi-oval pocket piece, carving horizontal ridges across the outer face with an embossing stylus. Curve the damp pocket piece over a half-cylinder cardboard form, scoring the curved outer edges and aligning them with the lower perimeter of the arched backplate. Apply clay slip along the scored joints, pressing the pocket firmly onto the backplate and smoothing the seams internally with a rounded wooden modeling stick. Support the open pocket with crumpled wax paper and lay the unit flat to dry slowly under light cardboard weights to prevent the backplate from warping. Once cured, apply two generous coats of clear matte acrylic sealant to protect the pocket against regular plant moisture.
7. Chunky Footed Cylinder Pot
How to Create
The chunky footed cylinder pot introduces playful modern proportions by pairing a clean geometric cylinder with three substantial, oversized cylindrical peg feet. The vessel features straight, vertical walls that convey solid, architectural presence, while the stout support feet raise the container two inches off the surface. This elevated stance creates a light, floating profile that protects wooden furniture from moisture condensation while providing excellent airflow beneath the pot. Finished in speckled white, warm oatmeal, or matte sage green, this container complements broad-leaf tropical plants such as monstera deliciosa, calatheas, or bird of paradise. The contrast between the clean cylinder and the chunky support legs adds character without compromising the vessel’s minimalist lines. Building this footed planter teaches makers how to join weight-bearing structural appendages, manage balanced center-of-gravity points, and maintain vertical alignment during assembly.
Roll a smooth slab of clay to a thickness of six millimeters, cutting a rectangular panel measuring six inches tall by eighteen inches wide. Cut a circular base disc measuring five and a half inches in diameter, using a round template to guarantee true circular symmetry. Score the circumference of the base disc, wrap the rectangular wall slab around it, and seal the vertical seam using an overlapping bevel joint smoothed from both sides. Roll out three solid clay cylinders measuring two inches tall by one and a half inches wide to serve as the supporting tripod legs. Hollow out the interior cores of the legs slightly with a loop tool to prevent cracking during curing, leaving thick walls to support the main vessel’s weight. Score both the leg tops and the underside of the base plate, securing the legs with liquid clay slip and reinforcing the joints with small clay coils. Allow the vessel to dry slowly upside down for forty-eight hours, then turn it upright and seal the interior with waterproof masonry varnish.
8. Checkerboard Inlay Minimalist Planter

Execution Process
The checkerboard inlay minimalist planter introduces lively graphic patterns into modern plant styling through precise clay lamination and surface caning. This container features a straight-sided silhouette wrapped in a crisp grid of alternating colored squares, such as warm cream paired with muted mustard, sage green, or soft terracotta. The inlaid checkerboard pattern is built directly into the clay slab rather than painted onto the surface, creating an integrated, durable finish with crisp borders between colors. The graphic pattern contrasts with dark green, unstructured foliage like Boston ferns, trailing hoyas, or asparagus ferns. The clean geometric grid adds mid-century modern character to plant shelves, bright office desks, and creative workspaces. Learning this millefiori inlay technique expands your crafting skills, teaching you how to build patterned clay blocks, slice uniform veneers, and assemble seamless mosaic slabs.
Condition equal portions of white and terracotta clay, rolling each color into a long rectangular block of matching width and height. Slice the blocks into identical square rods, assembling the strips in an alternating checkerboard pattern to form a unified rectangular cane. Compress the block gently on all sides using a flat wooden board, chilling the clay in a refrigerator for twenty minutes to firm the structure before slicing. Using a flexible steel tissue blade, cut thin two-millimeter cross-sections from the cane, laying the patterned slices side-by-side on a thin base sheet of white clay. Roll over the mosaic sheet with an acrylic pin to fuse the slices into a flat, unbroken patterned slab, trimming the edges into a neat rectangular panel. Wrap the checkered slab around a circular base disc, joining the vertical seam carefully to maintain the continuous grid pattern around the container. Bake the assembled vessel on a clean tile, let it cool completely, and wet-sand the exterior with eight hundred grit paper to reveal crisp checkerboard transitions.
9. Scalloped Rim Pedestal Vessel

Setup Method
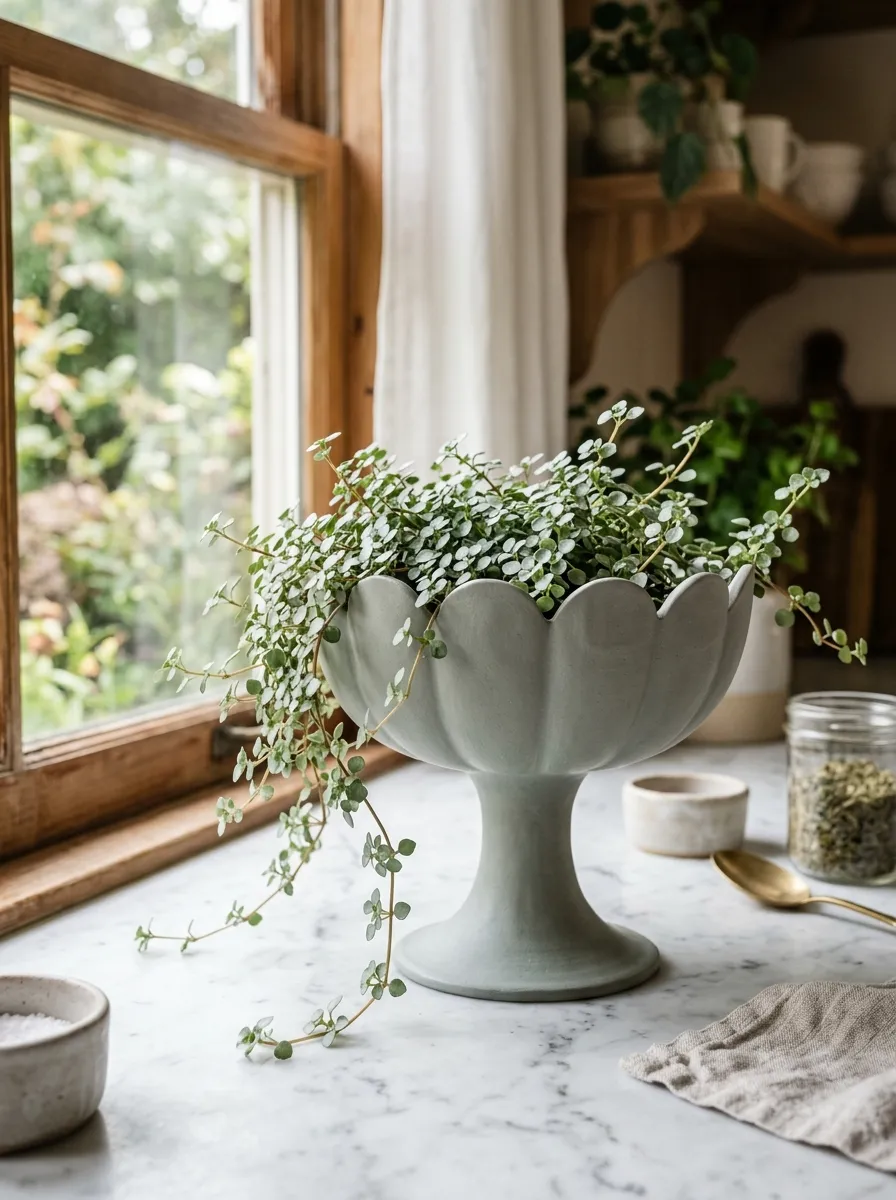
The scalloped rim pedestal vessel softens clean modern geometry by combining an undulating petal-like upper rim with an elevated tapered base. The body flares outward from a narrow pedestal foot into a wide, open bowl, ending in smooth, rhythmic scallops that frame the soil surface. This soft architectural silhouette looks especially charming paired with trailing succulents, flowering hoyas, or silver-toned foliage like pilea glauca. Finished in matte sandstone, soft peach, or pale celadon clay, the vessel brings quiet elegance to dining tables, vanity counters, and sunny kitchen windowsills. The elevated pedestal base provides functional clearance for trailing vines, allowing delicate foliage to cascade over the sides without catching on table surfaces. Hand-building this fluted vessel teaches makers how to manage structural scoring, carve repetitive details, and join separate cylindrical forms with balanced alignment.
Begin by rolling out a five-millimeter clay slab, using a scalloped circular template to cut out an eight-inch disc featuring twelve even perimeter curves. Place the scalloped disc over an inverted ceramic bowl covered in plastic wrap, pressing the clay gently against the form to create a flared, open bowl shape. Smooth the rounded scallop edges with a damp silicone sponge, removing any sharp burrs to achieve soft, organic rim contours. Roll a secondary smaller slab to construct the tapered pedestal base, forming a three-inch-tall cone with a flat top and bottom. Score the flat contact surfaces of both the leather-hard bowl and the pedestal cone, joining them securely with generous dabs of clay slip. Reinforce the connection seam with a thin interior clay coil, blending the joint smooth with a rounded wooden modeling stick. Allow the assembled pedestal vessel to dry slowly under a loose cloth for four days, finishing the inner bowl with waterproof resin before adding soil and plants.
10. Textured Linear Sgraffito Vessel
How to Make
The textured linear sgraffito vessel combines contrasting surface slips with hand-carved line work to produce an eye-catching, artisanal plant container. The design features a tall, unadorned cylinder coated in a contrasting dark slip or mineral wash, through which fine lines are carved away to reveal the lighter clay beneath. The carved patterns emphasize clean geometric line work, including fine vertical pinstripes, chevron clusters, and radiating sunbursts that add tactile depth to the exterior. This high-contrast surface treatment pairs with structural foliage like bird’s nest ferns, calathea lancifolia, and architectural monsteras. The hand-carved grooves catch natural room light, creating tactile interest that invites touch while showcasing genuine handmade craftsmanship. Working with sgraffito carving allows crafters to explore surface design freely, developing steady hand control and precision detailing using simple loop tools.
Construct a basic cylindrical pot by wrapping a five-millimeter slab of light cream clay around a circular base disc, smoothing the vertical and bottom seams securely. Allow the clay to firm up to a leather-hard state, then brush three even coats of contrasting black or terracotta liquid slip across the entire exterior surface. Let the surface slip dry until it loses its wet sheen, resting your hand comfortably on a steady support to begin the carving process. Using a fine-point loop carving tool or wire stylus, carve clean vertical lines through the dark slip layer to reveal the light clay base underneath. Keep your carving depth steady at one millimeter, blowing away clay shavings with a dry, soft brush to keep the lines clean. Punch a clean drainage hole through the base using a half-inch brass cutter before the clay hardens completely. Allow the carved vessel to dry for three full days away from direct drafts, sealing the interior with clear waterproof stone varnish while leaving the exterior matte.
Common Beginner Mistakes and How to Avoid Them
Constructing functional clay planters involves specific engineering requirements that can lead to cracked bases, separated seams, or plant stress if overlooked during the build. The most widespread beginner error is omitting drainage holes, which causes excess water to gather at the base of the pot and quickly leads to root rot. Prevent this by cutting a clean half-inch drainage aperture through the bottom slab while the clay is soft, or design your piece as an exterior cachepot that holds a plastic nursery pot inside. Another common problem is uneven slab thickness; when parts of a vessel dry faster than adjacent sections, the resulting shrinkage stress causes visible cracks along walls and joints. Always use rolling guide strips on both sides of your rolling pin to maintain uniform wall thickness throughout every part of your build. Failing to score and slip joining edges is another common mistake that can cause walls to pull apart along vertical seams as the clay dries. Cross-hatch every joining surface with a wire tool, apply moist slip, and reinforce the inner seams with a thin clay coil for lasting structural strength. Finally, remember to seal air-dry clays thoroughly; unsealed pots will soften and break down when exposed to damp potting soil, so always apply two coats of waterproof stone sealant before planting.
Practical Tips for Better Results
Achieving a clean, gallery-quality finish on handmade clay planters relies on simple hand-building habits that strengthen the structure and improve the final appearance. To prevent rapid drying and surface cracks in air-dry clays, cover your working pieces loosely with a plastic sheet during the initial forty-eight hours of curing, allowing moisture to evaporate gradually from the core outward. When rolling out clay slabs, lift and rotate the clay ninety degrees after each pass of the roller to relax the internal memory of the fibers and prevent future warping. If using polymer clay for indoor planters, place your pieces in an unheated oven and let them cool down slowly inside after baking to avoid thermal shock, which can leave the material brittle. Use smooth silicone ribs rather than wet fingers to smooth out seams and remove surface fingerprints without over-saturating the clay with water. For containers with painted accents, lightly sand the cured exterior with four hundred grit paper before applying acrylics to help the pigment adhere smoothly. Finally, test the waterproof seal of your finished vessel by filling it with water and letting it rest on a paper towel for twenty-four hours to check for leaks before adding potting soil and plants.
Styling, Presentation, or Organization Ideas
Styling handmade clay planters thoughtfully throughout your living space enhances both the architecture of your home and the natural beauty of your plant collection. Group pots in odd-numbered clusters of three on floating wooden shelves, pairing contrasting textures—such as a ribbed vessel, a smooth terrazzo cylinder, and a rough lava rock pot—for visual balance. Use plant stands of varying heights made from light oak, matte black steel, or unvarnished pine to create tiered vertical greenery arrangements in bright room corners. When arranging planters on open bookshelves or credenzas, place complementary ceramic saucers or cork coasters beneath each pot to protect furniture surfaces from accidental watering runoff. Hanging vessels, like geometric faceted pots, look best when suspended at staggered ceiling heights near sunny windows, drawing the eye upward and creating depth in compact living rooms. You can also match the vessel colors to your existing interior decor; warm terracotta and ecru pots harmonize with bohemian rugs and woven textiles, while charcoal and terrazzo finishes suit modern minimalist aesthetics. Adding smooth decorative river stones or dried preserved moss over the potting soil completes the display, providing a tidy, polished presentation that highlights the handcrafted details of your planters.
Budget or Time Planning
Creating custom clay planters at home is an economical and rewarding alternative to purchasing boutique pottery, but it benefits from simple scheduling and material planning. A standard ten-pound block of air-dry or ceramic clay can yield three to four medium-sized plant pots, keeping your material costs low while allowing you to build matching container sets. Plan your crafting across a realistic four-stage schedule: spend an evening conditioning and cutting slabs, dedicate the following day to building and joining forms, allow three to five days for drying, and finish with a day for sanding and sealing. To optimize your craft budget, look for everyday household items to repurpose as shaping molds, such as empty tin cans, plastic food containers, and sturdy cardboard mailing tubes wrapped in plastic wrap. Purchasing multi-packs of sandpaper, acrylic paints, and waterproof sealants online in larger quantities reduces your per-project expense compared to buying single craft supplies at retail stores. Keep a dedicated notebook with measurements of your plant nursery containers so you can build accurately sized pots that fit your greenery without wasting clay. This structured planning process prevents rushed crafting, ensuring each planter cures properly into a durable, functional home for your favorite plants.
Creative Expansion and Advanced Inspiration
Once you feel comfortable with foundational hand-building techniques, there are many exciting creative avenues to explore for expanding your handmade planter projects. Experiment with integrating mixed media into your vessels, such as wrapping brass wire around fluted rims, embedding polished crystal quartz points into raw clay bodies, or weaving rattan handles through pre-punched holes. Advanced makers can try building self-watering planters, creating a two-part clay vessel featuring an unglazed porous inner cup resting within an external water reservoir to provide continuous moisture for thirsty tropical ferns. You can also explore surface coloring techniques like sgraffito, painting contrasting clay slip over greenware and carving away fine geometric patterns to reveal the base color beneath. Try scaling your work by building large, modular pedestal planters assembled from separately cured, interlocking segments joined with structural epoxy. Alternatively, craft complete desktop organizational suites that pair matching plant pots with coordinating catch-all trays, propagation stations, and misting bottle holders. These advanced variations demonstrate the versatility of clay as a medium, allowing you to turn simple soil containers into expressive, functional works of modern ceramic art that grow alongside your botanical collection.
Leave a Reply