

Polymer clay jewelry continues to dominate digital craft feeds as enthusiasts seek wearable artistic pieces that showcase personality and precise hand fabrication. The kawaii aesthetic, originating in Japanese visual culture, emphasizes charming simplicity, pastel color stories, gentle rounded contours, and expressive character design. Crafting miniature rings from curable synthetic modeling compound provides makers with an accessible avenue to practice structural modeling without requiring specialized jewelry equipment. Readers exploring this tutorial will learn foundational clay conditioning routines, ring band sizing methods, sculptural detailing techniques, and temperature-controlled curing practices. Engaging with this medium allows artists to transform standard blocks of oven-bake compound into durable statement accessories that celebrate miniature culinary items, animal faces, and botanical motifs. Beyond visual appeal, the project offers functional value by refining fine motor control, color formulation skills, and spatial planning for micro-scale objects. Each wearable band functions as a distinct handmade sculpture that withstands everyday wear when properly reinforced and cured. Mastering these step-by-step techniques provides craft lovers with practical fabrication knowledge, turning simple raw materials into cohesive accessory collections suitable for personal wear, curated gift giving, or creative digital portfolios.
The Cultural Rise and Wearable Utility of Sculpted Ring Crafts
The widespread popularity of miniature sculpted jewelry across modern design platforms stems from a broader cultural shift toward tactile, self-directed expression and nostalgic fashion aesthetics. Modern accessory styling frequently incorporates playful statement pieces that break away from conventional metallic jewelry, allowing individuals to display bespoke creative ideas on their hands. Polymer clay remains an exceptionally accessible medium because it does not dry out during the sculpting phase, granting beginners unlimited working time to refine proportions and facial symmetry. The tactile nature of shaping miniature elements satisfies the demand for intentional, screen-free creative project activities that yield immediate, functional results. From a design perspective, the matte or gloss surfaces of baked modeling compounds provide an ideal foundation for soft pastel hues, translucent gradients, and miniature dimensional embellishments. Furthermore, the low financial barrier to entry democratizes wearable art, allowing anyone with an ordinary household oven and basic hand tools to fabricate intricate, durable accessories. The intersection of playful aesthetic expression, manageable production timelines, and budget ideas ensures that miniature clay modeling remains a staple trend in contemporary craft culture.
Essential Materials and Preparation for Micro-Sculpting
Achieving professional, structurally sound results with miniature wearable clay requires deliberate material selection and careful workspace organization before shaping begins. High-density polymer clay brands formulated for strength and flexibility after baking are essential, as brittle utility clays crack easily under the mechanical stress placed on wearable finger bands. Working surfaces should consist of non-porous ceramic tiles, tempered glass panels, or silicone mats, which prevent lint transfer and allow seamless baking directly on the preparation slab. Basic tools include an acrylic rolling rod, a stainless steel tissue blade, dual-ended silicone shaping pens, fine needle probes, and a calibrated oven thermometer to monitor baking environments accurately. Sizing accuracy requires a metal ring mandrel or cylindrical heat-safe wooden dowels wrapped in aluminum foil to preserve internal band diameters during thermal curing. Cleanliness is paramount when manipulating light pastel tones; crafters must clean hands and rolling tools with isopropyl alcohol or lint-free wet wipes between color transitions. Proper planning involves conditioning each clay portion through manual kneading until the mass becomes pliable without developing surface air bubbles, establishing a dependable foundation for lasting miniature builds.
Idea 1: Strawberry Cream Roll Ring
Step-by-Step Guide
The strawberry cream roll design captures the visual appeal of miniature patisserie through stacked layers, textured dough surfaces, and contrasting fruit accents. This concept utilizes a curved clay base that mimics a rolled sponge cake sliced cleanly to reveal interior whipped cream swirls and suspended berry segments. A warm biscuit tone forms the outer exterior wall, while an ultra-pale ivory compound fills the interior spiral, creating a recognizable bakery silhouette. The focal point rests on the upper plateau, where a miniature sculpted strawberry half featuring indented seed pockets sits nestled in an extra dab of textured white clay froth. This design balances structural thickness with delicate miniature detailing, ensuring the completed band retains rigidity around the finger while displaying charming culinary motifs from the top profile.
To fabricate this pastry-inspired band, roll a well-conditioned strip of tan clay into a uniform rectangle measuring three millimeters in thickness and ten millimeters in width. Layer an identical, thinner sheet of white clay directly over the base, then roll both layers into a tight, compact cylinder before slicing a five-millimeter cross-section with a rigid blade. Form a separate plain ring band around an oven-safe metal mandrel, blending the seams thoroughly with a silicone tool before smoothing the join flat against the metal curve. Secure the sliced roll cake directly onto the bridge of the band using a drop of liquid polymer adhesive to form a chemical bond during baking. Model a miniature teardrop from translucent red clay, slice it vertically, indent tiny surface seeds with a needle tool, and press the fruit half firmly into the top cream swirl before transferring the entire assembly on its mandrel to the preheated oven.

Idea 2: Sleeping Shiba Inu Coiled Band
How to Create
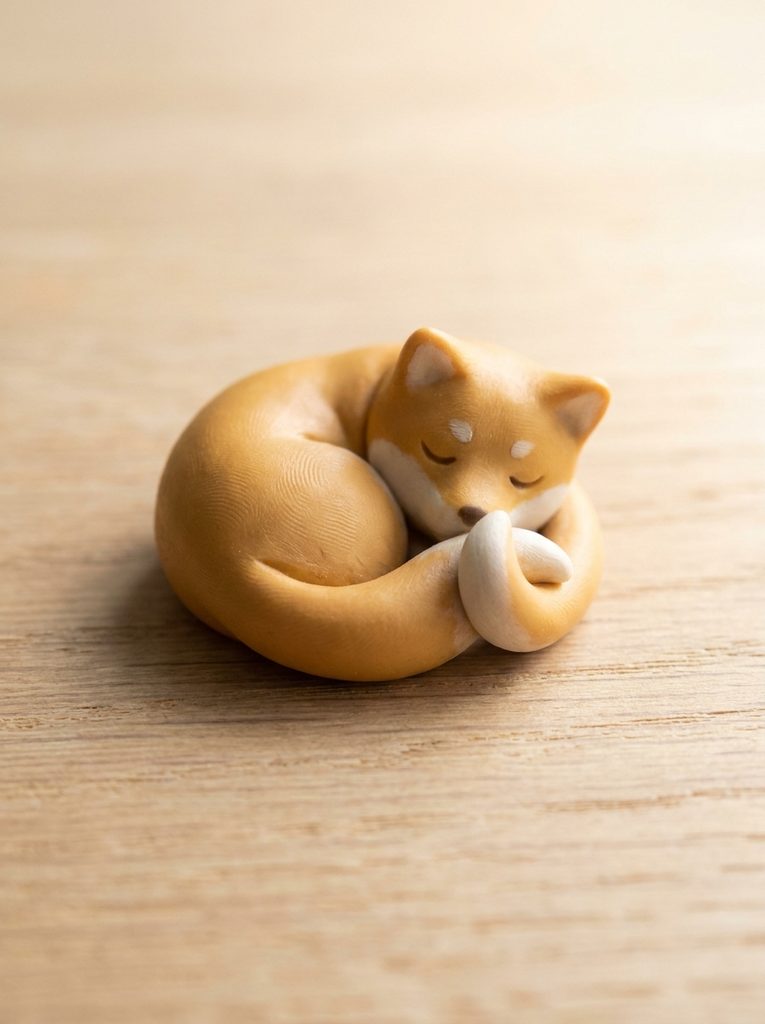
The sleeping Shiba Inu ring translates the organic posture of a curled canine into a functional, wrap-around finger band. Rather than attaching a separate decorative topper onto a flat loop, this design incorporates the animal’s body directly into the structural ring shank itself. The tail, torso, and relaxed paws flow in a continuous spiral, culminating in a resting head that overlaps the tail tip on the top of the finger. Soft ochre yellow, creamy white, and black clay tones reflect traditional breed markings, producing a recognizable character silhouette. The sleeping expression features closed crescent eyes and a subtle muzzle indentation, giving the ring a tranquil aesthetic that rests smoothly against neighboring fingers without catching on fabrics or everyday items.
Begin by rolling a tapered snake of conditioned ochre clay, keeping the center thick for the torso and tapering both ends for the head and tail. Wrap this tapered strand diagonally around your metal sizing rod, overlapping the ends slightly on the upper curve to establish the self-contained wrap-around architecture. Shape the thicker terminal end into a soft triangular head, adding two small, forward-facing triangular ears reinforced with tiny cream interior patches. Blend an oval of white clay onto the lower face to create the muzzle, then indent two curved sleeping eyes and a triangular nose using a fine-point steel probe. Coil the narrow tail end upward, texturing the fur with light longitudinal needle strokes, and carefully smooth all interior contact surfaces against the sizing mandrel before baking at the manufacturer’s recommended temperature.
Idea 3: Smiling Cloud Raindrop Band
Execution Process
The smiling cloud design utilizes soft geometric curves and balanced vertical extensions to create an airy, whimsical accessory. A pillowy white cloud contour forms the central focal point, spanning the upper width of the finger with billowy, rounded edges. The supporting ring band remains understated, formed from translucent sky-blue clay that enhances the atmospheric theme of the piece. Dangling below the central cloud, two tiny faceted teardrop charms mimic falling rain, suspended by miniature embedded eye pins that introduce dynamic physical movement. Two tiny rosy blush accents and minimalist black dot eyes give the cloud a friendly character, embodying classic kawaii design principles through restrained, cheerful facial features.
Construct the base band by flattening conditioned light blue clay through a smooth roller, sizing the strip precisely to match your target ring circumference before joining the ends on a ceramic cylinder. Form the cloud topper by clustering five small spheres of clean white clay together, using a flat acrylic block to compress them into a unified, pillowy silhouette. Insert a miniature silver-plated eye pin horizontally through the cloud base to anchor the support ring, and embed two vertical eye pins into the lower edge for the rain charms. Apply microscopic pink clay disks for the cheeks, gently smoothing their perimeters with a flat silicone chisel, then indent two shallow sockets to secure black micro-beads for the eyes. Model two translucent blue teardrops, insert matching eye pins into their tips, bake all components fully, and link the raindrops to the cloud base using small jewelry jump rings after cooling.

Idea 4: Miniature Glazed Donut Stacker
How to Make
The glazed donut stacker ring celebrates colorful dessert design by mounting a high-gloss, frosted pastry miniature onto an ergonomic clay shank. The central design showcases a golden-brown pastry ring covered in a layer of pastel pink frosting that appears to drip naturally over the outer baked edges. Multicolored miniature sprinkles, meticulously sliced from pre-baked polymer cane filaments, sit scattered across the icing to provide contrasting color pops. The proportion of the pastry remains compact, measuring roughly twelve millimeters across, preventing the piece from feeling cumbersome during daily tasks while maintaining intricate visual texture. This concept allows for endless variation, serving as an adaptable foundation for diverse icing shades, chocolate drizzle patterns, or holiday color themes.
To build this sweet confection, roll an even rope of warm ochre clay, join the tips into a seamless circle, and press the form gently between two smooth acrylic plates to flatten the top and bottom. Craft the frosting layer by rolling a paper-thin disc of pastel pink clay, using a dull needle to trace wavy, organic dripping margins around the outer edge. Drape the pink icing carefully over the dough foundation, pressing the center downward to line the inner donut opening cleanly without entrapping air bubbles. Slice paper-thin slivers from cured blue, yellow, and white clay filament strands, scattering these micro-sprinkles across the unbaked pink icing and tapping them gently into the surface with a flat blade. Mount the completed donut onto an unbaked matching tan finger loop with liquid clay, bake thoroughly, and apply two coats of high-gloss polyurethane varnish over the icing section to simulate realistic glaze.
Idea 5: Sprouting Garden Seedling Loop
Step-by-Step Guide
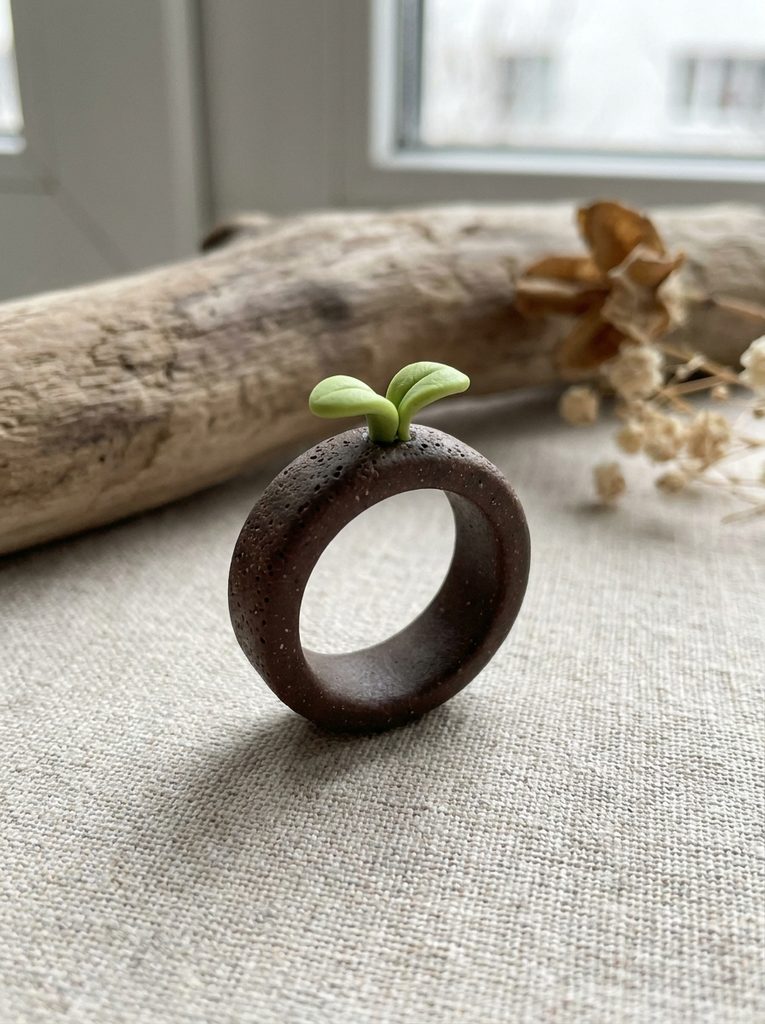
The sprouting garden seedling ring introduces organic botanical elements into miniature jewelry design, capturing the early emergence of foliage from rich soil. The ring band itself mimics a textured mound of dark earth, utilizing deep brown and black clay blends treated with stippling techniques to create an earthy, granular surface. Emerging from the top of this earthen band, two delicate, curved cotyledon leaves of vibrant spring green arch outward in a graceful, symmetric curve. A tiny pale green stem anchors the foliage to the base, reinforced internally by a concealed wire support to prevent bending during wear. This minimalist style design pairs well with nature-inspired outfits, offering an understated, modern design that emphasizes natural growth and botanical vitality.
Start by mixing raw umber clay with a hint of granite composite compound to establish a realistic, mineral-flecked soil base. Roll this mixture into a sturdy band measuring four millimeters wide, sizing it around a baking core, and texture the exposed exterior surface with a stiff-bristled wire brush. Cut a three-centimeter section of thin craft wire, bending it into a narrow U-shape to serve as the structural backbone for the emerging green sprout. Coat the exposed wire tips with pale chartreuse clay, flattening the upper lobes into two small, cupped oval leaves with smooth, rounded margins. Press the lower base of the wire frame securely into the top center of the textured earthen band, applying liquid bonding compound around the entry point to lock the elements together before baking at standard heat settings.

Idea 6: Kawaii Boba Milk Tea Cup
Setup Method
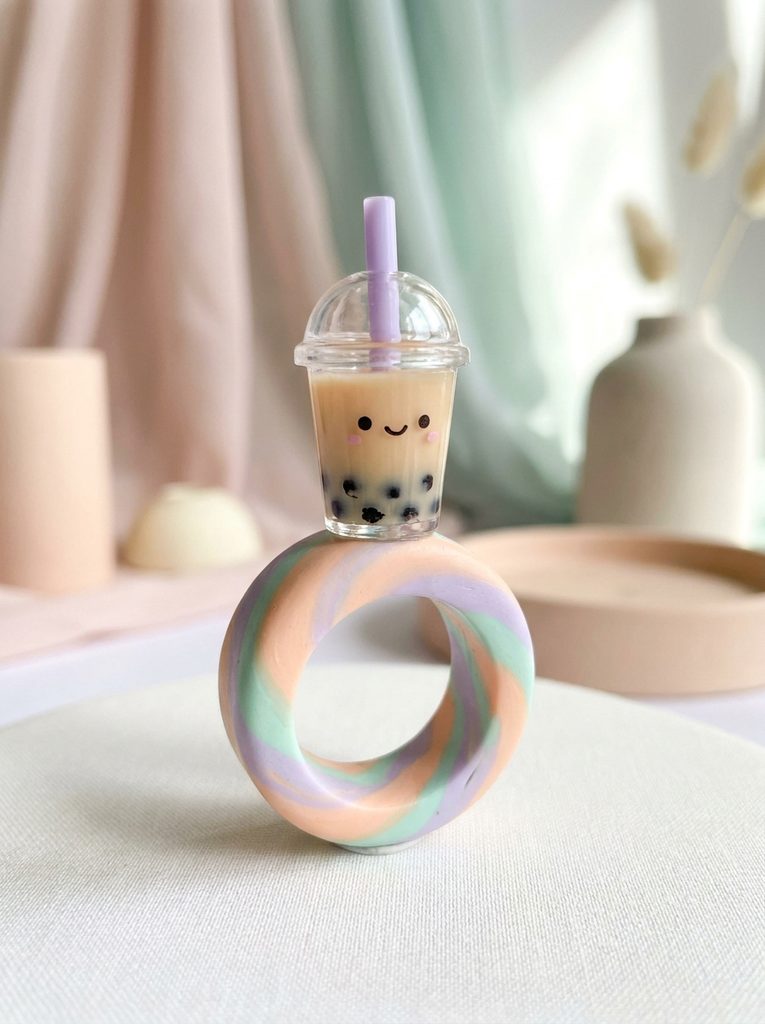
The boba milk tea ring miniaturizes a popular modern beverage into a distinct, three-dimensional statement piece. The focal element consists of a tapered translucent cup containing a warm beige milk tea mixture, punctuated by visible black tapioca pearls settling along the base. The top of the cup features a domed translucent lid topped with a tiny slanted drinking straw sculpted from bright, contrasting clay. A subtle smiling face applied to the side of the beverage container infuses the piece with classic character charm. Because the cup requires structural height, the band beneath is designed with a wide, flared mounting plate to distribute the weight evenly against the finger, ensuring the decorative cup remains stable without rotating during normal hand movements.
Begin by rolling translucent clay mixed with a minute speck of light brown pigment into a smooth, slightly tapered cylinder to form the beverage volume. Roll several microscopic spheres of black clay, pressing them firmly into the lower third of the translucent cylinder to create the appearance of suspended tapioca pearls. Wrap a thin ribbon of solid white clay around the top perimeter to form the cup rim, then dome a thin sheet of pure translucent clay over the opening to replicate a sealed plastic lid. Pierce the center of the lid with a needle tool and insert a tiny hollow cylinder of lavender clay to represent the wide beverage straw. Join this assembled drink miniature to a flattened, wide-shank ring base using oven-curing liquid adhesive, bake on a stable ceramic tile, and finish the cup body with glossy sealant while leaving the straw matte.

Idea 7: Blushing Peachy Keen Band
Execution Process
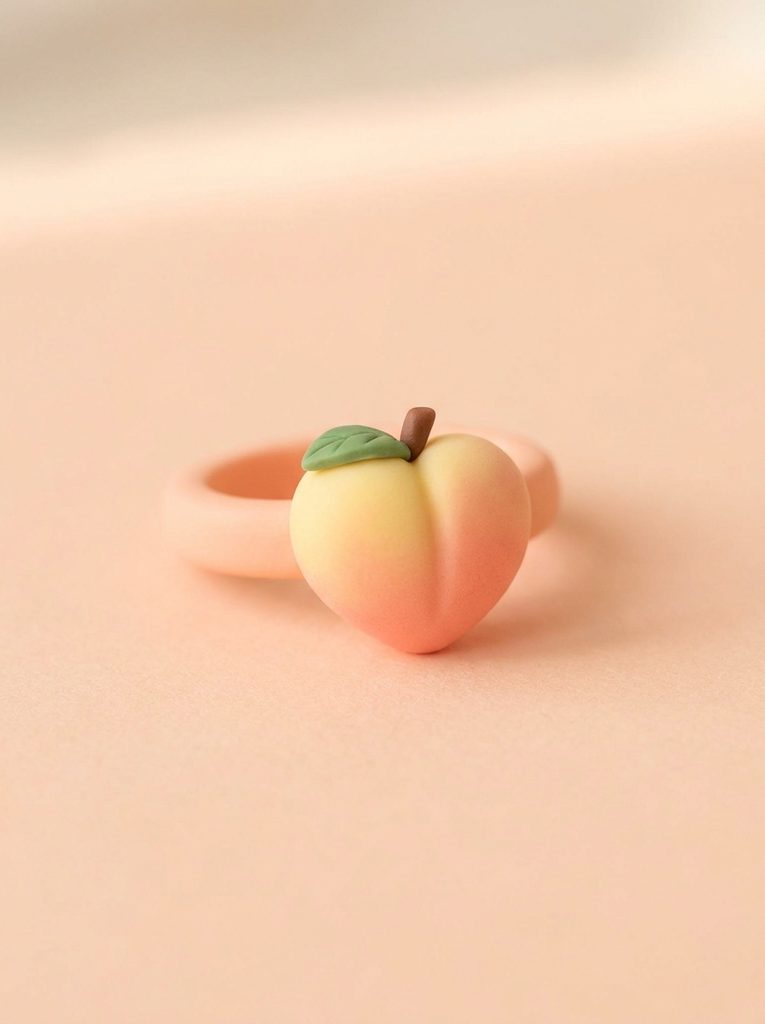
The blushing peachy keen ring celebrates soft fruit forms through gentle color gradients and smooth, organic sculpting techniques. The central feature is a plump, heart-shaped peach miniature displaying a seamless transition from pale buttercup yellow to soft coral pink across its curved cheeks. A defined vertical cleft runs down the center of the fruit, terminating at a miniature stem accented with a single sage green leaf. The supporting finger band is crafted from matching pastel peach clay, creating a unified monochromatic palette that feels cohesive and visually gentle. The velvety finish of unglazed, fine-sanded polymer clay gives the finished peach a soft, realistic matte appearance that complements minimalist aesthetic jewelry collections.
To create the gradient peach, prepare equal portions of pastel yellow and soft coral clay, blending them using a stepped conditioning fold to produce a clean two-color Skinner blend sheet. Form a firm ball from the blended clay, orienting the yellow tone toward the bottom and the rich coral hue toward the upper cleft. Use a flexible blade edge to press a soft, vertical indentation down the front hemisphere, shaping the base into a gentle, rounded point reminiscent of ripe orchard fruit. Affix a tiny brown clay fleck at the top apex to serve as the stem, accompanied by a single teardrop leaf stamped with a faint central vein line. Attach the sculpted fruit onto a pre-formed pastel band resting on a metal sizing rod, smooth the contact points thoroughly with a silicone blending tip, and bake at the precise temperature required for translucent blends.
Idea 8: Lavender Galaxy Stargazer Cat
How to Create
The galaxy stargazer cat ring merges whimsical animal sculpting with deep cosmic color blending and celestial accents. The main figure presents an abstracted feline head crafted from deep midnight violet and lavender clay marbled together with micro-fine silver cosmetic mica powder. Perky, upright ears feature tiny silver leaf foil accents on the inner folds, catching ambient light from multiple angles. Two bright white starbursts, carefully hand-painted with acrylic ink after curing, serve as expressive eyes, while tiny painted dot constellations sweep across the feline forehead. This piece adopts an adjustable open-shank band architecture, where one end terminates in the sculpted cat head and the opposite end finishes in a miniature four-point star, allowing flexible sizing and comfortable wear.
Start by twisting strands of deep violet, lavender, and translucent clay together, rolling and folding the mass until organic, marble-like striations emerge across the surface. Shape an oval piece of this galactic mixture into an abstracted feline head, pinching two defined, symmetrical triangular ears along the upper contour. Press a small square of silver craft foil onto the inner ear recesses, burning the metallic layer smooth using a rounded glass stylus. Roll a tapered band from the same marbled clay, curving it around an open-ended ring core so the ends overlap by ten millimeters without touching. Mount the cat head securely onto the primary band tip and shape a sharp four-point star onto the secondary tail tip, cure the piece thoroughly, and seal the constellation art with clear, scratch-resistant varnish.
Idea 9: Retro Pixel Gaming Heart
How to Make
The retro pixel gaming heart ring draws inspiration from vintage eight-bit digital graphics, utilizing precise geometric construction rather than soft, organic modeling. The central emblem depicts a stepped heart motif, composed of distinct cubic blocks arranged in a symmetrical digital pattern reminiscent of classic video game health indicators. A crisp black outline surrounds the vibrant crimson interior pixels, creating high visual contrast and an unmistakable pop-art sensibility. The supporting band features a squared, contemporary profile that echoes the geometric theme of the centerpiece. This design requires strict dimensional accuracy, making it an excellent exercise for makers looking to refine their cutting, measuring, and block-assembly skills.
Visual Grid Layout:
[ ][X][X][ ][X][X][ ]
[X][R][R][X][R][R][X]
[X][R][R][R][R][R][X]
[X][R][R][R][R][R][X]
[ ][X][R][R][R][X][ ]
[ ][ ][X][R][X][ ][ ]
[ ][ ][ ][X][ ][ ][ ]
Key: [X] = Black Outline, [R] = Red Heart Pixel, [ ] = Empty Space
Begin by extruding or cutting precise square rods of black and bright red conditioned clay, ensuring each rod measures exactly two millimeters on each face. Assemble these structural rods side by side according to a prepared eight-bit heart template grid, placing red rods in the core and framing them with solid black perimeter canes. Compress the assembled multi-rod block gently from all four sides using flat wooden blocks to eliminate interior voids without distorting the square alignment of the pixels. Chill the composite block in a refrigerator for fifteen minutes to firm the compound, then slice a crisp three-millimeter-thick pixel heart tile using a sharp tissue blade. Fuse this geometric tile onto a flat-topped black square-profile ring band with a thin film of liquid clay, and bake flat on a level tile.

Idea 10: Honeycomb and Honeybee Band
Step-by-Step Guide
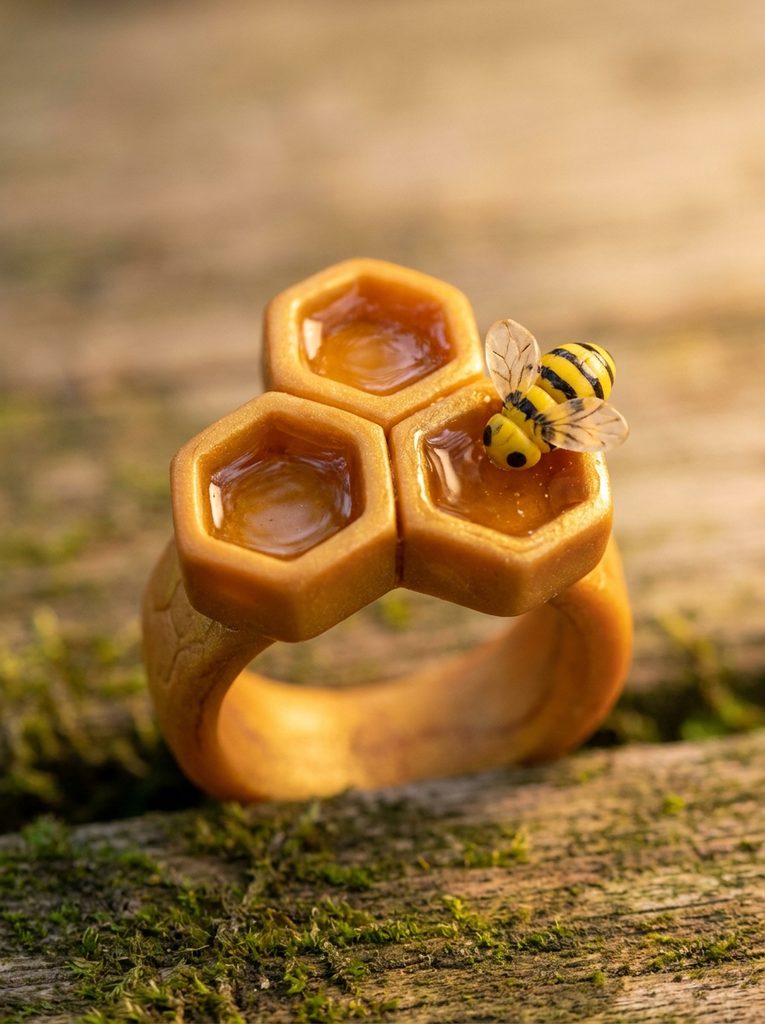
The honeycomb and honeybee ring combines geometric pattern construction with delicate organic character modeling to create an eye-catching statement piece. The central element features three interlocking hexagonal cells crafted from warm golden-amber clay, with two cells filled with translucent liquid clay to simulate glistening, fresh honey. Perched along the upper perimeter of the comb, a miniature honeybee with alternating yellow and black torso stripes rests with clear, textured clay wings. The structural band utilizes a warm butterscotch hue that complements the central comb without drawing attention away from the detailed insect sculpture. This design showcases advanced textural contrasts, combining matte geometric cell walls with ultra-glossy liquid honey fillings for maximum visual depth.
Form the honeycomb structure by rolling thin, even ribbons of amber clay and wrapping them around a miniature hexagonal shaping rod to produce three hollow, uniform geometric tubes. Cut the tubes to a uniform height of four millimeters, press their exterior walls together in an offset triangular cluster, and secure them onto a wide, curved ring band. Fill the bottom halves of two hexagonal chambers with liquid polymer clay tinted with a microscopic drop of translucent orange alcohol ink to create the liquid honey effect. Model the tiny bee body by joining alternating micro-discs of yellow and black clay, adding two paper-thin ovals of translucent clay for the wings. Place the bee carefully along the edge of the unfilled cell, stabilize the assembly on a curved mandrel, bake in a level oven, and finish the honey sections with clear gloss.
Overcoming Common Beginner Assembly and Baking Errors
Makers starting out with miniature clay accessories frequently encounter structural fragility, uneven curing, or unwanted surface contamination during their early projects. The most common structural failure involves ring bands snapping along the bottom curve after cooling, which happens when crafters use brittle novelty clays or bake the material below its required curing temperature. Polymer clay cures through a thermal fusion process; under-baking leaves the plasticizer oils unlinked, resulting in chalky, fragile rings that cannot endure natural finger movement. To eliminate this issue, use a dedicated standalone oven thermometer rather than relying solely on built-in appliance dials, which often fluctuate widely.
Troubleshooting Common Polymer Clay Ring Issues:

[Brittle / Snapping Bands] ---> Cause: Under-baking or low-grade clay
                             ---> Fix: Use durable clay; cure at recommended heat for full time

[Surface Lint & Dust]       ---> Cause: Dirty tools or static attraction
                             ---> Fix: Clean with isopropyl alcohol; wear nitrile gloves

[Visible Joining Seams]     ---> Cause: Dry joins without bonding agents
                             ---> Fix: Apply liquid clay; blend seams with silicone tools

[Warped Band Circumference]  ---> Cause: Baking flat without support
                             ---> Fix: Cure directly on a metal ring mandrel or curved core
Surface contamination from airborne lint, dust, and natural skin oils presents another frequent obstacle, particularly when working with pale pastel or white compounds. Keep a clean workstation by wiping all glass surfaces, acrylic rollers, and cutting blades with rubbing alcohol, and consider wearing powder-free nitrile gloves while conditioning light shades. If dust particles settle on unbaked pieces, smooth them away gently using a cotton swab dipped in isopropyl alcohol. Finally, avoid pressing separate decorative pieces directly onto smooth ring bands without a bonding agent; unbaked clay components often pull apart after curing unless secured with a thin layer of liquid polymer adhesive or blended thoroughly with silicone modeling tools.
Practical Refinement Strategies for Professional Finishes
Transforming a basic clay ring into an eye-catching, durable accessory requires close attention to structural reinforcement, surface refining, and deliberate finishing methods. Incorporating an internal wire armature—such as wrapping thin, sixteen-gauge aluminum craft wire within the center of the ring band—significantly improves tensile strength and prevents snapping across the base. Before curing your piece, smooth out fingerprints and slight tool marks across all exposed faces by stroking the raw clay with a soft brush dipped in a tiny amount of isopropyl alcohol. This simple step dissolves micro-textures, leaving a clean, uniform finish that requires minimal sanding after the piece cools.
Post-Curing Finishing Process:
Step 1: Wet-Sand (400-grit)  ---> Smooth rough seams and sharp edges
Step 2: Fine-Sand (800-grit) ---> Remove visible scratches
Step 3: Polish (1200-grit)   ---> Restore surface density and satin sheen
Step 4: Topcoat Application  ---> Apply matte or gloss polyurethane varnish
Once your ring is completely cured and cooled, use wet-and-dry automotive sandpaper to refine the interior band edges for maximum wearing comfort. Submerging the piece in warm, soapy water while sanding through four hundred, eight hundred, and twelve hundred grits eliminates rough spots without releasing airborne plastic dust. After sanding, restore the rich color depth of the material with a soft denim cloth buffing wheel or a gentle hand rub. When choosing surface sealants, select water-based polyurethane varnishes or UV-curable jewelry resins formulated specifically for polymer compounds. Avoid using generic aerosol spray lacquers, which contain propellants that can soften polymer clay over time, leaving the cured surface sticky to the touch.
Creative Styling, Storage, and Care for Miniature Rings
Thoughtful display and careful storage preserve the fine dimensional details of handmade clay rings while keeping them clean and accessible for daily wear. Because miniature clay elements feature raised components—such as fruit stems, animal ears, and pastry accents—storing them loose in large jewelry boxes can cause delicate parts to chip or snap. An ideal storage setup utilizes a compartmentalized acrylic ring organizer with soft velvet or high-density foam inserts that hold each band upright and separated. This arrangement prevents dust buildup, avoids accidental crushing, and presents your collection with a neat, organized look that highlights the creative ideas behind each distinct piece.
Ring Display and Care Best Practices:

Storage:
* Use individual velvet-lined ring slots to protect delicate protruding details.
* Keep away from direct sunlight to prevent long-term color shifting.

Care & Maintenance:
* Remove rings before washing hands, swimming, or applying alcohol-based lotions.
* Clean surfaces gently with a damp microfiber cloth; avoid harsh solvents.
* Store in a cool, dry place away from excessive ambient heat.
When styling your rings, pair these colorful pieces alongside neutral or minimalist metallic bands to let the character motifs stand out as intentional focal points. You can also group complementary designs—such as pairing the strawberry cream roll ring with the miniature glazed donut band—across adjacent fingers to create a playful, themed aesthetic. Although properly cured polymer clay is water-resistant, you should still remove your rings before heavy dishwashing, swimming, or applying chemical lotions and hand sanitizers. Solvents can degrade acrylic paint details and dull protective clear coats, so wiping the pieces clean with a damp microfiber cloth is the best way to keep them looking fresh and vibrant.
Project Timelines and Smart Material Allocation
Completing sculpted jewelry projects efficiently requires smart planning, especially when creating multi-piece collections or assembling intricate miniature components. Preparing your colored clays in batches significantly cuts down on overall fabrication time compared to conditioning and mixing new colors for every single ring design. Set aside dedicated prep blocks to condition core neutral tones, mix your custom pastel shades, and roll standard-thickness sheets, storing each prepared color in sealed polyethylene pouches to keep them dust-free.
| Production Phase | Dedicated Task | Time Allocation |
|---|---|---|
| Phase 1: Preparation | Color formulation, conditioning, workspace sanitization | 30–45 Minutes |
| Phase 2: Base Construction | Band sizing on mandrels, wire core insertion, seam smoothing | 45–60 Minutes |
| Phase 3: Detailing | Sculpting toppers, character expressions, miniature elements | 60–90 Minutes |
| Phase 4: Thermal Curing | Batch oven baking with calibrated temperature monitoring | 30–45 Minutes |
| Phase 5: Refinement | Wet-sanding interior edges, detail painting, protective coating | 45–60 Minutes |
Working on multiple bands simultaneously makes the most of your oven run, saving both energy and time by curing a full tray of projects in a single, controlled cycle. Grouping similar designs together—such as making several dessert-themed toppers in one sitting—lets you reuse specialized tools without having to clean them between steps. Keeping an accurate log of your clay mixing ratios, precise baking times, and temperature settings ensures consistent results across future projects, minimizing wasted compound and saving time on troubleshooting.
Advanced Sculptural Variations and Creative Design Expansions
After getting comfortable with foundational band sizing and character sculpting, you can explore more advanced decorative techniques that push the boundaries of miniature polymer clay jewelry. Incorporating translucent and metallic mica clay blends into your base forms introduces rich internal depth, giving pieces the soft, glowing appearance of natural stones or sea glass. You can also experiment with embedding small, flat-back chaton crystals, glass micro-beads, or sterling silver findings directly into the raw clay before curing, expanding your creative possibilities with contrasting material textures.
Advanced Design Concepts:

[Mica Shift Patterns]     ---> Texture metallic clay, slice flush, shape into shimmering bands
[Glow Pigment Infusions]  ---> Blend strontium aluminate into translucent clay for night-glow elements
[Articulated Link Charms] ---> Anchor miniature dangles onto dynamic, multi-part ring assemblies
[Faux Stone Textures]     ---> Incorporate dried herbs or rock powders for organic mineral looks
Another compelling direction is exploring miniature canework, where you build intricate graphic images—such as geometric checkerboards, citrus slices, or floral motifs—into large cylindrical blocks of clay. Slicing these canes into thin, uniform cross-sections provides identical, perfectly detailed tiles that can be applied across multiple ring shanks. You can also mix glow-in-the-dark powders or photochromic pigments into translucent clay to produce rings that respond dynamically to ambient light changes. As your comfort with micro-sculpting grows, you can integrate these techniques into broader handmade collections, crafting matching pendant charms, hairpins, and desk trinkets that celebrate your personal aesthetic with confidence and precision.
Leave a Reply