
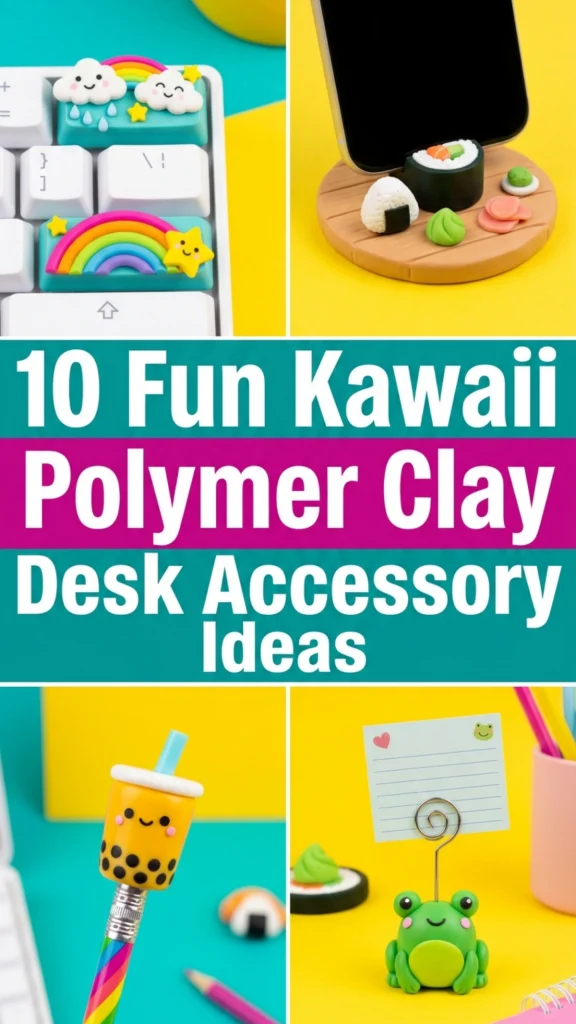
Personalizing a workspace with functional handcrafted accents transforms a routine office environment into an inviting and productive sanctuary. Kawaii polymer clay desk accessories combine Japanese-inspired cute aesthetics with practical organization tools, providing desktop utility through tactile art. This detailed guide offers complete creative ideas, structured design principles, and reliable assembly steps to sculpt durable, high-finish desktop items at home. Readers will explore ten innovative desk accessory concepts, essential clay conditioning practices, structural armature support methods, and protective curing protocols. Sculpting functional workspace decor allows individuals to produce customized stationery holders, paperclip trays, charging cord grips, and photo holders without relying on generic plastic desk supplies. Polymer clay serves as an optimal artistic medium because it cures hard, retains vibrant pastel pigmentation, and resists daily wear without deteriorating or fading. Through clear step by step tutorials, ergonomic considerations, and non-toxic finishing techniques, makers of any experience level can craft delightful office elements with absolute confidence.
Why This Idea Is Trending or Useful
Playful stationery accents and charming workspace organizers continuously lead contemporary Pinterest ideas because home office workers actively seek ways to balance corporate efficiency with joyful, comforting design elements. The kawaii aesthetic emphasizes simplified geometric curves, rounded proportions, friendly expressions, and soft pastel shades, which naturally soften rigid digital workstations. Beyond their decorative value, these polymer clay desk objects deliver notable practical value by solving everyday desktop clutter issues like loose charging cables, scattered paperclips, rolling pens, and misplaced business cards. From a DIY perspective, polymer clay represents an accessible, beginner friendly medium that does not require expensive ceramic kilns or large industrial studio tools. Small tabletop toaster ovens or conventional kitchen ovens cure the polymer matrix completely within forty minutes. The versatility of polymer clay allows makers to customize dimensions to fit their specific workspaces, making this an easy project with endless creative potential and minimal material waste.
Materials and Preparation
Executing clean, durable kawaii clay accessories requires selecting premium supplies and establishing a sanitary workspace prior to shaping your designs. Procure high-density oven-bake polymer clay in pastel tones such as mint green, powder pink, buttercup yellow, soft lilac, and crisp white. Gather essential sculpting tools, including acrylic rolling rods, flexible steel tissue blades, silicone-tipped color shapers, fine metal ball styluses, and clean glazed ceramic work tiles. To ensure structural strength for functional items, stock heavy-gauge aluminum armature wire, tin foil for hollow cores, and liquid polymer clay to serve as an internal adhesive bake bond. Clean your ceramic tiles, rolling equipment, and hands thoroughly with isopropyl alcohol to remove airborne dust, lint, and oils that could stain pale clay slabs. Maintain a cool room temperature so the clay does not become overly soft during handling. Always test your oven temperature using a standalone thermometer to ensure precise heat calibration before baking your finished pieces.
Idea 1: Sleeping Bunny Cable Bite Cord Protector
Step-by-Step Guide
The sleeping bunny cable bite cord protector provides functional utility by preventing delicate phone charging cables from bending and fraying at the connector base. This design features a chubby, rounded white rabbit figure positioned as if resting horizontally over the phone plug, with its chin hugging the cable wire. Rounded ears folded flat against the back, blushing pink cheeks, and delicate crescent eyes create a sweet sleeping expression that brings charm to charging stations. The base of the sculpture contains an open longitudinal groove that clips securely onto standard lightning or USB-C cables, absorbing mechanical stress whenever the cord is moved. The compact silhouette prevents the accessory from taking up too much room in laptop bags, making it an ideal travel companion.
Begin by conditioning two ounces of white polymer clay until supple, rolling it into an elongated egg shape measuring one and a half inches in length. Use a flexible tissue blade to slice a neat channel halfway through the underside of the egg, pressing a spare charging cable into the channel to establish the exact gauge before removing the cord. Roll two small teardrop forms in white clay, flatten them slightly, and press thin pink clay strips into the centers to create folded bunny ears, attaching them to the top of the head with liquid clay. Use a needle tool to score tiny closed eye curves, and blend tiny balls of soft pink clay onto the cheeks using a silicone blending tool. Insert an oven-safe scrap wire into the channel to prevent it from closing during heating. Cure the piece flat on a ceramic tile at 275 degrees Fahrenheit for thirty-five minutes, let it cool completely, and apply a matte protective glaze.

Idea 2: Happy Toast Sticky Note Pad Tray
How to Create
The happy toast sticky note pad tray organizes small square paper pads inside a raised ceramic-style border designed to look like a golden slice of bread. This desktop piece features a square clay base with rounded upper lobes and a raised, textured crust edge in rich amber brown, framing an interior reservoir perfectly sized for three-inch sticky notes. In the center or bottom corner of the tray, a friendly smiling face with wide black eyes and pink cheeks greets the user as notes are peeled away. The raised crust prevents paper pads from shifting during quick memos, while the low front edge allows fingertips to lift notes smoothly. This functional design adds playful warmth to minimalist wooden desks and modern student workspaces.
To build the tray, condition four ounces of warm cream clay and roll it out to an even four-millimeter thickness on your ceramic tile. Use a square cutter to trim the clay into a three-and-a-half-inch square, gently curving the top corners with your fingers to mimic the domed crest of a bread slice. Roll a thin rope of tan clay, flattening it into a ribbon, and wrap it around the outer perimeter to form a six-millimeter-tall raised crust wall, smoothing the interior seam with a silicone blending shaper. Mix brown and gold chalk pastel dust, brushing it lightly along the outer crust using a dry paintbrush to simulate a baked golden gradient. Add two round black clay dots for eyes and a curved mouth in the bottom right corner of the tray base. Bake the piece flat on a ceramic tile at 275 degrees Fahrenheit for forty minutes, allowing it to cool slowly inside the oven to prevent warping.

Idea 3: Strawberry Milk Carton Pen Stand
Execution Process
The strawberry milk carton pen stand brings retro Japanese vending machine nostalgia to desktop organization, holding highlighters, pens, and stylus tools upright. This accessory features a hollow rectangular box with a tapered triangular carton roof, styled in alternating panels of pastel pink, soft cream, and strawberry motifs. The open roof aperture allows tall writing instruments to stand vertically without toppling, while the heavy polymer base keeps the container balanced. Sculpted strawberry slices and cream drizzle accents along the carton collar provide multi-dimensional tactile relief. The nostalgic dairy carton silhouette introduces height to desk setups, breaking up horizontal surface clutter with clean geometric lines.
Construct the inner core of the carton by folding a hollow rectangular box out of stiff cardstock, wrapping it in heavy-duty aluminum foil to serve as a sturdy, removable baking armature. Roll out a uniform three-millimeter slab of pastel pink clay, slicing four rectangular panels to cover the carton walls, and secure the edges with liquid clay. Build the top slanted roof panels out of cream-colored clay, leaving the central triangular top open to provide an unobstructed opening for pens. Add tiny red clay strawberry cutouts and green leaf caps around the exterior pink walls, smoothing them flush with an acrylic rolling rod. Bake the upright structure on a baking tile at 275 degrees Fahrenheit for forty-five minutes to ensure the thick walls cure thoroughly. Once cool, remove the foil armature through the top opening, sand the top rim smooth with 600-grit wet sandpaper, and seal the exterior with satin varnish.
Idea 4: Sleeping Bear Cloud Wrist Rest
How to Make
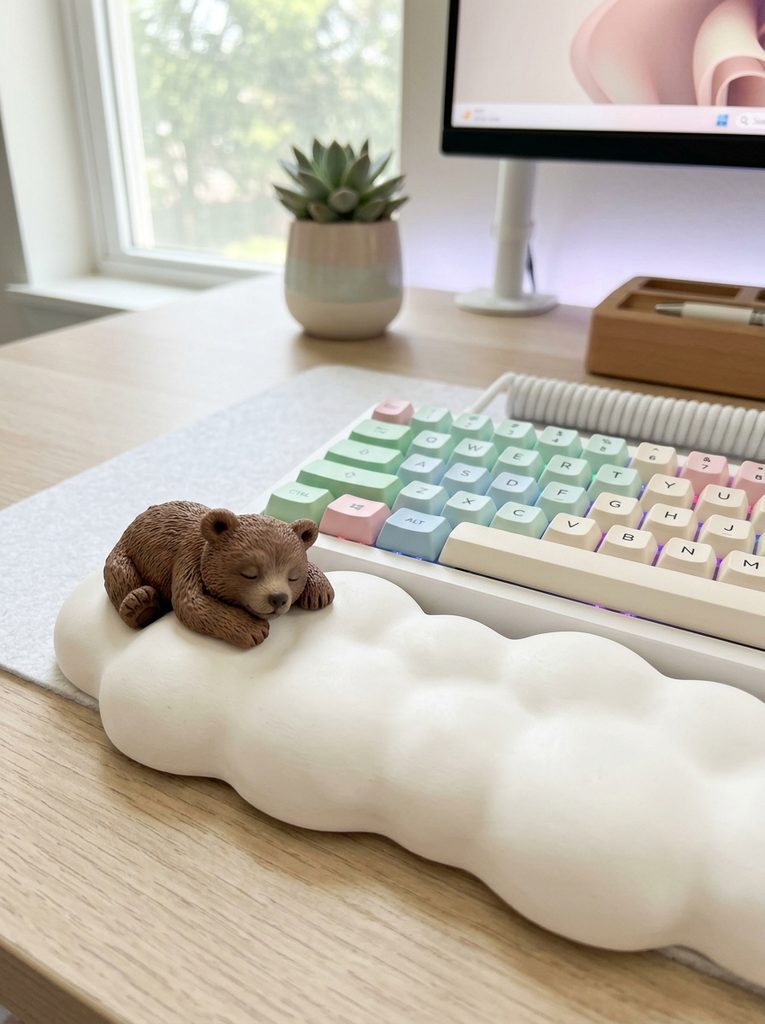
The sleeping bear cloud wrist rest reduces ergonomic strain during long typing sessions by providing a smooth, cushioned support surface directly in front of the keyboard. This design features a horizontal puffy white cloud silhouette, upon which a sleepy brown bear cub rests its head and paws along the edge. The cloud surface is shaped with soft, rolling mounds that support the base of the palms, keeping the wrists in a neutral, relaxed posture. The matte polymer finish remains cool to the touch throughout the workday and wipes clean easily, offering a hygienic alternative to standard foam wrist rests. The neutral brown and white color scheme keeps this charming design looking tidy alongside modern mechanical keyboards.
Begin by shaping a solid internal armature using crumpled aluminum foil, flattening it into a horizontal bar measuring ten inches long, two inches wide, and one inch tall to reduce the amount of clay needed. Roll out a large four-millimeter sheet of pure white polymer clay, wrapping it smoothly around the foil core and smoothing the seams with your fingers. Sculpt three shallow dips along the top surface to cradle the wrists comfortably, blending overlapping clay spheres along the bottom edge to create billowy cloud puffs. Sculpt a compact bear head in warm taupe clay, pressing it onto the left crest of the cloud with liquid clay, and sculpt two small paws draped over the front cloud rim. Use black clay to shape sleeping eye lines and a round nose. Bake the entire assembly supported on an oven-safe tile at 275 degrees Fahrenheit for fifty minutes, and buff the surface with denim after cooling.

Idea 5: Kawaii Boba Tea Paperclip Dispenser
Setup Method
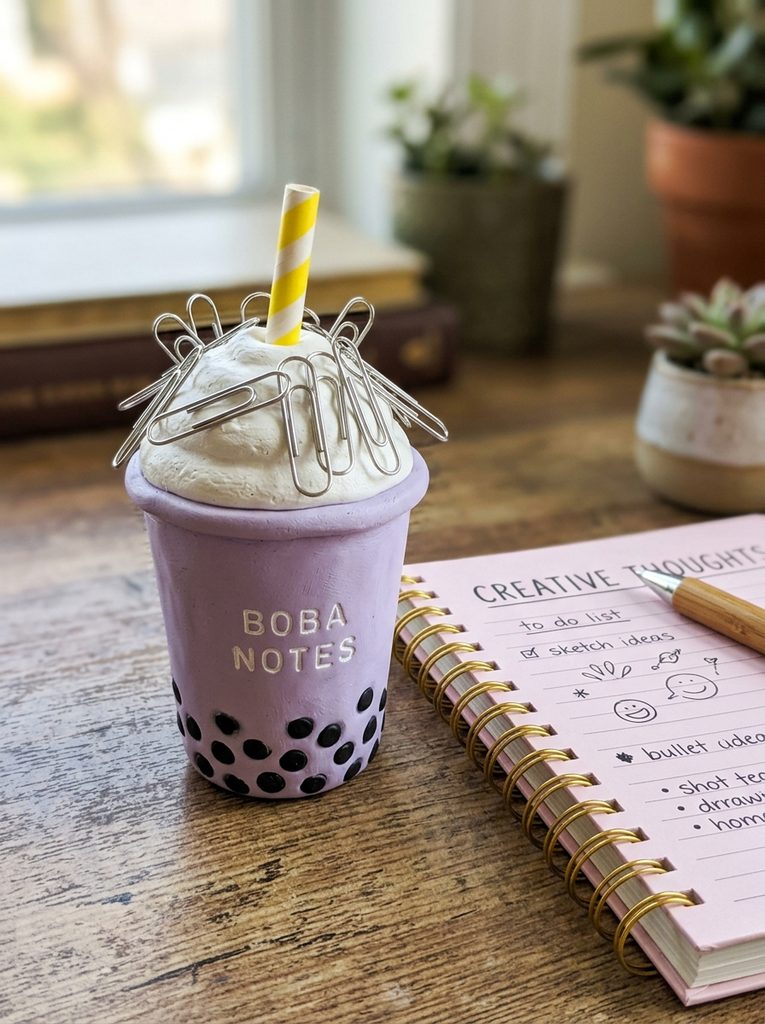
The kawaii boba tea paperclip dispenser combines practical magnetic storage with the beloved aesthetic of a bubble tea cup, keeping metallic clips neatly organized on the desk. This design features a tapered cup in soft lavender, mint, or milk tea beige, topped with a domed clear lid, a tilted drinking straw, and sculpted black tapioca pearls along the base. A powerful neodymium magnet is embedded flush beneath the domed top, allowing steel paperclips to cling to the lid like floating ice cubes. The wide, weighted base prevents the container from tipping over when paperclips are pulled away quickly. This interactive desk accessory keeps paperclips organized and within reach while bringing cheerful visual interest to workspaces.
Start by shaping the cup body using a truncated cone of scrap clay wrapped tightly around a metal fishing sinker to provide solid bottom weight. Wrap the core in a smooth three-millimeter layer of pastel lavender clay, trimming the top and bottom perimeters with a tissue blade to create clean, straight lines. Press six tiny spheres of shiny black clay around the lower perimeter of the cup to create the boba pearls, smoothing them halfway into the lavender wall. Press a strong half-inch neodymium magnet firmly into the top center of the cup, covering it with a thin sheet of white clay sculpted into whipped cream ripples. Roll a small cylinder of bright yellow clay to serve as the straw, angling it slightly into the whipped cream next to the magnet. Bake the piece upright at 275 degrees Fahrenheit for forty minutes, then coat the boba pearls and whipped cream with high-gloss glaze.
Idea 6: Smiling Avocado Photo and Memo Clip
How to Create
The smiling avocado photo and memo clip displays photos, sticky notes, and daily goal reminders at eye level using a coiled wire stand anchored in a fruit base. The design showcases an upright halved avocado with soft lime green flesh, a darker forest green outer rind, and a round brown pit featuring a cheerful smiling face. The wide base of the avocado rests firmly on the desk without rocking, while a sturdy silver alligator clip or coiled brass wire extends upward from the back to hold memos. The high-contrast green palette brings an organic, cheerful accent to neutral office desks, while the vertical wire keeps paper reminders clearly visible above flat desktop clutter.
Condition light lime green clay and dark green clay separately, rolling each into smooth, pliable balls. Form the lime green clay into a flat teardrop pear shape measuring two inches tall and half an inch thick, wrapping a two-millimeter strip of dark green clay around the outer edge to form the rind. Use a round ball tool to press a shallow circular depression into the lower belly, inserting a smooth ball of warm chocolate brown clay to serve as the pit. Score a small curved smile and press two black seed beads into the pit for eyes, using pink pastel dust to add blush to the cheeks. Cut a five-inch length of sixteen-gauge galvanized craft wire, twisting the top into three concentric flat memo coils, and push the straight bottom two inches down through the center of the avocado body. Bake upright on a ceramic tile at 275 degrees Fahrenheit for thirty-five minutes, securing the wire with epoxy glue after cooling.

Idea 7: Little Chick Eraser and Sharpener Caddy
Step-by-Step Guide
The little chick eraser and sharpener caddy provides specialized storage for small stationery accessories that frequently get lost inside desk drawers. This design features a plump, spherical baby chick in bright buttercup yellow, sculpted with an open back cavity designed to hold a standard pencil sharpener or pink eraser. Tiny orange triangular wings rest against its sides, while an open orange beak and wide black eyes give the chick a curious, friendly appearance. The thick, rounded walls protect the items inside, while the wide flat base keeps the caddy from rolling across the desk. This bright yellow accent brings cheerful energy to wooden desks and creative drafting tables.
To form the caddy, mold an egg-shaped ball of aluminum foil roughly two inches in diameter, flattening the bottom so it rests securely on your work surface. Roll out a uniform three-millimeter slab of pastel buttercup yellow clay, wrapping it around the foil ball and smoothing the seams with an acrylic roller. Use a craft knife to carve out a wide, semi-circular opening in the top back of the sphere, carving away the interior foil to create an accessible storage cup. Add two small triangular orange clay paddles to the sides for wings, and attach a small pointed orange cone to the front face for the beak. Add two tiny black clay rounds for eyes, using a silicone tool to press them flush into the yellow head. Cure the piece at 275 degrees Fahrenheit for forty minutes, carefully extract the remaining interior foil armature with needle-nose pliers once cool, and coat the interior cavity with protective polyurethane glaze.

Idea 8: Kawaii Cat Paw Stamp and Tape Cutter
Execution Process
The kawaii cat paw stamp and tape cutter introduces playful animal-themed utility to office paper-crafting by housing a small washi tape roll inside a sculpted paw. The design showcases a thick, rounded feline paw in soft blush pink, topped with raised, dimensional white toe beans that add tactile appeal. The base of the paw features an interior spool channel that holds decorative tape rolls, with a small serrated steel blade embedded into the front wrist edge for clean cutting. The rounded paw pads serve as an ergonomic grip when pulling tape, keeping the dispenser steady during one-handed use. This charming tool turns functional tape dispensing into an adorable desktop centerpiece that complements pastel stationery collections.
Begin by rolling out a thick block of white polymer clay measuring three inches long, two inches wide, and one and a half inches deep, rounding the top edges into a soft paw silhouette. Carve an interior U-shaped well across the center using a loop modeling tool to hold a standard fifteen-millimeter washi tape roll. Roll out four small oval pads and one larger rounded triangle pad in bright pink clay, pressing them firmly onto the front paw surface to create the iconic toe beans. Press a small, recycled serrated metal cutter blade into the front lower lip of the tape well, removing the blade carefully before baking. Insert an oven-safe wooden dowel through the tape well to preserve the spool dimensions during curing. Bake the piece flat on a ceramic tile at 275 degrees Fahrenheit for forty-five minutes. Once cooled, secure the metal cutting blade into the pre-formed slot with two-part epoxy adhesive, and slip your tape roll onto a wooden peg inside the well.

Idea 9: Pastel Dino Phone Stand
How to Make
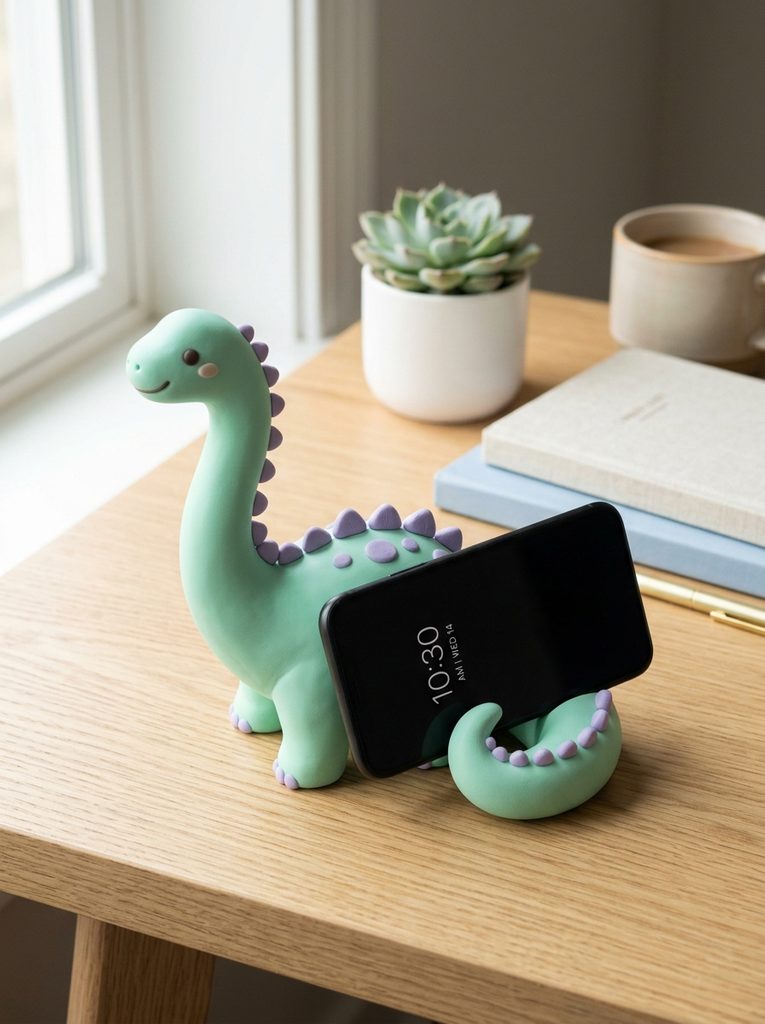
The pastel dino phone stand supports smartphones at an optimal viewing angle for video calls, digital calendar monitoring, and desk notifications. This design features a chubby, stylized sauropod dinosaur in soft mint green, with a long curved tail that wraps forward to form a supportive front cradle lip. The dinosaur’s rounded back rests at an angled incline that supports the phone securely in both portrait and landscape modes. The friendly face, tiny stubby legs, and pastel lavender back ridges give the prehistoric creature an adorable modern aesthetic. The weighted base ensures the stand remains stable under the weight of larger smartphones without tipping backward.
Create the internal core by shaping a dense, angled wedge out of crumpled aluminum foil, checking that the front rest shelf holds a smartphone at a comfortable sixty-degree viewing angle. Cover the foil wedge with a three-millimeter layer of conditioned mint green clay, smoothing the surface with an acrylic roller until seamless. Sculpt a thick, curved tail extending three inches forward from the base, curling the tip upward into a supportive hook to keep the phone from sliding off. Sculpt a rounded dinosaur neck and head, pressing it securely to the top left corner of the stand using liquid polymer clay. Add five small triangular purple clay plates along the dinosaur’s spine, and use black clay to add sweet sleeping eyes. Bake the entire stand on a ceramic tile at 275 degrees Fahrenheit for fifty minutes to achieve maximum structural strength, allowing it to cool slowly inside the oven before use.

Idea 10: Happy Sun and Cloud Desk Clock Frame
Setup Method
The happy sun and cloud desk clock frame surrounds a standard compact digital or quartz clock insert with cheerful weather motifs, keeping time management fun and stress-free. The design features a fluffy white cloud base from which a radiating, smiling golden sun rises, with a circular opening in the sun’s center to hold a mini clock insert. Tiny pastel raindrops along the cloud base add vertical balance and whimsical charm to the clock face. The flat bottom edge of the cloud ensures the clock stands firmly on shelves, computer stands, or bedside tables. The vibrant yellow and clean white tones provide a bright, eye-catching focal point that makes checking the time a pleasant visual break during busy workdays.
Begin by cutting a two-inch circular hole out of a flat four-millimeter sheet of golden yellow clay, using a round metal cookie cutter to match the outer diameter of your mini clock insert. Cut sixteen small triangular rays out of matching yellow clay, attaching them symmetrically around the outer perimeter of the yellow circle with liquid polymer clay. Roll out a thick, elongated white cloud shape, pressing the lower third of the sun disc into the top edge of the cloud to create an integrated foundation. Score a friendly smile and press two black clay dots onto the sun’s face beside the central clock cavity, adding blush to the cheeks with soft pink pastel powder. Smooth the back of the joint between the sun and cloud with scrap clay to reinforce the connection. Bake the piece flat on a tile at 275 degrees Fahrenheit for forty minutes. Once cooled, push the mini quartz clock mechanism into the center hole, securing it firmly with a small bead of removable silicone glue.
Common Beginner Mistakes and How to Avoid Them
Crafting functional desk accessories with polymer clay presents technical challenges that differ from sculpting purely decorative figurines. The most common mistake beginners make is sculpting thick, solid clay figures without internal armatures, which leads to uneven curing, internal cracking, and excessive clay use. Always build a dense core out of crumpled aluminum foil or scrap clay for items thicker than half an inch, keeping the outer decorative clay layer at a uniform three to five millimeters. Another frequent issue is underbaking the clay due to fear of scorching pale pastel colors. Underbaked clay fails to cure completely, leaving desk accessories soft, flexible, and prone to breaking under daily use. Protect pale colors by tenting your ceramic baking tile with an aluminum foil pan to shield pieces from direct oven heating elements, curing for the full recommended time. Finally, many makers handle light pastel clays with dusty hands or tools, embedding dark lint and fingerprints into the raw sculpture. Prevent surface contamination by wiping down tools, tiles, and hands with isopropyl alcohol, and gently smooth raw surfaces with an alcohol-moistened cotton swab before baking.
Practical Tips for Better Results
Achieving a clean, professional finish on handmade kawaii desk accessories relies on consistent clay conditioning, clean cuts, and proper surface care. Always pass your polymer clay through a rolling machine or work it thoroughly by hand until it is warm, supple, and completely free of internal air bubbles before shaping. Slabs with trapped air pockets expand during baking, leaving visible bumps and flaws on flat desktop surfaces like trays and stands. When cutting out precise geometric shapes, use clean, ultra-thin stainless steel cutters or blades, dipping the metal lightly into cornstarch to prevent the clay from sticking and stretching out of shape. If fingerprints or dust settle on cured pieces, wet-sand the cooled clay under cold running water using silicon-carbide sandpaper, progressing from 400 grit up through 1000 grit to create a velvety, scratch-free finish. When attaching delicate clay features like ears, cheeks, or limbs to a main body, always apply a drop of liquid polymer clay between the raw pieces to form a durable heat-fused bond during baking. Finally, seal high-contact accessories with a water-based polyurethane varnish to protect painted details against daily friction.
Styling, Presentation, or Organization Ideas
Thoughtful styling elevates the charm of kawaii desk accessories, whether you are staging a personal workstation, photographing items for social media, or organizing craft supplies. Coordinate your handcrafted clay pieces alongside complementary desk essentials, such as pastel mechanical keyboards, neutral felt desk mats, and matching washi tape rolls, to create a balanced, cohesive setup. Group accessories logically by function: position the sleeping bunny cable bite near your phone charger, set the happy toast sticky note tray beside your keyboard, and place the strawberry milk pen stand near your notebook for an organized, functional workspace. When photographing your creations, use soft, diffused natural daylight angled from the side to highlight rounded curves and pastel shades without harsh glares. Set your accessories against neutral, textured backdrops like bleached birch wood, clean white pegboards, or light linen desk pads to help the colorful clay details stand out. Incorporate matching pastel stationery props, such as colorful gel pens, paperclips, and sticky notes, to demonstrate scale and practical utility clearly in product photos.
Budget or Time Planning
Careful project planning allows you to produce high-quality desk organizers while keeping material costs low and your workflow efficient. Polymer clay represents an economical medium; a multi-pack of pastel clay blocks provides enough material to craft several desk accessories, making the cost per piece very low compared to store-bought organizers. Maximize your budget by saving leftover scraps of mixed colors to use as internal filler cores for larger pieces like pen stands, dinosaur stands, and cloud wrist rests, reserving pristine pastel clay for the visible outer layers. Organize your studio sessions into structured batches to make the most of your creative time. Dedicate your first session to conditioning clay colors, shaping aluminum foil armatures, and cutting flat bases, storing unfinished raw components in airtight plastic containers. Dedicate a second focused session to sculpting details, attaching cute facial features, and baking everything together on shared ceramic tiles to save energy. Reserve a final hour for post-bake wet-sanding, assembling hardware, and applying protective matte or gloss topcoats.
Creative Expansion and Advanced Inspiration
Once you master basic shapes and assembly methods, you can explore creative variations that expand the utility and style of your kawaii desk accessories. Experiment with embedded functional components, such as baking small USB flash drives directly into sculpted character covers, creating custom collectible data sticks. You can also explore surface effects by blending translucent clay with pastel pigments to replicate sea-glass, milky quartz, or frosted candy textures across pencil cups and memo stands. Another creative avenue involves mixing materials: combine sculpted clay characters with natural elements like polished blonde wood bases, brass wire loops, or soft cork linings to produce sophisticated, mixed-media desk decor. As seasons change, design themed accessory sets, such as pumpkin-spice beverage cup holders for autumn, blooming cherry blossom tape dispensers for spring, or holiday-themed cable protectors for winter. These adaptable design techniques keep your desktop styling fresh, functional, and joyful throughout the year.
Leave a Reply