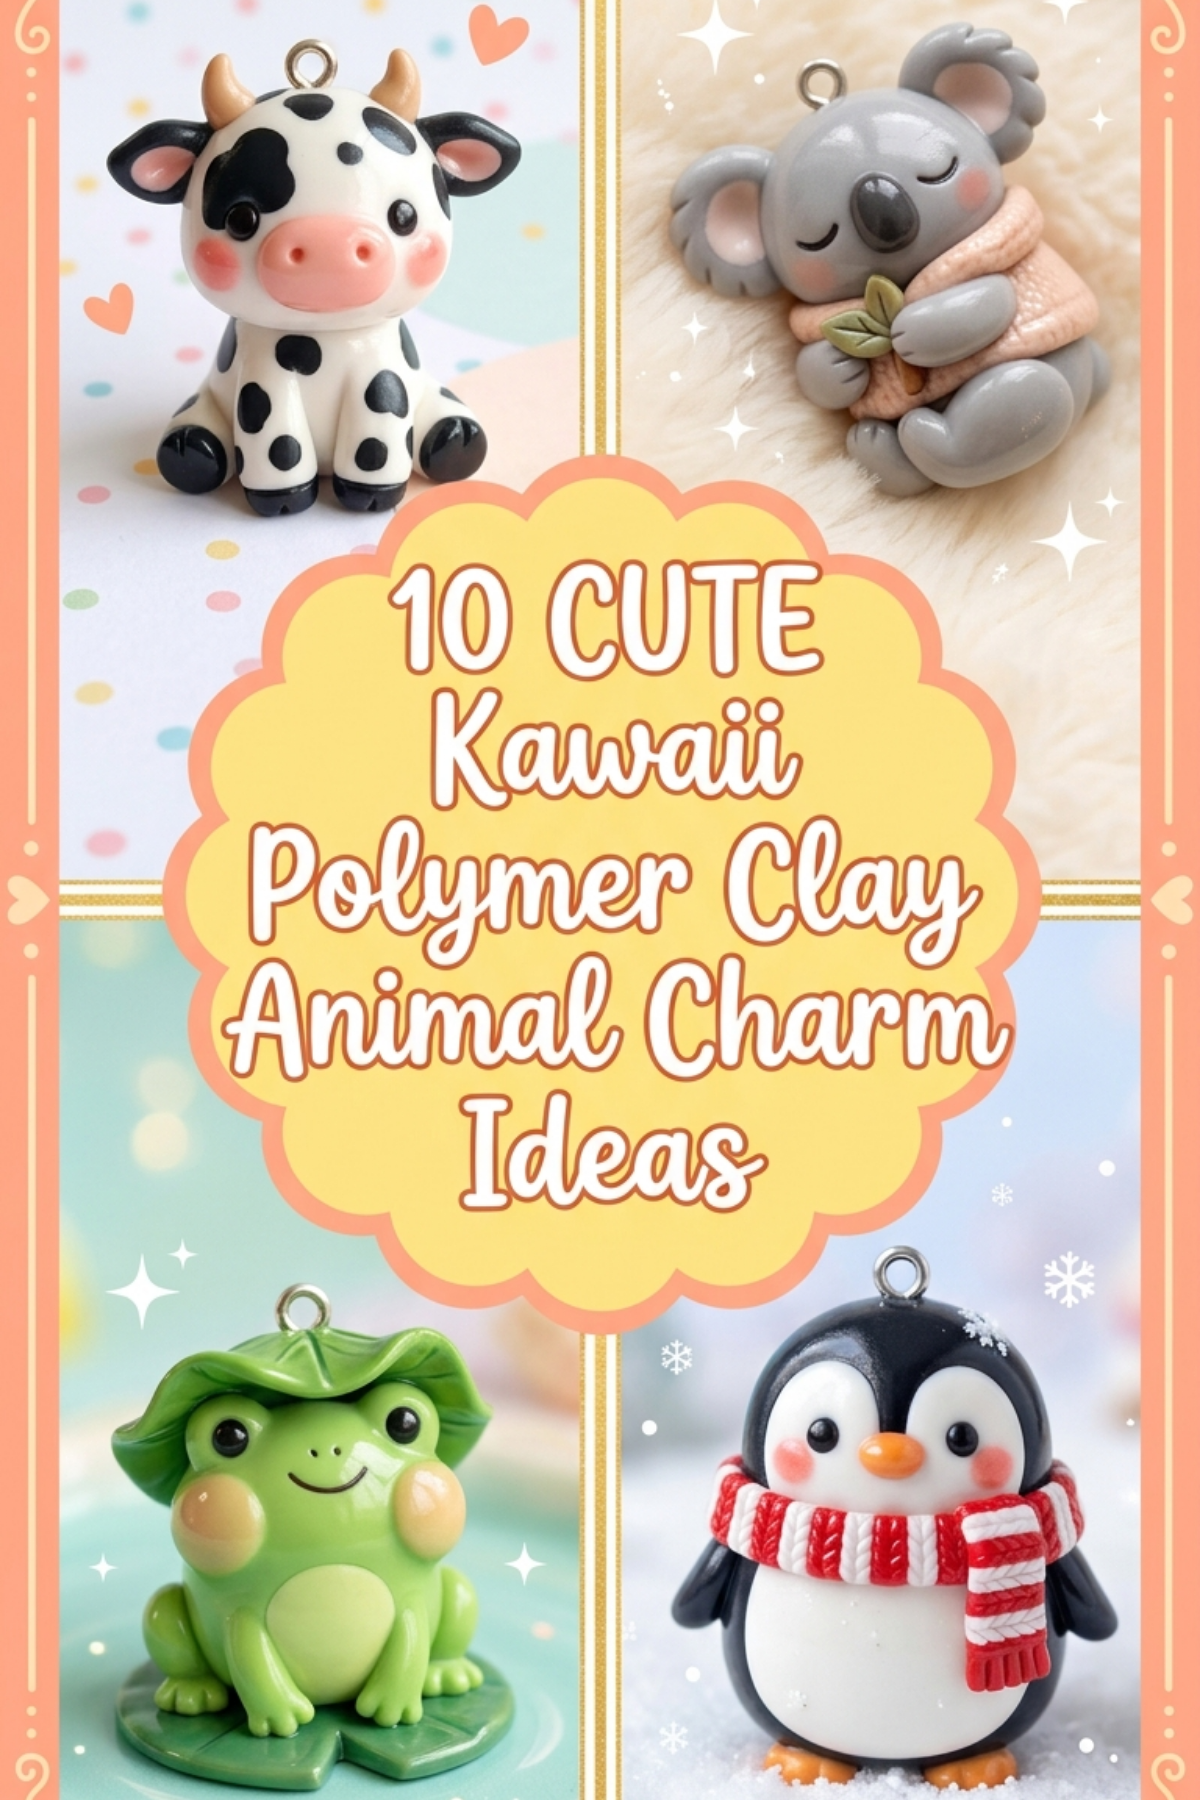
Creating miniature sculptures using oven-bake clay is a widely celebrated craft across digital maker communities and craft boards. This comprehensive guide explores ten charming designs that turn simple modeling blocks into adorable figures featuring soft expressions, simplified anatomy, and compact proportions. Readers will learn the essential construction methods needed to craft smooth surfaces, assemble balanced structural joins, and cure pieces safely for lasting durability. Learning these fundamental clay techniques is valuable because it equips crafters with repeatable skills applicable to wearable jewelry, custom keychains, planner ornaments, and whimsical desk displays. Sculpting these miniature figures requires minimal workspace and accessible equipment, making it an ideal creative project for enthusiasts of all skill levels. By understanding how to measure component ratios, blend clean seams, and add detailed pastel highlights, anyone can transform ordinary polymer compounds into professional-quality handmade trinkets. The instructions provide clear, actionable steps that simplify complex miniature modeling into accessible building blocks, enabling makers to complete expressive, polished figures with confidence.
Why This Idea Is Trending or Useful
Miniature animal charms continue to trend across design platforms due to their high visual appeal, tactile charm, and functional versatility. Crafters value these projects because they offer an accessible DIY outlet that delivers satisfying results within a single afternoon crafting session. The modern kawaii aesthetic emphasizes exaggerated round heads, tiny limbs, understated facial features, and subtle pastel palettes, matching current trends in contemporary craft and desk styling. From a practical perspective, these miniature figures provide an economical entry point into three-dimensional sculpting without requiring expensive studio machinery or specialized kilns. Beginners can quickly master basic geometry—such as rolling uniform spheres, teardrops, and cylinders—to build an entire collection of recognizable animal figures. Furthermore, these compact charms integrate seamlessly into daily accessories, functioning as personalized bag clips, phone strap accents, stitch markers, or delicate home decor elements. The widespread popularity of miniature figures on social platforms stems from this intersection of approachable crafting techniques, low material requirements, and universally engaging character design.
Materials and Preparation
Successful polymer clay modeling begins with careful workstation preparation, proper surface sanitation, and organized supplies. Essential materials include primary blocks of oven-bake polymer clay in pastel and neutral tones, liquid polymer clay to act as a heat-set bonding agent, and soft chalk pastels for adding blush tones. The mechanical tool set requires a smooth ceramic tile or tempered glass working mat, an acrylic rolling pin, stainless steel ball stylus tools in varying diameters, a flexible tissue blade, and rigid metal eye pins for hanging hardware. Cleanliness is critical when working with polymer clay because light-toned clays readily attract airborne dust, lint, and residual skin oils. Wash your hands thoroughly with oil-free soap, clean the entire work surface with isopropyl alcohol, and wipe down your hand tools using a lint-free cloth before opening the clay packages. Prepare the modeling medium by slicing small segments with a blade and conditioning each portion by hand or through a dedicated manual conditioning machine until the clay is pliable, smooth, and free of internal micro-fractures.
The Blushing Strawberry Bear Charm
Step-by-Step Guide
The blushing strawberry bear merges classic woodland character design with sweet fruit accents to produce an endearing, balanced figure. The core form relies on a stout, rounded torso seamlessly topped with a slightly larger, spherical head that establishes the classic kawaii proportions. A tiny sculpted strawberry, complete with a tiny leafy green calyx and surface indentations, rests between the bear’s front paws to add visual storytelling and dimensional contrast. The color scheme features warm buttermilk or soft beige clay for the body, accented by crisp crimson, leaf green, and miniature jet-black details for the eyes and nose. Soft pink chalk pastel dust brushed along the lower cheek contours softens the character’s expression and gives the miniature figure a gentle, hand-painted warmth. This design is structurally sturdy because the limbs and fruit accessory are pressed flush against the main torso, eliminating fragile extended elements that might snap during everyday handling.
Begin by rolling conditioned warm beige clay into an eighteen-millimeter sphere for the head and a slightly smaller fifteen-millimeter teardrop shape for the seated body. Position the head atop the tapered end of the body, anchoring the connection with a tiny drop of liquid clay, and smooth the seam using a silicone color shaper. Shape two four-millimeter spheres of beige clay, press a ball stylus into the center of each to create ear cavities, and attach them symmetrically to the upper head. Roll two tiny black clay specks into uniform spheres for the eyes, placing them across the horizontal midline of the face with wide spacing to enhance the innocent expression. Roll a tiny cone of vibrant red clay, texture the exterior with a needle tool to mimic berry seeds, and top it with five tiny green leaf shapes. Affix the miniature strawberry to the chest, fold two small rolled arm shapes around the sides of the fruit, insert a trimmed silver eye pin through the top center of the head, and bake according to package instructions.

The Sleeping Sleepy-Eyed Fox Brooch
How to Create
The sleeping fox charm captures a quiet woodland mood through a curled resting pose that forms a naturally protective, tear-resistant circular silhouette. This structural choice wraps the wide, bushy tail securely around the sleeping body and face, protecting the delicate nose and ear tips from snagging or accidental impact. The color palette centers on soft terracotta or muted pumpkin clay, highlighted with clean white accents along the tail tip, chest bib, and muzzle contours. Instead of rounded black bead eyes, this sleeping character features delicate curved lines that suggest closed eyelids, creating a calm, peaceful look. The flat back of the curled form provides a stable surface for mounting hardware, making this particular build exceptionally versatile for lapel pins, brooches, or flat magnetic accents. The gentle flowing transitions between the body, face, and sweeping tail showcase the natural beauty of simple geometric shapes blended into a clean, modern form.
Condition your terracotta clay and roll it into a thick tapered cylinder measuring roughly forty millimeters long, with one end noticeably wider than the other. Curve the cylinder into an enclosed, rounded teardrop shape on your ceramic work tile, tucking the narrow end inward to form the resting base. Flatten a small segment of pure white clay into a thin triangular sheet, then apply it to the front curve of the form using a silicone blending tool to create the chest bib. Sculpt a small triangular fox head from terracotta clay, add two tiny pointed ears with white inner linings, and position the head resting securely against the curved base. Roll a secondary tapered cone for the tail, attach a white clay tip to its point, and wrap the entire tail piece smoothly across the front of the body beneath the chin. Use the tip of a fine needle tool to indent two downward-curving arcs onto the muzzle for closed eyes, add a black speck for the nose, and cure on your tile.

The Miniature Sprout Piglet Figurine
Execution Process
The miniature sprout piglet combines rounded animal forms with playful botanical elements, resulting in a charming and cheerful character. The body consists of an intentionally plump, uniform sphere of pale bubblegum pink clay that serves as the foundation for the entire sculpture. Tiny stubby feet support the base, while a prominent oval snout and softly folded triangular ears give the face depth and recognizable animal anatomy. Rising directly from the crown of the head is a delicate two-leaf botanical seedling sculpted from fresh spring-green clay, suggesting creative nature-inspired whimsy. The contrast between the warm, smooth pink form and the crisp, vertical green foliage creates an eye-catching focal point that draws attention to the charm’s compact scale. This project is beginner friendly because it relies almost entirely on basic spherical geometry, requires minimal surface blending, and contains few seams, making it a reliable project for novice makers seeking dependable results.
Condition pale pink clay thoroughly and roll a smooth, crack-free sphere twenty millimeters in diameter to serve as the main body of the piglet. Roll four tiny, uniform three-millimeter spheres of the same pink clay, flatten them slightly against your working tile, and set the large sphere directly atop them to establish sturdy footings. Form a flat five-millimeter horizontal oval from slightly darker pink clay, indent two distinct vertical nostrils using the tip of a blunt needle tool, and mount this snout onto the lower third of the face. Roll two small teardrops, flatten them gently, and fold their top tips forward to form perky, drooping ears before pressing them securely onto the upper sides of the head. Mix a small amount of bright green clay, roll a tiny four-millimeter stem, attach two small pointed leaf shapes to the tip, and anchor the stem base into a pre-pierced hole atop the head using liquid clay. Add two tiny black clay dots for the eyes just above the snout line, insert an eye pin, and bake.

The Fluffy Cloud Sheep Trinket
How to Make
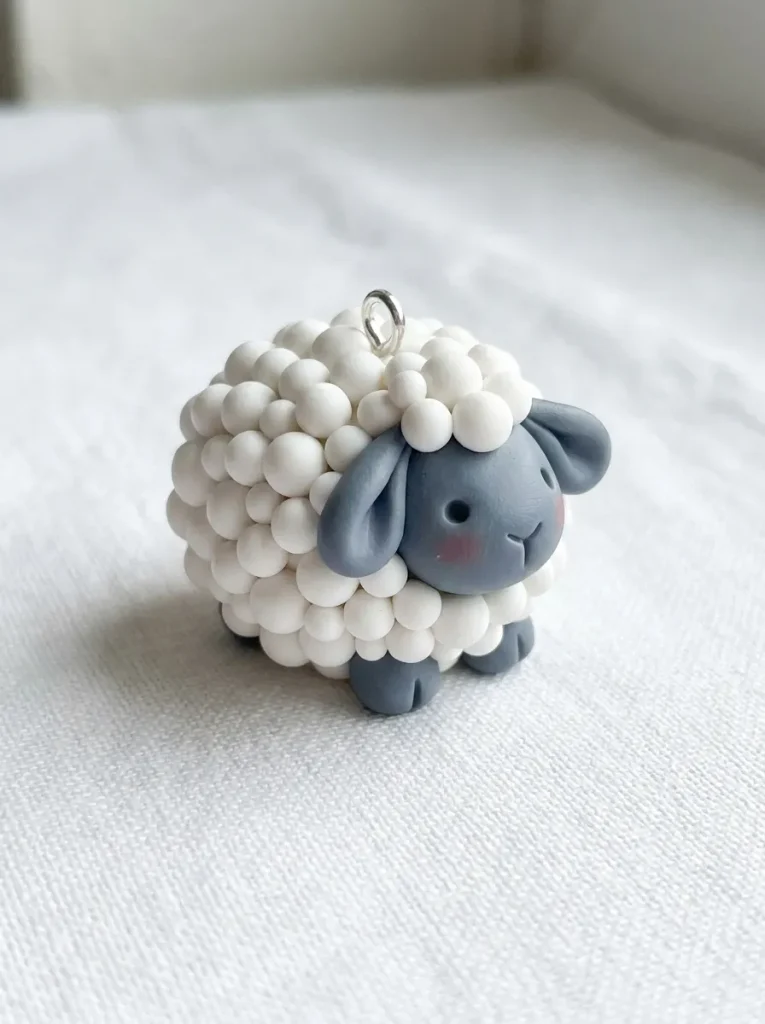
The fluffy cloud sheep uses repetitive textured surface detailing to create a soft, tactile charm inspired by floating cumulus clouds. Rather than maintaining an ultra-smooth finish, the body is deliberately covered with dozens of tiny, overlapping clay spheres that mimic voluminous wool fleece. This textured surface naturally masks minor fingerprints and imperfections, making it an excellent practice project for crafters developing their heat-curing workflows. The exposed face, ears, and feet use smooth, contrasting charcoal-gray or soft beige clay to create a clean visual balance against the dense white fleece. The compact, rounded shape minimizes protruding appendages, ensuring the finished piece remains durable when attached to zipper pulls, book straps, or portable pouches. The cloud sheep highlights how simple geometric repetition can build rich, dimensional textures across small surfaces, demonstrating the expressive range possible within miniature polymer clay sculpting.
Start by rolling an untextured fifteen-millimeter core ball of scrap clay to serve as an internal foundation, saving outer decorative clay and reducing total baking bulk. Roll roughly thirty to forty tiny, uniform three-millimeter balls of clean white clay, keeping them covered under an upturned glass dish so they remain supple and lint-free. Coat the scrap clay core lightly with liquid polymer clay, then place the white spheres closely over the entire surface, pressing them gently with a soft silicone tool to fuse the layers without flattening their dome shapes. Sculpt a small, smooth oval from slate-gray clay to form the sheep’s face, positioning it flat against the front of the textured body while nestling it between the wool rounds. Fashion two small downward-drooping teardrops for the ears and four short stubby cylinders for the trotters, attaching them symmetrically along the sides and bottom. Use a needle tool to imprint two tiny eyes into the face, apply pastel blush to the cheeks, insert a reinforced eye pin, and bake thoroughly.
The Pastel Boba Tea Panda
Step-by-Step Guide
The pastel boba tea panda combines contemporary cafe culture with classic animal sculpture, capturing a panda holding an iced milk tea drink. The character features the iconic monochrome panda pattern—jet black limbs, ears, and eye patches set against a soft ivory body—reimagined with softened, rounded contours. Tucked snugly against the panda’s rounded belly is an angled, miniature beverage cup sculpted from translucent clay, complete with tiny dark tapioca pearls along the bottom and a pastel drinking straw. The panda’s paws curve around the drink cup, naturally interlocking the accessories to create a structurally sound, cohesive single-piece charm. This design teaches makers how to combine opaque and translucent clay formulations within a single project, illustrating how different light transmissions add realism to miniature compositions. The finished figure is visually dynamic, packed with engaging micro-details, and provides an impressive centerpiece for accessory collections.
Roll a smooth, ivory-colored clay sphere eighteen millimeters wide for the head, along with a slightly smaller pear-shaped form for the lower torso. Connect the head and torso securely, smoothing the junction with a flat metal spatula to eliminate any structural gaps between the sections. Flatten two tiny circles of black clay into angled, teardrop-shaped eye patches, pressing them onto the face before setting tiny black bead eyes inside their boundaries for depth. Shape two distinct black half-spheres for the ears and attach them to the top curvature of the head. For the drink, cut a tiny seven-millimeter tapered cylinder from translucent clay, attach miniature black specks to the base to represent tapioca pearls, and cap the cup with a flat circle of white clay. Mount the cup against the panda’s torso, drape two rounded black clay arms over the sides of the drink, and insert a trimmed piece of colored wire to act as the straw. Insert an eye pin behind the head, check for lint, and bake.

The Pocket Blossom Bunny
How to Create
The pocket blossom bunny focuses on gentle curves, elongated vertical forms, and delicate floral accessories that embody spring-inspired craft design. The signature features of this piece are its tall, softly rounded ears that fold naturally against the sides of the head to prevent breakage during regular handling. The bunny holds a miniature five-petal sakura flower between its small paws, introducing a vibrant, organic splash of petal-pink color against a soft white or cream coat. The face features minimalist styling: widely spaced glossy black eyes, a tiny triangular pink nose, and soft pink pastel shading across the cheekbones and inner ear wells. By curving the long ears downward rather than allowing them to stand rigidly upright, the charm gains both visual charm and structural durability. This project helps crafters practice sculpting delicate floral petals and balancing tall forms, making it an excellent bridge between basic and intermediate sculpting.
Roll a smooth twenty-millimeter egg shape from conditioned white clay, positioning the wider end downward to create an integrated head-and-body base in one piece. Roll two long, tapered snakes of white clay measuring roughly twenty-five millimeters each, flattening them along their lengths to form the bunny’s ears. Press a fine stylus along the center of each ear to create an inner depression, shade the trough with pink chalk pastel dust, and fold the ears smoothly down against the head contours. Roll five tiny teardrops of light pink clay, press them together on your tile to form a small five-petal flower, and place a tiny yellow speck in the center. Affix the assembled flower directly to the bunny’s chest using a dab of liquid clay, and curve two tiny white arm shapes inward to hold the blossom. Use a fine-point dotting tool to place two black eyes on the face, add a tiny pink clay triangle for the nose, insert your eye pin, and bake.
The Cozy Coffee Cup Kitty
Execution Process
The cozy coffee cup kitty places an expressive feline character inside a colorful ceramic-style mug, creating a clean, self-contained composition. The sculpted mug serves as a stable base for the charm, eliminating the need to sculpt complex lower legs and paws. Peeking over the rim of the mug is a rounded cat head with perky triangular ears, resting its two front paws over the edge as if peering outside. The coffee surface inside the mug uses warm amber or dark brown clay, providing a realistic foundation that surrounds the cat’s chest. This enclosed design approach produces a robust charm with minimal fragile elements, as all exterior seams connect securely within the mug’s rim. The project introduces basic miniature vessel construction, teaching makers how to form straight-walled cylindrical hollows using simple household guide tools.
Roll a strip of conditioned mint-green clay to an even three-millimeter thickness using guide rings on your acrylic roller, and cut a neat rectangle twelve millimeters tall by thirty millimeters long. Wrap this clay rectangle around a smooth wooden dowel to form an even cylinder, trim the excess with a tissue blade, and blend the vertical seam smoothly. Cut a small circular base from the same mint clay, attach it to the bottom of the cylinder, and press a tiny coiled clay strip onto the side to form the mug’s handle. Fill the interior of the mug halfway with scrap clay, then top it with a flat disc of rich brown clay to represent freshly poured coffee. Sculpt an orange or calico cat head from patterned clay, attach perky ears, and seat the head firmly into the brown coffee surface. Place two tiny white paw shapes over the front rim of the mug, indent eyes and whisker details, insert an eye pin, and bake.

The Golden Honeycomb Bumblebee
How to Make
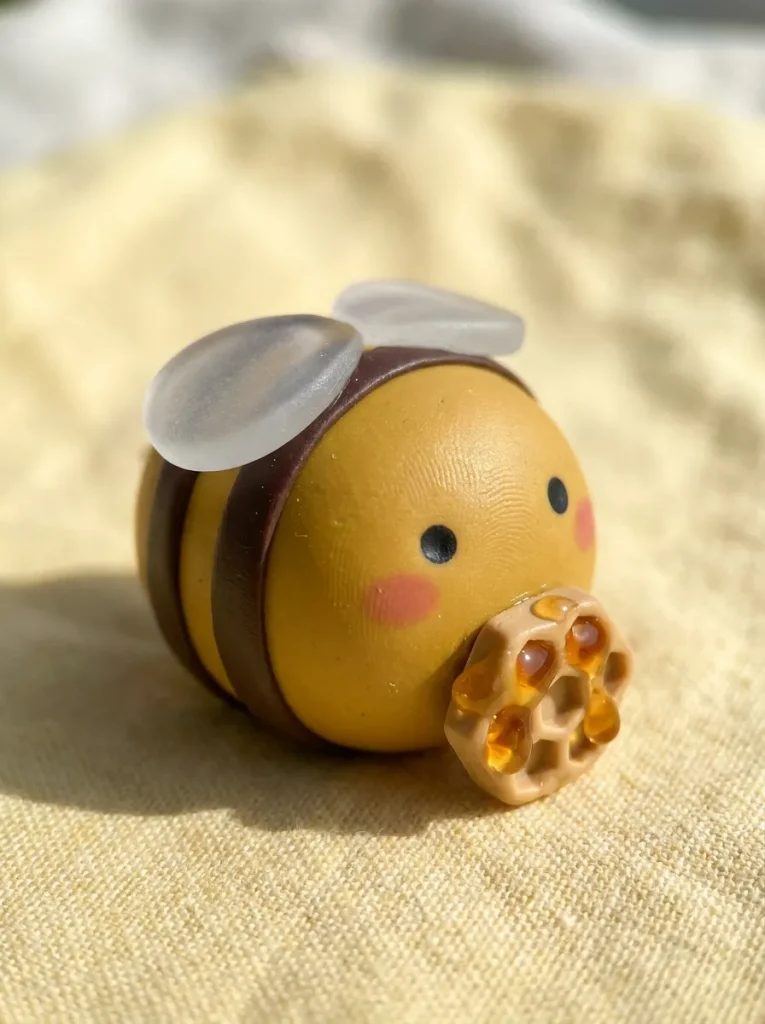
The golden honeycomb bumblebee balances stylized insect anatomy with a soft, whimsical aesthetic, resulting in a sunny and cheerful miniature sculpture. The body features a rounded, barrel-like oval of warm mustard-yellow clay, accented by two thin, embedded chocolate-brown stripes that wrap neatly around the midsection. Instead of thin, fragile wings, this design uses thick, translucent teardrop wings that lie flat against the insect’s back, significantly increasing durability. A tiny hexagonal honeycomb piece, accented with glossy faux-honey drips crafted from tinted liquid polymer clay, nests under the bee’s front legs to anchor the design’s theme. The face remains sweet and accessible, featuring simple black dot eyes and soft pastel blush on the cheeks, avoiding intimidating realistic insect traits. This build teaches makers how to wrap clean stripes without distorting underlying forms, a fundamental skill for patterned polymer clay sculpting.
Condition vibrant mustard-yellow clay and shape a plump twenty-millimeter barrel form with softly rounded ends to establish the bee’s abdomen and head. Roll two thin, uniform snakes of dark brown clay, flatten them slightly on your tile, and wrap them evenly around the center of the yellow body. Roll the entire striped cylinder gently on your work mat to press the brown stripes flush with the yellow surface, creating an integrated, smooth exterior. Shape two thick teardrops from translucent clay, texture the upper surfaces with subtle wing-vein impressions, and press them flat against the bee’s back. Cut a tiny six-sided hexagon from pale yellow clay, texture the center with a pencil tip to create honeycomb cells, and attach it beneath the bee’s chin. Place two black dots on the face for the eyes, brush soft pink pastel onto the cheeks, insert an eye pin through the center of gravity along the back, and cure.
The Sweet Sloth Succulent Planter
Step-by-Step Guide
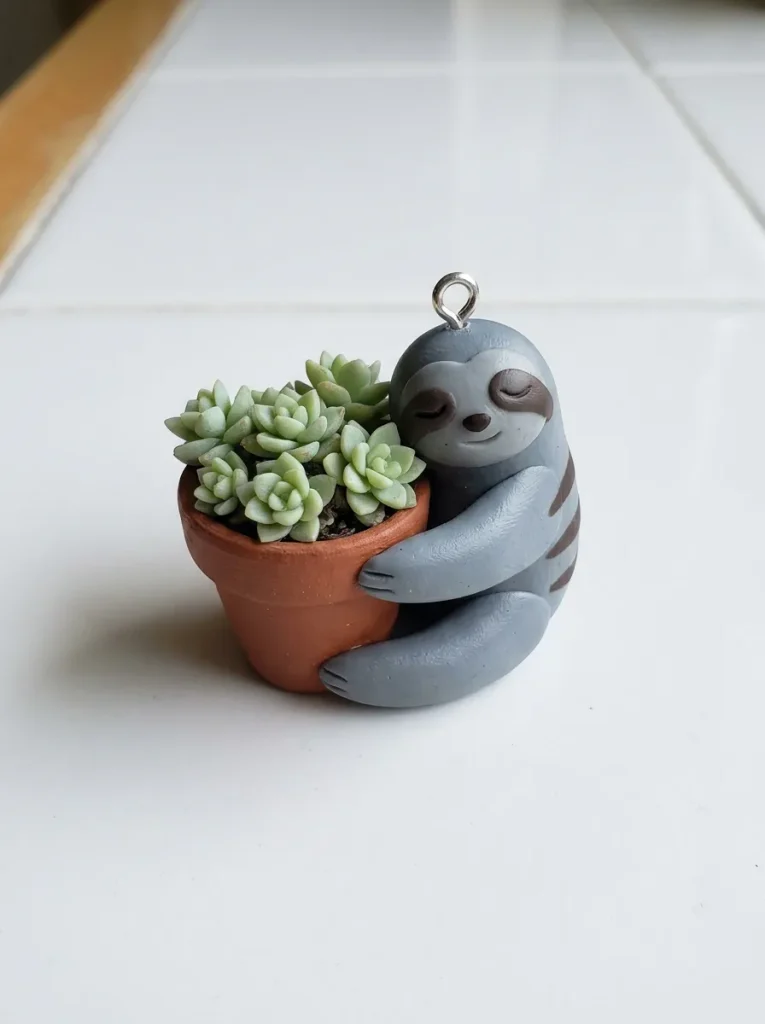
The sweet sloth succulent planter combines animal portraiture with miniature botanical sculpting, capturing a sleeping sloth hugging a tiny terracotta pot. The sloth features a cool-gray or taupe coat, with characteristic dark eye bands and long, curved limbs wrapped securely around its container. The pot itself is sculpted from rich brick-red clay, filled with a cluster of tiny, fleshy succulent leaves arranged in an attractive rosette. This composition naturally distributes physical mass across both the animal and the pot, forming a sturdy finished piece that resists bending or shearing under mechanical stress. The contrast between the sloth’s smooth coat and the faceted geometric layers of the succulent leaves creates an eye-catching craft project. This charm is especially appealing for plant lovers and nature enthusiasts who enjoy intricate micro-sculpting within an accessible miniature format.
Roll a tapered cylinder of terracotta-toned clay, hollow the upper center slightly with a rounded ball tool, and smooth the exterior to create a tiny twelve-millimeter plant pot. Roll several tiny pointed teardrops from sage-green clay, flattening each slightly, and arrange them in concentric overlapping rings inside the pot opening to build a lush succulent rosette. Sculpt an oval head and curved body from light taupe clay, blending two dark brown eye bands across the face and marking closed, resting eyes with a needle tool. Position the sloth’s body snug against one side of the plant pot, anchoring the pieces with a thin layer of liquid polymer clay. Shape four thin, elongated limb cylinders, wrapping the front and back pairs around the exterior of the terracotta pot so the sloth appears to be hugging it. Apply soft cheek blush, insert a sturdy eye pin down through the center of the succulent cluster, and bake thoroughly.
The Tiny Toadstool Frog Prince
How to Create
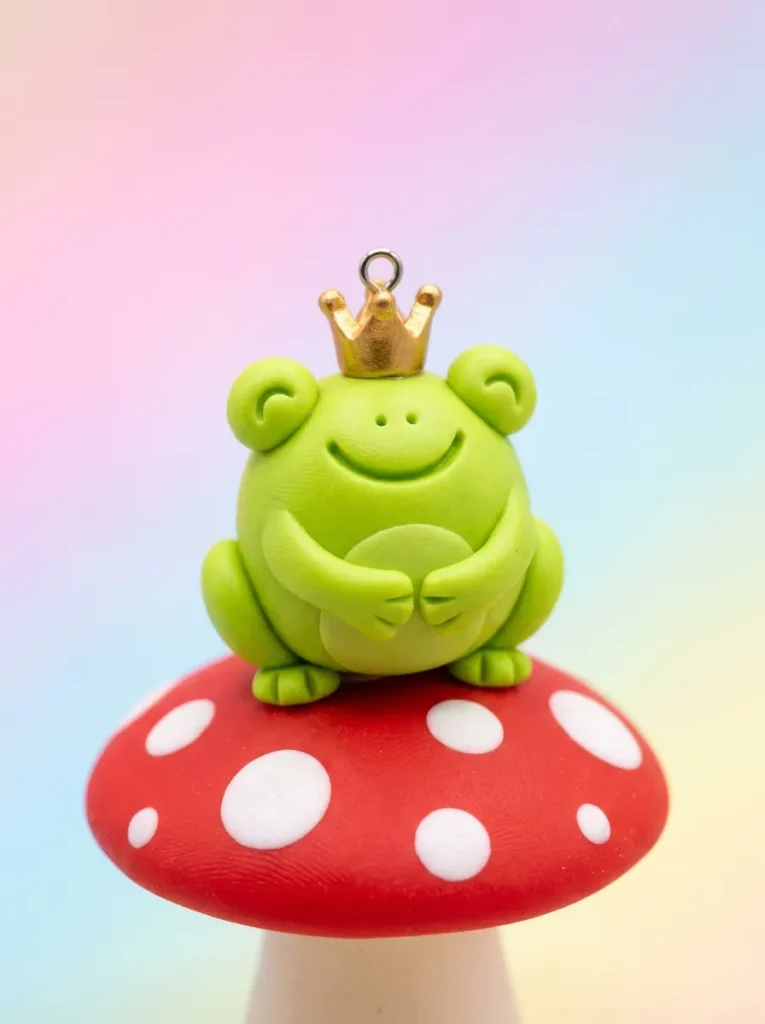
The tiny toadstool frog prince combines amphibious character design with fairytale imagery, producing an expressive miniature charm. The base figure features a squat, rounded lime-green frog with prominent, dome-shaped eye ridges set high on the head, giving the character an inquisitive silhouette. The frog rests on the cap of a stylized red-and-white spotted toadstool mushroom, which provides a solid pedestal that simplifies display and mounting. Atop the frog’s head sits a tiny, three-pointed royal crown sculpted from metallic gold clay, adding a playful pop of regal contrast to the natural color scheme. The frog’s front feet rest together on its pale cream belly, keeping all small elements safely tucked against the central core. This model teaches crafters how to build multi-tiered vertical assemblies, balancing separate elements on top of one another to produce a stable, cohesive finished piece.
Form a thick stem from ivory clay and top it with a domed red cap, using white clay dots to add spots and create a stable sixteen-millimeter mushroom base. Sculpt a wide fifteen-millimeter sphere of lime-green clay, flatten the bottom slightly, and press it securely onto the top of the red mushroom cap. Form two small green spheres, press them onto the upper corners of the head, and blend their lower seams smoothly to create the frog’s elevated eye sockets. Place two tiny black clay pearls onto the front of these sockets for eyes, and use a sharp needle tool to impress a wide, cheerful mouth across the lower face. Shape a tiny cylinder of metallic gold clay, snip three small triangular points along its top rim with fine craft scissors, and mount this tiny crown between the eye ridges. Fold two small green front arms against the body, insert an eye pin vertically through the crown and deep into the base, and bake.

Common Beginner Mistakes and How to Avoid Them
Beginner polymer clay crafters often encounter challenges with surface contamination, fragile joins, and incorrect baking temperatures. A frequent mistake is allowing dust, lint, and residual oils to settle onto light-colored clays during sculpting. Prevent this by thoroughly cleaning your workstation with isopropyl alcohol, scrubbing your hands, and keeping an unbaked scrap piece of white clay nearby to roll between your fingers to pick up stray surface fibers before handling project pieces. Another common issue is structural detachment, where small appendages like ears or limbs fall off after baking. Prevent this by applying a tiny drop of liquid polymer clay at every seam and using a silicone shaper to blend attachment points into the underlying base. Finally, under-baking clay causes pieces to remain brittle and snap easily under light pressure. Always use an independent standing oven thermometer to verify your oven’s actual internal temperature rather than relying on the appliance dial. Polymer clay requires sustained, accurate heat to cross-link its plasticizer compounds fully, so maintain the manufacturer’s recommended baking temperature throughout the entire curing cycle.
Practical Tips for Better Results
Achieving a clean, professional finish on miniature clay charms requires attention to surface prep, temperature control, and proper smoothing techniques. If you notice unwanted fingerprints or micro-textures on your unbaked clay, gently brush the raw surface with a soft paintbrush lightly moistened with rubbing alcohol to dissolve surface imperfections and create an ultra-smooth finish. Additionally, chilling delicate sculpted components in the refrigerator for ten minutes before final assembly firms the clay, allowing you to handle and attach small pieces without squishing their shapes. When applying powdered chalk pastel for cheek blush or subtle shading, always apply the pigments before baking using a dry, fluffy miniature brush. The porous surface of raw clay absorbs the dry pigment directly into its binder, locking in the color permanently during the heat-curing process. After baking and cooling your charms completely, apply a thin coat of water-based gloss glaze specifically formulated for polymer clay to the eyes and noses. This selective glazing technique creates a striking contrast between the glossy features and the soft, velvety matte finish of the clay body.
Styling, Presentation, or Organization Ideas
Presenting, styling, and storing your completed charms thoughtfully preserves their delicate details and showcases your handmade work at its best. To display these miniature creations as home decor, mount them inside small wooden shadow boxes lined with pastel linen fabric, using hidden wire loops to hang each piece in an organized grid. For wearable accessories, use jump rings to attach the baked charms to pastel lobster clasps, phone lanyards, beaded ball chains, or braided thread bracelets for an on-trend look. When photographing your projects for online platforms, place the figures next to everyday items like a thimble, an acorn, or a coin to emphasize their tiny scale and detailed craftsmanship. Use soft, indirect natural morning light and clean, neutral backgrounds—such as pale wooden boards, matte ceramic dishes, or pastel construction cardstock—to highlight the soft tones of the clay. Organize your physical collection in divided plastic hardware cases lined with soft felt, keeping individual characters separated to prevent surface scuffs and keep hardware rings from tangling.
Budget or Time Planning
Sculpting miniature clay charms is an accessible craft that offers exceptional efficiency and value for makers working within practical budgets and schedules. A standard multi-color sample pack of quality polymer clay, a basic set of double-ended ball stylus tools, and a package of silver-plated eye pins provide enough supplies to complete dozens of miniature charms at minimal upfront cost. To maximize your working time, organize your sculpting sessions into distinct production phases rather than completing single charms from start to finish. Dedicate your first hour to conditioning clay blocks, blending custom pastel shades, and slicing uniform portions using your tissue blade to ensure consistent scale across figures. The next phase focuses entirely on shaping core bodies, attaching miniature appendages, and detailing expressions while your tools and surfaces remain clean. Finally, batch-bake multiple completed charms together on a single ceramic tile to conserve electrical energy and maintain consistent curing temperatures. This modular workflow lets you produce five to eight detailed, fully cured charms in an afternoon, delivering high creative returns for your invested time and materials.
Creative Expansion and Advanced Inspiration
Once you have mastered the foundational animal forms in this guide, expand your sculpting practice with more advanced techniques and mixed-media additions. Experiment with translucent and metallic clay formulations, blending fine cosmetic-grade mica powders or iridescent flakes into pale clays to produce ethereal, shimmering finishes. You can also explore functional houseware adaptations by sculpting these animal figures around the tops of metal bookmark stems, tea infuser counterweights, decorative storage jar lids, or custom crochet hook handles. Another creative avenue is incorporating UV resin to simulate realistic fluid details, such as morning dew drops on leaves, glistening drink ice, or miniature glassy puddles beneath resting figures. As your sculpting confidence grows, create themed seasonal sets, such as autumn woodland creatures wearing miniature knitted scarves or seaside animals resting on pastel seashells. By blending basic geometric building blocks with diverse textures, materials, and playful details, you can continuously adapt this versatile craft to reflect your evolving personal aesthetic and imaginative design ideas.
Leave a Reply