Clay succulent planters have become a focal point of modern interior styling, capturing widespread attention across Pinterest boards dedicated to botanical living and interior decor. This comprehensive tutorial teaches readers how to design, shape, and finish functional ceramic and air dry containers specifically tailored to the unique physiological needs of small succulents and cacti. Readers will examine foundational pottery methods, water drainage integration, durable sealing processes, and contemporary exterior texturing approaches that turn basic modeling compounds into refined household accents. Understanding these methods is exceptionally valuable because commercial planters frequently lack adequate proportions, proper drainage apertures, or customized profiles needed for tight windowsills, narrow shelving units, and curated tabletop arrangements. Creating bespoke planters allows full control over depth, diameter, porousness, and aesthetic integration, ensuring indoor plants survive in environments that simultaneously complement interior color schemes. Through direct technical guidance, this guide bridges the gap between artistic exploration and plant health, providing dependable methods suitable for home studios and dining table workspaces alike. By mastering these ten distinct vessel constructions, makers acquire transferable ceramic skills, reduce decorating expenditures, and gain the creative agency to produce personalized botanical displays that remain durable, balanced, and structurally sound across seasons of plant growth.
Why Handcrafted Planters Remain a Mainstay in Modern Spaces
The enduring prominence of clay planters within visual discovery spaces stems directly from the convergence of functional horticulture and the widespread shift toward organic interior elements. Modern design trends heavily prioritize tactile, unrefined materials that soften rigid architectural layouts, and hand-formed clay supplies an earthy texture that mass-produced synthetic materials cannot replicate. Beyond aesthetic appeal, these projects carry immense practical value for indoor gardeners because specialized succulent root systems demand fast-drying substrates and tailored moisture regulation. Standard plastic or non-porous glass containers often trap moisture, whereas properly formed and punctured clay vessels promote optimal root aeration. From a maker’s perspective, hand building provides an exceptionally low barrier to entry, requiring no expensive pottery wheels, high-fire commercial kilns, or industrial machinery to achieve gallery-quality results. Beginners can successfully complete projects using accessible air dry clay, oven-bake polymer compounds, or basic self-hardening stoneware on an ordinary kitchen table. The straightforward nature of manipulating raw clay also offers a calming, tactile diversion from screen-focused routines, making it an appealing weekend pursuit for individuals seeking productive, creative outlets that yield tangible home furnishings without significant financial commitment.
Essential Materials and Comprehensive Workspace Setup
Constructing dependable planters requires methodical workstation planning and the selection of appropriate raw compounds, shaping tools, and protective barriers. The primary material choice centers on either natural self-hardening clay, polymer modeling clay, or low-fire earthenware, depending on access to baking appliances or dedicated ceramic kilns. Essential tools include an acrylic rolling pin to ensure uniform slab thickness, wooden clay modeling knives, needle tools for precise edge trimming, flexible steel scrapers for surface refining, and hollow hole-punch tubes designed to cut clean drainage apertures. Work surfaces must be lined with canvas cloth, silicone craft mats, or non-stick wax paper to prevent the damp compound from adhering to tables during rolling and structural assembly. Planning considerations must also factor in the physical shrinkage rates of clay, which typically contract between five and fifteen percent during the drying and curing phases. Additionally, preparing waterproof acrylic sealants, non-toxic liquid bonding slip, fine-grit sanding sponges, and a stable, draft-free drying zone ensures that delicate greenware cures evenly without developing hairline structural fractures, setting a solid foundation before executing any specific sculptural concept.
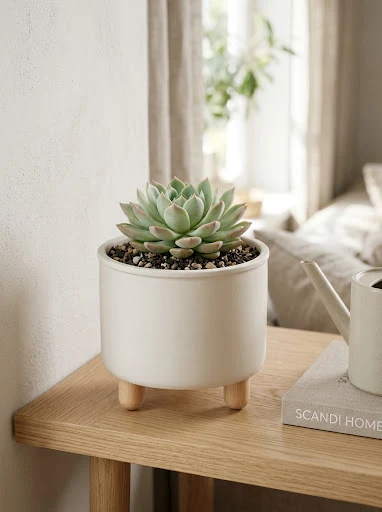
1. Minimalist Cylindrical Vessels with Footed Pegs
How to Create
The cylindrical footed planter relies on balanced geometric form, offering an elevated stance that permits increased air circulation beneath the root zone while establishing a clean, mid-century Scandinavian aesthetic. This design features a flat-bottomed circular cylinder supported by three or four thick, spherical or peg-style clay legs attached securely to the base plate. The vertical rise keeps the pot slightly detached from tabletop surfaces, which helps prevent moisture accumulation directly beneath the drainage hole while imparting a lighter, floating appearance to dense clay bodies. The exterior walls are intentionally kept smooth and unadorned, allowing the stark, clean silhouette and the natural texture of the clay body to form the primary visual statement. In terms of dimensions, maintaining a one-to-one ratio between height and diameter provides ideal structural equilibrium, preventing top-heavy succulents from tipping over when placed on elevated wall shelves or narrow window sills. This minimalist approach functions exceptionally well within modern living spaces that emphasize uncluttered architectural lines and neutral earthy color palettes.
Begin by rolling out a uniform sheet of clay to an exact thickness of one-quarter inch across a flat canvas work surface, using rolling guide sticks to maintain consistent depth throughout the slab. Cut a circular base measuring three inches across with a circular stencil, followed by a straight rectangular strip measuring ten inches in length and three inches in width for the cylinder wall. Form the rectangle into a hollow tube around the perimeter of the circular base, scoring both joining edges thoroughly with a crosshatch pattern using a needle tool and applying liquid clay slip to cement the vertical seam. Smooth the interior and exterior seams using a damp wooden modeling spatula until the joint completely disappears, reinforcing the inner corner with a tiny rolled coil of soft clay. Turn the cylinder upside down, mark three equidistant points around the base perimeter, and attach three pre-rolled cylindrical clay pegs of equal length using rigorous scoring and slip application. Carefully punch a half-inch drainage hole through the center of the base using a circular hollow cutter before setting the upright vessel aside to dry slowly under loose plastic wrap.
2. Hand-Pinched Organic Pebble Pots
Setup Method
Pebble pots embrace the Japanese philosophy of embracing natural asymmetry, deriving their structure from the intuitive pressure of fingers rather than rigid geometric templates or mechanical measuring devices. The concept centers on forming a compact, boulder-like silhouette characterized by soft indentations, gentle curve variances, and a softly rounded base that mimics river stones smoothed by water currents. Because succulents thrive within organic interior vignettes, the soft, undulating contours of a hand-pinched pot provide an exceptional visual balance against the geometric rosette foliage of echeveria or the spiky verticality of miniature haworthia varieties. The wall thickness varies slightly across the body, offering a comfortable, grounded weight that adds distinct physical presence to side tables, open shelving, and desk surfaces. Rather than attempting to eliminate natural tool impressions or finger dimples, the maker intentionally celebrates these surface variations, creating a highly tactile object that highlights raw earth compounds and authentic manual craftsmanship within every single finished piece.
To begin the construction, shape a portion of well-conditioned clay into a uniform, dense sphere roughly the size of an orange, ensuring no internal air pockets remain trapped within the core. Hold the clay sphere firmly in the palm of one hand and slowly press the thumb of the opposing hand directly down into the vertical center until approximately half an inch remains above the bottom surface. Gradually pinch the clay upward and outward between thumb and fingers, rotating the ball continuously in quarter-turn increments to draw the walls upward into an open, hollowed basin. Maintain a consistent wall thickness of approximately three-eighths of an inch, supporting the outer wall with your palm while shaping the interior curve smoothly without stretching the clay too quickly. Create a stable flat resting area on the bottom by gently tapping the base against a hard tabletop surface, taking care not to warp the rounded exterior silhouette. Complete the vessel by gently smoothing the top rim with a barely damp sponge, punching a clean drainage channel through the bottom floor, and leaving the pot to dry away from direct heat sources.
3. Geometric Faceted Polygonal Planters

Execution Process
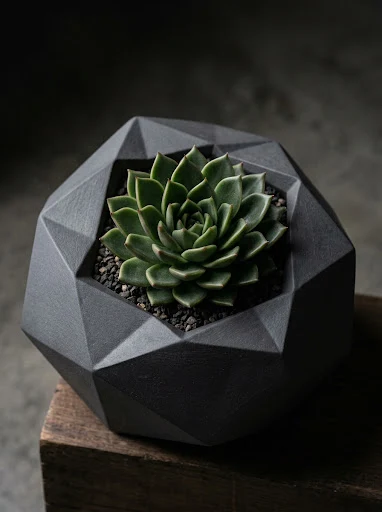
The geometric faceted planter uses sharp planar surfaces and pronounced angles to create dynamic contrasts of shadow and light across the exterior of the container. Instead of relying on traditional circular silhouettes, this design incorporates multiple cut facets that intersect at crisp ridge lines, producing an architectural profile reminiscent of cut gemstones or crystalline mineral formations. The clean-cut surfaces provide a striking textural and visual juxtaposition against the soft, fleshy leaves of miniature succulent plants, making the finished piece an eye-catching focal point for desks, bookshelves, and modern coffee tables. The internal cavity remains traditionally circular or cylindrical to accommodate standard root ball structures and facilitate unobstructed soil aeration, while the outer walls present a multi-sided polygon. This structural variation demands thoughtful material volume, as the walls must begin with sufficient mass to allow deep angular trimming without penetrating through to the inner planting chamber, achieving an ideal balance between sculptural visual weight and horticultural utility.
Begin by gathering a solid block of prepared clay, kneading it thoroughly on a canvas board to remove micro-bubbles, and shaping it into an upright octagonal column measuring roughly four inches high and four inches wide. Hollow out the internal planting reservoir using a metal ribbon or loop carving tool, scooping material outward from the center until a consistent wall boundary of roughly five-eighths of an inch remains. Allow the hollowed vessel to rest uncovered until it transitions from soft plasticity into a firm, leather-hard state that holds its form firmly without warping under finger pressure. Once the clay reaches this semi-rigid stage, use an angled pottery knife or a rigid stainless steel slicing blade to shave deliberate diagonal planes across the exterior surfaces from base to rim. Cut each planar facet with a single, continuous slicing stroke to maintain razor-sharp boundary lines between adjacent panels, rotating the vessel systematically to keep the angular cuts balanced. Finish the build by boring a vertical drainage port through the interior floor, refining the planar edges with a dry trimming tool, and letting the faceted structure cure gradually.
4. Layered Dual-Tone Marbled Ceramic Cups
Step-by-Step Guide
The marbled clay planter incorporates two or more contrasting clay bodies rolled and folded together to create organic, swirling surface patterns that mimic geological strata, natural agate, or sedimentary cliff faces. Rather than applying colored glazes or surface paints after firing or drying, this method builds visual character directly into the physical structure of the vessel walls through raw material manipulation. Using naturally off-white clay alongside a rich terracotta or mineral-tinted dark clay creates clean, contrasting bands that wrap seamlessly around the form. The outer surface is intentionally scraped flush and polished smooth to expose the uninterrupted linear transitions of the blended clays, producing an artisanal finish where no two vessels display the same pattern. Because the internal patterns run entirely through the wall structure, the interior and exterior present mirror reflections of the swirling geological movements, resulting in a cohesive piece that blends natural material honesty with contemporary tabletop styling.
Start by selecting two distinct batches of clay with identical shrinkage and moisture characteristics, such as an off-white stoneware compound and a deep iron-red terracotta body, keeping the portions balanced at an equal ratio. Form each clay variety into separate snake-like coils approximately one inch in diameter, align the alternating coils side-by-side, and twist them firmly together into a single unified spiral column. Fold the spiral column in half upon itself, gently compressing the mass against a flat canvas surface, and twist the clay block a second time to further interweave the contrasting layers without overworking the colors into a muddy, uniform tone. Flatten the twisted mass with an acrylic roller until it forms a level slab one-quarter inch thick, carefully misting the surface if minor hairline cracks begin to show along the color seams. Cut the marbled slab into an appropriate vessel base and rectangular wall strip, join the scored edges using clear water or thin slip, and burnish the exterior wall with a flexible steel rib to cleanly reveal the marbled striations before cutting out the vital drainage hole.
5. Shallow Circular Succulent Dish Gardens
How to Make
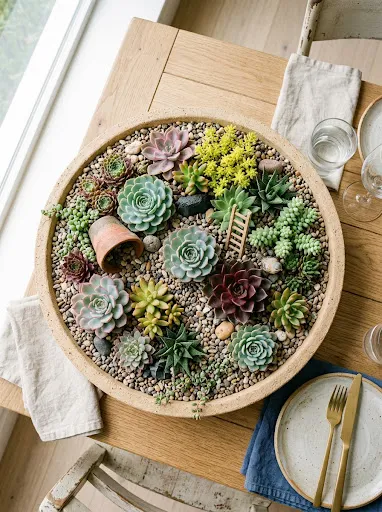
Shallow dish gardens are specifically suited to the natural root growth habits of miniature succulents, which spread their root networks horizontally across topsoil rather than pushing deep downward into containers. This design features a wide, low-profile basin with a broad diameter and low vertical walls, creating an open panoramic view that accommodates multiple complementary succulent varieties within a single, unified planting landscape. The generous surface area allows makers to experiment with varied plant textures, balancing upright stems against low groundcover rosettes, while integrating decorative river gravel, weathered rock accents, and miniature driftwood branches into the arrangement. The low center of gravity ensures total stability across broad surfaces such as dining centerpieces, outdoor patio tables, and wide credenzas, eliminating any risk of falling over. Additionally, the expanded soil surface accelerates surface evaporation rates, creating a reliable safeguard against soil moisture retention that can damage delicate succulent root systems.
Begin by flattening a generous portion of clay into a wide, uniform slab one-third of an inch thick, using guide slats to prevent regional dips or uneven spots across the broad surface. Place a circular template measuring roughly eight to ten inches in diameter onto the slab, cutting the perimeter cleanly with a sharp needle tool held at a strict perpendicular angle. Prepare a long, narrow strip of clay measuring two inches wide, bevelling the short joining ends at a forty-five-degree angle to create an overlapping, structurally durable structural seam. Score the outer perimeter of the large disc base along with the bottom edge of the wall strip, apply a thin coat of joining slip, and wrap the low wall upright around the base, securing the join firmly. Smooth the interior seam completely with a rounded wooden thumb tool, adding a very fine reinforcement coil along the internal corner to guarantee structural integrity against wet soil pressure. Use a hollow punch to bore two or three equidistant drainage holes across the broad floor, smooth the exposed top lip with a damp sponge, and let the dish dry under cloth.
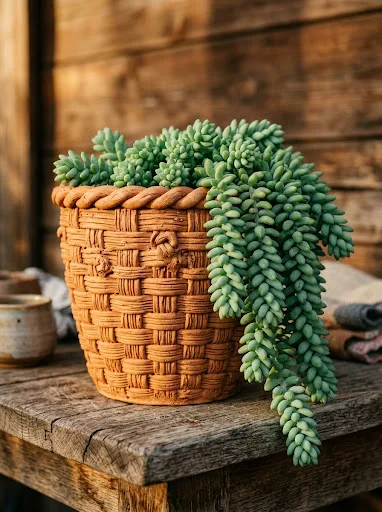
6. Woven Faux-Rattan Terracotta Baskets

Step-by-Step Guide
The woven clay planter applies textile-inspired construction techniques to traditional ceramic materials, creating an appealing visual hybrid that captures the warm texture of woven rattan along with the heavy durability of fired terracotta. The wall structure consists of systematically interlaced clay coils, producing an open-weave or continuous basketweave relief across the exterior of the vessel. This technique introduces deep physical texture and pronounced shadow lines that soften modern interiors, pairing naturally with trailing succulents such as string of pearls, string of hearts, or burro’s tail whose cascading vines drape gracefully over the textured rim. Beyond its decorative value, the overlapping coil framework builds structural strength throughout the container walls, producing a durable, impact-resistant planting chamber. The natural, porous terracotta clay accentuates the craft-focused character of the woven pattern, grounding the design firmly within traditional folk crafts while maintaining practical water-wicking qualities essential for plant health.
Prepare for construction by extruding or hand-rolling a series of long, uniform clay coils measuring approximately one-quarter inch in diameter, storing them beneath a slightly damp linen cloth to retain their flexibility during the assembly process. Form a flat circular base slab measuring four inches across and one-quarter inch thick, scoring the outer perimeter to prepare the anchoring track for the primary structural coils. Form the initial wall layer by wrapping a continuous horizontal coil around the perimeter, then lay down vertical coil ribs spaced evenly around the circular frame to create the structural basket posts. Weave horizontal coils systematically over and under the vertical posts, pressing the overlapping intersections gently to ensure complete clay-to-clay contact without flattening the rounded coil profile. Build the woven wall upward to a height of four inches, keeping the vertical alignment plumb with a drafting square as you work around the circumference. Trim the vertical ribs flush with the top horizontal coil, seal all internal seams with a thin layer of soft clay to establish a water-retaining wall, punch a central drainage aperture, and leave the piece to dry.
7. Hanging Slanted Wall-Pocket Planters
Execution Process
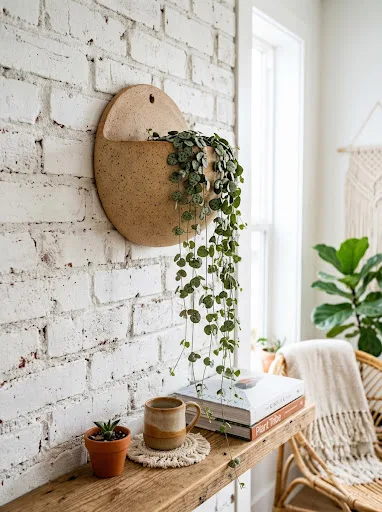
The hanging wall-pocket planter adapts traditional tabletop ceramic designs into vertical displays, allowing indoor gardeners to cultivate plants across unused vertical surfaces, blank walls, and ambient sunny hallways. Designed with a perfectly flat reverse wall that rests flush against vertical surfaces, the container arcs outward at the front to form a supportive planting reservoir angled slightly toward overhead light sources. This forward-leaning profile provides ideal light exposure for succulent foliage while ensuring water remains securely contained within the planting well. Hanging pocket planters create striking visual statements when displayed individually or grouped in vertical arrangements, functioning as living wall art that introduces fresh greenery without occupying valuable surface area. Wall planters also keep vulnerable plants out of the reach of household pets, providing a secure, elevated microclimate where delicate, sun-loving varieties can thrive undisturbed.
Roll out a flat slab of clay to a thickness of five-sixteenths of an inch, using a template to trace and cut an elongated spade or shield shape measuring six inches wide and eight inches long for the flat backplate. Cut a separate semi-circular slab measuring seven inches across, which will be arched outward to create the protruding front pocket of the vessel. Score the side and bottom edges of the backplate along with the corresponding curved edges of the front pocket piece, applying liquid joining slip generously across all contact points. Position the curved pocket onto the flat backplate, pressing the edges firmly together to produce a half-cone container, and reinforce the inner joins with rolled coils to prevent leaks or splitting. Use a sharp brass tube to cut a clean mounting aperture measuring half an inch in diameter through the top portion of the backplate, leaving adequate clearance from the edge to support the hanging weight safely. Angle a small drainage hole through the very bottom point of the forward basin, taking care not to chip the backing plate, and dry the vessel flat on a level board.
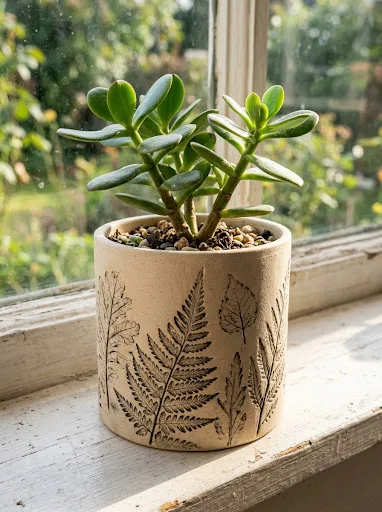
8. Stamped Botanical Motif Cylinders
How to Create
The stamped botanical planter incorporates natural organic textures directly into the raw clay body, using real foliage, seed heads, or carved wooden relief stamps to form decorative impressions across the exterior walls. This technique creates a delicate surface relief that captures the fine vein patterns, leaf margins, and textural nuances of real botanical specimens, permanently preserving their forms within the hardened clay structure. The impressed surface adds an appealing tactile dimension to clean cylindrical vessels, catching ambient light and emphasizing the connection between the ceramic container and the living plant growing within it. The decorative impressions can be highlighted using subtle ceramic washes, thinned acrylic stains, or natural mineral pigments that settle deeply into the recesses while leaving the raised outer planes light and clean. This balanced approach to ornament maintains a refined, understated aesthetic that complements rustic, bohemian, and minimalist living spaces with equal ease.
Begin by gathering fresh, structural leaves displaying prominent raised vein networks, such as sage, ferns, eucalyptus, or structural pine needles, keeping them sealed in a moist paper towel until the clay slab is fully rolled out. Roll a fresh slab of clay to a consistent one-quarter-inch thickness across smooth canvas, ensuring the surface is completely free of dust, lint, or rolling indentations. Arrange the selected botanical specimens face-down across the upper half of the damp clay slab, pressing them gently with your fingertips to keep them firmly in place. Run the acrylic rolling pin across the arranged leaves with steady, downward pressure, pressing the botanical forms flush into the surface to transfer their detailed vein architecture into the clay. Peel the foliage away carefully using a fine needle point to expose the crisp botanical prints, then cut the slab into a measured base and rectangular wall section. Assemble the cylinder by joining the scored, slip-treated ends along the smooth back edge, smooth the interior floor seam carefully, punch a central bottom drainage hole, and let the finished cylinder dry slowly.
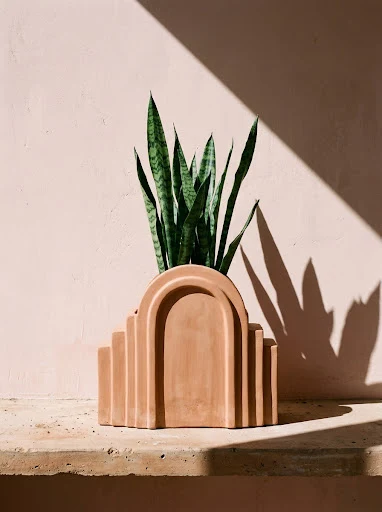
9. Modern Stepped Arch Art Deco Planters
Setup Method
Drawing inspiration from Art Deco architectural elements and modern architectural arches, the stepped arch planter uses tiered geometric profiles and bold vertical forms to deliver a refined design statement. This style features a curved crown flanked by symmetrical stepped shoulders that descend toward a stable rectangular base, producing a multi-dimensional silhouette that stands out from conventional round pottery. The stepped facade introduces a structured, monumental presence to indoor shelving, framing succulent foliage within an architectural border that feels both retro and contemporary. The planting chamber is integrated directly behind the arch facade, providing ample root volume while maintaining a clean, uninterrupted front profile. The combination of clean curves and sharp right angles offers a compelling visual rhythm that pairs naturally with structured, architectural succulents such as gasteria, sansevieria, or rigid clustering crassula varieties, creating a cohesive visual display grounded in thoughtful, structural balance.
To build this architectural piece, prepare three separate flat clay slabs rolled to a thickness of one-quarter inch, keeping the clay covered with plastic between steps to prevent uneven drying. Cut two identical arch profiles featuring a rounded crest and stepped rectangular shoulders from a stiff cardboard cutting pattern, using a metal ruler and a sharp scalpel knife to ensure clean, square cuts. Cut a series of long, uniform clay strips measuring two and a half inches wide, which will form the perimeter walls, floor, and contoured roof of the planting container. Score the inner edge of one arch facade along with the perimeter edge of the structural sidewall strip, joining the pieces at a ninety-degree angle using firm finger pressure and liquid slip. Attach the matching rear arch piece to the open side of the rectangular wall strip, carefully sealing all interior seams with a small modeling tool to form a stable hollow structure. Cut a generous planting opening into the curved top crest, bore a clean half-inch drainage port through the bottom floor panel, and let the arch cure slowly between wooden support blocks to avoid warping.
10. Textured Slab Cube Planters with Mitered Joints

How to Make
The textured slab cube planter relies on architectural simplicity and sharp, boxy geometry, offering a stark structural alternative to traditional wheel-thrown circular containers. This design features five flat square slabs joined together with precise forty-five-degree beveled edges, producing a cube with crisp, clean corners and flat, uninterrupted surfaces. The exterior faces provide an ideal canvas for subtle surface texturing, such as rolling coarse linen, dragging a serrated metal rib, or pressing grooved wooden blocks into the soft clay to generate an understated industrial concrete look. Cube planters are particularly effective for modular arrangements, as multiple matching units can be aligned seamlessly along narrow windowsills, deep wall ledges, or long office desks to form a cohesive succulent display. The balanced cubic shape provides outstanding physical stability, ensuring that plants with higher centers of gravity remain upright and secure without risking tip-overs on polished display surfaces.
Roll out a smooth, uniform slab of clay to a thickness of three-eighths of an inch, allowing the large sheet to dry until it reaches a firm, leather-hard state that can be cut without edge distortion. Use a metal square and a fine hobby knife to cut five identical square panels measuring exactly four inches by four inches, ensuring every corner forms an accurate ninety-degree angle. Place each panel flat on the cutting mat and bevel all four joining edges to an inward forty-five-degree angle using a dedicated clay bevel cutter or an angled scalpel guided by a steel ruler. Generously score every beveled edge with a crosshatch pattern, apply a coating of viscous joining slip, and assemble the four vertical wall slabs onto the square bottom base. Press the mitered seams together firmly, using a wooden modeling tool to burnish the corners into clean, seamless joints, and apply a thin reinforcing coil along the interior floor joints. Complete the build by cutting a half-inch drainage hole through the center of the base floor, lightly softening the outer corner ridges with a dry finishing sponge, and allowing the cube to cure on an open drying rack.
Preventing Structural Defects and Ensuring Healthy Growth
Achieving durable, long-lasting clay planters requires avoiding several common construction pitfalls that often lead to cracking or root decline. A frequent mistake among beginners is failing to install an adequate drainage hole; succulents require swift, unobstructed water runoff, and containers without drainage holes trap moisture, quickly rotting delicate root systems. Another common structural issue involves leaving hidden air bubbles trapped inside the clay body, which expand during drying or firing phases and cause sudden fractures across the walls. Inconsistent wall thickness also poses a major risk, as thin sections dry far faster than thick bases, generating internal stress that splits corner seams. In addition, rushing the drying cycle by placing damp clay directly in warm sunlight or near heating registers causes rapid moisture loss, leading to warping and seam separation. To avoid these issues, always knead clay thoroughly before rolling, maintain uniform wall dimensions with guide sticks, score and slip every joint methodically, and allow finished greenware to cure slowly under loose plastic wrap for several days before applying final sealants or glazes.
Refined Construction Techniques for Long-Lasting Finishes
Refining fundamental handling habits can dramatically elevate the structural durability, surface finish, and utility of handcrafted clay planters. One practical habit is maintaining a dedicated set of wooden modeling ribs, flexible steel scrapers, and damp linen cloths at your workstation, allowing you to continually smooth out micro-fissures as you assemble each piece. When joining flat slabs or hand-pinched bases, always reinforce internal joints with a pencil-thin coil of fresh clay, pressing it firmly into the inner corner to prevent structural separation under soil weight. For air dry clays, applying two coats of water-resistant, non-toxic liquid acrylic sealer or masonry waterproofing varnish to both interior and exterior surfaces prevents residual potting moisture from softening the cured walls. Furthermore, gently rounding sharp rim edges with a slightly damp finishing sponge reduces chipping vulnerabilities over time, creating a polished, durable rim that withstands frequent plant handling. Taking the time to burnish leather-hard surfaces using a smooth river pebble or the back of a metal spoon compresses the outer clay particles, yielding a silky, water-resistant sheen that highlights the natural beauty of the clay without requiring thick layers of artificial glaze.
Balanced Styling and Thoughtful Tabletop Integration
Presenting handcrafted planters effectively requires thoughtful attention to spatial balance, lighting conditions, and complementary plant selections that harmonize with each vessel’s silhouette. When styling arrangements across open display shelves, window perches, or coffee tables, group pots in odd-numbered clusters of three or five to establish organic, visually balanced compositions. Pair warm terracotta and sandy buff clay tones alongside cool, pale blue echeverias, deep purple aeoniums, or bright chartreuse sedums to produce vibrant, eye-catching color contrasts that accentuate the natural character of the plants. Varying the physical heights of adjacent vessels—by combining elevated footed cylinders with low-profile dish basins and wall pockets—adds vertical movement that prevents arrangements from appearing flat or cluttered. You can also finish the top of the potting substrate with a neat layer of crushed pea gravel, volcanic black sand, or tumbled river pebbles, which conceals loose soil, secures the root balls, and mirrors the handcrafted artistry of the clay vessel beneath, tying the entire display together into a cohesive visual statement.
Resource Allocation and Safe Working Timelines
Managing material resources and working timelines efficiently ensures smooth, organized project completion while preventing wasted clay, premature drying, and unexpected structural failures. From an economic standpoint, purchasing bulk air dry clay or raw terracotta blocks from ceramic suppliers rather than individual craft retail packages significantly lowers the cost per container, making large-scale creative projects affordable. When planning your schedule, divide the creation process into distinct, manageable steps spread across several days: spend day one kneading, cutting slabs, and assembling the primary vessel forms; reserve day two for leather-hard carving, edge beveling, and piercing drainage channels; and dedicate days three through seven to gradual, unassisted air curing away from drafts. Applying water-resistant sealants or surface stains should only take place after the clay body has released all moisture and feels completely warm to the touch. Establishing a clean, dedicated drying shelf lined with breathable cardboard prevents base warping, ensuring your investment of time and raw materials results in durable, functional containers ready for potting.
Advanced Ceramic Explorations and Creative Variants
Once you have mastered foundational hand building, pinch pot shaping, and slab assembly methods, you can explore advanced ceramic techniques to expand your craft. Experimenting with natural mineral oxides, such as black iron oxide, cobalt carbonate, or copper washes, introduces rich, weathered patinas across raw clay surfaces, highlighting carved geometric facets and fine stamped botanical textures with lasting depth. You can also explore multi-tiered constructions by joining stacked clay cylinders or stepped modular shapes into unified multi-chamber planters that house several succulent varieties at differing soil depths. If you have access to a high-fire ceramic kiln, moving from air dry materials to durable stoneware or grogged earthenware opens up new functional possibilities, including weather-resistant garden installations that safely endure freezing winter temperatures outdoors. In addition, integrating mixed materials—such as wrapping cured vessel collars with natural jute rope, constructing minimalist bent-copper wire stands, or mounting clay pockets onto reclaimed hardwood boards—broadens your design options, allowing you to create distinctive, high-end botanical installations tailored to your living space.
Leave a Reply