Holiday decoration projects frequently highlight polymer clay because the medium allows makers to craft durable, customized keepsakes with clean geometric control and playful aesthetic balance. Kawaii design focuses on charm, approachable character silhouettes, soft pastel palettes, and expressive, understated facial details. Combining these visual conventions with holiday themes produces unique Christmas tree decorations that depart from generic commercial decor. This comprehensive tutorial walks crafters through ten distinct miniature ornament concepts, covering fundamental clay conditioning, slab rolling, fine-detail sculpting, eyelet anchoring, and heat curing. Readers will learn how to produce balanced character designs, apply subtle surface blush tints, integrate hanging hardware securely, and seal finished surfaces for long-term holiday display. Handmade polymer clay ornaments serve as personal creative expressions, meaningful holiday gifts, and customizable festive focal points for modern seasonal trees. Understanding how to shape proportional forms, manage structural balance, and utilize reliable baking techniques enables beginners and seasoned crafters alike to execute cohesive decorative sets. By following structured methods, anyone can create polished holiday keepsakes that celebrate the warmth of handmade seasonal craftsmanship.
Why This Idea Is Trending or Useful
Textured, miniature holiday keepsakes continue to dominate modern Pinterest inspiration boards because they blend functional holiday utility with accessible, budget-conscious crafting methods. Modern home decor trends increasingly emphasize personalized, handmade decoration rather than mass-produced retail ornaments, prompting makers to seek creative project concepts that offer distinct personality. Kawaii polymer clay ornaments fit this modern design aesthetic seamlessly through their clean lines, soft pastel palettes, and approachable character forms. From a practical standpoint, polymer clay remains completely workable until it is baked, giving beginners unlimited time to adjust proportions, realign facial features, and correct mistakes without wasting materials. Furthermore, completed ornaments are lightweight, shatter-resistant, and compact, making them safe for households with pets or young children while remaining easy to pack away neatly. The DIY appeal extends beyond personal holiday tree trimming to include handmade gift toppers, festive keychains, advent calendar surprises, and seasonal wreath accents. This accessibility allows crafters to produce professional-looking holiday decor within small living spaces using basic household crafting tools.
Materials and Preparation
Proper preparation and workspace setup ensure smooth, clean results when crafting miniature holiday ornaments from polymer clay. Essential materials include high-density polymer clay in traditional and pastel seasonal shades, liquid polymer clay to act as an adhesive bond, stainless steel eye pins, jump rings, and high-gloss or matte water-based glaze. Key tools include an acrylic rolling pin, a flat ceramic tile to serve as both an assembly board and an oven-safe baking surface, precision needle tools, silicone tip shapers, ball styluses, and round craft cutters. Before beginning, sanitize your hands and wipe the work table thoroughly with isopropyl alcohol to eliminate ambient dust, lint, and residual pigments that easily transfer onto light-toned clay. Condition each block of clay by hand kneading or running it repeatedly through a dedicated clay roller machine until the material is pliable and crack-free. Plan your ornament scale carefully, aiming for silhouettes between two and three inches in length to ensure the cured items hang properly from evergreen branches without bending delicate boughs under excessive weight.
1. Peppermint Swirl Reindeer Face Discs

Step-by-Step Guide
Peppermint swirl reindeer face discs merge classic holiday confectionery patterns with gentle woodland animal silhouettes to create a balanced, circular tree ornament. The design features a smooth circular base imprinted with red and white candy cane spiral stripes, overlaid with a sculpted reindeer head characterized by soft cheek curves, miniature rounded antlers, and a bright red nose. Light beige or warm milk-chocolate clay forms the face, providing a neutral visual ground that contrasts cleanly with the high-contrast candy swirl perimeter. The charm of this design comes from the juxtaposition of dynamic geometric stripes with the calm, smiling expression of the reindeer face. Keeping the disc profile flat while raising the facial features creates dimensional relief that catches overhead holiday tree lighting effectively. This flat-backed structure ensures the ornament hangs straight against tree boughs, making it an excellent beginner project that teaches basic color blending, circular cutting, and multi-piece component assembly without demanding complex structural armatures.
To create this ornament, roll thin snake coils of equal length from bright red and opaque white clay, pressing them side by side before twisting them into a rope. Fold the twisted rope in half, roll it smooth against your ceramic work tile, and slice the striped log crosswise to reveal swirling candy patterns. Press these slices together into a flat slab, smoothing the seams with an acrylic roller until the sheet measures four millimeters thick. Cut a crisp base circle using a two-inch round metal cutter. Next, shape a small flat oval of warm tan clay for the reindeer muzzle, attaching it to the lower half of the disc using a drop of liquid clay. Form two tiny brown antler branches, flattening them slightly, and affix them to the upper edge of the head. Use a micro ball stylus to indent two miniature eye sockets, inserting tiny spheres of black clay to complete the expressive face. Insert a silver eye pin deeply into the top rim of the disc, then bake on your flat ceramic tile according to the clay package instructions.
2. Sleeping Fox in a Knitted Santa Hat

How to Make
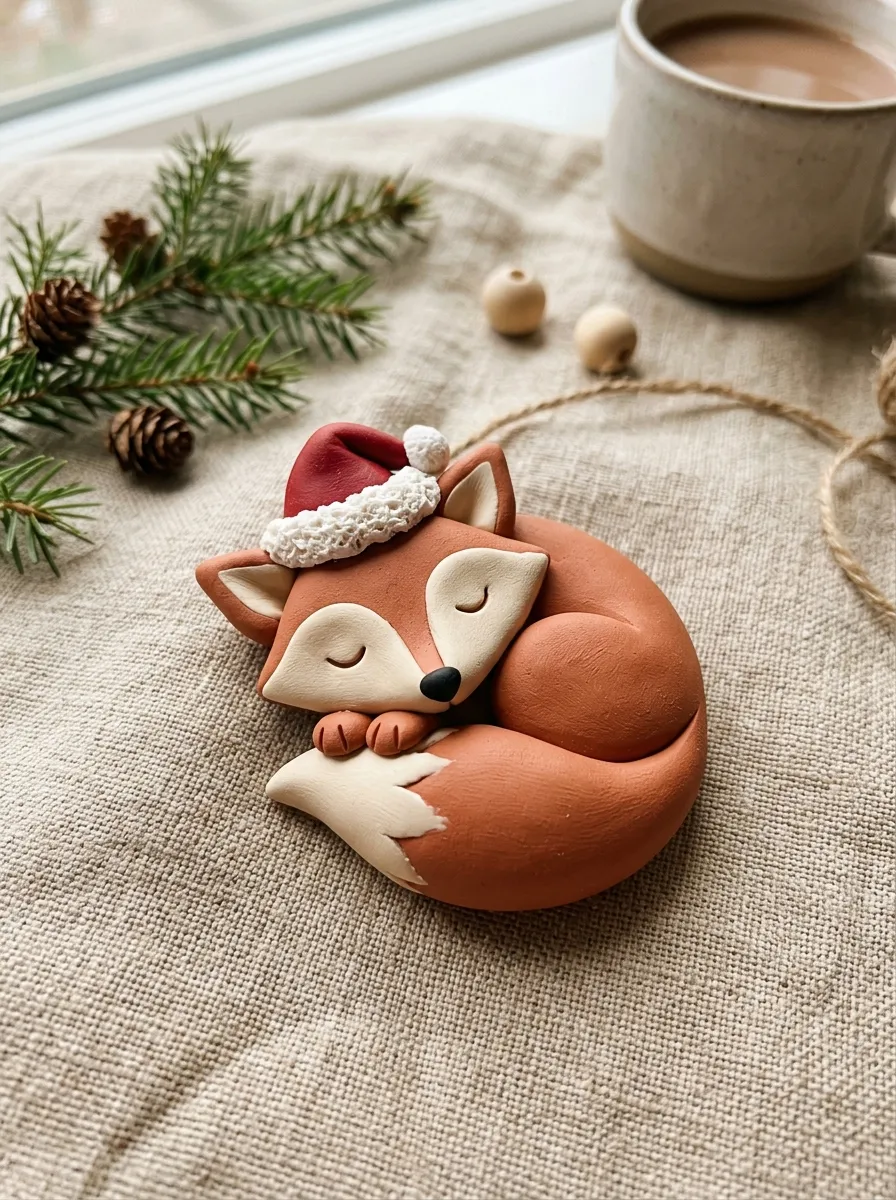
The sleeping fox ornament combines cozy winter textile textures with the serene, endearing form of a resting woodland animal curled into a teardrop silhouette. Soft terracotta or muted burnt-orange clay creates the primary fox body, while creamy ivory clay defines the chest, tail tip, and muzzle contours. A miniature folded red Santa hat sits nestled between the ears, detailed with a stippled, fluffy white pompom and rim that simulates real wool knitwear. The character design emphasizes peaceful seasonal rest, conveyed through two curved, downward-turned arc lines that represent sleeping eyes. Applying delicate surface texturing across the hat brim provides tactile contrast against the satiny, smooth finish of the curled fox body. This ornament functions beautifully as a woodland-themed holiday tree accent, bringing organic, warm color palettes to evergreen branches. Its low center of gravity and solid triangular form provide exceptional structural stability during handling, minimizing the risk of breakage across multiple holiday seasons.
Begin by conditioning terracotta clay and rolling it into a smooth, plump teardrop shape measuring roughly two and a half inches tall. Flatten the teardrop gently against your ceramic work tile so the back remains completely planar while the front stays gently domed. Cut a tiny crescent of white clay to layer over the pointed tip of the tail, curving the tail inward across the front base of the fox body. Blend a pale cream triangular patch onto the head to establish the facial mask, smoothing the seams seamlessly using a silicone color shaper. Shape a small cone of bright red clay, bending the pointed tip downward over the fox’s brow to form the relaxed Santa cap. Add a thin roll of white clay along the hat base and a small white sphere at the tip, stippling both with a stiff-bristle brush or dull needle tool to mimic knit fuzz. Press two curved crescent indentations for the sleeping eyes using a blunt curved tool, insert an eye pin into the fold of the hat, and cure the piece flat on your baking surface.
3. Pastel Frosted Gingerbread Star Cookies
Execution Process
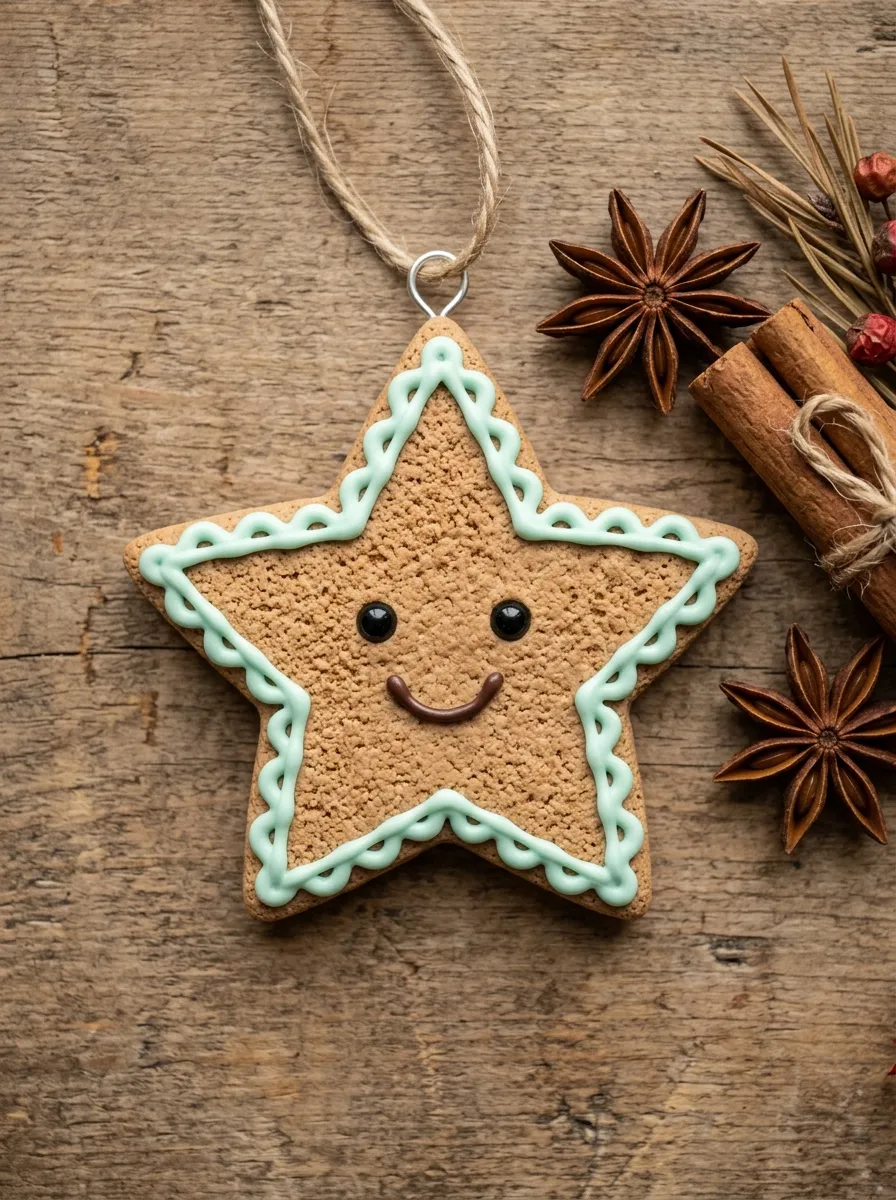
Pastel frosted gingerbread star cookies translate traditional holiday baking into permanent miniature clay keepsakes, using warm tan gingerbread clay paired with dimensional faux icing. The concept relies on soft, muted pastel tones—such as baby pink, mint green, or sky blue—rather than conventional bright holiday colors, aligning with modern aesthetic palettes. The warm dough tone is mixed by blending light brown clay with a touch of translucent clay to mimic the depth of real baked cookies. A micro-textured surface is applied to the star base using fine-grit sandpaper, giving the unglazed areas an authentic crumb appearance. Dimensional liquid clay icing borders the star points in smooth, flowing scallops, framing a simple smiling character face at the center. This ornament design offers high versatility, serving as a reliable template for making matching cookie sets that evoke warmth, sweet confectionery charm, and nostalgic holiday cheer across contemporary home decor settings.
Condition medium brown clay thoroughly and roll out an even slab measuring four millimeters thick, using rolling pin guide rings to maintain consistency. Press a sheet of eighty-grit sandpaper across the clay slab using firm downward pressure to transfer a realistic, crumbly cookie texture across the entire surface. Cut star shapes using a two-inch stainless steel star cutter, lifting away the excess scrap clay with a craft knife. Mix white liquid polymer clay with a pinch of dry pastel chalk dust until you achieve an opaque, pourable pastel pink or mint frosting consistency. Carefully apply the colored liquid clay around the star edges using a fine-tip needle applicator, forming continuous scalloped icing borders that rise slightly above the textured base. Place two micro dots of black clay near the star center for eyes, adding a curved smile beneath them with a tiny clay thread. Push a sturdy metal eye pin directly down into the uppermost star point, cure the piece in the oven, and allow it to cool completely before handling.
4. Cozy Polar Bear Wrapped in a Fair Isle Scarf
Setup Method
The cozy polar bear ornament utilizes pure white sculptural clay, rounded anatomical shapes, and detailed miniature textile modeling to create an endearing arctic holiday companion. The silhouette features a seated bear with wide paws and small rounded ears, wrapped comfortably in an oversized holiday scarf featuring stamped Fair Isle geometric motifs. Opting for a pristine white satin finish gives the bear body a clean, modern aesthetic, while the vibrant patterned scarf introduces rich festive detailing. Stamping miniature knit patterns, chevrons, or snowflake marks into the clay scarf provides tactile depth without requiring tedious freehand painting. The compact, stout posture of the seated bear ensures structural durability, as all limbs remain fused closely to the primary torso rather than protruding outward. This charming figure captures the calm stillness of winter wildlife, making it a standout decorative piece that complements minimalist style and Scandinavian-inspired holiday tree themes.
Roll a smooth two-inch ball of conditioned white clay into a rounded egg shape to form the combined head and torso of the bear. Flatten the bottom slightly by tapping it firmly against your tile so the ornament sits upright or hangs plumb without tilting. Form two miniature white clay spheres into flat discs and attach them smoothly to the upper head to serve as rounded ears. Roll a long, thin ribbon of soft holiday green or berry red clay, pressing a fine herringbone or knitted texture stamp firmly into its surface with an acrylic roller. Wrap the patterned ribbon around the bear’s neck, crossing the ends over the chest and trimming the edges with tiny parallel vertical cuts to create realistic scarf fringe. Use a needle tool to create two tiny indentations for eyes and a small triangular snout indentation, filling them with dark gray clay spheres. Insert a threaded eye pin into the center of the head, and bake the ornament upright supported by an oven-safe ceramic bead stand.
5. Mistletoe Mouse in a Walnut Shell Bed
How to Create
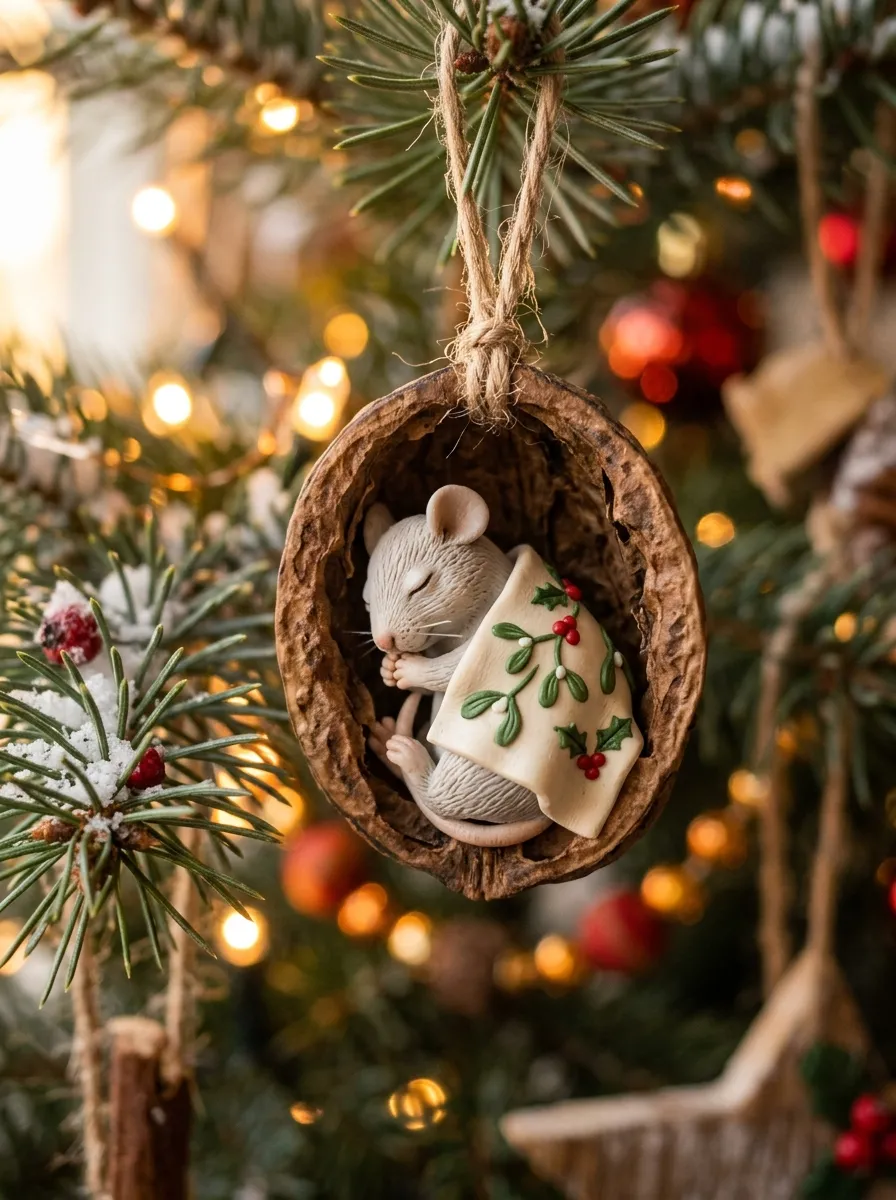
The mistletoe mouse ornament incorporates mixed-texture sculpting by placing a miniature sleeping rodent inside an authentic-looking, sculpted clay walnut shell cradle. The design features a smooth, light gray mouse curled inside an intricately textured, earthy brown outer half-shell, covered by a folded holiday blanket accented with tiny green mistletoe leaves. Deep brown and raw umber clay shades are heavily textured with a wire brush or dull needle to recreate the rugged exterior ridges of a real walnut. In contrast, the interior mouse and blanket remain smooth and soft, creating a satisfying visual balance between rough organic elements and delicate character modeling. The hollow half-shell shape keeps the total weight of the ornament minimal, ensuring it hangs gracefully from delicate exterior tree branches. This narrative-driven design evokes classic holiday storybook illustrations, adding whimsical storytelling appeal and vintage warmth to handmade seasonal collections.
Condition rich umber clay and shape it into a two-inch hollow half-oval, pressing your thumb into the center to create a hollowed half-shell basin. Texture the entire exterior curved shell deeply using the tip of a stiff wire brush, dragging varied lines across the surface to mimic real walnut bark fissures. Roll out a small oval of light gray clay for the sleeping mouse head, placing it inside the walnut cup along with two flat circular clay ears. Roll a thin sheet of cream clay to act as a folded blanket, draping it over the lower half of the mouse body so only the sleeping face and paws remain visible. Sculpt two tiny teardrop mistletoe leaves from dark green clay, affixing them to the blanket fold alongside two micro-sized red holly berries. Press two curved sleeping eye marks into the mouse face using a needle tool. Anchor a wire loop firmly into the top rim of the clay walnut shell with liquid clay, then cure the assembled piece flat on its open back.
6. Shimmering Snowman with a Pastel Earmuff Set

Step-by-Step Guide
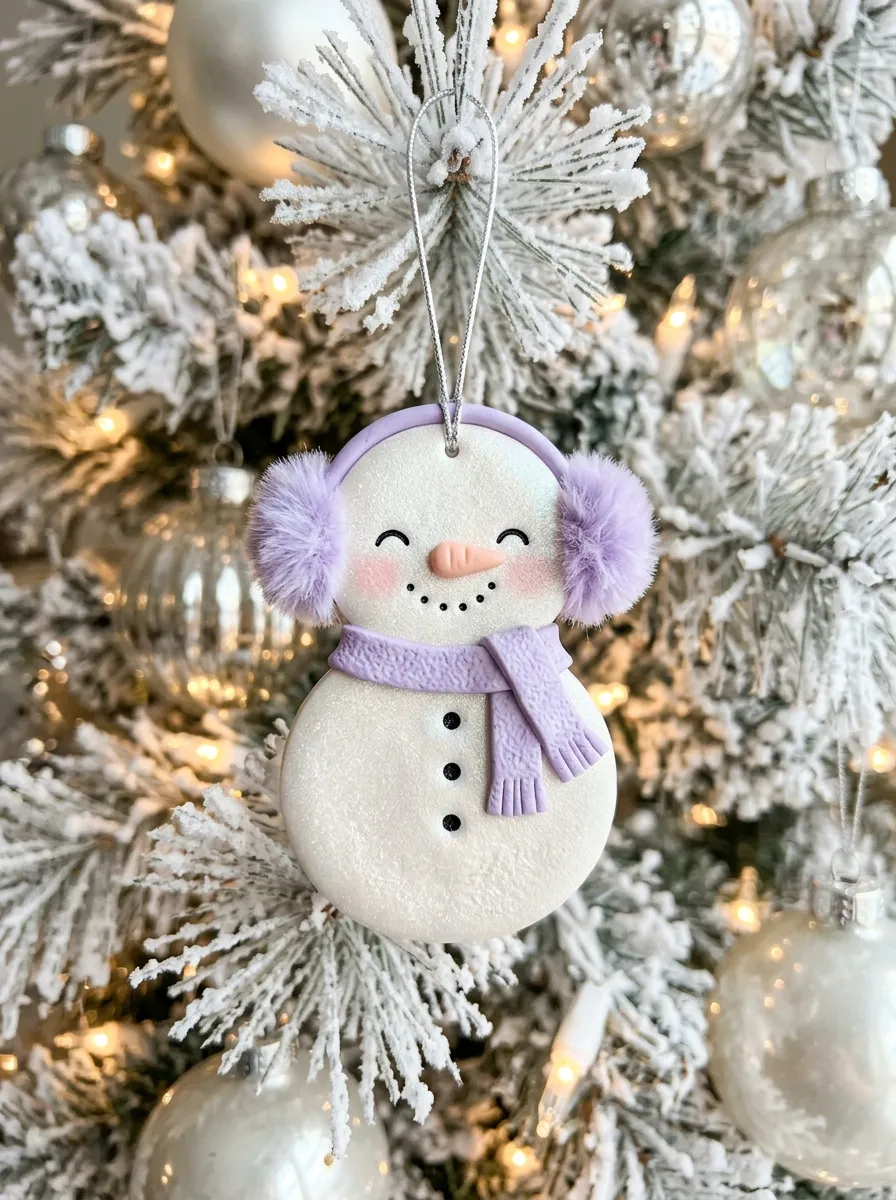
The shimmering snowman ornament updates a traditional winter icon by introducing soft pearlescent clay, modern pastel winter accessories, and clean spherical geometry. Rather than using conventional black top hats and coal buttons, this design incorporates cozy oversized earmuffs sculpted in soft lavender or blush pink, connected by a flexible clay headband. The snowman’s body consists of two flattened, overlapping white clay discs infused with ultra-fine iridescent mica powder that catches the twinkling glow of tree string lights. Tiny stamped snowflake impressions or gentle pastel blush marks on the cheeks replace harsh facial detailing, reinforcing the gentle kawaii aesthetic. This updated look pairs exceptionally well with contemporary flocked or white artificial Christmas trees, offering a fresh, modern alternative to rustic winter decor. Its streamlined, flat-backed construction ensures the snowman stays facing outward when hung, preventing the spinning and twisting common with bulky round decorations.
Mix pure white polymer clay with a pinch of translucent clay and pearl mica powder, rolling the conditioned blend into a smooth four-millimeter sheet on a ceramic tile. Cut one large two-inch circle for the lower body and an overlapping one-and-a-half-inch circle for the head, smoothing the seam where they meet using a flat silicone blending tool. Roll a thin strip of pastel clay across the top of the head for the earmuff band, attaching two textured pastel clay balls directly over the sides of the head to form plush ear coverings. Use a small stylus to indent the center of each earmuff, stippling the edges with a needle tool to create fluffy faux-fur texturing. Shape a tiny cone of soft peach clay for the nose, pressing it lightly into the center of the face. Indent two small dot eyes and a gentle smile using a fine ball tool, filling the recesses with brown liquid clay. Press a metal eyelet into the top center of the head, and bake the flat silhouette thoroughly on your tile.
7. Kawaii Christmas Pudding with Glossy Cream Drip
How to Make
The kawaii Christmas pudding ornament reimagines the classic British holiday dessert as a sweet, rounded character ornament topped with layered white cream and holly accents. A rich, dark cocoa-brown clay forms the domed pudding base, mixed with specks of golden-brown and red clay to replicate spiced fruit and raisins baked inside the sponge. The upper third of the pudding features an opaque white liquid clay drip that flows naturally down the sides in thick, rounded droplets. Perched atop the cream drip is a cluster of sculpted glossy holly leaves and vibrant red berries, which adds seasonal color contrast to the dessert. Large, wide-set glossy black eyes and a wide, open smile give the dessert an animated, joyful presence. This food-miniature concept brings a modern novelty element to tree decorating, blending culinary craft trends with festive seasonal iconography in an accessible, beginner-friendly format.
Condition deep chocolate-brown clay and press it into a smooth, slightly flattened half-sphere measuring roughly two inches in diameter. Press the flat bottom against your tile to create a stable base, gently rounding the upper dome with the palm of your hand. Mix opaque white liquid clay until it reaches a thick glaze consistency, then spoon a small amount over the peak of the brown dome, guiding smooth drip shapes down the sides using a toothpick. Sculpt three miniature pointed holly leaves from bright emerald green clay, detailing them with a central leaf vein using a craft blade, and place them across the top peak of the pudding. Roll three tiny balls of red clay for berries, nestling them together between the leaves. Form two flat black clay discs for the eyes, placing them wide apart on the brown pudding face, and accent each eye with a tiny white clay highlight dot. Insert an eye pin through the holly cluster into the base, then cure the ornament upright.
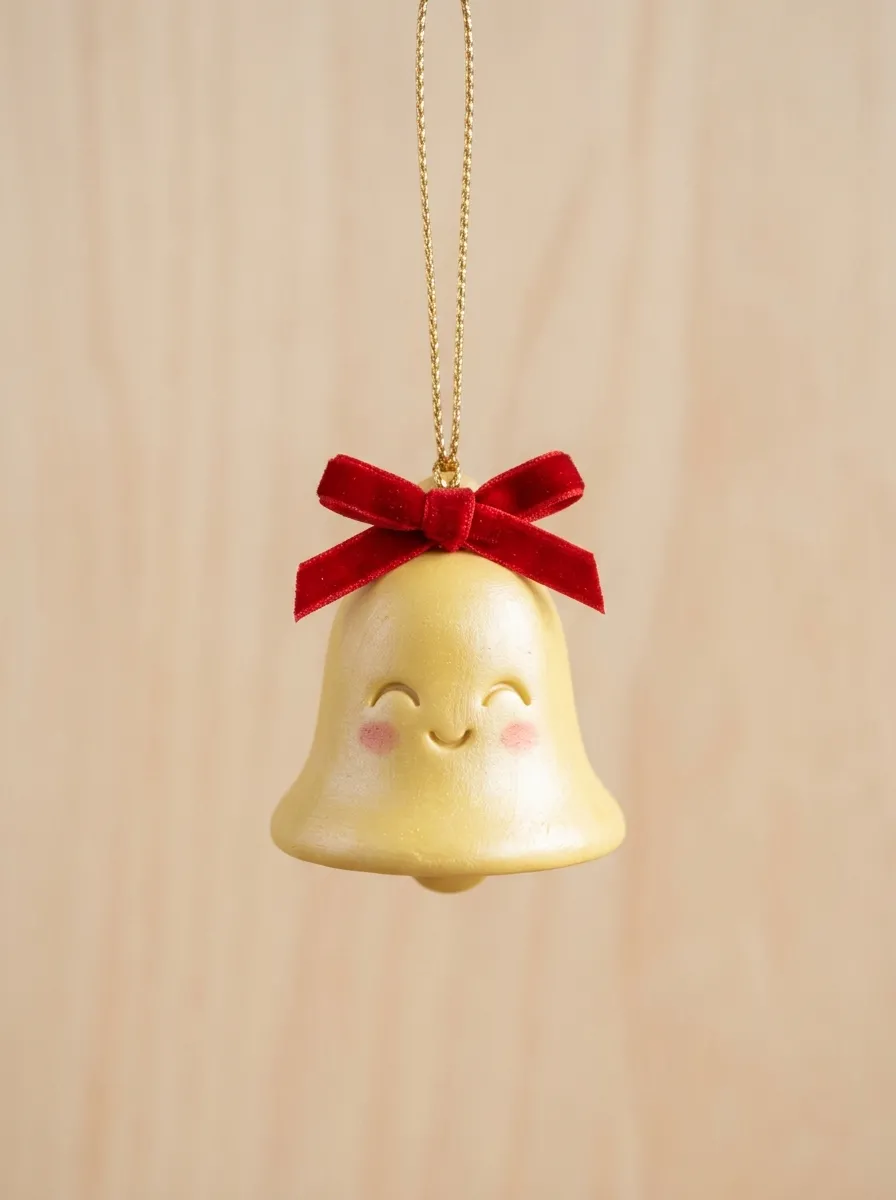
8. Festive Holiday Bell with Cheerful Expression
Execution Process
The festive holiday bell ornament transforms a traditional metallic holiday symbol into a soft, approachable character accent using warm pastel yellow clay and structured bell geometry. The visual framework features a flared conical bell body topped with a decorative curved handle and finished with a round clapper peeking out from the lower rim. Rather than using harsh, reflective metallic paints, the design utilizes matte buttercup-yellow or soft champagne clay dusted with a gentle golden pearl sheen. A miniature holly bow or ribbon sculpted in holiday red sits at the apex of the bell, providing a vibrant focal point that balances the wide bottom silhouette. The bell face features closed, happy arc-shaped eyes and rosy blushed cheeks, giving the inanimate holiday object a sweet, expressive character. This ornament works exceptionally well in multi-piece collections, offering a distinct architectural shape that contrasts pleasingly with standard round bulbs and animal figures on a decorated holiday tree.
Condition pastel yellow clay until smooth and roll it into an even slab five millimeters thick on your work board. Use a template or bell-shaped cutter to cut a clean bell silhouette measuring two and a half inches from the top handle to the flared base. Smooth the cut edges with a water-dampened fingertip or silicone shaper to remove any sharp tool marks and create a soft, rounded rim. Cut a small circle of matching yellow clay, flatten it slightly, and attach it beneath the bottom center of the bell to represent the clapper. Sculpt a tiny holiday bow from bright red clay, pressing it firmly onto the top neck of the bell beneath the handle loop. Use a curved metal tool to stamp two smiling crescent eyes into the center of the bell body. Dust the cheeks softly with shaved pink chalk pastel using a small, fluffy dry makeup brush. Insert a secure wire hanging loop into the top handle, and bake the flat bell ornament directly on your ceramic tile.
9. Miniature Holiday Cupcake with Candy Cane Topper

Setup Method
The miniature holiday cupcake ornament builds on the popularity of decorative holiday bakery goods, featuring a pleated cupcake liner, tall swirled buttercream frosting, and miniature festive toppings. The lower portion utilizes a pleated silicone mold or hand-scored lines across pastel clay to replicate a paper baking cup. Rising from the cup is a thick, textured spiral of white or pale mint clay sculpted to look like freshly piped bakery frosting. A miniature red-and-white striped candy cane stands nestled into the frosting swirl alongside a dusting of microscopic clay holiday sprinkles. Wide-set character eyes and a sweet expression placed on the front of the baking cup give the confection a distinct personality. This project introduces beginners to rotational clay extrusions, dimensional piping techniques, and mixed-surface assembly, yielding an eye-catching, dimensional ornament that stands out beautifully against holiday greenery.
Roll a thick cone of pastel pink clay and press it into a small fluted cupcake base mold, or score vertical lines around the perimeter using a ruler to create pleated liner details. Flatten the top surface and apply a thin layer of liquid polymer clay to serve as an adhesive coat. Extrude or hand-roll a long, smooth tapered coil of soft white clay, twisting it around itself in a rising spiral over the cupcake base to mimic piped frosting. Sculpt a tiny candy cane by twisting red and white clay micro-snakes together, trimming the curved cane to one inch and inserting it firmly into the frosting swirl. Slice multicolored cured clay canes into microscopic bits to create festive sprinkles, scattering them over the wet frosting with gentle finger pressure. Add two small black clay beads to the front of the pleated cup for eyes, indenting a small smile beneath them with a needle tool. Push an eye pin down through the peak of the frosting swirl, and bake the cupcake upright in a supportive bead rack.
10. Cozy Holiday Mug with Marshmallow Cloud Topping

How to Create
The cozy holiday mug ornament celebrates the comfort of warm seasonal drinks, featuring a miniature ceramic-style mug filled with hot cocoa and topped with puffy, smiling marshmallow accents. The mug body is constructed from bright holiday red or forest green clay, sporting a sturdy side handle and a clean cylindrical silhouette. Inside the mug rim, a flat layer of rich brown clay represents steaming hot chocolate, supporting two or three miniature sculpted marshmallow cubes. Each tiny marshmallow features a micro-stamped smiling face, transforming the beverage garnish into charming miniature characters peeking over the mug edge. The smooth, glazed finish of the outer mug contrasts with the soft, powdery matte texture of the marshmallow toppings, producing rich surface interest. This ornament appeals strongly to lovers of cozy seasonal rituals, bringing the warmth of winter kitchen memories into everyday handmade holiday tree decoration.
Roll a smooth rectangular strip of conditioned red clay four millimeters thick, wrapping it around an oven-safe wooden peg or smooth dowel to form a neat hollow cylinder one and a half inches wide. Cut a flat disc of red clay to serve as the bottom base, smoothing the joint securely with a silicone blending tool before removing the internal form. Roll a curved snake of red clay and attach it to the side to create an authentic C-shaped mug handle, securing the joins with liquid clay. Fill the interior cup with scrap clay, finishing the top layer with a smooth disc of deep chocolate-brown clay placed just below the mug rim. Sculpt three small cubes from white clay, softening the corners slightly, and arrange them floating atop the brown cocoa surface. Use a micro-stylus to press tiny dot eyes and smiling mouths onto each marshmallow cube. Insert a heavy-duty eye pin down through the center of the cocoa layer into the mug interior, and bake the assembled piece upright on your ceramic tile.
Common Beginner Mistakes and How to Avoid Them
A frequent error beginners encounter when crafting polymer clay ornaments is improper eye pin placement, which can cause hanging hardware to pull out after baking. Avoid inserting straight, smooth wire pins directly into clay; always use round-nose pliers to bend a small hook or zig-zag kink into the embedded wire tip, anchoring it mechanically inside the clay body. Another common misstep is baking ornaments on uneven surfaces or bare metal baking sheets, which creates shiny flat spots or causes thin pieces to warp under heat. Always bake ornaments on an unglazed ceramic tile or a smooth sheet of parchment paper to ensure an even, uniform matte finish across the entire back. Dust and stray lint contamination also present significant challenges, especially on white and light pastel clays. Keep a pack of alcohol-free baby wipes nearby to clean fingers between color changes, and run a scrap piece of light-colored clay across your hands and roller to lift surface dust before touching final project pieces. Finally, avoid applying liquid glazes too thickly, as excess sealant pools in recessed facial details and can dry with a cloudy, uneven sheen.
Practical Tips for Better Results
Achieving clean, professional results with handmade clay ornaments requires attention to clay firmness, consistent thickness, and proper curing temperatures. If your clay feels overly soft or sticky during shaping, place the conditioned sheet between two sheets of plain paper for twenty minutes to leach out excess plasticizers, which restores firmness for clean cutting. Maintain uniform thickness across all flat ornament slabs by using rolling pin guide rings or stacking acrylic playing cards on both sides of the rolling pin. To achieve delicate, natural-looking cheek blush on kawaii characters, shave dry artist chalk pastels into a fine powder and apply the pigment sparingly using a soft, dry eyeshadow blending brush before baking. When baking, use an independent oven thermometer placed directly beside your ceramic tile, as home oven dials frequently deviate from true internal temperatures and can scorch pastel pigments. After curing, allow ornaments to cool completely inside the turned-off oven with the door closed, which prevents thermal shock, reduces brittleness, and ensures maximum durability for years of holiday use.
Styling, Presentation, or Organization Ideas
Presenting handmade polymer clay ornaments thoughtfully elevates their aesthetic value, whether they are displayed on your personal tree, packaged for holiday gifting, or shared on creative project boards. When trimming a tree, hang these lightweight character pieces on outer bough tips alongside warm white micro-fairy lights, which highlights their dimensional surface relief without casting harsh shadows. Complement the pastel and modern tones of kawaii ornaments by pairing them with natural wood-bead garlands, dried citrus slices, and neutral linen ribbons to maintain a balanced, modern rustic style. For gift presentations, tie completed ornaments onto brown kraft paper packages using striped baker’s twine, transforming the keepsakes into charming, reusable gift tags that recipients can hang directly on their trees. Store your ornament collection in divided archival storage boxes, wrapping each piece individually in acid-free tissue paper to protect delicate antlers, ears, and surface finishes from abrasion. Photographing your collection against natural wood surfaces or soft evergreen branches in natural morning window light captures fine textures clearly, creating bright, engaging images suitable for digital crafting portfolios.
Budget or Time Planning
Crafting a complete set of handmade holiday ornaments is an economical creative project that can be completed efficiently through organized batch-processing techniques. Polymer clay is an inherently budget-friendly medium because leftover scraps can be combined, conditioned, and repurposed as internal core fillers for larger dimensional figures, reducing waste. Rather than buying numerous specialty clay colors, purchase primary colors along with large blocks of white and translucent clay, mixing your own custom pastel palettes to keep supply costs minimal. To maximize crafting time, organize your project into structured assembly-line stages: condition and mix all colored clay batches on the first day, cut and shape the main character bodies on the second day, and add detailed accessories, faces, and hanging hardware on the third day. Batch-baking multiple ornaments simultaneously on a single large ceramic tile optimizes oven use and reduces household electricity consumption. Allocating two to three focused crafting sessions allows makers to produce a cohesive collection of ten to twelve finished holiday keepsakes without feeling rushed, ensuring consistent quality and attention to detail across every piece.
Creative Expansion and Advanced Inspiration
Once you master foundational ornament shaping and curing techniques, you can explore advanced variations that combine mixed media, complex surface finishes, and interactive functional elements. Experiment with embedding tiny faceted glass rhinestones, metallic jump rings, or miniature glass beads directly into the clay before baking to add sparkling holiday texture. You can also explore mica powder gradients, dusting gold or pearl pigments across raised clay details with a soft fan brush to achieve a luminous, gilded appearance reminiscent of vintage European blown-glass ornaments. Another compelling direction involves carving custom stamps from linoleum blocks or rubber erasers, allowing you to imprint repeating Scandinavian knit patterns, snowflakes, or personalized family monograms into ornament backs. Additionally, you can create interactive shaker ornaments by curing hollow clay frames, sandwiching loose glitter behind clear heat-resistant plastic sheets, and sealing the borders with colored liquid clay. Expanding your crafting practice through these techniques builds your sculpting skills while keeping the playful, heartwarming essence of kawaii holiday art at the center of your creative journey.
Leave a Reply