Polymer clay modeling provides an accessible medium for crafters interested in creating miniature sculptural art, functional accessories, and charming home decor accents. Kawaii design, rooted in Japanese visual culture, focuses on rounded shapes, pastel palettes, and expressive, simplified facial features that convey gentle charm. This tutorial outlines ten approachable polymer clay projects tailored specifically for crafters seeking reliable creative ideas that do not demand advanced sculpting background or specialized studio equipment. Readers will discover essential foundational techniques, including clay conditioning, geometric component assembly, seamless blending, and exact oven-baking methods. Working with polymer clay is exceptionally useful because it remains workable at room temperature for extended periods, curing only when exposed to low household oven heat. This property allows beginners to refine their shapes patiently without the time constraints associated with air-dry compounds. The finished pieces serve diverse practical functions, transforming easily into wearable jewelry charms, decorative desk figurines, functional paperclips, and magnetic kitchen accents. By mastering these core techniques, any maker can produce clean, durable, and eye-catching clay sculptures that capture a bright modern aesthetic.
Why Kawaii Clay Crafts Are Trending
The enduring popularity of kawaii polymer clay crafts across modern Pinterest ideas stems from the combination of low entry barriers and high visual appeal. In modern design spaces, miniature handmade objects offer a playful contrast to stark, minimalist interiors, introducing personal warmth to workspaces, craft stations, and vanity shelves. The DIY appeal is reinforced by the small physical scale of the projects, which allows makers to complete finished items in brief creative sessions without requiring extensive cleanup or dedicated studio furniture. For beginners, the rounded geometry central to kawaii aesthetics simplifies the sculpting process; simple spheres, cylinders, and teardrops form the primary building blocks for characters, botanical accents, and miniature confections. Additionally, the finished pieces photograph exceptionally well, generating strong social sharing interest due to their vibrant colors and smooth finishes. Because polymer clay is inexpensive and readily available in dozens of mixable shades, crafters can produce professional-grade art on a modest budget. The tactile, hands-on satisfaction of turning basic colored blocks into three-dimensional characters makes this craft a rewarding creative outlet.
Essential Materials and Preparation Methods
Beginning a polymer clay creative project requires gathering appropriate tools and preparing an orderly, lint-free workspace to maintain clean surfaces. The foundational materials include several blocks of standard polymer oven-bake clay in soft pastel shades, primary tones, and dense black and white for detailing. Essential sculpting tools comprise an acrylic rolling rod, a rigid tissue blade for straight cuts, ball stylus tools in varying diameters for eye sockets and texturing, and needle tools for fine scoring. Preparation begins by thoroughly cleaning a non-porous working surface, such as a smooth ceramic tile, tempered glass cutting mat, or silicone craft sheet, using isopropyl alcohol to eliminate surface dust and airborne lint. Conditioning the clay is an indispensable step: knead small segments by hand or pass them through a manual clay conditioning roller until the compound becomes pliable, glossy, and free of internal air bubbles or surface cracks. Proper planning also involves preheating a dedicated craft oven or conventional kitchen oven verified with a standalone analog oven thermometer to guarantee accurate temperature calibration throughout the entire baking cycle.
Idea 1: Miniature Pastel Cloud Charm
How to Create
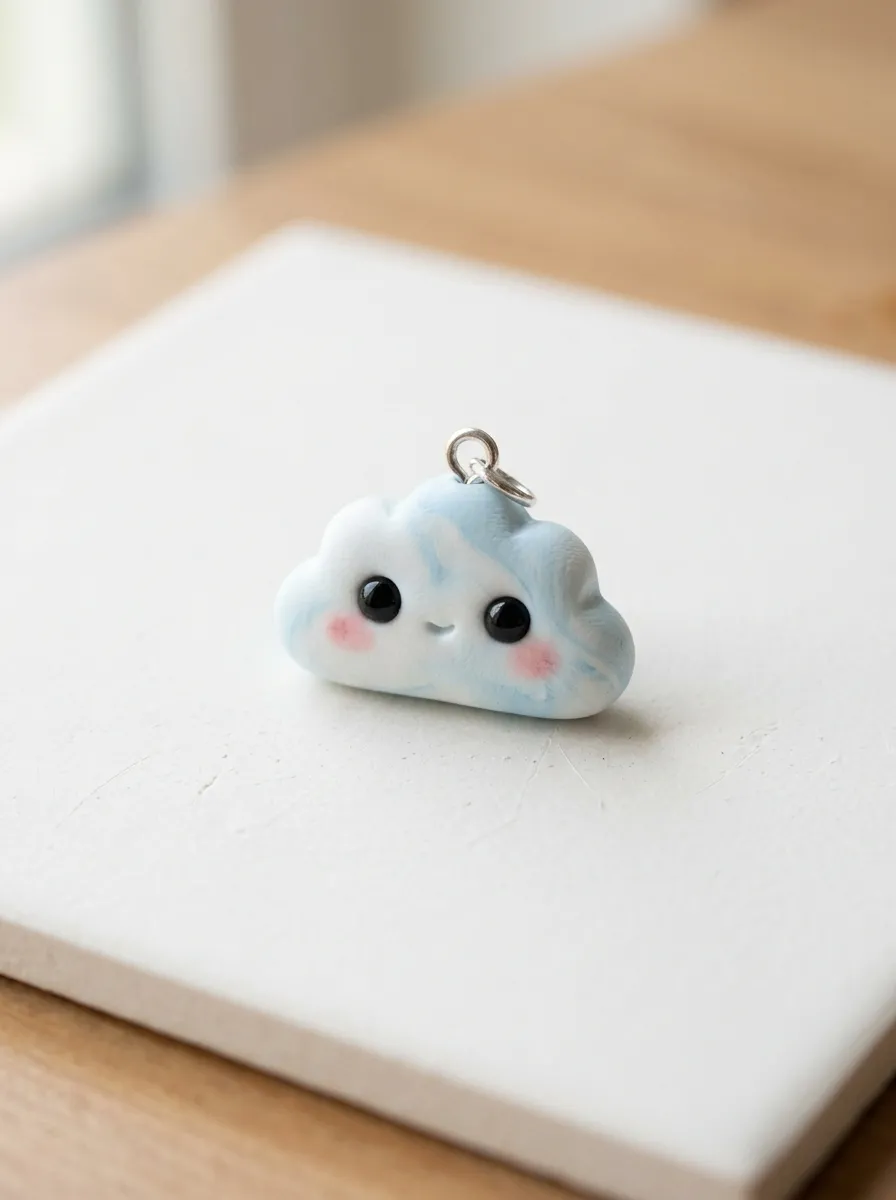
The miniature pastel cloud charm embodies quintessential kawaii design by transforming an ethereal natural shape into a tangible, rounded character piece. The base structure relies on multiple overlapping spheres of soft white or light sky-blue polymer clay, merged seamlessly along their lower contours while allowing the upper mounds to produce classic billowing curves. Two miniature black spheres serve as wide-set eyes, paired with an embroidered-style curved mouth and subtle soft pink blush accents placed high on the cheeks. This project serves as an ideal baseline exercise for novice sculptors because it teaches volumetric balance, surface smoothing, and basic facial proportioning without requiring rigid symmetry. The soft curves minimize visible fingerprints, while the flattened back surface provides a stable orientation when resting on flat furniture or being converted into a functional accessory. The finished cloud can be transformed into a mobile phone charm, a planner bookmark, or a delicate pendant, offering a gentle aesthetic that integrates effortlessly into contemporary pastel-themed stationery collections and everyday carry items.
To construct the cloud, roll five balls of conditioned white polymer clay, making the center sphere approximately twelve millimeters wide and the four flanking spheres progressively smaller down to eight millimeters. Arrange the spheres in a straight row on your ceramic working tile, pressing their contact points together firmly with your fingertips. Use a silicone chisel blender tool to smooth the seam lines across the lower half, leaving the top ridges pronounced to define the distinct cloud billows. Flatten the entire assembly gently using an acrylic roller until it reaches a uniform thickness of approximately six millimeters. Form two microscopic black clay spheres, flatten them slightly with a small ball stylus, and press them into the face spaced six millimeters apart along the center sphere. Add two tiny pink clay ovals directly below the eye line for rosy cheeks, then score a shallow curved smile between the eyes using a fine needle tool. Insert a metal eye pin securely into the top center seam, bake the piece on the tile at the manufacturer temperature for twenty-five minutes, and let it cool completely.
Idea 2: Sleeping Kawaii Avocado Figurine
Step-by-Step Guide
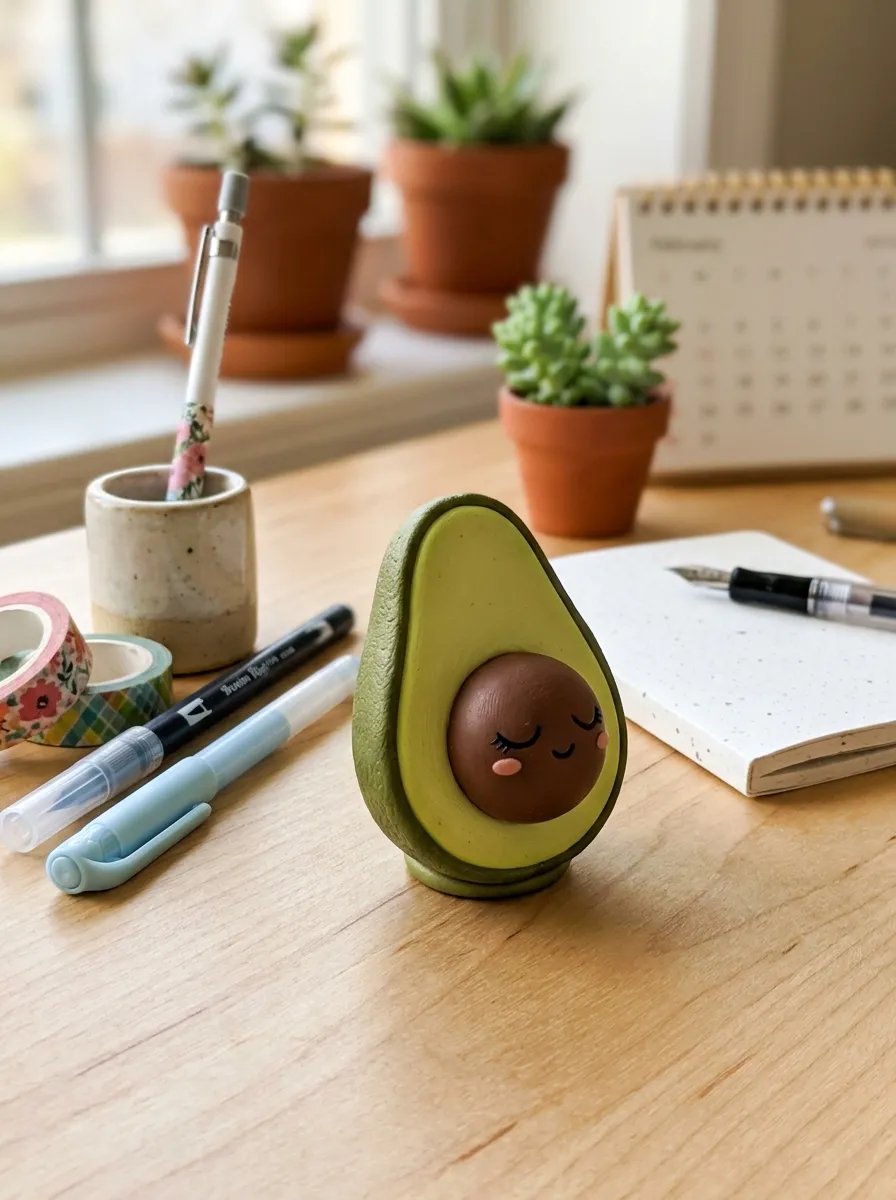
The sleeping kawaii avocado figurine translates a beloved culinary staple into a whimsical, self-standing decorative desk sculpture. The exterior shell consists of deep moss-green clay shaped into an elongated pear, while the interior flesh utilizes a light lime or pale chartreuse tone to create realistic color gradation. The focal element is the central seed cavity, which houses a prominent brown hemisphere featuring curved, downward-slanting black clay eyelids that convey a resting facial expression. A subtle smiling mouth placed directly between the eyes adds personality, while the outer rim of the avocado maintains a clean, uniform perimeter that frames the character. This beginner friendly project introduces dual-layer sculpting, precise teardrop shaping, and structural balance, ensuring the completed figurine rests upright on flat surfaces without tipping over. The tactile contrast between the smooth seed face and the textured outer rind provides visual depth, making the sculpture an eye-catching accent for office workstations, studio organization trays, or decorative bookshelf arrangements.
Begin by shaping a piece of conditioned olive green polymer clay into an oval, pinching the top third slightly to establish a classic pear shape measuring thirty millimeters tall. Flatten the base against your work surface so the sculpture stands independently, then use an acrylic roller to create an even front-facing plane. Roll out a thin sheet of pale chartreuse clay, cut out a matching pear contour slightly smaller than the base, and press it smoothly onto the olive foundation to represent the inner flesh. Press a medium ball stylus firmly into the lower center of the chartreuse layer to indent a clean circular socket. Roll a sphere of rich chocolate-brown clay to fit snugly within this impression, pressing it into place so it protrudes outward as a rounded dome. Roll two ultra-thin strands of black clay, bend them into downward-facing arcs, and adhere them across the brown seed to form sleeping eyes. Bake the upright figure on a flat ceramic baking tile according to manufacturer instructions, allowing the piece to harden thoroughly before handling.
Idea 3: Pink Glazed Miniature Donut
Execution Process
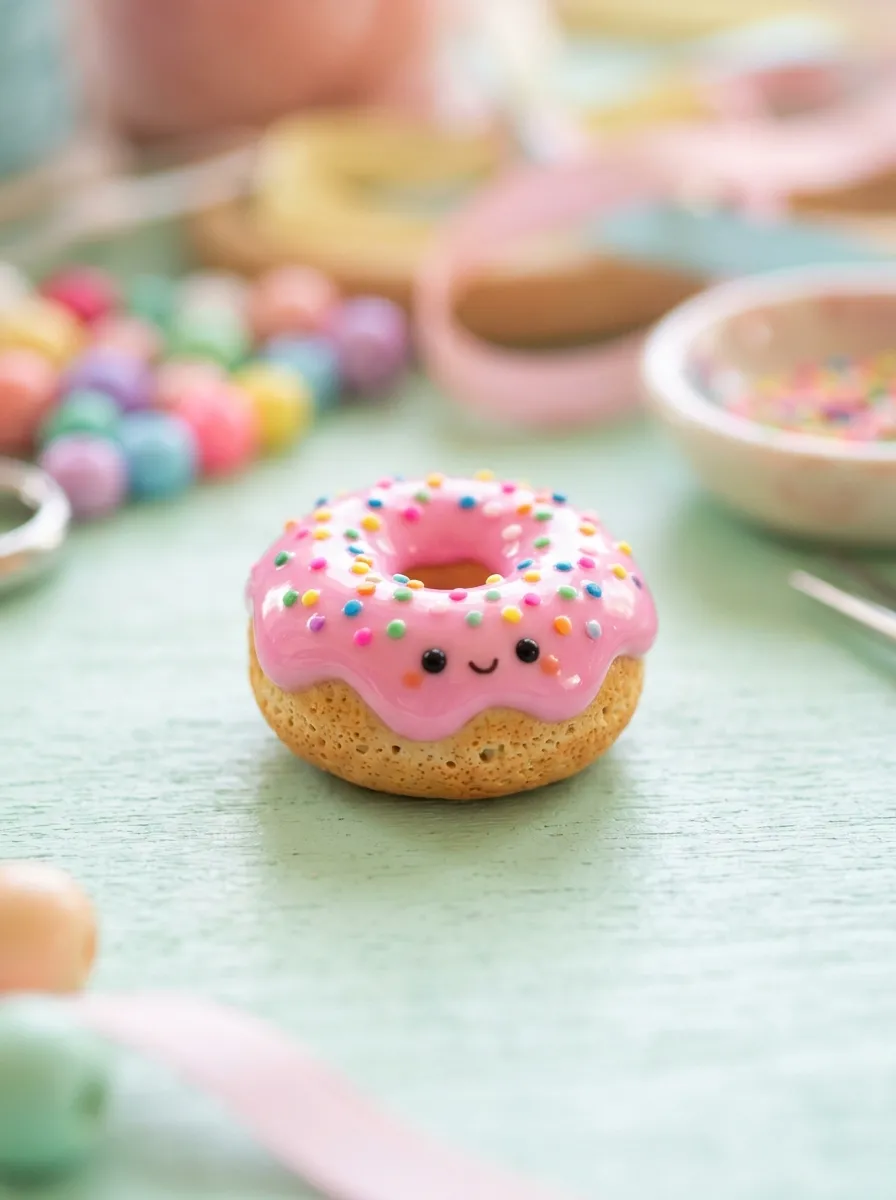
The pink glazed miniature donut offers an approachable introduction to faux miniature food crafting, focusing on realistic ring shaping and glossy fluid clay overlays. The pastry base features a warm, baked-dough tone mixed from white, translucent, and yellow ochre clay, carefully shaped into an even torus with a clean central aperture. The decorative topping utilizes a vibrant pastel pink sheet cut with irregular, wavy edges to mimic poured sugar glaze settling over the baked ring. Sprinkles formed from tiny, multicolored clay rods are scattered across the glaze surface, introducing crisp geometric contrast against the fluid pink layer. Wide-set black bead eyes and a tiny pink smile give the pastry a lively personality, turning a traditional confection into an animated kawaii character. This project teaches fundamental clay cutting, surface texturing using a stiff toothbrush, and miniature detailing, making it an excellent step by step project for crafters seeking quick, high-impact DIY gifts or planner charms.
To make the donut base, roll a three-inch rope of tan-colored clay to a consistent eight-millimeter diameter, then join the ends together to create an unbroken circular ring. Smooth the joint thoroughly using your thumb, rotating the ring along your work surface to ensure uniform thickness across the entire circumference. Tap the entire surface gently with a firm-bristled toothbrush to impart a subtle baked pastry texture. Roll out a very thin sheet of baby-pink polymer clay, cut a central circle to match the inner hole of the donut, and trim the outer border into soft, irregular waves using a craft knife. Drape the pink glaze over the tan base, pressing it gently to eliminate trapped air pockets beneath the surface. Add two black clay micro-dots for eyes on one side of the glaze, along with a small crescent mouth. Roll thin strings of white, mint, and yellow clay, slice them into one-millimeter lengths with a tissue blade, and scatter them over the glaze. Bake the piece at the recommended temperature, and apply gloss varnish over the pink section once cooled.
Idea 4: Whimsical Tiny Star Figurine
How to Make
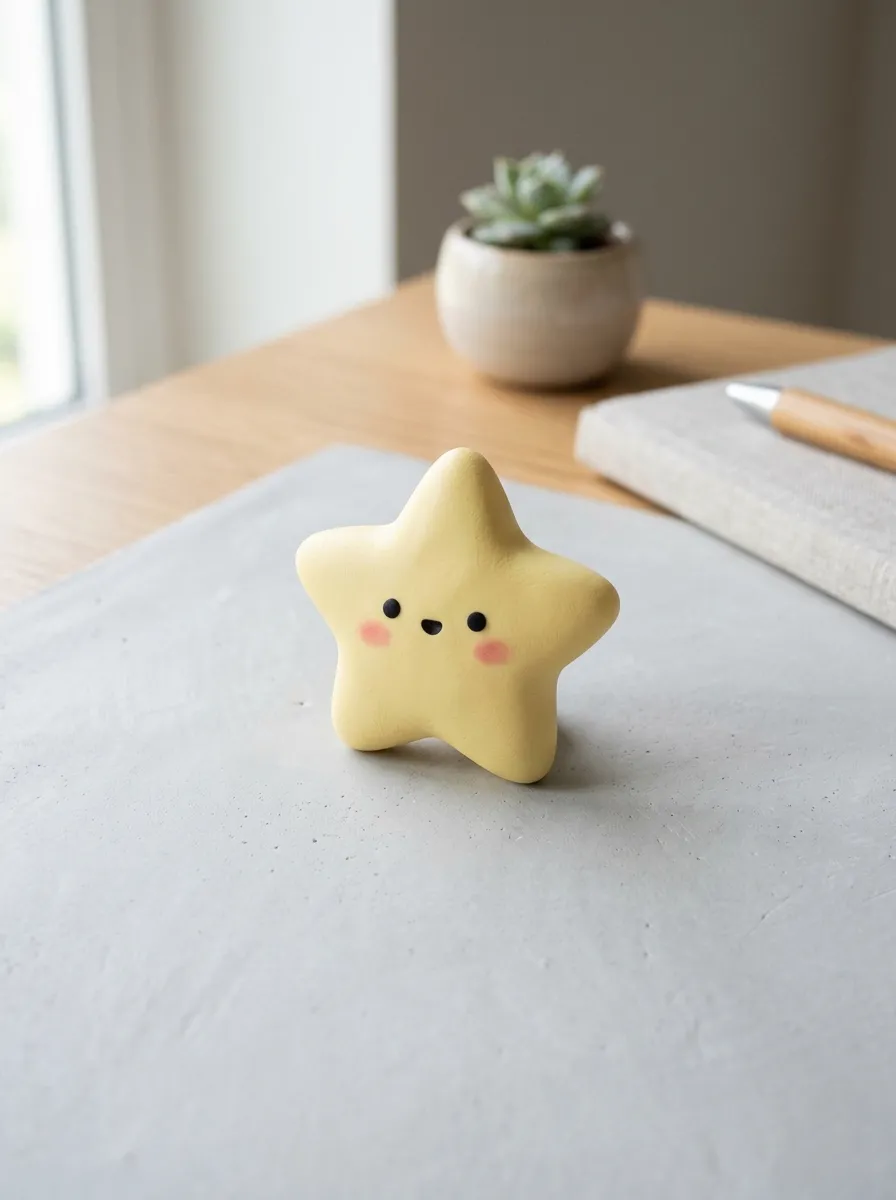
The whimsical tiny star figurine captures a clean celestial aesthetic through geometric five-point symmetry and a gentle, welcoming facial design. Sculpted from butter-yellow or soft cream polymer clay, this design relies on five evenly proportioned points tapering outward from a thick, stable central core. The tips are gently softened rather than left sharply pointed, reinforcing the friendly, rounded character inherent to kawaii visual styling. The eyes sit squarely in the lower quadrant of the central face, complemented by tiny round blush accents and a neat open mouth that creates a joyful, alert expression. Because five-point geometric stars can be challenging to balance freehand, this project provides excellent practice in measuring proportions, managing symmetrical cuts, and smoothing compound angles. The finished star functions wonderfully as a standalone desk mascot, a whimsical refrigerator magnet, or an accent embedded within a decorative jewelry dish, bringing cheerful modern aesthetic charm to everyday environments.
Commence by conditioning a walnut-sized ball of pastel yellow clay, flattening it into a smooth disk that is approximately eight millimeters thick. Using a rigid tissue blade, make five evenly spaced diagonal cuts along the circumference to block out a symmetrical pentagon. Pinch each of the five corners outward between your thumb and forefinger, drawing the material gently away from the center to lengthen and shape each individual star point. Soften the points by tapping them lightly against your work surface, then smooth out any fingerprint indentations using a light mist of rubbing alcohol on a cotton swab. With a small ball stylus, indent two shallow sockets in the lower half of the central hub, pressing small black clay spheres into the recesses to create flush, secure eyes. Add two tiny pink clay disks directly beneath the eyes for rosy cheeks, followed by a shallow center puncture with a needle tool to represent an open mouth. Place the star flat on a parchment-lined baking sheet, bake at the specified temperature for twenty minutes, and cool completely before display.
Idea 5: Chubby Kawaii Cat Desk Mascot
Step-by-Step Guide
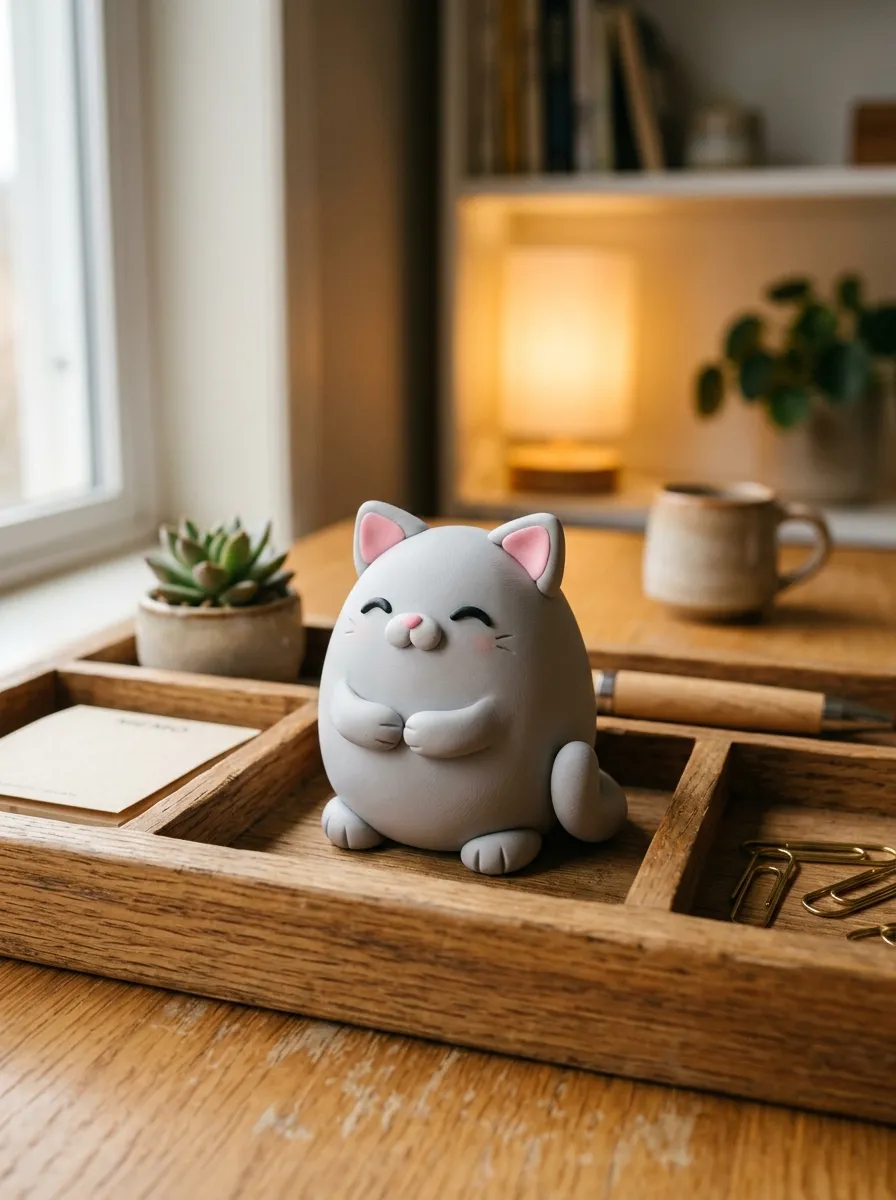
The chubby kawaii cat desk mascot features an egg-shaped body that minimizes limb assembly while emphasizing a delightfully plump, rounded form. The design eliminates long legs in favor of two tiny front paws folded neatly against the chest, accompanied by a small tail curled smoothly around the base. Triangular ears with soft pink inner linings sit perched on the crown of the head, framing a compact face detailed with closed curved eyes, delicate whisker dots, and an inverted triangular pink nose. The continuous, spherical body reduces the risk of delicate parts breaking off during everyday handling, making it a robust desktop ornament or paperweight. This project develops skills in teardrop massing, delicate component attachment, and surface smoothing, demonstrating how simple geometric reductions can evoke a recognizable, charming animal form. Rendered in contemporary neutrals like soft gray, cream, or warm terracotta, this handmade sculpture coordinates effortlessly with modern office organization setups and minimalist decor palettes.
Begin by rolling a generous portion of conditioned light gray clay into a smooth sphere, then taper the top slightly to form an egg shape measuring roughly thirty-five millimeters in height. Tap the broad bottom against your work tile to create a flat, secure pedestal that rests upright without wobbling. Shape two small gray triangles for the ears, press smaller pink triangles onto the front faces, and attach them securely to the top curve of the head, blending the back seams down into the skull. Roll two tiny teardrops of gray clay for the paws, flattening them against the midsection of the torso pointing inward. Form a thin, tapered rope for the tail, wrapping it snugly around the lower right side of the body base. Using a fine-tipped needle tool, score two sleeping crescent eyes and a small mouth onto the upper face, and add a tiny pink triangle between the eyes for the nose. Bake the mascot on a ceramic tile in an oven preheated to the clay specifications for thirty minutes to ensure complete core curing.
Idea 6: Kawaii Strawberry Charm with Seeds
How to Create
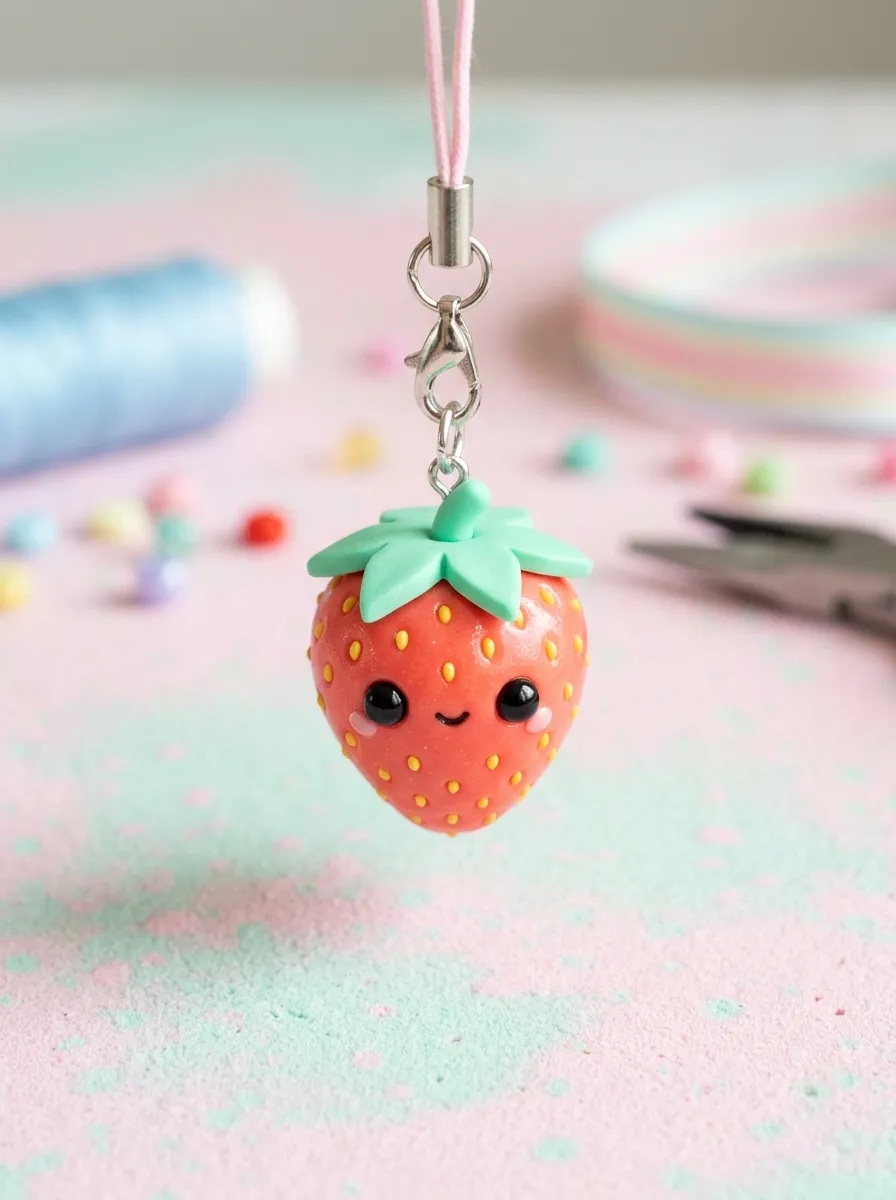
The kawaii strawberry charm combines vibrant fruit geometry with miniature facial detailing, creating an eye-catching accessory suitable for keychains or stitch markers. The main fruit body uses deep scarlet or soft coral clay shaped into an inverted cone with rounded shoulders and a blunt tip. The crown of the berry features a five-pointed calyx of fresh mint-green clay that drapes naturally over the upper contour. What distinguishes this kawaii version is the deliberate seed placement: rather than covering the entire fruit randomly, the miniature yellow or white seed indentations frame the upper face, leaving clear space for glossy black safety-style eyes and blushing cheeks. This project refines precision skills, specifically controlling very small clay components and using needle tools to create rhythmic surface textures without warping the underlying form. The high-contrast color scheme of red, green, and black yields a bold, playful finish that fits seamlessly into contemporary aesthetic fruit craft trends.
To assemble the strawberry, roll a marble-sized piece of red polymer clay into an even sphere, then roll one end back and forth on your tile to produce a tapered strawberry cone. Flatten the broad upper end lightly to receive the green leaves. Roll out a thin sheet of leaf-green clay, use a craft knife or miniature star cutter to create a five-pointed leaf crown, and press it securely onto the top of the strawberry cone. Using a fine needle tool, press shallow, angled oval indentations around the lower two-thirds of the fruit to simulate natural seed pockets, inserting a speck of pale yellow clay into each groove. In the upper smooth area, press two small black clay dots to form wide-spaced eyes, then apply two tiny pink clay blush patches directly below them. Insert an eye pin straight down through the center of the green calyx into the red core, bake at the recommended temperature for twenty-five minutes, and let cool before attaching jewelry findings.
Idea 7: Little Sprouting Seedling in a Terracotta Pot
Execution Process
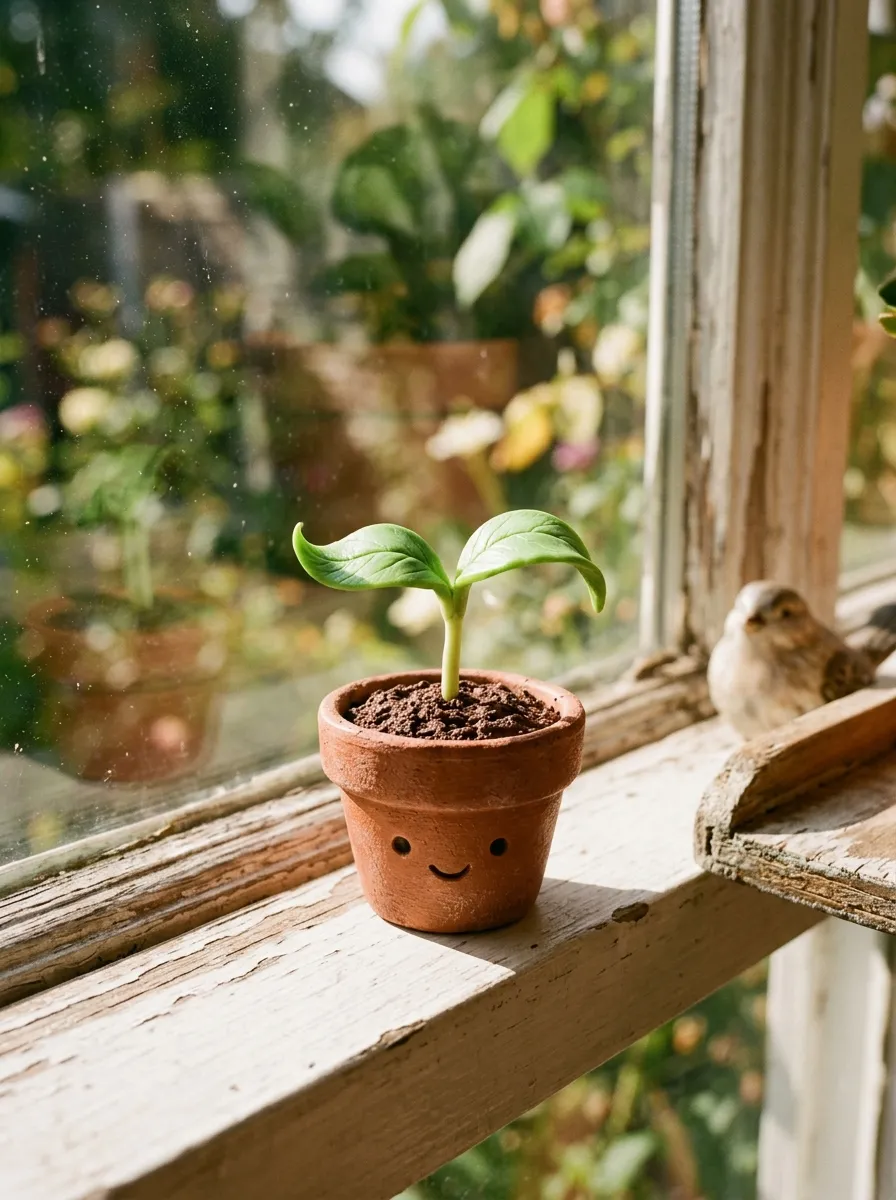
The little sprouting seedling in a terracotta pot offers a delightful blend of botanical craft and animated character art, requiring no plant care while remaining permanently vibrant. The structure consists of a classic flared flowerpot sculpted from warm terracotta clay, filled with textured dark-brown soil clay that sits flush with the rim. Rising from the center of the earth are two delicate green cotyledon leaves unfurling from a pale green central stem. The character face is situated directly on the vertical surface of the terracotta pot itself, featuring smiling curved eyes, pink cheeks, and an open mouth that gives the container an engaging personality. This project provides practical experience in structural assembly, geometric pottery shaping, and combining separate static elements into a cohesive narrative sculpture. The warm earth tones contrasted with fresh leafy greens create an appealing accent for modern home decor, looking particularly attractive when displayed on narrow windowsills, desk shelves, or alongside living houseplant collections.
Fabricate the terracotta pot by conditioning brick-red clay and rolling it into a truncated cone that measures twenty-five millimeters tall with a slightly flared upper rim. Wrap a thin, flat strip of the same red clay around the top perimeter to form the classic raised pot collar, smoothing the seam at the rear. Roll a ball of dark-brown clay, flatten it to fit within the top opening of the pot, and press it into place; texture the brown surface with a stiff wire brush to simulate potting soil. Roll two tiny paddle-shaped leaves from spring-green clay, attaching them to a short, sturdy green stem, and embed the stem firmly into the center of the soil. On the front of the red pot, press two tiny black clay balls into place for the eyes, positioning them across the vertical midpoint, and score a curved smile underneath with a needle tool. Add two soft pink clay blush spots to complete the character expression, then bake the entire assembled piece upright for thirty minutes at the designated oven temperature.
Idea 8: Miniature Frosted Animal Cookie
How to Make
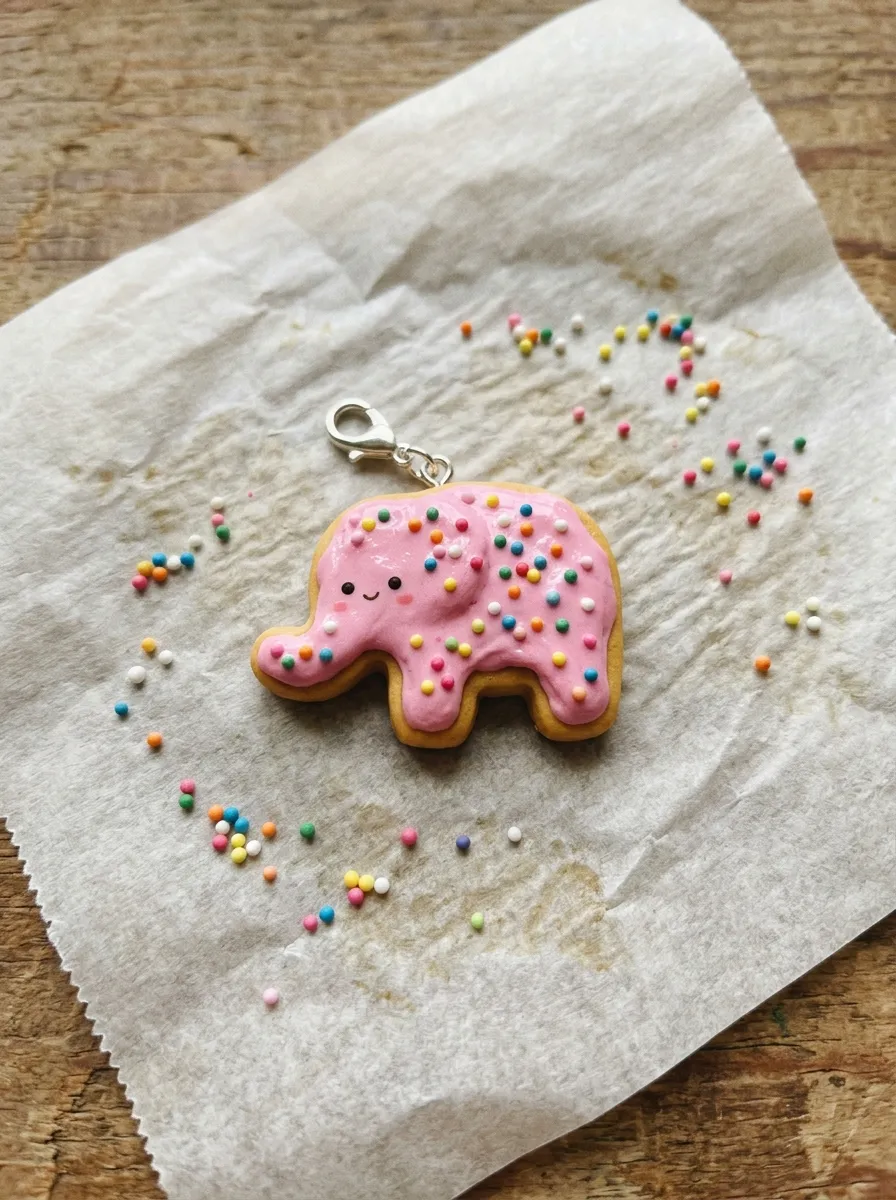
The miniature frosted animal cookie reinterprets nostalgic sweet treats into durable, collectible clay jewelry and charms. The project begins with a baseline animal silhouette—such as an elephant, teddy bear, or circus horse—cut from a textured golden-brown pastry base clay. The entire top surface is coated in an opaque pastel pink or white clay layer, mimicking the thick, poured confectionary frosting characteristic of classic iced cookies. Multi-colored nonpareil sprinkles made from microscopic spheres of blue, yellow, and green clay are distributed evenly across the frosted layer, pressed flush to maintain structural adhesion. Instead of leaving the piece as a plain food replica, subtle kawaii facial details—including tiny dark eyes and a curved mouth—are incorporated into the frosting layer to give the cookie animated charm. This project provides excellent practice in working with mixed-thickness slabs, precise template trimming, and managing intricate, microscopic clay elements without smudging surrounding colors, resulting in a clean, charming finish.
Roll out a flat sheet of golden-tan polymer clay to a uniform thickness of four millimeters on a piece of parchment paper. Roll out a matching very thin sheet of baby-pink clay, layer it directly over the tan base, and smooth out any trapped air bubbles using light pressure from an acrylic roller. Using a miniature animal cutter or a paper stencil and a sharp craft knife, cut out the animal profile, taking care to keep the vertical cut edges crisp and defined. Texture the exposed tan edges around the sides with a coarse needle tool to replicate the porous crumb structure of a baked biscuit. Roll dozens of microscopic clay balls in yellow, lavender, and white, scattering them over the pink surface and pressing them gently with a flat acrylic block so they adhere securely. Add two tiny black clay specks for the eyes onto the frosting, along with a petite mouth score. Bake the flat cookie on a smooth tile for twenty minutes at the correct heat setting, and coat with matte or satin glaze after cooling.
Idea 9: Sleepy Kawaii Boba Milk Tea Cup

Step-by-Step Guide
The sleepy kawaii boba milk tea cup brings a contemporary beverage trend into miniature polymer sculpture through simple cylindrical construction and charming character detailing. The primary cup consists of a slightly flared cylinder sculpted from warm beige or soft caramel clay, replicating the creamy tone of classic milk tea. The bottom third of the vessel features a cluster of glossy, dark brown polymer pearls that appear stacked inside the liquid. The top of the cup is capped with an opaque white domed lid, complete with a colorful straw protruding at an angle from the center. Across the front of the cup, a sleepy expression—featuring closed crescent eyes and pink cheeks—lends the beverage a cozy, relaxing vibe. This project reinforces skills in maintaining clean cylindrical symmetry, joining disparate colors cleanly without cross-contamination, and inserting structural armatures like cut eye pins or wire segments to support projecting features such as the beverage straw.
Begin by rolling a piece of light cream-colored polymer clay into a smooth cylinder twenty-five millimeters tall, tapering the lower half slightly inward to mimic a tapered plastic cup profile. Roll twelve tiny spheres of dark espresso-brown clay, flattening them slightly, and press them around the lower perimeter of the beige cylinder to represent tapioca pearls. Construct a flat circular lid from pure white clay, adhering it to the top rim of the cup and rounding the edges smoothly. Cut a short ten-millimeter section of pastel-colored clay rope, insert a thin wire core down its center for structural rigidity, and press it diagonally through the white lid to serve as the straw. Using a fine needle tool, carve two downward-curving arcs for sleepy eyes across the mid-section of the beige cup, highlighting each with a tiny pink clay blush dot underneath. Bake the boba cup upright on a level baking tile for twenty-five minutes, allowing it to cool fully before brushing clear gloss glaze over the dark tapioca pearls and straw for visual contrast.
Idea 10: Chubby Little Whale Desk Companion

How to Create
The chubby little whale desk companion utilizes organic, hydrodynamic curves and a split-tone color scheme to create an exceptionally charming marine figurine. The body features an oversized, rounded teardrop form, using soft dusty-blue or lavender clay for the upper dorsal area and crisp white clay for the flat underbelly. A neat horizontal tail fluke projects from the tapered rear, while two small side flippers rest flat against the lower body, providing lateral balance. Perched on top of the whale’s crown is an optional whimsical detail: a tiny, white three-tiered water spout or a miniature pink flower. Wide-set black eyes placed along the lateral boundary line between the white and blue clay give the whale an innocent, welcoming gaze. This project helps crafters master dual-color clay layering, invisible seam blending along curved volumes, and delicate fin sculpting, producing an endearing desktop accent that sits comfortably on workspaces or display shelves.
To build the whale, shape a piece of pastel blue clay into a smooth egg shape, flattening the bottom surface firmly against your work tile. Flatten a thin oval sheet of white clay and apply it directly to the bottom flat surface, trimming the edges so it meets the blue clay in a crisp, horizontal seam line along the lower third. Roll two small blue teardrops and flatten them into curved flippers, attaching one to each side just above the white belly line. For the tail, roll a small blue cylinder, flatten the end into two symmetrical rounded lobes, and join it smoothly to the rear taper of the main body. Form two glossy black clay spheres and press them into the sides of the head using a ball stylus, adding a tiny curved smile just below the eye plane with a needle tool. Bake the whale resting on its flat belly on a parchment-lined tile for twenty-five minutes at the temperature recommended by your clay manufacturer, and let it cool completely.
Common Beginner Mistakes and How to Avoid Them
Novice polymer clay sculptors frequently encounter several technical pitfalls that can compromise the strength, cleanliness, and visual appeal of their finished pieces. One of the most prevalent mistakes is baking clay at incorrect temperatures; relying on uncalibrated oven dials often leads to scorching or under-curing, which leaves the clay brittle and prone to snapping. Crafters should always place an independent, analog oven thermometer directly next to their baking tile to verify accurate heat levels. Another frequent issue is dust and lint contamination, which shows up prominently on light pastel and white clays; washing hands regularly, wiping tools with rubbing alcohol, and keeping baby wipes at the workstation will prevent airborne fibers from marring raw surfaces. Beginners also tend to join miniature clay components with inadequate surface pressure, causing ears, limbs, or pins to detach after baking; using liquid polymer clay or a tiny drop of bakeable adhesive between contact points ensures strong, permanent structural bonds. Finally, under-conditioning raw clay leads to micro-cracks and weak spots during baking. Spending sufficient time warming and kneading the clay until it is entirely pliable will yield smooth, crack-free, professional-quality results.
Practical Tips for Better Results
Achieving refined, boutique-quality finishes with kawaii polymer clay requires adopting specific habits that elevate basic shapes into professional craft pieces. Always work on a smooth, transportable surface—such as an unglazed ceramic tile or a tempered glass mat—so that delicate sculptures can move directly from the craft desk into the oven without being handled or distorted. When creating fine facial details like eyes and blush spots, chill the clay in the refrigerator for ten minutes beforehand; cooler clay is firmer, allowing you to slice clean, microscopic circles without squishing them out of shape. For seamless smoothing, dip a silicone-tipped shaping tool or a cotton swab into a small amount of isopropyl alcohol to dissolve light surface imperfections, tool marks, and fingerprint ridges before the piece enters the oven. When inserting metal eye pins for keychains or charms, bend the submerged end of the wire into a slight zigzag using needle-nose pliers before pressing it into the clay; this mechanical anchor locks the pin securely into the cured plastic, preventing it from pulling out during everyday use.
Styling, Presentation, or Organization Ideas
Kawaii polymer clay creations offer versatile styling possibilities that bring playful, handmade character into modern home decor and workspace organization. Small figurines—such as chubby cats, sleeping avocados, and potted seedlings—serve as delightful accents when arranged in organized grids inside acrylic display cases, shadow boxes, or on floating wooden nursery shelves. Crafters can also glue strong neodymium magnets to the flat backs of clouds, stars, or cookies, turning them into charming, functional organizers for magnetic memo boards, kitchen refrigerators, or metal studio tool racks. To present finished clay charms as gifts, mount them on minimalist kraft cardstock backings stamped with simple ink borders, securing them with matching pastel twine to enhance the boutique handmade aesthetic. For functional desk styling, combine clay characters with sturdy wire photo clips embedded into their bases before baking, creating charming stationary holders for notes, recipes, or small art prints. Grouping sculptures in odd-numbered clusters with cohesive color palettes ensures your displays look intentional, modern, and visually balanced rather than cluttered.
Budget or Time Planning
Executing polymer clay projects efficiently depends on thoughtful material sourcing, workspace preparation, and structured batching techniques. Because polymer clay does not dry out when exposed to air, crafters can condition and mix custom color palettes ahead of time, storing them in clean, airtight plastic containers or zip-top bags protected from direct sunlight. To maximize your budget, purchase primary colors along with large blocks of white and translucent clay; blending small portions of saturated hues into white yields an endless spectrum of soft pastel shades at a fraction of the cost of buying pre-mixed specialty colors. Organize your crafting sessions into focused assembly phases: spend thirty minutes conditioning clay and rolling base shapes, thirty minutes assembling characters and facial details, and complete the session with a single, consolidated baking cycle. Baking multiple projects together on a single ceramic tile conserves household electrical energy and ensures uniform curing across your entire collection. Adopting this structured workflow allows makers to produce consistent batches of charms or decorative figurines within two to three hours.
Creative Expansion and Advanced Inspiration
Once you feel comfortable with basic kawaii shaping and baking fundamentals, you can explore advanced techniques that introduce rich texture, dimension, and mixed-media elements to your work. Experiment with surface coloring by brushing dry pastel chalks or mica powders onto raw clay before baking; this technique creates soft, airbrushed blush gradients, realistic baked-cookie browning, and shimmering highlights that add professional depth. You can also incorporate liquid polymer clay mixed with chalk pastels or oil paints to formulate realistic drippy frostings, glossy syrups, and miniature beverage layers that flow naturally across solid clay surfaces. For structural expansion, consider sculpting larger, functional home accessories—such as decorative trinket dishes, customized ceramic mug handles, or sculpted mechanical pen covers—using aluminum foil cores to minimize weight and reduce clay consumption. Incorporating jewelry hardware like jump rings, earring studs, and swivel clasps allows you to transform miniature charms into wearable accessories. These creative extensions help you build upon basic techniques, encouraging continuous creative growth within the engaging world of polymer clay art.
Leave a Reply