Kawaii polymer clay fruit charms represent a charming and accessible segment of modern handmade jewelry making, miniature sculpting, and creative accessory design. This comprehensive tutorial introduces crafters to foundational techniques required to turn colorful modeling compounds into durable, pocket-sized botanical miniatures complete with iconic Japanese-inspired character expressions. Readers will master the essentials of clay conditioning, color formulation, miniature facial detailing, metal hardware integration, and proper thermal curing procedures. Crafting tiny charms serves multiple practical functions across creative disciplines, supplying unique handmade components for phone straps, stitch markers, charm bracelets, and decorative stationery accents. Learning the proper construction methods ensures your wearable accessories remain structurally sound, resistant to chipping, and securely fastened during daily use. By understanding how basic geometric forms can be transformed into expressive miniature produce, crafters can produce dozens of high-value gifts, market items, or personal embellishments on an accessible budget. This tutorial breaks down every technical aspect into actionable methods, helping beginners turn standard craft supplies into professional, high-gloss accessories that add playful handmade character to modern accessories.
Why This Idea Is Trending or Useful
Miniature fruit charms featuring cute facial expressions remain a staple of contemporary craft boards due to their cross-generational visual appeal and high project versatility. As modern design leans toward playful nostalgia, personalized keychains, and bag charms, these tactile miniature accessories offer a straightforward way to individualize everyday accessories. The design relevance stems from the kawaii aesthetic, which simplifies complex real-world forms into clean curves, soft pastel tones, and friendly minimalist faces. For novice crafters seeking an easy project, polymer clay provides an forgiving introduction to dimensional sculpting without requiring expensive studio machinery or kiln access. Stored properly, the unbaked material remains workable indefinitely, allowing makers to refine details at an unhurried pace. Charms can be completed in short crafting sessions, making them ideal for weekend creative sessions or quick gift preparation. The finished pieces provide enduring practical value as zipper pulls, planner charms, earrings, or desk decorations. This unique balance of low material costs, fast turnaround, and universally recognized charm ensures that miniature fruit charms remain evergreen favorites for makers seeking accessible, high-yield DIY projects.
Materials and Preparation
Successful charm fabrication begins with assembling dedicated sculpting tools, safe curing hardware, and clean foundational compounds. Essential materials include standard polymer clay blocks in primary fruit tones, including cadmium red, blush pink, citrus yellow, lime green, deep olive, and opaque white, alongside fine black clay for character expressions. Crucial tools include an acrylic roller, a sharp tissue blade, silicone-tipped clay shapers, steel ball styluses, needle tools, and fine-point tweezers for microscopic placements. For hardware integration, procure stainless steel eye pins, heavy-gauge jump rings, and heat-resistant liquid polymer clay to serve as an internal adhesive. Prior to handling clay, clean your work surface with rubbing alcohol to remove dust, lint, and airborne residue that easily soils pale clay. Work exclusively on smooth, non-porous bases such as ceramic tiles, tempered glass slabs, or silicone crafting mats. Plan your workflow systematically by preparing color blends first, chopping hardware pins to proper lengths, and calibrating your work oven with an independent oven thermometer to guarantee accurate thermal curing temperatures.
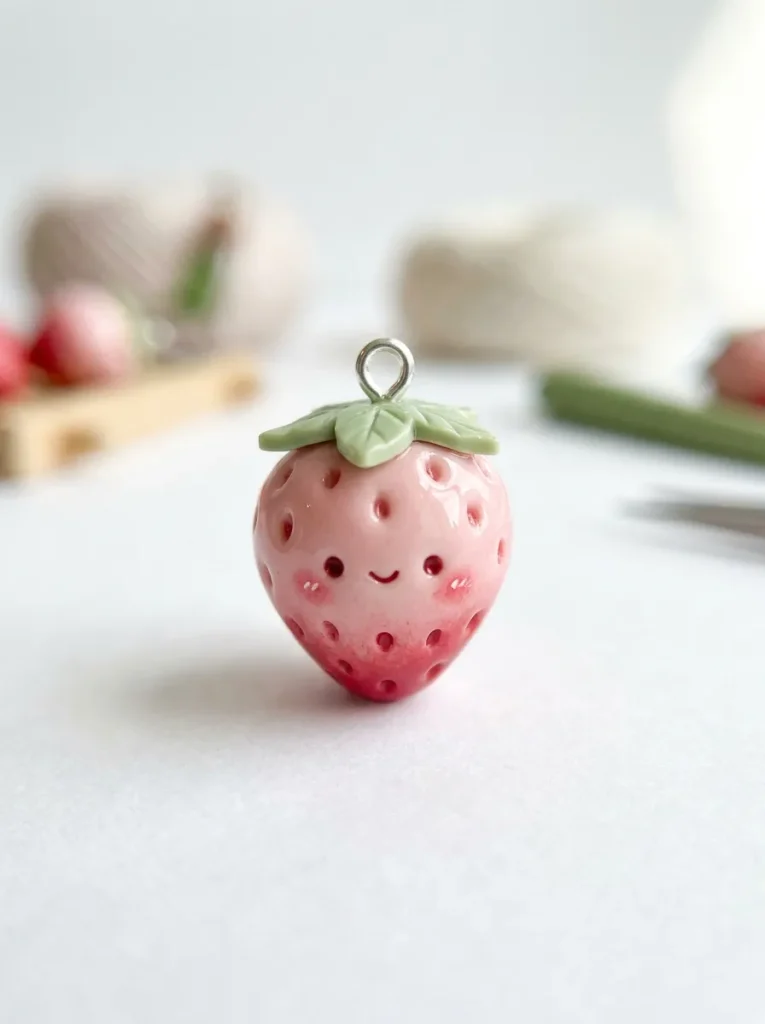
Idea 1: Blushing Strawberry Pendant with Seed Dimples
Step-by-Step Guide
The smiling strawberry charm provides a fundamental foundation in teardrop shaping, textured indentations, and delicate calyx construction. This design features a bright crimson or pastel pink conical body crowned with a five-point green leaf cap and finished with a minimalist smiling face. The visual charm relies on rhythmic surface indentations that replicate natural seed pockets without disrupting the rounded character silhouette. Choosing a soft pastel or saturated cherry tone dictates the final personality of the piece, allowing it to function as a romantic accessory or a vibrant summer accent. The tapered form ensures structural stability around the central metal eye pin, making it one of the most durable charm shapes for high-contact accessories. Crafters will develop control over symmetry, learn to manage micro-scale facial proportions, and master the use of ball styluses to produce uniform surface dimpling across curved three-dimensional planes.
To begin assembly, condition a marble-sized portion of red polymer clay until pliable, rolling it into a smooth, crack-free sphere between your palms. Gently pinch and roll one side of the sphere against your work tile to create an inverted cone with a softly rounded point. Using a fine-tipped needle tool or the smallest ball stylus, press shallow indentations across the cone surface in alternating diagonal rows to mimic natural strawberry seeds. Roll an ultra-thin sheet of olive or mint green clay, cutting out a five-point star to serve as the leafy calyx. Coat the blunt top of the strawberry cone with a drop of liquid clay, press the leaf star flat over the summit, and insert an eye pin coated in liquid adhesive straight down through the center core. Complete the character by rolling microscopic specks of black clay for eyes, mounting them across the midpoint of the berry, and applying powdered pink chalk pastel to the cheeks using a dry, soft-bristle brush before baking.
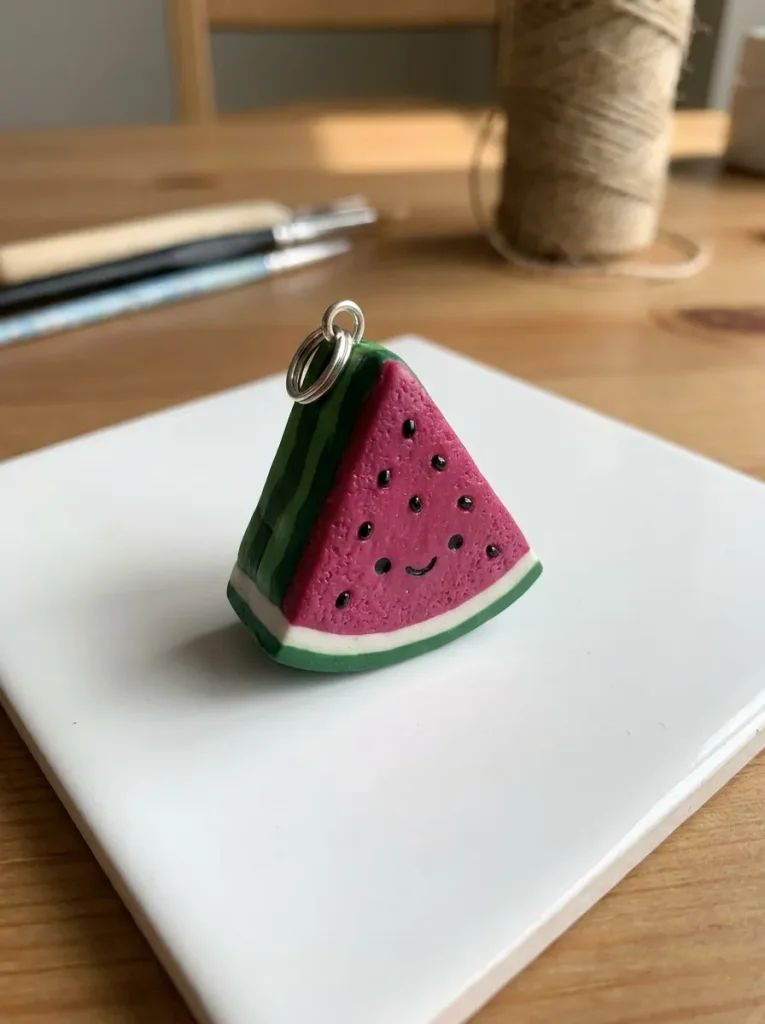
Idea 2: Joyful Watermelon Slice with Embedded Rind
How to Make
The smiling watermelon wedge introduces flat-slab cutting, multi-layer veneer lamination, and edge-contouring methods. This charm captures the graphic contrast of a sliced melon, presenting a vibrant pink triangular interior bordered by clean bands of white pith and patterned green rind. Rather than painting details onto a cured surface, this method relies on structural clay layering, ensuring colors never chip or fade with daily friction. The flat triangular profile makes this charm lightweight, sitting comfortably flat against skin when mounted as drop earrings or pendant necklaces. The contrast between the bright interior core and the deep green outer skin creates immediate visual impact. Developing clean lamination skills through this design teaches crafters how to eliminate trapped air bubbles between joined sheets of polymer clay, producing crisp, professional striping that remains sharp through cutting, baking, and glazing.
Begin by rolling a slab of translucent-mixed magenta clay to a thickness of four millimeters, slicing out an isosceles triangle measuring approximately two centimeters on its longest side. Condition a thin strip of white clay and an equally thin strip of emerald green clay, rolling each to a uniform one-millimeter thickness. Brush a microscopic film of liquid clay along the curved bottom edge of the magenta triangle, pressing the white strip on first, followed immediately by the green rind strip. Trim excess rind flush with the triangular edges using a rigid tissue blade to ensure crisp geometric boundaries. Form tiny elongated black clay droplets to serve as embedded melon seeds, pressing them flush into the pink flesh on either side of the center. Position two small black spheres at the midpoint for eyes, indent a cheerful curved smile using a blunt needle tool, and sink a trimmed eye pin securely into the top apex. Bake the slice flat upon a ceramic tile to preserve shape uniformity.
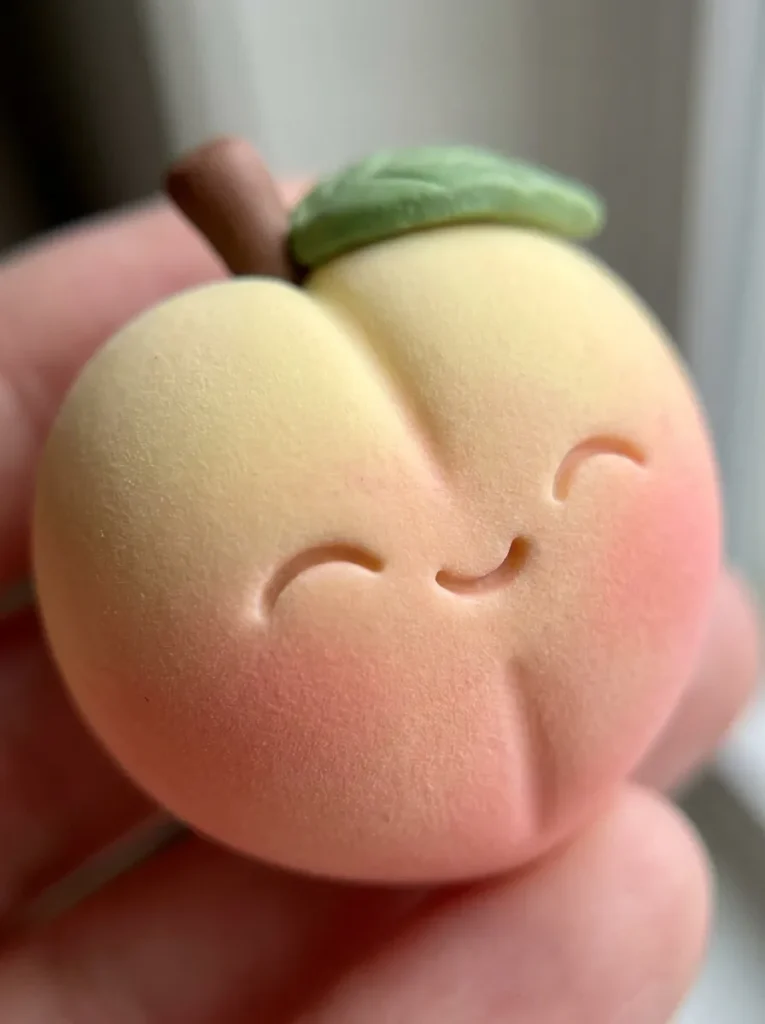
Idea 3: Plump Kawaii Peach with Velvety Gradient
Execution Process
The blushing peach charm focuses on organic cleft shaping, surface powder blending, and delicate leaf placement to convey a soft, velvety appearance. This design features a round, plump body with a distinct central crease that tapers into an offset bottom point, capturing the natural anatomy of stone fruits. Soft pastel chalks are applied directly to raw clay, creating a seamless watercolor gradient that shifts from creamy pale yellow to vivid coral pink. The cleft provides a natural recess that catches light, giving the miniature dimensional depth even at small scales. Topped with a tiny brown stem and a solitary curved leaf, the peach delivers an authentic aesthetic that complements cottage-style accessories, phone charms, and dainty jewelry sets. Learning this technique teaches crafters how dry pigments bond with uncured polymers, creating professional airbrushed effects using basic craft tools.
Condition a blend of equal parts opaque white, translucent, and warm cream clay, forming a smooth sphere approximately fifteen millimeters in diameter. Press the dull back edge of a craft blade or a silicone clay wedge vertically down one face of the sphere, rocking it gently to impress a clean, soft crease from top to bottom. Pinch the base opposite the top slightly to form the peach tip, preserving the rounded fullness of the two front lobes. Scrape soft pink and crimson artist chalk pastels into fine powders, dusting the pigment across the upper shoulders and cleft using a fluffy eyeshadow applicator. Roll a tiny cone of leaf green clay, flatten it into a pointed oval, and score a central vein down its length. Apply liquid clay to the top crevice, attach the leaf, and insert an eye pin directly behind the foliage. Add two miniature black clay eyes and a tiny curved mouth over the rounded cheeks, baking the charm upright on a bed of cornstarch to prevent flat spots.
Idea 4: Twin Glossy Cherries on a Flexible Stem
Step-by-Step Guide
The twin cherry charm explores paired-element engineering, wire armatures, and sculptural foliage union. Unlike standalone charms, this design features two identical glossy spheres suspended from curved green stems joined at a single shared leaf. The deep bordeaux or bright ruby spheres require balanced weight distribution to hang evenly when worn on charm bracelets or hoop earrings. By building internal wire armatures into the stems, the slender connections gain durability against bending and breakage. This dual-sphere design allows crafters to explore dual expressions, giving each twin fruit an alternative emotion, such as one winking eye and one wide smile. Mastering paired charm construction develops planning discipline, teaching makers how to unify separate components into an interconnected decorative unit that withstands continuous motion.
Condition deep crimson clay, dividing the mass with a precision blade into two identical portions to guarantee matching sizes. Roll both pieces into spheres twelve millimeters in diameter, pressing a shallow pinhole into the top of each ball to accept the stem hardware. Cut two pieces of flexible twenty-four-gauge green craft wire to two-centimeter lengths, coating the lower tips in liquid clay before seating them inside each cherry sphere. Roll a small oval of vibrant green clay, score realistic veins along its surface, and sandwich the two loose top wire ends inside the leaf base, crimping them tightly around a central silver jump ring. Place tiny black clay discs for eyes on each cherry face, adding pinpoint white clay highlights to convey an expressive cartoon gaze. Suspend the cherries from a heat-safe metal rack during baking so the hanging spheres cure without resting against a flat tray, and coat the cured fruit in high-gloss UV resin for a liquid shine.

Idea 5: Chubby Lemon Drop with Textured Rind
How to Make
The sunny lemon charm emphasizes asymmetrical citrus shaping, authentic skin texturing, and vibrant monochromatic contrast. This design features a chubby oval body with distinctive tapered end nodes, creating an unmistakable citrus silhouette. Instead of leaving the surface smooth, the rind is stippled with abrasive tools to mimic natural citrus oil dimples, diffusing light across the sunny yellow clay. The addition of a stylized single dark green leaf offers striking color balance against the pale yellow body, creating visual grounding. This cheerful design works exceptionally well as a summery focal point for planners, zipper pulls, or beaded bag straps. Crafters will learn to form clean citrus terminal tips, balance rough textures against smooth decorative features, and secure delicate accessory leaves to uneven, dimpled surfaces.
Roll conditioned bright yellow polymer clay into an oval shape approximately eighteen millimeters long and fourteen millimeters wide. Using your thumb and forefinger, gently roll each end against your work surface to pull out two small, blunt points characteristic of fresh lemons. Take a clean, stiff-bristle toothbrush or a square of coarse sandpaper, rolling the lemon across the texture to create uniform, subtle rind dimpling across the exterior. Form an elongated leaf from deep forest green clay, indenting the center vein with a needle tool, and press it firmly near the top stem node over a drop of liquid clay. Insert an eye pin alongside the leaf connection, sinking the shaft completely into the lemon interior. Mount two black clay spheres for eyes, spacing them widely apart to enhance the cute, chubby character design. Indent a wide open mouth between the eyes, fill it with a speck of pink clay, and cure the charm on a level baking tile.

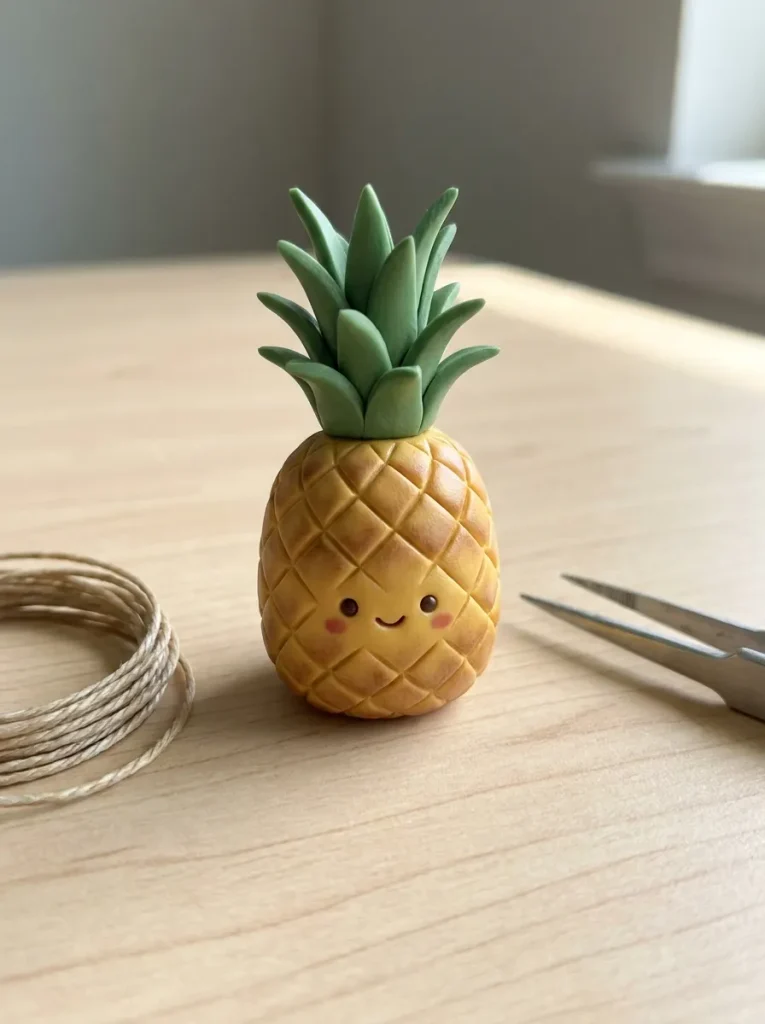
Idea 6: Kawaii Pineapple with Dimensional Crosshatch
Setup Method
The miniature pineapple charm teaches geometric grid texturing, layered crown foliage assembly, and structural height management. This design pairs an elongated cylindrical amber-yellow body with an upright spray of spiky green palm-like fronds. The surface of the fruit is cut with an intersecting diagonal grid, accented with soft brown chalk shading inside the grooves to simulate natural peel depth. The upright crown of leaves requires structural reinforcement, ensuring the thin pointed foliage remains rigid during everyday use. The playful contrast between the geometric body pattern and the wild spiky crown makes this piece an instant focal point on keyrings and lanyard attachments. Constructing this charm refines a maker’s precision marking, repetitive cut control, and vertical balancing skills, ensuring multi-tiered models bake without warping or leaning under gravity.
Roll a block of warm golden-yellow clay into an egg shape with flattened ends, measuring twenty millimeters tall and fifteen millimeters wide. Using the dull side of a precision blade, press deep diagonal lines across the surface in both directions, forming a diamond crosshatch pattern across the entire body. Brush powdered raw umber chalk pastel into the recesses, wiping the raised diamond surfaces clean with a damp wipe to leave soft, dimensional shadow inside the grooves. Form six slender, tapering triangles from firm emerald green clay, pinching each down its center to form an arched leaf blade. Stack these green leaves in concentric tiers to form an upright pineapple crown, anchoring them to the top of the body using liquid clay. Pass an extra-long head pin straight up through the bottom of the fruit through the center of the crown, looping the top wire with round-nose pliers. Add two black clay eyes and curved blushing cheeks before baking.

Idea 7: Smiling Banana with Peeled Skin Details
Step-by-Step Guide
The peeled banana charm provides an engaging study in dynamic curvature, multi-part structural wrapping, and contrasting interior-exterior clay shades. This design depicts an arched yellow banana partially peeled at the top, revealing a pale cream-colored fruit core featuring a smiling face. The curling peel segments require delicate handling, as they flare outward into open space without breaking or drooping during the heat cure. The combination of bright peel yellow, pale vanilla interior flesh, and dark brown terminal stem tips creates authentic color staging. This dynamic silhouette brings movement to charm collections, serving as an eye-catching pendant on backpack zippers or pencil pouches. Crafters will master the challenge of wrapping ultra-thin clay sheets around curved cores, creating natural peel flares, and securing cantilevered clay petals so they retain their shape permanently.
Condition pale ecru clay by mixing white, translucent, and a speck of yellow, rolling it into a gently curved cylinder with tapered ends. Roll a separate sheet of bright yellow clay to a one-millimeter thickness, wrapping it around the ecru cylinder so it encases the entire lower half and extends upward along the back. Use a tissue blade to slice the upper yellow casing into three equal vertical flaps, pulling and curling them downward to expose the pale fruit core inside. Add a tiny point of dark brown clay to the bottom tip and the top stem, smoothing the seams into the yellow peel using a silicone blending tool. Insert an eye pin down through the top of the exposed fruit core, anchoring it internally with bakeable adhesive. Construct a minimalist smiling face on the exposed cream surface using black clay lines, supporting the flared peel flaps with small rolls of scrap paper during baking to maintain their open shape.

Idea 8: Miniature Blueberry Cluster on Leaf Platform
Execution Process
The miniature blueberry cluster charm explores multi-element grouping, specialized indentation geometry, and deep color saturation. This design brings together three small indigo berries mounted on a shared foundation of delicate pale green foliage. Rather than using simple circular depressions, the calyx end of each blueberry features a distinctive five-point star indentation that captures authentic botanical anatomy. The cluster arrangement provides substantial mechanical strength, as the multiple spheres fuse together along shared contact points to form a solid unit that resists impacts. The deep dusty blue tone of the berries pairs harmoniously with soft sage green leaves, making it a sophisticated accent for stitch markers, charm bracelets, and delicate drop earrings. Makers will develop precision when producing matching micro-spheres and learn how to stabilize multi-piece clusters on small surface planes.
Mix cobalt blue clay with a small amount of black and translucent to achieve a rich, muted indigo blueberry tone. Form three identical spheres measuring seven millimeters in diameter, setting them aside on your work tile. Using a miniature five-pointed star punch tool or five angled needle pricks, indent the top of each sphere to create the characteristic fluted blueberry crown. Condition soft sage green clay, cutting out two small pointed leaves, and score subtle vein patterns down their centers. Arrange the two leaves flat on your tile with their stems overlapping, applying a drop of liquid clay at the junction to serve as the mounting platform. Position the three blueberries into a tight triangle over the leaf junction, pressing them firmly together so their contact seams adhere. Sink a head pin up through the underside of the leaves through the center seam of the berries, finishing each berry with tiny black clay eyes and curing the cluster thoroughly.
Idea 9: Crisp Green Apple with Leaf and Stem
How to Make
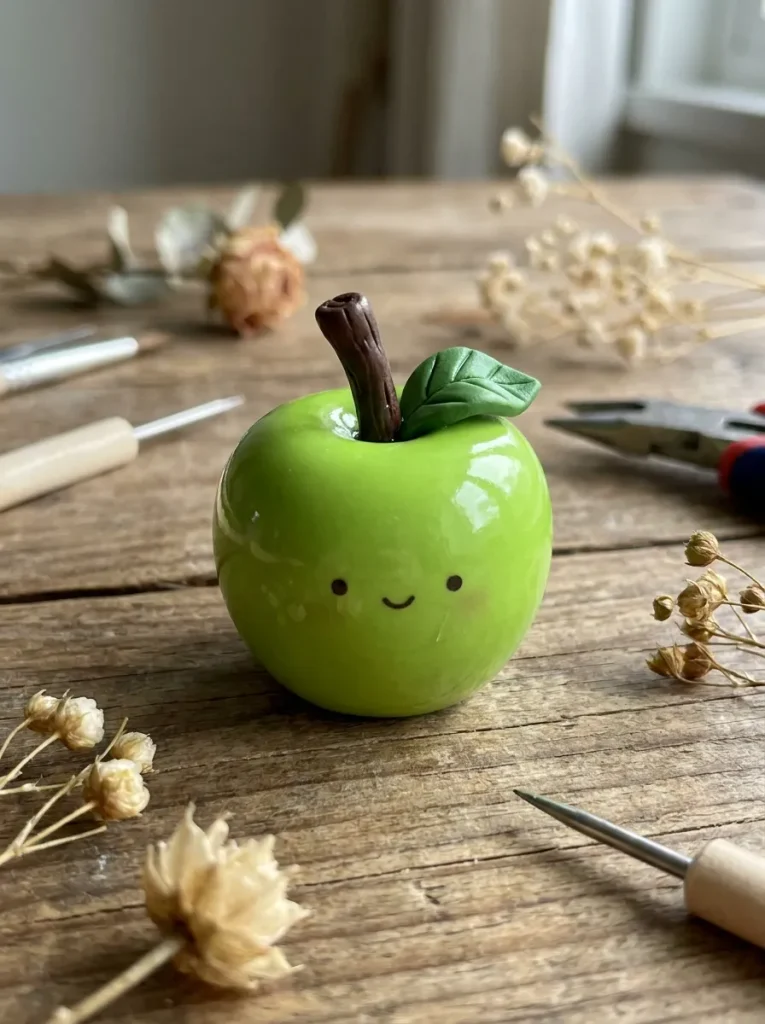
The green apple charm explores spherical shaping, deep stem well cavities, and high-contrast accessory placement. This design presents a glossy Granny Smith green sphere with subtle upper and lower indentations, giving it an authentic apple profile. The high-saturation chartreuse tone is complemented by a textured brown woody stem and a single folded green leaf resting against the top rim. The spherical design is physically resilient, lacking protruding limbs that could catch on clothing or bag linings during daily wear. This clean, modern design suits minimalist accessories, teacher gift sets, and colorful zipper embellishments. Crafters will master the method of creating balanced top and bottom wells, anchoring slender organic stems into deep cavities, and applying high-gloss clear coats to mimic the waxy natural finish of fresh fruit.
Roll conditioned bright lime green clay into a firm, smooth sphere approximately sixteen millimeters in diameter. Press your index finger and thumb gently into the top and bottom poles of the sphere, rolling it slightly to create balanced indentations that mirror real apple anatomy. Roll a microscopic cylinder of rich chocolate brown clay to serve as the stem, texturing its sides with needle score marks for an organic wood grain look. Form a small teardrop of matching green clay, flattening it into an oval leaf and pinching the stem end to create a natural fold. Seat the brown stem and folded leaf deep into the upper indentation using a drop of liquid clay, sliding an eye pin down along the base of the stem. Construct an expressive kawaii face across the front hemisphere using black clay dots for eyes and white clay flecks for highlights, baking the piece resting in a cornstarch tray to retain its bottom curve.
Idea 10: Fuzzy Kawaii Kiwi Slice with Seed Ring
Setup Method
The kiwi slice charm focuses on radial cane assembly, geometric center placement, and outer edge texturing. This design presents a cross-section disc featuring a pale cream core surrounded by radial white rays, a ring of black seeds, and bright emerald flesh, all framed in a fuzzy brown rind. By assembling the interior design as a simple cane or through direct flat application, crafters achieve clean geometric alignment that remains uniform throughout. The contrast between the bright, translucent interior flesh and the textured earthy rind brings realistic depth to the piece. Its flat medallion shape sits smoothly when used as a pendant, badge reel decoration, or pocket charm. Constructing this design teaches makers how to space elements evenly along circular layouts, integrate textured skins onto thin perimeters, and use translucent clay to simulate fruit pulp.
Condition a blend of bright lime green and thirty percent translucent clay, rolling it into a flat round disc five millimeters thick and eighteen millimeters wide. Press a small circle of pale ivory clay into the exact center of the green disc, flattening it flush with an acrylic roller. Use a needle tool to score fine lines radiating outward from the ivory center into the green flesh, creating pulp rays. Position ten to twelve microscopic black clay seeds in an even circle around the ivory core, pressing each seed lightly into the clay surface. Wrap the outer perimeter of the disc in a thin ribbon of light brown clay, texturing the exterior with a stiff wire brush to mimic fuzzy kiwi skin. Insert an eye pin along the top edge between the rind and the interior flesh, anchor it with liquid adhesive, add simple black eyes to the central ivory zone, and bake the medallion flat between parchment sheets to ensure smooth surfaces.

Common Beginner Mistakes and How to Avoid Them
Working with miniature polymer clay charms presents specific mechanical challenges that can undermine your results if not addressed early. The most frequent mistake is handling light-colored clay with soiled hands or tools, which introduces lint, dust, and dark pigment specks onto pale fruit flesh. Keep your hands, rollers, and blades clean with alcohol wipes between colors, and dedicate separate tools to light and dark compounds. Another structural failure occurs when crafters insert smooth metal eye pins directly into raw clay without adhesive, causing pins to pull out easily after baking. Prevent this by using screw-eye pins or bending a small hook at the base of straight pins, coating the wire in liquid clay before insertion to lock it inside the cured core. Inconsistent baking temperatures also spoil projects, as domestic ovens regularly fluctuate, causing scorching or leaving clay under-cured and brittle. Place an independent oven thermometer right next to your baking tile to confirm accurate internal temperatures. Finally, avoid leaving thin, unsupported elements extending outward from the main charm body; keep leaves, stems, and peels closely attached to the core so they resist impact during daily use.
Practical Tips for Better Results
Achieving clean, professional results in miniature clay modeling depends on systematic conditioning, surface refinement, and protective topcoats. When clay feels too soft, warm, or sticky to hold fine texturing, leach out excess plasticizer by sandwiching the sliced clay between two sheets of clean copy paper for thirty minutes. Conversely, soften dry, crumbly clay by working in a drop of liquid polymer clay or dedicated clay softening compound until it bends smoothly without cracking. Remove visible fingerprints and surface dust from raw charms by smoothing the clay with a cotton swab lightly dipped in rubbing alcohol before curing. To prevent charms from developing flat spots during baking, rest rounded pieces in an oven-safe dish filled with cornstarch or polyester batting, which cradles curved shapes through the heating cycle. After curing and cooling, seal your pieces with water-based polyurethane gloss varnish or clear UV resin to protect delicate surface chalks and provide a clean, glass-like shine. Applying these finishing techniques ensures your handmade charms have the structural durability and polished appearance of professional boutique accessories.
Styling, Presentation, or Organization Ideas
Presenting your completed fruit charms properly enhances their aesthetic impact, turning small polymer pieces into finished, wearable gifts and displays. Attach finished charms to high-grade metal findings, such as lobster clasps, pastel braided cord loops, or ball chains, so they can be clipped directly to backpacks, key rings, and travel planners. For jewelry collections, pair identical charms like cherries or lemon drops with sterling silver ear wires, adding pastel glass spacer beads to balance the visual proportions. Display completed charms at home or craft markets on custom cardstock backing cards, stamping cute fruit-themed borders around the mount to frame the artwork. In your work area, keep finished pieces organized in divided clear acrylic storage boxes lined with soft felt, categorizing charms by fruit variety or color family. This organized storage method keeps high-gloss surfaces from scratching while allowing you to review your inventory at a glance. Coordinated sets of five or six complementary fruit designs can be packaged in clear window tins, creating ready-to-give gift sets that showcase the charm of handmade crafts.
Budget or Time Planning
Managing supply expenses and production schedules allows you to create polymer clay charms efficiently, whether crafting for pleasure or building inventory for seasonal markets. Purchasing multipacks of primary colored clay alongside two-ounce blocks of translucent and white compound provides an economical foundation, allowing you to mix dozens of custom fruit shades without buying individual specialty colors. Standard jewelry hardware, including head pins, jump rings, and clasps, is best bought in bulk packs, drastically lowering the cost per finished charm. Streamline production by organizing your work into focused batches: condition and blend colors on day one, sculpt bodies and attach hardware on day two, and handle curing, detailing, and glazing together on day three. Sculpting identical components in batches—such as rolling twenty strawberry bases at once—improves muscle memory, ensures consistent sizing, and cuts assembly time in half. Dedicating focused, organized crafting blocks reduces material waste, keeps your workspace clean, and lets you produce dozens of durable, polished charms on an accessible craft budget.
Creative Expansion and Advanced Inspiration
Once you master these foundational fruit charms, you can apply these sculpting and assembly techniques to broader, more intricate craft projects. Try scaling down these fruit designs to create micro-miniatures for resin shaker charms, custom phone cases, or nail art embellishments. Expand your botanical repertoire by sculpting complex cross-sections, such as sliced dragon fruit, segmented pomegranates, or layered citrus wheels using multi-stage clay canes. Integrate mixed-media elements into your designs, embedding glass seed beads as seeds, dusting surfaces with fine iridescent glitter, or combining clay charms with freshwater pearls on statement necklaces. You can also explore functional home decor by enlarging the fruit forms, turning these cute character concepts into novelty desk photo holders, drawer pulls, or dimensional magnet sets. These core modeling skills establish an enduring foundation in polymer clay craft, allowing you to design an endless variety of charming, functional accessories that bring colorful handmade creativity into everyday life.
Leave a Reply