Miniature sculpture crafts continue to inspire vibrant crafting boards worldwide, with tiny culinary charms leading the movement for collectible accessories. Handcrafted polymer clay miniatures capture the iconic Japanese kawaii aesthetic, which emphasizes simplified shapes, gentle pastel palettes, and expressive character details. This comprehensive tutorial provides makers with systematic instructions for building durable, highly detailed miniature food charms from conditioning to curing. Crafters will learn the mechanical principles of clay manipulation, realistic food texturing, facial placement geometry, and secure metal hardware installation. Mastering these foundational techniques enables anyone to transform plain blocks of oven-bake synthetic clay into polished, wearable charms suitable for keychains, planner tassels, jewelry, and creative desk displays. The curated concepts in this guide focus on popular cafe staples, baked treats, and fruit motifs that maintain balanced structural proportions. By understanding precise oven management, shade blending, and protective glazing, creators can consistently produce professional trinkets that endure regular daily handling. This resource serves as an actionable framework for crafters seeking to develop their sculpting abilities through accessible, small-scale artistic projects.
Tiny food miniatures consistently rank among trending ideas across visual discovery platforms because they merge functional portability with irresistible charm. Modern design movements prioritize playful, personalized accessories that introduce color and individuality to everyday personal carry items like bags, jackets, and key rings. Handcrafted miniatures bridge the gap between creative project exploration and usable fashion items, allowing individuals to carry unique artistic expressions wherever they travel. The DIY appeal of polymer clay stems from its high accessibility; the material requires no expensive equipment or specialized studio setups to yield impressive results. Beginners can achieve clean results using standard household work surfaces and hand tools, eliminating the steep initial investment common to other craft disciplines. Additionally, the compact nature of these projects offers rapid satisfaction, as makers can complete and cure miniature pieces within a single afternoon session. Clay modeling encourages tactile mindfulness while delivering tangible, miniature sculptures that brighten personal accessories or serve as thoughtful, handcrafted gifts for friends and community swaps.
Preparation establishes the foundation for clean sculpting by ensuring all necessary materials and workspaces remain organized and dust-free. Primary materials include standard polymer clay in essential colors such as translucent, white, ecru, chocolate brown, pastel pink, and soft yellow, alongside dry soft pastels for realistic surface baking effects. Recommended tools include a smooth ceramic tile or glass working mat, an acrylic roller, precision hobby knives, metal ball-stylus modeling tools, texturing toothbrushes, and silicone blending tips. Metal hardware requires sturdy eye pins, jump rings, needle-nose pliers, and liquid polymer clay to act as an unyielding structural adhesive before baking. Thoroughly clean your hands, blades, and work surfaces with rubbing alcohol or lint-free wet wipes before conditioning each color block, especially when handling light shades prone to picking up lint. Plan the dimensional scale of each charm before slicing raw clay blocks, ensuring all components maintain consistent physical proportions to guarantee even heat distribution throughout the curing cycle.
Miniature Strawberry Shortcake Slice
Step-by-Step Guide
The miniature strawberry shortcake slice captures classic cafe confectionery through distinct layers of airy sponge cake, sweet whipped filling, and bright fruit slices. The charm relies on an equilateral triangular wedge geometry that provides flat, stable surfaces for showing realistic interior cake texture. Warm cream-colored clay mixed with a hint of translucent medium simulates the delicate crumb structure of baked sponge cake, while opaque white clay represents fresh whipped cream. Tiny strawberry cane slices, embedded flush into the cream layers, introduce bright scarlet accents that contrast against the soft pastry tones. The top surface features piped cream rosettes and a sculpted miniature whole berry, creating vertical visual interest without making the charm excessively top-heavy. This design combines structured architectural slicing with organic fruit modeling, teaching makers how to balance clean geometric planes with natural food textures. The finished slice measures less than an inch along its longest edge, making it an ideal size for delicate jewelry charms or zipper pulls.
Begin by rolling out two identical sheets of warm sponge-toned clay to an even two-millimeter thickness using your acrylic roller. Roll out a matching sheet of pure white clay to the same thickness, sandwiching it neatly between the two sponge layers to establish the basic sponge cake stack. Use a sharp, tissue-slicing blade to cut clean, straight triangular wedges from the layered block, wiping the metal blade between cuts to avoid color contamination. Score and pick at the exposed side sponge surfaces using a sewing needle or stiff toothbrush to create an authentic open crumb texture, leaving the white cream layer completely smooth. Cut tiny cross-sections from a pre-baked strawberry cane and press them gently into the middle cream layer along both exposed slice faces. Mold a miniature whole red strawberry for the top garnish, indenting its surface with a fine needle to form seed pits, and place it beside a small white clay dollop. Insert an eye pin coated in liquid clay through the top center, and bake the piece at the temperature specified on your clay packaging.

Glazed Character Donut Ring
How to Make
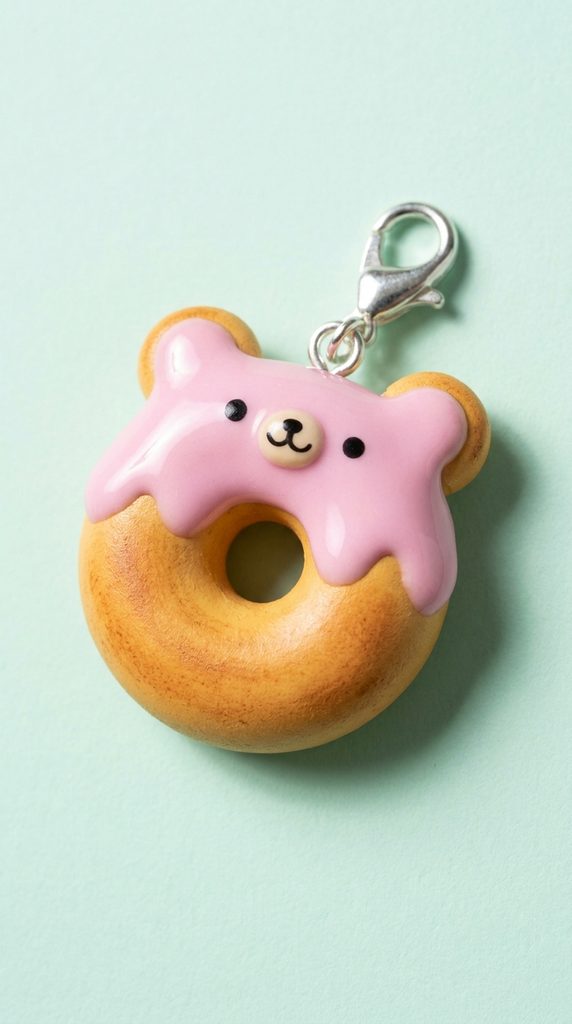
The glazed character donut ring transforms a classic circular pastry into an expressive charm using a smooth ring base and high-contrast drip icing. The design features a golden-brown pastry base shaped into a torus, topped with a wavy ring of pastel frosting that mimics glossy confectionery glaze. Animal features, such as cat ears, bear ears, or rounded panda contours, attach seamlessly to the upper perimeter of the pastry ring to infuse distinct character appeal. Fine facial details applied to the frosted surface establish personality while keeping the charm streamlined and resistant to snags during everyday use. The central hole provides visual balance and reduces the total mass of the charm, ensuring rapid and even heat curing within standard craft ovens. Soft pastel chalks brushed across the donut body before icing create a baked gradient that transitions naturally from pale dough to golden, oven-toasted edges.
Form a smooth snake of pale tan clay approximately three inches long, joining the two tapered ends together to create a symmetrical circular ring with a clean center opening. Smooth the joined seam thoroughly using a flexible silicone shaping tool until the connection is invisible, then tap the ring gently against your tile to flatten both faces slightly. Lightly dust the outer rim of the ring with pulverized ochre and golden-brown soft chalk pastels using a soft makeup brush, concentrating pigment along the equator where natural baking occurs. Roll out a paper-thin sheet of pastel pink clay and cut an irregular, wavy starburst circle that drapes gracefully over the upper surface of the donut base. Press two tiny rounded clay triangles onto the top edge to form ears, smoothing their base joins into the main pastry ring for maximum structural strength. Paint miniature closed eyes and smiling mouth contours using dark brown acrylic paint, embed a trimmed eye pin into the top edge between the ears, and bake the charm thoroughly.
Steamed Dim Sum Baozi
Execution Process
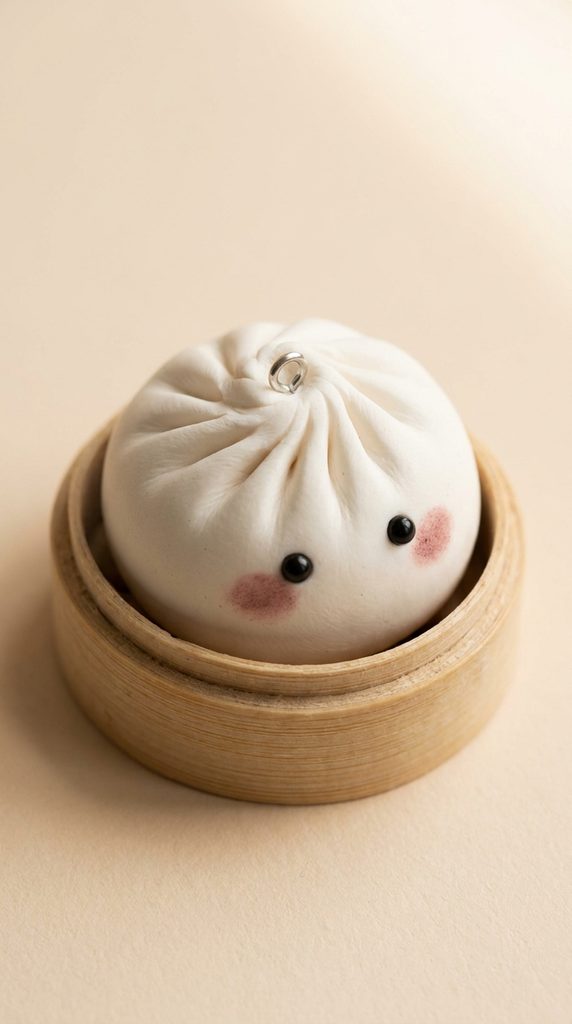
The steamed dim sum baozi charm celebrates traditional dumpling artistry through soft white pleats gathered neatly into a compact bun. The charm features a domed teardrop silhouette that mirrors the puffed, pillowy volume of yeast-leavened flour dough cooked in a bamboo steamer. A swirl of rhythmic, folded ridges converges at the bun apex, demonstrating hand-gathered culinary authenticity. To complement the simple white geometry, the face incorporates minimal, widely spaced kawaii eyes and rosy blushed cheeks positioned near the lower curve of the form. The monochromatic base keeps the aesthetic modern and clean, allowing the piece to coordinate effortlessly with diverse personal accessory palettes. The rounded mass of the charm gives it substantial tactile weight, making it especially satisfying as a phone strap accessory, planner ring accent, or tactile keychain addition.
Shape a marble-sized portion of off-white polymer clay into a smooth, seamless ball, ensuring all surface cracks are smoothed away through thorough palm rolling. Pinch the top third of the sphere between your thumb and index finger, rotating the ball steadily to form a gentle teardrop silhouette with a rounded base. Using the dull back edge of a craft blade or a curved needle tool, press vertical indents along the upper perimeter, angling them slightly inward toward the central peak to mimic folded dough pleats. Lightly twist the very tip of the bun clockwise to create the signature top gather, blending any loose seams into the central knot. Apply two micro-dots of black polymer clay onto the lower cheek quadrant to establish widely spaced eyes, pressing them flush with a ball-stylus tool. Dust soft chalk pastel in dusty rose across the lower cheeks using a miniature brush to create a delicate blush effect, insert an eye pin through the gathered crown, and bake until firm.
Golden Flaky Croissant
How to Create
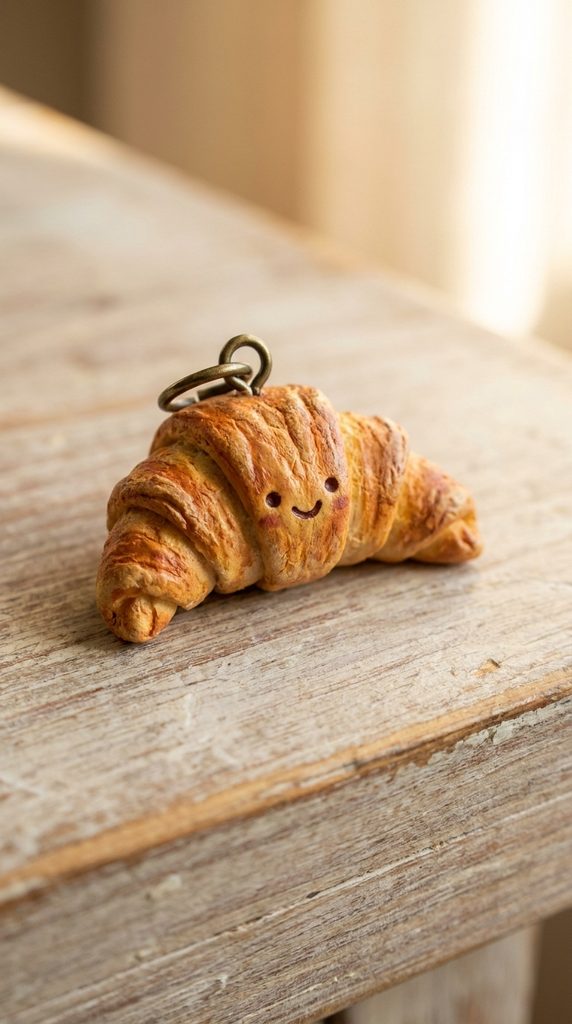
The golden flaky croissant charm models classic French pastry making through crescent curves and layered dough ridges. The design relies on an elongated triangular blank rolled around itself, creating tiered surface ridges that taper gracefully toward pointed ends. Deep golden-brown shading applied into the recessed folds enhances the appearance of buttery, multi-layered puff pastry crust. The tips curve inward toward one another, forming an iconic crescent shape that remains structurally rigid once cured. Adding a simple smiling face directly across the central dough ridge provides a delightful contrast between realistic baking textures and stylized character design. This charm highlights the power of surface coloring techniques, teaching crafters how dry pigment application can transform basic yellow clay into an authentic, oven-toasted culinary miniature.
Roll a small lump of warm ivory clay into a flat, elongated isosceles triangle measuring approximately two inches from wide base to narrow point. Using an acrylic roller, smooth the triangle until it reaches a uniform one-millimeter thickness, keeping the outer edges clean and straight. Starting from the broad bottom edge, roll the clay forward tightly toward the narrow point, allowing the central section to build layered thickness while the ends stay naturally slender. Gently curve the two pointed tips inward toward the center, forming a classic horseshoe crescent shape, and tap the bottom lightly to create a stable resting plane. Using a dry blending brush, build up layers of yellow ochre, raw sienna, and burnt umber soft pastel dust across the raised ridges, leaving the deep crevices lighter to simulate natural expansion during baking. Insert a sturdy eye pin horizontally through the thickest center fold, bake according to manufacturer directions, and seal the finished pastry with a matte protective glaze.
Cheerful Sunny-Side Egg
Setup Method
The cheerful sunny-side egg charm captures visual simplicity through an organic, freeform white base and a raised golden yolk. The outer edge of the egg white features soft, asymmetrical curves that mimic liquid egg settling across a hot skillet surface. The yolk sits prominently near the center as a smooth, rounded dome, cast in deep marigold yellow with a high-gloss finish that suggests rich, runny liquid. Minimalist black eyes and a miniature open smile applied to the yolk create an expressive character focal point. Because the white perimeter remains thin while the yolk adds focused height, this design offers an interesting profile that lays comfortably flat against notebooks, pouches, or key bundles. The simple color scheme of bright yellow and crisp white produces an eye-catching accent that stands out against dark backdrops and fabrics.
Begin by softening pure white clay, flattening it with your thumb against a ceramic working tile to form an irregular oval base roughly two millimeters thick. Smooth the perimeter edges using a rounded silicone tool, creating gentle, wavy indents around the boundary while avoiding sharp or pointed corners. Condition a small amount of bright yellow clay mixed with a pinch of translucent medium, rolling it into a neat, smooth dome to serve as the yolk. Position the yellow yolk off-center onto the white base, pressing down gently around the base boundary to bond the two pieces securely without flattening the dome. Apply two small black clay dots onto the front face of the yolk for eyes, and press a tiny red crescent underneath to shape an open, cheerful mouth. Insert an eye pin horizontally into the thickest edge of the egg white, bake the piece flat on your tile, and coat only the yellow yolk with high-gloss liquid varnish after cooling.

Miniature Matcha Swiss Roll
Step-by-Step Guide
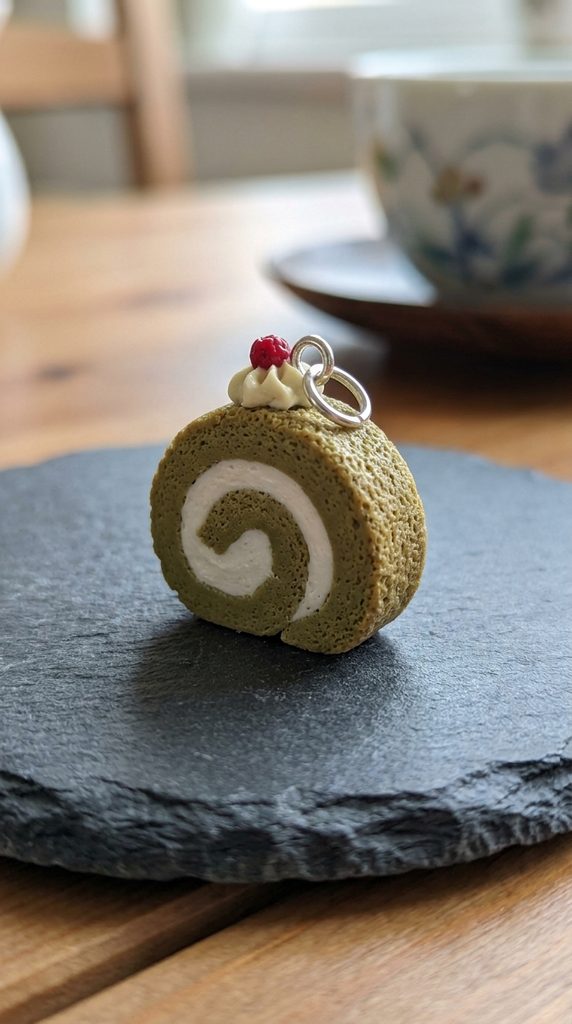
The miniature matcha swiss roll charm celebrates modern cafe aesthetics through balanced spiral geometry and tranquil earthy green tones. The charm represents a cross-section slice cut from an elongated rolled sponge cake filled with rich vanilla cream. An interior spiral of pure white cream winds evenly outward from the center, encased within a thick outer layer of muted olive-green matcha sponge cake. Texturing on the green outer ring provides realistic sponge crumb detail, while the smooth, untextured white spiral creates clean graphic contrast. A miniature piped star of white cream and a tiny molded red berry sit atop the curved upper ridge, adding vertical balance. This design showcases cane-rolling mechanics, where multiple flat clay slabs are rolled together to produce uniform patterned slices suitable for matched sets of jewelry charms.
Roll out a flat sheet of matcha-green polymer clay and an identical sheet of white clay, trimming both into uniform rectangles approximately one and a half inches wide. Lay the white clay sheet directly on top of the green sheet, pressing them together lightly with an acrylic roller to remove any trapped air pockets between the layers. Starting at one narrow end, roll the two sheets together into a tight, compact cylinder, ensuring the spiral remains uniform without hollow center gaps. Wrap the cylinder in plastic wrap and chill it in the refrigerator for twenty minutes to firm the clay before slicing. Using a fresh, clean razor blade, slice the chilled cane into five-millimeter thick discs, revealing the crisp spiral cross-section on both sides. Texture the outer green edge of each slice with a stiff needle tool, add a micro-piped cream dollop on top, insert an eye pin through the upper rim, and bake on a level ceramic surface.
Stacked Blueberry Pancake Tower
How to Make
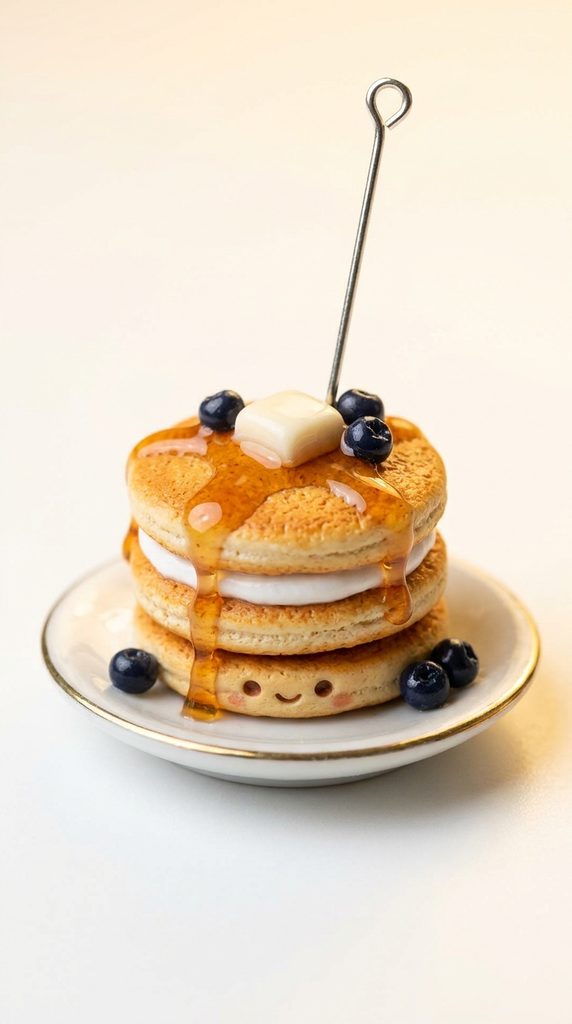
The stacked blueberry pancake tower combines layered architectural elements with flowing organic accents to create an appetizing, dynamic charm. The design features a vertical stack of three round, golden pancakes separated by thin layers of pale butter cream. A translucent square of rich golden butter and a flowing stream of glossy syrup drape naturally over the top pancake, trickling down the textured sides. Small, deep navy blueberries are scattered across the top surface, introducing deep jewel-toned accents that complement the warm golden dough. The layered horizontal structure gives the charm visual height and stability, while the textured pancake edges simulate genuine griddle-cooked cakes. A cheerful kawaii face detailed across the bottom pancake anchors the personality of the charm, making it a favorite for breakfast-themed accessory collections.
Form three identical balls of warm biscuit-colored clay, flattening each into a five-millimeter thick round disc with rounded outer edges. Tap the circular rims with a coarse toothbrush to introduce authentic griddle sponge texture, then brush the top surfaces with golden-brown pastel dust to create realistic toasted centers. Stack the three pancake discs vertically, sandwiching tiny flattened slivers of white cream clay between the layers to hold the tower securely. Shape a miniature cube of pale yellow clay to represent a butter pad, placing it in the center of the top pancake. Mix a drop of liquid polymer clay with raw sienna pastel dust to formulate miniature maple syrup, drizzling it carefully over the butter cube so it drips naturally down the stack sides. Position three tiny navy blue clay balls around the butter to serve as fresh blueberries, insert an extra-long eye pin completely through the stack, and bake the assembled piece until set.
Miniature Boba Milk Tea Cup
Execution Process
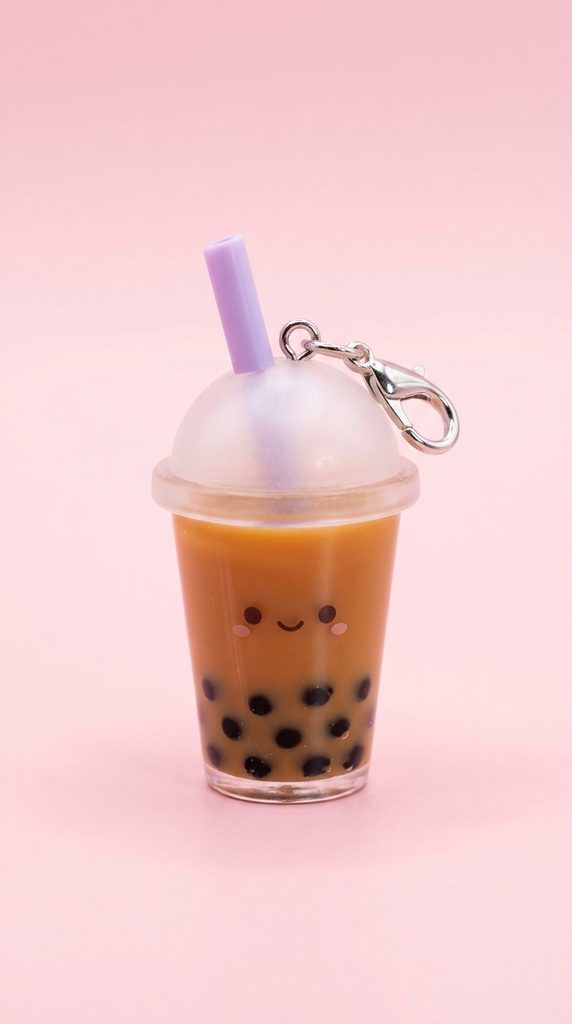
The miniature boba milk tea cup transforms a popular modern beverage into a portable charm featuring translucent depth and miniature suspended mix-ins. The body takes the form of a small, tapered cylinder shaped from translucent clay mixed with a hint of warm caramel brown, recreating classic milk tea. Dark black tapioca pearls cluster tightly inside the rounded base of the cup, visible through the semi-translucent liquid medium. A thick domed lid of frosted white clay caps the top of the cylinder, pierced by an oversized angled straw made from a rigid clay cylinder. Expressive facial details stamped onto the front of the cup bring the beverage to life while maintaining a clean, modern aesthetic. This project introduces makers to translucent clay tinting, demonstrating how internal components can be layered inside raw clay to produce lifelike depth.
Roll a cylinder of translucent clay blended with a tiny speck of raw umber clay, shaping it into a downward-tapering tumbler approximately three-quarters of an inch tall. Roll ten to twelve miniature balls of black clay into tiny tapioca pearls, pressing them firmly into the lower third of the tinted cylinder body. Smooth the cylinder surface by rolling it gently across your ceramic working tile, embedding the dark pearls beneath the outer translucent surface. Form a rounded white disc to serve as the domed plastic cup lid, attaching it securely to the top circular rim with a drop of liquid polymer clay. Roll a thin rod of pastel purple or pink clay to represent a wide boba straw, cutting it at a sharp forty-five-degree angle and inserting it through the center of the lid. Add two black bead eyes and a smiling mouth to the front cup face, pass an eye pin through the lid next to the straw, and bake thoroughly.
Pastel Party Cupcake
How to Create
The pastel party cupcake charm brings traditional bakery aesthetics into miniature scale through fluted base lines and rich, swirling frosting peaks. The charm features a tapered base encased in an authentic ridged pastry liner, topped with a spiraling mound of pastel soft-serve icing. Tiny multicolored clay sprinkles are scattered across the frosting tiers, adding playful pops of color that celebrate festive celebration themes. The ridged base provides structural grip and crisp vertical lines, offsetting the flowing organic swirls of the whipped topping. A tiny character face placed along the front of the cupcake wrapper grounds the design, transforming a traditional culinary treat into an endearing, expressive friend. Its balanced, conical shape makes this charm exceptionally sturdy, with low vulnerability to snagging or accidental breakage during everyday bag use.
Press a ball of warm tan clay into a miniature silicone cupcake base mold, or hand-carve fine vertical grooves around a tapered cylinder using a dull needle tool to simulate a folded paper liner. Dust the upper exposed rim of the baked cake base with golden-brown pastel dust to create a realistic, oven-baked transition zone. Extrude a thin, uniform snake of pastel pink or mint green clay, twisting it carefully into an ascending concentric spiral that mimics soft-serve bakery frosting. Carefully place the swirled frosting tower onto the cupcake base, securing the join with a thin film of liquid polymer clay. Roll micro-slivers of bright yellow, blue, and white clay into tiny cylindrical sprinkles, scattering and pressing them gently onto the frosting ridges. Press two black clay eyes and a tiny pink smile into the lower cupcake base, drive an eye pin down through the center frosting peak, and bake on a level tray.

Sculpted Avocado Half
Setup Method
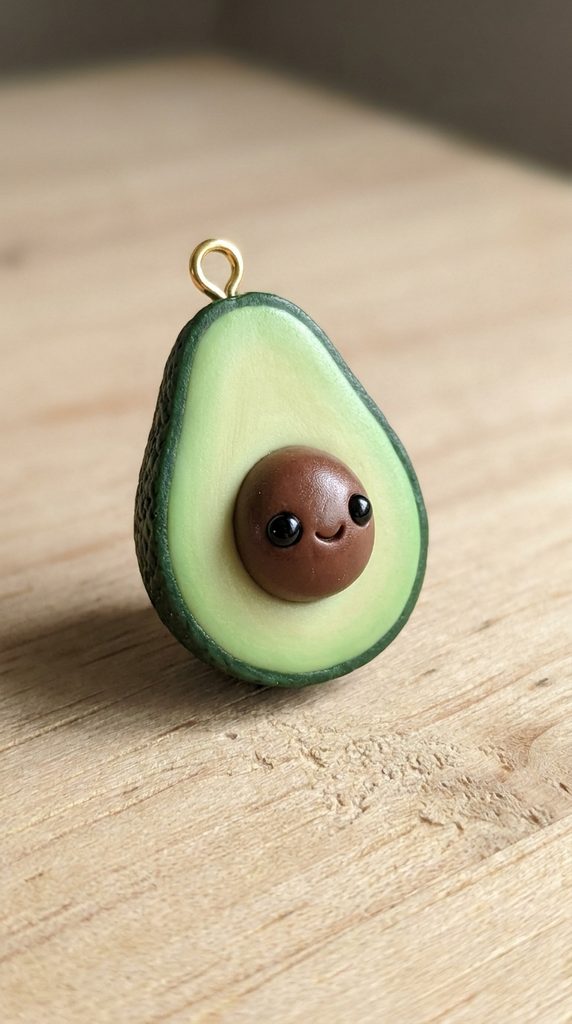
The sculpted avocado half charm embraces clean, modern botanical aesthetics through gentle organic curves and rich, concentric fruit gradients. The design models a clean cross-section of an avocado, featuring a smooth, pale green interior that transitions seamlessly into a dark forest-green outer skin. A smooth, hemispherical seed cavity sits in the lower half, occupied by a rich, chocolate-brown seed that provides focal depth and rounded visual balance. The broad teardrop shape offers an ideal canvas for subtle gradient blending, demonstrating how adjacent clay colors can be blended into smooth, realistic transitions. A delicate kawaii face applied directly to the brown seed transforms the core of the fruit into an expressive character focal point. This charm provides an earthy, modern accent that pairs effortlessly with natural linen accessories, brass key rings, and casual daywear.
Begin by rolling out a tear-shaped base of rich dark green clay to a three-millimeter thickness to serve as the outer avocado rind. Roll a smaller, matching teardrop of pale celery-green clay, applying it directly on top of the dark green backing and blending the outer edges inward with a smooth silicone tool. Using a medium-sized metal ball-stylus tool, press a smooth hemispherical indentation into the wider lower half of the pale green face to create the seed cavity. Roll a ball of rich chocolate brown clay to fit snugly inside the indented cavity, ensuring it projects outward as a rounded dome above the flat fruit surface. Add two microscopic black clay eyes and a cheerful smile to the brown seed face, highlighting the eyes with tiny dots of white clay for a reflective sparkle. Insert a trimmed metal eye pin through the narrow top tip of the fruit, bake the piece flat, and coat only the seed with satin varnish for subtle contrast.
Common Beginner Mistakes and How to Avoid Them
The most frequent error beginner crafters encounter when making miniature polymer clay charms is surface contamination from dust, clothing fibers, and transferred skin oils. Working with light clay shades like white, cream, or soft pastels easily highlights tiny specks of lint, which become permanently trapped during curing. To prevent this, clean your hands, blades, and ceramic tiles with isopropyl alcohol or lint-free wet wipes before handling every new color. Another widespread mistake is improper oven temperature management, which leads either to brittle, under-cured charms or scorched, discolored pieces. Home ovens often experience temperature spikes, making a standalone analog oven thermometer essential for monitoring true internal baking temperatures rather than relying solely on digital appliance dials. Additionally, many beginners forget to reinforce mechanical joins between tiny clay attachments, causing ears, berries, or decorative toppings to pop off after baking. Always apply a microscopic drop of liquid polymer clay or bakeable adhesive between separate clay components before pressing them together. Finally, inserting eye pins without structural preparation frequently results in hardware pulling out during use. Always bend the lower shaft of the eye pin into a slight zig-zag with pliers before coating it in liquid clay, ensuring it locks permanently into the cured clay core.
Practical Tips for Better Results
Achieving professional results in miniature clay sculpting requires deliberate conditioning, purposeful tool handling, and disciplined finishing workflows. Always condition raw clay thoroughly until it becomes pliable and free of surface cracks, as properly kneaded clay yields significantly higher structural strength after baking. When blending gradients on small surfaces, use shaved artist-grade soft chalk pastels applied with soft, dry cosmetic brushes rather than wet paints, as pastels bond naturally to uncured clay. For clean, distortion-free cuts across layered canes and detailed pastry slices, use ultra-thin tissue blades and chill your raw clay assemblies in the refrigerator for fifteen minutes beforehand. Incorporating translucent clay into dessert bases, doughs, and fruit slices dramatically improves realism by simulating the natural depth and light absorption of real food ingredients. After baking and cooling your charms completely, apply protective varnishes selectively rather than coating the entire piece indiscriminately. Brushing high-gloss glaze solely onto syrup, glazes, fruit seeds, and eyes while leaving pastry dough surfaces matte creates professional contrast that elevates simple miniatures into convincing handmade art.
Styling, Presentation, or Organization Ideas
Miniature polymer clay food charms provide versatile styling possibilities that extend far beyond standard metal key rings. Attach finished charms to high-quality brass or silver lobster clasps, allowing users to move their miniature accessories easily between zipper pulls, tote handles, and personal backpacks. In home and office spaces, these colorful food charms can be suspended from magnetic hooks, framed corkboards, or decorative grid panels, turning everyday accessories into charming wall displays. Grouping several complementary food designs—such as pairing a coffee cup with a croissant, or an egg with toast—creates themed clusters that tell a cohesive visual story. For makers preparing charms for seasonal craft fairs or gift packaging, mounting individual pieces onto illustrated cardstock backings with decorative washi tape creates a memorable, professional presentation. You can also integrate finished charms into planner bookmark ribbons, loop them onto beaded wristlet lanyards, or use them as unique stitch markers for knitting and crochet projects.
Budget or Time Planning
Crafting miniature polymer clay charms is an exceptionally cost-effective creative endeavor that delivers high artistic yield from a modest investment in materials. A standard two-ounce block of polymer clay can produce dozens of miniature charms, making the material cost per piece remarkably low. Crafters can minimize upfront expenses by purchasing primary clay shades—such as red, blue, yellow, translucent, black, and white—and mixing custom pastels and pastry tones by hand rather than buying dozens of specialty colors. When planning your crafting schedule, organizing work into focused, modular stages dramatically improves efficiency and output quality. Dedicate your first session to conditioning clay, mixing signature palettes, and rolling patterned canes; reserve your second session for sculpting, assembling, and detailing characters. Bake your charms in batches on a single large ceramic tile to save energy and ensure consistent temperature exposure across all pieces. This structured approach makes it easy to produce charming, high-quality collections within convenient, manageable weekend crafting windows.
Creative Expansion and Advanced Inspiration
Once you master these foundational food charm concepts, you can explore advanced modeling techniques to broaden your creative craft portfolio. Experiment with integrating mixed media, such as embedding glass micro-beads for sugar textures, adding genuine metallic leaf accents to luxury desserts, or using jewelry wire to sculpt intricate miniature kitchen utensils. You can also explore multi-step liquid clay techniques, mixing translucent liquid medium with artist oil paints to simulate drippy fruit jams, melted chocolate drizzles, or realistic ramen broths. Scaling these food designs up or down opens exciting new possibilities: micro-miniature versions can be mounted on sterling silver earring posts or delicate ring blanks, while enlarged versions serve as unique decorative drawer knobs and whimsical desk sculptures. As your technical confidence grows, challenge yourself by designing intricate regional delicacies, holiday-themed treats, and multi-piece miniature picnic spreads. The principles of balance, texture, and character design mastered here provide a versatile creative foundation for endless miniature sculpture adventures.
Leave a Reply