Kawaii polymer clay modeling provides an accessible, expressive medium for crafters seeking to produce miniature sculptural art without investing in specialized studio machinery. The Japanese concept of kawaii centers on innocence, rounded proportions, simplified anatomical contours, and gentle pastel hues that evoke emotional warmth. This comprehensive tutorial details ten unique kawaii polymer clay ideas achievable using exclusively basic household tools, such as toothpicks, metal rulers, clean craft blades, and smooth glass surfaces. Readers will learn the essential mechanical fundamentals of clay conditioning, seamless joint fusion, color formulation, miniature facial embroidery, and controlled oven curing. Crafting miniature figures from oven-bake clay eliminates the intimidation factor of traditional pottery or complex metal jewelry smithing, giving makers total creative agency over scale, character design, and surface finish. In addition to creating delightful desk companions and charming pocket charms, mastering these simple sculpting techniques develops tactile agility and spatial awareness that readily apply to functional home decor, customized planner organization accessories, and personalized gift packaging. By learning to harness basic household implements to texture, indent, and shape pliable clay masses, decorators of any experience level can achieve clean, boutique-grade results. The upcoming sections provide preparation guidelines, required basic tool inventories, ten detailed two-paragraph instructional project breakdowns, and practical project planning strategies.
Why This Idea Is Trending or Useful
Miniature clay figures continue to capture widespread popularity across digital creative communities and Pinterest ideas due to their high visual charm, small physical footprint, and practical utility. Modern living spaces frequently emphasize minimalist style aesthetics, where tiny, whimsical sculptures introduce personality and warmth to floating wall shelves, computer monitors, and tiered vanity trays without generating physical clutter. The functional appeal of kawaii polymer clay modeling lies in its immediate versatility: completed miniatures can be converted into functional refrigerator magnets, decorative pushpins, planner bookmarks, or phone charms using inexpensive hardware. As a rewarding DIY creative project, miniature sculpting requires no dedicated studio space, functioning cleanly at a kitchen table or small study desk. Because these kawaii projects rely on fundamental geometric forms like spheres, teardrops, and flattened discs shaped simply by hand, this medium serves as an exceptionally beginner friendly entry point into three-dimensional arts. Crafting small figures also delivers dependable budget ideas, as a few two-ounce blocks of clay yield dozens of coordinated charms at minimal unit cost. Furthermore, these cheerful, durable objects provide satisfying handmade gifts that brighten everyday office routines and study desks.
Materials and Preparation
Disciplined material preparation and thoughtful workstation organization form the essential foundation for producing pristine, lint-free polymer clay miniatures using everyday tools. The primary medium consists of artist-grade oven-bake polymer clay in primary hues, opaque white, and translucent formulations, allowing makers to custom-mix gentle pastel tones. The required basic tool kit eliminates specialized clay apparatus, utilizing accessible household items: a smooth ceramic floor tile or glass cutting board as a non-porous work surface, wooden toothpicks for detailing and piercing, an untextured metal ruler for measuring and straight cuts, a single-edge razor blade, and a smooth glass jar to serve as an acrylic roller alternative. For facial details, procure dark brown or black clay, liquid polymer clay to serve as an invisible bakeable adhesive, and dry chalk pastels for blush shading. Preparation begins by wiping down the work tile, metal tools, and hands with ninety-one percent isopropyl alcohol to eliminate surface oils and airborne dust particles. Condition the clay thoroughly by hand-kneading small segments between your palms until the mass becomes soft, pliable, and free of perimeter cracking when bent. Calibrate your household oven with an independent, freestanding oven thermometer to verify temperature accuracy before baking, ensuring pale pastel figures do not scorch.
1. Smiling Strawberry Milk Carton Desk Charm
Step-by-Step Guide
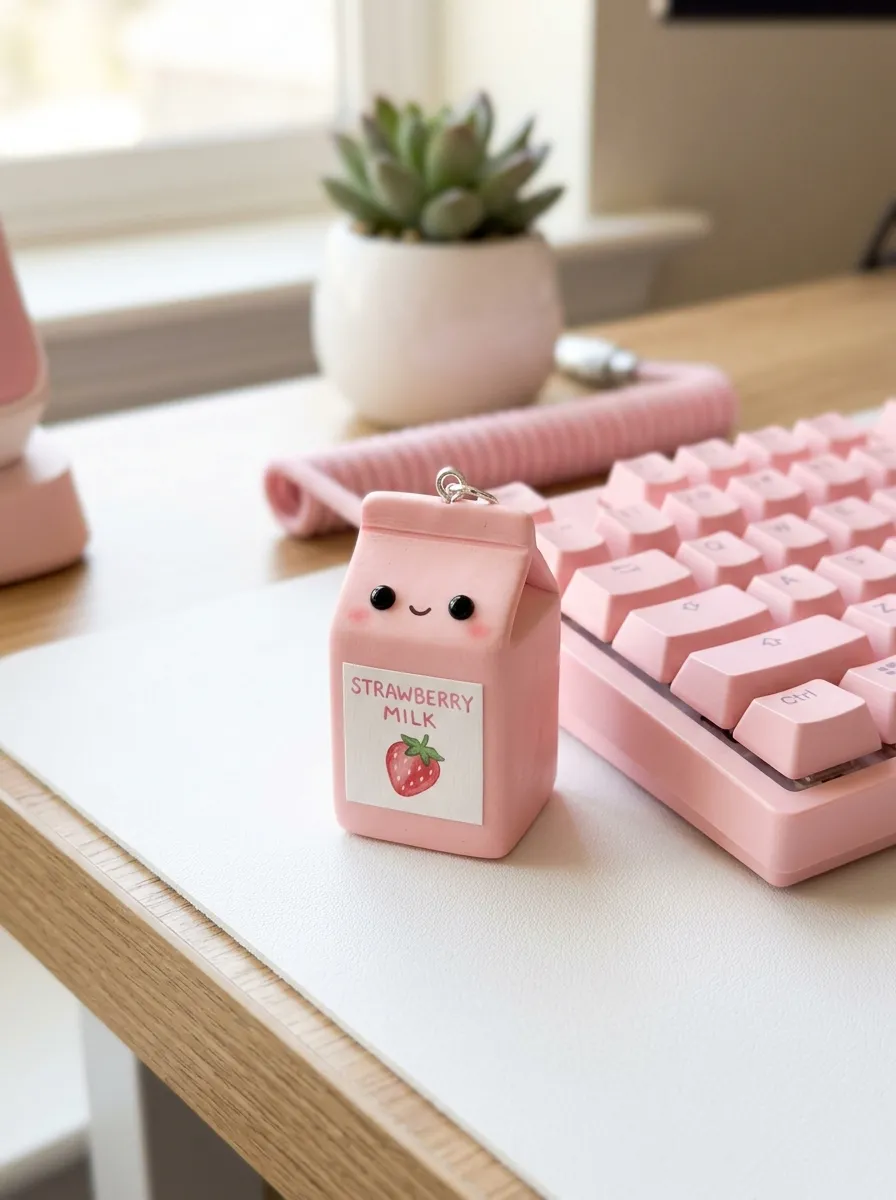
The miniature strawberry milk carton captures classic kawaii stationery aesthetics through crisp architectural geometry, soft pastel pink tones, and cheerful anthropomorphic detailing. This project features a clean, rectangular prism body sculpted from pastel strawberry-pink clay, topped with an angled gable roof that mimics commercial paper beverage cartons. A tiny white label panel applied to the front torso displays a miniature red strawberry motif, framed by wide-set black eyes and a sweet open smile. The sharp planar edges of the milk carton contrast with the soft, rounded features of the face, creating a balanced silhouette that sits upright on any flat surface. Sized at approximately one inch in height, this compact figure serves as an adorable desk companion, planner weight, or mechanical keyboard accent. The self-contained cubic shape makes it remarkably durable, containing no fragile protruding limbs that might break off during everyday handling.
To construct the milk carton, condition two ounces of light pink clay, formed by blending opaque white with a pinche of saturated red clay. Roll the conditioned pink clay into a thick, uniform cube measuring twenty millimeters on each side, using the flat side of a metal ruler pressed against your ceramic work tile to establish crisp, right-angled corners. To form the pitched roof, use your thumb and forefinger to pinch the top quarter of the cube into an elongated triangular gable, pressing a wooden toothpick horizontally along the top ridge to create the sealed carton seam. Roll a paper-thin sheet of white clay, cutting a neat square with your craft blade and adhering it to the front face with a smear of liquid clay. Roll two microscopic spheres of black clay for the eyes and a tiny curved filament for the smile, pressing them flush into the white panel using a blunt toothpick point. Bake the figure upright on your ceramic tile for thirty-five minutes at the temperature indicated on the clay packaging.
2. Chubby Sleeping Cloud with Rosy Pastel Cheeks
Execution Process
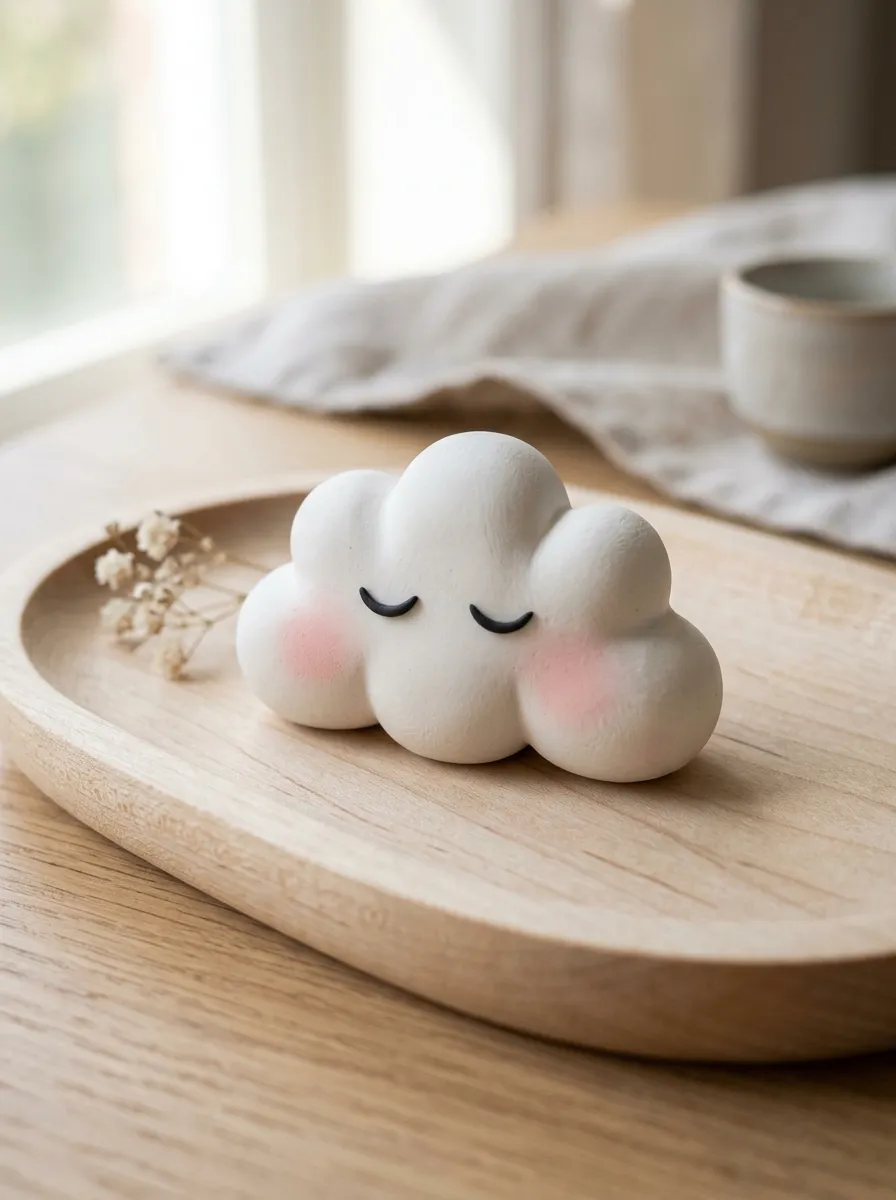
The chubby sleeping cloud design embodies calming minimalism, organic curves, and dreamy nursery aesthetics through soft, pillowy contours. This sculpture features an undulating, lobe-shaped cloud body sculpted from opaque white or pale sky-blue clay, resting flat on its underside with a gentle forward tilt. The character’s face showcases two delicate curved arcs that represent peaceful sleeping eyelids, paired with soft, blended pink blush marks on the outer lobes. The absence of complex appendages or intricate parts makes this figure exceptionally sturdy, functioning reliably as a worry stone, paperweight, or decorative computer monitor topper. The smooth, matte texture of the cloud provides tactile satisfaction when handled, while the serene facial expression introduces a peaceful, reassuring presence to study spaces and bedside tables. Its low profile prevents accidental tipping, ensuring it rests securely on wooden floating shelves or inside shallow organization trays.
Begin by conditioning an ounce of pure white polymer clay until completely soft, rolling the entire mass into a smooth, crack-free sphere between your palms. Gently press the sphere down onto your ceramic tile to create a flat, stable bottom plane, leaving the upper surface domed and rounded. Use the rounded side of a clean wooden toothpick or the barrel of a smooth pen to press gentle vertical indentations along the perimeter of the dome, creating five rounded, puffy cloud lobes of varied sizes. Smooth away all tool marks and seam lines using a light fingertip touch moistened with a drop of isopropyl alcohol. Roll two hair-thin threads of black clay, curling each into an upturned crescent to form sleeping eyelids, and position them symmetrically on the central lobe using the tip of a toothpick. Scrape a small amount of pink chalk pastel into powder with your craft blade, using a dry cotton swab to dust gentle blush circles onto the outer cheeks before baking the cloud for thirty minutes.
3. Plump Honey Pot Bear with Drizzling Amber Glaze
How to Create
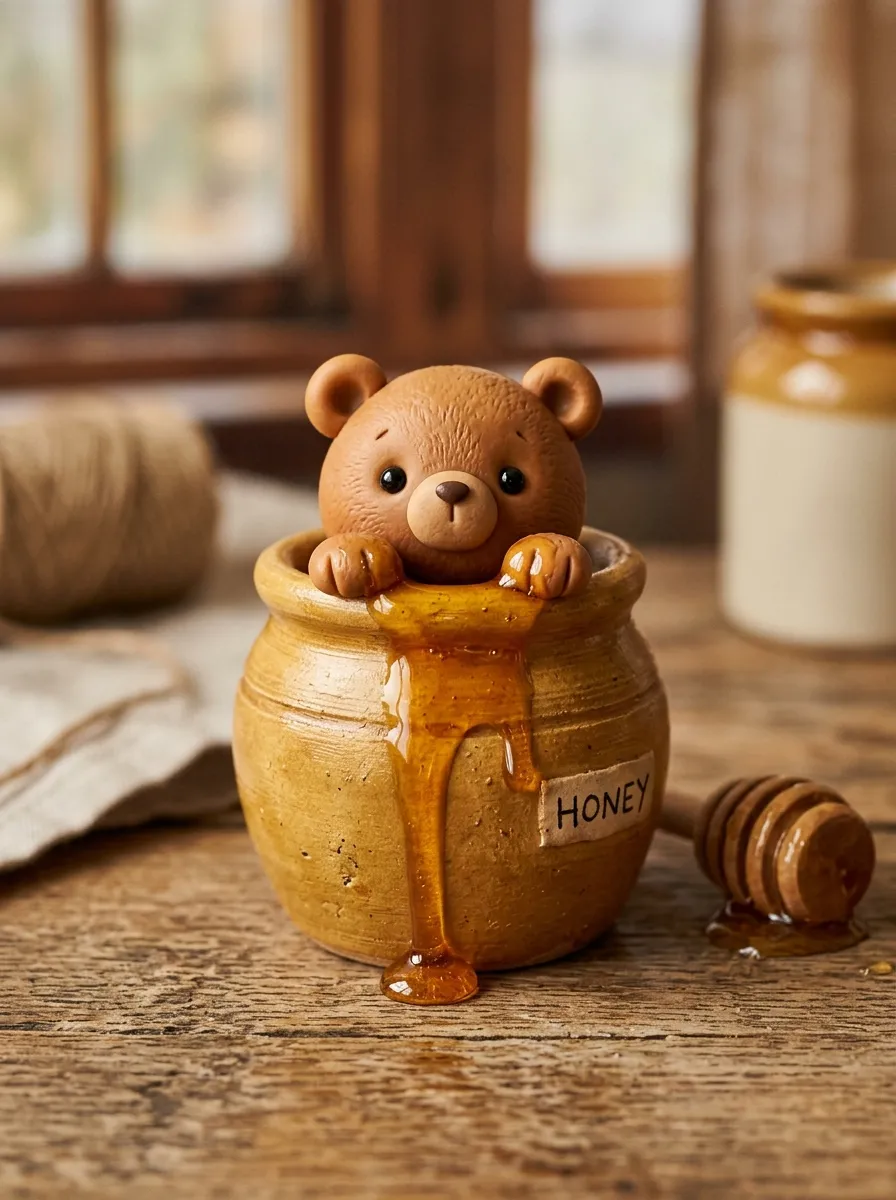
Combining sweet animal figures with food miniatures produces an engaging, storybook character that highlights varied surface finishes and layered dimensional clay work. This project features a chubby, spherical teddy bear head and paws peeking over the rim of an earthen honey crock. Sculpted in warm caramel and golden-ochre clay, the honey pot displays subtle horizontal grooving that mimics wheel-thrown pottery, while the bear’s rounded ears and muzzle project curious innocence. The standout feature is a thick, glossy drip of golden honey cascading over the pot rim, crafted from translucent yellow clay that catches ambient light. The contrast between the matte, earthen clay of the pot and the shiny honey drip adds visual richness without requiring expensive glazes. This whimsical figurine functions delightfully as a decorative pencil holder mascot, tier-tray ornament, or miniature garden accent.
To assemble the honey pot bear, roll a walnut-sized ball of golden-ochre clay into a squat cylinder, pressing your thumb into the top center to form a hollow bowl cavity with thick, sturdy walls. Roll a ball of warm caramel-brown clay to fit snugly inside the pot opening to form the bear’s head, adding two small pinched spheres for ears and an unbleached cream oval for the snout. Use the dull tip of a toothpick to press two eye sockets into the face, inserting microscopic black clay spheres, and add an inverted triangular nose. Shape two small tear-shaped paws in caramel clay, hooking them over the outer lip of the pot as if the bear is climbing inside. To create the honey drizzle, blend translucent clay with a tiny speck of yellow and orange clay, stretching the mixture into soft, teardrop drips that drape naturally over the pot rim and down the front wall. Cure the assembled figure on your tile for forty minutes, allowing it to cool slowly inside the oven.
4. Sprouting Avocado Pal with Textured Seed Belly
Step-by-Step Guide
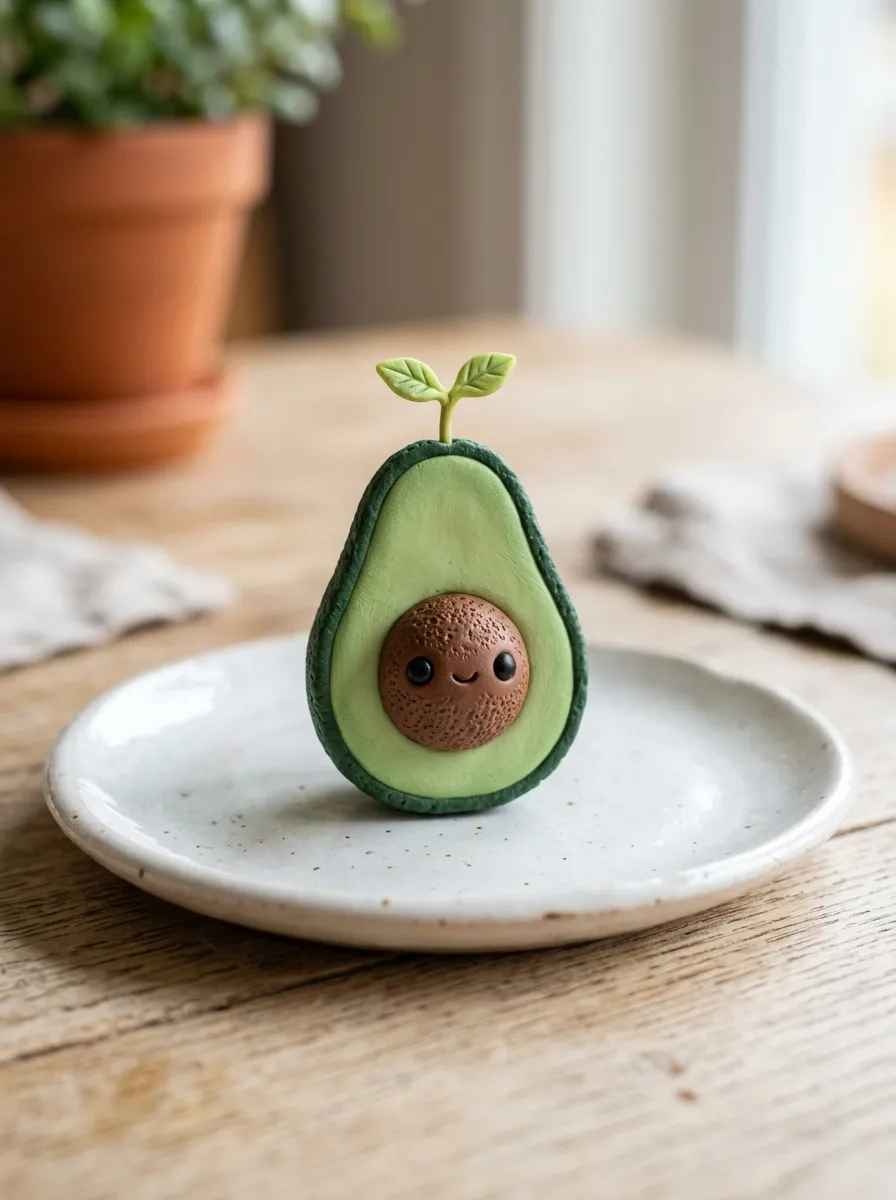
The sprouting avocado character translates popular healthy lifestyle motifs into a playful, smiling botanical friend through simple layering and contrasting surface textures. This design incorporates a pear-shaped avocado half sculpted in light meadow-green clay, framed by a dark forest-green skin rind and centered around a prominent, rounded brown seed belly. Emerging from the top of the brown pit is a tiny, bright green two-leaf sprout, adding a whimsical gardening detail that draws the eye upward. The defining characteristic of this piece is the textural contrast between the smooth, buttery surface of the fruit flesh and the deeply stippled, pitted texture of the central seed. Wide-set black eyes and tiny pink blush spots positioned directly on the brown pit give the character an endearing, surprised expression that charms plant lovers and foodies alike.
To create the avocado pal, roll light green clay into a smooth pear shape measuring twenty-five millimeters in length, pressing it flat against your work tile until it measures five millimeters thick. Roll a long, thin coil of dark forest-green clay, wrapping it around the outer perimeter of the pear shape to create the protective skin rind, smoothing the outer seam flat with your metal ruler. Roll a separate sphere of warm chocolate-brown clay, flattening the underside and pressing it firmly into the lower center of the light green flesh to form the seed. Use the pointed tip of a wooden toothpick to gently stipple the entire surface of the brown seed, creating a rough, organic pit texture. Embed two tiny black clay dots for eyes and a smiling mouth into the seed face, brushing the cheeks with pink pastel dust. Form two miniature tear-shaped leaves from bright lime-green clay, anchoring them to the top of the pit using a drop of liquid clay before baking the piece for thirty-five minutes.
5. Petite Strawberry Tartlet with Fluted Pastry Crust
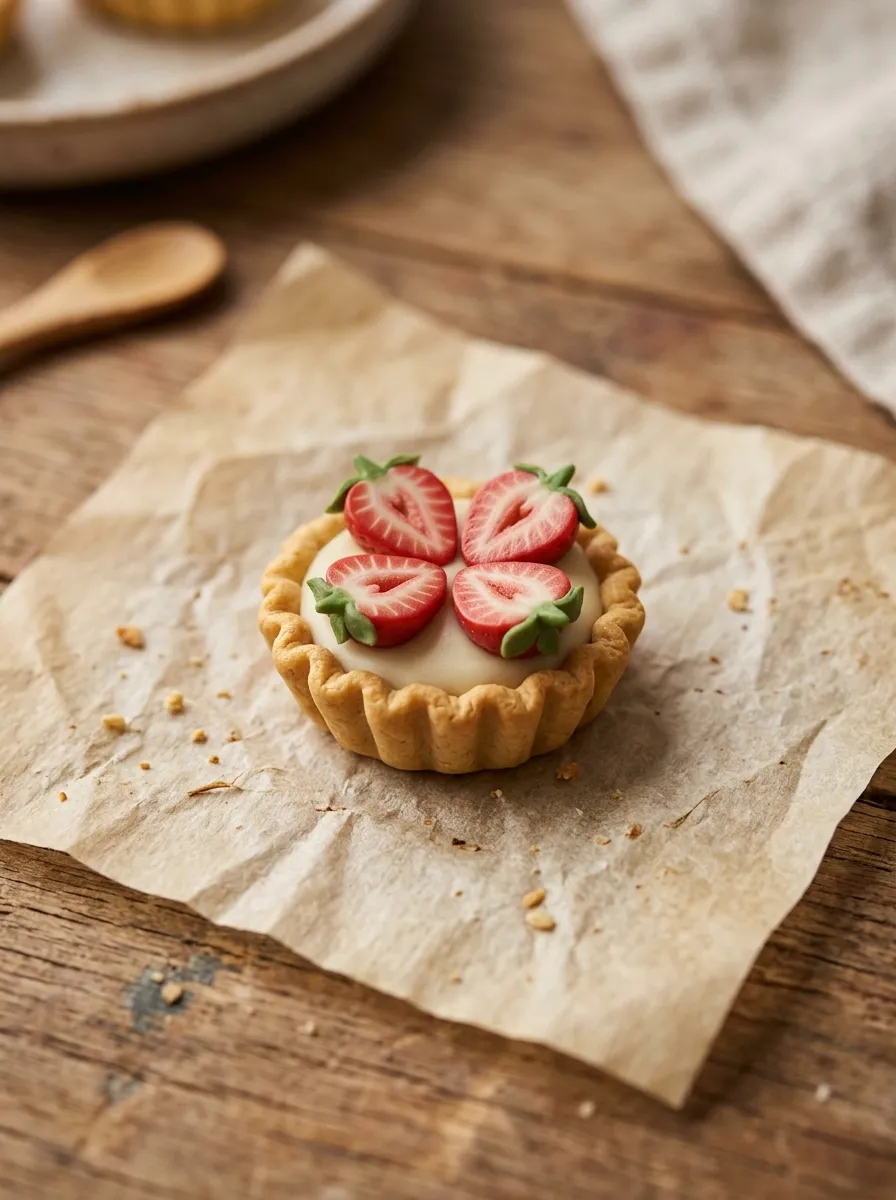
Execution Process
Miniature patisserie charms celebrate the detailed craftsmanship of French pastry through crisp textures, fruit sculpting, and faux confectionary finishes. This project features a circular tartlet crust with fluted, crimped edges sculpted from warm pastry-tan clay, filled with an ivory cream base and topped with four sliced strawberry halves. The fluted edge of the crust introduces sharp geometric ridges, while the vibrant crimson strawberries provide a bold pop of color. The tiny strawberries feature hand-indented seed dimples and pale cream internal flesh rings, capturing authentic fruit anatomy at a miniature scale. The compact, flat-bottomed pastry format makes it an exceptional base for functional accessories, such as a sturdy magnetic refrigerator clip or a decorative pushpin for cork memo boards. The durable, interlocking construction ensures the small fruit toppings stay firmly attached through frequent handling.
Begin by mixing white, translucent, and a pinch of raw sienna clay to achieve a realistic, unbaked pastry dough color. Roll the dough clay into a ball, pressing it into a flat disc measuring twenty millimeters wide and four millimeters thick on your tile. Use the flat edge of a toothpick to press evenly spaced vertical indentations around the outer rim of the disc, crimping the clay upward to create a traditional fluted tart shell. Fill the center hollow with a flat disc of cream-colored clay to represent pastry cream. To make the strawberries, shape four tiny cones from translucent red clay, using a craft blade to slice each cone in half lengthwise. Press the pointed tip of a toothpick into the red outer skin of each strawberry half to produce authentic seed dimples. Arrange the strawberry slices in a tight, overlapping spiral inside the cream center, pressing their bases into the soft clay. Bake the completed tartlet on your tile for thirty-five minutes, allowing the piece to cool completely before handling.
6. Cheerful Toadstool Mushroom with White Appliqué Spots
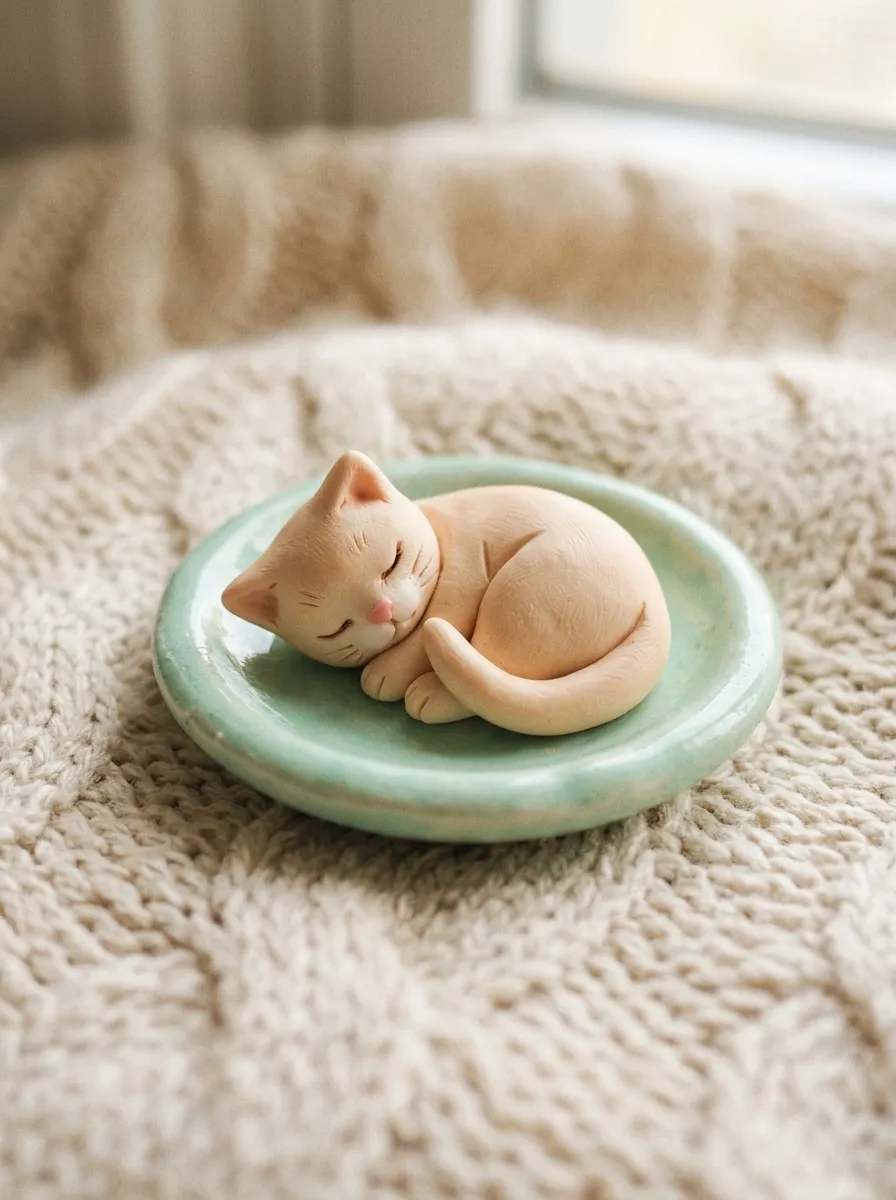
How to Create
Storybook woodland motifs bring folklore nostalgia, rich forest palettes, and friendly character styling to miniature clay crafting. This project features an upright woodland mushroom displaying a stout, unbleached cream stem and a plump, domed scarlet-red cap adorned with raised white polka dots. The smiling face is sculpted directly onto the thick stem, featuring wide-set black bead eyes and a tiny open mouth that radiates cheerful optimism. The broad, flat base of the stem gives the figurine exceptional physical balance, allowing it to stand independently inside terrariums, on plant pot soil, or along computer monitor stands. The contrast between the bright red cap and the neutral ivory stem establishes strong visual clarity, making the tiny sculpture immediately recognizable from across a room. The simple, unsegmented geometry contains no delicate extremities, ensuring it withstands everyday desktop bumps.
To construct the toadstool mushroom, roll a portion of unbleached cream clay into a smooth cylinder measuring fifteen millimeters wide, tapering the top slightly to form a stable trunk stem. Press the bottom edge down onto your work tile to create a broad, completely flat resting foot. For the cap, roll an equal-sized ball of vibrant scarlet-red clay, flattening the bottom while shaping the top into a smooth, rounded half-sphere using the palms of your hands. Use the tip of a toothpick to hollow out a shallow depression in the underside of the red cap, applying a drop of liquid clay before seating the cap firmly onto the tapered stem. Roll several tiny, irregular spheres of white clay, flattening them into thin discs between your fingertips and pressing them onto the red dome as natural toadstool spots. Use your toothpick to indent two eye sockets into the cream stem, inserting black clay beads, and bake the upright mushroom for forty minutes.
7. Pastel Boba Milk Tea Cup with Floating Tapioca Pearls
Step-by-Step Guide
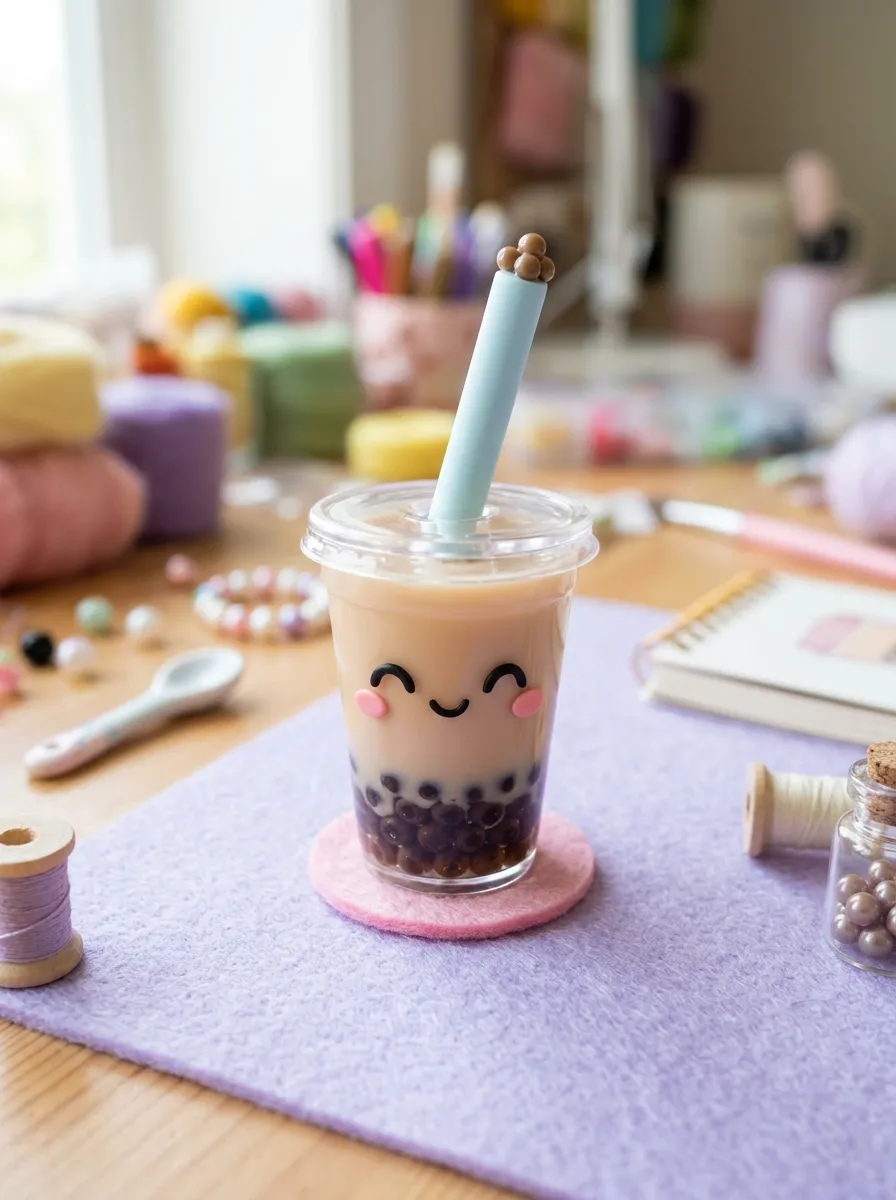
Boba tea iconography represents a defining staple of modern kawaii food illustration, celebrating pastel cafe drinks, oversized drinking straws, and playful textural toppings. This design incorporates a tapered cylindrical cup sculpted in translucent milk-tea beige or pastel taro purple, topped with a domed clear lid and a wide, slanted drinking straw. Resting along the bottom third of the translucent cup is a cluster of glossy, dark brown tapioca pearls, visible through the beverage body. The clean, straight vertical lines of the drink cup provide a modern silhouette that contrasts with the rounded boba pearls clustered below. The smiling face applied to the front of the cup gives the beverage a lively personality that resonates with cafe enthusiasts, students, and collectors. Its sturdy, flat-bottomed cylindrical form makes it an ideal charm to mount onto keychains or planner bookmark clips.
To create the boba cup, condition translucent clay mixed with a tiny speck of raw umber to produce an authentic iced milk-tea shade. Roll the clay into a smooth cylinder measuring twenty-five millimeters tall, rolling it gently against your tile with a metal ruler tilted at an angle to create a slight downward taper. Roll twelve to fifteen microscopic spheres of dark chocolate-brown clay to serve as tapioca pearls, pressing them in a dense cluster around the lower outer circumference of the cup. To form the domed lid, roll a half-sphere of translucent white clay, pressing a flat disc beneath it to form the rim and adhering it to the cup top with liquid clay. Cut a short, eight-millimeter length of plastic coffee stirrer or a rolled cylinder of pastel clay to serve as the wide boba straw, inserting it diagonally through the center of the dome lid. Add two tiny black clay eyes and blushing cheeks to the cup torso, curing the piece upright on your tile for thirty-five minutes.
8. Cozy Sleeping Kitty Curled on a Ceramic Saucer
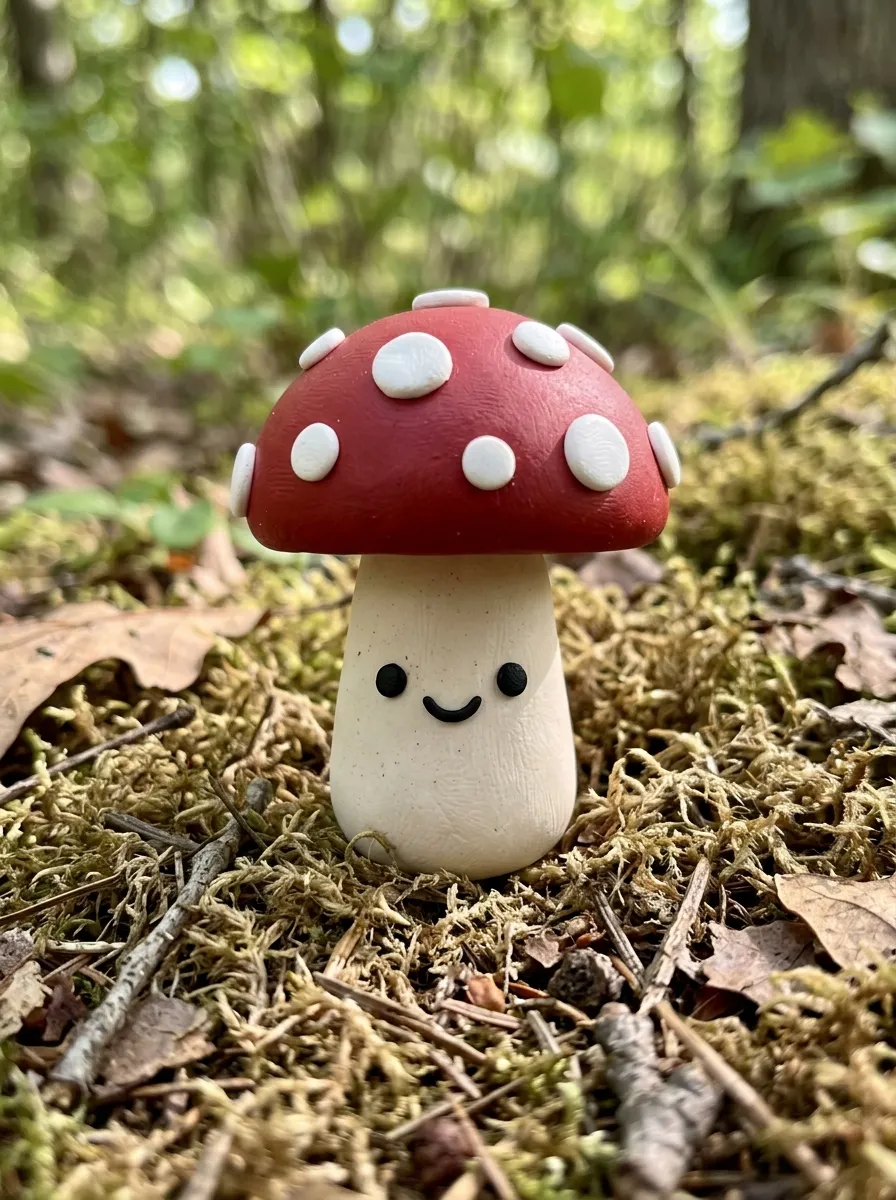
Execution Process
Sleeping animal sculptures capture peaceful domestic tranquility, tactile curves, and gentle feline anatomy through rounded, flowing shapes. This project showcases a compact, sleeping kitten curled into a tight crescent circle, resting atop a separately sculpted pastel ceramic saucer. Sculpted in soft peach, warm cream, or gentle gray clay, the cat features two pointed ears folded back, a curved tail wrapped snugly around its paws, and delicate hand-embroidered sleeping whiskers. The accompanying round saucer base provides a broad, stable footprint that protects the delicate ears and tail from snagging or snapping. The circular composition creates a self-contained, harmonious desktop ornament that introduces calming energy to office workspaces and nightstands. The lack of open negative space between the limbs and body maximizes structural strength, ensuring the piece stays intact through years of handling.
Begin by conditioning an ounce of soft pastel clay for the saucer base, rolling it into a flat, smooth disc measuring twenty-five millimeters in diameter and three millimeters thick. Use the back of a smooth metal spoon or the rounded end of a thick marker to gently press the center of the disc downward, creating a slightly raised outer dish rim. For the sleeping cat, roll warm cream-colored clay into a smooth, tapered oval, curving the elongated mass into a tight circular donut shape with no central hole. Gently shape the thicker end into a resting feline head, pinching two tiny triangular ears from the clay mass with your fingertips. Wrap the tapered tail end smoothly around the body, pressing the seams flush with a toothpick. Use your craft blade to slice three microscopic whiskers and sleeping eye curves on the face using dark brown clay threads. Seat the curled cat into the saucer hollow, securing the contact point with liquid clay, and bake for forty minutes.
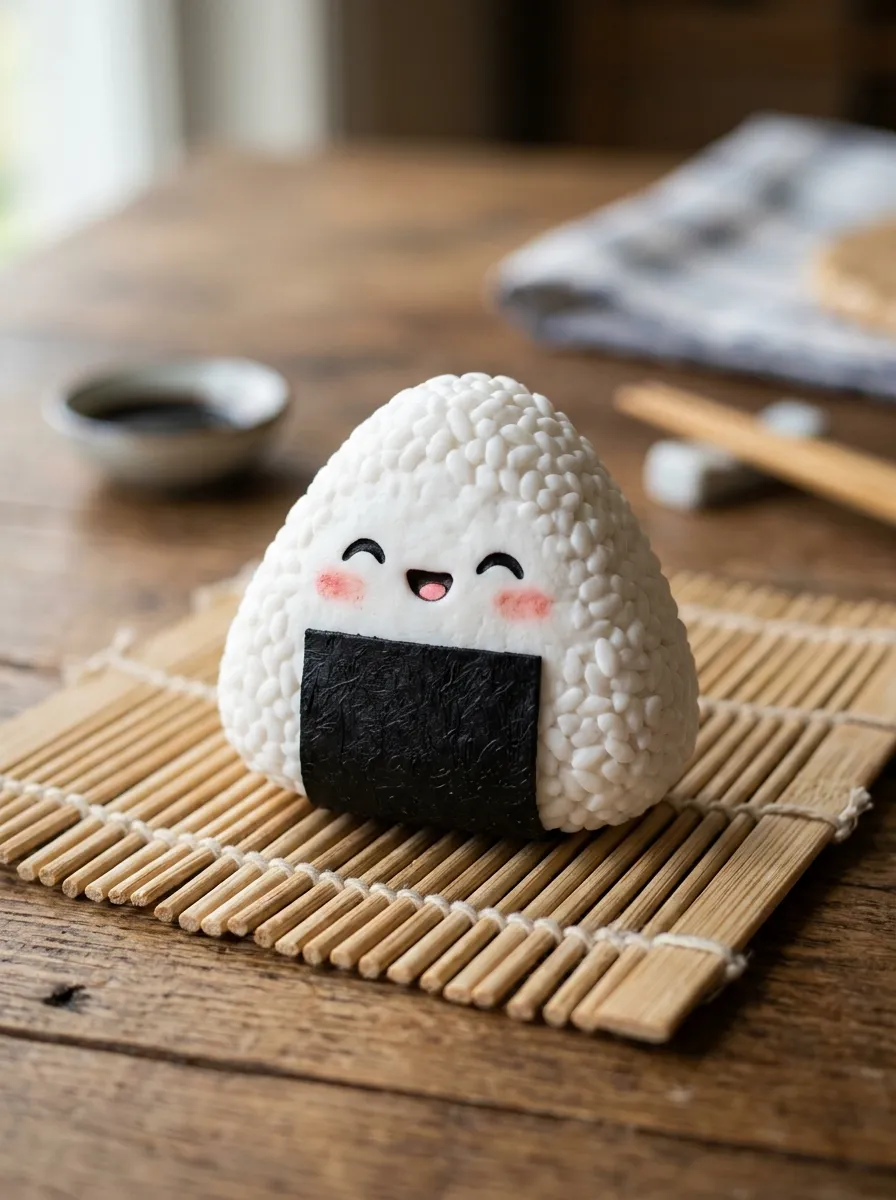
9. Smiling Onigiri Rice Ball with Crisp Nori Wrap
How to Create
Traditional Japanese culinary shapes offer minimalist geometry, clean monochromatic contrast, and joyful graphic character within miniature sculpture. This project features a plump, triangular onigiri rice ball sculpted from textured white clay, wrapped along its base with a wide band of matte black nori seaweed. Positioned directly on the white rice face is a sweet kawaii expression, featuring smiling curved eyes, pink blush marks, and a tiny open mouth. The crisp triangle with rounded corners provides an iconic silhouette that captures the comforting simplicity of home-cooked bento lunches. The defining textural feature is the lightly stippled surface of the white clay, which realistically replicates individual grains of steamed short-grain rice. This compact, durable charm makes a wonderful zipper pull, lunchbox tag, or culinary-themed refrigerator magnet that brings everyday cheer to kitchens and workspaces.
To craft the onigiri charm, condition two ounces of opaque white polymer clay, rolling the mass into a smooth sphere before flattening it gently between your palms to a thickness of eight millimeters. Use the flat edge of your metal ruler to press the sides of the clay ball into an equilateral triangle, softening the three sharp points with your fingertips until the contours become rounded and plump. Take a wooden toothpick and gently tap the pointed end repeatedly across the entire white surface to produce a realistic, pebbled rice texture, avoiding the central face area. Roll a thin sheet of jet-black clay, using your craft blade and ruler to slice a neat rectangular strip measuring eight millimeters wide and twenty-five millimeters long. Wrap the black strip around the lower base of the white rice triangle to form the nori sheet, pressing it flat against the textured clay. Embed two black clay threads for eyes and dust pink pastel onto the cheeks before baking the onigiri for thirty minutes.
10. Floating Narwhal Whale with Golden Swirl Horn
Step-by-Step Guide
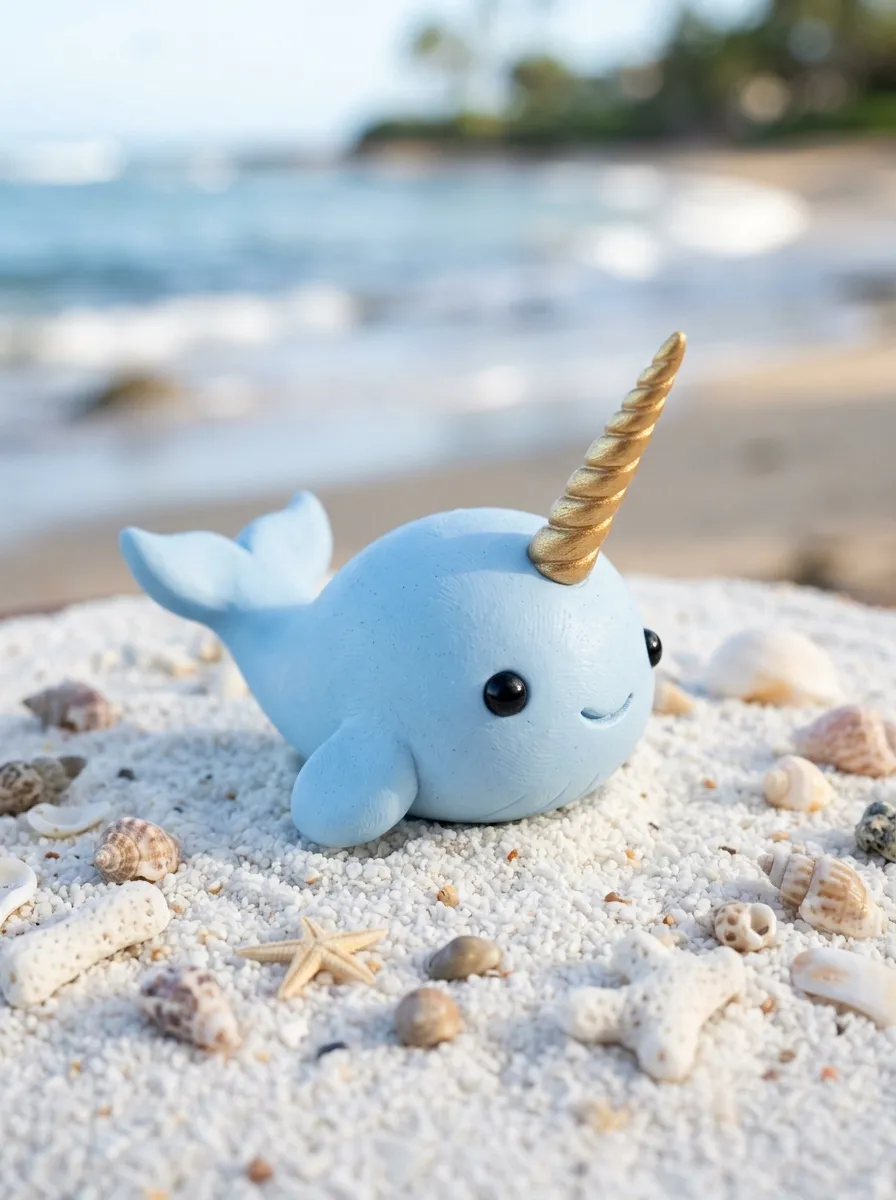
Whimsical marine creatures introduce aquatic fantasy, soft pastel gradients, and playful storytelling to miniature clay collections. This project features an adorable floating narwhal sculpted in soft pastel mint or baby-blue clay, characterized by a rounded bean-shaped body, tiny side flippers, and a perky horizontal tail fluke. The centerpiece of the sculpture is a slender, spiraled unicorn tusk mounted to the forehead, crafted from metallic gold clay or highlighted with gold mica powder. The hydrodynamic, rounded contours give the figure a friendly, approachable appearance that feels comfortable in the palm of your hand. Wide-set black bead eyes and a gentle curved smile complete the magical sea creature’s face. Sized at roughly an inch and a half in length, this charming aquatic figurine functions beautifully as a desk companion, decorative paperweight, or hanging mobile accent.
To construct the narwhal, roll conditioned pastel mint clay into a smooth egg shape, narrowing the tapered end into a slender tail and flattening the tip into two rounded horizontal flukes using your thumb. Attach two tiny paddle-shaped flippers to the lower sides of the body, smoothing the seam lines seamlessly into the torso using the rounded shaft of a toothpick. For the narwhal horn, roll a tiny thread of metallic gold clay into a pointed coil, twisting the wire-like thread gently between your fingers to produce a spiral tusk texture. Use a pin tool to create a small pilot hole in the narwhal’s forehead, applying a tiny drop of liquid clay before seating the gold horn firmly into the socket. Indent two shallow eye sockets on either side of the forehead with a toothpick, inserting tiny black clay spheres to form the eyes. Place the narwhal onto a crumpled bed of parchment paper to support its rounded belly without creating flat spots, and bake for thirty-five minutes.
Common Beginner Mistakes and How to Avoid Them
The most critical technical error when sculpting polymer clay miniatures using basic household tools is failing to maintain clean, lint-free working conditions. Because kawaii designs rely heavily on pristine white, cream, and soft pastel clays, stray airborne dust particles, dark clothing fibers, and skin oils show up immediately on light surfaces. Prevent this contamination by wiping your tile, tools, and hands with ninety-one percent isopropyl alcohol before touching light clays, and roll a small scrap ball of light-colored clay across your work surface to collect lingering debris before starting. Another frequent mistake is applying excessive, uneven pressure when cutting shapes with utility blades, which drags the clay and deforms crisp geometric angles. Always chill your shaped clay pieces in the refrigerator for fifteen minutes before making fine cuts, and use a sharp, clean carbon steel blade pressed straight down in a single decisive motion rather than sawing back and forth. Beginners also frequently overlook oven temperature calibration, trusting built-in stove dials that often run hot and scorch delicate pastel pigments into brittle, discolored messes. Always position an independent, freestanding oven thermometer directly next to your baking tile, and tent a sheet of folded aluminum foil over your sculptures to shield them from direct heating elements. Finally, avoid joining clay components with light surface contact alone; always smooth seams thoroughly with a toothpick or use a drop of bakeable liquid clay to ensure parts do not separate after baking.
Practical Tips for Better Results
Achieving boutique-grade, professional finishes on polymer clay miniatures using everyday tools relies on disciplined smoothing habits and precise post-bake refinements. To eliminate fingerprints and tool indentations on raw clay figures without sanding, dip a soft-bristled artist paintbrush lightly into isopropyl alcohol and stroke the wet bristles gently across the clay surface; the alcohol dissolves surface imperfections, leaving a smooth, satin finish before baking. When shaping tiny, symmetrical facial components like eyes or blush circles, roll a microscopic clay coil and slice identical lengths with a razor blade before rolling them into spheres, ensuring both eyes have matching volumes. Utilize a flat ceramic floor tile as both your primary sculpting mat and your oven baking tray; this eliminates the risky process of peeling delicate raw clay sculptures off your table, preventing distorted bases and squished appendages. When applying chalk pastel blush to cheeks, always apply the dry pigment onto the raw clay before baking using a soft, dry cotton swab; the heat of the oven locks the pigment permanently into the curing clay without requiring sticky post-bake sealants. Finally, let your cured figures cool completely inside the turned-off oven with the door closed; allowing the clay to cool slowly prevents thermal shock and ensures maximum structural flexibility and strength.
Styling, Presentation, or Organization Ideas
Integrating miniature kawaii clay figures into your everyday living environment introduces cheerful personality, creative craftsmanship, and playful warmth to diverse spaces. Arrange your completed clay creations on tiered wooden display shelves, inside small glass shadow boxes, or nestled beside potted succulent gardens on sunlit windowsills to create charming, personalized vignettes. For study and office spaces, convert your miniature figures into functional desk organization tools by embedding strong neodymium disc magnets into their backs before baking, transforming them into cheerful memo holders for magnetic whiteboards and metal filing cabinets. If presenting these handmade sculptures as gifts, place each figure inside a clear acrylic display dome or a miniature kraft paper jewelry box lined with shredded crinkle paper, tying the exterior with natural cotton baker’s twine and a hand-stamped cardstock gift tag. You can also mount small figures onto metal paperclip slides or pushpins using high-strength two-part epoxy, creating delightful custom planner accessories that make daily scheduling feel joyful. When photographing your clay art for digital mood boards or inspiration portfolios, utilize soft morning window daylight, neutral linen backdrops, and simple wooden props to highlight the fine handcrafted textures, gentle pastel tones, and clean sculptural lines.
Budget or Time Planning
Executing a collection of kawaii polymer clay miniatures requires minimal financial investment and structured time management to maximize creative productivity. Minimize startup expenses by purchasing large economy blocks of foundational white and translucent clay, custom-mixing an infinite spectrum of soft pastel shades by blending microscopic pinches of saturated primary colors into the neutral bases. Rather than purchasing expensive sculpting kits, look around your home for functional shaping tools: use sewing needles for micro detailing, clean bottle caps as circular cutters, and smooth glass tumblers as rolling pins. Structure your creative workflow into three focused operational phases: dedicate the first session to conditioning clay, blending custom pastel palettes, and rolling basic foundational shapes; use a second uninterrupted block for assembling details, sculpting facial features, and adding pastel blush; and reserve a final session for batch baking, cooling, and hardware assembly. Simple single-form figures like the sleeping cloud or onigiri require approximately twenty to thirty minutes of active sculpting, making them ideal high-efficiency weekend projects. Store unused conditioned clay wrapped tightly in clean wax paper inside airtight polypropylene plastic containers, shielding the material from heat and airborne dust to ensure it remains soft and ready for future crafting sessions.
Creative Expansion and Advanced Inspiration
Once you have mastered foundational hand-shaping and basic tool mechanics, explore creative variations to expand your clay art across wider practical applications. Translate your miniature characters into functional wearable jewelry by inserting stainless steel eye pins into the top crowns before baking, turning the figures into charming dangle earrings, charm bracelet accents, or personalized zipper pulls. You can also experiment with incorporating mixed-media elements into your clay art, such as dusting cured pieces with iridescent cosmetic mica powders, embedding tiny glass seed beads, or applying selective coats of high-gloss UV resin over eyes and fruit glazes to create dynamic contrasts between matte and glossy surfaces. Consider designing complete themed miniature collections, such as a cohesive breakfast cafe set featuring matching toast, coffee mugs, and pastry characters unified by identical pastel color palettes and smiling facial aesthetics. Document your custom clay mixing ratios, successful baking durations, and dimensional sketches in a dedicated studio notebook, establishing a valuable personal reference archive that streamlines future creative projects and ensures consistent, beautiful results across every handmade collection.