Crafting miniature holiday accessories with oven-bake clay offers an accessible and rewarding way to celebrate seasonal traditions through personalized, handmade art. Designing miniature festive charms allows makers to blend soft pastel color palettes with expressive, rounded silhouettes, resulting in miniature decorations that capture joyful spring motifs. This tutorial outlines ten unique kawaii polymer clay Easter charm concepts, ranging from cracked-shell hatching chicks and blushing bunnies to miniature braided hot cross buns and pastel carrot charms. Readers will learn the precise technical fundamentals of conditioning raw modeling compound, executing clean geometric joins, embedding hardware securely, and curing pieces without burning delicate pastel pigments. Creating custom clay charms eliminates reliance on generic, mass-produced seasonal trinkets, granting complete creative control over character expressions, dimensions, and textural surface finishes. Furthermore, mastering these miniature sculpting mechanics develops versatile crafting capabilities that transition easily into holiday home decor accents, jewelry construction, and desktop accessories. By utilizing straightforward forming actions like rolling uniform spheres, pulling soft cones, and embossing simple facial features, crafters of all backgrounds can achieve boutique-quality results. The subsequent sections outline essential preparation workflows, comprehensive material lists, step-by-step assembly guides for ten complete designs, and strategic operational tips to execute an inspiring DIY creative project smoothly.
Why This Idea Is Trending or Useful
Handmade holiday charms continue to dominate modern digital mood boards and Pinterest ideas because they combine nostalgic comfort with functional creative play. Modern crafters frequently seek out small, manageable projects that provide immediate creative satisfaction without generating excessive clutter or waste. From an artistic perspective, the kawaii aesthetic—defined by rounded contours, simplified facial proportions, and gentle pastel tones—introduces a lighthearted, modern design touch to traditional Easter motifs. As an engaging DIY creative project, sculpting miniature clay charms requires minimal dedicated studio equipment, functioning seamlessly on a standard kitchen counter or craft desk without demanding extensive infrastructure. Because foundational kawaii forms rely on basic geometric shapes like spheres, ovals, and soft teardrops, this medium serves as an exceptionally beginner friendly entry point into three-dimensional sculpting. Furthermore, producing seasonal clay charms delivers practical budget ideas, as a handful of standard two-ounce clay blocks can yield dozens of high-value gifts, stitch markers, planner accents, and necklace pendants at minimal unit cost. Completed charms can also be integrated into seasonal home decor, functioning as miniature hanging basket ornaments, floral arrangement accents, or personalized place-setting markers for holiday dining tables.
Materials and Preparation
Thorough planning and disciplined supply acquisition ensure that miniature clay charms maintain structural integrity, clean pigment definition, and secure hardware attachment after baking. The primary medium must center on premium artist-grade polymer clay in white, translucent, and assorted pastel shades, including butter yellow, soft mint, lavender, and baby pink. Essential mechanical assembly components include stainless steel eye pins, heavy-duty jump rings, lobster clasps, liquid polymer clay, and water-based gloss varnishes. Key sculpting tools feature an acrylic rolling pin, rigid tissue blades, double-ended silicone shaping pens, stainless steel ball styluses, and fine-point tweezers. Preparation begins by establishing an immaculate, lint-free workspace on a polished ceramic floor tile or glass cutting plate, wiping every surface down with ninety-one percent isopropyl alcohol to eliminate dust contamination. Condition the clay thoroughly by hand-kneading or running it repeatedly through a dedicated manual conditioning machine until the slab bends smoothly without tearing along folded edges. Calibrate your household craft oven using a freestanding, independent oven thermometer, verifying precise thermal regulation before initiating any baking cycles to prevent scorching delicate pastel pigments.
1. Hatching Pastel Chick in a Scalloped Eggshell
Step-by-Step Guide
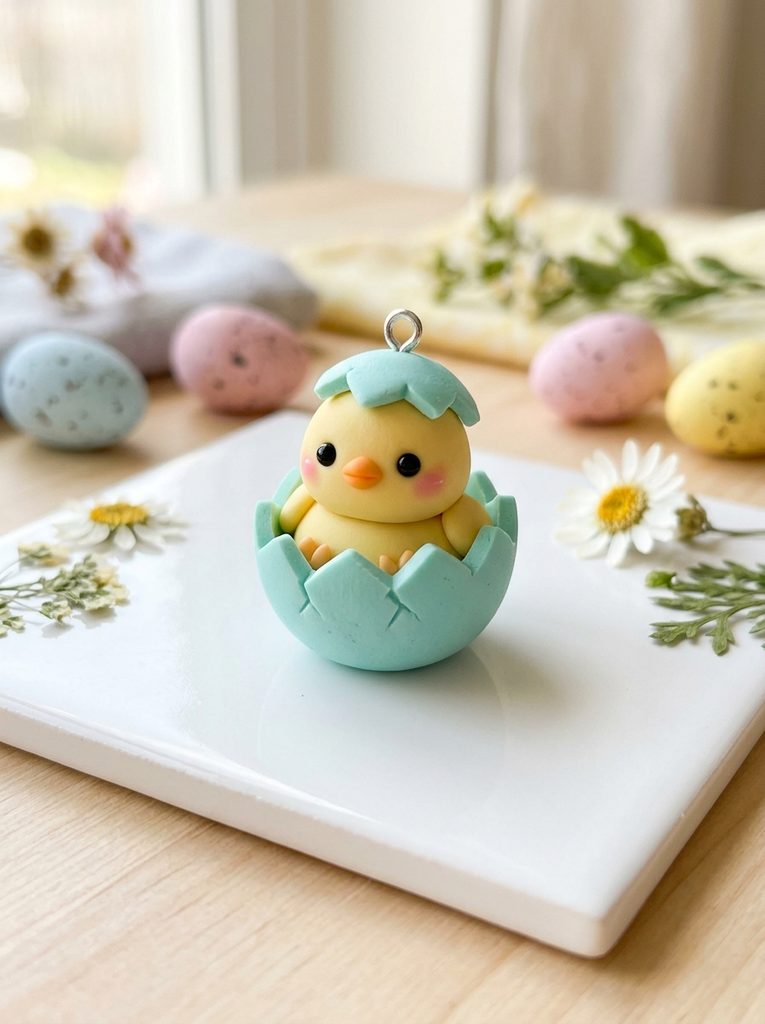
The hatching chick inside a broken eggshell is an iconic springtime symbol that naturally aligns with the plump, rounded proportions of kawaii design. This concept features a bright buttercup-yellow spherical chick body peeking out from the jagged, zigzag rim of a pastel turquoise or lavender eggshell base. The chick displays widely spaced, glossy black bead eyes, soft pink blush marks on the cheeks, and an upturned miniature orange beak that gives the character a curious, friendly personality. The white or pastel eggshell cup wraps snugly around the lower half of the yellow body, providing a sturdy, broad base that reinforces the charm structurally. Resting atop the chick’s head is a tiny matching triangular eggshell fragment, adding asymmetrical balance and narrative charm to the piece. The contrast between the smooth, matte chick body and the crisp, angled eggshell edges establishes delightful visual texture within a compact footprint.
To construct this hatching chick, condition two ounces of butter yellow polymer clay and roll a uniform three-quarter-inch sphere to form the chick head and body. Next, roll a sheet of pastel turquoise clay to a thickness of two millimeters, cutting out a small circular disc using a micro metal cutter. Wrap this disc around the lower hemisphere of the yellow ball, using a sharp craft scalpel to carve small zigzag triangles along the upper rim to simulate a cracked shell. Form a tiny orange clay cone for the beak, pressing it into the center face between two microscopic black clay spheres that serve as eyes. Sculpt a miniature curved triangular shell fragment from the turquoise clay, pressing it onto the top of the chick head with a drop of liquid clay. Insert an 18-gauge stainless steel eye pin straight down through the top shell fragment into the center core of the yellow body. Bake the charm on a ceramic tile for thirty-five minutes, allowing it to cool before applying a high-gloss glaze over the eyes.
2. Sleeping Lop-Eared Bunny with Floral Crown
Execution Process
Gentle woodland creatures paired with botanical embellishments evoke the quiet renewal of springtime landscapes, making the sleeping rabbit an enduring seasonal favorite. This design features a seated cream-colored bunny whose long, flat ears drape softly down the sides of the head, resting flush against the rounded torso. Instead of wide, open eyes, the bunny displays curved, peaceful sleeping lines applied with fine charcoal thread or painted detail, creating a serene, restful aesthetic. Crowning the rabbit’s forehead between the ears is a miniature floral wreath composed of tiny pastel pink roses, yellow buttercups, and soft green leaf nodes. The compact, seated posture creates a solid, unified structure that eliminates thin, protruding elements susceptible to snapping during everyday wear. The combination of untextured cream clay and delicate floral micro-sculpting produces an artisanal, storybook quality suited for delicate pendant necklaces or charm bracelets.
Begin by rolling a one-inch sphere of conditioned unbleached white or cream polymer clay, gently tapering the top third to create a unified head and torso form. Roll two tapered teardrops of cream clay measuring one inch in length, flattening them gently on your work tile to create the long lop ears. Attach the narrow tips of the ears to the top sides of the head, pressing the lengths flat against the cheeks using a silicone shaper to secure a strong bond. For the floral crown, roll microscopic spheres of pastel pink clay, flattening them into thin discs and rolling them tightly into spiral rosebuds. Arrange four rosebuds across the brow line between the ears, tucking tiny pointed green leaf shapes beneath the flowers with fine-point tweezers. Indent two downward-curving arcs onto the lower face with a needle tool to indicate sleeping eyes, applying a light dusting of pink chalk pastel dust to the cheeks. Insert a wire eye pin behind the floral crown, curing the assembled bunny on a level baking tile.
3. Sweet Pastel Dipped Chocolate Strawberry Bunny
How to Create
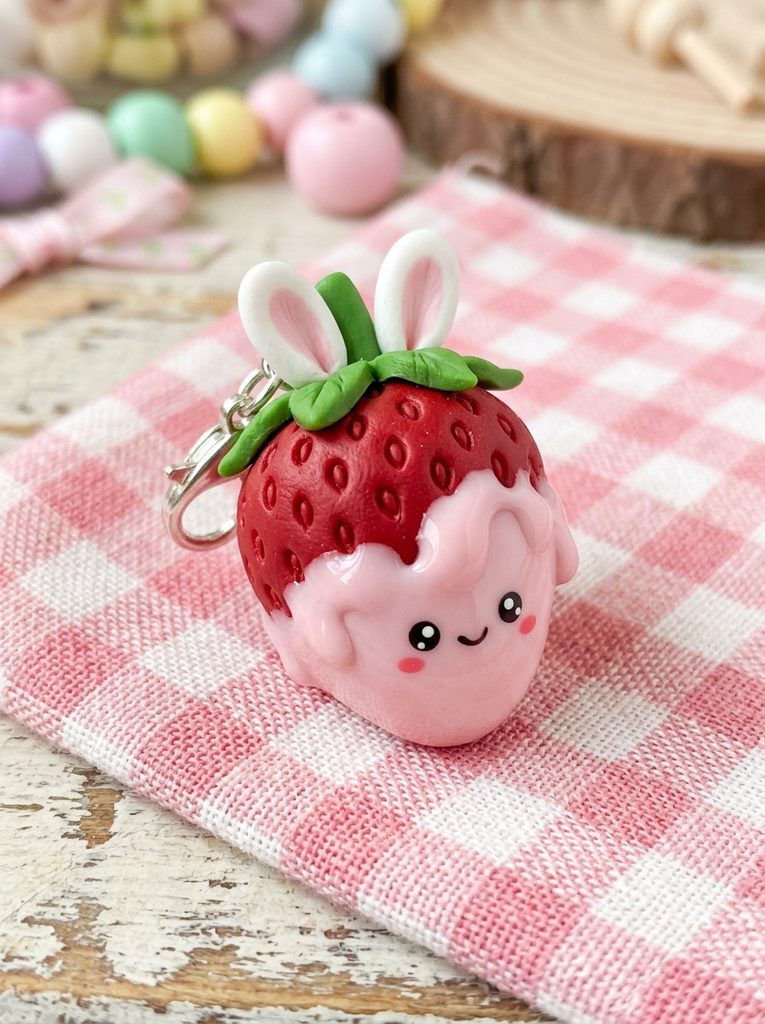
Merging classic holiday confectionery with miniature animal characteristics produces an adorable, playful design that appeals to crafters of all ages. This charm features a plump, heart-shaped red strawberry body with embossed seed indents, partially dipped in a layer of creamy pastel pink white chocolate. Two perky white bunny ears emerge from the green strawberry leafy hull, establishing an imaginative hybrid between garden fruit and holiday rabbit. A smiling kawaii face is detailed directly onto the dipped pink chocolate zone, framed by tiny white drip textures that mimic liquid confection. The glossy, dipped coating contrasts with the matte, textured fruit base, creating rich tactile appeal within a diminutive silhouette. This design serves as a delightful seasonal accent for zipper pulls, stitch markers, or festive keychain clusters.
Fabricate the strawberry by rolling a three-quarter-inch sphere of rich strawberry-red clay, pinching the bottom slightly to establish a tapered berry silhouette. Use a blunt needle tool to press uniform rows of tiny indents across the red surface to mimic natural strawberry seeds. Roll out a thin slab of pastel pink clay, cutting an irregular, wavy border along one edge to simulate a dipped chocolate coating. Wrap this pink sheet around the top half of the strawberry, pressing the seams flush against the berry base. Roll two white clay cylinders with pointed ends to form upright bunny ears, detailing the centers with thin strips of pink clay and anchoring them into the berry crown. Cut a five-pointed star from soft sage green clay to serve as the fruit hull, draping it over the top around the ears. Detail the face using black acrylic paint for the eyes and smile, insert a top eye pin, and bake thoroughly before sealing the chocolate layer with gloss varnish.

4. Golden Braided Hot Cross Bun Bear
Step-by-Step Guide
Traditional holiday baked goods carry rich cultural nostalgia, and reimagining them as cheerful animal figurines introduces modern warmth to seasonal celebrations. This concept depicts a plump, freshly baked round sweet bun shaped into a smiling bear head, complete with two rounded ears emerging from the pastry crown. Crafted from warm golden-tan clay, the bun surface is dusted with soft brown chalk pastel powders before baking to simulate oven-baked browning and crust texture. Across the forehead and down the cheeks of the bear sits a crisp, raised white icing cross, celebrating traditional holiday pastry aesthetics. The minimalist bear face, characterized by tiny dark eyes and a white snout with a brown nose, peeks out from beneath the textured glaze lines. This charming pastry miniature looks delightfully appetizing and serves as an ideal gift for baking enthusiasts or kitchen decoration displays.
To make the hot cross bun bear, roll a three-quarter-inch ball of warm tan polymer clay, flattening it slightly into a plump, rounded bun shape on your ceramic tile. Attach two small pea-sized spheres of tan clay to the upper perimeter to form the ears, smoothing the base seams carefully with a silicone tool. Use an old toothbrush or a ball of crumpled aluminum foil to texture the entire surface of the bun with microscopic pits and porous dough marks. Dust the raised edges and ear tips lightly with shaved brown and ochre chalk pastels using a soft makeup brush to create an authentic baked gradient. Roll two ultra-thin coils of bright white clay, crossing them perpendicular across the top face of the bun to represent piping icing, trimming the ends flush at the bun base. Attach a small white oval snout and detail the eyes and nose with dark brown paint. Insert an eye pin between the ears, baking the piece flat on parchment paper.
5. Kawaii Pastel Polka-Dot Decorated Egg Charm
Execution Process
Decorated eggs represent the ultimate creative canvas of the spring season, offering endless opportunities for colorful geometric patterns and expressive character art. This design showcases an upright, perfectly symmetrical egg form sculpted in soft lilac, mint, or buttercup yellow clay, adorned with tiny raised white polka dots and a smiling facial expression. A miniature pastel bow sculpted from pale coral clay sits perched at the upper apex of the egg, adding a refined, gift-wrapped dimension to the design. The smooth, uninterrupted surface of the egg provides an ideal canvas for highlighting clean, precise modeling and crisp clay placement. Because the egg form is naturally aerodynamic and free of delicate protruding limbs, it offers superior durability against everyday friction and pocket wear. This versatile charm looks lovely strung onto spring charm necklaces, beaded phone straps, or festive tabletop wire trees.
Begin by rolling a conditioned piece of pastel lilac clay into an even sphere measuring three-quarters of an inch in diameter. Roll the sphere gently between your palms with uneven pressure to taper the upper half into an authentic ovoid egg profile, pressing the bottom lightly against your work tile to create a flat, stable standing base. Roll several dozen microscopic spheres of opaque white clay, pressing them gently across the egg surface in an alternating, spaced polka-dot pattern using a silicone stylus. Form two tiny black clay discs for the eyes, placing them across the lower third of the egg, and indent a small smiling arc between them with a needle tool. Sculpt a miniature ribbon bow by joining two small triangular clay loops with a central band, adhering it to the top tapered point of the egg with a drop of liquid clay. Thread a wire eye pin through the center of the bow down into the egg body, baking the piece upright on the tile for thirty-five minutes.

6. Miniature Garden Wheelbarrow with Tiny Carrots
How to Create
Garden motifs capture the agricultural roots and outdoor freshness of the spring season, celebrating early vegetable harvests and green growth. This project features a miniature, rustic wooden wheelbarrow crafted from textured terracotta or soft brown clay, carrying an abundant load of hand-sculpted baby carrots. The front of the wheelbarrow features a functional-looking clay wheel and two rear support legs, providing a grounded, three-dimensional profile. Peeking out from the cargo bed are four or five bright orange miniature carrots, topped with feathery green foliage that spills over the wooden side slats. The front panel of the wheelbarrow is adorned with a tiny smiling kawaii face, personifying the garden implement with friendly character. The balance between the structured wooden wagon lines and the organic, clustered vegetables creates an eye-catching, dimensional charm that stands out within any seasonal collection.
To construct the wheelbarrow, roll a slab of soft brown clay to a two-millimeter thickness, using a tissue blade to cut a rectangular base and four low side panels with scored wood-grain textures. Assemble the panels into an open-topped box on your work tile, securing the interior joints with thin coils of liquid clay. Cut a small clay disc for the front wheel and two small rectangular posts for the rear legs, attaching them beneath the cart base. Sculpt five miniature tapered cones from bright orange clay, pressing microscopic horizontal lines across each root to mimic carrot skin, and top each with a tiny three-leaf cluster of vibrant green clay. Pile the carrots into the wheelbarrow bed, securing them together with drops of liquid clay so they form a unified, solid mass. Paint two smiling eyes and a small mouth onto the front wood panel, insert an eye pin into the back upper rim, and bake the assembled cart on a ceramic tile.
7. Fluffy Pastel Cloud with Draped Easter Egg Garland
Step-by-Step Guide
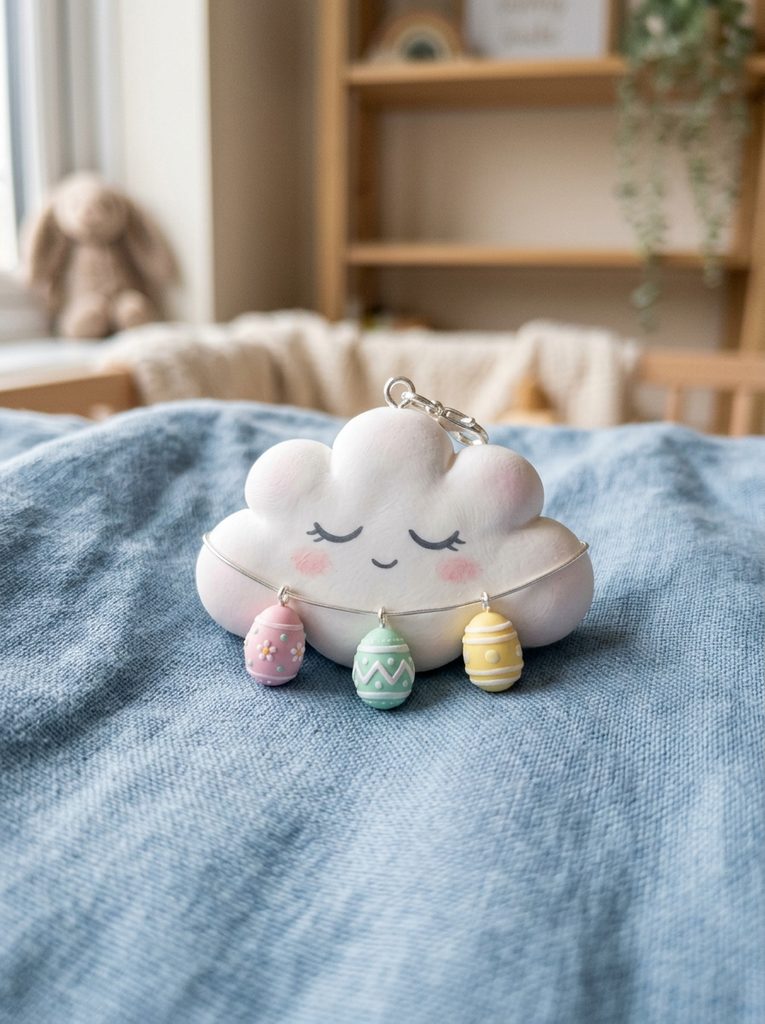
Celestial weather elements combined with festive decorations bring an airy, whimsical atmosphere to seasonal jewelry, contrasting pillowy volumes with colorful micro-accents. This charm features a puffy, smiling white cloud cushion sculpted with soft overlapping lobes, accented by a tiny festive garland strung beneath its base. Suspended across the lower curve of the cloud on a fine wire or clay cord is a row of three miniature, brightly colored Easter eggs in pastel pink, yellow, and mint. The peaceful sleeping face on the cloud, rendered with closed curved eyelashes and soft pink blush, introduces a calming aesthetic that balances the colorful eggs below. The broad, horizontal shape of the cloud provides an expansive foundation that distributes stress evenly across the charm, while the dangling eggs introduce subtle kinetic motion. This design is exceptionally suited for decorative brooches, planner clips, or statement necklace centerpieces.
Begin by rolling five graduated spheres of pure white polymer clay ranging from one-quarter to one-half inch in diameter, clustering them together on a ceramic tile in an overlapping horizontal row. Smooth the interior seam lines using a silicone shaper while leaving the outer curves puffy and distinct, flattening the back of the cloud slightly against the tile. Indent two downward-curving arcs onto the central white lobe for the sleeping eyes, applying soft pink chalk pastel dust to the cheeks with a small blending brush. Sculpt three tiny, rice-grain-sized oval eggs from pastel pink, mint, and yellow clays, decorating them with microscopic dots or stripes. Connect the three miniature eggs together along a short piece of 24-gauge craft wire, forming small loops at the wire ends. Insert the wire loops into the bottom corners of the cloud, securing them with liquid clay. Insert a top eye pin into the center cloud lobe, curing the entire assembly flat on parchment paper.

8. Whimsical Mushroom Bunny with Moss Accents
Execution Process
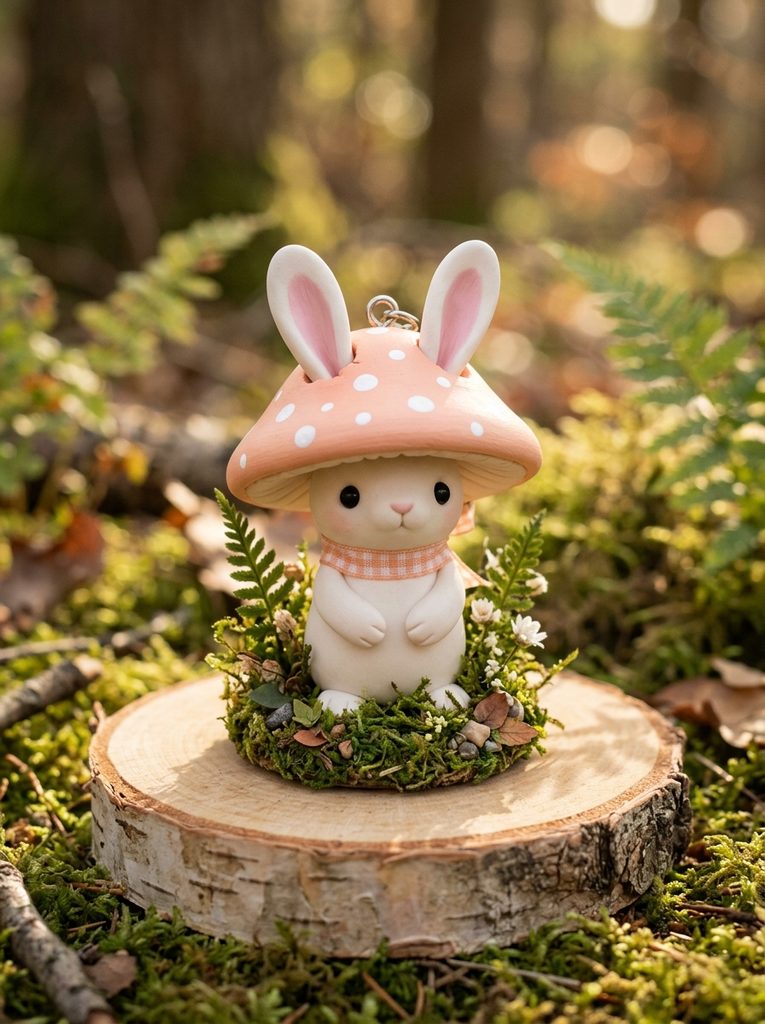
Fairy-tale woodland aesthetics blend naturally with spring celebrations, combining traditional holiday rabbits with whimsical forest flora. This creative concept depicts an upright white bunny character wearing a wide, domed toadstool cap as a decorative bonnet. The mushroom cap is sculpted from soft pastel peach or lilac clay, adorned with raised white polka dots and finished with an authentic, textured underside gill pattern. Two long bunny ears poke upward through pre-cut slits in the mushroom cap, standing tall with soft pink inner ear linings. At the base of the bunny, tiny patches of textured green clay simulate woodland moss, grounding the figurine with earthy realism. The contrast between the smooth, satin-finished rabbit body and the sprawling, colorful mushroom hat establishes rich visual narrative and charming character. This sturdy, low-profile design serves as an ideal desk companion, zipper pull, or decorative pocket charm.
Fabricate the bunny body by rolling a one-inch cylinder of white clay, rounding the top into a head and flattening the base so it stands upright securely. For the mushroom hat, roll a three-quarter-inch sphere of pastel peach clay, pressing your thumb into the underside to hollow out a wide, shallow dome. Use a needle tool to score radial gill lines inside the hollow under-cap before pressing it onto the bunny head with a drop of liquid clay. Sculpt two upright white ears, cutting two small slits through the peach mushroom cap with a scalpel and inserting the ears firmly into the underlying head. Add flat white clay polka dots to the cap surface, and apply tiny patches of green clay textured with a stiff needle around the bunny’s base to mimic forest moss. Detail the facial features using black acrylic ink, insert an eye pin through the center of the cap, and bake the upright figure supported by a ceramic stand.
9. Miniature Braided Easter Challah Loaf with Dyed Eggs
How to Create
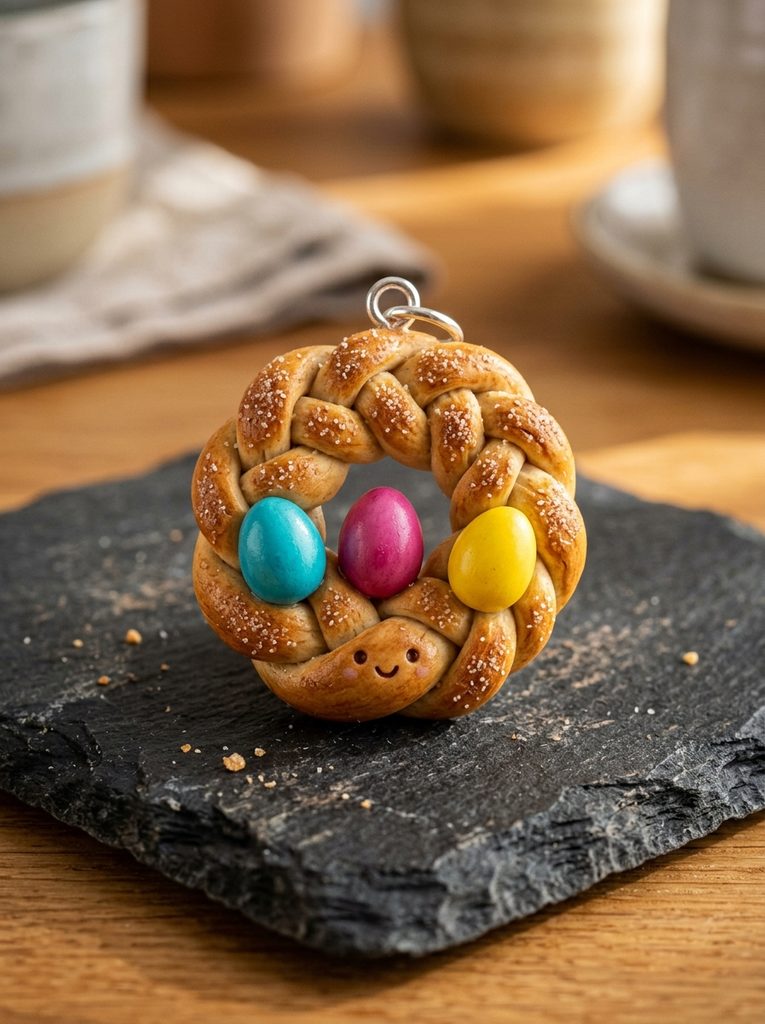
Traditional festive yeast breads, woven into intricate braided wreaths with colorful dyed eggs nestled inside the dough, represent a rich culinary craft across spring cultures. This charm replicates that intricate baking art in miniature, showcasing a three-strand braided circular wreath of golden-brown pastry clay. Tucked securely between the woven strands of the dough are three miniature dyed eggs in contrasting spring shades, such as turquoise, magenta, and sunny yellow. The surface of the woven loaf is detailed with realistic golden-brown baking shading, topped with microscopic white clay sprinkles to simulate coarse sparkling sugar or sesame seeds. A tiny, cheerful face peeks out from the central dough intersection, blending cultural culinary appreciation with friendly kawaii styling. The circular wreath structure offers high mechanical strength, as the continuous loop prevents delicate ends from snapping off during active use.
To assemble the braided loaf, condition two ounces of warm tan clay and roll three long, uniform coils measuring three millimeters in diameter and four inches in length. Align the three coils at one end, pinching them together, and carefully braid them into a tight, even three-strand plait. Join the ends of the braid together to form a circular wreath, pressing the seam flat and texturing it with a needle tool to match the dough grain. Sculpt three microscopic oval eggs from bright pink, blue, and yellow clays, pressing them firmly into the crevices between the braided dough strands with small dabs of liquid clay. Dust the raised dough curves with shaved ochre and brown chalk pastels to create an authentic baked coloration, scattering microscopic white flecks over the surface for sugar sprinkles. Paint a tiny smiling face on the front loop of the braid, insert an eye pin through the top dough join, and bake the wreath flat on a ceramic baking sheet.

10. Pastel Chick and Tulip Garden Flowerpot
Step-by-Step Guide
Floriculture and newly emerging garden plants capture the spirit of spring renewal, making potted plant designs a delightful addition to holiday charm collections. This design features a miniature terracotta-colored flowerpot holding a plump, happy yellow chick nestled among newly bloomed tulips. The flowerpot showcases an authentic flared rim, rich earthen-orange coloration, and a smooth, clean exterior that supports the entire arrangement. Emerging from the rich brown potting soil within the pot is a bright yellow chick head flanked by two delicate, closed tulip buds in pastel pink and lavender. The combination of agricultural pottery, botanical floristry, and animal character art produces a multifaceted scene within an exceptionally compact footprint. The sturdy container walls cradle and protect the delicate interior stems, making the completed charm durable and resistant to handling damage.
Begin by shaping the flowerpot using terracotta-toned polymer clay, rolling a slightly tapered cylinder three-quarters of an inch tall and wrapping a flat clay strip around the top to form the characteristic flared rim. Fill the interior of the pot with dark brown clay textured with a coarse needle to simulate moist potting soil. Roll a half-inch sphere of bright yellow clay to form the chick head, pressing it into the center of the soil base so the lower third is submerged. Add a tiny orange triangular beak and two black clay beads for eyes, brushing the cheeks with pink pastel dust. Sculpt two miniature tulip blossoms from pastel pink and lavender clay, mounting them on short, sturdy green clay stems nestled alongside the chick. Insert a heavy-duty stainless steel eye pin through the center of the chick head deep into the base of the terracotta pot, securing it with liquid clay. Bake the flowerpot assembly upright on a ceramic tile, coating the chick and tulip blooms with gloss varnish once cooled.

Common Beginner Mistakes and How to Avoid Them
The most critical technical error in miniature charm crafting involves under-baking the finished pieces out of fear of scorching delicate pastel clays. Under-cured polymer clay remains chalky, brittle, and prone to snapping when subjected to the everyday kinetic stress of wearable jewelry or keychains. Prevent this by using an independent, calibrated oven thermometer to verify temperature accuracy, curing high-strength polymer clays for the maximum duration recommended by the manufacturer. Another frequent mistake is inserting smooth, straight eye pins into the clay without mechanical anchors, which causes the hardware to pull free under minimal tension. Always bend the embedded tip of the wire eye pin into a zigzag or hook shape with round-nose pliers and coat it with liquid clay before inserting it into the piece. Beginners also frequently contaminate pale pastel and white clays with airborne dust, pet hair, and lint. Keep your work tile clean by wiping tools with isopropyl alcohol, washing hands regularly, and rolling a scrap piece of light-colored clay across your working surface to pick up stray debris before handling project materials. Finally, avoid applying thick layers of solvent-based sealants or clear nail polish over cured pieces, as non-compatible varnishes become sticky, yellow, and degraded over time; utilize certified water-based polymer glazes or UV resin exclusively.
Practical Tips for Better Results
Achieving professional, boutique-quality finishes on miniature polymer clay charms relies on meticulous surface finishing and disciplined curing practices. Always utilize a high-density ceramic floor tile or thick glass cutting mat as both your primary sculpting surface and your baking tray; this eliminates the need to peel raw, delicate clay shapes off your desk, preventing unwanted fingerprint dents and warped outlines. To eliminate tedious post-bake sanding on tiny charms, smooth away tool marks and finger impressions on raw clay using a soft paintbrush dipped lightly in isopropyl alcohol before placing items in the oven. Invest in high-grade silicone-tipped shaping tools, which allow you to blend seams, smooth transitions, and press tiny accents into place without leaving hard tooling marks. If working on microscopic facial features, apply black liquid polymer clay with a fine needle tool instead of trying to roll microscopic clay dots, ensuring razor-sharp eye and mouth definition. After curing and cooling, gently wash your pieces with warm soapy water to remove any surface release agents before applying protective topcoats. Finally, applying an ultra-thin coat of UV-curing craft resin over painted facial details locks in pigment and provides lasting protection against everyday friction.
Styling, Presentation, or Organization Ideas
Integrating handcrafted kawaii Easter charms into your seasonal celebrations elevates their visual impact, whether for craft fair merchandising, home staging, or creative social sharing. Display your finished miniature charms on rustic pastel ceramic egg trays, light-colored wooden display ledges, or miniature woven willow baskets lined with crinkle paper to highlight their diminutive scale and seasonal charm. For practical home decor applications, suspend the charms from a painted white manzanita branch centerpiece arranged inside a ceramic pitcher, creating an interactive Easter tree display on your dining table. If preparing pieces as wearable gifts, mount the clay elements onto silver-plated keychain clips, ball-chain necklaces, or delicate pastel phone straps accented with matching glass crystal beads and satin ribbon bows. Present your handcrafted creations inside clear, miniature acrylic gift boxes lined with pastel shredded crinkle paper, tying the packaging with iridescent organza ribbon to echo the cheerful spring theme within. When styling scenes for photography, use diffused morning daylight, clean linen fabrics, and complementary craft materials like loose pastel ribbons and vintage glass jars to create an inviting, aesthetic composition.
Budget or Time Planning
Executing a comprehensive collection of kawaii Easter charms requires structured time management and smart material purchasing to maintain high creative efficiency. Minimize raw material expenses by purchasing large economy blocks of white, translucent, and primary-colored clays; you can easily custom-mix any desired pastel shade by blending small amounts of saturated pigment into neutral white clay. Organize your crafting time into focused, modular production stages: reserve the first session for cleaning tools, blending custom pastel palettes, and conditioning clay slabs; use a second uninterrupted session for sculpting and assembling figures; and dedicate a final session to baking, detailing faces, and assembling metal hardware. Simple designs like the polka-dot egg or hatching chick require approximately twenty minutes of active sculpting, whereas complex, multi-layered designs like the wheelbarrow or braided loaf require forty minutes per piece. Store uncured custom clay mixtures inside labeled, air-tight polypropylene plastic containers or clean wax paper wraps, shielding the material from heat and direct sunlight to prevent premature hardening. Planning your creative batches around unified color palettes ensures minimal clay waste, streamlined tool cleanup, and consistent aesthetic harmony across all finished pieces.
Creative Expansion and Advanced Inspiration
Once you have mastered foundational kawaii sculpting and miniature charm construction, explore advanced variations to expand your decorative portfolio across broader holiday applications. Transform simple freestanding charms into practical lifestyle accessories by attaching heavy-duty neodymium magnets to the backs of flat figurines using two-part industrial epoxy, turning your creations into cheerful organizational tools for refrigerators and magnetic memo boards. Experiment with advanced surface embellishments, such as applying liquid clay glazes, chameleon mica pigments, and glow-in-the-dark powders alongside your pastel clays to achieve luminous, eye-catching finishes. You can also explore multi-media crafting by incorporating cast resin water droplets, miniature dried florals, and embroidered textile ribbons into your clay displays to produce rich mixed-media accents. Consider scaling up your favorite miniature characters into functional desk accessories, such as sculpted place card holders, ring cones, and decorative memo clips that brighten everyday workstations. Following your creative exploration, document your unique clay formulas, custom color ratios, and dimensional sketches in a dedicated studio journal, building a personalized design archive that streamlines future creative projects and ensures consistent, professional results across every handmade collection.