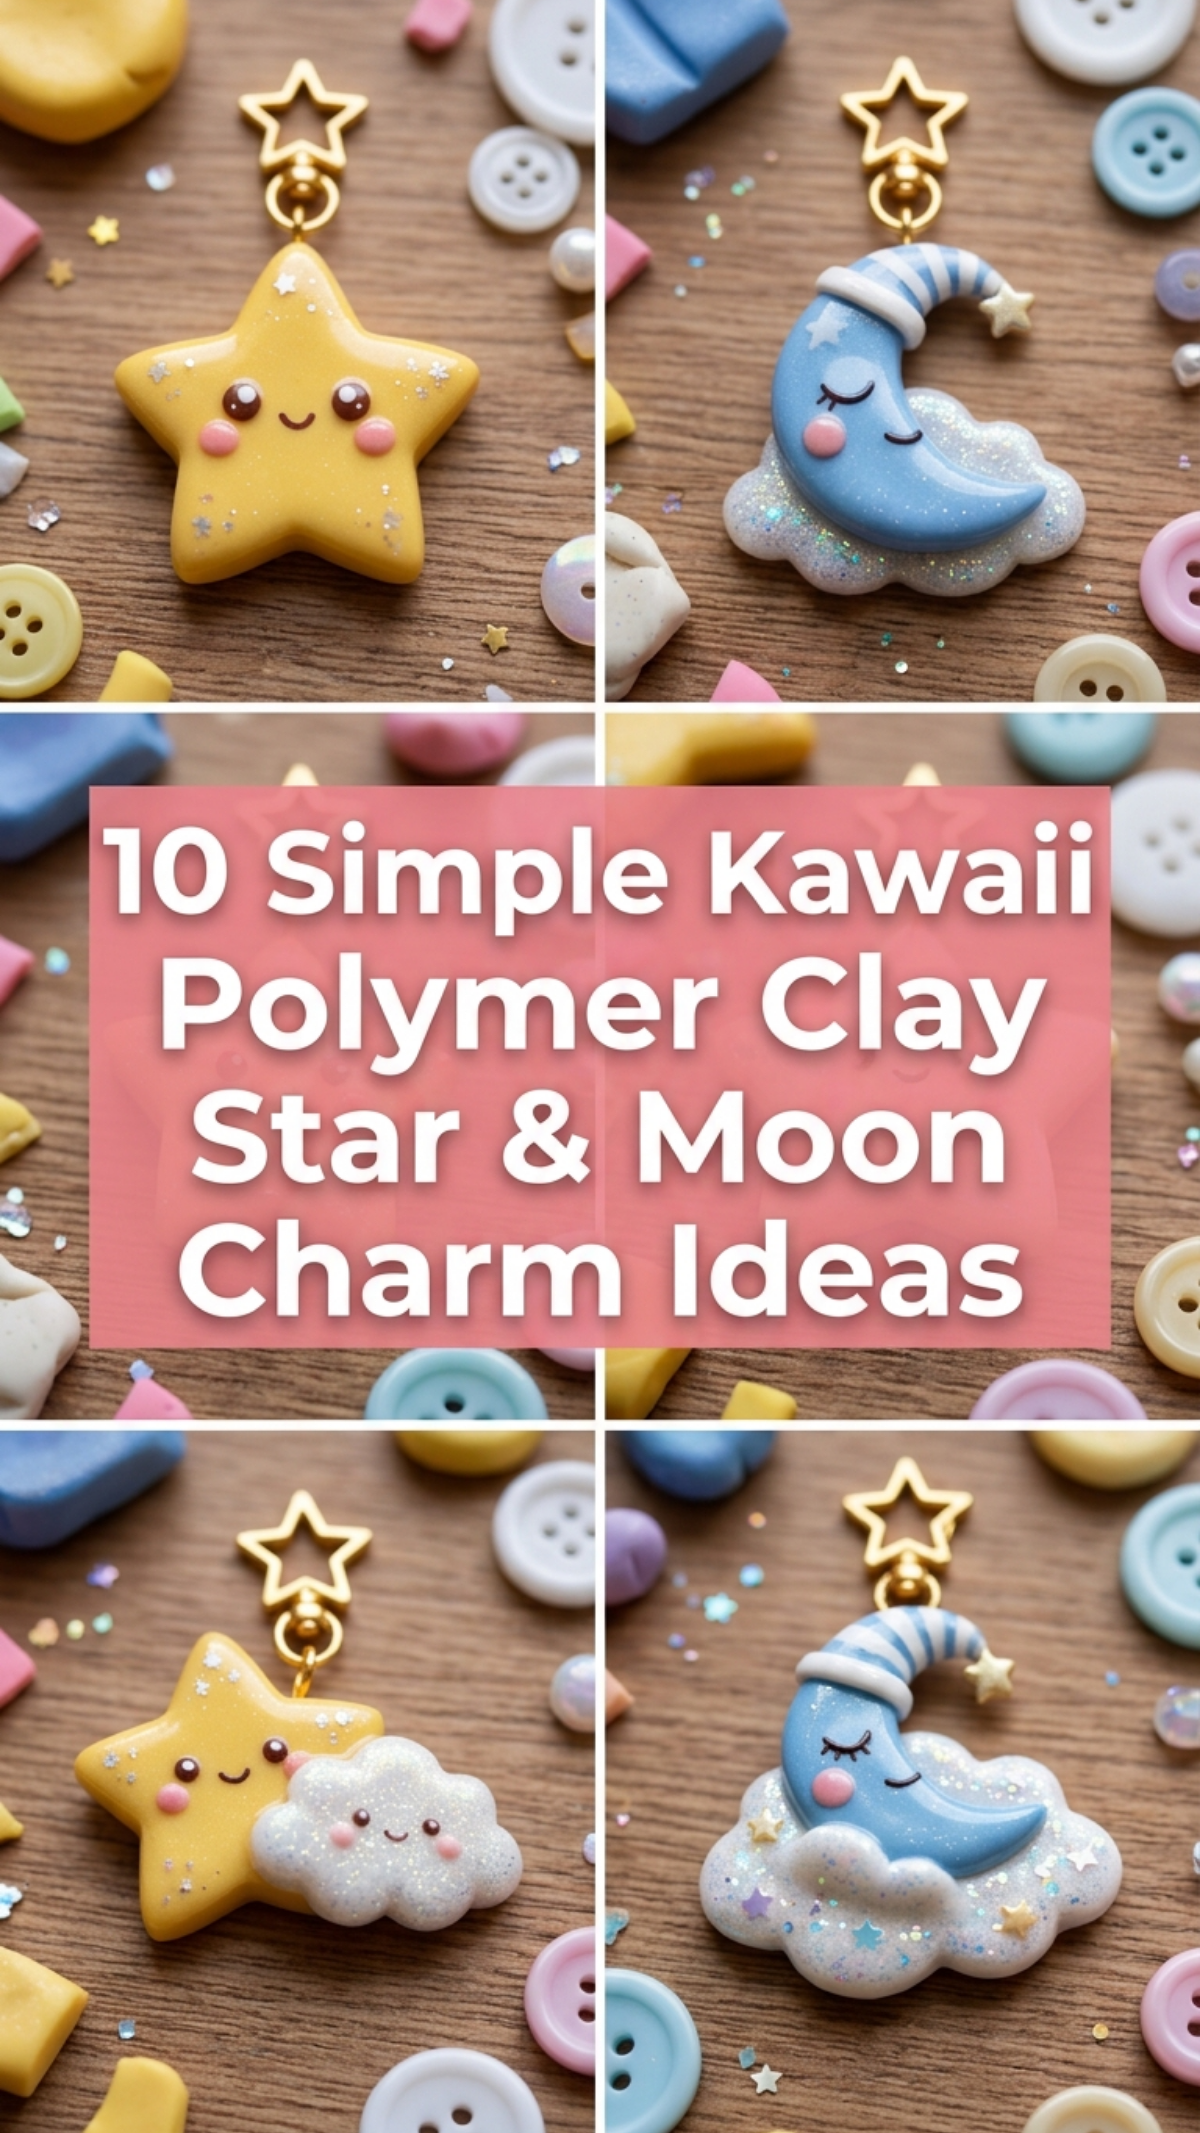
Handcrafted celestial accessories continue to hold a prominent place within modern craft styling, inspiring makers who appreciate subtle character accents and accessible modeling techniques. This step by step tutorial explores ten original kawaii polymer clay star & moon charm ideas, providing clear guidance for creating celestial accessories, keychains, and small decorative pieces. Readers will learn how to mold harmonious geometric foundations, blend gentle pastel color schemes, sculpt micro-scale facial expressions, and secure hanging hardware with structural confidence. Exploring these creative ideas allows artisans of all backgrounds to master essential miniature sculpting methods that adapt seamlessly across broader jewelry making, personalized gifting, and DIY stationery projects. Working with bakeable polymer compounds requires minimal initial equipment, turning a standard kitchen setting into an efficient creative studio. By following the systematic instructions throughout this guide, you will gain an understanding of proper clay conditioning, seam blending, metallic powder integration, and balanced oven curing. The resulting handmade charms function reliably as everyday carry embellishments, personalized planner dangles, or minimalist gift accents, combining reliable mechanical resilience with a soft, whimsical character finish.
Why This Idea Is Trending or Useful
Celestial themes have transitioned from traditional novelty items into refined modern design accents favored across popular inspiration boards. The enduring appeal of star and moon motifs stems from their balance of universal symbolism, gentle geometric curves, and easy adaptability to Japanese kawaii design aesthetics. For beginners seeking budget ideas, miniature celestial charms offer an accessible entry point because a single block of craft clay yields dozens of miniature finished items. Crafting small clay pieces requires little workspace footprint and simple hand tools, making it convenient for individuals pursuing creative projects at a home desk. Modern craft enthusiasts value the functional versatility of these accessories, styling them as phone charms, planner paperclip toppers, delicate necklace pendants, or botanical stake markers. Sculpting simplified curves and symmetrical star points also builds foundational manual dexterity, teaching novices how to maintain clean surfaces and control clay elasticity. The calm, repetitive actions involved in kneading, shaping, and detailing these figures deliver a grounded, focused crafting experience while producing durable keepsakes that match current creative aesthetics.
Materials and Preparation
Reliable sculpting outcomes rely on thorough workspace preparation, clean hands, and quality crafting materials. Essential supplies include professional-grade oven-bake polymer clay in pastel yellow, pale lavender, soft blush, mint cream, warm white, and translucent varieties, supplemented by fine-grade pearlescent mica powders. Hand tools should feature an acrylic rolling cylinder, double-ended silicone shaping pens, fine stainless steel ball styluses, precision craft needles, sharp cutting blades, and durable stainless steel eye pins. Work on a clean, non-porous ceramic tile or tempered glass sheet to avoid dust contamination and ensure your raw figures lift without distortion. Before handling light-toned clays, wash your hands thoroughly to remove stray fibers, and clean all metal tools with isopropyl alcohol. Condition each block of clay by rolling, folding, and kneading it until it stretches smoothly without cracking along the edges. Pre-plan your color schemes and hardware placements before cutting clay segments to avoid cross-contamination of pigments. Set up an accurate external oven thermometer inside your domestic baking unit to verify that internal temperatures remain stable throughout the entire curing schedule.
1. Cloud-Cushioned Sleeping Crescent
Step-by-Step Guide
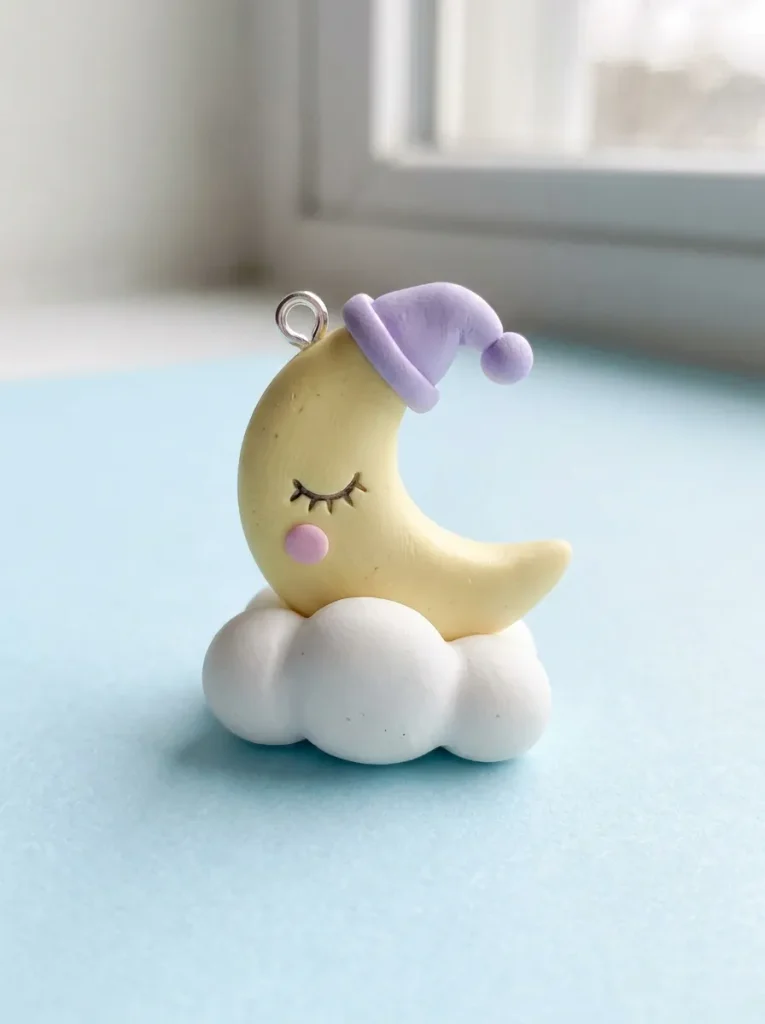
The cloud-cushioned sleeping crescent blends soft cloud shapes with a peaceful crescent moon figure to produce a calming bedside or planner charm. The base silhouette features a pale butter-yellow crescent moon resting gently atop a three-lobed puffy white cloud foundation. The moon’s face showcases closed, curved eye markings, a micro-sized blush dot on each cheek, and a small sleeping cap angled over its top point. This design relies on rounded, soft contours rather than sharp geometric corners, giving the celestial character a friendly, approachable form. The contrast between the smooth yellow surface of the moon and the rounded lobes of the cloud provides tactile variety while keeping the overall piece durable. The wide surface connection between the cloud and the crescent provides strong mechanical support, preventing thinner components from bending or detaching during everyday keychain handling.
To create this charm, condition equal portions of soft yellow and bright white clay until elastic. Roll the white clay into three equal spheres, pressing them together on your ceramic tile and smoothing the base seams to form a flat, puffy cloud base. Roll the yellow clay into an elongated cylinder with tapered ends, bending it around a round cutter into a clean crescent arch. Press the curved moon into the cloud lobes, applying a tiny drop of bakeable liquid clay at the junction to guarantee adhesion. Sculpt two tiny pink clay rounds for cheeks, positioning them below curved lines pressed into the clay with a fine needle tool for resting eyes. Roll a micro-cone of lavender clay for the nightcap, curving the tip forward over the upper moon tip. Insert a trimmed eye pin vertically down through the cap and into the moon core, then bake on your flat tile.
2. Twinkling Pastel Star Cluster
Execution Process
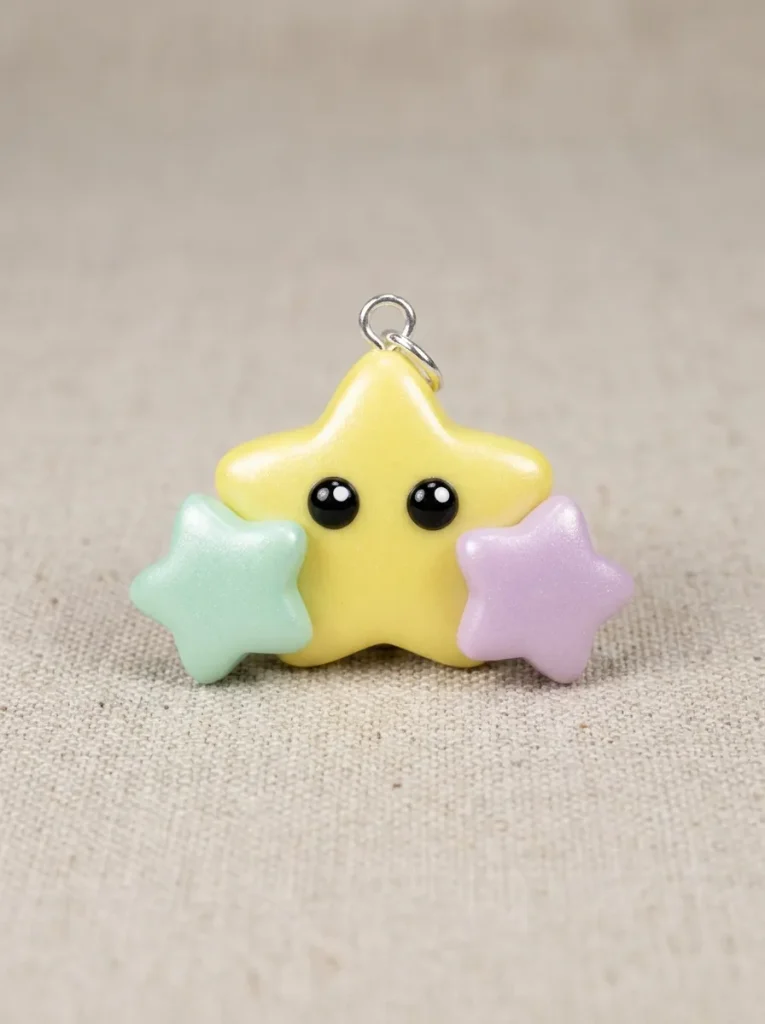
The twinkling pastel star cluster brings three graduated star shapes together in an overlapping, dynamic arrangement that catches the eye through color harmony. The layout centers on a soft lemon-yellow star accompanied by smaller companions in pastel mint and soft lilac, arranged in an ascending cluster. Each star features rounded tip points and soft domed centers, avoiding sharp edges in keeping with the gentle kawaii style. The central star carries wide, curious pupil eyes and tiny white catch-light spots that establish an alert character expression. This layered approach teaches crafters how to build stable, multi-element charms without introducing excess bulk or delicate connection joints. The resulting piece is flat-backed, making it exceptionally functional as a phone strap dangle or decorative hair accessory base that sits flush against flat surfaces.
Begin by rolling out lemon, mint, and lilac clay into sheets of three-millimeter thickness using your acrylic roller. Use a miniature five-point star cutter to stamp out one large yellow star and two smaller secondary stars, rounding off any sharp point edges with your fingertips. Arrange the stars on your work tile so the lilac and mint stars tuck partially behind the lower points of the central yellow star. Blend the contact points at the back with a flat silicone tool, ensuring a secure physical weld across all three components. Detail the main yellow star by indenting two eye sockets with a ball stylus, inserting tiny black clay spheres, and adding micro-dots of white clay for highlights. Dust the surface lightly with clear pearl mica powder using a dry cosmetic brush. Insert an eye pin between the top two points of the center star, then cure the piece according to manufacturer directions.
3. Shimmering Starlight Jar Pendant
How to Create
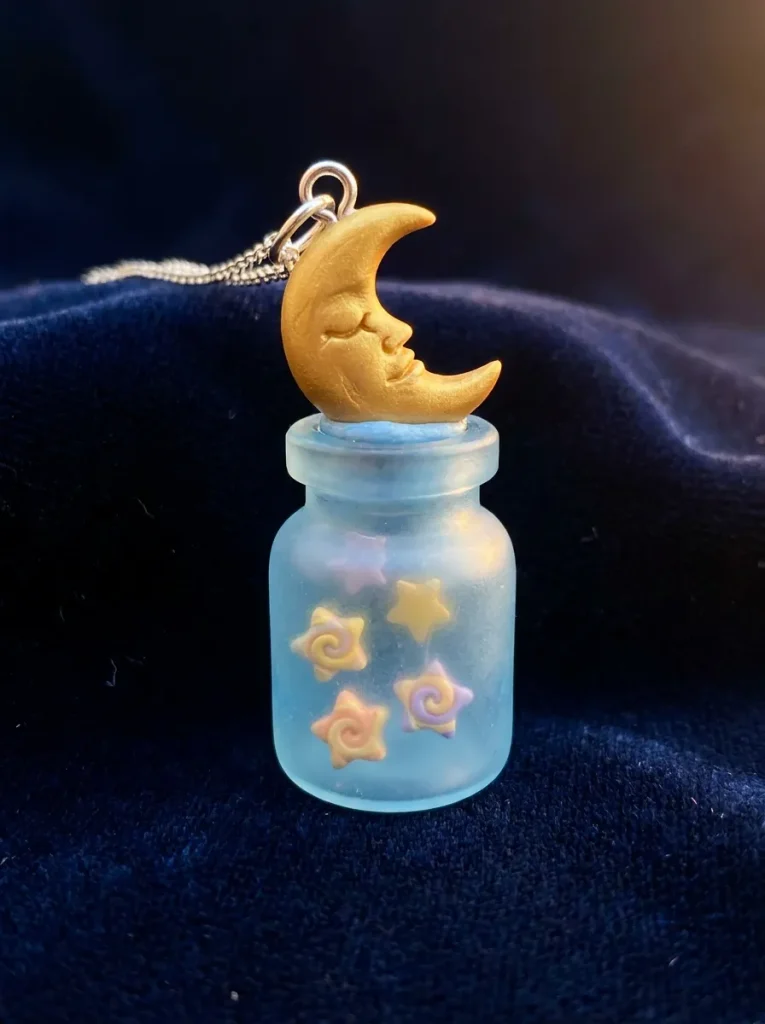
The shimmering starlight jar charm simulates a miniature glass apothecary bottle filled with tiny luminous stars, topped by a sleeping crescent moon stopper. The jar base uses translucent polymer clay tinted with a faint wash of sky-blue pigment, giving the piece visual depth and light-passing clarity. Inside the jar silhouette, multiple micro-stars in pale yellow, peach, and lavender appear suspended as if floating in space. A small, golden crescent moon forms the jar lid, creating a unified celestial scene contained within a tidy geometric border. This design introduces translucent modeling techniques, showing makers how clay density variations create rich visual layers in miniature pieces. The self-contained rectangular profile protects internal components, resulting in a dependable, everyday accessory that resists accidental snagging or chipping.
Start by rolling a three-millimeter thick slab of translucent clay mixed with a minute speck of blue pigment to form the jar body. Cut a neat rectangle with rounded bottom corners, smoothing the cut edges with a damp craft swab. Roll tiny crumbs of yellow, peach, and lavender clay into microscopic spheres, pinching five tiny points onto each to produce micro-stars, and press them flat onto the jar face. Lay an ultra-thin sheet of clear translucent clay over the stars, burnishing it down gently to seal the star elements inside the jar structure. Sculpt a curved crescent moon from metallic gold clay, mounting it across the top neck of the jar using liquid clay. Add two curved closed-eye indentations to the moon lid using a needle tool. Push a silver eye pin straight down through the center of the golden moon into the jar body, then cure on a baking sheet.
4. Star-Draped Luna Moth
Step-by-Step Guide
The star-draped luna moth pairs celestial night symbols with insect anatomy, producing an imaginative charm suited for nature-inspired jewelry collections. The body features a plump, mint-green caterpillar torso, crowned with curved feathery antennae and wide, rounded moon wings. Each lower wing extension curves downward into an elegant tail terminating in a miniature sculpted star drop. The upper wings display inlaid pale yellow crescent moon markings that sit completely flush with the mint base, showcasing smooth decorative clay inlay work. This design balances whimsical fantasy styling with clean symmetry, making it a favorite for crafters who enjoy methodical, balanced construction. The connected wing structure provides reliable surface area, ensuring the delicate star drops remain anchored without breaking under light tension.
Roll a smooth oval of mint-green clay for the body, adding light horizontal rings across the lower half with a blunt needle tool. Roll out a matching mint slab to a two-millimeter thickness, using a sharp blade to cut two wide, symmetrical moth wings with elongated, rounded tail tips. Cut two miniature crescent shapes from pale yellow clay, pressing them firmly into the wing surfaces and smoothing the edges flush using an acrylic roller. Form two small yellow five-point stars, attaching them directly to the rounded tips of the lower wing tails. Secure the central torso between the wings using liquid clay along the seam. Add two micro-coils of white clay curled outward at the head for antennae, and indent simple dot eyes on the face. Insert an eye pin down through the head between the antennae before baking flat.

5. Wandering Cosmic Star Wand
Setup Method
The wandering cosmic star wand adapts classic magical accessory designs into a sturdy miniature pendant. The central focus is a puffed, golden-yellow star with a happy facial expression, mounted on a spiraled pastel handle adorned with miniature orbiting planetary rings. A tiny, smooth lavender moon wraps snugly around the base of the star, reinforcing the connection between the star head and the wand handle. This design provides practical training in structural reinforcement, showing how to balance a top-heavy charm using internal wire supports. The interplay between pastel purple, soft gold, and clean white gives this charm a classic anime-inspired look that appeals to kawaii collectors and fantasy stationery fans alike. The solid handle provides an easy anchor point for jump rings, tassels, or phone strap loops.
Prepare a two-inch segment of straight twenty-gauge craft wire to serve as an internal spine, which prevents the wand shaft from warping during baking. Roll a thin cylinder of white clay, wrapping a spiral coil of lavender clay around it, then slide this composite layer over the lower half of the wire. Model a plump, double-sided star from yellow clay, pressing the top exposed wire directly into its base with a drop of liquid clay. Sculpt a slender lavender crescent moon, wrapping its curved horns around the lower joint where the star meets the wand shaft. Add friendly black dot eyes and pink blush circles to the star face. Use an acrylic ball stylus to smooth all joining seams around the wire base. Form an eye loop at the exposed top wire tip using round-nose pliers, then bake the assembly vertically in an oven-safe support block.

6. Moonlit Star Blanket Hammock
How to Create
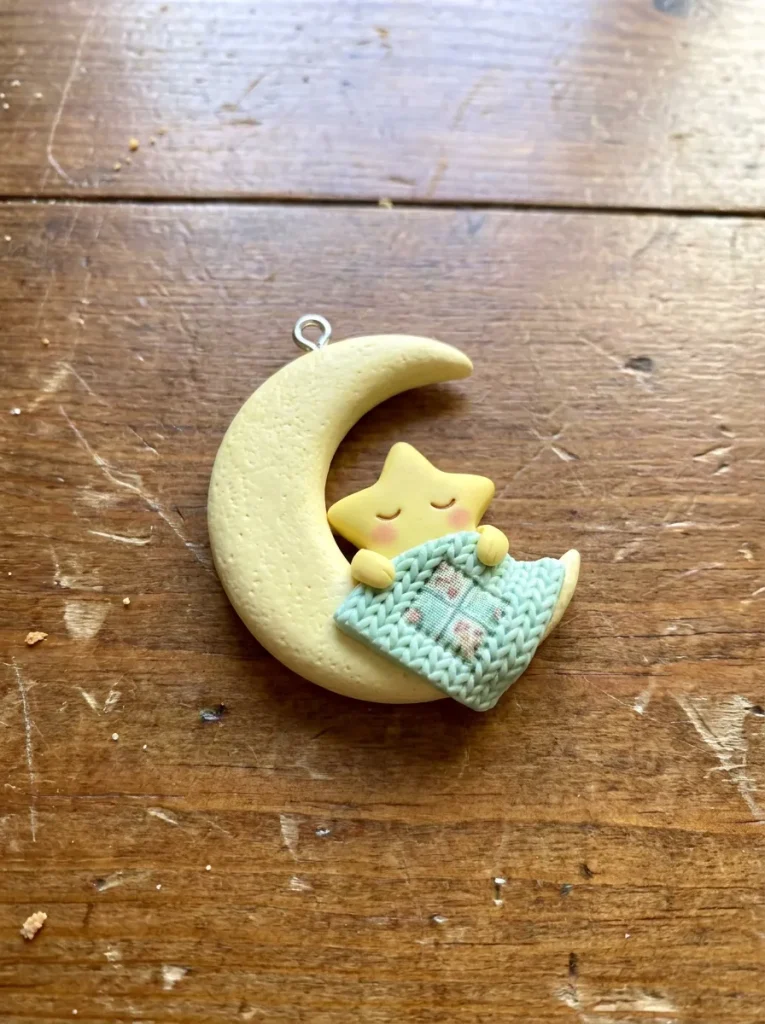
The moonlit star blanket hammock captures a restful narrative scene within a compact, balanced jewelry footprint. The structure features a large, reclining pale yellow crescent moon that acts as a cradle, holding a small sleeping star character tucked beneath an embossed mint-green quilt. The star’s head peaks out over the blanket edge with closed crescent eyes, while its small hands grip the fold of the quilt. This design demonstrates how to layer separate clay slabs to create the illusion of three-dimensional depth within a small space. The solid crescent frame encloses and supports the interior characters, producing an exceptionally durable charm that resists catching on clothing threads. The calm composition makes this design well-suited for relaxing home decor accents, curtain ties, or bedside zipper pulls.
Roll a thick slab of pale yellow clay, cutting out a wide, sweeping crescent shape that sits steadily on its lower curve. With an acrylic tool, hollow out a shallow recess in the inner curve of the crescent to receive the sleeping star figure. Shape a small yellow star with rounded points, nestling it into the prepared recess with a dab of liquid clay. Roll out a thin sheet of mint clay, texturing its surface with a fine cross-hatch fabric pattern using a clean needle tool, and drape this blanket over the lower half of the star. Sculpt two micro-ovals of yellow clay to serve as little hands resting on the blanket trim. Indent resting eye lines on both the moon and the sleeping star, then insert an eye pin through the upper horn of the crescent moon before baking.

7. Pastel Meteor Trail Dangle
Execution Process
The pastel meteor trail dangle uses vertical movement and kinetic assembly to create a lively accessory that catches the light as it sways. The top element consists of a bright, smiling yellow star charm, from which three cascading curved vapor trails descend in shades of blush, lavender, and sky blue. The vapor trails taper naturally toward the bottom, ending in tiny round stardust baubles that swing independently on linked metal eye pins. This multi-piece design introduces articulated assembly techniques, showing how to divide a larger concept into smaller linked parts for better durability. The flowing lines and balanced color gradients give the charm a graceful, dynamic appearance that works especially well on car rearview mirrors, bag clasps, or long pendant necklaces.
Sculpt the top star by molding yellow clay into a plump, rounded five-point star, pressing two small black bead eyes into the front and blushing the cheeks with dry pastel powder. Pierce a vertical hole through the star with a needle tool to accommodate hardware later. For the lower trails, roll three curved, teardrop-shaped ribbons from blush, lavender, and blue clay, texturing their surfaces with soft longitudinal ridges. Insert small wire loops into both ends of each cured ribbon segment to allow flexible connection after baking. Bake the star and the trail elements separately on a flat ceramic tile to ensure uniform curing without drooping. Once the parts are fully cooled, assemble the individual segments using small jewelry jump rings and flat-nose pliers, linking the articulated trails directly below the top smiling star.
8. Smiling Crescent with Star Balloon
Step-by-Step Guide
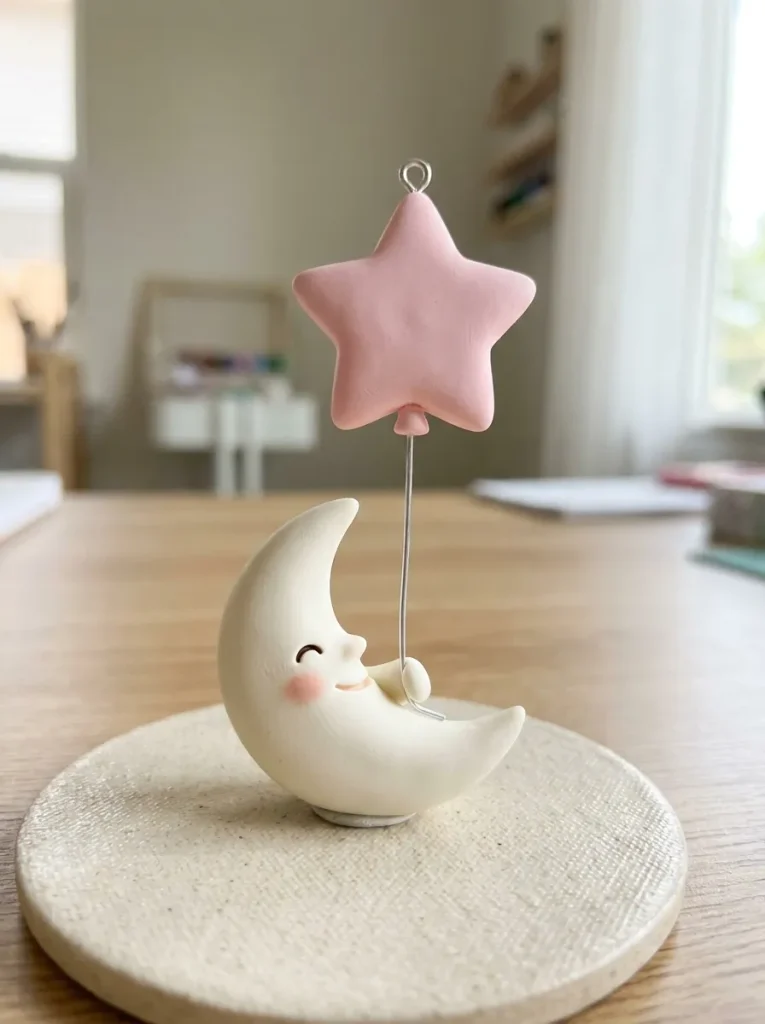
The smiling crescent with star balloon introduces an asymmetrical, playful pairing featuring two celestial elements connected by a delicate wire. The lower foundation is an upright, smiling crescent moon sculpted from creamy ivory clay, tilted slightly backward as if looking up at the sky. One of the moon’s curved tips holds the silver wire string of a floating pastel-pink star balloon that hovers just above its head. This design explores negative space, using strong jewelry wire to suspend elements and create an airy, floating effect. The clean ivory and soft rose palette complements modern minimalist style preferences, offering a refined charm that avoids visual clutter. The unified base gives the piece balance, ensuring it hangs straight when suspended from a bag or charm bracelet.
Form the base moon by shaping an ivory clay cylinder into an upright, crescent arch with a flat back and gently domed front. Detail the moon’s profile by embossing an open, smiling mouth with a curved tool tip, adding black clay pupils and soft peach blush to the cheek area. Shape a miniature puffed star from pastel pink clay, baking it briefly for five minutes on a tile to firm its shape. Take a two-inch length of stiff silver craft wire, insert one end into the base of the pink star with liquid clay, and insert the other end securely into the upper horn of the unbaked ivory moon. Anchor an eye pin into the balance point of the moon’s back curve to ensure the charm hangs level. Bake the complete assembly on a supportive bed of polyester batting to keep the wire suspended during curing.
9. Cosmic Donut with Star Sprinkles
Setup Method
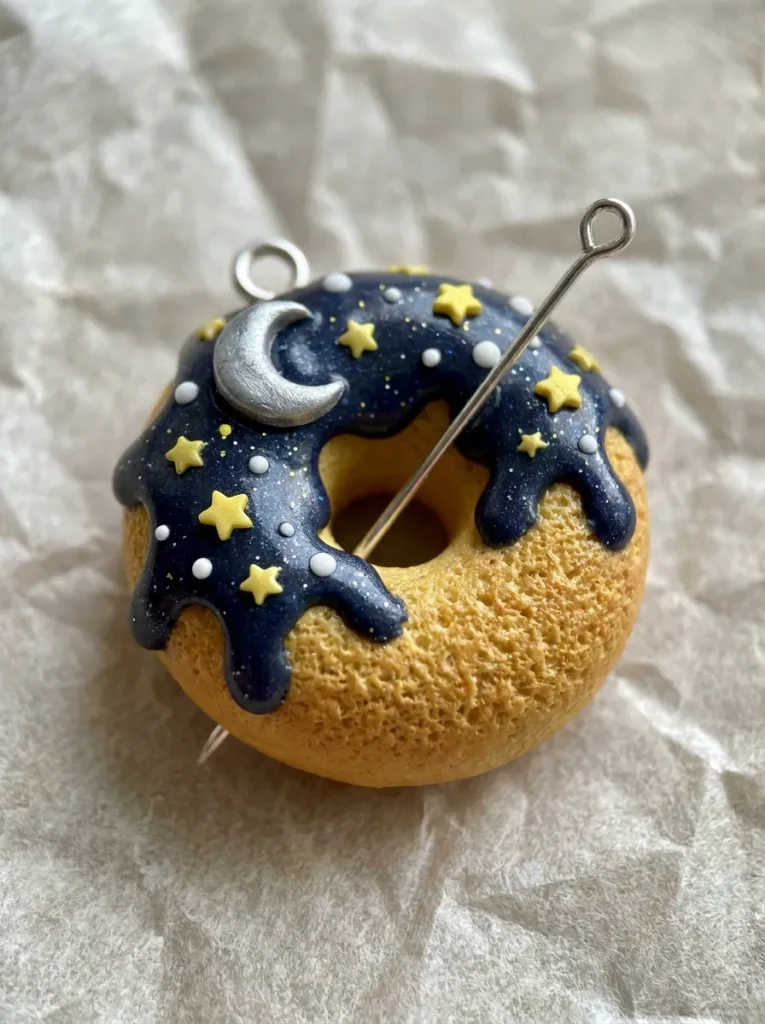
The cosmic donut charm brings miniature patisserie themes together with night sky colors, transforming a classic pastry silhouette into a celestial centerpiece. The base consists of a golden-brown baked pastry ring, topped with a deep galaxy-blue frosting layer that cascades realistically over the edges. Instead of traditional sugar sprinkles, the icing is decorated with miniature hand-sculpted yellow stars, pale white dots, and a small silver crescent moon medallion. This design teaches realistic culinary texturing techniques, demonstrating how dry chalk pigments and gloss glazes create lifelike bakery finishes. The circular ring structure provides substantial physical strength, protecting the smaller surface decorations from wear. Its balance of dessert and space motifs makes it an eye-catching accent for keyrings, zipper pulls, and gift wrap embellishments.
Roll a uniform coil of tan clay, joining the ends cleanly to create a donut ring measuring three centimeters across with a smooth central opening. Texture the outer circumference by gently stippling the raw clay with a firm-bristled toothbrush to simulate a baked pastry crumb. Roll out a thin sheet of dark navy clay, cutting a wavy, scalloped outer perimeter to mimic flowing sugar glaze, and lay it over the tan base. Sculpt four micro-stars from yellow clay and one miniature white crescent moon, pressing them randomly into the raw navy glaze layer. Dust the outer edge of the tan ring with golden-brown chalk pastel powder using a soft, dry blending brush. Insert an eye pin diagonally through the thickest part of the pastry body, then cure the piece on a flat tile.
10. Floating Astronaut Kitty on Crescent Moon
How to Create
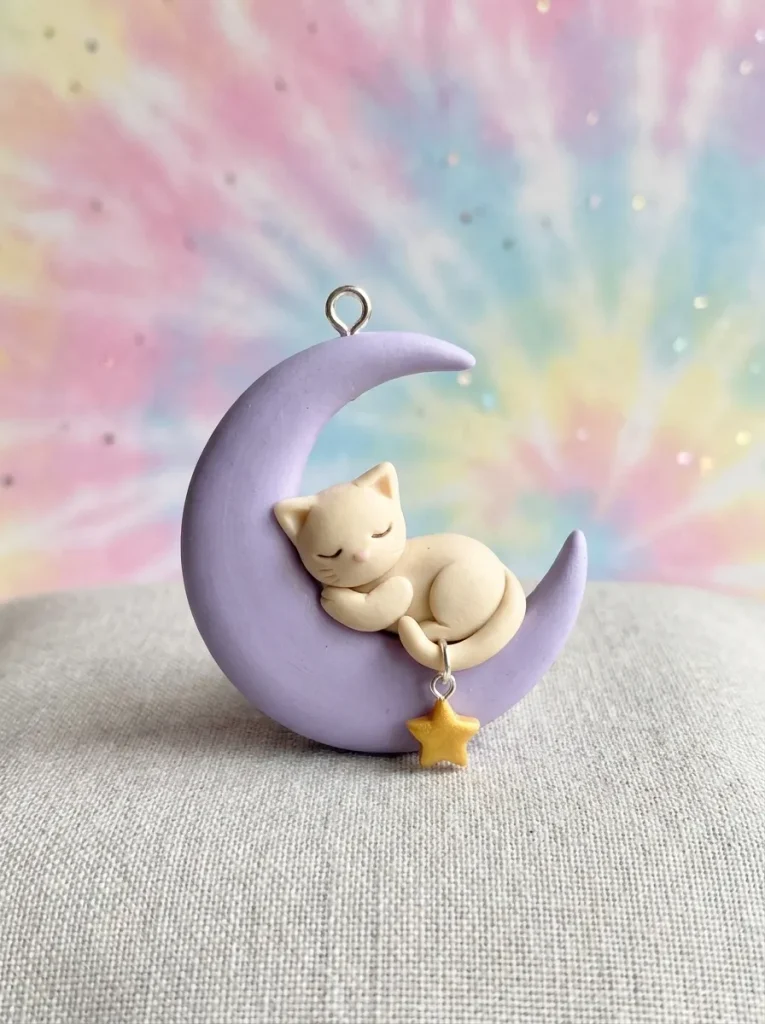
The floating astronaut kitty charm combines animal character sculpting with celestial props, creating an imaginative focal piece with storybook charm. The design features a white kitten wearing a clear dome helmet, curled up asleep inside the safe hollow of a wide lavender crescent moon. The cat’s tail loops over the edge of the moon, holding a small dangling star charm that sways below the main figure. This project provides practical experience in character staging, showing crafters how to seat miniature figures securely within curved supporting structures. The combination of gentle lavender, pure white, and soft yellow produces an appealing, balanced pastel palette. The wide contact point between the sleeping kitten and the moon shell yields a strong charm that handles daily use with ease.
Shape the moon base by bending a thick lavender clay cylinder into a wide, shallow crescent with rounded tips, smoothing the inner cavity with a ball stylus. Sculpt a compact white kitten body, tucking its paws close to the chest, and press it firmly into the lavender moon cavity using a drop of liquid clay. Detail the cat’s face with sleeping curved eyes and tiny pink ear interiors, adding a curled tail that drapes naturally over the lower rim. Mold a miniature yellow star, inserting a small wire eye into its top point to serve as the bottom dangle. Insert an eye pin down through the top of the moon, and attach an additional small wire loop to the bottom of the cat’s tail to hold the swinging star. Bake the components, then attach the small star to the tail loop with a jump ring once cooled.
Common Beginner Mistakes and How to Avoid Them
Working with small polymer clay charms involves unique material challenges that can cause flaws if core handling practices are overlooked. A frequent mistake among beginners is using under-conditioned clay, which causes small star points and crescent tips to crack or crumble after baking. Always knead your clay until it bends without surface tearing before attempting to shape fine points. Another common problem is dust and lint contamination, which shows up quickly on light yellow and white surfaces. To prevent this, clean your hands and tile regularly with alcohol wipes, and keep a dedicated small ball of scrap clay on hand to roll across your workspace to pick up stray lint before starting. Weak joint attachments also cause many charm breaks; simply pressing raw clay elements together rarely forms a permanent mechanical bond. Always apply a small drop of bakeable liquid clay between adjoining pieces, such as clouds and moons, to weld them securely together during the heat cycle. Inconsistent baking temperatures can also lead to either scorched, discolored pieces or under-cured, brittle charms. Use an independent standing oven thermometer placed beside your baking tile rather than relying on standard domestic oven dials, which often fluctuate significantly.
Practical Tips for Better Results
Achieving a clean, refined finish on miniature celestial charms requires attention to simple finishing habits and consistent tool handling. When shaping small star points, shape the clay with double-ended silicone tools and flat craft blades rather than warm fingers, which helps preserve sharp lines and prevents unwanted fingerprints. If surface imprints do occur, smooth the raw clay gently with a cotton swab lightly dampened with isopropyl alcohol before baking. To achieve soft, natural cheek blush, scrape powder from high-pigment chalk pastels with a craft blade and dust it onto the raw clay using a soft, dry makeup brush. Adding tiny white clay catch-lights to dark pupil elements immediately brings miniature faces to life, giving them a friendly, alert look. When inserting eye pins for jewelry use, bend the bottom third of the wire into a slight zigzag with round-nose pliers before insertion. This mechanical bend creates an anchor within the clay, preventing the pin from pulling free under tension after curing. Finally, consider finishing cured eyes and mouths with a dab of water-based gloss glaze while leaving the body matte to create an appealing visual contrast.
Styling, Presentation, or Organization Ideas
Presenting and organizing your handmade charms thoughtfully enhances their aesthetic value and makes them ready for display, gifting, or storage. For creative presentation, mount completed charms onto custom cardstock backing cards stamped with celestial or minimalist illustrations, securing them through pre-punched holes with natural twine. If you are curating a collection at home, display finished pieces in glass-topped shadow boxes lined with linen fabric, arranging them by color palette or seasonal theme. Charms can also be styled functionally by transforming them into matching collections of planner bookmarks, stitch markers for knitting projects, or delicate charms for zipper pulls on handmade pouches. For crafters managing an expanding inventory of supplies, organize uncured clay blocks by color family inside clear, airtight polypropylene storage containers to protect them from dust and ambient heat. Keep miniature metal findings, jump rings, headpins, and clasps separated in multi-compartment bead cases labeled by finish. Maintaining a clean, organized studio setup preserves your materials in peak condition while providing an inspiring workspace ready for your next creative crafting session.
Budget or Time Planning
Miniature clay crafting provides an economical creative outlet when planned with practical efficiency and structured time management. A modest starter kit containing a multi-color pastel clay pack, basic shaping tools, and a pack of eye pins requires very little financial investment yet provides enough material to produce dozens of miniature charms. To maximize material efficiency, mix primary colors with translucent or white clay to create unique pastel hues rather than buying extensive collections of specialty tones. When planning your crafting schedule, adopt a batch-production workflow to save time and reduce energy consumption. Dedicate one focused session to conditioning clay, rolling uniform spheres, and preparing base shapes for multiple designs at once. Dedicate a subsequent session to assembling fine details, attaching ears, and applying pastel shading across all pieces. Consolidate your baking schedule by curing an entire collection simultaneously on a single ceramic tile, which minimizes oven usage and ensures identical curing conditions across your set. This structured process keeps material costs minimal while allowing you to complete high-quality, polished collections within short weekend crafting windows.
Creative Expansion and Advanced Inspiration
Once you master the fundamental techniques of miniature celestial sculpting, explore advanced variations to expand your creative portfolio. Experiment with mixed-media elements by embedding faceted glass rhinestones, micro glass seed beads, or raw mineral chips into the clay before baking to create whimsical fantasy accessories. You can also move beyond basic shapes into dynamic, kinetic designs, such as articulated multi-part dangling charms where stars swing freely below a resting moon, linked by hidden internal jump rings. Advance your surface finishing skills by carving intricate geometric patterns into cured clay using micro-chisels, then backfilling the grooves with dark acrylic wash to accentuate depth through an antiqued patina. Consider integrating small, rare-earth neodymium magnets into the backs of unpinned figures during assembly to create high-end decorative kitchen or studio accents. Scaling these designs up slightly also allows you to craft customized desk buddies, mechanical keyboard escape keys, or delicate ring holders, demonstrating the versatility of polymer clay across an endless array of modern home decor and lifestyle applications.