Functional kitchen accessories bring personalized charm to daily life, and handmade refrigerator magnets represent one of the most practical applications of home polymer clay crafting. The beloved kawaii aesthetic focuses on clean geometric silhouettes, gentle pastel tones, rounded outer contours, and sweet minimalist facial expressions. When applied to magnetic displays, these miniature clay sculptures transform utilitarian kitchen appliances, metallic office message boards, and school lockers into cheerful visual galleries. This comprehensive tutorial provides ten unique, beginner friendly polymer clay magnet concepts designed to build foundational sculpting confidence while yielding durable utility accents. Throughout this practical guide, you will master essential clay manipulation methods, including conditioning, cane assembly, precise stamping, smooth surface finishing, and secure magnetic hardware adhesion. You will also gain valuable technical insight into controlling oven curing temperatures, preventing air bubbles, and choosing the strongest adhesives for long-term magnetic hold. Whether you are seeking budget ideas for handmade gift giving or exploring fresh creative ideas to refresh your daily living space, these detailed project breakdowns deliver reliable, step-by-step guidance for every maker.
Why Handcrafted Clay Magnets Trend Across Modern Decor
Miniature sculpted magnets have experienced sustained popularity across modern home decor boards because they seamlessly blend tactile artistic warmth with reliable domestic organization. In modern interior spaces, metal refrigerators and magnetic notice boards often become chaotic repositories for receipts, reminder notes, and grocery checklists. Introducing charming handmade magnets turns these purely functional surfaces into curated focal points that reflect personal taste and creative flair. The kawaii style is particularly effective in modern design environments because its clean lines, balanced proportions, and soft color palettes prevent visual clutter while introducing playful personality. From a practical DIY standpoint, crafting magnets is exceptionally accessible for beginners because flat-backed miniatures require minimal material volume and do not demand complex internal armatures. The small physical footprint allows crafters to complete multiple finished pieces within a single afternoon crafting session using basic home oven equipment. Furthermore, social media feeds continually elevate these projects because the vibrant contrast of colored clay components and satisfying finishing processes makes compelling visual inspiration for craft enthusiasts worldwide.
Essential Materials and Workspace Preparation
Careful workspace preparation and the right selection of sculpting materials establish the foundation for durable, professional-quality clay magnets. Begin by choosing premium polymer clay blocks in a balanced assortment of pastel tones, neutral bases, and primary colors, ensuring the chosen clay brand cures with structural resilience rather than brittleness. For your toolkit, assemble an acrylic rolling rod, a sharp straight tissue blade, silicone color shapers, double-ended ball stylus tools, and fine-point needle probes for micro-detailing. Your hardware selection requires heavy-duty neodymium rare-earth disc magnets measuring roughly eight to ten millimeters in diameter, paired with a two-part epoxy adhesive or industrial cyanoacrylate glue for permanent mounting. Prepare a clean, non-porous working surface, preferably a polished ceramic tile or tempered glass sheet that can move directly into the oven without disturbing raw clay creations. Wipe all surfaces, tools, and hands thoroughly with isopropyl alcohol before handling lighter clay hues to eliminate airborne dust and pigment transfers. Finally, position an independent analog oven thermometer on your baking rack to verify accurate thermal conditions before starting the heating cycle.
Smiling Honey Toast Slab Magnet
Step-by-Step Guide
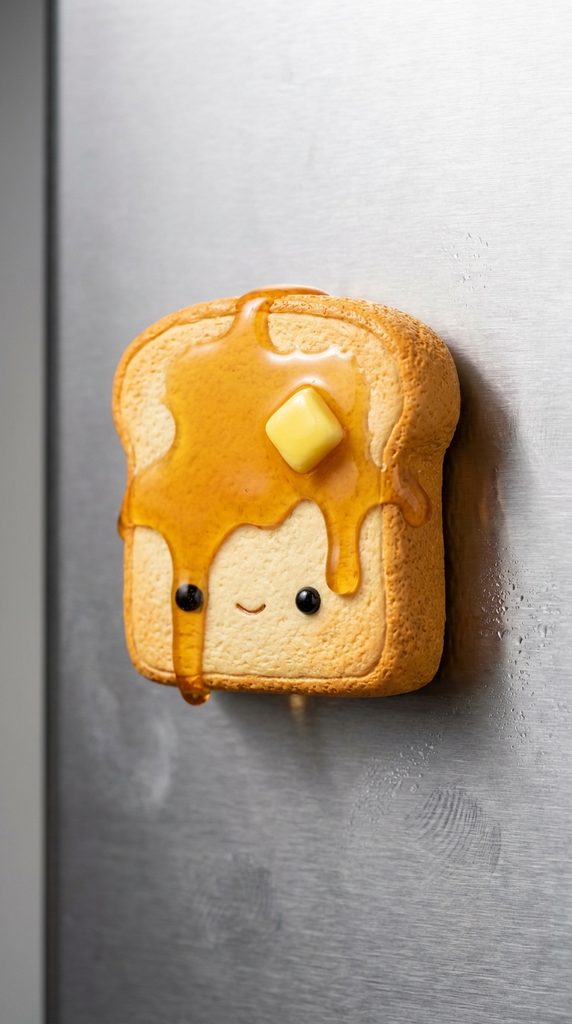
The smiling honey toast slab magnet adapts a beloved bakery treat into a textured home accessory featuring contrasting creamy glazes and golden bread crusts. The foundation consists of a thick, square-cut slice of artisan bread sculpted from warm cream or wheat-toned polymer clay, bordered by a textured, caramel-brown crust rim. Centered atop the toasted surface sits a melting pat of butter molded from bright primrose yellow clay, surrounded by a translucent puddle of dripping golden liquid honey. A sweet, minimalist face applied to the bread surface gives the bakery item an approachable character without overwhelming its authentic pastry styling. The flat, broad reverse surface of the bread slice provides ample surface contact for heavy-duty disc magnets, ensuring it holds thick papers securely against any metallic appliance.
Begin by rolling conditioned warm cream clay into an even slab eight millimeters thick, cutting it into a neat square measuring three centimeters on each side using a sharp tissue blade. Roll a thin strip of golden-tan clay, wrapping it around the outer four edges to represent the crust, and texture the crust band using an old toothbrush. For the topping, mix translucent liquid clay with a drop of amber alcohol ink and drizzle a small pool across the toast face, allowing it to spill slightly toward one edge. Sculpt a miniature three-millimeter cube of buttery yellow clay, resting it askew within the liquid honey puddle to simulate melting dairy. Form the facial details by pressing two tiny black clay specks into the lower half of the toast, using a fine needle to impress a subtle upturned smiling curve between them. Bake the completed toast flat on a ceramic tile for thirty minutes, allow it to cool completely, and fix a neodymium magnet to the backside using two-part epoxy.
Cheerful Cloud with Dripping Pastel Rainbow
How to Create
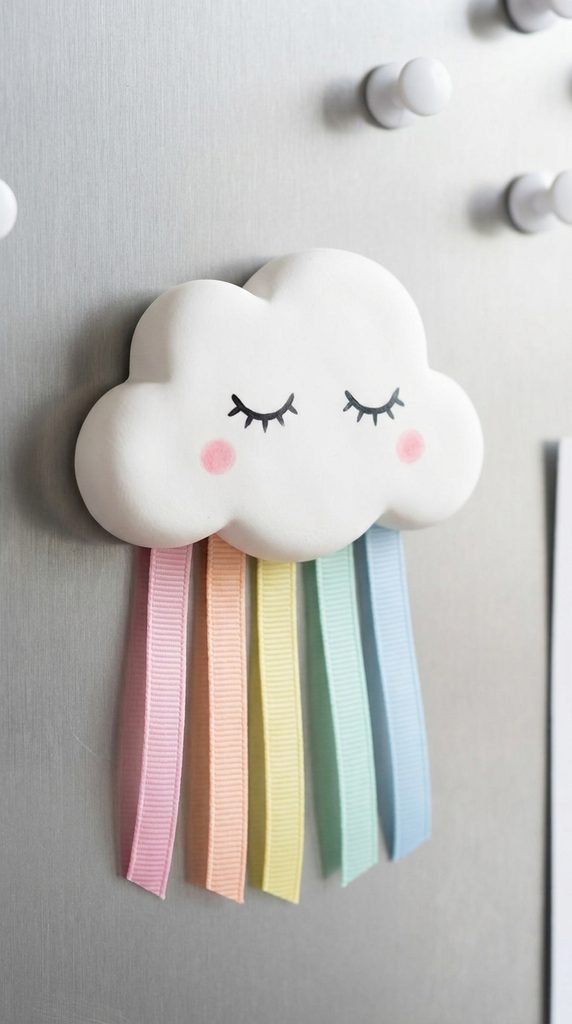
The cheerful cloud magnet captures whimsical sky imagery through gentle rounded lobes, smooth planar surfaces, and cascading color accents. The primary structure features a billowy, clustered cloud silhouette sculpted from pure white polymer clay, maintaining a consistent flat depth to prevent uneven heat curing. Suspended beneath the lower flat edge are five narrow ribbon bands arranged in pastel rainbow hues of rose, soft apricot, pale buttercup, mint green, and baby blue. Two fine-line curved sleeping eyes and subtle powdered blush cheeks impart a serene, calming emotional presence to the sculpture. This design functions exceptionally well as functional magnetic organization on home message boards because its horizontal width allows multiple papers to be pinned underneath a single decorative piece.
Roll conditioned white clay to a uniform five-millimeter thickness using an acrylic roller with guide rings, then cut out an undulating cloud contour featuring five overlapping rounded perimeter lobes. Smooth all cut borders using a silicone blending chisel dampened with a tiny drop of rubbing alcohol to remove sharp angles and fingerprints. To construct the cascading rainbow accents, extrude or roll thin snakes of each pastel color, flattening them side by side into a contiguous multi-colored striped ribbon three millimeters wide. Trim the rainbow ribbon into five neat vertical segments of varied staggered lengths, pressing the top edge of each strip firmly behind the lower baseline of the white cloud. Paint two downward-curving closed eye arcs on the front white surface using black acrylic paint and a fine liner brush, dusting powdered pink chalk pastel across the cheeks. Cure the charm thoroughly in the oven, let it cool, and secure two small magnets behind the outer lobes for balanced stability.
Kawaii Sunny-Side-Up Egg Magnet
Execution Process
The smiling sunny-side-up egg magnet translates breakfast minimalism into a bold, graphic kitchen accent characterized by organic forms and bright color contrast. The background base represents an asymmetrical, fluid splash of cooked egg white, modeled with soft, undulating margins that vary naturally in perimeter shape. Positioned slightly off-center within the white field is a glossy, elevated hemispherical yolk formed from vibrant dandelion or marigold yellow clay. Miniature black bead eyes and a tiny open mouth placed directly upon the bright yolk dome turn an everyday morning food staple into an endearing character. The organic silhouette makes this magnet an exceptionally forgiving creative project for beginners, as natural fluid asymmetries completely eliminate the need for rigid geometric measuring.
Roll well-conditioned pure white clay onto a tile to a thickness of four millimeters, then use a craft knife to slice a freeform puddle shape roughly four centimeters in diameter. Gently smooth the perimeter transitions with your fingertip to ensure the outer rim slopes softly toward the working surface while keeping the back plane entirely flat. Roll a small ball of rich golden-yellow clay, flattening the base against the tile to create a smooth dome, and seat it securely within the upper-left quadrant of the white field. Use a small ball stylus tool to create two shallow indentations on the yellow dome, seating two tiny spheres of black clay firmly within the recesses for eyes. Impress a delicate semicircular smile beneath the eyes using the curved edge of a clean straw or needle tool. Cure the magnet on a flat baking surface, coat the yellow yolk with a layer of clear high-gloss varnish after baking, and adhere a strong magnet to the back.

Rosy Cheeked Red Woodland Mushroom
Step-by-Step Guide
The rosy cheeked woodland mushroom magnet adapts natural botanical forms into a fairytale-inspired decorative piece featuring rich surface contrasts. The upper cap presents a wide, domed half-circle modeled from vibrant scarlet or warm crimson clay, punctuated by raised ivory polka dots scattered organically across the crown. Supporting the vibrant cap is a short, stout mushroom stem sculpted from warm ivory clay, shaped with a broad, flat bottom to maximize magnetic contact. The sweet character face rests on the pale stem surface beneath the cap rim, creating a pleasing dimensional shadow that emphasizes depth. This sturdy design resists edge chipping during continuous kitchen handling because all connected parts share a wide, stable seam contact area.
Shape warm ivory clay into a tapered trapezoid measuring two centimeters tall and two centimeters wide at the base, pressing it flat against your tile to establish the mushroom stalk. For the cap, roll conditioned red clay into a thick dome, slicing the bottom flat with a tissue blade before smoothing the rounded upper perimeter with an acrylic smoother. Apply a thin line of liquid polymer clay along the top edge of the ivory stalk, seating the red cap firmly atop the join and blending the rear seam completely flat. Roll eight to ten tiny specks of white clay into spheres, pressing them gently across the red cap to form flat, circular decorative spots. Position two shiny black clay dots across the upper third of the ivory stem for eyes, dusting powdered coral chalk pastel across the cheeks with a dry detailing brush. Bake the assembled mushroom upright or flat, allow it to cool, and attach an eight-millimeter disc magnet to the center rear.

Smiling Pastel French Macaron Magnet
How to Make
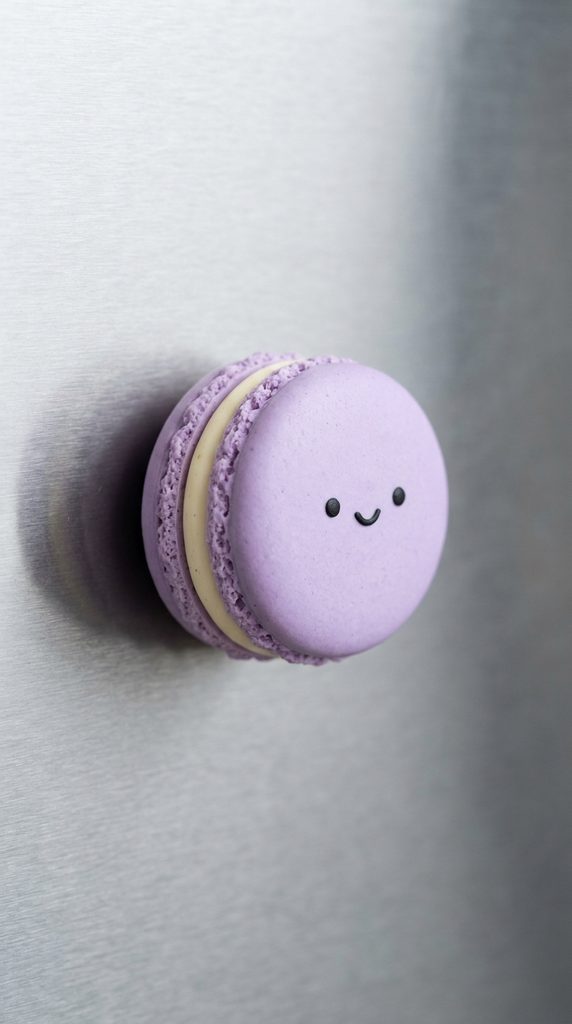
The smiling French macaron magnet showcases classic European patisserie styling through gentle pastel coloration, crumbly baked textures, and smooth filling layers. The confection consists of two rounded outer cookie shells sandwiching a thick layer of creamy off-white or vanilla filling. Soft shades such as lavender, pistachio mint, or blush pink work exceptionally well for the outer biscuit shells, providing a delicate aesthetic that complements modern kitchen home decor. Achieving realistic ruffled textural edges—known as the confection foot—transforms simple flattened discs into realistic miniature pastries. Adding a minimalist smiling face to the top shell brings the sweet treat firmly into the kawaii aesthetic, resulting in a charming accent that pairs beauty with utility.
Condition your chosen pastel clay and split it into two identical halves, rolling each piece into a smooth ball approximately two and a half centimeters in diameter. Press each ball flat against your working tile to create two domed discs with flat undersides, ensuring the thickness remains around five millimeters each. Take a needle probe or stiff wire bristle and gently shred and pick at the bottom two millimeters around the perimeter of each disc, creating a rough, porous crumb border. Roll a slightly smaller disc of warm ivory clay to represent the buttercream filling, sandwiching it between the two textured pastel shells without compressing the ruffled edges. Affix two tiny black clay specks and an impressed smiling curve onto the top cookie dome, pressing them flush with the surface. Bake the assembled pastry according to clay packaging instructions, cool thoroughly, and affix a heavy neodymium disc magnet securely to the bottom flat surface.
Petite Strawberry Planter Pot Magnet
Setup Method
The petite strawberry planter pot magnet combines modern indoor gardening trends with miniature fruit sculpting, producing an earthy yet adorable botanical accent. The base structure features a traditional tapered terracotta flowerpot sculpted from warm rust or brick-red clay, accented with a pronounced raised upper rim band. Overflowing from the top of the pot are tiny green clover-shaped leaves surrounding a plump crimson strawberry, complete with indented seed pits and white blossom petals. A friendly, smiling face centered upon the terracotta pot facade infuses the botanical craft with heartwarming warmth. The compact, vertical orientation makes this magnet an efficient organizational tool, holding recipe cards and photos firmly without taking up excessive display room.
Roll conditioned terracotta-colored clay into a thick cone shape, flattening both the top and bottom ends against your tile to produce a tapered plant pot two centimeters tall. Roll a thin strip of the same terracotta clay, wrapping it around the upper circumference and trimming the ends to create an authentic raised flowerpot rim. For the foliage, roll five miniature teardrops of forest green clay, flattening them around the top pot opening, and seat a miniature red clay strawberry cone in the center. Use a fine needle tool to press tiny rhythmic seed impressions diagonally across the red strawberry surface, adding a tiny white clay five-petal flower alongside it. Press two glossy black clay spheres into the front panel of the terracotta container, adding a tiny curved smile between them. Cure the finished plant pot in your craft oven, allow it to cool completely, and adhere a strong magnet to the flat rear wall using epoxy.

Cheerful Boba Milk Tea Cup Magnet
How to Create
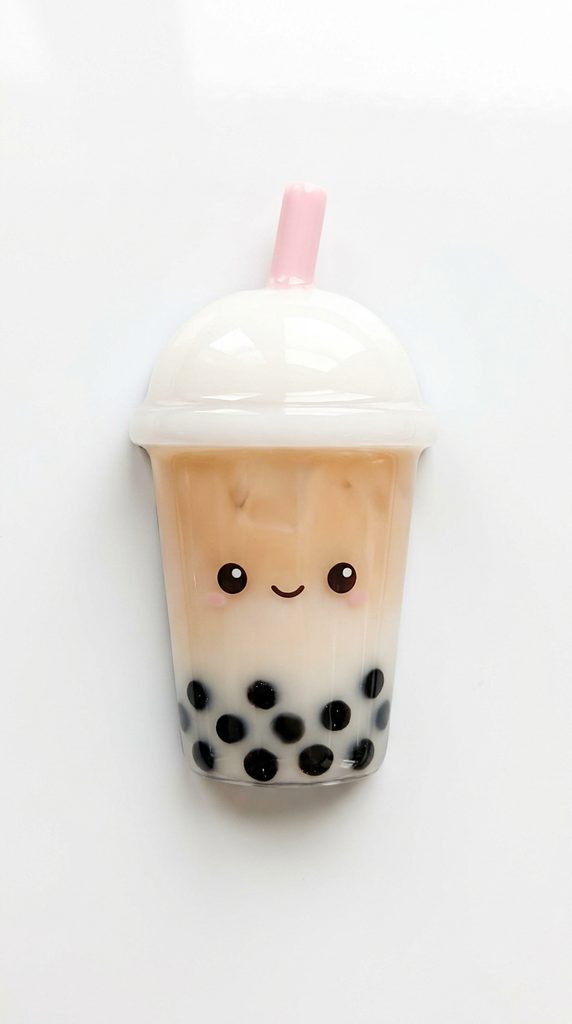
The cheerful boba milk tea magnet translates a globally beloved beverage into a modern dimensional accent complete with creamy liquid, tapioca pearls, and a wide sipping straw. The central tumbler utilizes translucent polymer clay blended with a hint of warm caramel or soft lavender pigment, simulating rich iced tea held within a smooth drinking cup. Clustered along the bottom curved base are individual spheres of dark espresso clay, visible through the semi-translucent matrix to represent chewy boba pearls. An opaque white domed lid caps the structure, penetrated by a bright pastel straw that provides an energetic vertical accent. A friendly smiling face placed upon the cup facade transforms the popular drink into a playful companion piece suitable for daily kitchen organization.
Blend a small marble of translucent clay with a tiny speck of light tan clay, rolling the mixture into a clean flat-backed tumbler shape that tapers toward the bottom edge. Roll eight to ten tiny balls of dark brown clay, pressing them firmly into the lower third of the cup shape so they sit flush with the front surface. Roll a thin slab of pure white clay, cutting out a domed lid profile that spans the top rim of the beverage cup, and blend the connecting seam smoothly. Roll a tiny cylinder of pastel pink or blue clay for the straw, trimming the ends cleanly and adhering it diagonally into the center of the white lid. Apply two miniature black clay bead eyes and an open smiling mouth to the cup front, using a silicone shaping tool to ensure clean boundaries. Bake the charm flat, apply a clear gloss glaze over the beverage section to simulate plastic or glass, and attach a magnet to the reverse.
Kawaii Avocado with Smiling Pit Magnet
Step-by-Step Guide
The kawaii avocado magnet showcases rich botanical colors, concentric layered assembly, and tactile surface textures within a classic pear-shaped fruit silhouette. The outer foundation consists of an egg-shaped teardrop modeled from light chartreuse clay, encased within a narrow outer skin band of deep olive green. Excavated directly within the lower bulbous section of the light green flesh is a circular hollow that cradles a rounded chocolate-brown seed. The brown pit features the primary character face—complete with tiny black bead eyes and rosy pink cheeks—giving the impression of a tiny character resting comfortably within the fruit core. The broad, flat rear surface makes this design exceptionally stable against refrigerator doors, preventing spinning or tilting during daily use.
Roll conditioned pale lime-green clay into a plump teardrop shape measuring four centimeters in length, flattening it to an even six-millimeter thickness against your work tile. Press a medium-sized ball stylus tool firmly into the lower half of the teardrop, creating a clean circular cavity roughly twelve millimeters wide. Roll a small sphere of rich dark brown clay, test fitting it into the circular cavity until it sits snugly as a protruding half-sphere, and remove it temporarily. Roll two tiny specks of black clay onto the brown pit to form eyes, adding a fine needle-impressed smile and soft pink pastel powder blush before returning the pit to its socket. Roll a very thin snake of dark forest green clay, wrap it tightly around the perimeter of the teardrop, and texture this outer rind band using a coarse wire brush. Bake the entire assembly flat, apply matte glaze over the flesh and gloss over the seed, and glue a disc magnet securely behind the pit region.

Smiling Golden Waffle Square Magnet
Execution Process
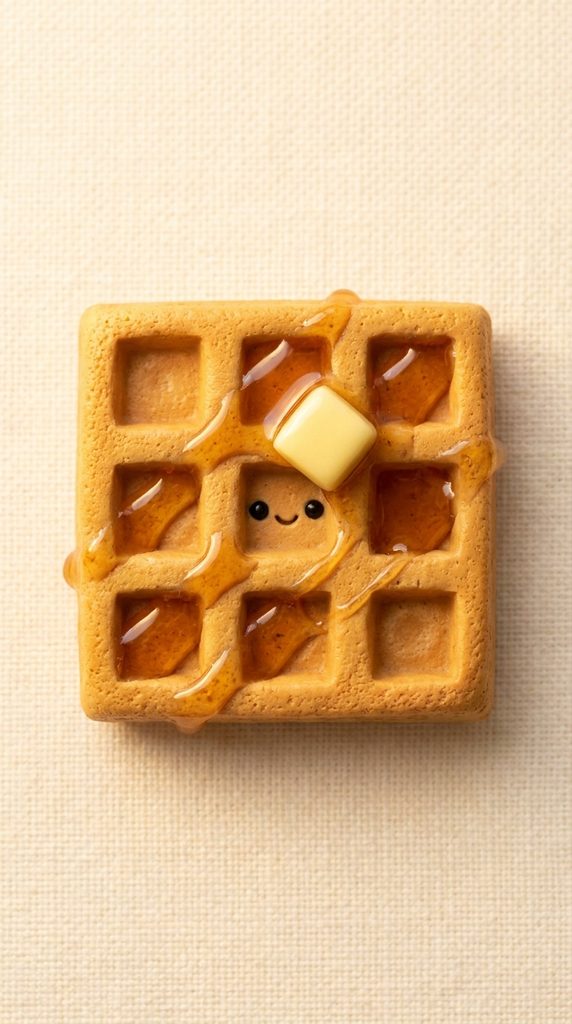
The smiling golden waffle magnet pairs geometric grid textures with buttery bakery details to produce a warm, nostalgic kitchen accessory. The core structure features a square biscuit base sculpted from warm ochre clay, stamped with a symmetrical three-by-three recessed grid that replicates authentic Belgian waffle pockets. Draped diagonally across the grid pockets is a glossy pool of translucent amber maple syrup, accented with a miniature melting butter pat molded from creamy buttercup yellow clay. A cheerful smiling face placed within the central grid pocket transforms the waffle from a realistic food replica into a signature kawaii character. The square shape provides excellent structural rigidity, preventing edge warping during oven baking and ensuring long-lasting daily utility.
Roll warm honey-tan polymer clay into a neat square slab measuring three centimeters across and seven millimeters thick, smoothing all outer edges flat against your work surface. Use the square end of a modeling stick or the back of a ruler to press a balanced nine-square grid pattern into the top surface, creating deep pocket wells. For the syrup topping, blend liquid polymer clay with a trace of brown and yellow alcohol inks, spooning a glossy drop diagonally across four of the grid pockets. Form a crisp five-millimeter square of light yellow clay for the butter slice, positioning it within the syrup puddle so it appears partially melted. Seat two miniature black clay spheres within the center pocket to establish the eyes, carving a subtle smile directly into the lower clay ridge. Bake the completed waffle flat on parchment paper, cool thoroughly, and affix a strong neodymium magnet to the center rear with cyanoacrylate adhesive.
Rosy Faced Sleeping Narwhal Magnet
How to Make
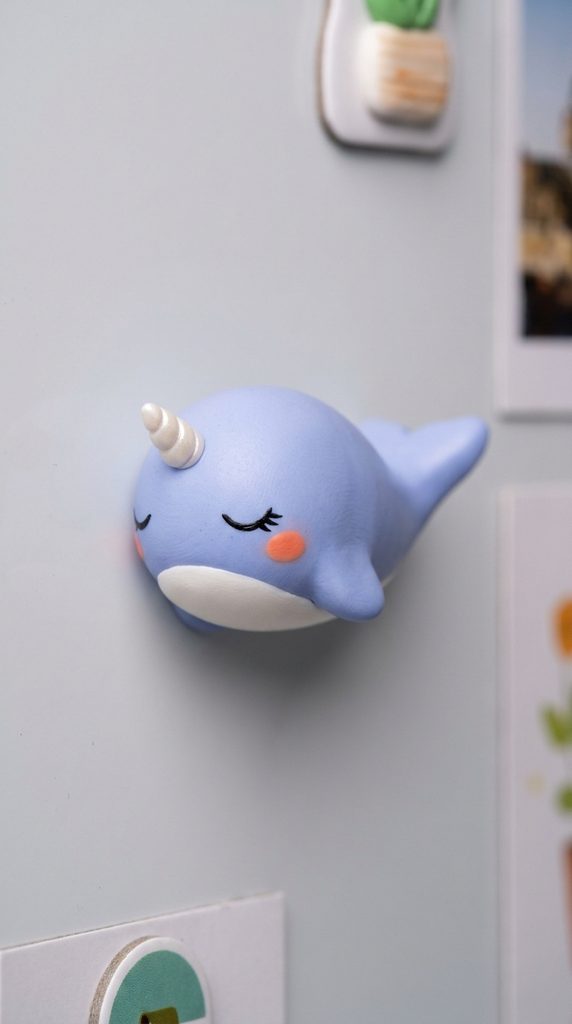
The sleeping narwhal magnet brings arctic marine life into functional decor, featuring an elongated teardrop body, fluked tail fins, and an iconic spiraled tusk. Soft periwinkle or pastel mint clay establishes a tranquil aquatic tone, complemented by a clean white belly plate covering the lower half of the torso. Projecting forward from the rounded forehead is a miniature golden or pearlescent horn sculpted with delicate spiral twisting grooves. Curved sleeping eye arcs and soft pink blushing cheeks emphasize a calm, sleepy demeanor that complements relaxed modern interior spaces. The streamlined horizontal profile makes this magnet an exceptional clip for wide horizontal cards, panoramic photos, or weekly appointment calendars.
Roll conditioned pastel blue-gray clay into an elongated tapered cone, curling the narrow tail tip gently upward and adding two tiny flattened fin flukes at the base. Flatten the underside of the narwhal completely against your tile, ensuring the body maintains a level four-millimeter thickness from head to tail. Roll a thin sheet of pure white clay, cut an oval patch, and blend it seamlessly across the lower front belly to establish the light underside. For the tusk, twist two ultra-fine threads of pearl-white clay together into a tight spiral cone, trimming it to one centimeter and pressing it firmly into the forehead ridge. Paint two delicate downward-curved sleeping eyes onto the blue facial surface using black acrylic paint, adding soft coral pastel blush below each eye. Bake the narwhal flat on your ceramic tile, coat the entire surface with a durable satin varnish, and secure two small magnets along the body underside.
Common Beginner Mistakes and How to Avoid Them
Novice clay crafters often encounter structural detachment, color contamination, and baking failures that compromise the durability of their finished magnetic accessories. One of the most frequent errors is using weak, flexible craft glue or hot glue to adhere magnets to cured polymer clay. Standard craft glues fail to bond with the slick plasticized surface of cured clay, causing heavy magnets to snap off under regular pull tension; always use high-strength two-part epoxy or industrial cyanoacrylate glue, roughing both the clay and magnet surfaces with sandpaper before bonding. Another common issue is lint and stray pigment contamination on light-colored clay projects. Prevent this by thoroughly cleaning work surfaces with alcohol wipes, wearing powder-free gloves, and running a scrap piece of translucent clay across your hands to lift off residual fibers before starting. Improper baking temperatures also ruin many projects, leading to brittle clay that shatters easily or scorched brown discoloration. Never rely on the factory dial on your home oven; always verify actual chamber temperatures with an independent oven thermometer, curing pieces for the full time specified by the manufacturer to ensure complete plastic cross-linking.
Practical Tips for Clean and Durable Results
Achieving professional, gallery-worthy finishes on handmade clay magnets requires systematic material conditioning, thoughtful surface refinement, and durable assembly practices. Always condition your polymer clay thoroughly by rolling and folding it repeatedly until it feels soft, warm, and entirely pliable, which prevents internal air pockets and brittle cured seams. When joining separate clay components prior to baking—such as attaching waffle butter pats or mushroom caps—apply a micro-drop of bakeable liquid clay adhesive to guarantee a permanent chemical fusion during the heat cycle. To eliminate unwanted fingerprints and subtle surface imperfections before heating, gently rub the raw clay contours with a cotton swab lightly moistened with isopropyl alcohol. After baking and cooling, protect delicate painted facial features and powdered pastel blush by applying two light coats of water-based polyurethane varnish or UV-curing resin. Finally, when mounting your disc magnets, embed them slightly into shallow recesses carved into the back of the raw clay before baking, ensuring the magnet sits flush with the clay perimeter for maximum holding power against metal surfaces.
Styling, Presentation, and Organization Ideas
Curating your finished polymer clay magnets transforms individual craft projects into a cohesive decorative system that enhances modern living and office spaces. When styling magnets on kitchen refrigerators or metallic message boards, group thematic designs together—such as clustering the toast, egg, and waffle into a charming breakfast corner that anchors weekly meal plans and grocery lists. In home office setups, use sleek pastel designs like the cloud and sleeping narwhal to hold inspiration photos, postcards, and milestone reminders against magnetic whiteboards without visual clutter. If you are preparing these handmade creations as gifts, mount sets of three or four coordinated magnets onto heavy watercolor cardstock backings printed with simple grid borders, securing them in place using magnetic metal washers taped behind the presentation card. You can also package individual magnets inside small tin favor boxes lined with crinkle-cut kraft paper, turning modest craft projects into thoughtful, presentation-ready tokens for birthdays or holidays. Displaying your magnets in coordinated color stories reinforces clean aesthetic design principles, elevating everyday domestic organization into an engaging creative showcase.
Efficient Time and Budget Project Planning
Strategic planning and organized material procurement allow makers to complete multiple clay magnet projects efficiently while keeping hobby expenses exceptionally low. Maximize your budget ideas by purchasing high-yield economy blocks of primary colors alongside large blocks of pure white and translucent clay, allowing you to custom-blend an infinite variety of pastel tones without buying dozens of individual color packs. Group your creative workflow into distinct batch-processing stages: dedicate one focused session to conditioning and blending color batches, a second session to cutting base shapes, a third session to facial detailing, and a final block for baking and magnet adhesion. Segmenting your crafting time eliminates repetitive tool cleaning and minimizes hand-washing intervals between contrasting color families, saving significant time. Conserve household energy by filling an entire ceramic baking tile with completed magnet charms rather than running oven heating cycles for single pieces. Store unused conditioned clay in airtight polypropylene containers or clean plastic film away from heat sources and direct sunlight, preserving material freshness for future creative endeavors.
Creative Expansion and Advanced Design Inspiration
Once you gain confidence in fundamental miniature modeling and hardware mounting, you can expand these kawaii concepts into more sophisticated, mixed-media home accessories. Experiment with advanced textural elements by incorporating fine metallic mica powders, iridescent glitters, or silkscreen enamel stencils onto raw clay slabs before cutting out your primary silhouettes. You can also evolve standalone refrigerator magnets into interactive magnetic stationery sets, sculpting matching magnetic bookmark clips, pushpins, and decorative magnetic pen rests from leftover color batches. Explore advanced cane-building methods to produce intricate multi-layered citrus canes, floral patterns, or character faces that yield dozens of uniform slices from a single sculpted log. Another exciting creative avenue involves combining cured clay sculptures with clear UV resin puddles or miniature shaker elements filled with micro-beads, creating dynamic liquid effects for beverage and terrarium designs. Embracing these advanced variations allows you to continually reinvent simple craft materials into high-value decorative accents that inspire friends, family, and online craft communities alike.