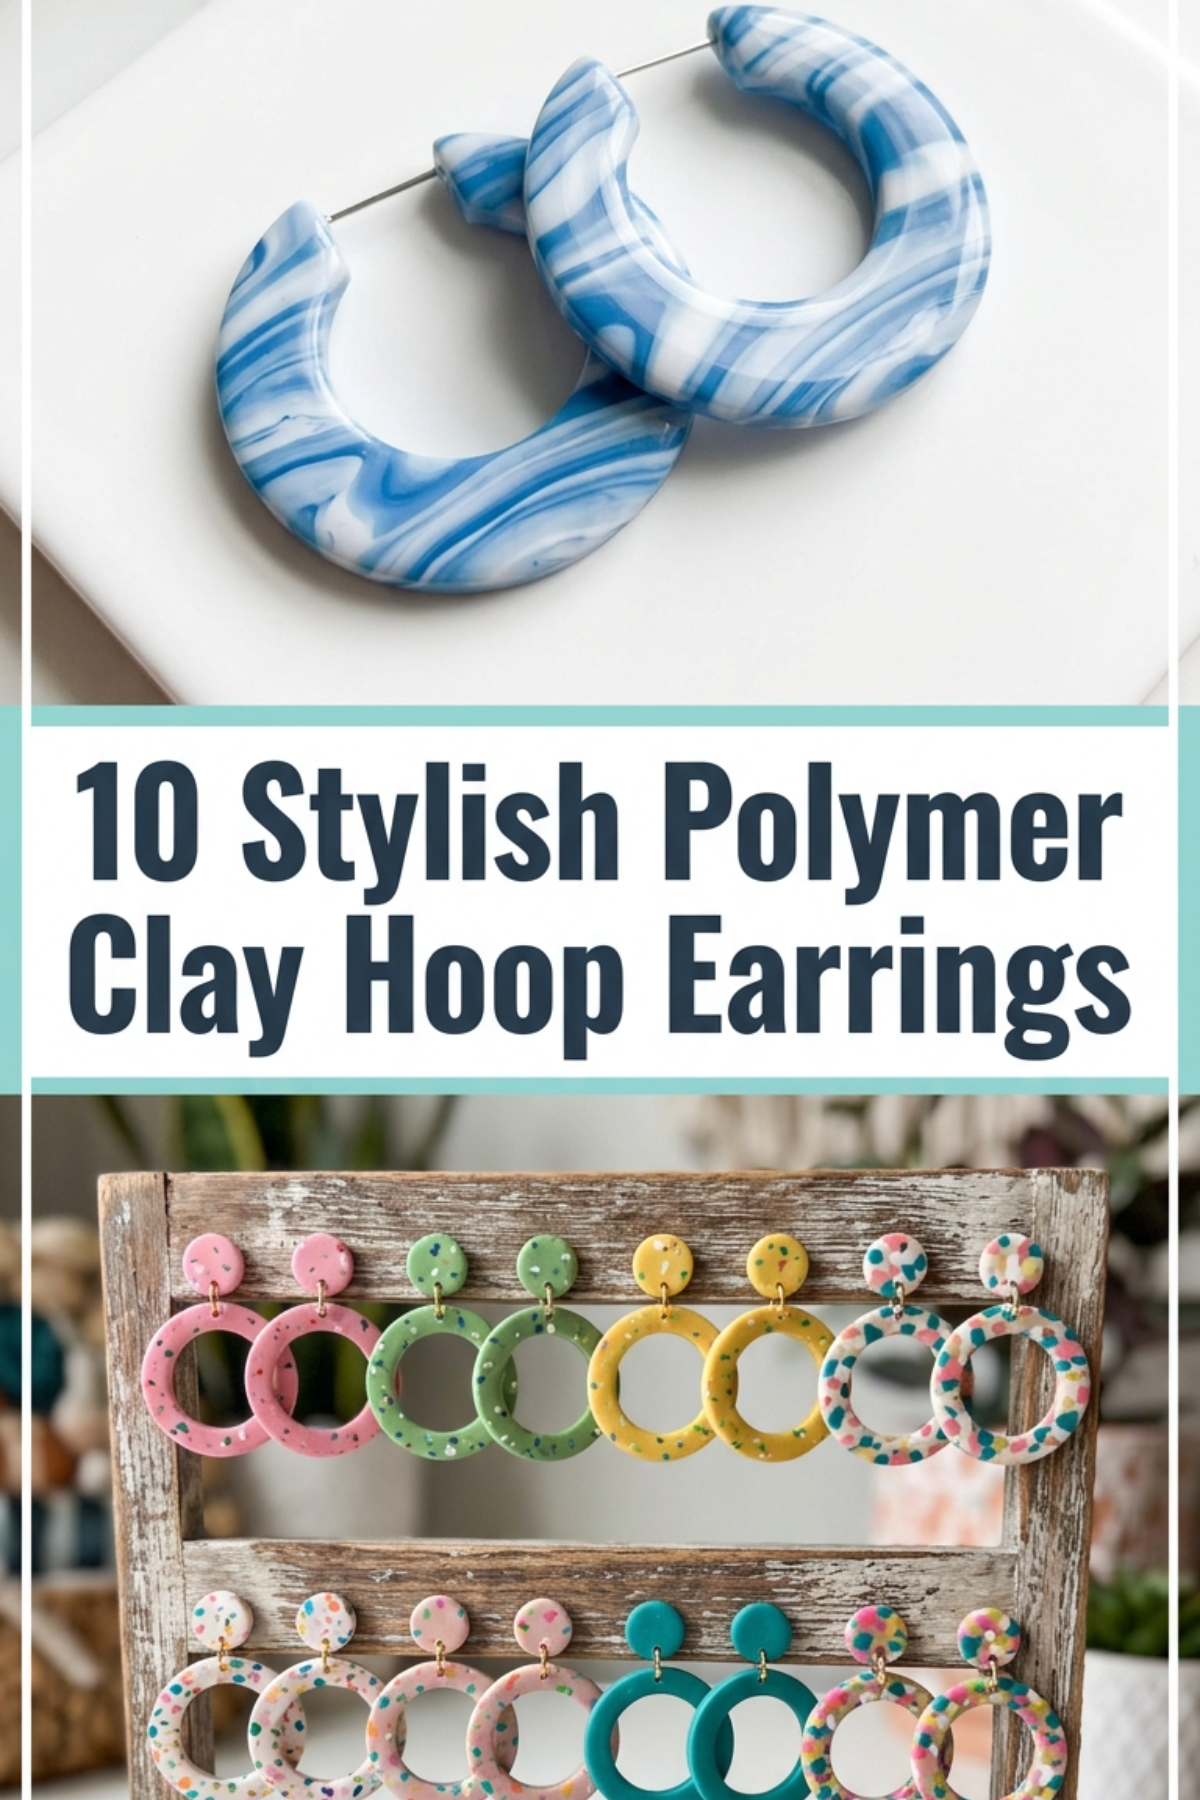

Handcrafted polymer clay hoop earrings merge sculptural artistic expression with featherweight everyday functionality. Searching visual inspiration boards reveals a widespread movement toward modular, color-blocked, and organic jewelry elements that elevate everyday styling. This extensive tutorial teaches you how to design, shape, condition, cure, and assemble ten distinct variations of polymer clay hoop earrings from scratch. Readers will explore foundational clay manipulation techniques, including flat slab rolling, organic cane extrusion, multi-tonal marbling, and delicate surface stamping. Polymer clay serves as an accessible medium that empowers makers to construct boutique-quality accessories using minimal workshop machinery and affordable domestic tools. Beyond visual appeal, learning proper clay conditioning and temperature control ensures your finished accessories remain flexible, durable, and break-resistant over extended wear. Each project outlined in this comprehensive reference manual delivers actionable, measured instructions designed to streamline production while eliminating common structural weaknesses. By mastering these step-by-step assembly workflows, you can build an adaptable collection of lightweight statement earrings that pair sculptural silhouettes with balanced hardware elements.
The Enduring Appeal of Handmade Statement Hoops
The sustained visibility of polymer clay jewelry across digital platforms highlights a broader cultural shift toward tactile, artisanal accessories and customized wardrobe pieces. Unlike heavy metal or resin hoops that pull uncomfortably on the earlobes, polymer clay maintains a micro-density that permits expansive, architectural silhouettes without physical strain. This unique material property provides immense practical value for individuals seeking all-day wearability alongside noticeable visual scale. From a modern design perspective, clay offers limitless customization across surface sheens, muted earthy palettes, speckled stoneware finishes, and geometric configurations. The medium attracts beginners and experienced artists alike due to its approachable entry barrier; anyone with a conventional household oven, basic cutting tools, and polymer blocks can initiate production immediately. Furthermore, crafting personalized accessories fulfills the demand for sustainable slow fashion, allowing makers to avoid mass-produced retail inventory in favor of small-batch, intentional creations. The intersection of lightweight functionality, creative freedom, and low startup overhead makes polymer clay hoop earrings an exceptional creative project for designers at every technical level.
Workshop Preparation, Essential Tools, and Surface Staging
Proper workspace preparation and dependable material selection form the backbone of durable, professional polymer clay accessories. High-density polymer clays that cure to a slightly flexible, non-brittle finish provide the ideal foundation for delicate hoops and pendant charms. Essential tools include an acrylic rolling rod or mechanical clay conditioner, stainless steel tissue blades, circular cutter sets, high-grit wet-dry sandpaper, and an accurate freestanding oven thermometer. Assembly requires hypoallergenic findings, such as stainless steel open hoop bases, jump rings, brass connectors, flat-pad ear posts, and dual jewelry pliers. Preparation begins by wiping down smooth ceramic tiles or tempered glass sheets with isopropyl alcohol to remove airborne lint, residual oil, and household dust. Accurate planning involves testing color recipes in small sample batches, calculating clay shrinkage allowances, and setting up dedicated ceramic baking tiles to minimize surface distortion during heating. Preparing your materials methodically guarantees consistent thickness, clean edge profiles, and structural integrity throughout the curing process.
1. Minimalist Speckled Stoneware Huggies
Step-by-Step Guide
The minimalist speckled stoneware huggie design mimics the earthy texture and subtle imperfections of wheel-thrown ceramic pottery. This style centers on compact, low-profile hoops that sit close to the earlobe, creating an understated modern design appropriate for professional environments or casual daily wear. The visual identity relies on an off-white, ecru, or oatmeal base clay infused with microscopic dark flecks that simulate granite, sand, or baked iron particles. The absence of high-gloss varnishes preserves a raw, matte finish that highlights the clean architectural shape of the hoop. By pairing rounded clay segments with warm metallic findings, this concept achieves a harmonious balance between natural ceramic textures and refined contemporary jewelry elements. The understated profile ensures the earrings remain exceptionally lightweight, comfortable, and resilient against everyday movements.
To fabricate this pair, begin by conditioning two ounces of unbleached off-white polymer clay through an acrylic roller until the material feels pliable and smooth. Incorporate a pinch of finely ground black pepper, crushed dried tea leaves, or pre-cured dark polymer shavings into the sheet, folding and rerolling until the inclusions distribute uniformly across the slab. Adjust your roller or rolling guide rails to a uniform three-millimeter thickness. Using a circular cutter set, stamp out matching concentric rings, utilizing a thirty-millimeter outer cutter paired with an eighteen-millimeter inner cutter to form balanced donut bands. Carefully remove the inner clay centers with a craft needle, lift the rings using a flexible tissue blade, and slice open the top apex of each ring to create a three-quarter huggie silhouette. Place the cut pieces directly onto a clean ceramic tile, pierce an attachment hole through the top terminal with a one-millimeter hand drill pin, and bake at the manufacturer’s specified temperature for thirty-five minutes. Once cooled, smooth any rough edges using four-hundred-grit wet sandpaper, wash away the residue, and attach hypoallergenic stainless steel ear posts to the back of each upper terminal using two-part liquid epoxy.

2. Twisted Terra Cotta Endless Hoops
Execution Process
The twisted terra cotta endless hoop emphasizes rich sculptural rhythm through interlocking cords of warm, earthy clay wrapped into a continuous circular form. This design draws inspiration from Mediterranean pottery and classical corded metalwork, reinterpreting ancient forms through soft polymer textures. The visual depth stems from the gentle play of light and shadow across the helical twists of the clay strands. By utilizing deep clay tones like burnt orange, rust, sienna, or adobe red, this style projects organic warmth that complements fall palettes and neutral linen textiles. The structural integrity relies on the internal tension of two identical clay coils wound tightly together before baking, forming a sturdy, unified loop. The result is a bold, three-dimensional accessory that delivers dynamic visual weight without imposing physical strain on the earlobe.
To execute this twisted design, condition four equal segments of deep terra cotta polymer clay into soft, workable spheres. Roll each sphere across a glass work mat using an acrylic smoothing block, maintaining even hand pressure to form uniform snakes measuring four millimeters in diameter and six inches in length. Align two coils side by side, press the top ends firmly together to anchor them, and twist the coils around each other in a consistent, clockwise direction until the spiral pattern appears even along the entire length. Gently roll the twisted rope across the glass surface with featherlight pressure to set the coils together without flattening the rounded ridges. Cut the twisted cord into two three-and-a-half-inch lengths, bend each segment into a smooth circular hoop, and overlap the joining ends by three millimeters. Conceal the join by smoothing the underside with a silicon shaping tool. Slide a heat-resistant headpin through the upper apex of each hoop before baking to serve as the post channel, cure on an accordion-folded cardstock tent for forty minutes to prevent flat spots, and attach hinged clasp wires after the pieces cool completely.

3. Asymmetrical Sage Green Arch Drop Hoops
Setup Method
The asymmetrical sage green arch drop hoop incorporates mid-century artistic balance by juxtaposing a flat, U-shaped clay bridge with an open metallic wire hoop. This two-piece design explores negative space, allowing the wearer’s neck and jawline to frame the open center of the lower hanging element. The muted sage green tone provides a calming, botanical aesthetic that pairs naturally with brushed gold and raw brass components. The top component consists of a solid circular stud that anchors the earring securely against the earlobe, while the lower arch swings freely from a flexible jump ring connection. The architectural contrast between the sharp planar geometry of the clay slab and the slender radius of the brass wire gives this design an upscale gallery aesthetic. Because the clay portions are rolled thin, the mobile structure retains fluid movement and all-day comfort.
Start by mixing a custom muted sage hue by combining olive green, zinc yellow, ecru, and a small trace of ultramarine blue clay until the tone achieves a uniform, matte botanical balance. Pass the conditioned clay through your rolling station set to a precise two-millimeter depth, burnishing the surface with deli paper to eliminate surface air bubbles. Use a steel arch-shaped cutter to punch out two matching flat bridges, followed by a ten-millimeter round cutter to create the coordinating upper stud toppers. Before baking, use a needle tool to pierce a one-millimeter hole through the bottom center of each stud topper and through the upper crossbar of each arch piece, verifying that the holes sit at least two millimeters away from the cut edges to prevent tearing. Bake the clay pieces flat on a parchment-covered ceramic tile at the recommended temperature for thirty-five minutes. After the components have fully cured and cooled, deburr the hole perimeters with a handheld precision drill. Fasten a surgical steel post to the reverse side of each circular stud with liquid polymer clay, bake for an additional ten minutes to fuse the bond, and link the lower sage arch to a slender round brass wire hoop using an open four-millimeter gold-plated jump ring.

4. Marbled Monochrome Marble D-Ring Hoops
How to Create
The marbled monochrome D-ring hoop blends classic modernist graphic style with organic fluid patterns. This style uses clean contrasts of pure white, deep jet black, and smoky charcoal gray to emulate the luxurious patterns of quarried Carrara marble. The geometric silhouette breaks away from conventional circular earrings by utilizing a D-ring profile, presenting a straight horizontal top bar paired with a rounded lower curve. The unpredictability of clay marbling ensures that every individual earring showcases a distinct, one-of-a-kind stone grain while maintaining structural harmony across the pair. The polished, semi-gloss surface of this design reflects ambient light, producing a sleek look that matches formal evening wear, tailored blazers, and minimalist fashion boards.
Begin by conditioning three parts brilliant white clay, one part deep black clay, and one part neutral translucent clay on separate working tiles. Roll each color into separate rods of varying thicknesses, stack the rods parallel to one another, and twist the bundle repeatedly into a single candy-cane striped coil. Fold the twisted coil in half, roll it out into a uniform cylinder, and gently compress it into a compact block to blend the color seams without muddying the distinct monochrome boundaries. Slice thin veneers from the end of the patterned block using a razor-sharp tissue blade, laying the slices edge-to-edge across a conditioned two-millimeter backing slab of solid white clay. Smooth the layered slab with an acrylic roller until the seams vanish into a continuous marbled surface. Use a D-shaped jewelry cutter to stamp out matching earring pairs, punch an attachment hole along the top flat edge, and cure the shapes on a smooth ceramic plate for forty minutes. Once cooled, polish the surfaces progressively using wet eight-hundred, twelve-hundred, and two-thousand-grit sandpaper to reveal the rich depth of the marbled layers, then link each piece to an open metal hoop fixture using round-nose pliers.

5. Muted Terracotta Petal Charm Hoops
Step-by-Step Guide
The muted terracotta petal charm hoop combines traditional open wire hoops with suspended, dimensional clay botanical elements. This design features delicate, stylized clay leaves or flower petals that slide freely along a thin gold-filled or brass wire loop, creating soft motion and gentle sound with movement. The matte finish of the baked terracotta clay contrasts against the polished metal, adding tactile depth and rich color. The organic curved shape of each separate petal softens the sharp perimeter of the wire circle, creating a balanced visual arrangement. This style works well for spring and summer capsule collections, offering a relaxed handmade charm that remains clean and contemporary. The modular construction also allows wearers to slide charms on or off, adapting the look to match diverse settings.
Begin by conditioning warm terracotta polymer clay until it reaches a soft, malleable consistency, then roll it down to a consistent one-and-a-half-millimeter thickness using rolling guide rails. Use a miniature botanical petal cutter to stamp out six identical teardrop petal shapes for each earring, yielding twelve charms in total for the finished pair. Place each raw cutout onto a soft foam pad and press a round ball-stylus tool gently into the center to cup the petals, giving them a three-dimensional contour. Carefully pierce a one-point-five-millimeter hole through the narrow tapered tip of each cupped petal using a clean needle probe, checking that the hole accommodates the diameter of your metal hoop wire. Arrange the cupped petals concave-side up on a cardstock sheet and bake at the designated temperature for thirty minutes. After cooling, inspect the hole openings and clear any small blockages using a fine reamer tool. Thread three distinct terracotta charms onto each open thirty-millimeter endless wire hoop, separating the charms with tiny raw brass spacer beads to ensure fluid, independent movement along the curve.

6. Retro Color-Blocked Half-Moon Hoops
Execution Process
The retro color-blocked half-moon hoop celebrates bold mid-century design through contrasting, saturated color fields. This design features a flat, semicircular crescent frame divided into distinct geometric zones using contrasting tones like mustard yellow, rich cobalt blue, and dusty desert rose. The precise lines between the color blocks show deliberate craftsmanship, turning simple geometric shapes into wearable modernist art. The curved outer contour of the half-moon frames the jawline cleanly, while the hollowed-out inner crescent keeps the piece lightweight and airy. This visual concept appeals to lovers of vintage fashion, contemporary art, and creative statement styling, functioning as a vibrant focal point that enlivens monochrome linen outfits or everyday casual wear.
To build these color-blocked earrings, condition separate blocks of mustard yellow, cobalt blue, and desert rose polymer clay until completely smooth and flexible. Roll each color through a clay conditioning machine to an identical three-millimeter setting. Using a rigid stainless steel tissue blade, cut straight, clean edges along each colored strip, then butt the cut edges together on a glass tile, pressing the seams with a finger to join them into a single tricolor sheet. Place a piece of wax paper over the joined sheet and smooth gently with an acrylic roller to blend the seams without distorting the straight boundary lines. Position a large half-moon cutter over the joined slab so each color sector spans a balanced third of the shape, then press down firmly to cut the forms. Use a smaller concentric cutter to remove the inner core, creating an open crescent frame. Bake the cut pieces on a flat tile for forty minutes, sand the perimeter edges with six-hundred-grit wet sandpaper after cooling, and install stainless steel ear posts behind the upper corners using clear UV resin cured under a dedicated lamp.

7. Textured Botanical Fern Impression Hoops
Setup Method
The textured botanical fern impression hoop integrates delicate natural textures directly into polymer clay, celebrating fine organic detailing. This design features flat rectangular or curved ribbon hoops stamped with real fern fronds, evergreen needles, or carved woodcut stamps. The debossed plant veins and stems catch overhead light, giving the clay the look of antique wax seals or pressed herbarium specimens. Using muted, natural tones like olive, moss, bone white, or charcoal allows the botanical impressions to stand out without competing with bold colors. The understated charm of this design suits nature-inspired gatherings, botanical weddings, or earthy seasonal wardrobes. Because the texture is pressed directly into the clay before curing, the final pattern remains permanently set within the piece without requiring delicate surface paints or fragile topcoats.
Prepare for this design by collecting fresh, distinct fern leaflets or flexible botanical sprigs featuring pronounced, raised veining along their undersides. Condition two ounces of deep moss green clay until it is soft and pliable, then roll it out into a uniform two-millimeter slab on a clean glass tile. Arrange the fresh fern fronds across the damp clay surface, lay a sheet of parchment paper over the foliage, and roll an acrylic rod across the top with firm, even pressure to push the natural textures into the clay. Peel the leaves away with fine tweezers to reveal the crisp, detailed impressions beneath. Use a sharp tissue blade to cut the textured slab into two long ribbons measuring twelve millimeters wide by seventy millimeters long. Carefully curve each strip into a continuous open teardrop hoop, overlapping the ends by five millimeters, and press the seam gently together from the inside. Insert a temporary support core of rolled scrap cardstock inside the loop to maintain its shape, bake for thirty-five minutes, and attach an ear wire finding through a drilled hole at the top point once the piece has cooled completely.

8. Chunky Pastel Tube Huggies
How to Create
Chunky pastel tube huggies bring playful volume, curved surfaces, and pop-art energy to modern handmade accessories. Unlike flat slab designs, this style features thick, tubular cylinders bent into small, bold hoops that wrap snugly around the lower earlobe. Soft pastel shades like buttercup yellow, pale lilac, mint, or powder blue soften the visual weight of the chunky silhouette, keeping the look approachable, modern, and cheerful. The tubular shape feels smooth and substantial to the touch while retaining the featherweight qualities of cured polymer clay. This design fits into Y2K revivals, maximalist styling, and playful street-style outfits, offering a comfortable statement piece for active days. The smooth, seamless surface highlights the consistent density of the clay, showing clean, controlled technique without relying on complex surface patterns.
To make this chunky tubular design, thoroughly condition four ounces of pastel lilac polymer clay until completely pliable and free of trapped air pockets. Divide the clay into two equal portions and roll each portion into a thick, uniform cylinder using a clean acrylic rolling block against a smooth ceramic tile. Maintain steady, parallel pressure until both tubes reach a diameter of eight millimeters and a length of sixty millimeters, trimming the ends square with a sharp tissue blade. Form each cylinder into an open C-shaped hoop around a round wooden dowel or heat-resistant glass vial, leaving a ten-millimeter gap between the two open ends. Gently smooth out any surface stretch marks along the outer curve using a cotton swab dipped in rubbing alcohol. Bake the hoops while resting on the curved dowel, supported over an open baking frame, for forty-five minutes to ensure the thick core cures completely without scorching. After the hoops have cooled, flatten the rear opening with high-grit sandpaper, drill a partial blind hole into the flat face, and secure an ear post directly inside the opening with industrial jeweler’s adhesive.

9. Layered Arch Waterfall Hoops
Step-by-Step Guide
The layered arch waterfall hoop brings kinetic rhythm and tiered architectural symmetry to statement jewelry design. This style features multiple graduated U-shaped arches nested together, anchored by jump rings to swing freely as the wearer moves. The design uses coordinating gradient color palettes—such as transitioning from deep ochre through warm sand to pale ivory—to create a balanced, ombré effect across the descending bands. Because each individual arch swings independently from its own connection point, the earring creates playful visual movement without feeling heavy. The clean geometry of the nested arches gives the piece a modern deco look that easily transitions from workday styling to evening events. Its visual impact comes from the layered composition of the shapes rather than bulky components, keeping the entire piece remarkably comfortable.
To construct this layered design, condition three harmonious tones of ochre, sand, and ivory polymer clay, rolling each sheet to an exact two-millimeter depth. Use a graduated arch cutter set to stamp out three nesting U-shaped arches from the different colored slabs, ensuring each smaller arch fits neatly inside the perimeter of the next size up with a two-millimeter gap all around. Carefully use a fine needle tool to pierce balanced pairs of jump ring holes through the top tips of each arch, making sure the holes are aligned so the pieces hang straight once assembled. Lay the flat arches onto a parchment-covered baking sheet and cure at the recommended temperature for thirty-five minutes. Once cooled, inspect each hole opening with a one-millimeter twist drill to clear away any remaining clay flash. Link the nested arches together at the top using open three-millimeter gold jump rings, and attach the entire assembly to a half-ball post finding at the upper center point using jewelry assembly pliers.

10. Sculpted Ribbed Scallop Hoops
Setup Method
The sculpted ribbed scallop hoop pairs classic Victorian shell motifs with modern sculptural jewelry shapes. This style features an expanding fan-like crescent decorated with carved or pressed three-dimensional ribs that radiate outward from the inner curve. The scalloped outer perimeter creates an eye-catching silhouette that softens geometric jawlines and frames the face beautifully. Using monochrome tones like rich ivory, dark chocolate, or soft terracotta allows the light and shadow across the ridges to define the design, eliminating the need for complex painted details. The fan shape gives the earring significant presence without unnecessary bulk, while the sculpted ribs add structural strength across the clay surface. This approach suits vintage-inspired outfits, romantic summer styling, and artistic professional wardrobes, offering an elegant balance of classical texture and modern craft.
Begin by conditioning three ounces of rich ivory polymer clay until it is smooth, supple, and completely free of air pockets. Roll the clay through your rolling station to an even three-millimeter thickness on an ultra-smooth glass work surface. Cut out two matching wide crescent shapes using an oval or specialized scallop cutter set, trimming the inner curve to fit neatly around the earlobe. Using a flexible dull modeling tool or the blunt back of a craft knife, press deep, evenly spaced indentations that radiate outward across the crescent face, creating a series of dimensional fluted ribs along the perimeter. Trim along the outer edge with a small round cutter between each rib line to produce a soft scalloped border that follows the fluted pattern. Bake the textured crescents flat on a smooth ceramic tile for forty minutes, sand the backside lightly with fine-grit paper to remove any handling marks, and finish by mounting flat-pad surgical steel posts to the upper inside corner using two-part jeweler’s epoxy.

Common Beginner Mistakes and How to Avoid Them
A frequent issue when making polymer clay hoop earrings is underbaking the clay, which leaves finished pieces brittle, weak, and prone to snapping under everyday stress. Polymer clay requires an uninterrupted curing period at a verified, stable temperature to allow the plasticizers to fuse completely into a durable, flexible structure. Always use an independent oven thermometer placed directly beside your baking tile, as internal stove thermostats often fluctuate significantly from their displayed settings. Another common mistake is rolling clay slabs to an inconsistent thickness, leading to warped edges, uneven curing, and misaligned jump ring connections. Use calibrated acrylic rolling guide rails or a mechanical clay conditioner to keep your sheets completely uniform. Additionally, beginners often push attachment holes too close to cut edges, which can cause the thin perimeter to tear under tension. Always drill or pierce holes at least two full millimeters away from any outer edge. Finally, handle raw clay with clean, washed hands and lint-free gloves to prevent airborne dust, surface fibers, and natural fingerprints from marring your smooth, cured surfaces.
Practical Methods for Professional Assembly
Achieving a clean, gallery-ready finish on handmade clay jewelry requires disciplined finishing, careful sanding, and proper hardware selection. After baking, smooth every exposed edge using wet-and-dry sandpaper, working systematically through four-hundred, six-hundred, and one-thousand-grit papers beneath a trickle of running water to eliminate rough cuts and tool marks. For high-gloss designs, buff the cured clay against a soft cotton wheel or seal the surface with a thin, bubble-free layer of liquid UV resin cured beneath a dedicated ultraviolet lamp. When assembling hardware, use two smooth-jawed chain-nose pliers to twist jump rings open sideways with a gentle lateral shear, rather than pulling the ends outward, which weakens and distorts the circular wire. Select high-grade findings made from surgical stainless steel, titanium, or nickel-free brass to prevent skin sensitivities for sensitive wearers. When securing ear posts directly to flat clay backs, abrade the metal pad with coarse sandpaper to create a mechanical tooth, and embed the post under a small piece of matching raw clay or industrial epoxy to form a permanent, lasting bond.
Strategic Presentation and Packaging Ideas
Presenting and packaging handmade earrings thoughtfully elevates the perceived value of your work while keeping delicate pieces safe during shipping and storage. Display hoops on custom, heavy cardstock earring cards cut from textured kraft, linen, or recycled cotton paper, using minimalist stamped lettering that complements the colors of your clay. For online storefronts or social sharing, photograph your earrings on neutral, matte backgrounds like travertine stone, raw oak blocks, or textured plaster tiles under diffuse morning light to capture true color and subtle surface textures without harsh glare. Store your finished collections in compartmentalized jewelry boxes or lidded craft organizers lined with soft felt to protect the pieces from dust and accidental scratches. If mailing orders, wrap the mounted display cards in protective glassine envelopes and pack them inside rigid, cardboard shipping boxes rather than padded mailers, preventing heavy transit sorting machines from crushing delicate hoop curves or bending wire posts.
Planning Timelines and Managing Production
Managing your materials and work sessions efficiently makes small-batch jewelry production smooth, predictable, and enjoyable. A typical production run of ten coordinated earring pairs takes roughly four to six hours of hands-on work, split across clay conditioning, cutting, baking, surface finishing, and final assembly. Group your workflow into dedicated, organized phases: mix custom color recipes and roll all your baseline slabs on the first day, cut and cure your geometric shapes on the second day, and handle all hole drilling, water sanding, and hardware assembly on the third. Sourcing base clays in bulk, purchasing multi-packs of commonly used jump rings, and investing in durable stainless steel shape cutters helps lower your unit costs while maintaining consistent sizing across your designs. Keep a dedicated workshop journal to record custom clay color mixing formulas, roller depth settings, and exact baking times, making it easy to recreate your most successful seasonal designs reliably whenever you need to restock.
Creative Expansions and Advanced Variations
Once you have mastered foundational hoop assembly, you can explore advanced techniques to expand the visual range of your jewelry collections. Try incorporating fine metallic elements into raw clay slabs, rolling genuine gold, silver, or copper leaf across conditioned surfaces to produce an organic, crackled leaf texture as the clay stretches. You can also experiment with liquid polymer clay, using it as a raised ceramic glaze, an adhesive for complex layered elements, or a dimensional marbling agent across flat shapes. Another compelling direction is carving into pre-baked slabs using fine linoleum gouges, cutting delicate geometric patterns or folk-art motifs that can be filled with contrasting oil paints or dark acrylic washes for added depth. You can also scale up these techniques to build coordinating accessory sets, translating the shapes and colors of your hoops into matching hair barrettes, statement pendants, or modern link bracelets. These advanced techniques help you build a distinctive, cohesive design voice that stands out across online design channels and boutique craft markets.